
Bambu Lab X2D Review: Affordable Dual-Nozzle Printing, with a Catch
Bambu Lab X2D review after 250 hours: dual nozzles from $649, a heated chamber, and why the bowden-fed auxiliary hotend is the real compromise.
TL;DRthe short version
- The X2D starts at $649 standalone and $899 with the AMS 2 Pro, roughly $100 more than a P2S but with a heated chamber, two nozzles, better belts and an exhaust filter included.
- The catch is the second nozzle: the auxiliary hotend is fed by a bowden extruder sitting in a box on the back of the machine, so it runs slower, strings more and gets no jam or clog detection.
- Parts printed on the auxiliary nozzle took clearly longer, some almost twice as long, and you lose about 20 millimeters of printable width on that side of the plate.
- On the main nozzle the quality is excellent: a 3D Benchy in 37 minutes, overhangs close to perfect up to 80 degrees, and barely any VFAs thanks to the 1.5GT belts.
- The heated chamber reached a real 65 °C in around 20 minutes with the heater alone, and ASA, PETG and carbon fiber nylon all printed beautifully.
- Measured power draw was 14 W idle, around 160 W for PLA and roughly 330 W for ASA with the chamber at 65 °C: about 22 cents for a four-hour PLA print.
- The AMS still has only one exit port, so only one of the two nozzles can be fed automatically and the second one needs an external spool or a second AMS.
- For me the X2D makes the P2S very hard to justify and is probably the enclosed Bambu Lab printer to get, unless you need the H-series build volume, the laser or 350 °C hotends.
🐼 Get the Bambu Lab* X2D ($649 standalone / $899 Combo): https://geni.us/BBL-X2D*
This is the Bambu Lab X2D, the long-awaited successor to the X1 Carbon, the printer that changed consumer 3D printing four years ago. But the X2D isn’t just a simple update. It brings dual-nozzle printing to a much lower price point compared to their H-Series machines. Starting at $649 it could bring multi-material printing to so many enthusiasts! There is just one catch: the second nozzle comes with a pretty unusual compromise. So is this now the Bambu printer to get, does it make the P2S irrelevant, and why would anyone still spend more on an H-Series machine? Let’s find out.
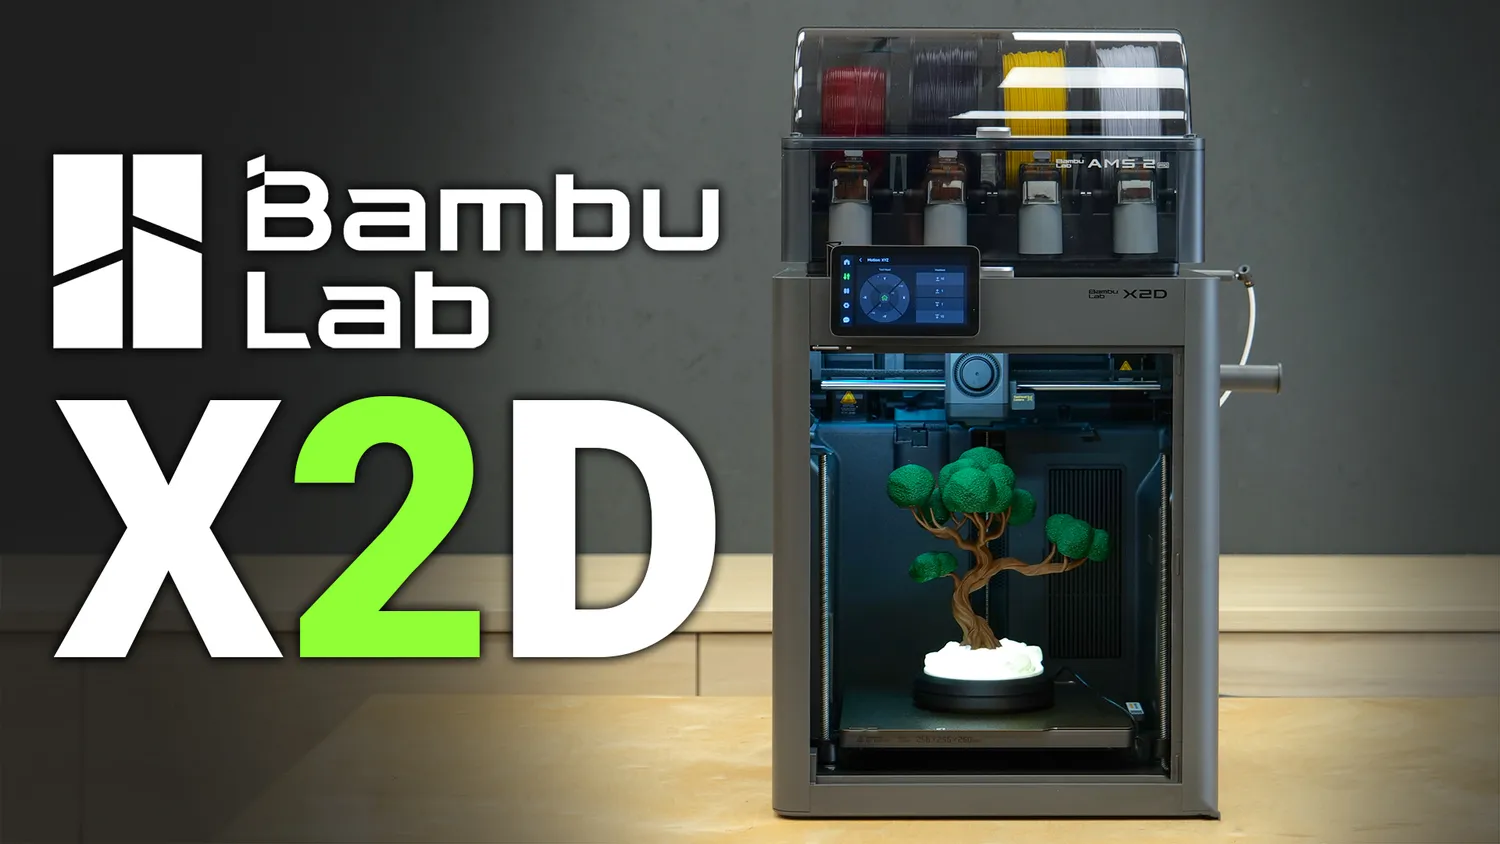
Just a few days ago, Bambu Lab announced that they will discontinue the X1 Carbon. And honestly, that was not too surprising. Over the last year they’ve been reshaping their lineup. The P2S already covered most of what made the X1 attractive, and now the X2D arrives at an even more aggressive price: $649 on its own, or $899 with the AMS 2 Pro. And unlike the P2S, this machine adds a dual-nozzle toolhead and a heated chamber. On paper, that makes the X2D look almost too good for the money.
Why two nozzles are worth the trouble
But before we look at the machine itself, let’s answer the obvious question: why even care about two nozzles? Bambu Lab made multi-color printing explode over the last years thanks to their very reliable AMS system, but on single-nozzle printers every color change creates a lot of waste. The old material has to be flushed out before you can cleanly print with the next one. And multi-material printing was even more limiting, because if two materials are incompatible, like PLA and PETG, even tiny residues in the nozzle can ruin layer adhesion. To avoid that, you need separate hotends.
 Two colors on one nozzle means flushing between every change
Some companies solve this with toolchangers, but that adds complexity and takes up a lot of space. Bambu Lab instead went for a dual-nozzle printhead, so you can switch between two materials or colors much more efficiently and without nearly as much purge waste. That’s especially useful if you do a lot of dual-color parts, want break-away supports, or print parts that combine very different materials like PLA and TPU.
 The toolchanger approach: four heads, a lot more space
And so far, if you wanted that capability from Bambu Lab, you had to spend a lot more money on an H2D. The X2D is supposed to close that gap and make multi-material printing much more affordable. Just for transparency: Bambu Lab sent me this unit free of charge around four weeks before this review went live, but no other compensation changed hands. All thoughts are my own, and they haven’t seen it before release. Also, don’t be confused by the mix of shots from my basement and the studio. Obviously I couldn’t let anyone see the machine during the review process, so I only brought it to the office at the very end. If you consider getting one, there is a link at the top of this article that supports my work and also tools like BumpMesh, which I recently released open source and completely free of charge. But let’s start by looking at the machine.
This is the Bambu Lab X2D
The X2D looks phenomenal from the outside with its dark gray appearance. It has roughly the same size and form factor as the old X1 and shares quite a few components with the P2 that was released last year. You get a sheet metal construction, glass door, and glass lid, and they also added these small side windows that give you a better view of your prints. The screen is higher resolution and tiltable. And importantly, it now comes with an exhaust air filter by default, something I really criticized on the P2S.
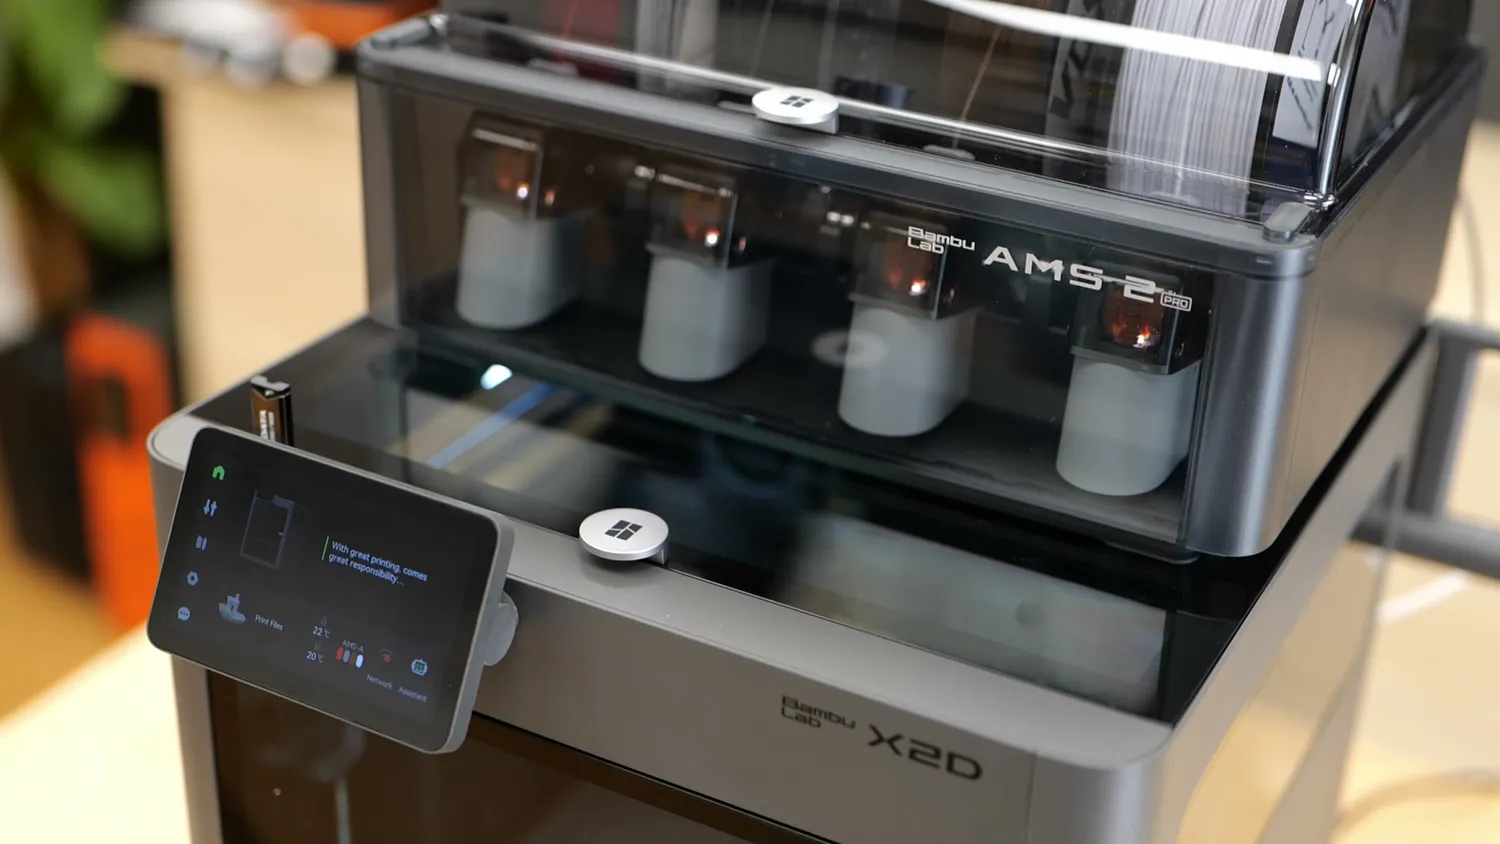 Higher resolution and finally tiltable
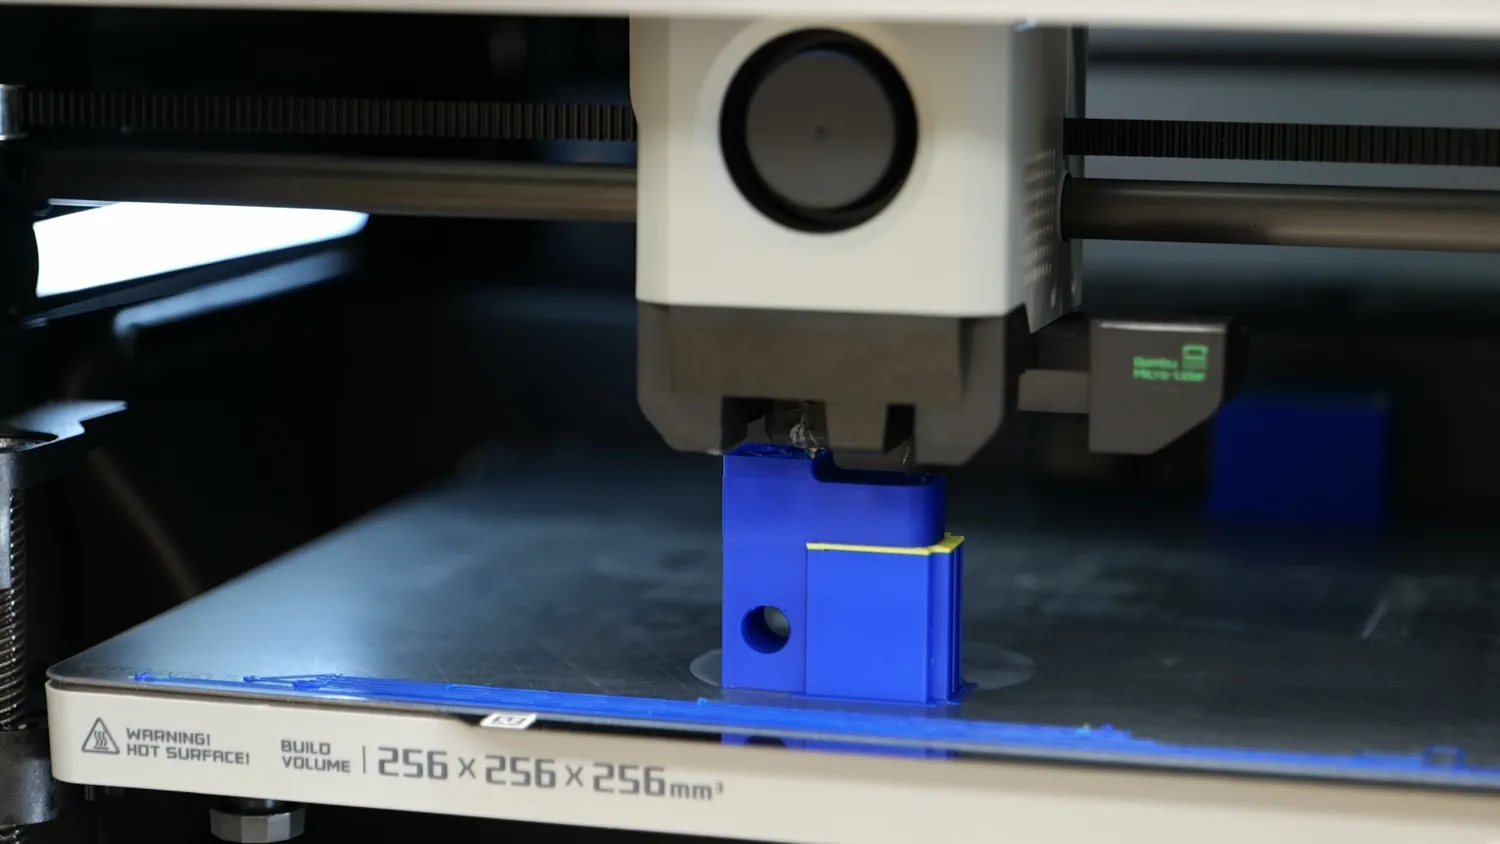
On the inside, at first glance, it also doesn’t look all that different from the P2S. You get a 256 by 256 millimeter heated bed that goes to 120 °C instead of only 110 °C, and you also get a slightly increased build height of 260 millimeters. Since the filament cutters are now actuated from the bed, you also don’t lose one of the corners anymore. It also has this small fillet at the front, which makes the chamber much easier to clean and means you no longer need one of those diapers* that BQ sells for the older machines.
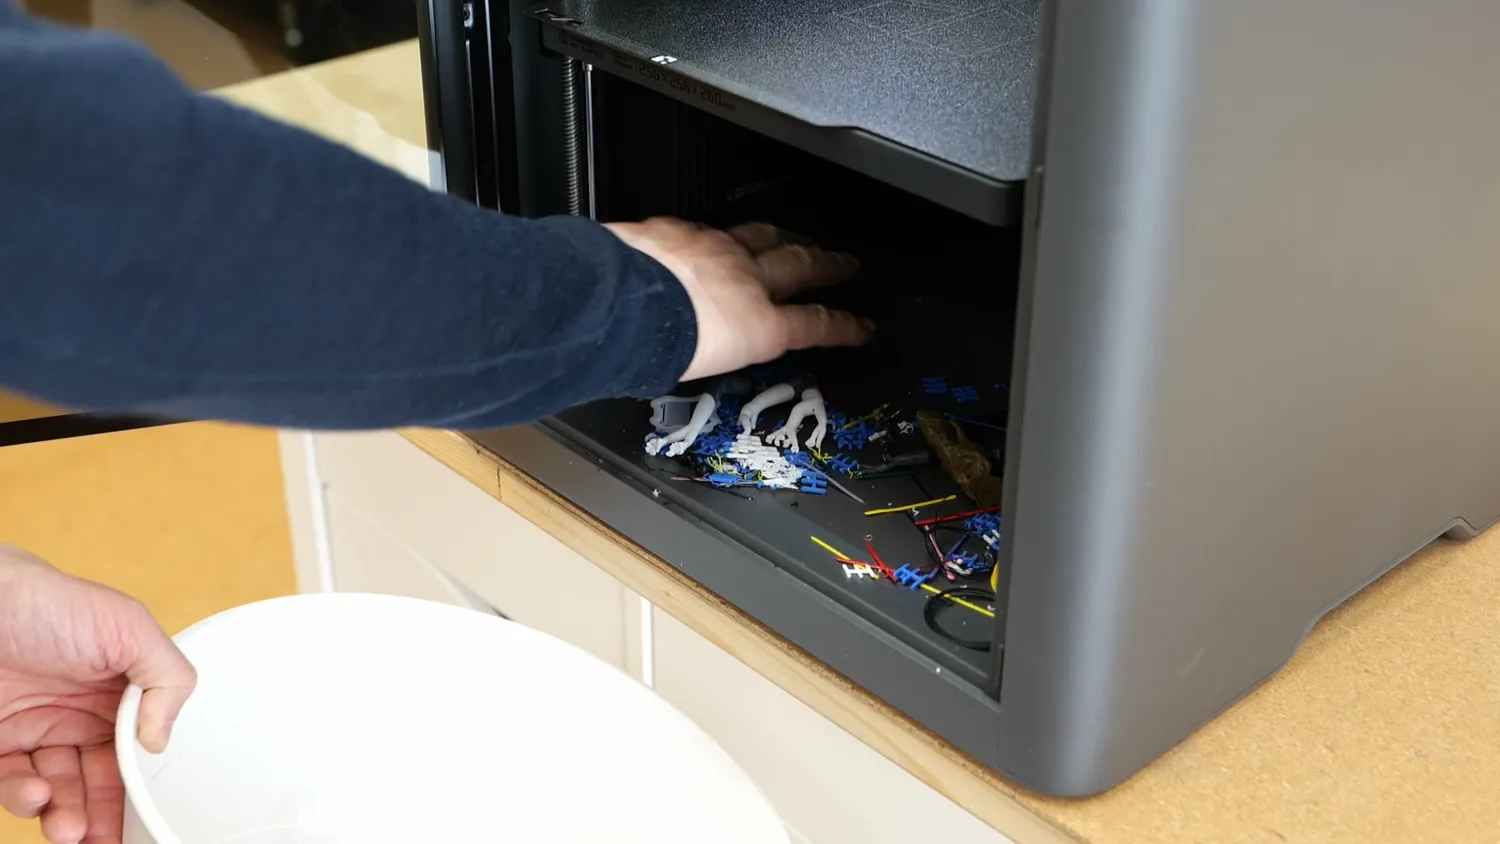 The fillet at the front makes cleaning much easier
Setup is very straightforward. Once you get it out of the box, the wizard guides you through the process. You can connect it to your network and the internet for file sending and remote monitoring, but you don’t strictly have to. Then the machine calibrates the motion system, probes the bed, and even aligns the two hotends automatically without any manual adjustment by using a sensor in the back of the buildplate. You also get a spare hotend, tools, and maintenance items in the box, but no filament, so if this is your first machine, don’t forget to buy some.
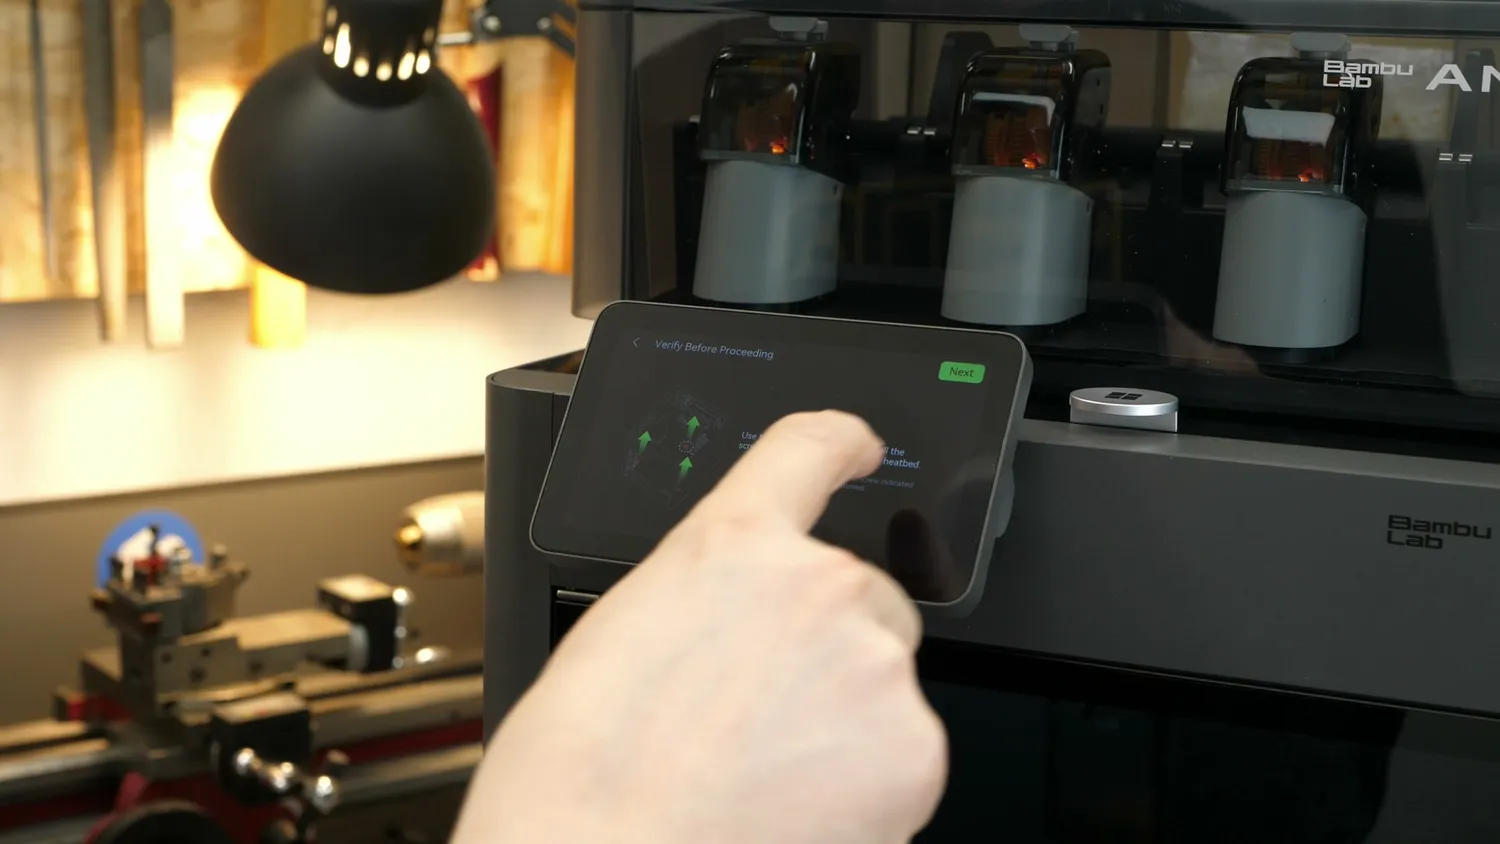 The wizard walks you through the whole setup
So from the outside, the X2D looks familiar. The really interesting changes are inside.
Lighting, camera and the motion system
There is now significantly better lighting compared to the X1, paired with a Full HD camera that has a privacy cover. It’s used for remote monitoring and for spaghetti detection, which works most of the time. Maybe not always saving the print, but at least often saving you from a giant pile of wasted plastic or a full-on blob of doom.
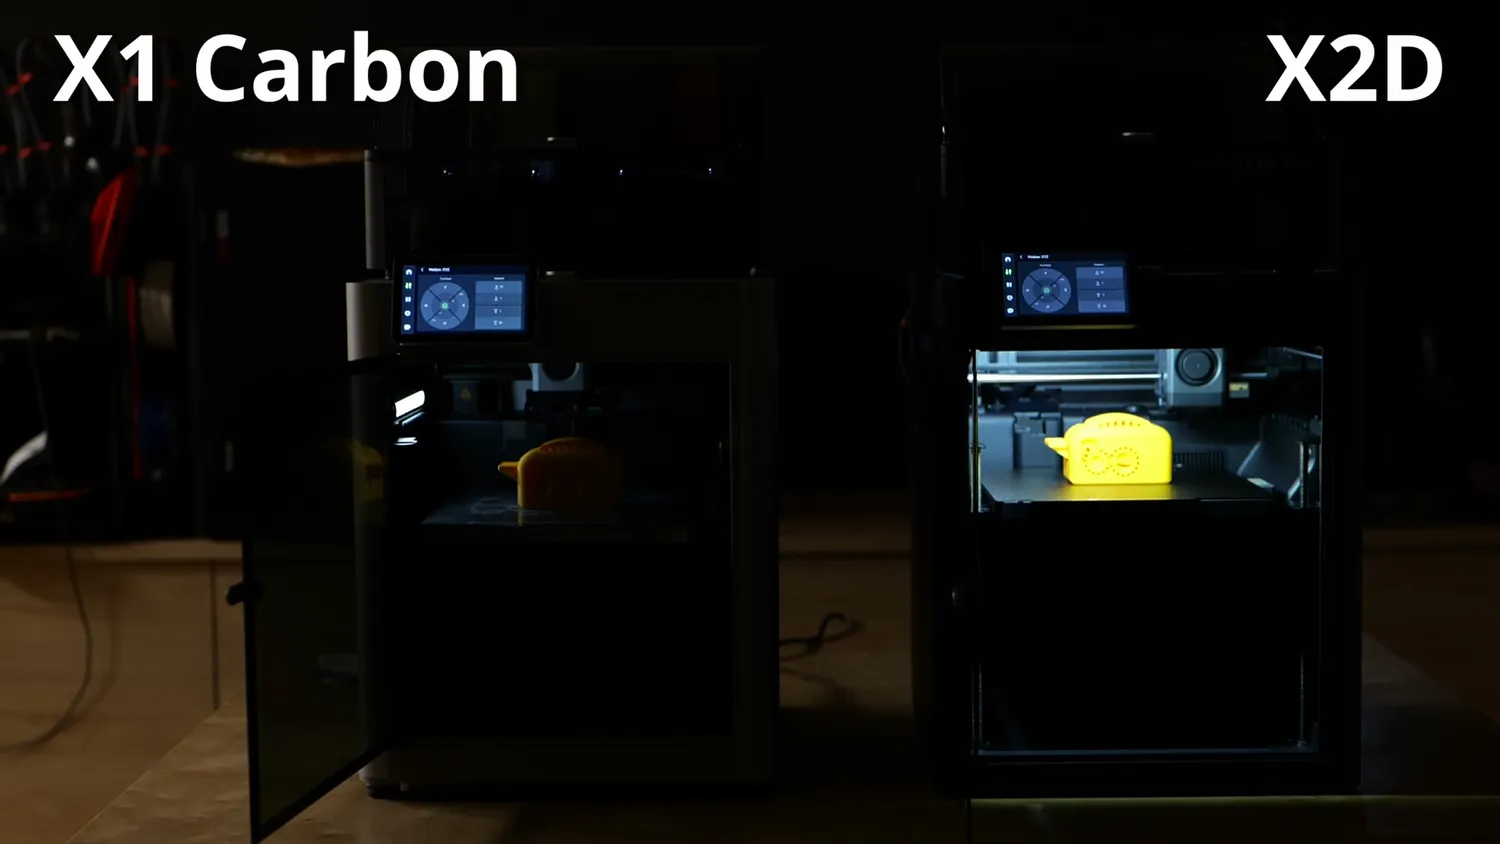 (left) X1 Carbon, (right) X2D, the lighting is much better
Let’s get to the motion system. If you were hoping for linear rails for the printhead, you will be disappointed. Bambu Lab ditched the carbon smooth rods that gave the X1 Carbon its name and went with hollow steel rods, which should be significantly easier to maintain at only a bit more weight. And this also doesn’t come at the cost of print speed, because just like on the P2, it’s basically as fast as the X1 Carbon. With the latest firmware update they even increased the maximum travel speed to 1000 millimeters per second. But the motion system is not completely identical to the P2, because on the X2D they use 1.5GT precision belts, which have proven to show fewer VFAs so vertical fine line artifacts on your parts, and from the prints I made I can already confirm that this seems to be working.
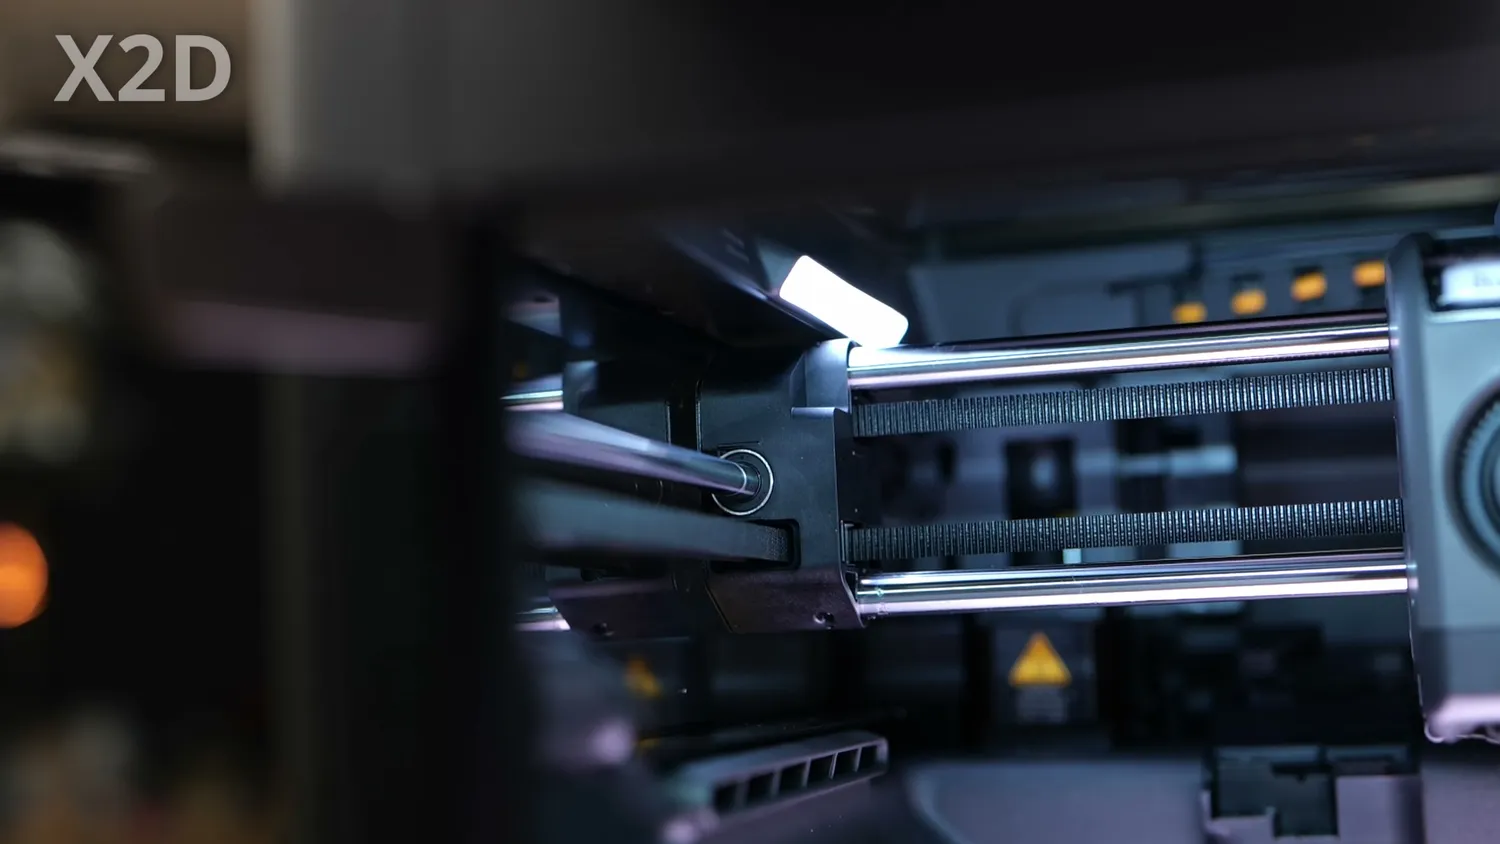 Hollow steel rods instead of the X1’s carbon ones
The dual-nozzle printhead and the auxiliary extruder
And that brings us to the printhead, which is really the defining feature of the X2D. At first glance it doesn’t look much bigger than the one on the P2. But inside, this toolhead houses two nozzles. One is fixed, and the other can be lifted and lowered using a mechanism on the back that gets triggered by a pin. To prevent oozing, there’s also a small wiper that blocks the inactive hotend. The hotends themselves can be heated to 300 degrees Celsius and are the same style as on the H-series and the P2, so they can be swapped quickly using a small clip on the front.
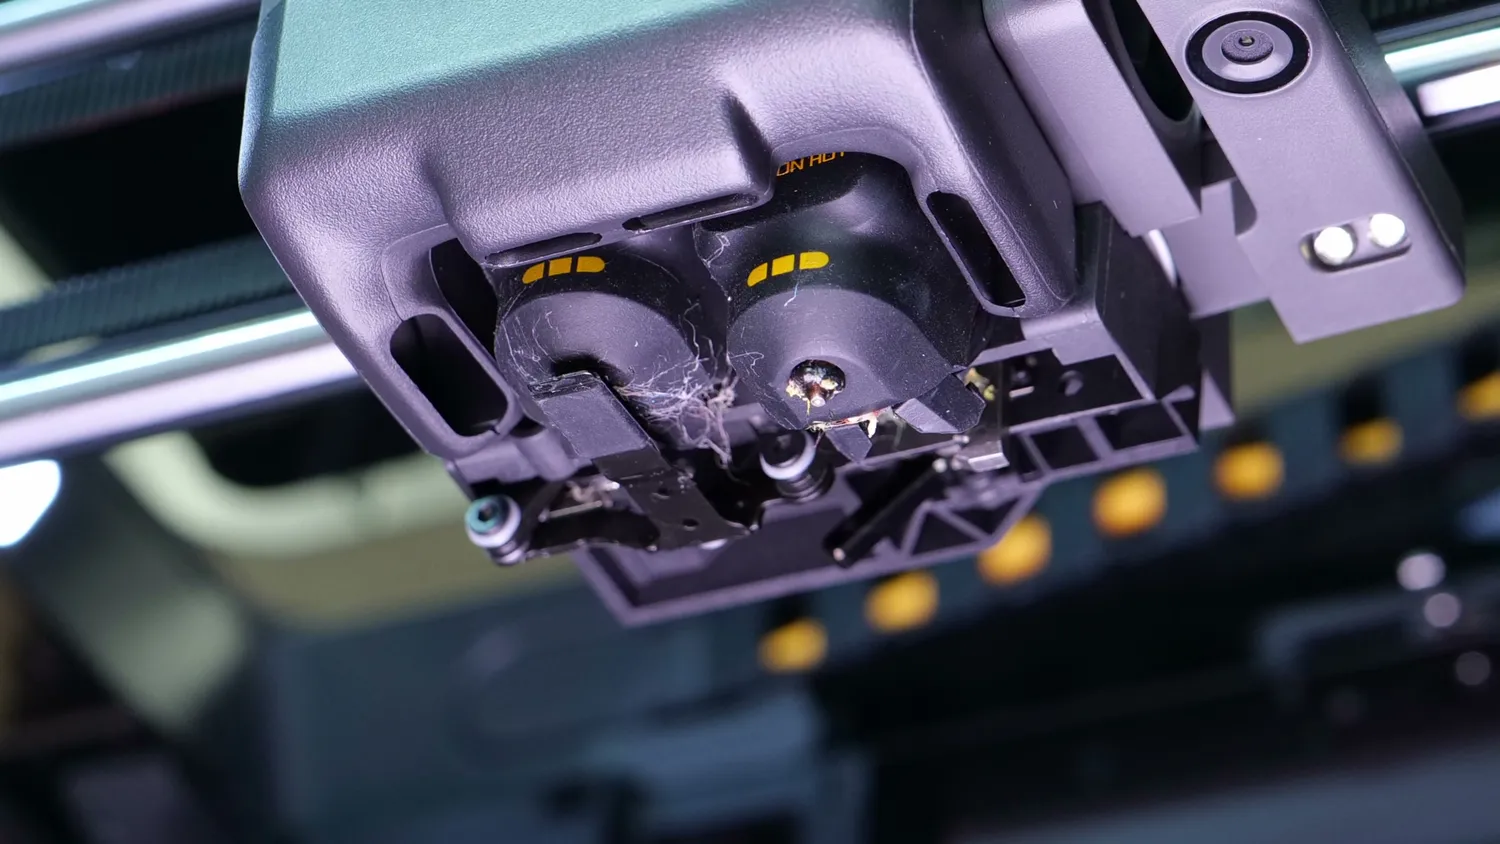 Two nozzles and the wiper that blocks the inactive one
But once you look more closely, it becomes obvious that this is not the same dual-nozzle approach as on the H2D. And the reason is sitting on the back of the machine.
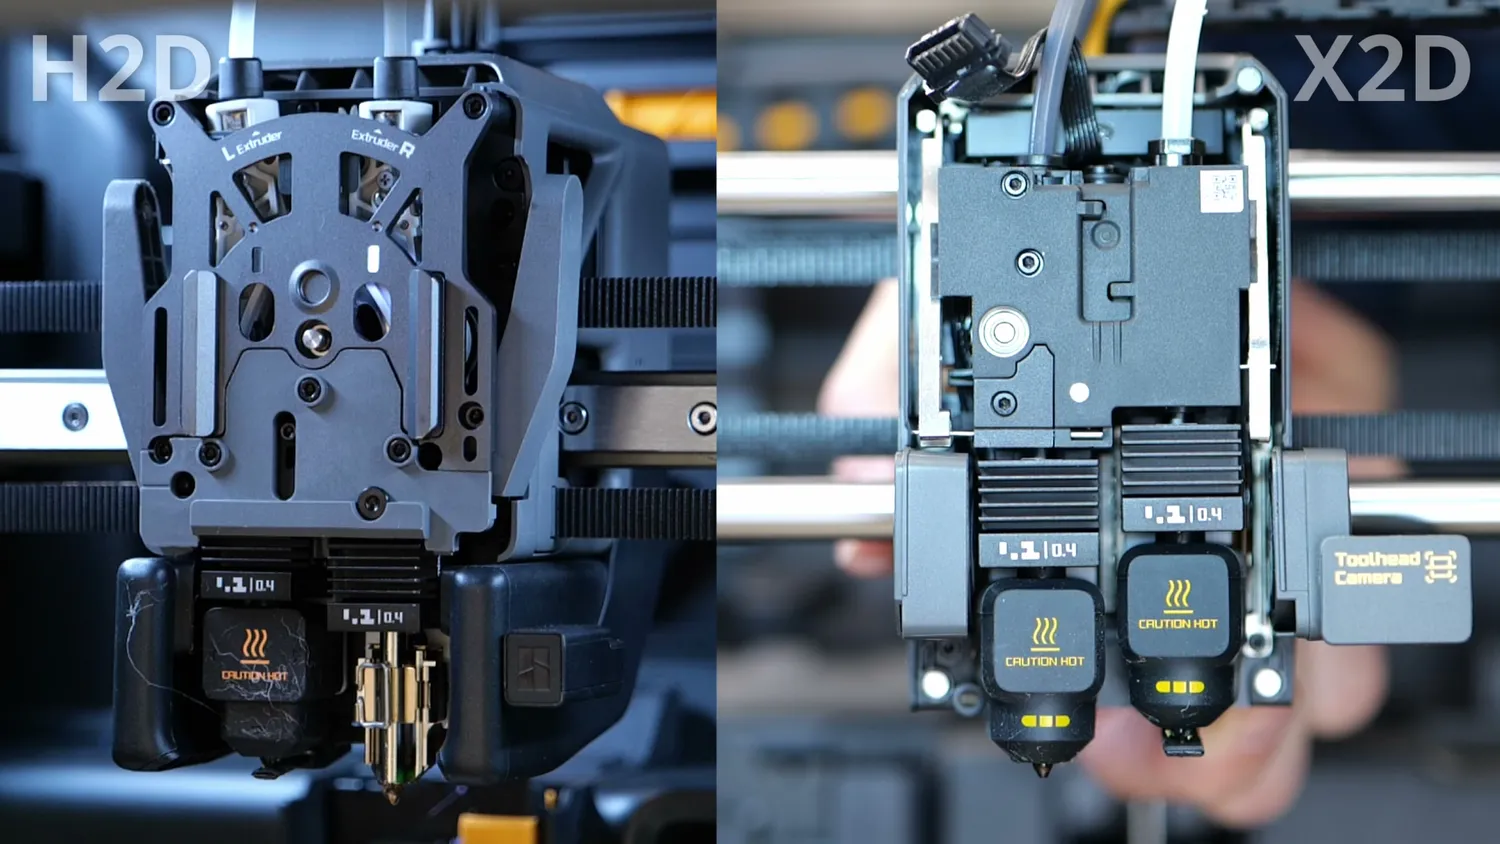 (left) H2D with two direct drive extruders, (right) X2D
There’s a suspicious little box back there that leaked online quite a while ago. At first people thought it might be a new TPU assist motor, but it turns out it’s the bowden extruder for the X2D, or as Bambu Lab calls it, the Auxiliary Extruder. And that means the two hotends on the X2D are not equal.
The left main hotend uses a direct drive extruder with a servo motor, similar to what we already know from the P2S and H2D. That gives Bambu Lab extra data for things like jam and clog detection. The right auxiliary hotend, on the other hand, is fed through a bowden system from the back of the machine, a setup that used to be extremely common a few years ago on printers like the Ender 3 and all of its clones.
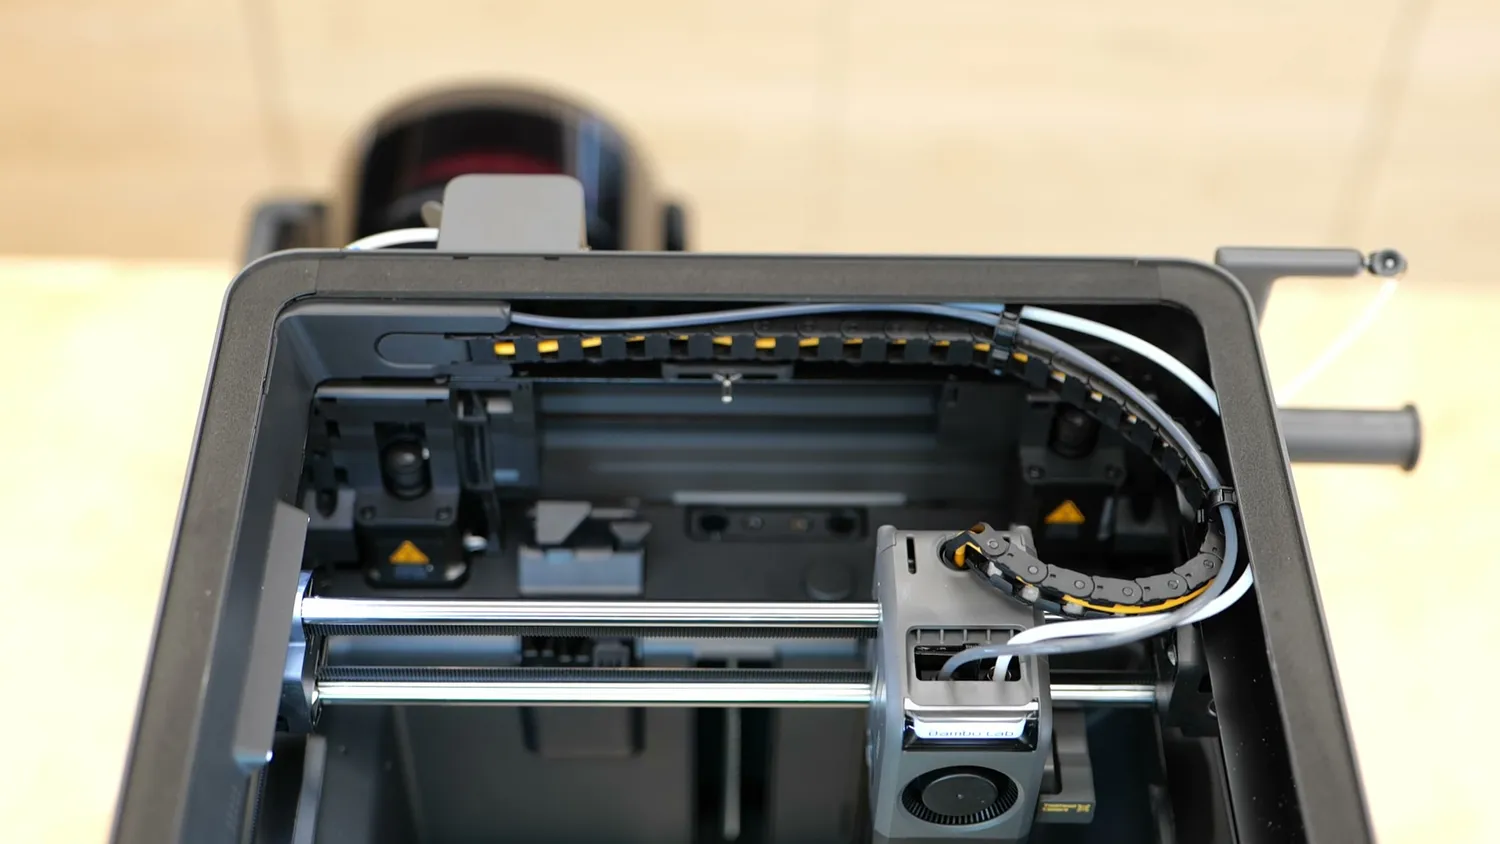 The auxiliary nozzle is fed all the way from the back
That has consequences. With a long bowden path, dosing filament precisely becomes more difficult, especially at high speed. In practice, that means significantly higher retractions, lower print speeds, and especially lower accelerations. But a bowden setup also has some real benefits: it keeps the printhead lighter and more compact, and the long filament path can act almost like a low-pass filter that smooths out extrusion a bit. So in some cases, surface quality can actually benefit from it.
You can absolutely print models with both nozzles, and in my test parts the most noticeable difference was not a huge drop in print quality, but simply longer print times on the auxiliary nozzle. In fact, some parts took almost twice as long. The change in quality was typically more stringing and when perimeters became too short holes in the surface which hopefully can be reduced by further tuning the profiles. The main hotend can use the full build plate, but because of space limitations the right nozzle loses about 20 millimeters of printable width on the left side of the plate.
Cooling, filtration and the heated chamber
During printing, the parts get cooled by a radial fan on the front of the machine plus two huge side fans that pull in cool air from outside. And after a ton of complaining (also from my side) they now include an exhaust air filter, which helps reduce odors and particles even when printing PLA.
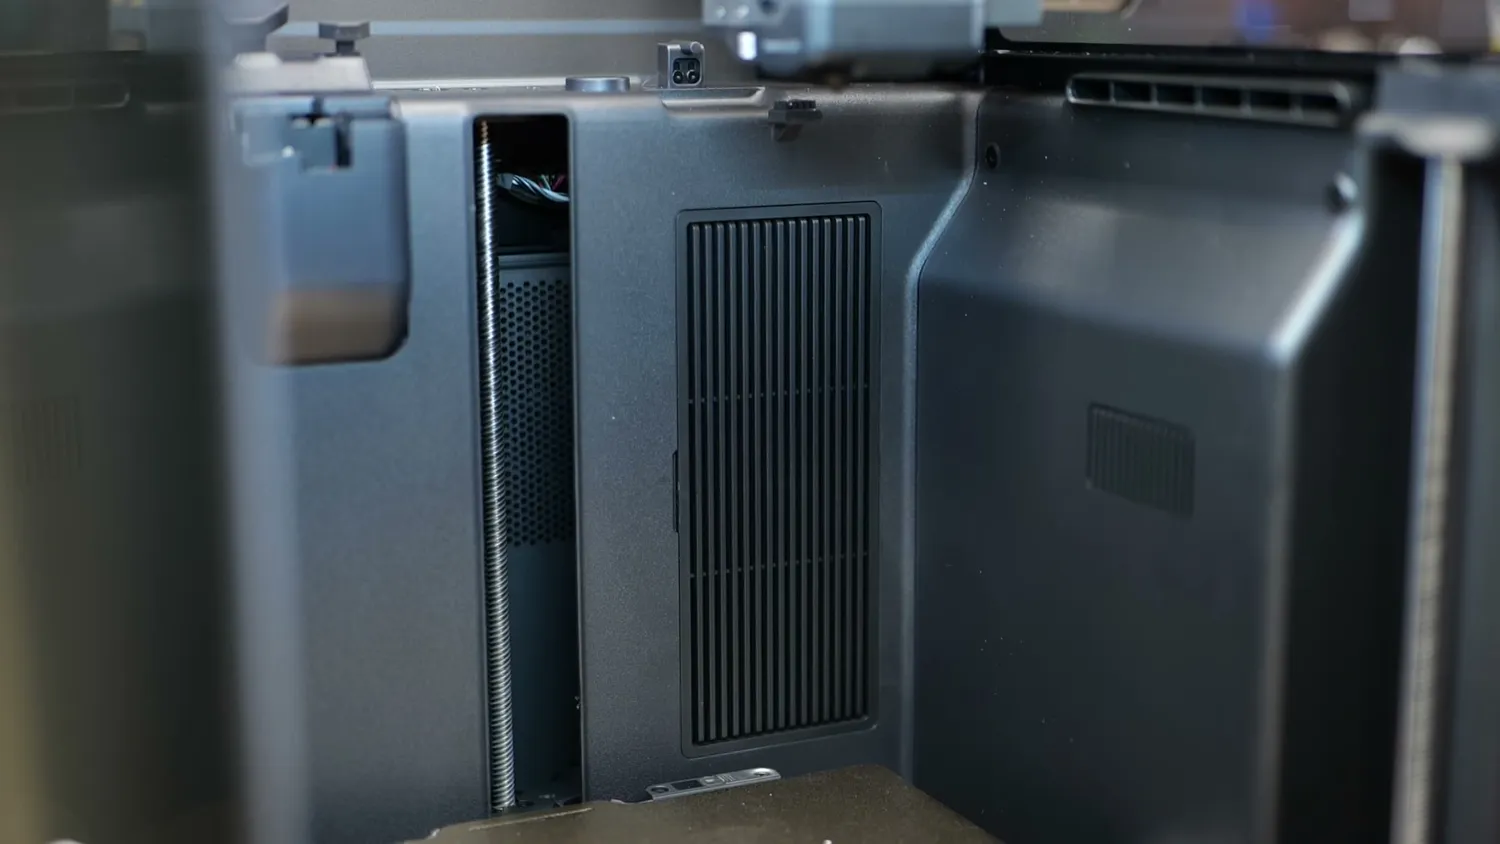
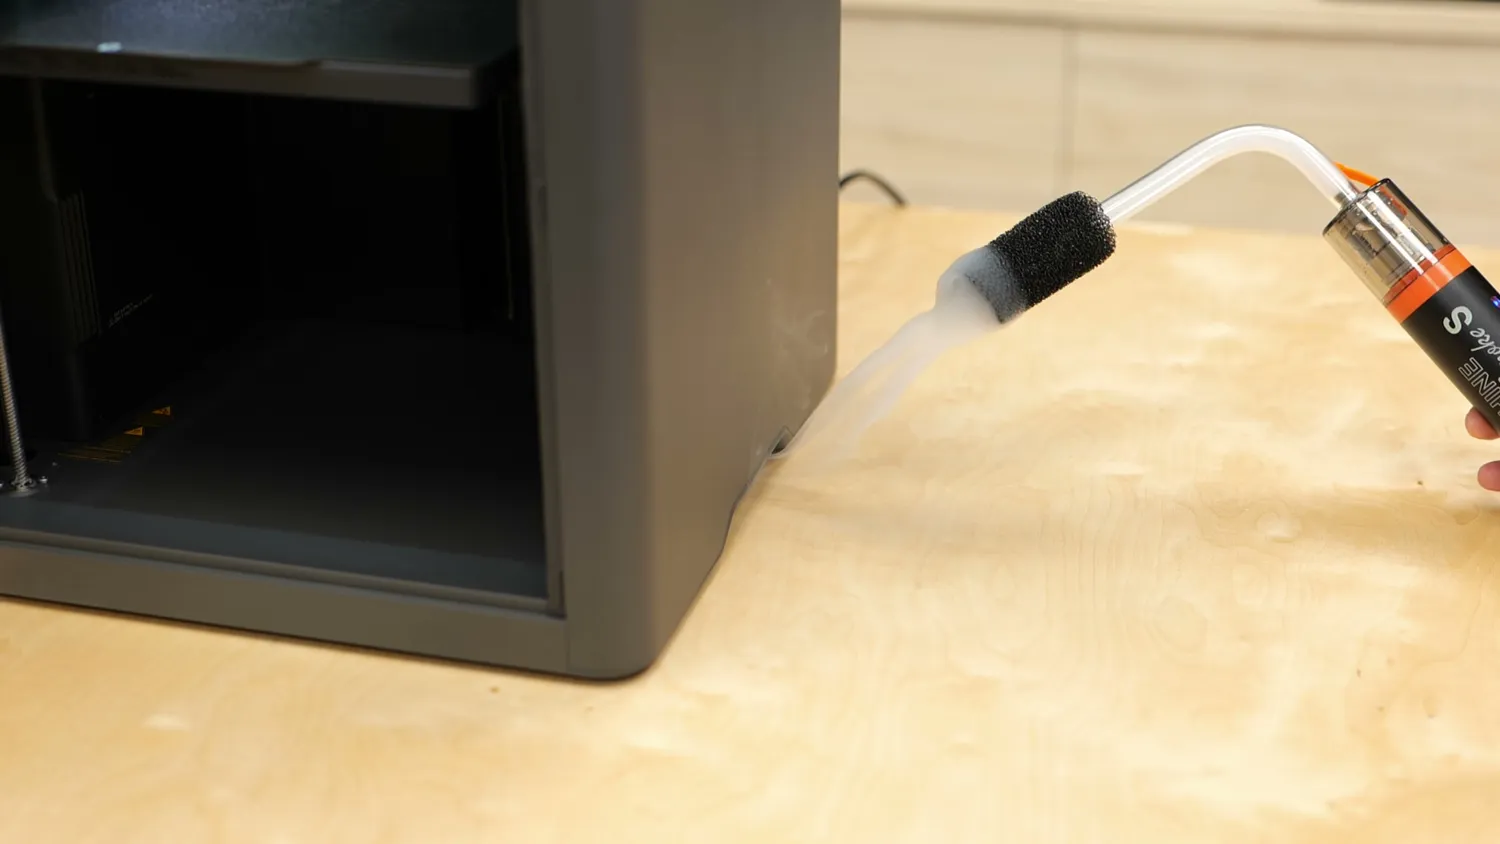
The other big distinction compared to the cheaper P2S is that the X2D has a heated chamber capable of, on paper, 65 degrees Celsius, but if you set a higher value in the slicer it will even heat to 70. That can be really useful for some challenging materials. I placed some thermocouples into the chamber and it reached a real 65 degrees in around 20 minutes with the heater alone, but realistically you’ll also have the heated bed running, which cuts the heat-up time roughly in half.
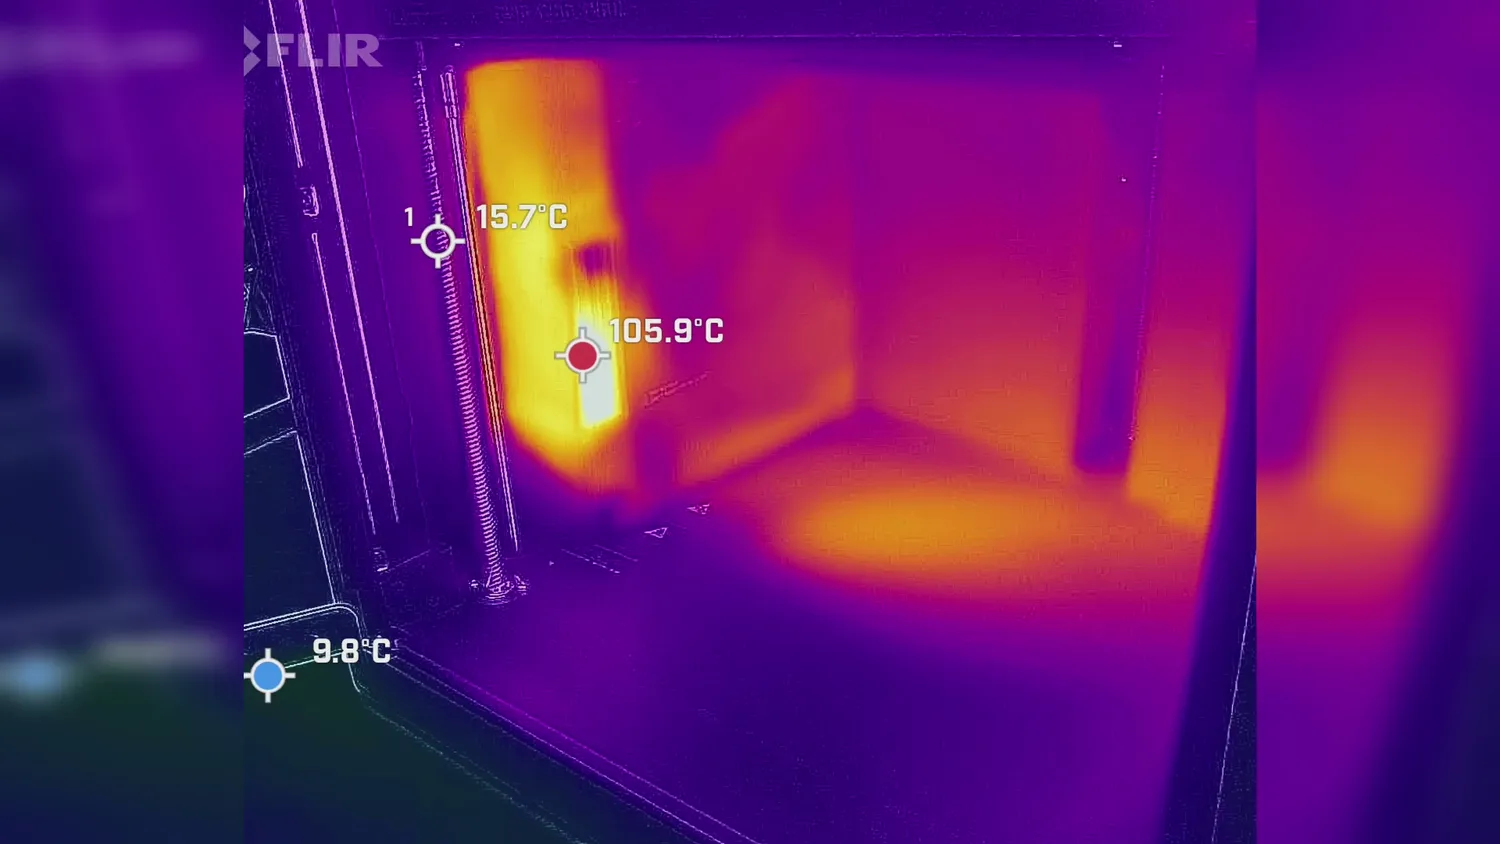 The chamber heater seen through the thermal camera
When chamber heating is activated, both side fans transform. The left one contains the heating element and pulls in air at the bottom before pushing it out a bit above. The right side switches to recirculation mode, where air gets pulled through a charcoal and HEPA filter in the back and then exhausted back into the chamber. The addition of the heater makes the X2D a really capable machine, especially for technical materials like ASA, polycarbonate, or nylons.
The AMS 2 Pro and the Filament Track Switch
If you buy the Combo, the X2D comes with the AMS 2 Pro, Bambu Lab’s multi-material system that can feed up to four spools and also works as a dry box with heating up to 65 degrees Celsius. These little ports let moist warm air escape during drying and then seal again for storage and now also finally works during printing if you get the additional power brick* for it! There is also space for desiccant* in the back, though it’s so little that the effect is more homeopathic than useful over the long term if you regularly open the box and load fresh, moist spools. So I would still recommend printing one of the larger desiccant containers and regenerating that regularly.
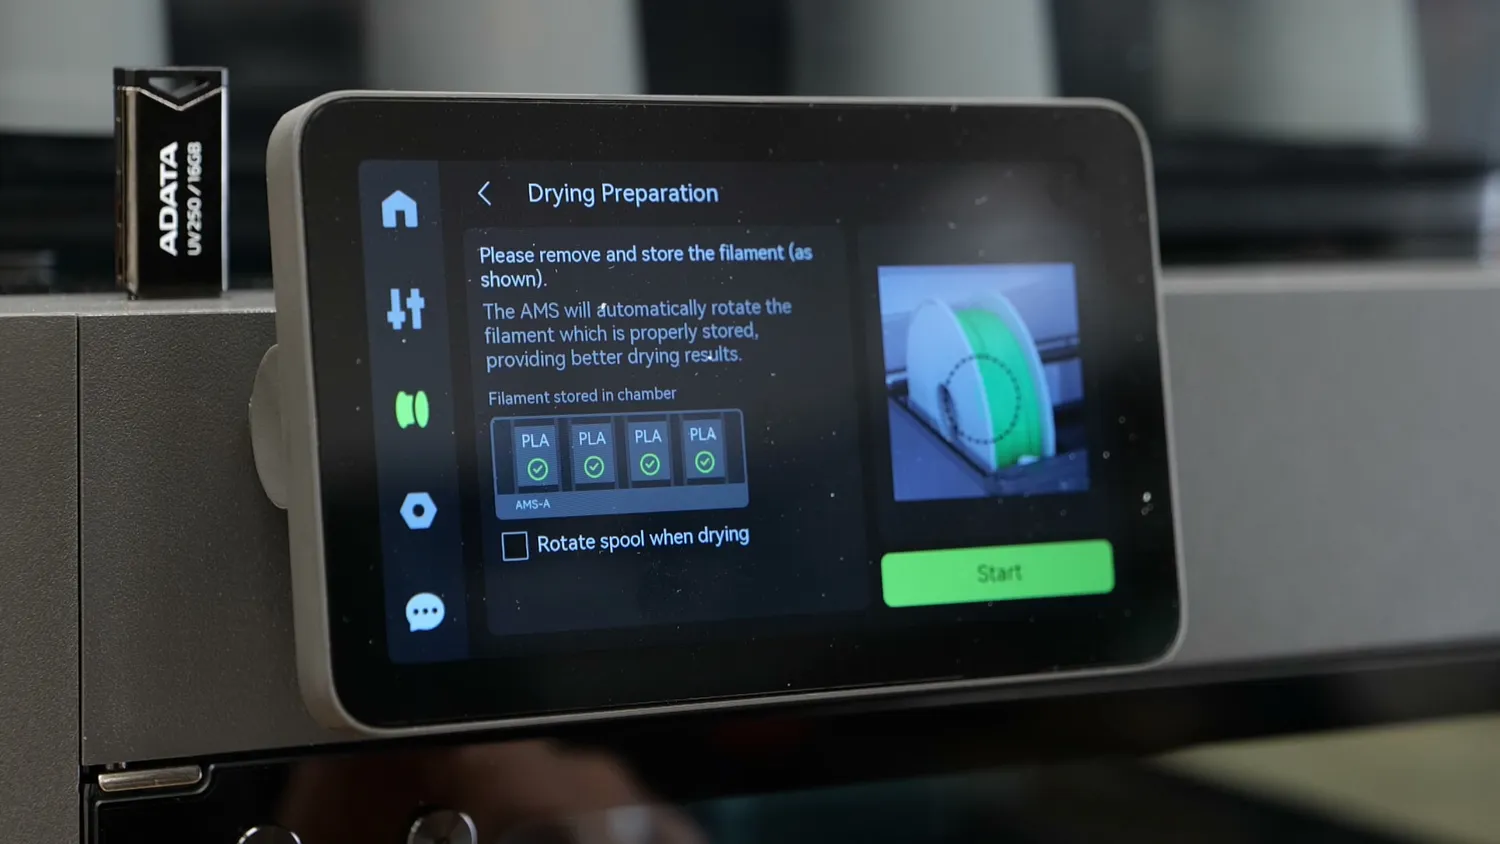 The AMS 2 Pro doubles as a heated dry box
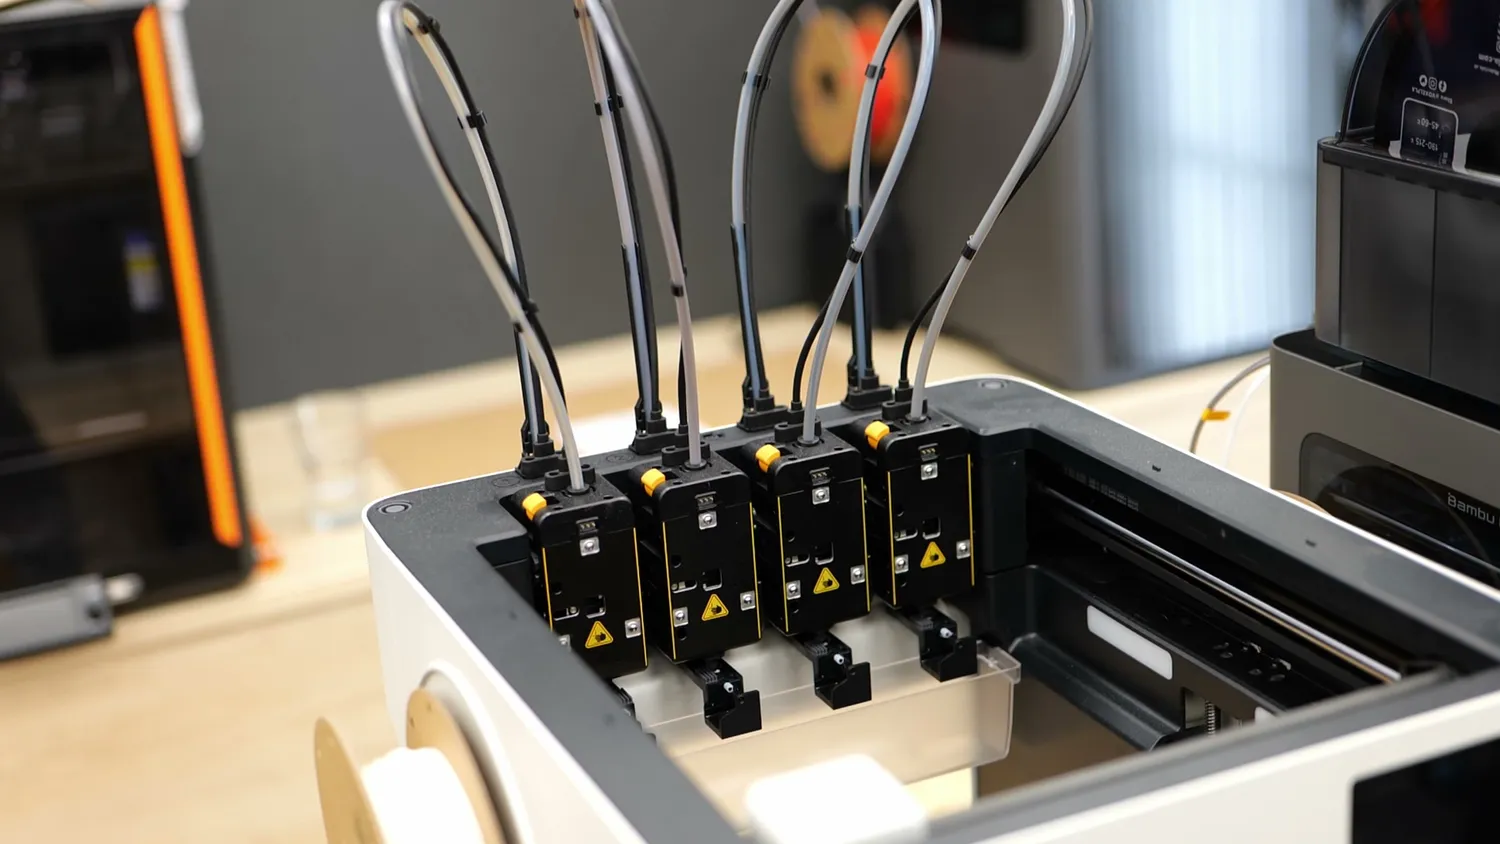
Now here’s the important thing specifically for the X2D: the AMS still only has one exit port. So even if you buy the Combo, only one of the two nozzles can be fed automatically through the AMS at a time. The second nozzle has to be loaded from an external spool holder. That means if both materials need to stay dry during printing, you’ll either want a separate dry box or an additional AMS for the second nozzle.
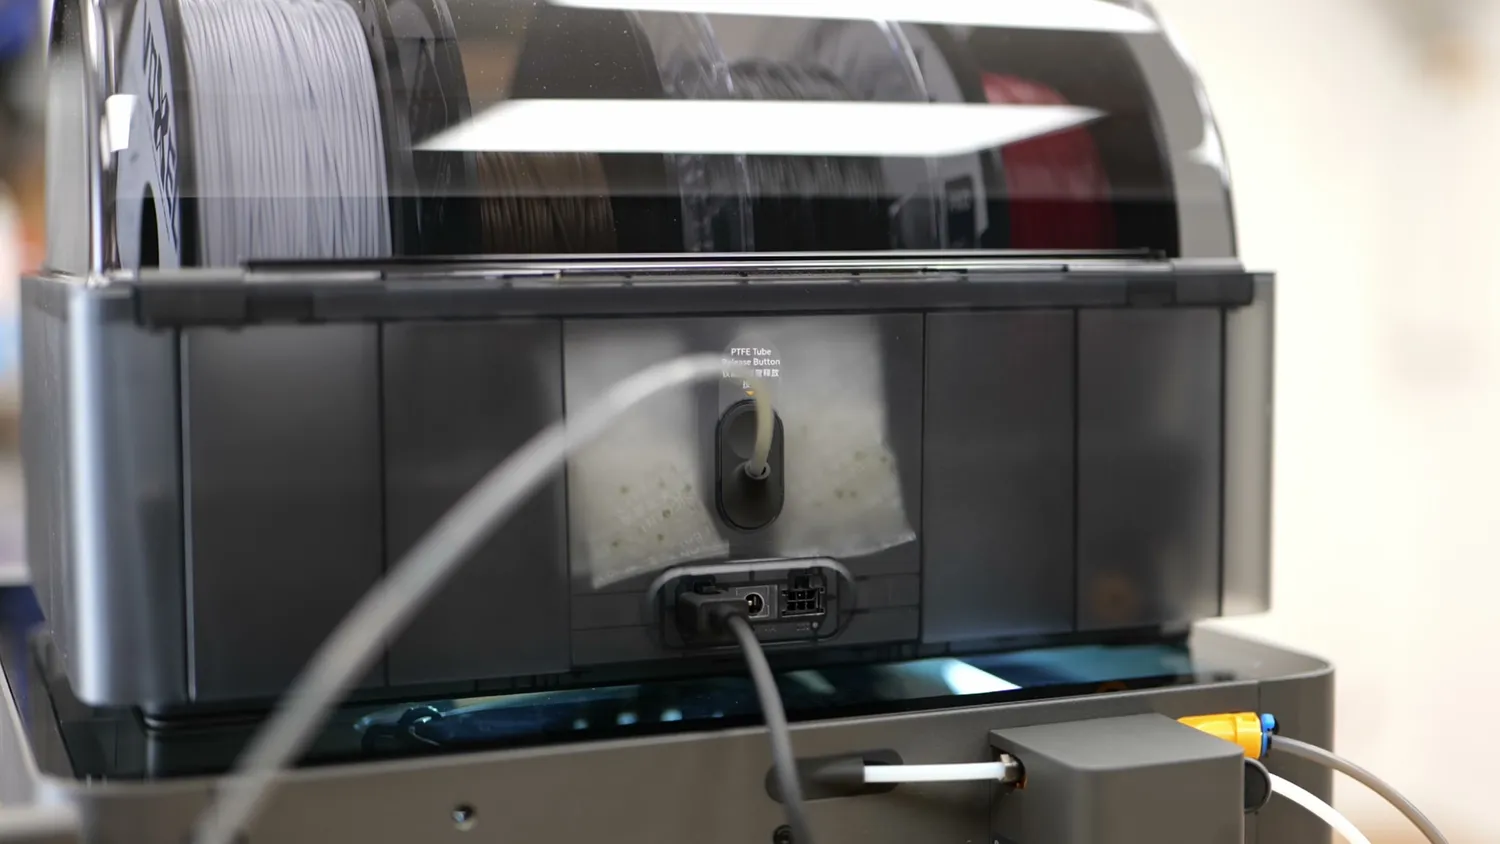 One exit port, so only one nozzle gets fed automatically
To make that workflow easier and constantly avoid swapping spools, Bambu Lab introduced the Filament Track Switch with the X2D. It allows one AMS to feed either nozzle automatically, so you don’t have to reorganize your spools manually. That’s a nice addition, but for the X2D, H2D, and H2C, the real killer feature would have been an AMS that could feed both hotends at the same time.
Print quality after 250 hours
So after looking at the machine and the specs, how does it actually perform? I’ve put roughly 250 hours on the X2D with different materials and a wide range of parts, and overall I can say that I’m very happy with the results.
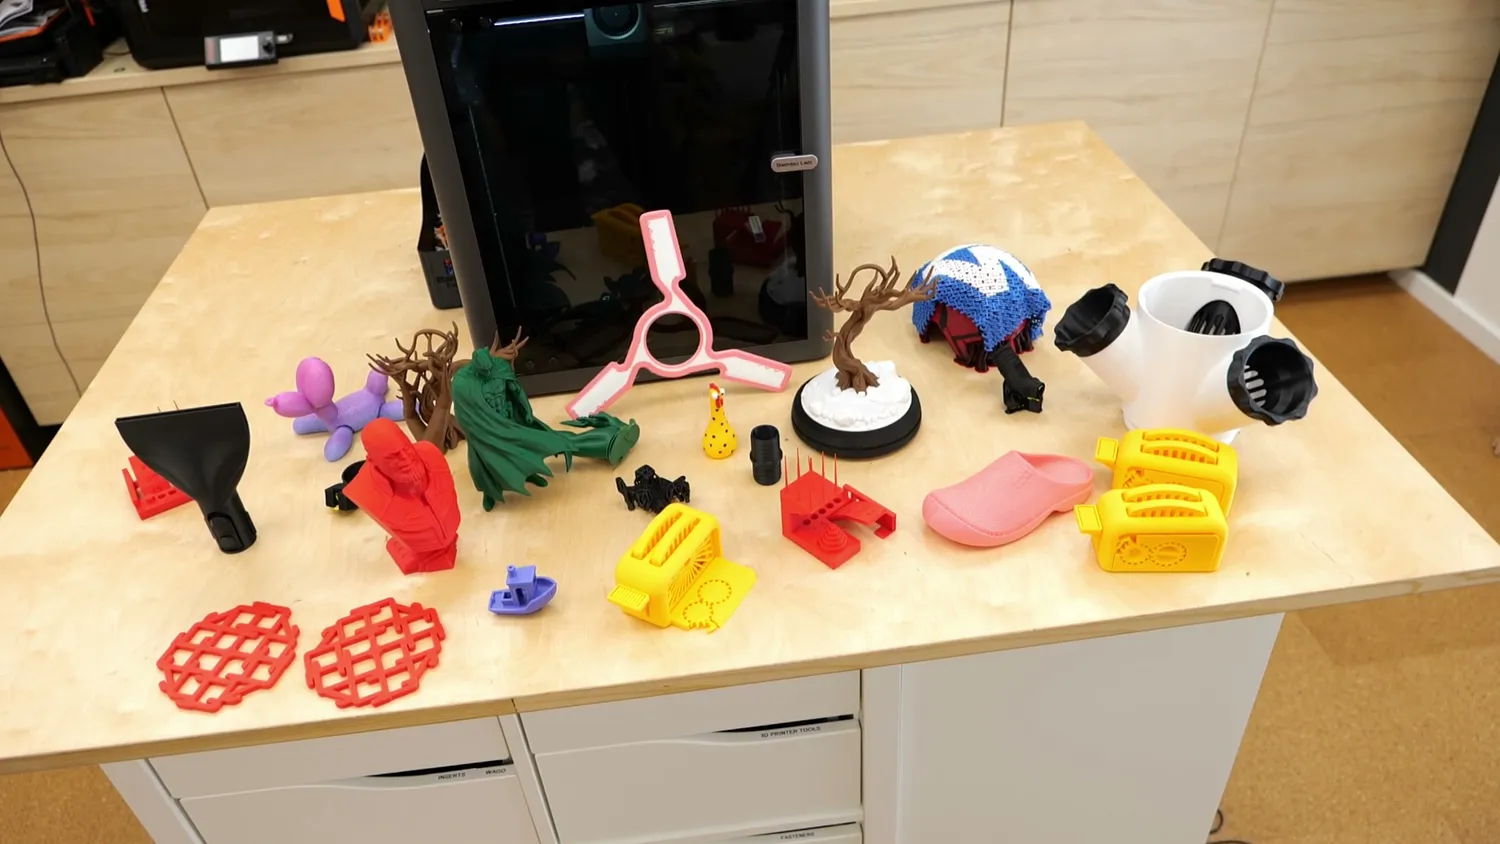 Roughly 250 hours of test prints
For baseline quality, the obligatory 3D Benchy came out very nicely in 37 minutes using the standard 0.2 millimeter profile. Nice bottom and top layers, corners that aren’t over-smoothed, and barely any visible VFAs.
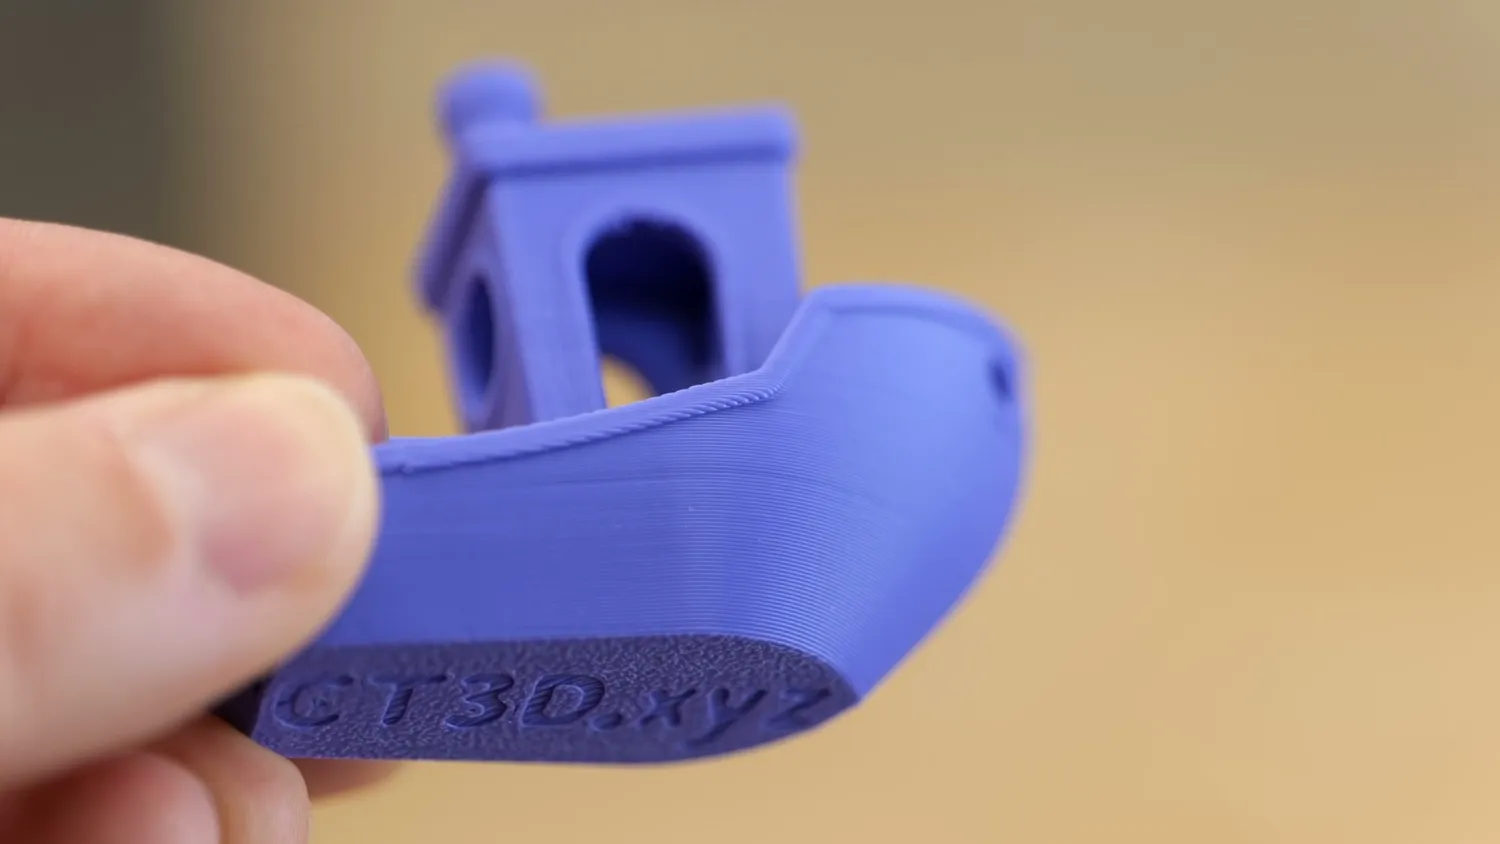 Clean bottom layers and hardly any VFAs
For general print quality and overhang behavior, I printed three Torture Toasters by Clockspring: one in the standard profile, one in the high-quality profile, and one on the auxiliary nozzle. All of them looked very good. Especially the high-quality one showed superb overhangs, getting close to perfect results up to 80 degrees. On the standard profiles this section looked a bit worse. The one printed with the auxiliary nozzle still looked good but the surfaces were not as perfect and you can clearly see the gaps on small perimeters. The only thing I wasn’t able to free were the tolerance pins at 0.2 millimeters and below which is a bit surprising.
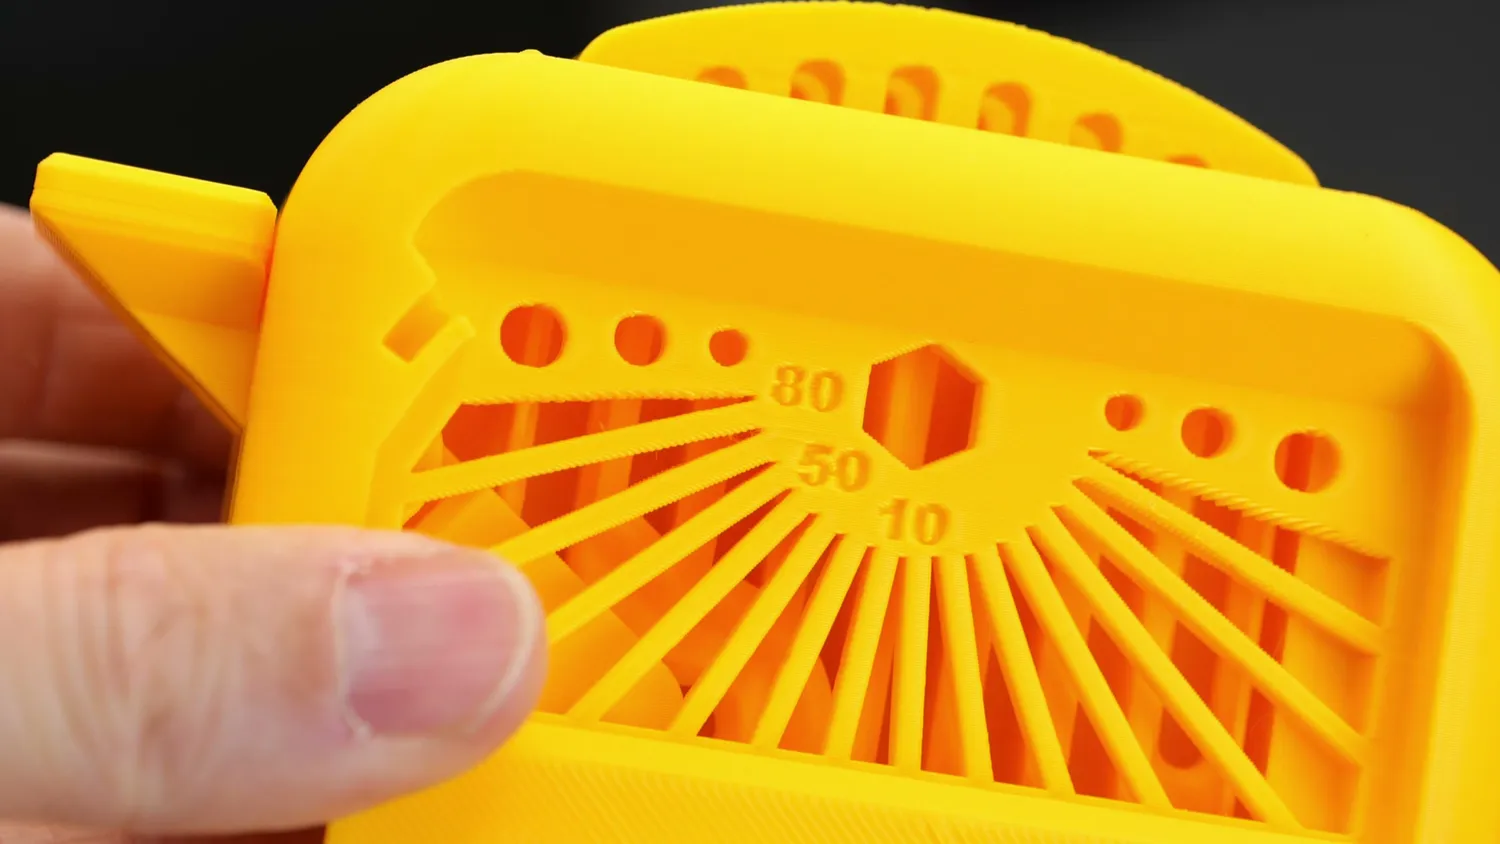 Overhangs close to perfect up to 80 degrees
On the KSR test print, though, all pins were loose, including the 0.2 millimeter one, and the quality was excellent regardless of whether the part was printed with the left or right nozzle. The only clear downside on the auxiliary nozzle was more stringing and some small holes on the retraction spikes.
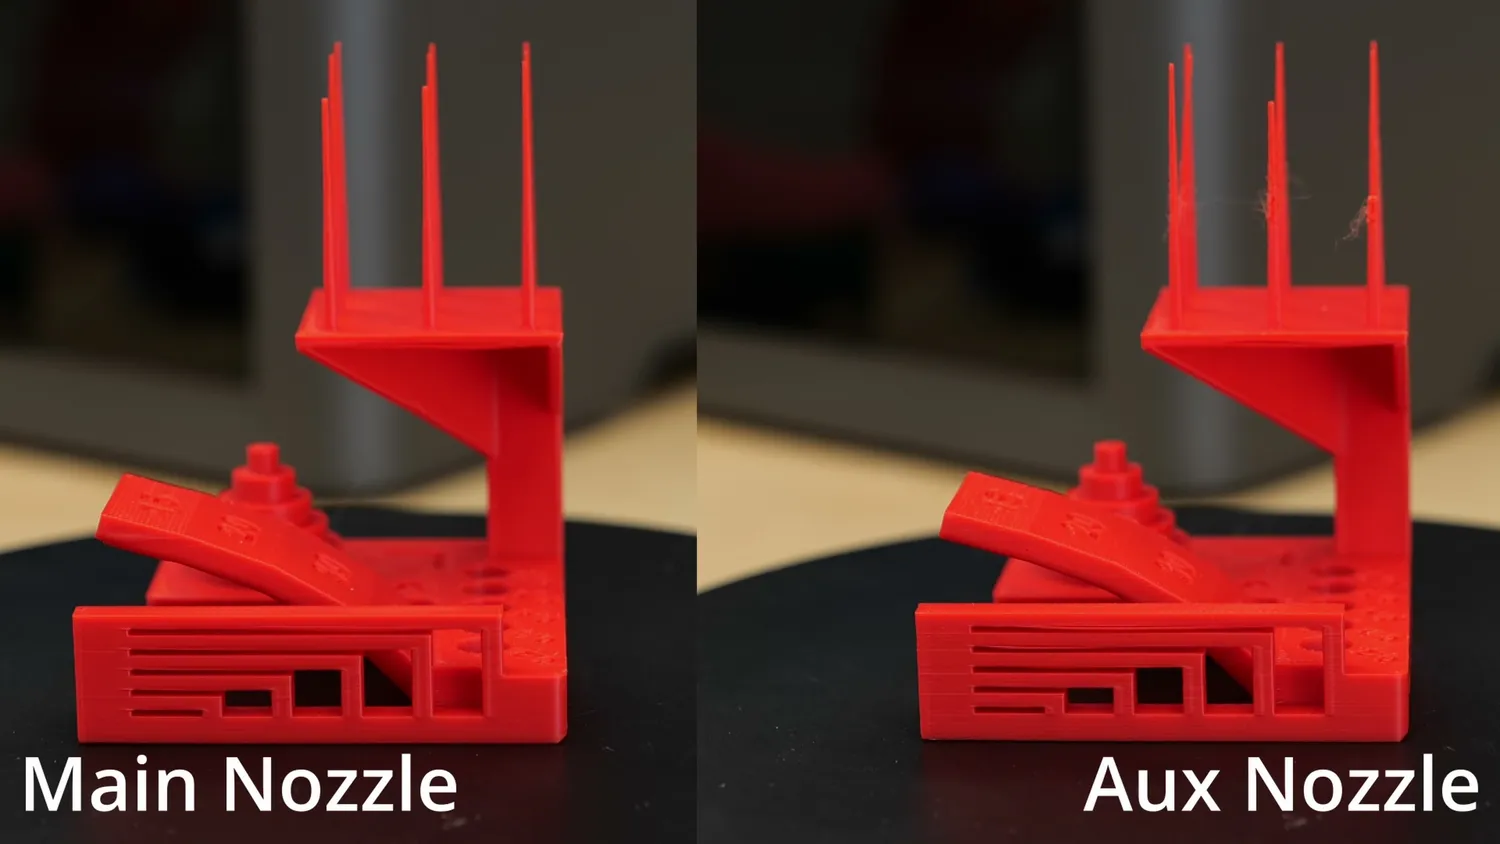 (left) main nozzle, (right) auxiliary nozzle
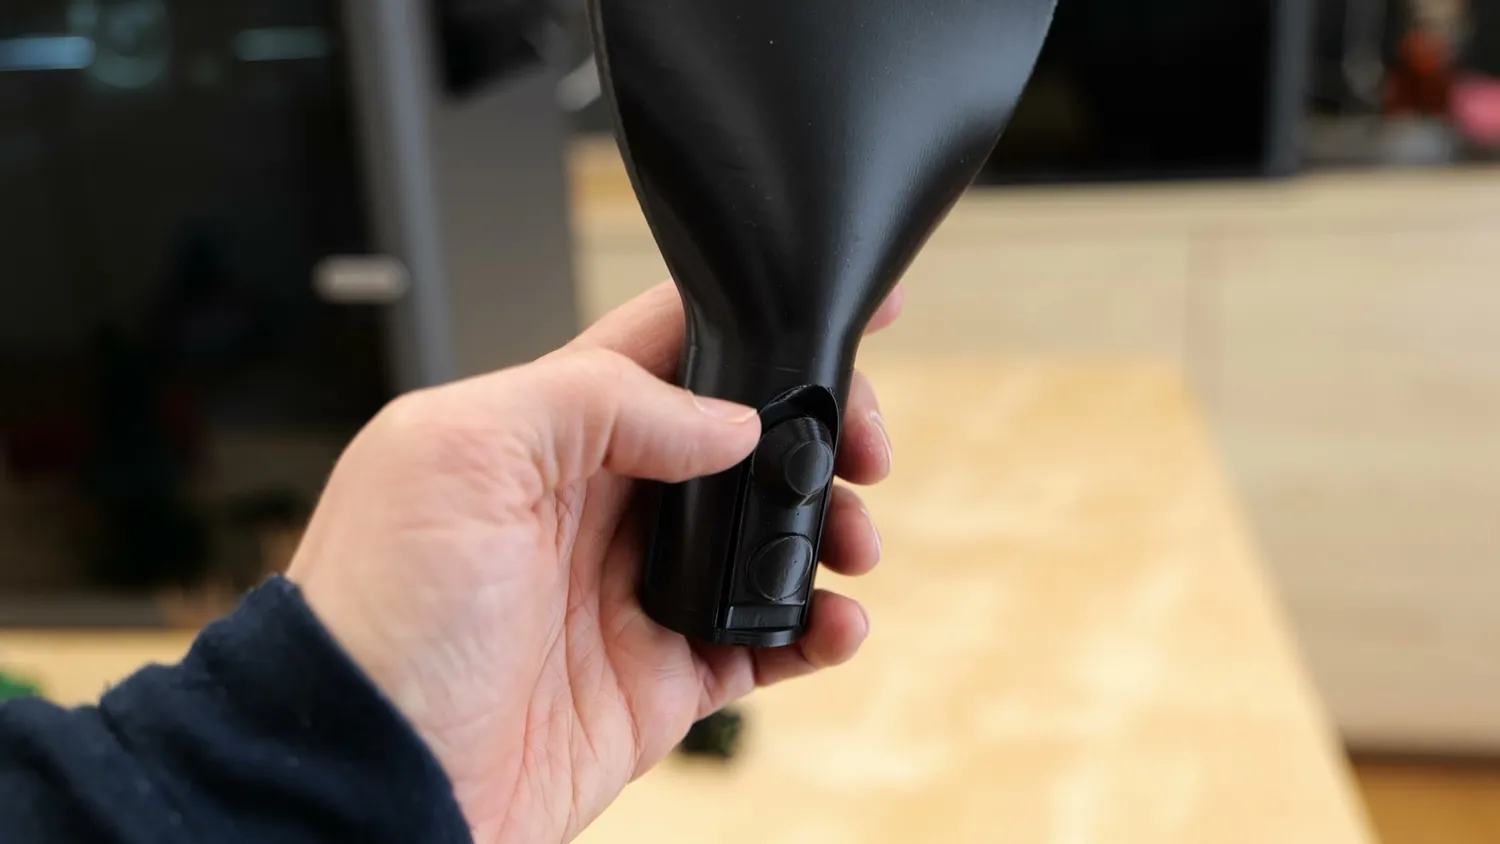
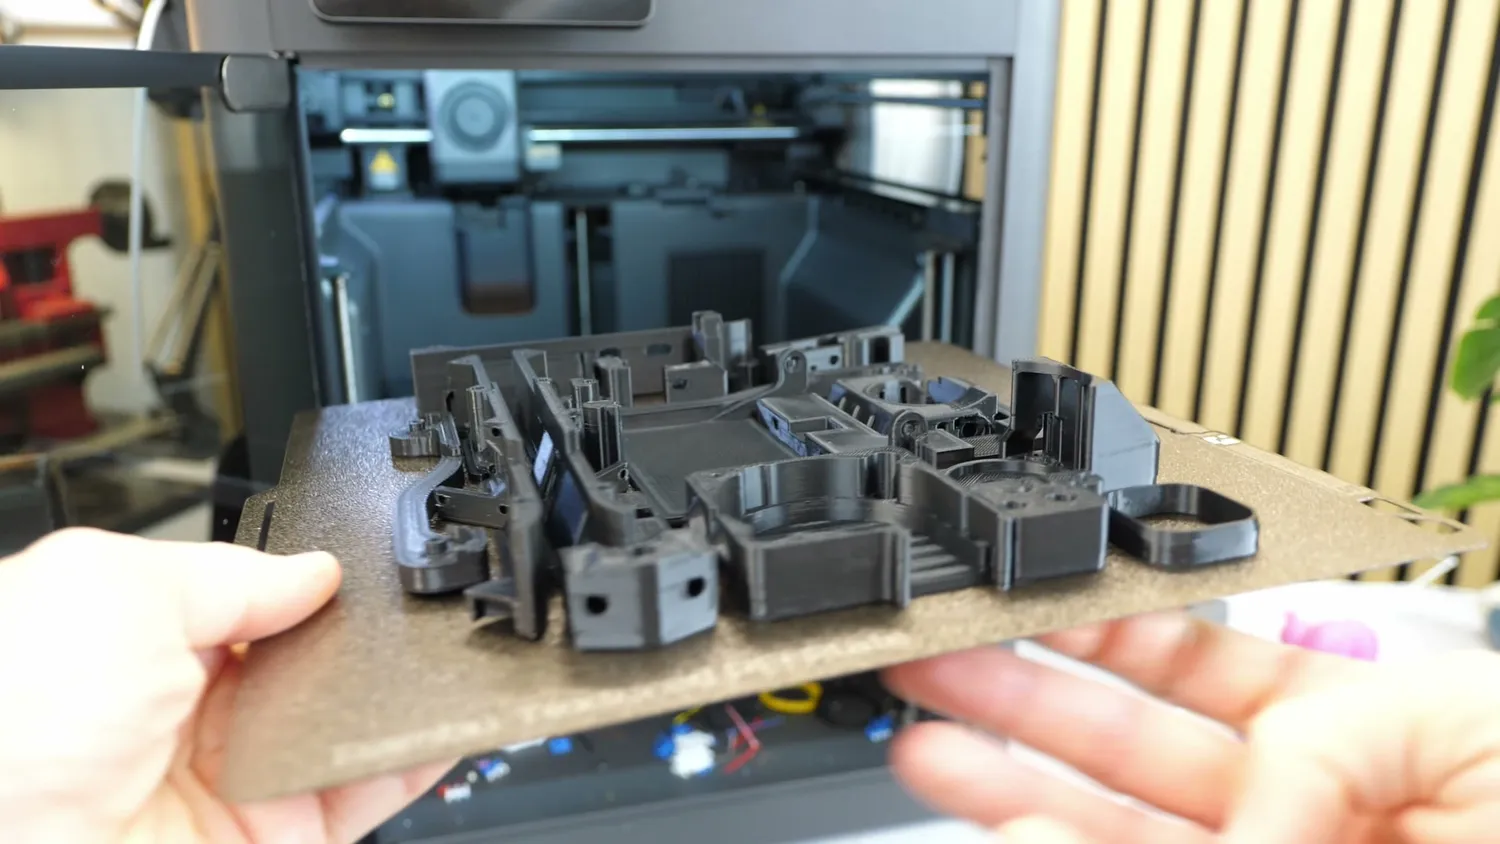
Then for real materials, I printed a ton of ASA parts, and those came out beautifully with strong layer adhesion specifically thanks to the heated chamber. PETG also printed without any problems and really highlighted the smooth surfaces this machine can produce.
Dual-material prints and break-away supports
And of course, the X2D gets especially interesting once you use both nozzles for the kinds of jobs where they actually matter. I recently did a bunch of jobs for a customer who had parts that had a fillet on the bottom and these typically don’t turn out good with standard supports. But using a combination of PETG with PLA Supports turned out really good parts! Dual-color printing worked well, even though my first Torture Fabric failed because one loose link caused a catastrophic chain reaction. The next print with a cleaned bed turned out well, though. Multi-material printing was also no problem. I printed a TPU shoe with PLA supports, a TPU-overmolded PLA boomerang. This was all done with the new TPU assist module* that acts like a mini filament buffer and pushes especially soft and sticky materials to the nozzle to remove drag. It still looks a bit DIY with the printed housing but it worked really well also for softer TPUs!
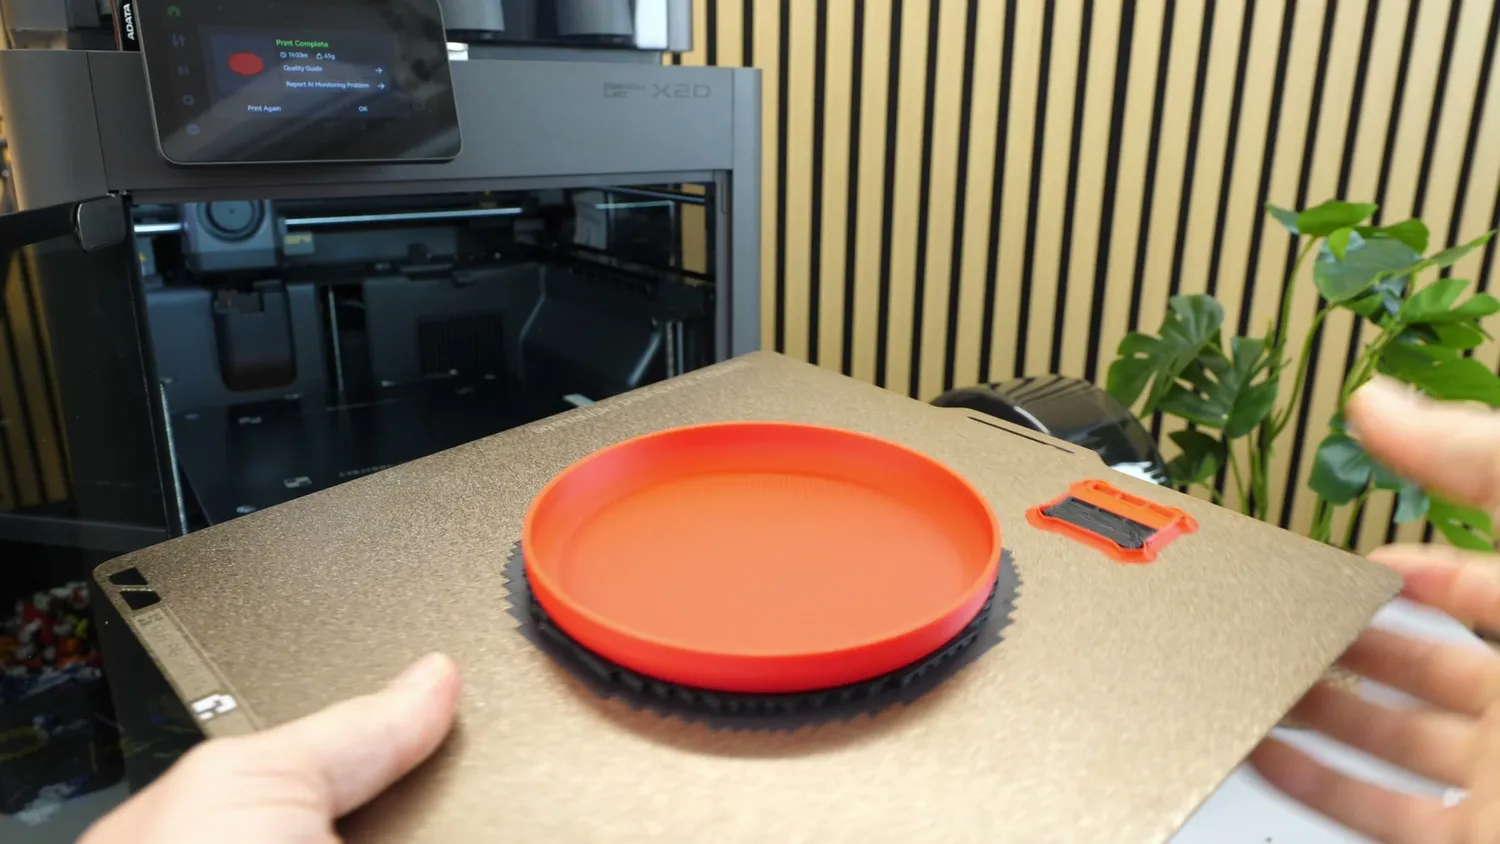 A filleted bottom printed in PETG on PLA supports
Next I printed several parts with support interfaces printed from a different material. Those supports released cleanly, with only one arm of my bonsai coming loose, but that’s kind of the tradeoff when you use a support material that is specifically designed to let go easily.
Finally, I even printed a bike lock holder from high-temperature carbon fiber nylon using supports out of Polymaker*’s PolySupport. That part looked great, and the supports released really cleanly. That’s exactly the kind of application where the X2D makes a lot of sense.
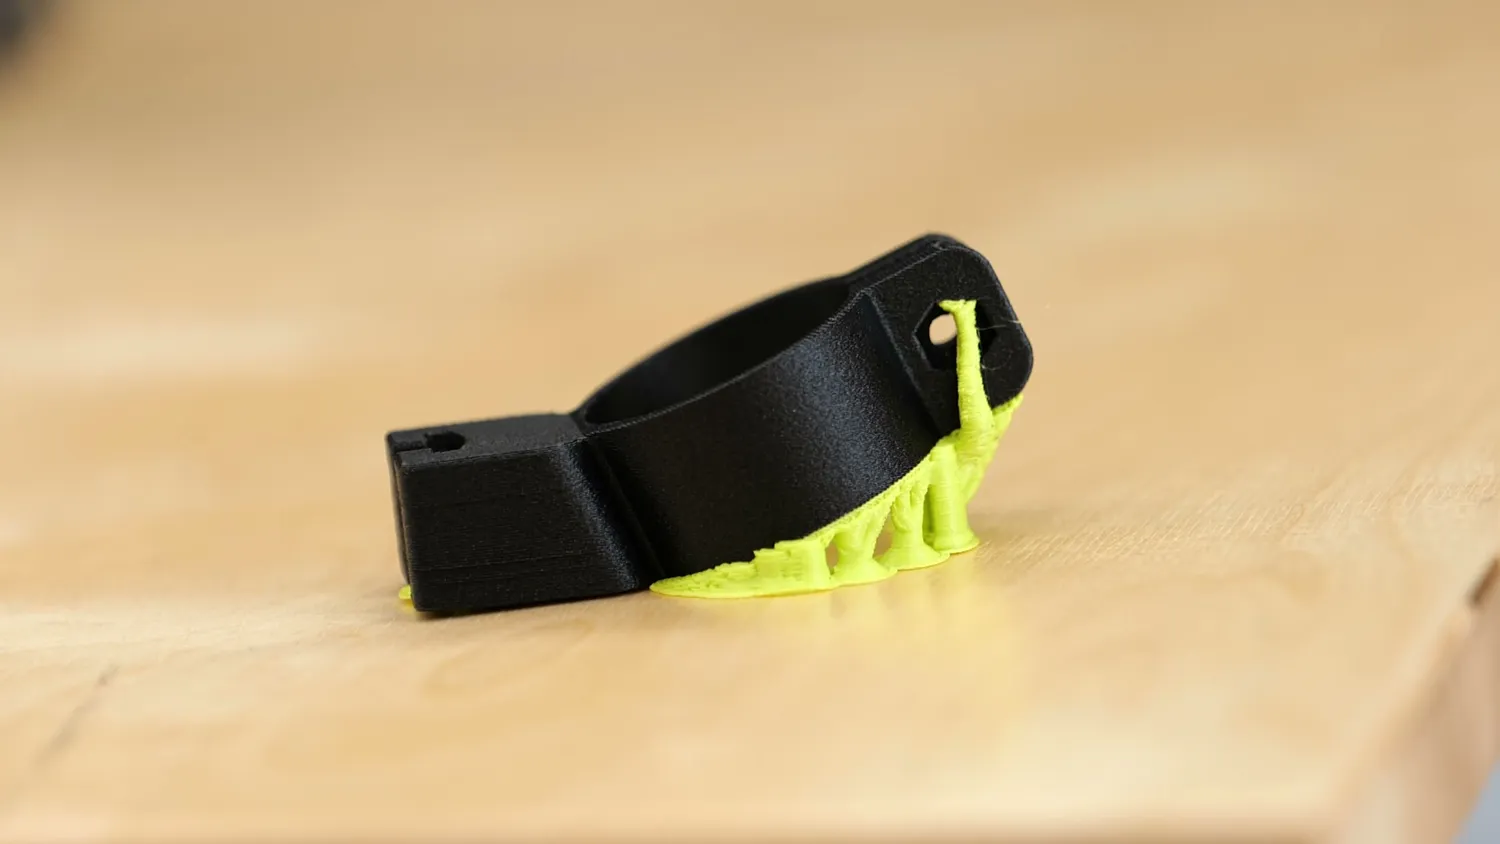 Carbon fiber nylon with a separate support material
So overall, on the print quality side, there is very little to complain about. Though you will have noticed there is still always a prime tower on dual nozzle prints. This is used to establish a consistent nozzle pressure after a change to improve print quality. You could print without one with slightly worse quality but the amount of waste is relatively low compared to all the poop waste on a single nozzle system. And also Toolchangers don’t really get around that problem. Of course if you print with more than 2 colors or materials on the X2D it will start purging again like their other machines.
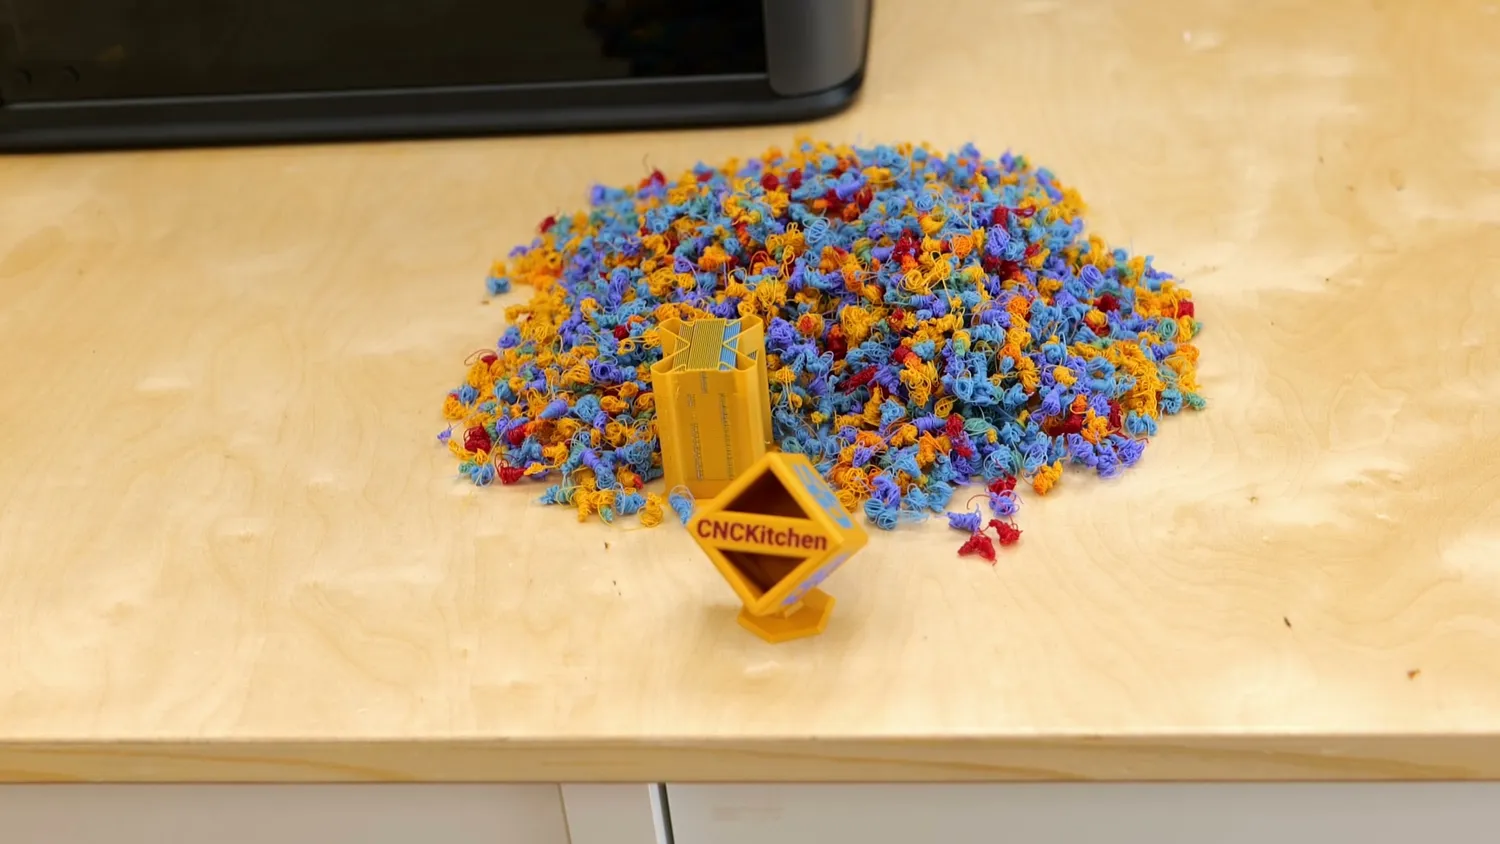 The kind of waste a single-nozzle color change produces
Power consumption and real print times
This time I finally did something I probably should have done for all of my previous printer reviews as well: I connected the machine to a smart plug and fed the data into my smart home system. That let me track not just power consumption, but also the real print time and compare it with the slicer estimate. I do have to note that I have the 230-volt European version here, which has higher-power heaters in the bed and probably also in the chamber, so if you get a US version, your heat-up times will likely be longer.
During idle, the machine draws around 14 watts. That doesn’t sound like much, but if you never turn it off, it would still cost you over 40 dollars a year at an electricity price of 35 cents per kilowatt hour. When you start a print, power consumption is obviously the highest because all the heaters turn on, and that can go up to over 1500 watts on my machine, but it drops quickly once everything is warm.
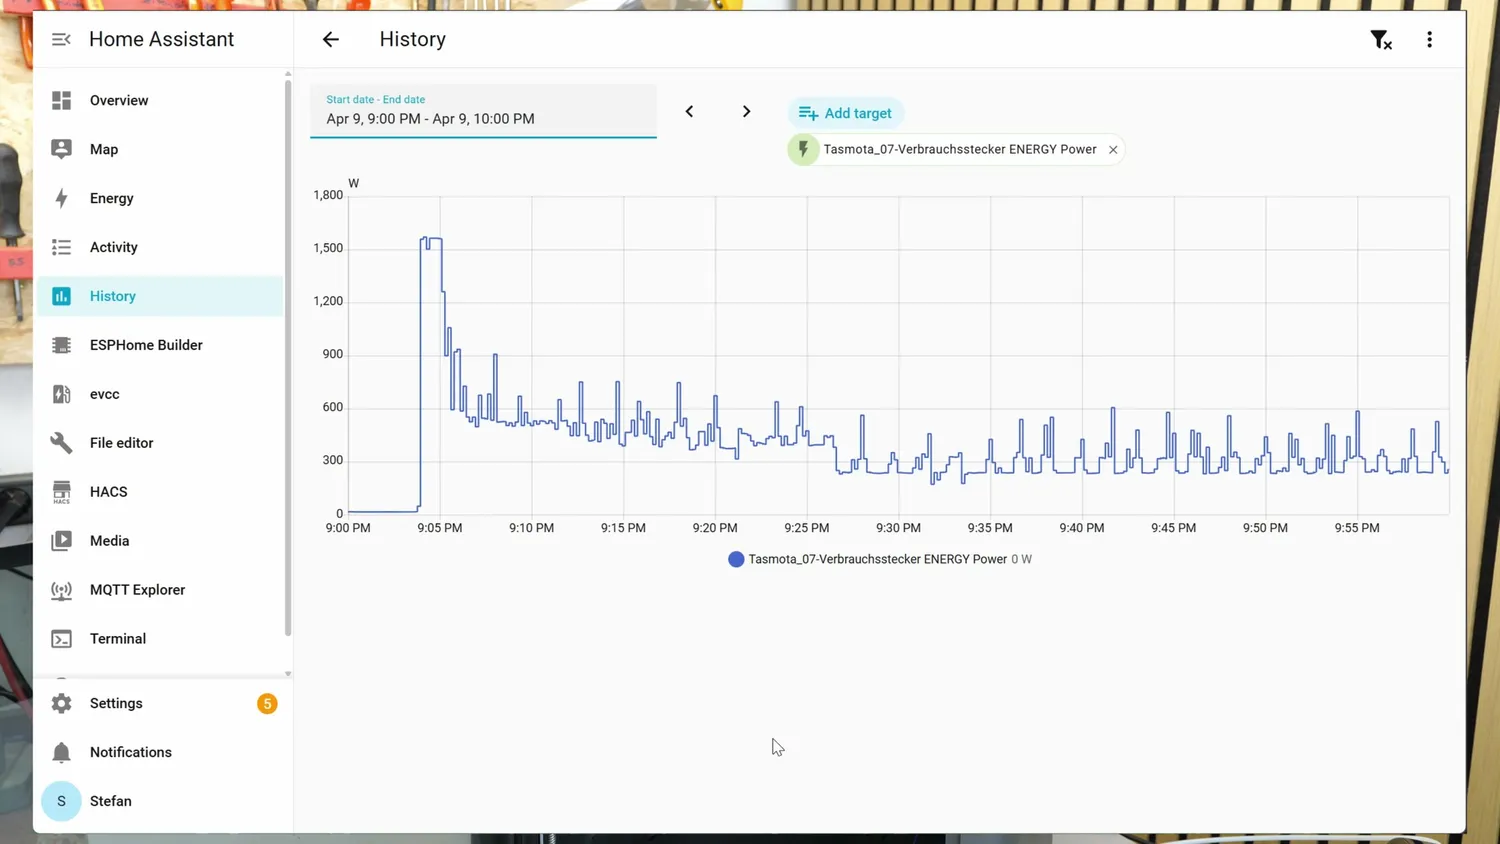 Over 1500 watts at the start, then it settles down
When printing PLA, I measured an average power consumption of around 160 watts. PETG with a higher bed temperature brings that to roughly 180 watts. And ASA prints with the chamber heated to 65 degrees and the bed at 110 consumed approximately double at around 330 watts. To put that into perspective, a typical four-hour PLA print costs you around 22 cents, while the same print in ASA would run you about 46 cents.
As I mentioned, power draw isn’t the only thing I could get from that setup, but also the real printing time compared to the slicer estimate. Every print took a bit longer than what the slicer said. The deviation for prints on the main extruder was only around 1 to 4 percent but the one on the auxiliary extruder took 7% longer, probably because accelerations and decelerations are not properly accounted for.
Fumes and noise
And speaking of what comes out of the machine, besides plastic parts there are also emissions, namely fumes and noise.
Let’s start with the fumes, because I’m a sucker for clean air even in my work environment. The internal recirculation filter does a reasonable job filtering out ABS or ASA fumes, but I was still able to smell these materials during printing. The chamber is not hermetically sealed, and the new exhaust filter is not running during heating mode, so it’s not creating negative pressure inside the chamber. I’m a bit disappointed here, but maybe tuning the exhaust fan could make this less of a problem. Still, it’s great that they added an exhaust filter again, and even though it looks a bit like an afterthought, it’s well integrated into the software.
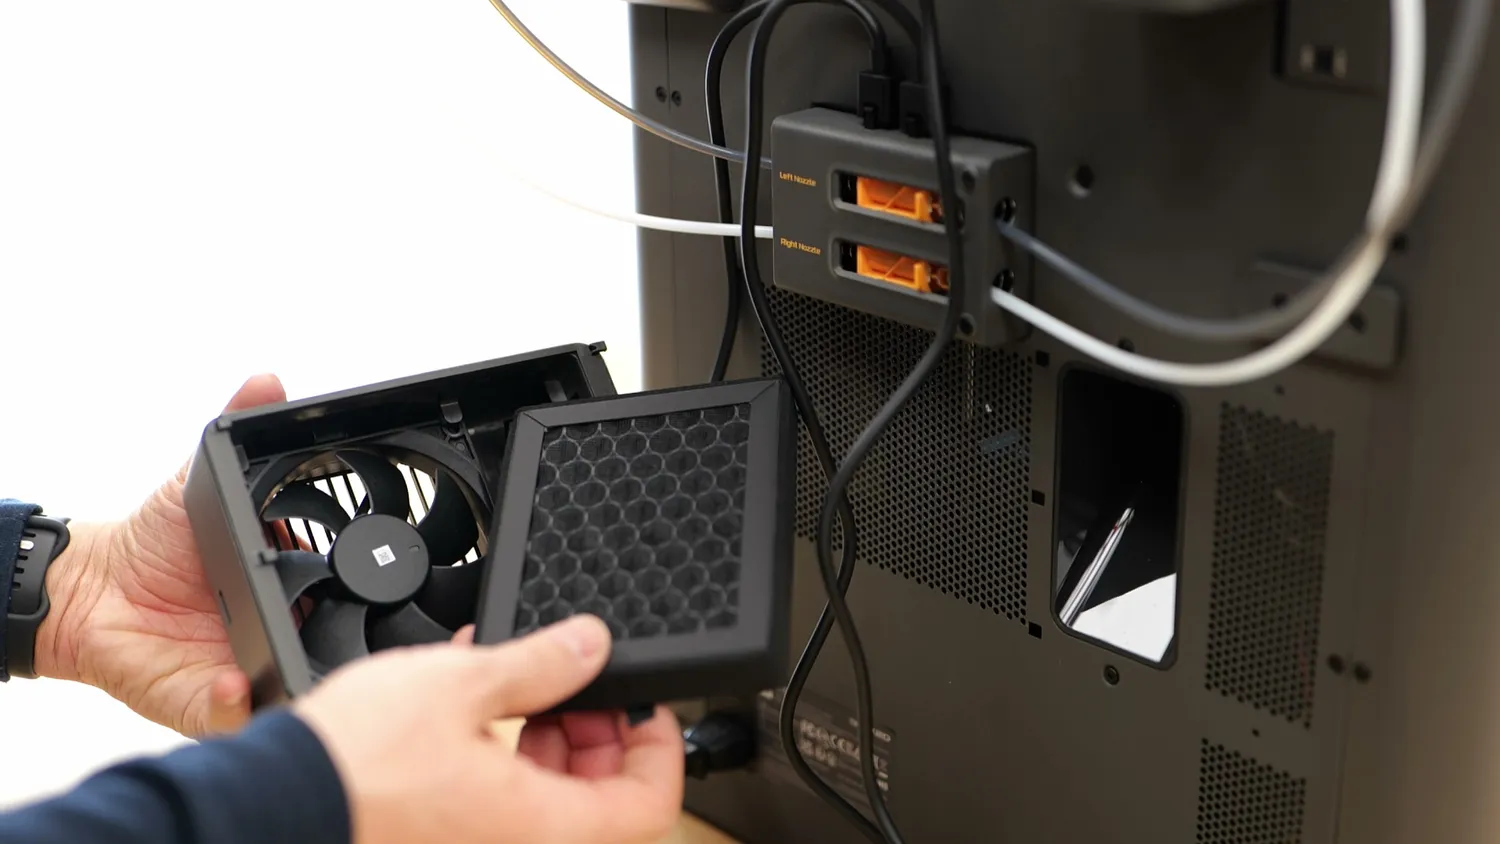 The exhaust filter that finally comes included
There is still some air leaking out through gaps in the housing, especially when the powerful side cooling fans pull in fresh air from the outside. But during all of my PLA printing I never had the feeling that I smelled the typical fumes that many PLA Plus materials tend to give off these days. By default the exhaust fan is also not running at full speed, probably to reduce noise, so there is still room to improve filtration efficiency at the cost of making the printer a bit louder.
And judging how loud it is is always difficult, because saying it’s around 55 dBA during normal printing and a bit above 60 dBA during fast travel moves probably doesn’t tell you a whole lot. It’s not annoyingly loud, and I’m sensitive, so I wouldn’t want to sit right next to one in a very quiet, small office, but if there is some background noise, it’s not really bothersome.
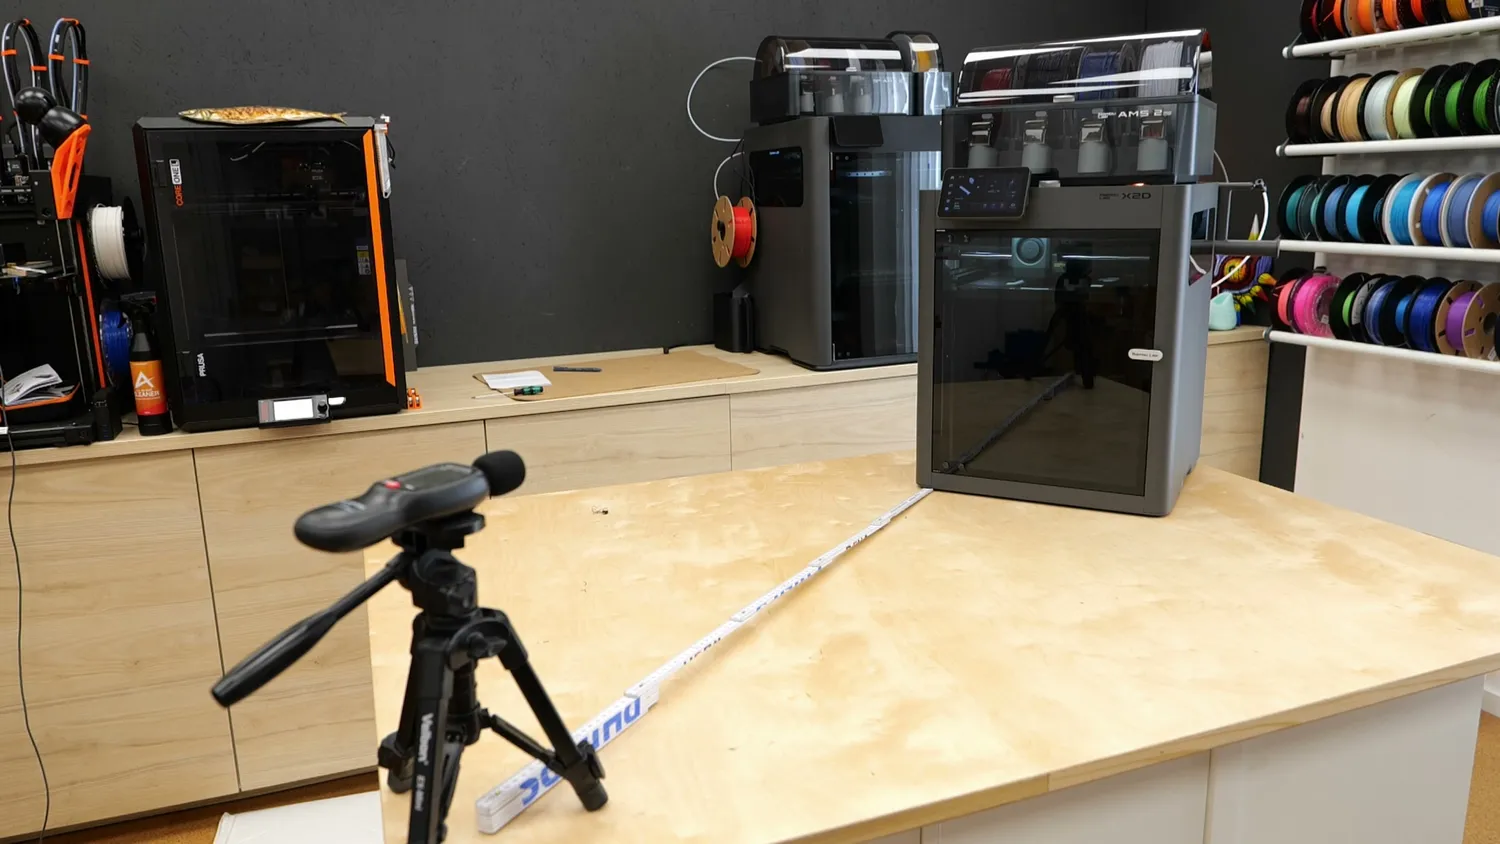 Measured from one meter away
The Vision Encoder Plate
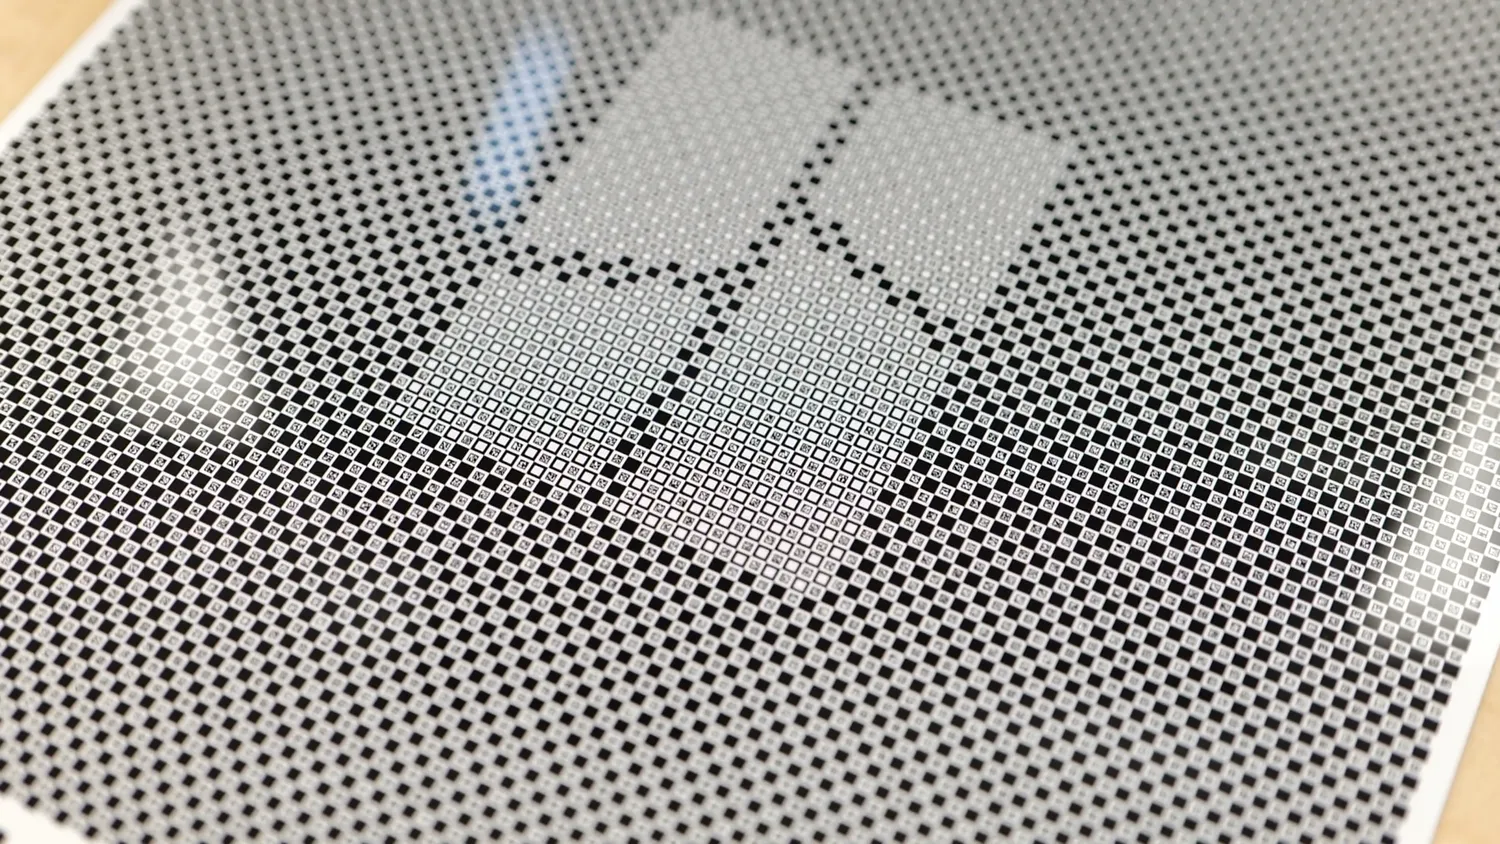
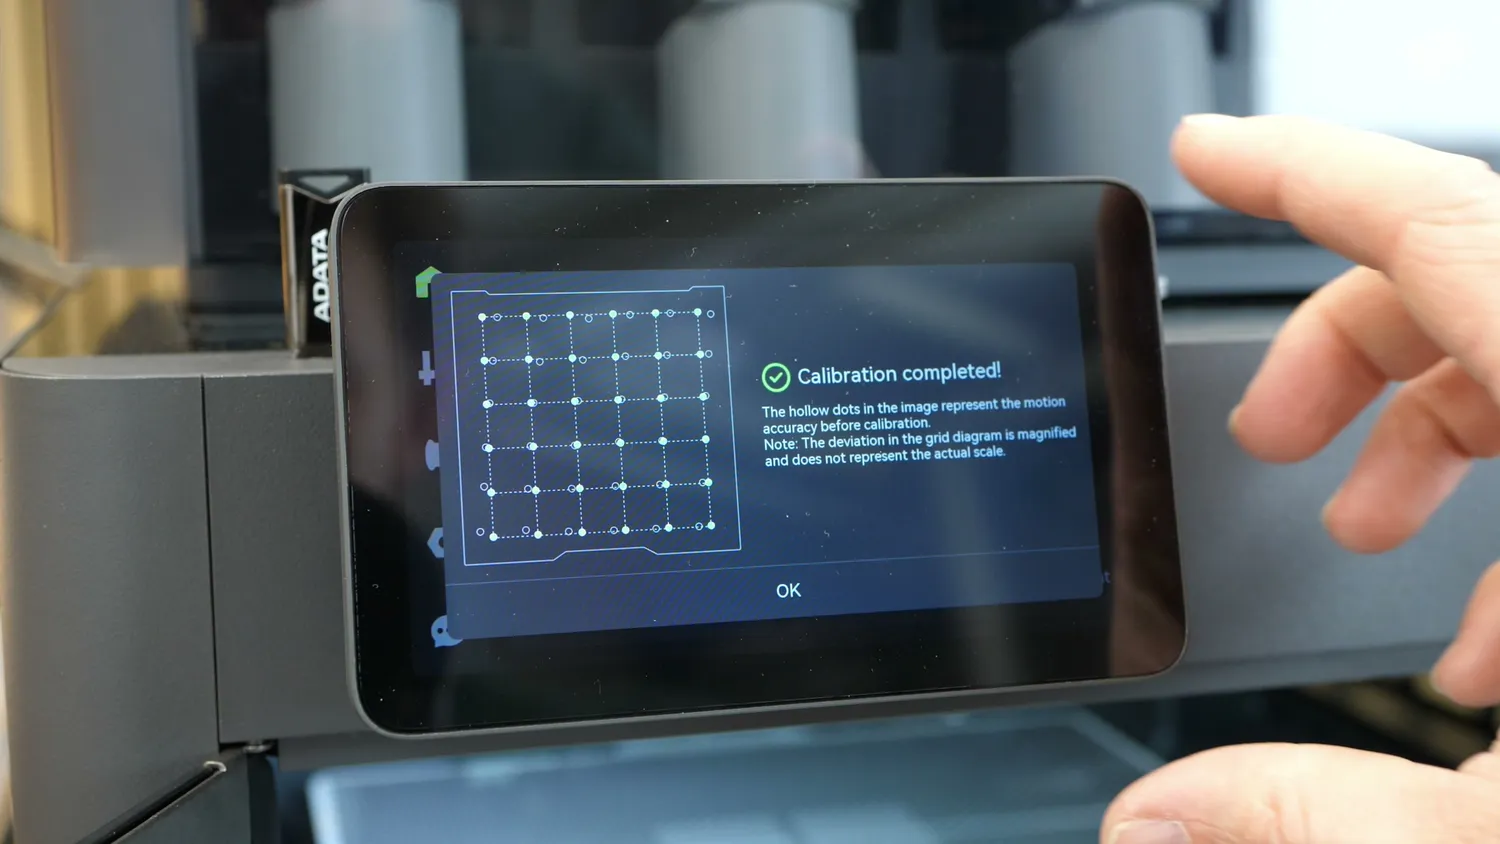
And now after smelling and hearing, let’s talk about Vision, namely the Vision Encoder Plate*. Even though they ditched the lidar scanner from the X1 and now do pressure advance calibration with a sensor in the hotend, they kept the down-facing camera, which can be used together with the Vision Encoder Plate. That’s a separate accessory that calibrates the motion system of the printer.
I regularly use Vector3D’s Califlower calibration print to dial in skew on my printers, basically checking whether the X and Y axes are actually perpendicular. With the Vision Encoder Plate, this becomes an automatic process that not only calibrates skew but also position tolerances across the whole print area. In my case, skew was reduced by 80 percent, from 0.17 degrees to only 0.03. If you print parts that need to fit together, you will notice this. For random decorative prints, it probably won’t matter much. In my opinion, most people don’t need it, but if you run a print shop with several machines, this can be a good way to make sure parts from different printers all come out the same. And since you won’t be doing this every day you could also just buy one and share it with friends or your maker space.
The downsides you should know about
Alright, that was a lot of good stuff, so let me also summarize the main downsides you should know about before buying one.
First, I had some first-layer inconsistencies when printing on the textured sheet. Most first layers looked very good, but there was always one area in the back left corner that just didn’t look quite right. Switching to a smooth sheet solved it, so this may be an issue with my unit or with that specific print plate.
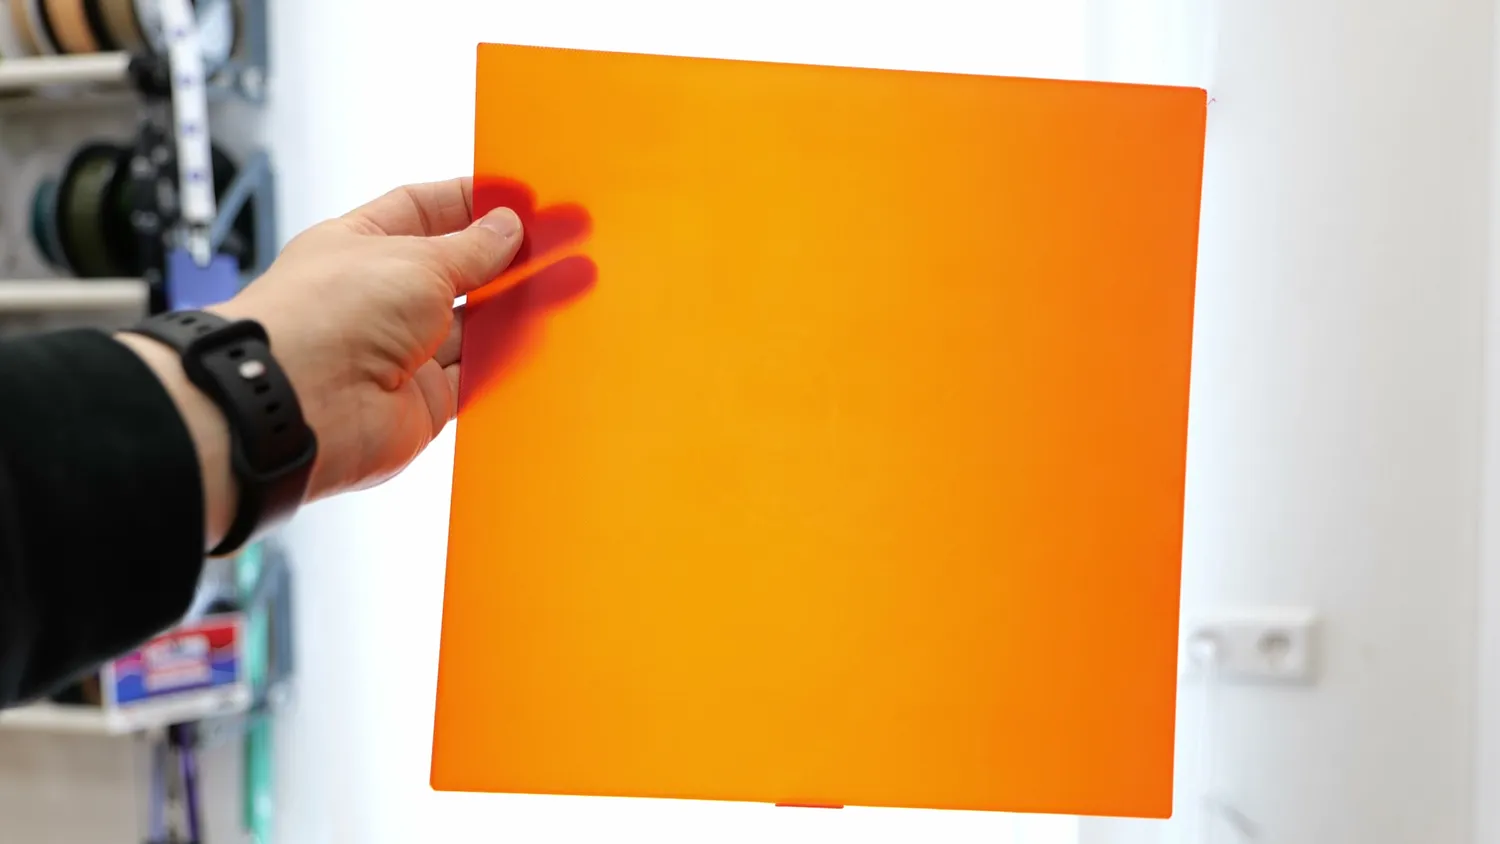 On the smooth sheet the first layer was perfectly even
Second, I had an issue with feeder one on my AMS 2 Pro. It would occasionally fail during the initial filament loading and grind the filament instead. Once I gave it a little push, it worked again, and from what I could find online I don’t seem to be the only one seeing that problem. So at least reviewers apparently don’t get hand-picked golden samples.
Third, the filtration is not perfect. It definitely helps, especially for PLA, but it doesn’t completely eliminate smell. If you’re sensitive to fumes, that could still bother you, even though I’d also say that very few other printers handle this better out of the box.
And then there is the auxiliary hotend itself. Even though it worked well overall, it is clearly a compromise and not fully featured. Print times are longer due to lower speeds and accelerations, you lose about 20 millimeters of build width on that side, print quality is good but not perfect and some materials are restricted on that nozzle, and because the bowden feeder uses only a basic stepper motor, you don’t get jam or clog detection there. So while the main nozzle is absolutely where you want to print your actual model, the auxiliary nozzle is best treated exactly how Bambu Lab names it: as an auxiliary tool for supports, secondary materials, and less critical geometry.
The 300 degree Celsius nozzle limit is also worth talking about. At first glance it seems a little restrictive for a machine with a heated chamber up to 65 degrees. But I suspect that is very much intentional, because one of the main differentiators to the H2D, besides build volume, is that the H-series hotends can go all the way to 350 degrees. And realistically, for the vast majority of people looking at a machine like this, 300 degrees is already enough to cover almost everything they will actually print. Printing PPS might sound interesting, but in the end, it costs $200 per kilo.
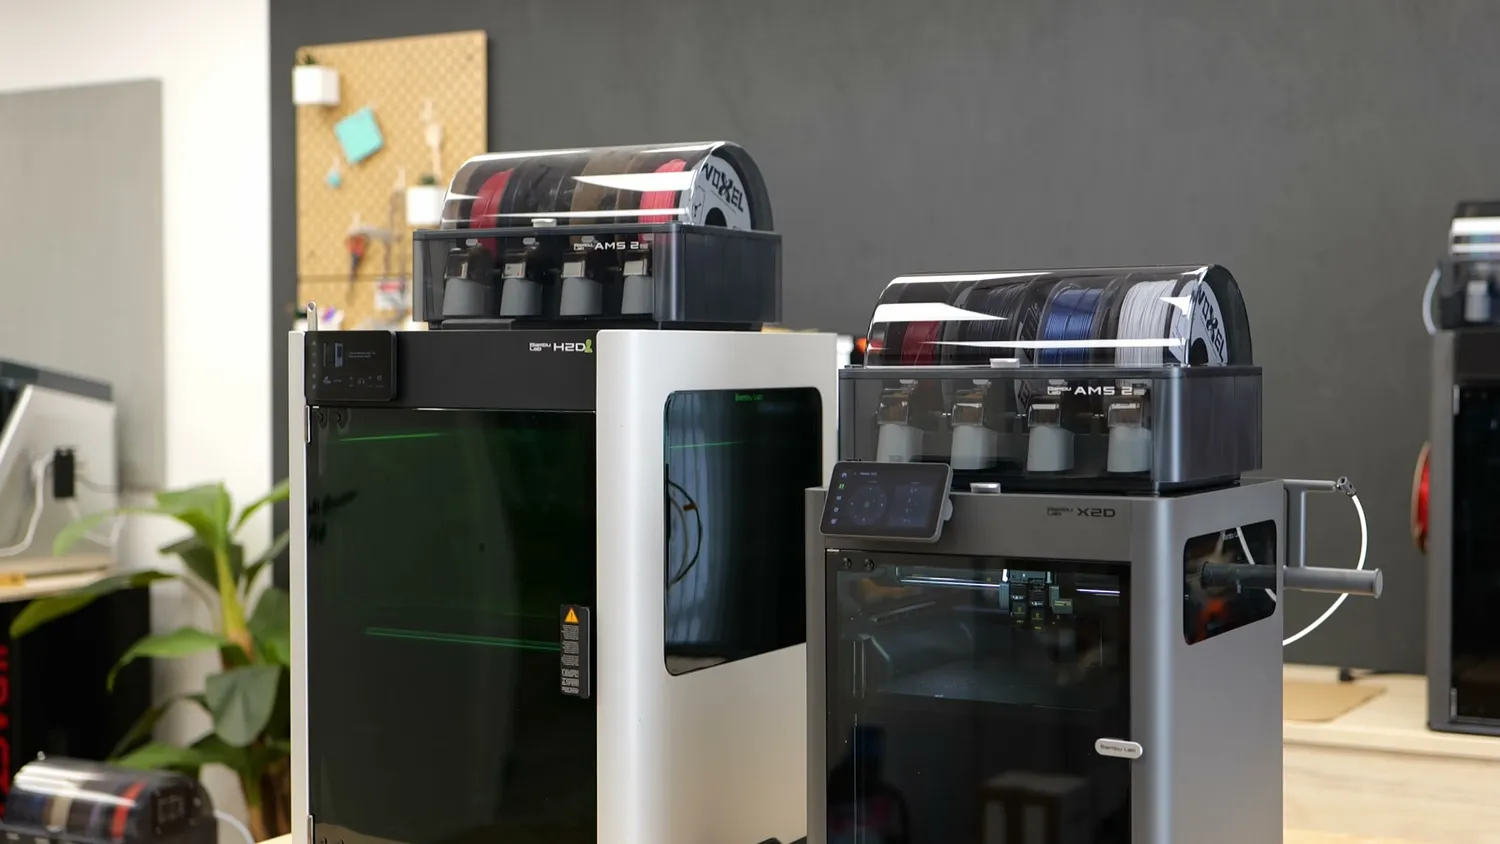 (left) H2D with 350 °C hotends, (right) X2D
The Bambu Lab experience
And that leads to the most polarizing part of the X2D, and Bambu Lab machines in general. What you are buying here is what Bambu Lab likes to call the “Bambu Lab experience.” Their marketing material says “Printing is no longer this headache-inducing process full of tweaking and troubleshooting, but something much closer to a button press”. For most people, that’s exactly what they want.
At the same time, Bambu Lab has been slowly tightening its ecosystem. In practice, they clearly want you to use their slicer, their workflow, and, increasingly, even their own materials, because they want to ensure things work reliably.
And to be fair, that system does work. Their machines are excellent, the slicer is very capable, and their materials and accessories are still generally affordable and widely available. So I absolutely understand why so many people love the ecosystem. But I also understand the concern from the part of the community that grew up with open-source 3D printers and values flexibility above convenience. If that matters a lot to you, then the X2D is probably not the right machine.
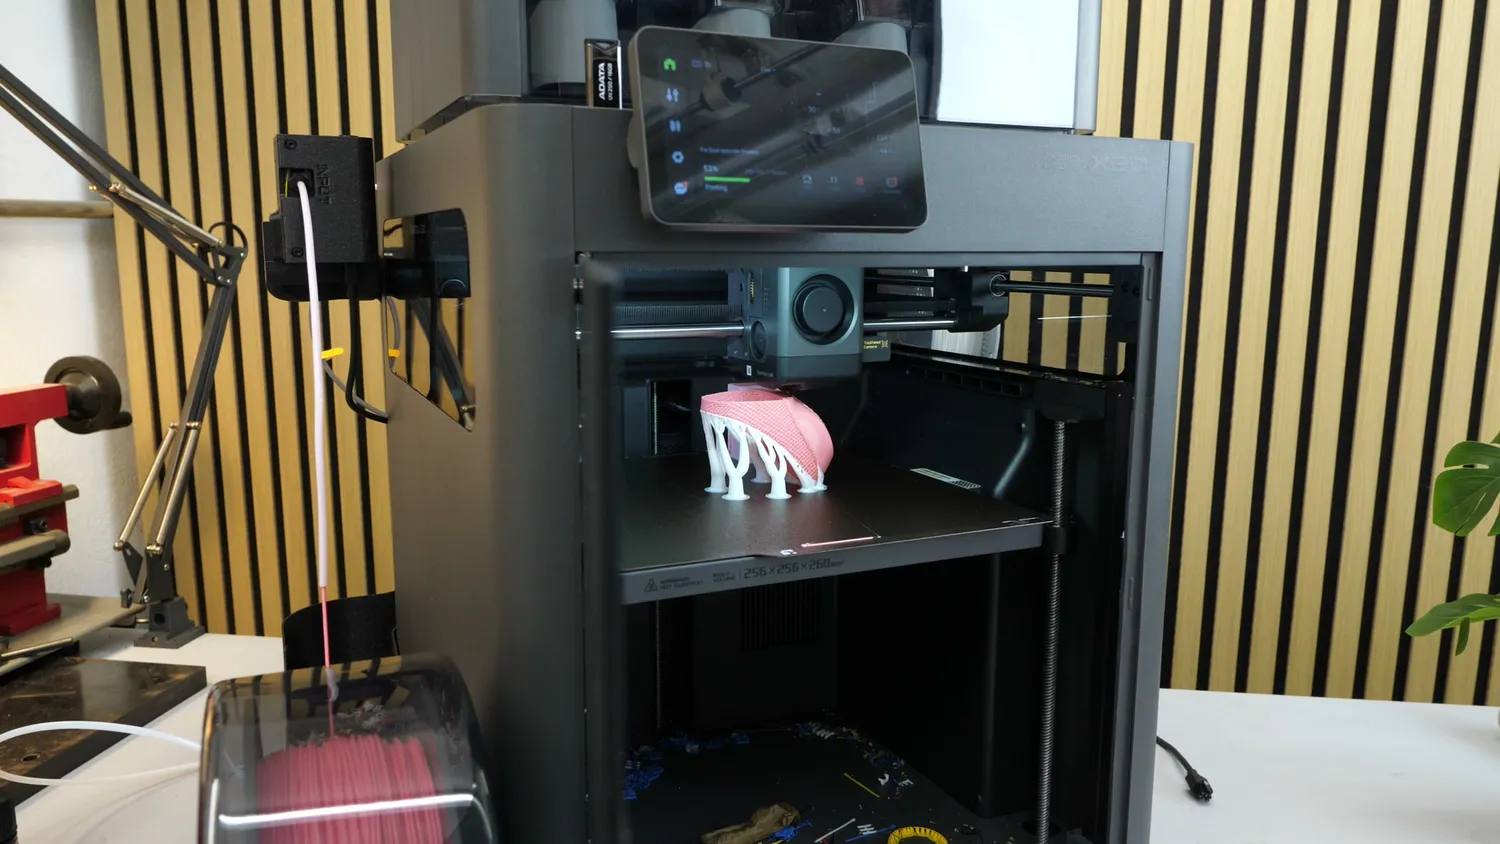 A TPU print on PLA supports, running without any fuss
My verdict on the X2D
But here is my bottom line: I had a really good time with the X2D, and for me it makes the P2S very hard to justify. For just $100 more, you get the heated chamber, the dual-nozzle system, better belts with fewer VFAs, and an exhaust filter included. That is a lot of additional machine for very little extra money.
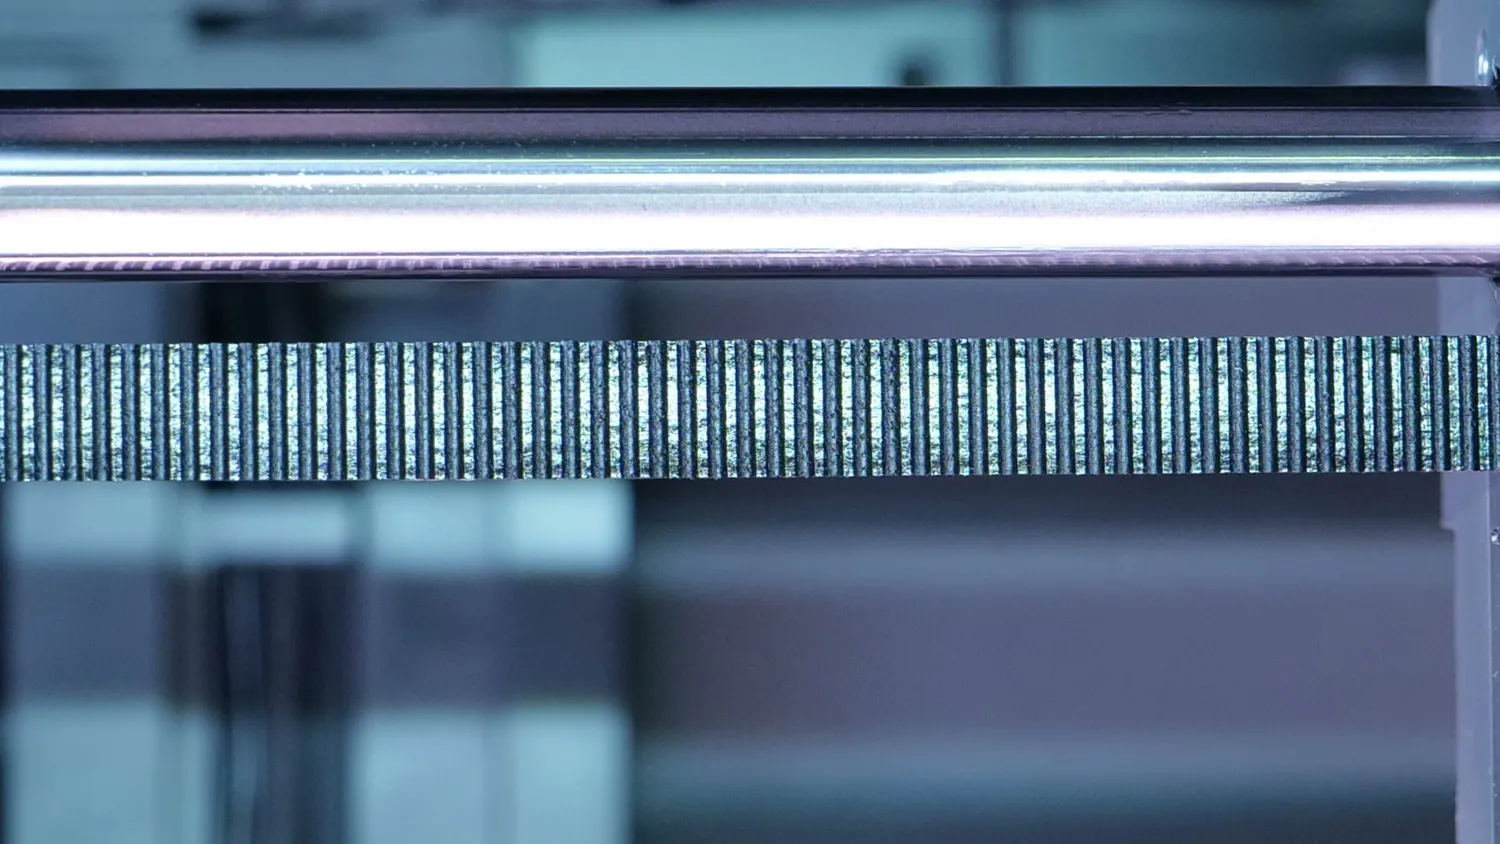 The 1.5GT belts that keep VFAs down
I expected the X2D to land much closer to $1000 and therefore closer to the H-Series of machines. Instead, Bambu Lab priced it at $649 standalone and $899 for the Combo, and that makes it extremely aggressive. So for most people looking at an enclosed Bambu Lab printer that can handle almost anything they are realistically going to throw at it, this is probably the one to get.
The gap to the H-Series is still there, though. If you need the larger build volume, the more capable dual direct-drive setup, want a hybrid system with the laser or the higher temperature ceiling, then the H2D still makes sense. But for everyone else, the X2D now feels like the new sweet spot in Bambu Lab’s semi-professional lineup. I don’t think there will be a Single Nozzle X2 and could only imagine an X2C, so basically a Mini Vortek System with just one but a swappable nozzle. Who knows, but what are your predictions?
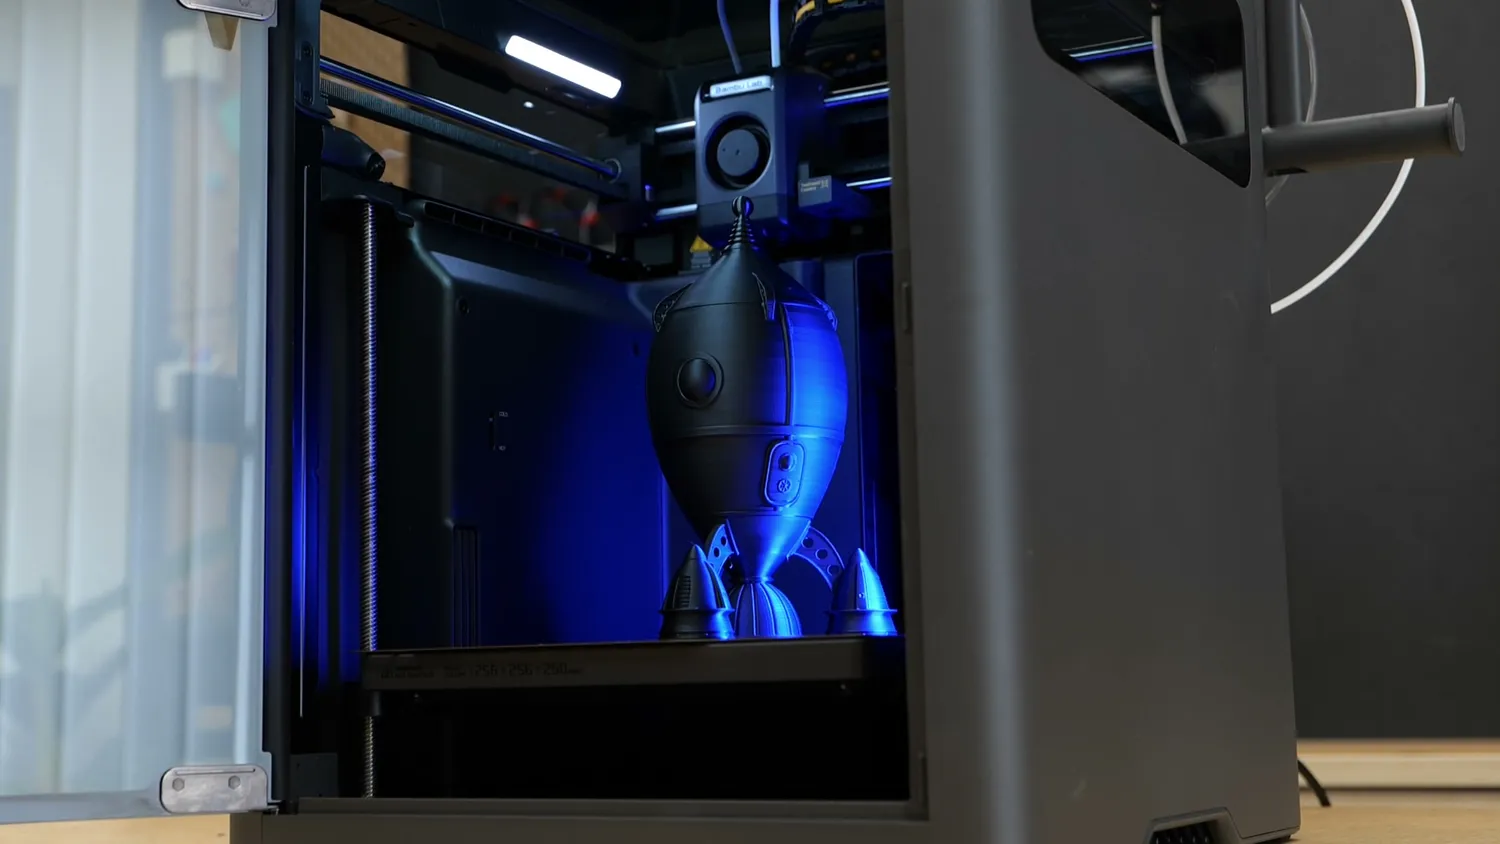 The new sweet spot in Bambu Lab’s lineup
Alternatives in the same price range
If you’re looking for alternatives in the same price range, there is, on the one hand, the Snapmaker U1* at $899 with 4 toolheads. It’s definitely better and more efficient for multi-color or multi-material prints, but it’s not ideal when you want to work with technical materials. On the other hand, there is the QIDI Q2* at $499, which also has a heated chamber, a nozzle that goes all the way to 370 °C, and Klipper firmware. But you’re missing the dual nozzles, and the machine and experience are simply not as polished as on a Bambu Lab machine. And if you want something western made, there is or rather will be the Prusa* CORE One with the INDX system but that will probably set you back around $2000 once it’s available.
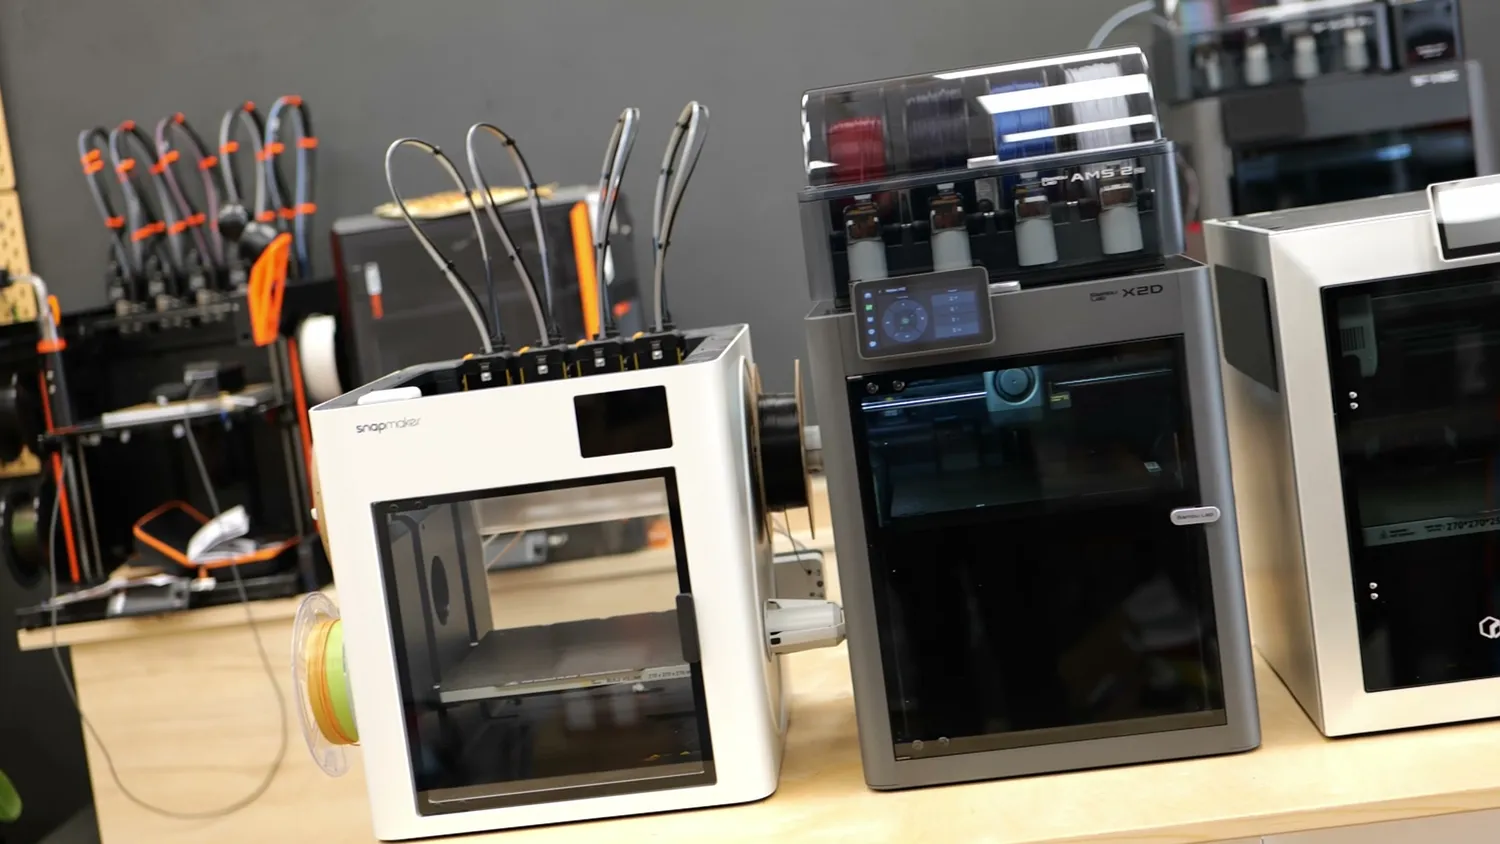 The Snapmaker U1 and the QIDI Q2 next to the X2D
In the end, I hope I was able to give you a good overview of Bambu Lab’s X2D. If you have questions, please let me know and I’ll try to answer them as well as I can.
🐼 Get the Bambu Lab X2D ($649 standalone / $899 Combo): https://geni.us/BBL-X2D*
* Links marked with an asterisk are affiliate links — if you buy through them, I earn a small commission at no extra cost to you. As an Amazon Associate I earn from qualifying purchases. Thanks for supporting my work!