
I Tested the Bambu Lab H2D – And It’s More Than I Expected…
The Bambu Lab H2D reviewed: dual-nozzle printing, a heated chamber, the new AMS 2 Pro and AMS HT, plus a 10W laser and drag knife in one machine.
TL;DRthe short version
- The H2D is Bambu Lab’s big CORE XY, at $1,899 for the printer alone, $2,199 with the AMS 2 Pro and $2,799 for the Full Combo with the 10W laser. Another $700 buys the 40W version.
- Build volume is 350 x 320 x 325 mm, but the two nozzles cost you width: 325 mm with one nozzle, 300 mm with both. That’s still noticeably smaller than a Prusa XL.
- The left nozzle lowers when it’s used and retracts when it isn’t, and a tiny cover swivels over the inactive one, so oozed material doesn’t land on your part. That’s where it beats Ultimaker’s approach.
- Single-material quality is excellent. The default 0.2 mm Benchy took 47 minutes, the pre-sliced speedboat one 23, and ASA and CF-Nylon came out perfectly thanks to the 65 °C heated chamber.
- Two-color printing with both nozzles is far better than the AMS: the panda dropped from 5 hours to 2 and from 129 g of material down to 40 g. With five colors the octopus only went from 23.5 to 18.5 hours.
- The new AMS 2 Pro and AMS HT are my highlight. They dry filament properly with Active Air vents that open and close on their own, and they’ll work on the old X and P series after a firmware update.
- My complaints: two blocked hotends after ASA prints that were a real hassle to clear on this complex printhead, dedicated support material that doesn’t print reliably, and TPU that’s anything but user-friendly to feed.
- The laser and drag knife are the best implementation of this idea I’ve seen, safety included, and I don’t think the 3D printing was compromised for them. But for more than two colors a toolchanger is still faster.
🐼 Get the Bambu Lab* H2D ($1,899 printer / $2,199 Combo / $2,799 Laser Full Combo): https://geni.us/BambuLabH2D*
It’s here! After almost three years, Bambulab has finally released their new CORE XY 3D printer, the H2D. This is the large machine that so many have been waiting for, offering more than twice the print volume of its predecessors. While it might still disappoint some, this machine has all the bells and whistles that makers expect in a digital fabrication system. Yes, I didn’t call it a 3D printer because the H2D can be more than just a 3D printer. One of the most exciting aspects might not even be the 3D printer itself! So, let’s take a closer look at it and see where it shines and where it still needs some polish!
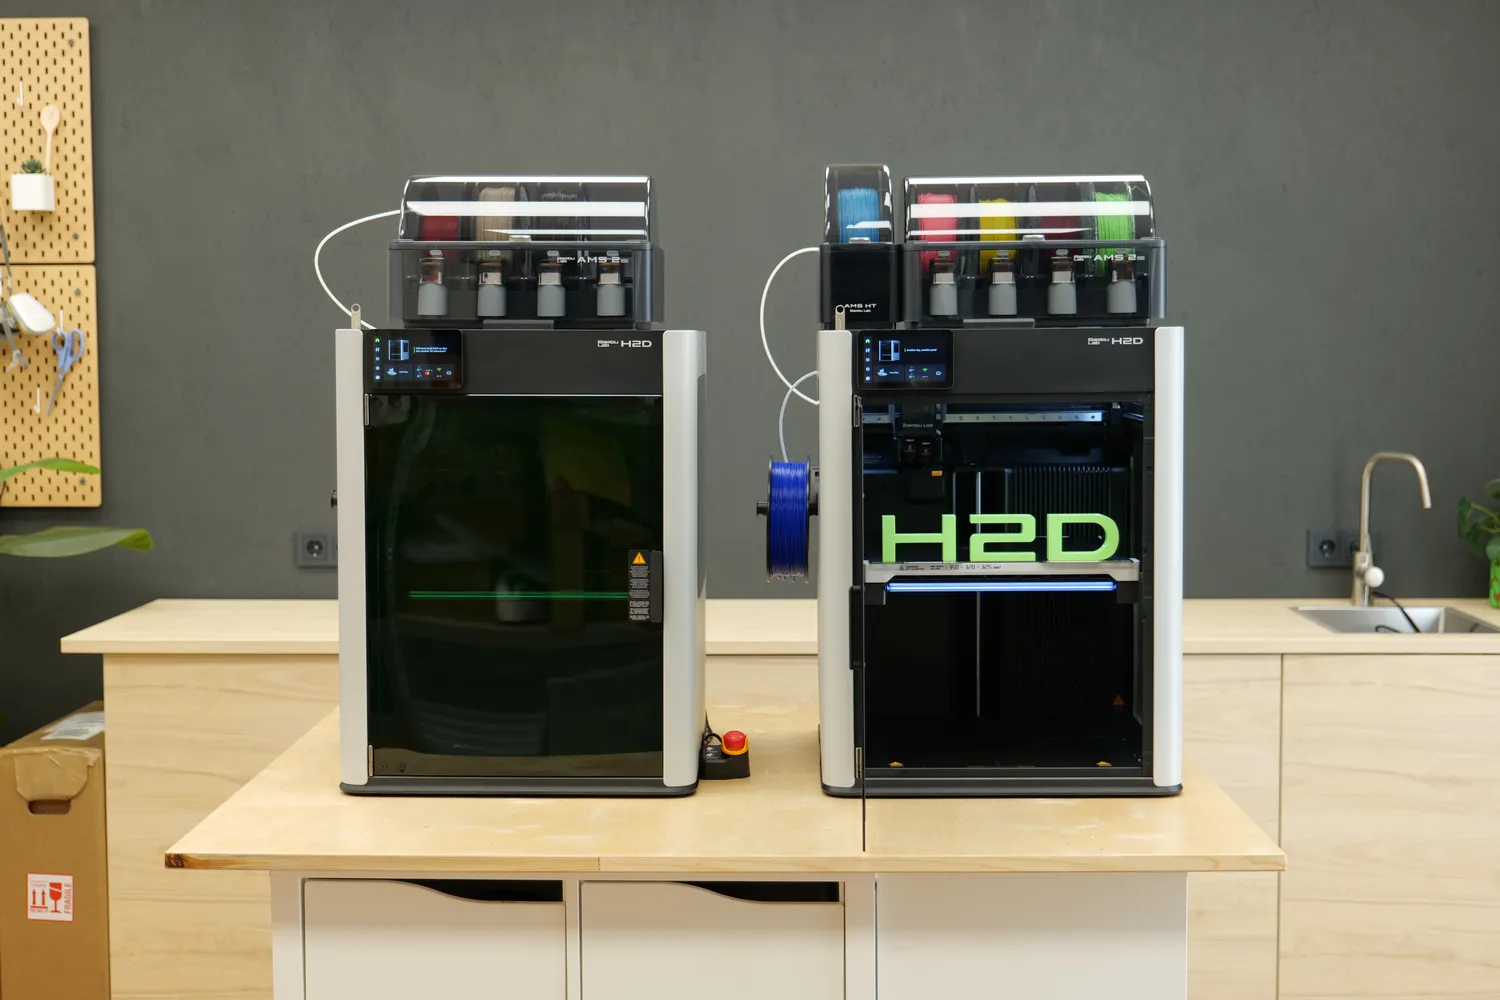
(left) the H2D Laser Combo with its green windows, (right) the standard H2D
Price and availability
Yes, the H2D is finally here, and it’s available at Bambulab’s warehouses worldwide, not just as a preorder or Kickstarter. There is, however, a slight caveat. As you may have heard, the H2D is more than just a 3D printer. It also comes as a laser combo with either a 10W or 40W laser unit, featuring green-tinted windows for laser protection. The standard H2D is in stock now, along with the new AMS unit, but the laser combo will still take a few weeks to ship and is currently available for preorder. Whether it makes sense to wait for the combo or if the 3D printer-only version suits your needs is something you’ll need to decide, and I’ll help you figure this out in this article. For completeness, there will be an upgrade path from the standard H2D to the H2D Laser Combo if you later decide you want the additional features! A quick word about pricing: The H2D starts at $1899 for the printer itself. The Combo, which includes the AMS 2 Pro, costs $2,199, while the Full Combo with the 10W laser is priced at $2,799. If you spend an additional $700, you’ll receive the 40W laser. The H2D targets the more professional maker market, but it’s not as expensive as many expected.
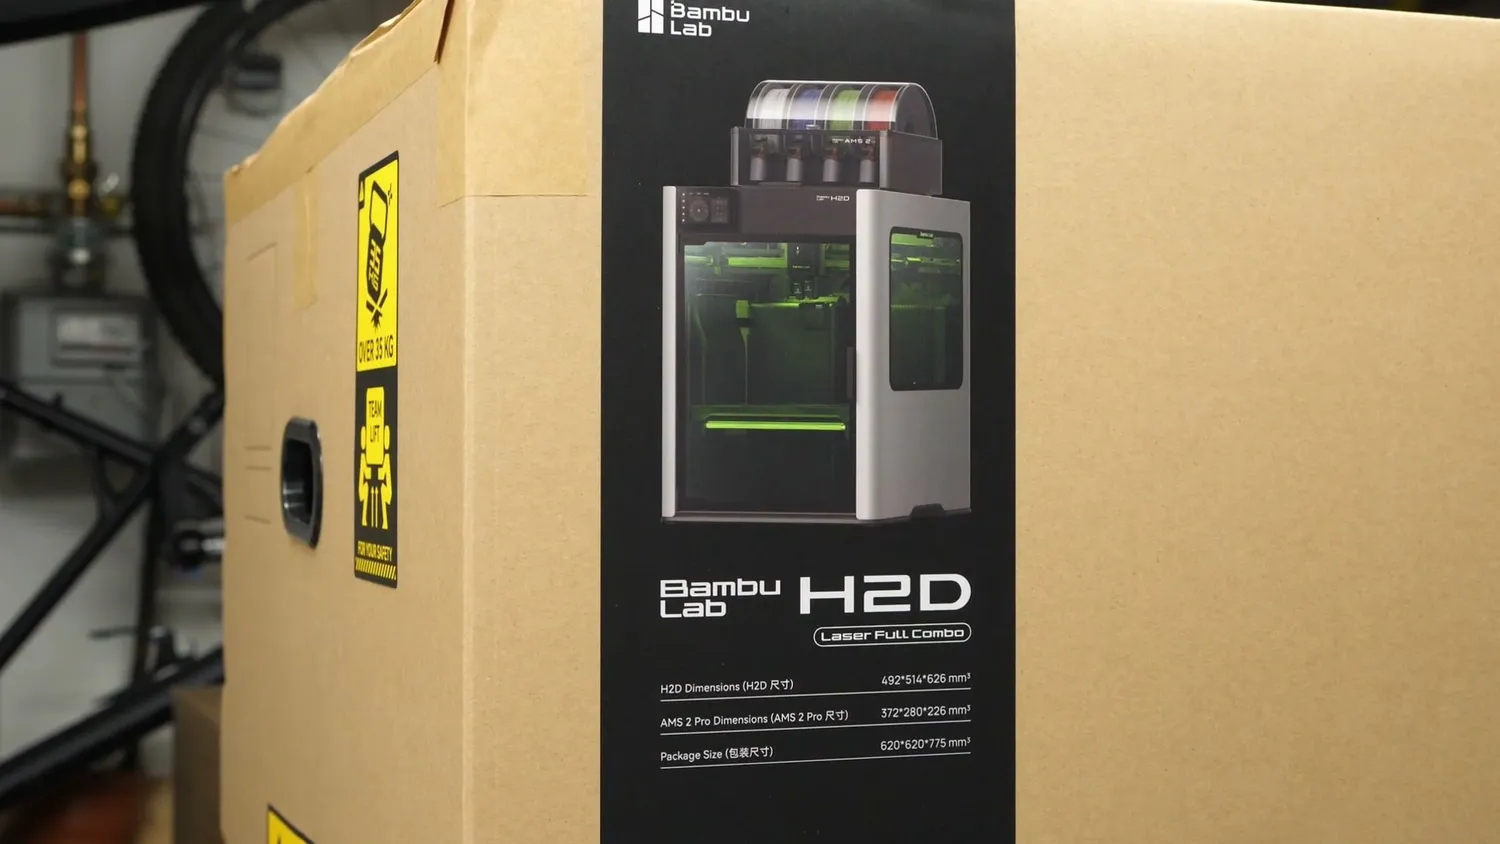
The Laser Full Combo, still in its box
A 30 kilo machine with a linear rail
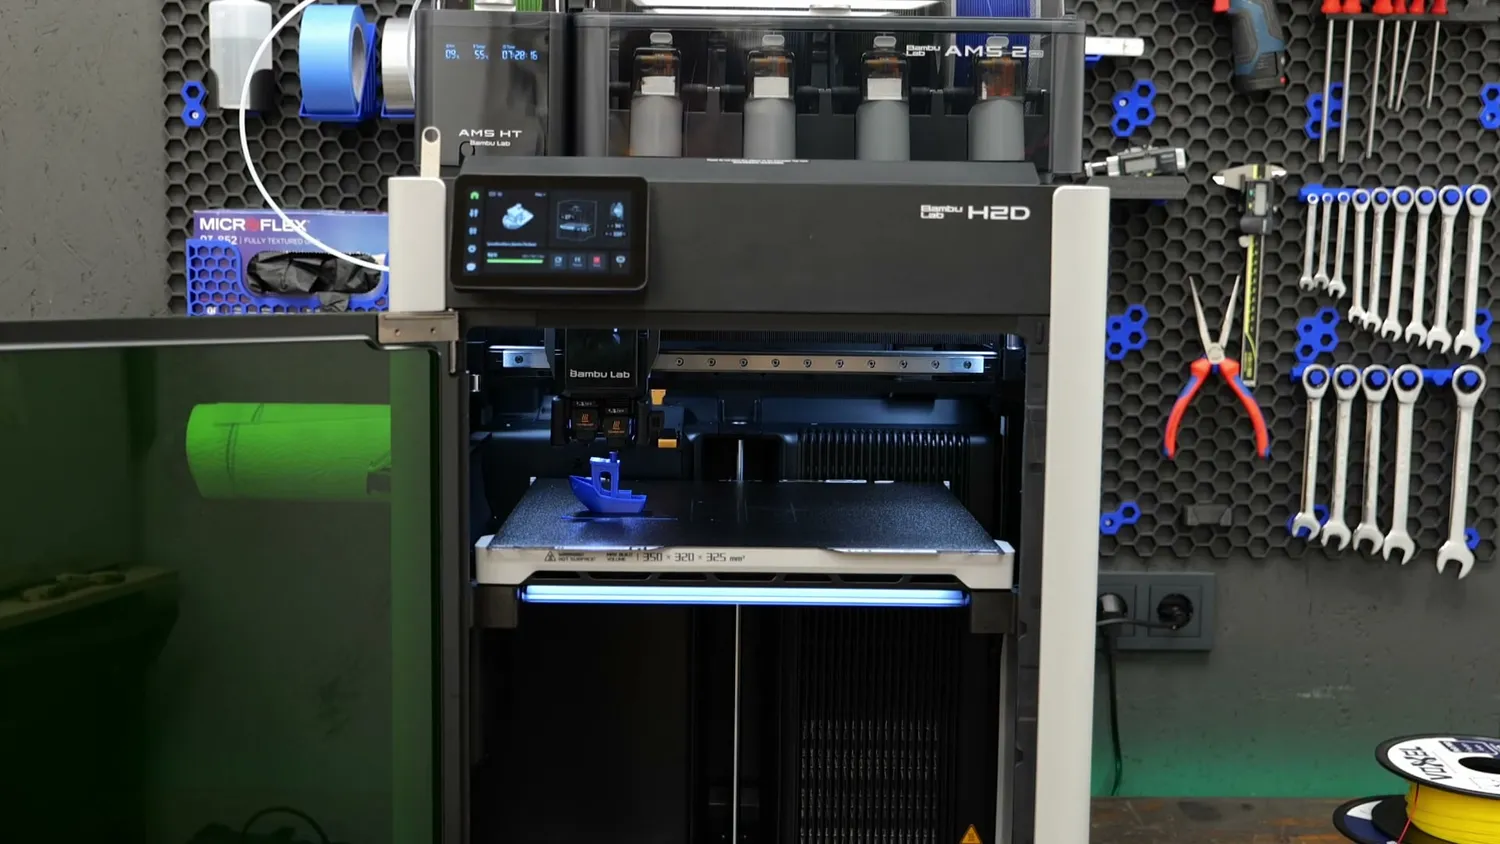
The H2D has honestly too many new features, more than I can cover in this article. However, if you really want to explore all the details, I recommend checking out BambuLab’s resources. First of all, the new machine is large and weighs over 30 kilos, which definitely makes it a two-person job to get it out of the box and onto your workbench. What contributes to this machine’s weight is the die-cast aluminum frame for the motion system, along with numerous aluminum, steel, glass, and injection-molded parts that make up the machine. Something that many X1C users will celebrate is that it finally uses a linear rail for the x-axis, although it still comes with linear rods for the y-axis. Overall, it looks very clean and professional. Everything is well-machined or injection-molded and fits together perfectly. There is no part of the machine that feels cheap or flimsy. I must correct myself slightly here: whereas the door on the standard H2D is glass, the laser protection door and side panels on the laser combo are plastic and a bit wobbly, plus they are prone to scratching. Anyway, the front of the machine features a tiltable screen that is similar in size to the one on the old X1, but with a completely overhauled user interface that feels noticeably smoother to use. There are still some aspects that are a bit confusing or not functioning perfectly, but I have heard that they are working hard to enhance the user experience, and they have already ensured that the experience feels quite friendly. By the way, the H2D can now be fully set-up and firmware upgraded offline using a USB drive, without ever connecting it to WiFi or registering it with a Bambu account. If you want to utilize the MQTT interface like with old machines, you can activate developer mode, but that will cost you remote monitoring capabilities over the Bambu Cloud.
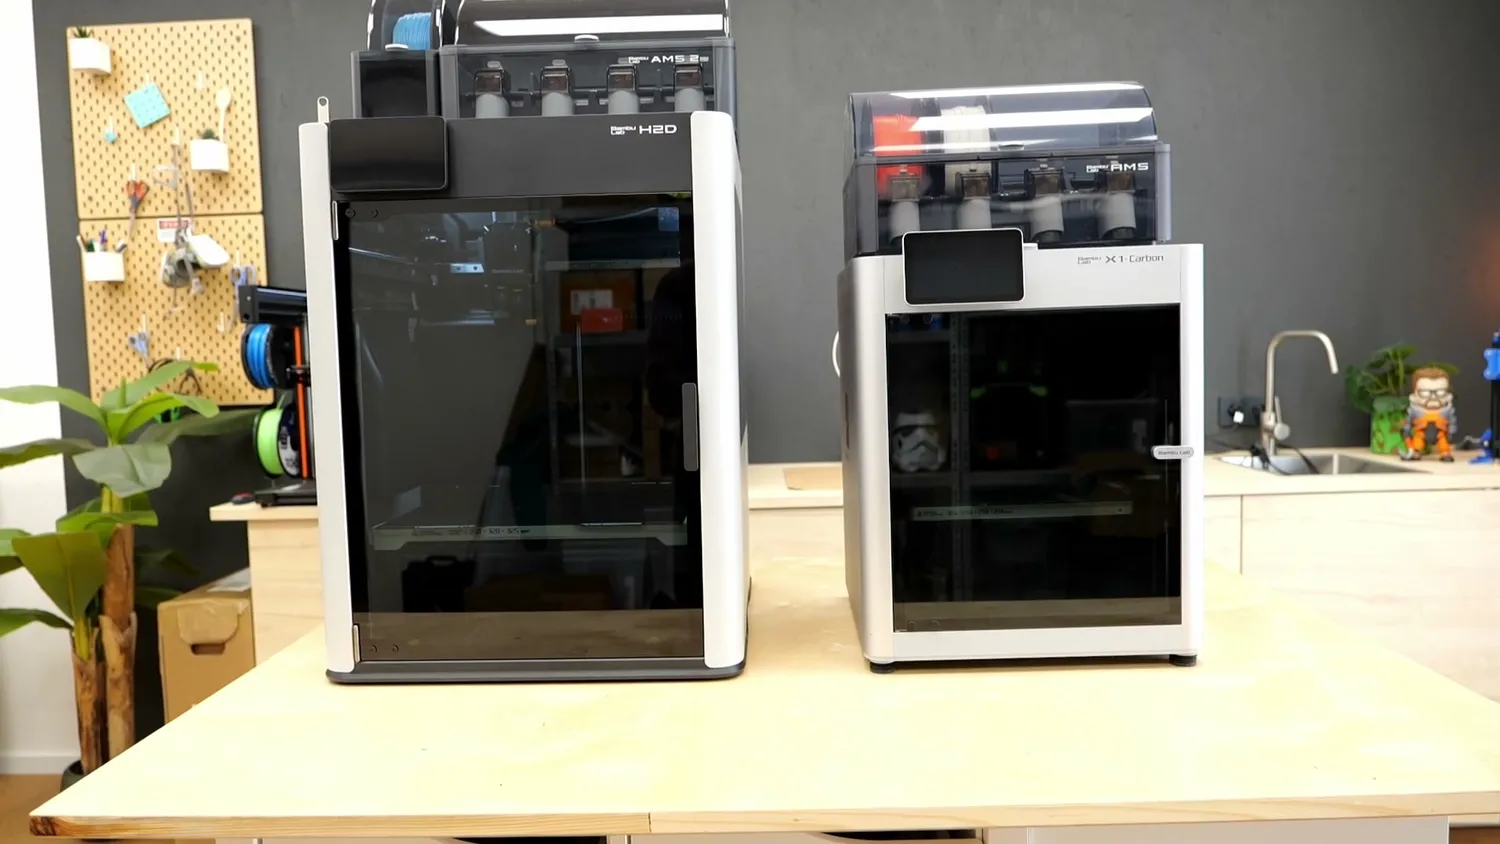
(left) the H2D, (right) an X1 Carbon
Print volume and the dual nozzle penalty
Upon looking inside, we find the new, large heated bed that can reach up to 120 °C and comes shipped with a textured PEI sheet that generally works well for print adhesion. A nice detail here is the indicator light bar that also serves as a progress bar. The maximum print volume is 350 x 320 x 325 mm, which is more than double the volume of the X and P series printers, though perhaps not as spacious as many had hoped for from an XL BambuLab printer. Unfortunately, in most prints, you won’t be able to utilize the full 350 mm of width. This is not due to the filament cutter, but rather a consequence of the new dual nozzle print head. Since the nozzles are spaced apart, the left nozzle can’t reach all the way to the right side of the bed, and the right nozzle can’t reach all the way to the left. This results in a printing width of 325 mm for single nozzle prints, and if you’re using dual nozzles, this is further reduced to 300 mm, which may disappoint some. Personally, I don’t mind this too much, as I find that the size is adequate for most of my prints. However, it is still significantly smaller than a Prusa XL*, for example, which can print 360 mm in all directions with every tool head! Nevertheless, the print volume is still mostly larger than that of the new Ultimaker S8.
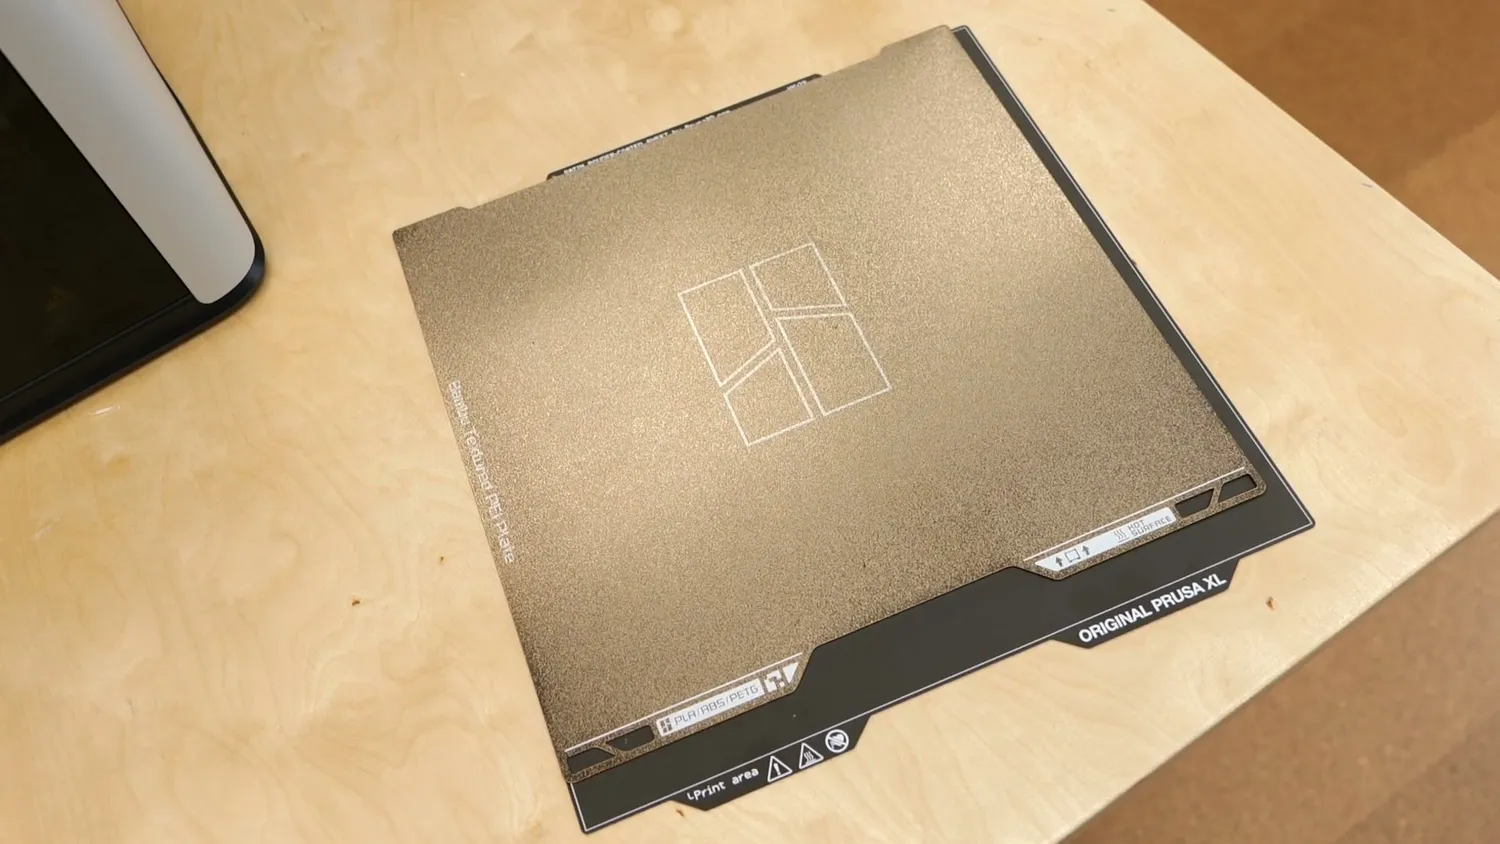
(left) the H2D’s plate, (right) the plate of the Prusa XL
How the dual nozzle print head works
Why do I compare it to the Ultimaker, though? This is because the way BambuLab approaches multi-nozzle printing is quite similar to Ultimaker’s method. You might think this is a rip-off, but it’s not, as they have made significant improvements with one particular feature. The left of the two nozzles is adjustable in height. When used, it lowers, and when inactive, it retracts. This way, only the active nozzle touches the print during operation, preventing interference from the inactive one. It’s not just about mechanical interference; the worst aspect of having two nozzles at the same height is that a small amount of material always oozes out, which can ruin the appearance of your print. By lifting the nozzle, the likelihood of this material landing on your part decreases, but it has always been a challenge on the Ultimaker, especially if you’re using materials that aren’t entirely dry! Here’s where BambuLab’s technology shines. They have implemented a tiny nozzle cover that automatically swivels over the inactive nozzle, preventing oozing and resulting in perfectly clean prints!
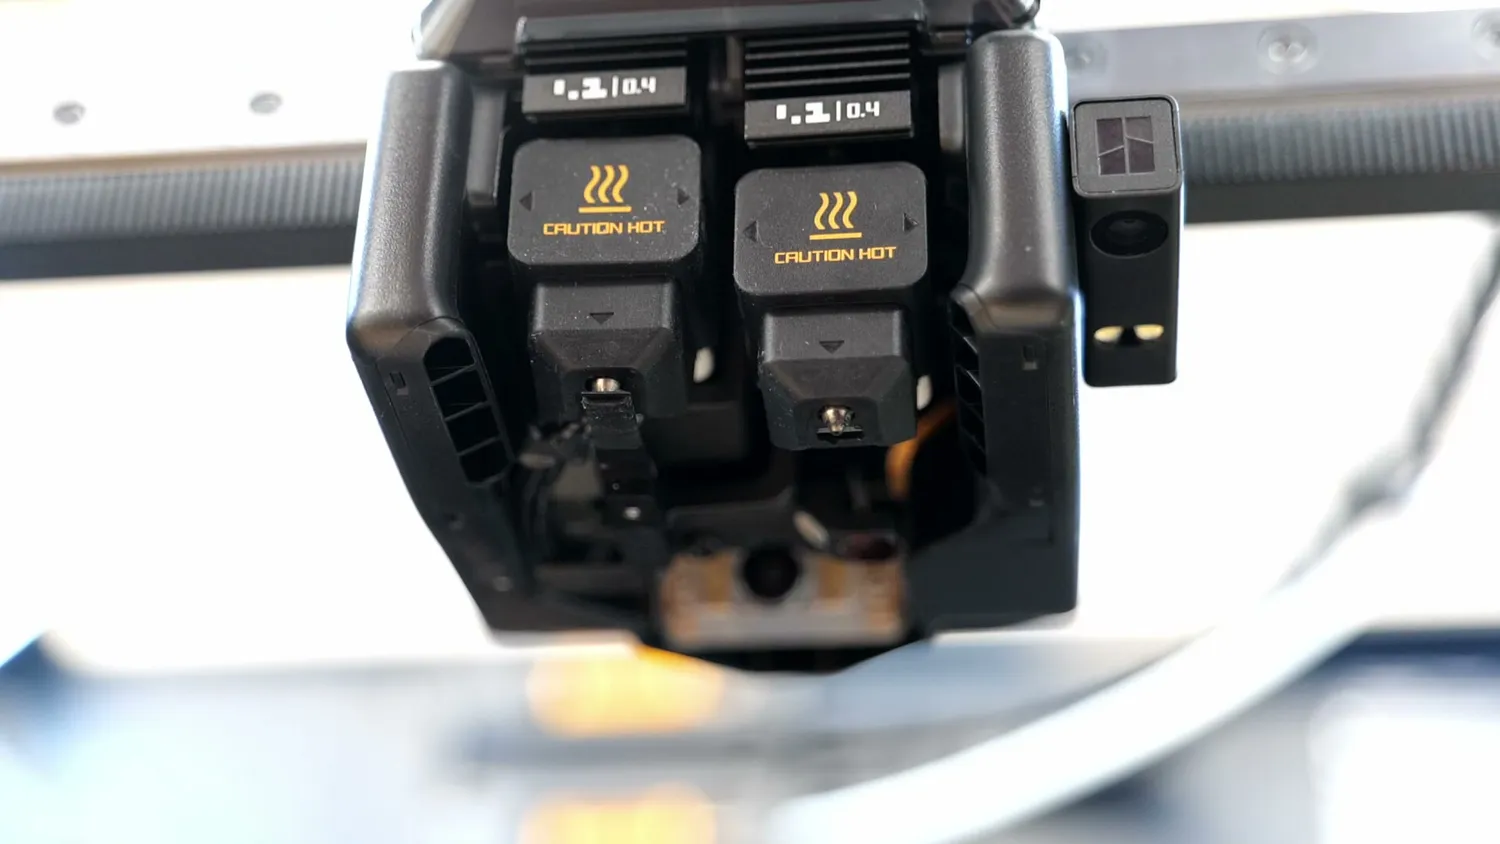
The dual nozzle print head from below
Hotends, filament feeding and the nozzle cam
The hotends themselves look almost identical to what Bambulab uses on their A1 series of printers, where changing the nozzle involves simply removing the silicone sock, opening a clip, and tilting the hotend out. The heater and thermistor are located at the back and are attached to the printhead, which saves on costs and reduces the hassle while minimizing the risk of breaking wires or connectors. However, there are internal differences that optimize the flow, making them not fully compatible with the A1 hotends. Additionally, a high-flow version is available that claims to increase flow rates from 40 to 60 mm³/s, but I haven’t tried it yet. I’m even considering cutting one open to compare how it works to regular CHT nozzles*. Let me know if you would be interested as well! By the way, the printer can now recognize the type of hotend installed through a small data matrix that’s laser-engraved on the front, preventing accidental printing with the wrong hotend or nozzle size. This is a similar technique they also use to distinguish build plates.
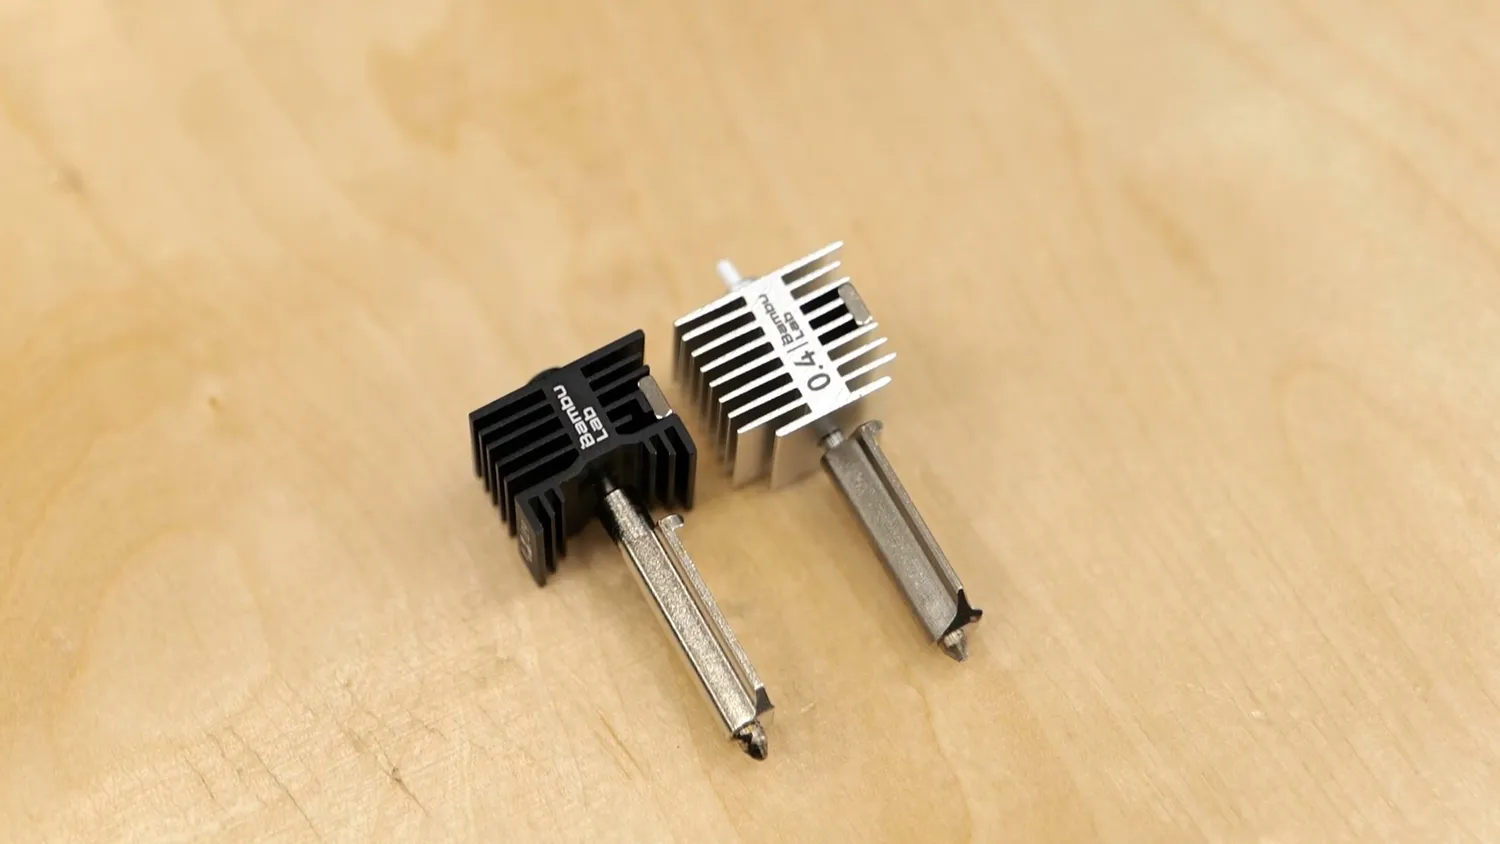
(left) the H2 hotend, (right) the A1 hotend
Another quick note about filament feeding on the H2D’s printhead: they do not use two feeding motors; instead, there’s one central gear and motor along with swiveling idlers that push the filament either to the left or right. This clever approach saves weight. The motor design is another innovation; they use a self-developed servo motor that allows them to measure torque for tasks like clog or jam detection, and I believe they also use this technology for pressure advance calibration.
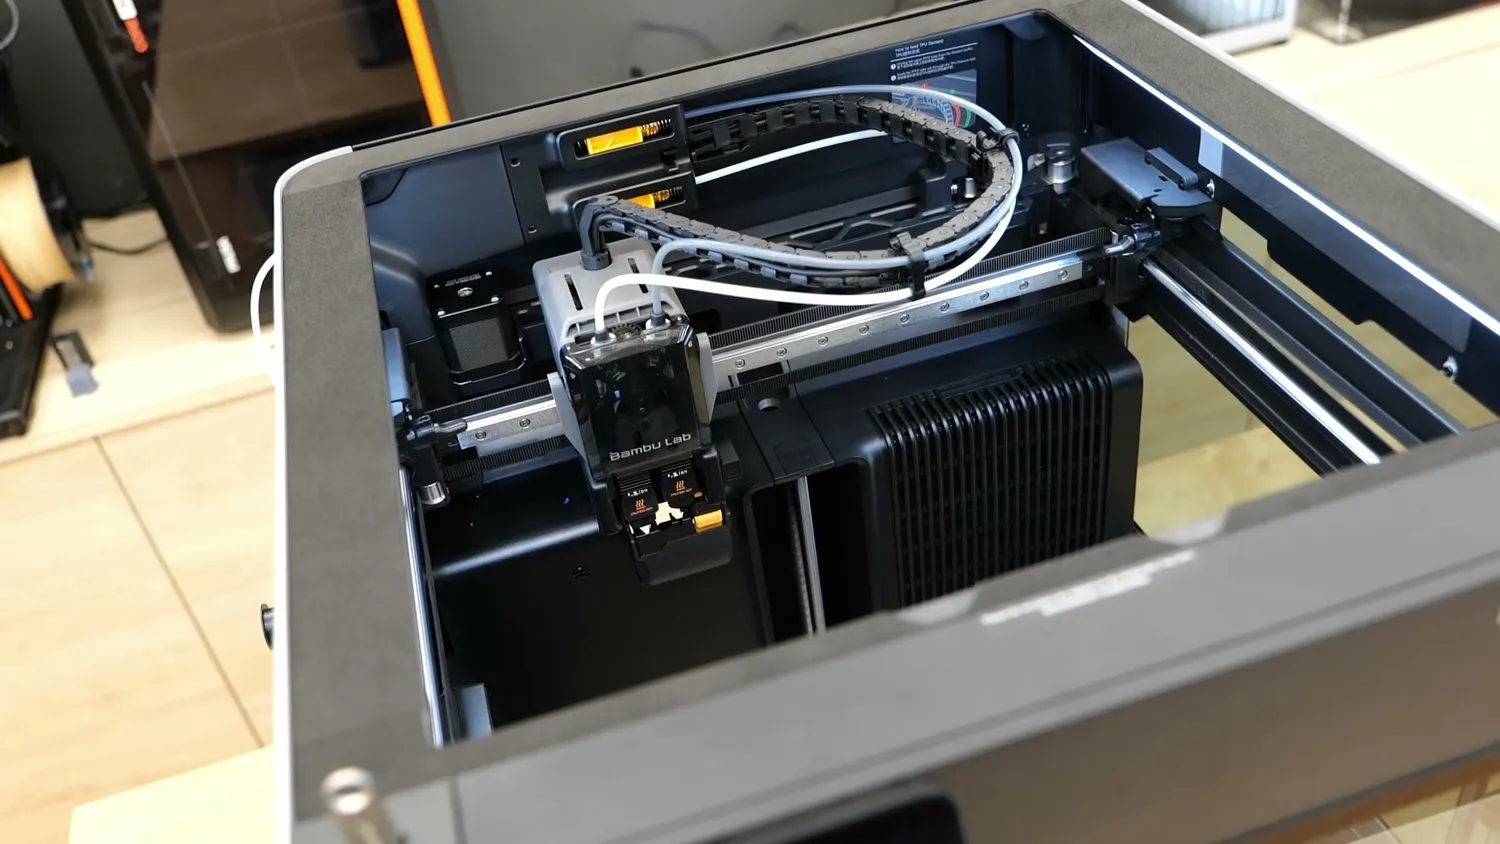
The print head on the linear rail, with the top cover off
This change means that the micro lidar previously used for flow calibration is no longer present on the tool head. However, there remains a downward-facing camera for recognizing the print plate and other functionalities, and notably, they now have a nozzle cam installed that should enhance print failure detection. There have been instances where the AI detection worked perfectly, but others where it didn’t. Whether this is due to the selected sensitivity, I can’t really say at this point. Unfortunately, this camera cannot be monitored in the slicer or the app yet, which I think would be a nice feature.
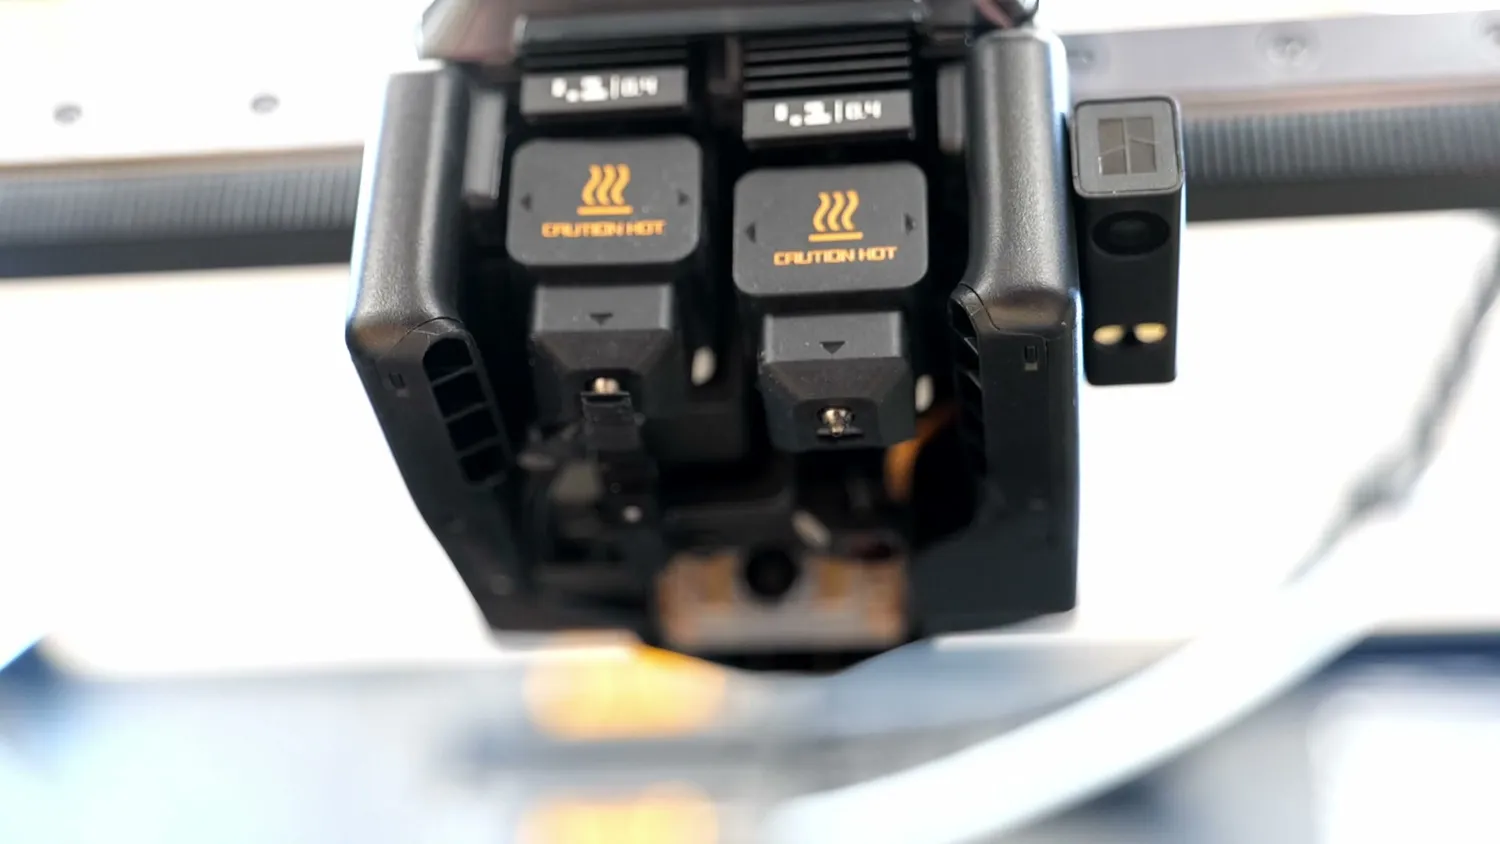
The nozzle cam sits between and below the two hotends
Since the H2D is capable of both dual nozzle and multi-material printing, there are filament cutters on each printhead to cleanly snip off the filament when it retracts to the AMS. The cutters are now activated by a sophisticated mechanism, eliminating the print areas on the print beds where printing was previously impossible, as seen in the X and P series printers.
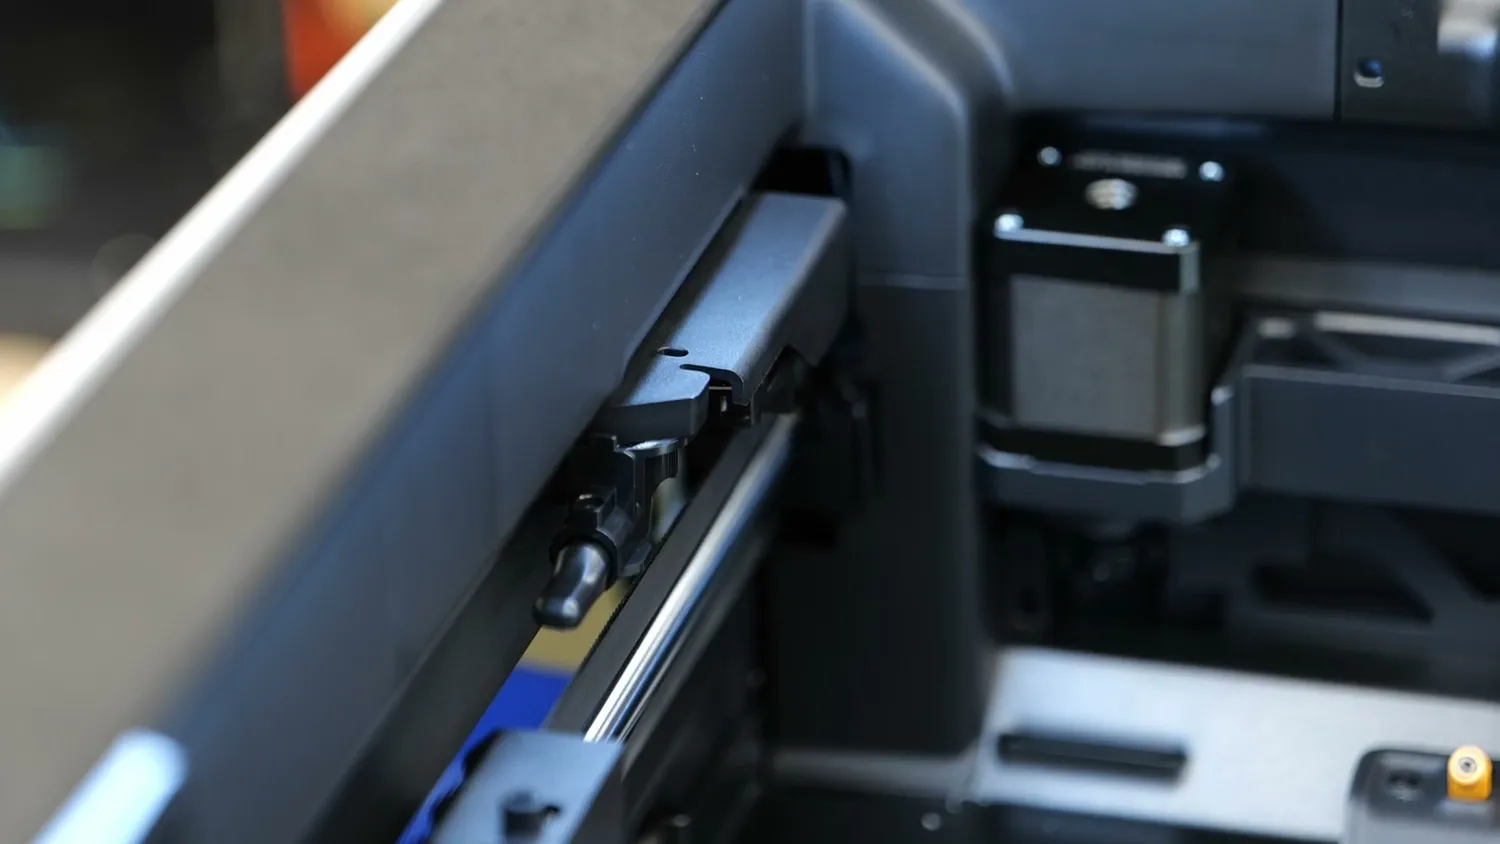
The new cutter mechanism sits at the back of the bed
Single material print quality
After discussing so many specifications, though still far from all of them, let’s look at some print results, because isn’t that what matters most? Let’s start with a single material print. What else beside a 3DBenchy could I print? Printing is quite quiet due to the linear rail and enclosure; the only noise you usually hear is from the fans. With the default profile at 0.2 mm layer height, it took 47 minutes to finish. It wasn’t the fastest, but compared to other printers’ default profiles, it’s definitely comparable. The result looked great, with hardly anything to complain about. The surfaces were super smooth, the extrusions very consistent, and there was no ringing or VFAs. The only thing to mention is a bit of oversmoothing from the input shaper, which caused some details to be smoothed out. The underside also looked perfect! Then, I printed the speedboatrace Benchy that was pre-sliced, and it took 23 minutes; it also looked basically perfect but exhibited slightly fewer details due to the thicker layers. Additionally, the other parts I printed were almost flawless, except for some slight and fine stringiness. Next, I printed Boba Fett overnight, and the next morning, when I checked it, I was seriously concerned due to the rough texture. However, after reviewing the slicer, I realized that these weren’t printing defects but rather the texture of the highly detailed model that the H2D reproduced exceptionally well. So this is a very good start. The PETG parts also looked good, aside from some stringing, and the ASA and CF-Nylon parts came out perfectly, partly due to the heated chamber in the H2D.
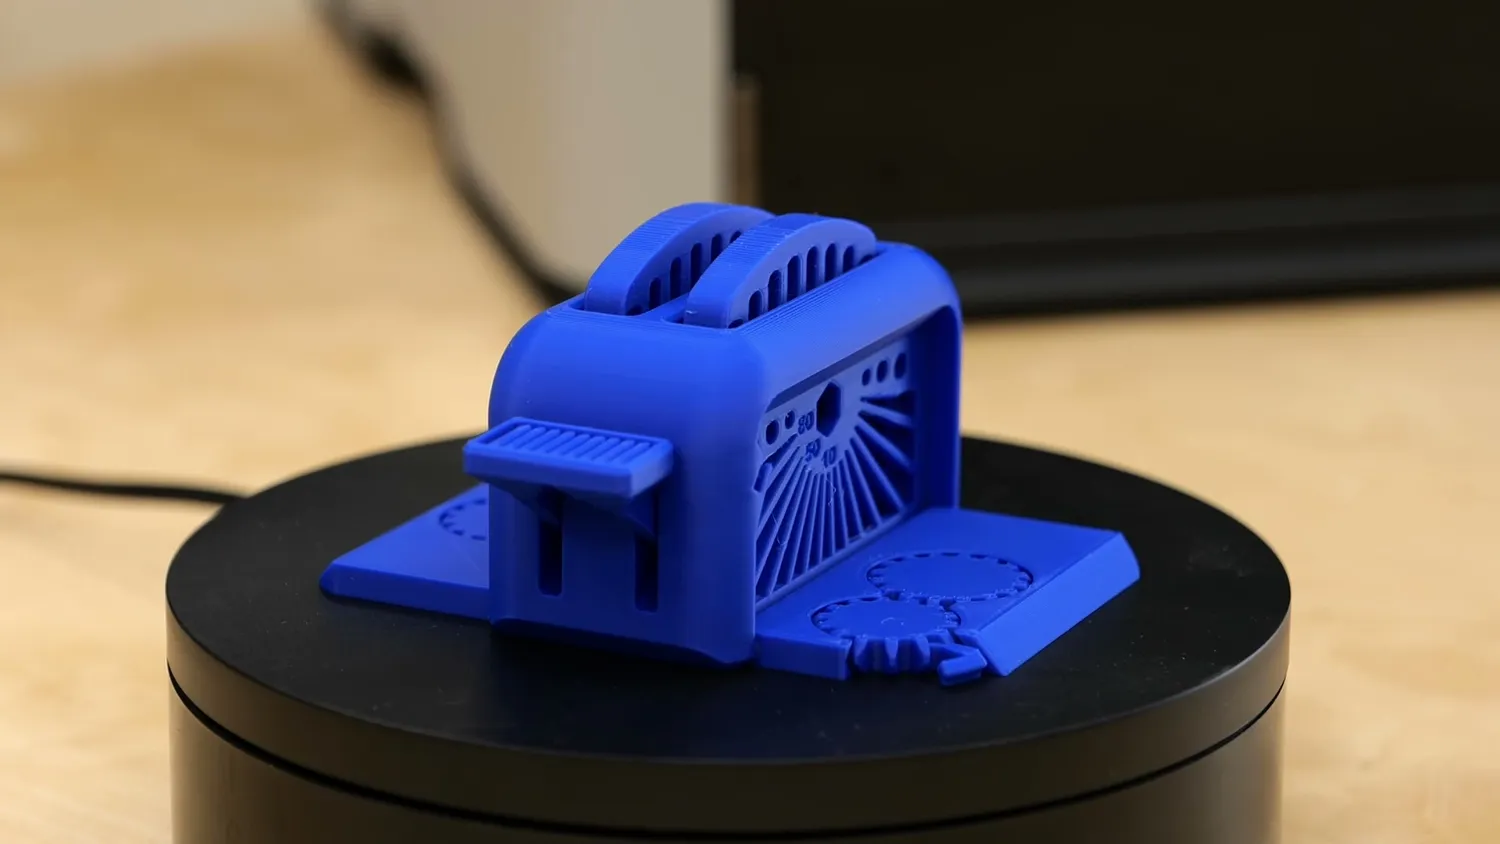
One of the single material test prints
The heated chamber and air management
Yes, one of the significant features that make the H2D a professional machine is the capability to actively heat the chamber up to 65 °C. This significantly helps reduce warping on larger prints made with technical materials and also enhances layer adhesion, as I demonstrated in a previous video. If the bed and heater operate in parallel, reaching 60°C, which is the default for many technical materials, takes around 10 minutes. US machines, or rather those with 110V, might be slower due to their considerably lower maximum power rating compared to the 2200W available in 230V regions.
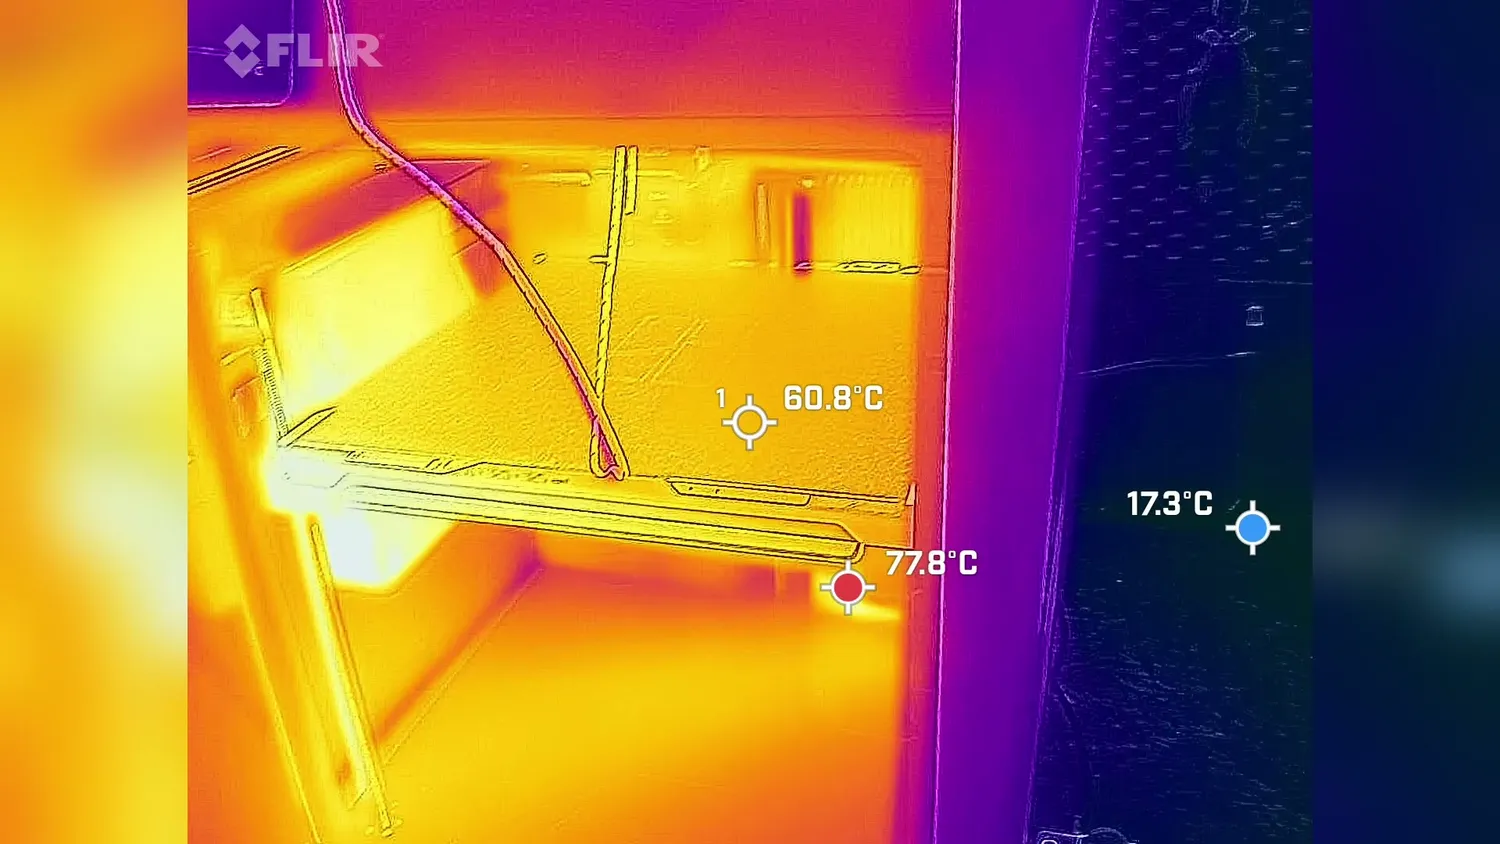
The heated chamber, seen with the thermal camera
The printer is equipped with a properly sized HEPA and charcoal filter to minimize odors and particles emitted during printing. When the active heater is used, the internal air is recirculated through this filter, continually cleaning the air and reducing the smell around the machine while printing with ABS or ASA. The air management system is also active and will not only close the exhaust when printing high-temperature materials, but it also doesn’t require leaving doors open when working with lower-temperature materials like PLA. When using these filaments, a vent automatically opens on the top of the machine, allowing a constant flow of fresh air from the front. Our press material mentioned that in this situation, the exhaust should be filtered, but at least with my two units, the shutter isn’t closing yet. I hope this is addressed soon. Still, it’s pretty cool and seriously hassle-free!
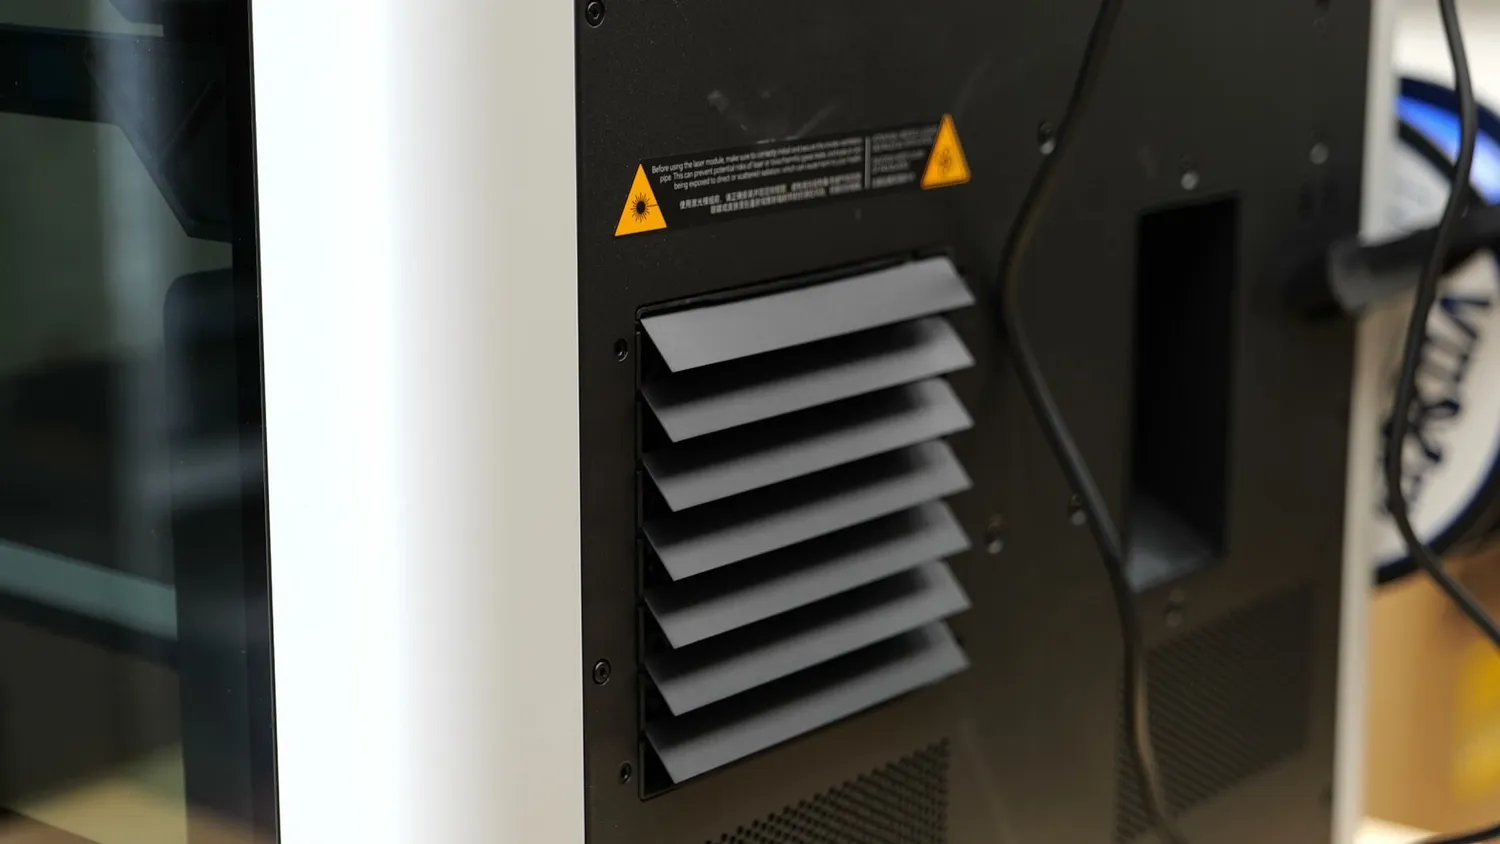
The exhaust vanes at the back of the machine
The new AMS 2 Pro and AMS HT
Now, let’s talk about the new AMS systems, starting with the more familiar one, the AMS 2 Pro. If you place the old and new models side by side, you won’t spot a significant difference. It’s the same size, still holds 4 spools, and remains a bit limited in terms of compatible spools. However, if you look below the rolls, you’ll notice one game-changing feature for anyone who has ever had to clean a clog or replace a Bowden tube on the old AMS: the Bowden tubes are now easily accessible, making troubleshooting much simpler. The feeders appear quite similar, but they operate more quietly and feature a ceramic inlet that shouldn’t wear out as quickly.
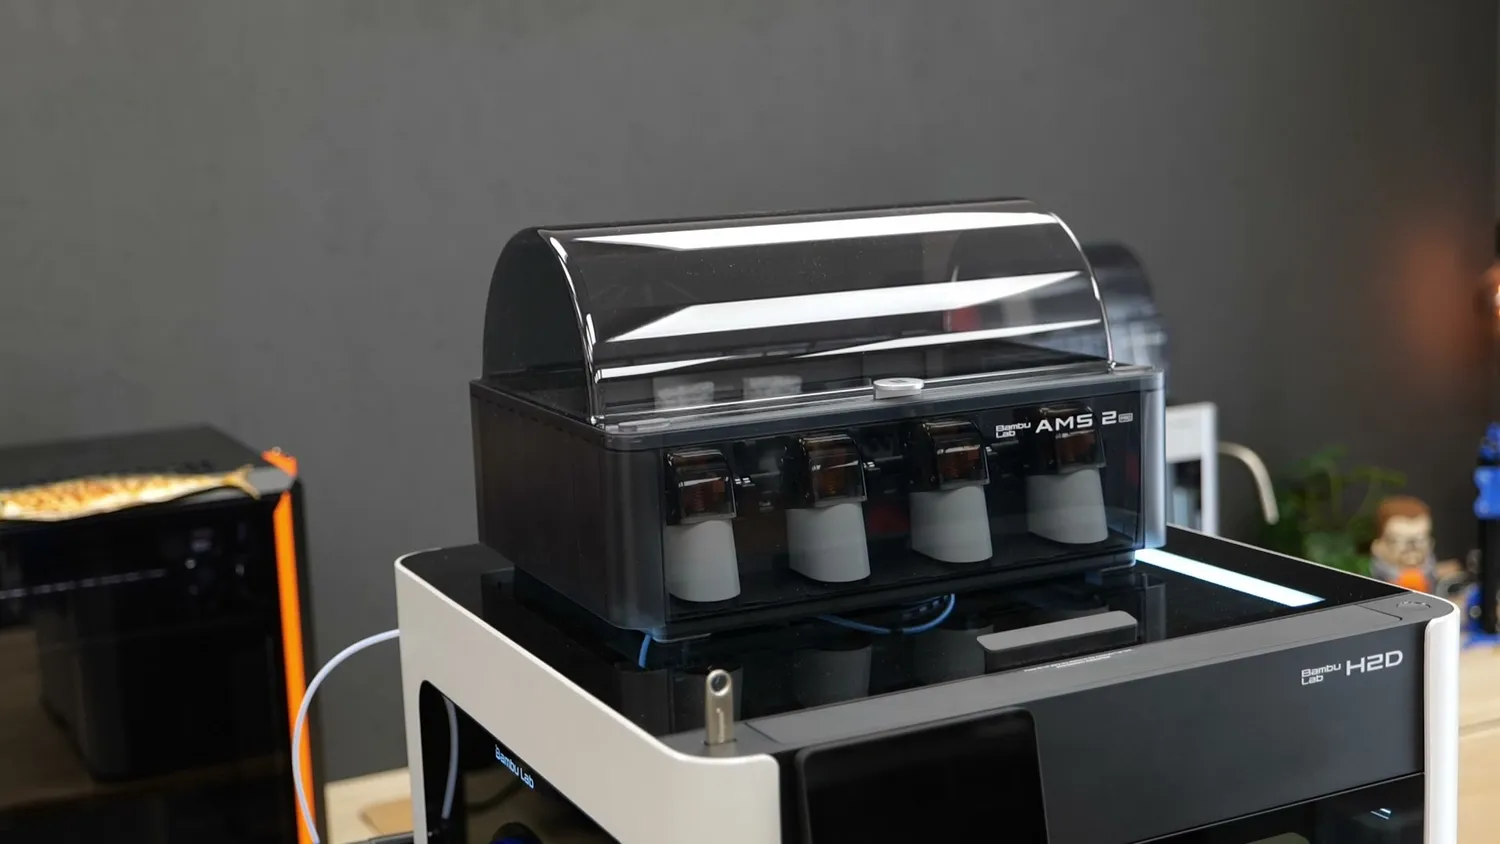
The AMS 2 Pro on top of the H2D
So, what makes it PRO? The old AMS was simply a filament storage solution but the AMS 2 Pro now also can dry your filament! At first, this might not seem groundbreaking to many since others, like ANYCUBIC, already have that feature in their multi-material unit. However, Bambulab is the first to do it correctly. Their system is really smart, and I hope others will adopt this approach for their filament dryers in the future. When you dry filament, the moisture from the material transfers to the warm air, but when that air becomes saturated, it stops effectively drying the materials. If you leave your standard filament dryer closed, it won’t function properly, and you can only count on a leaky housing for some air exchange. I often either regularly open or leave a gap in the lids of my dryer to allow fresh air to replace the moist air. The AMS 2 Pro will now handle this automatically! The unit has two Active Air vents to expel moist air and get in fresh air. Once you start the drying process, these vents open, and when the pre-set time is over, they close again, sealing the unit airtight. All of this happens automatically, making the AMS not only a dryer but also a really good storage solution.
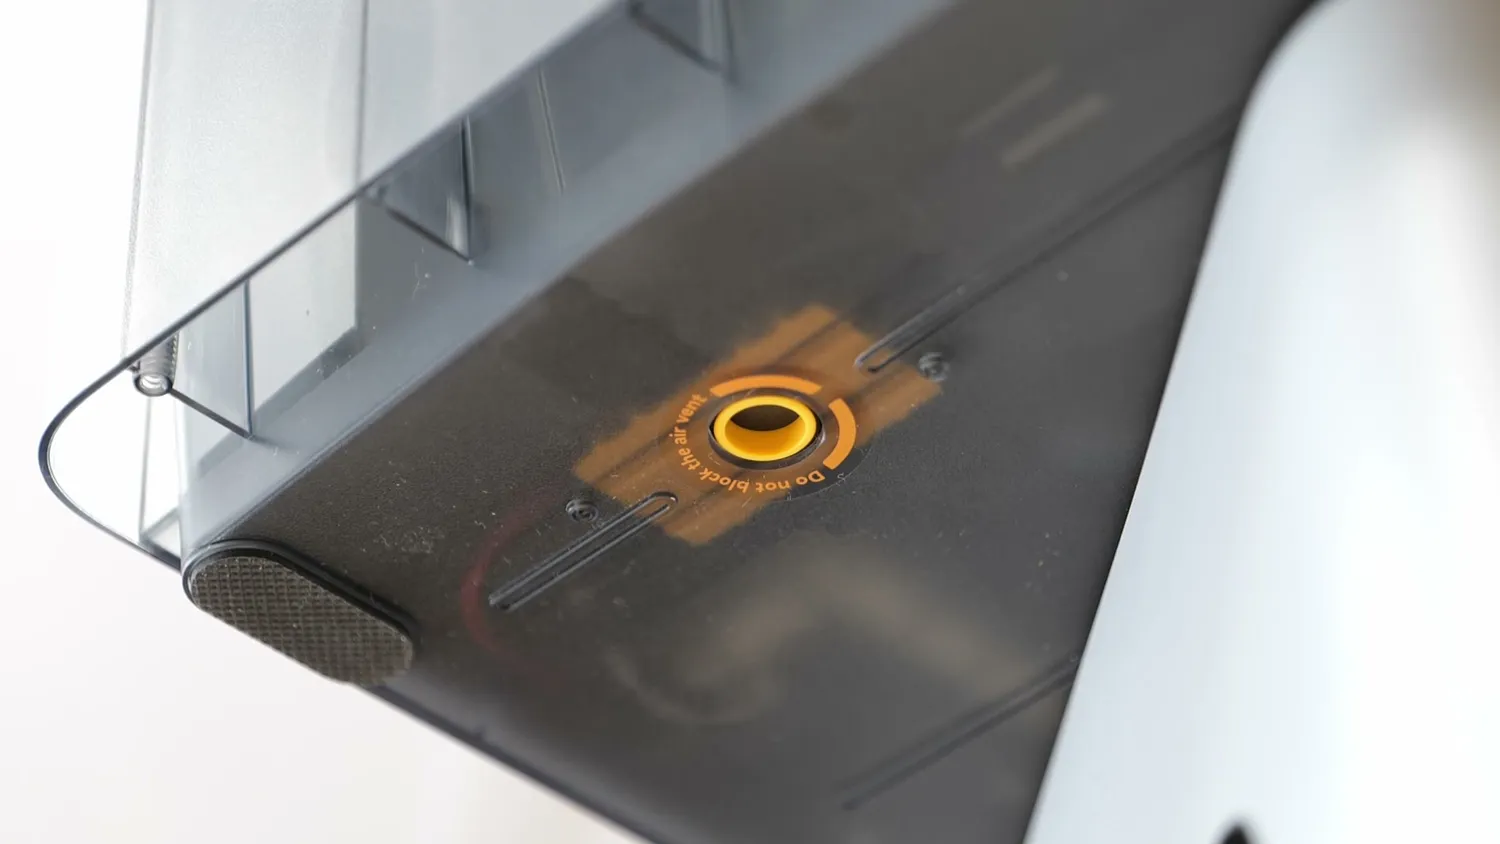
One of the two Active Air vents
The AMS HT, which accommodates one spool, operates similarly. It includes the vents, but the heater can reach up to 85 °C, allowing it to dry more technical materials. It has an external screen displaying internal temperature, humidity, and remaining drying time, and connects directly to the mains for power. To ensure uniform drying, both units will slowly rotate the spools throughout the process when filament isn’t inserted into the feeder. In fact, when drying PLA, the AMS won’t allow you to start the drying process until you disconnect the filament to prevent issues when the material softens during drying. The AMS HT is designed to work with both very flexible and very stiff materials, which wouldn’t be compatible with the standard feeder, and these can be fed outside the AMS using a bypass.
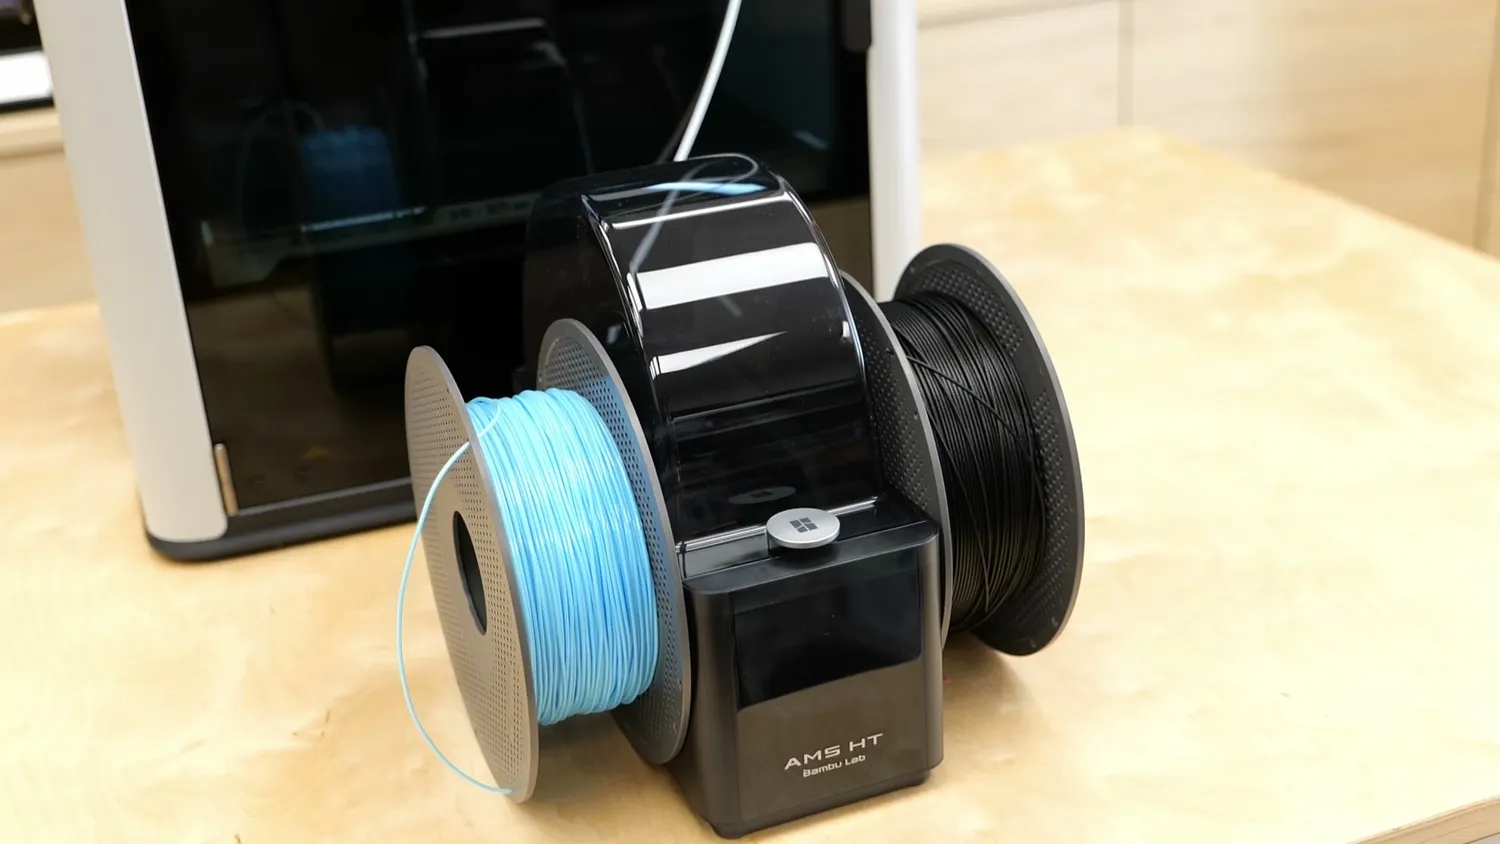
The AMS HT takes a single spool
Kudos to Bambulab because the new AMS units will also work with the old X and P series printers after a firmware update. Additionally, the old AMS will function with the H2D, allowing you to save some money by purchasing an H2D without the new AMS if you already own an old one. You can also daisy chain up to 4 AMS units for serious multi-color printing. You can connect up to 4 AMS 2 Pros plus an additional 8 AMS HT to the H2D for a total of 24-material printing, if anyone ever needs that.
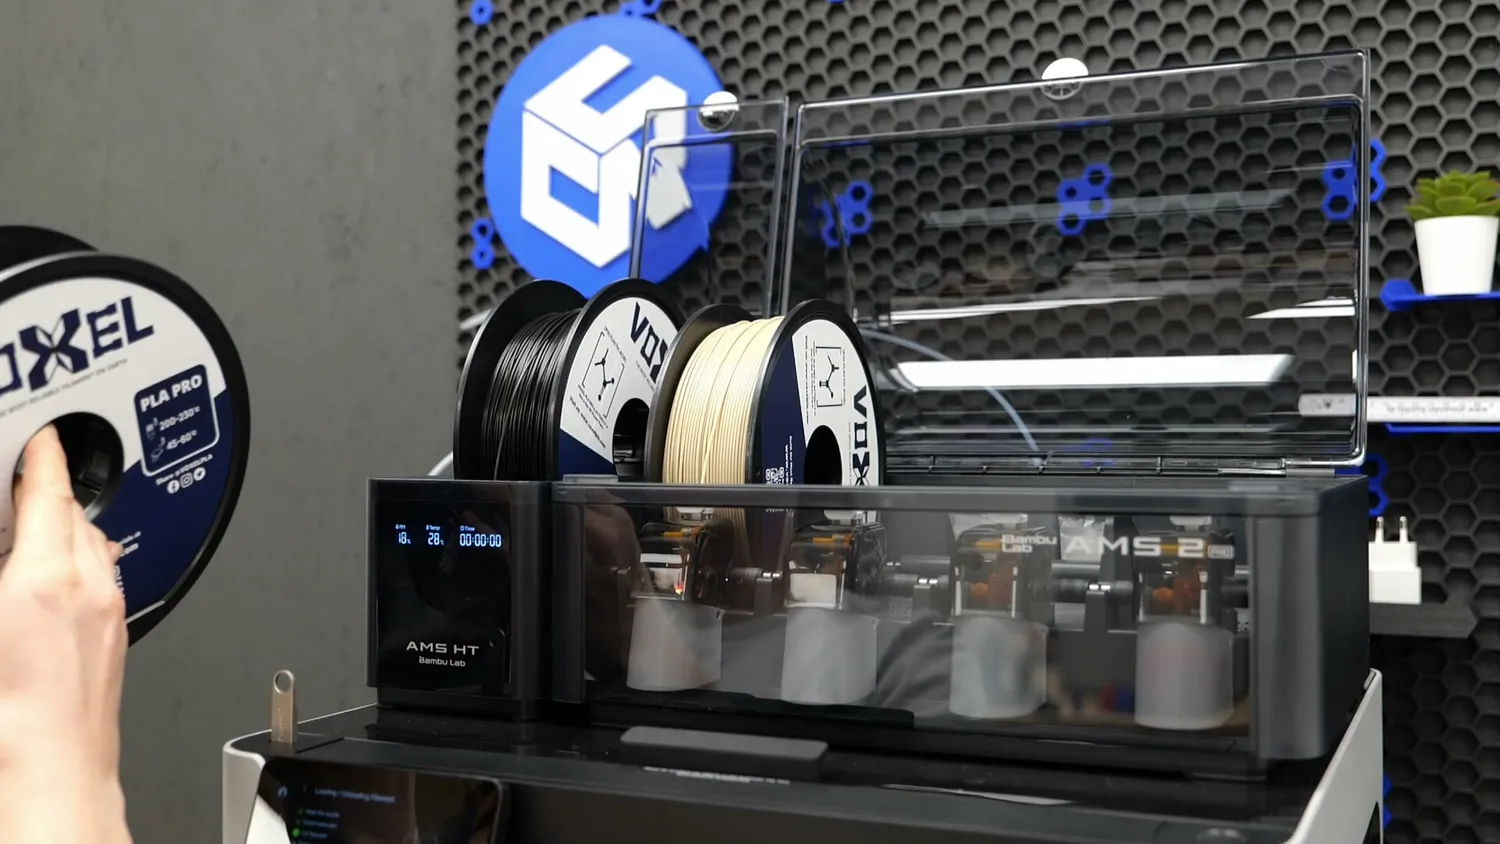
An AMS HT and an AMS 2 Pro daisy chained on the H2D
Dual material printing with two nozzles
Let’s discuss dual-material printing, which the H2D should be really good at due to its dual hotend printhead. I began with a simple Panda model. To use the two printheads, you need to feed the materials separately from the back. If you have an AMS, it will connect to one of the ports. With two AMS units, you can connect the other to the second port. If you don’t have two units, which most likely won’t be the case, you can simply use an external spool holder on the side to feed a filament spool. The process can still be a bit tricky, and I hope improvements are made to the user experience. However, once you load the material and assign its type and color, you can easily select them in Bambu Studio for your model. Since we use two nozzles, they must align with each other, or rather, we need to know the offset between them. To do this, Bambulab equipped the back of the print bed with an Eddy Current sensor that measures both nozzles before each print, ensuring perfect alignment, even if you’ve changed a hotend. Because it’s an eddy current sensor, it detects only the metal, enabling precise measurements of the nozzle, regardless of whether it’s dirty. Now, onto printing. Once one color is finished, the printhead quickly moves to the back, changes nozzles, switches filaments, and then continues printing. This process is significantly faster than using a single nozzle with the AMS, like Bambulab’s other printers. For the Panda, the old method took 5 hours, while the dual nozzle mode only takes 2 hours, making it almost three times faster! This not only saves time but also filament. The AMS print uses 129 g of material, including waste, while the new toolhead only requires 40 g, which is three times less! However, you might have noticed that it still uses a purge tower. This is necessary to purge any degraded material that sat in the nozzle, and since the extruder disengages when switching filaments, it helps return to a known position. You can deactivate the purge tower in the slicer, but doing so will result in holes in your part at the start of printing. For now, purging is essential, though I believe it’s more than what is truly needed. I hope they can enhance the profiles. I also have printed some larger parts with this method, and the results were impressive and reliable.
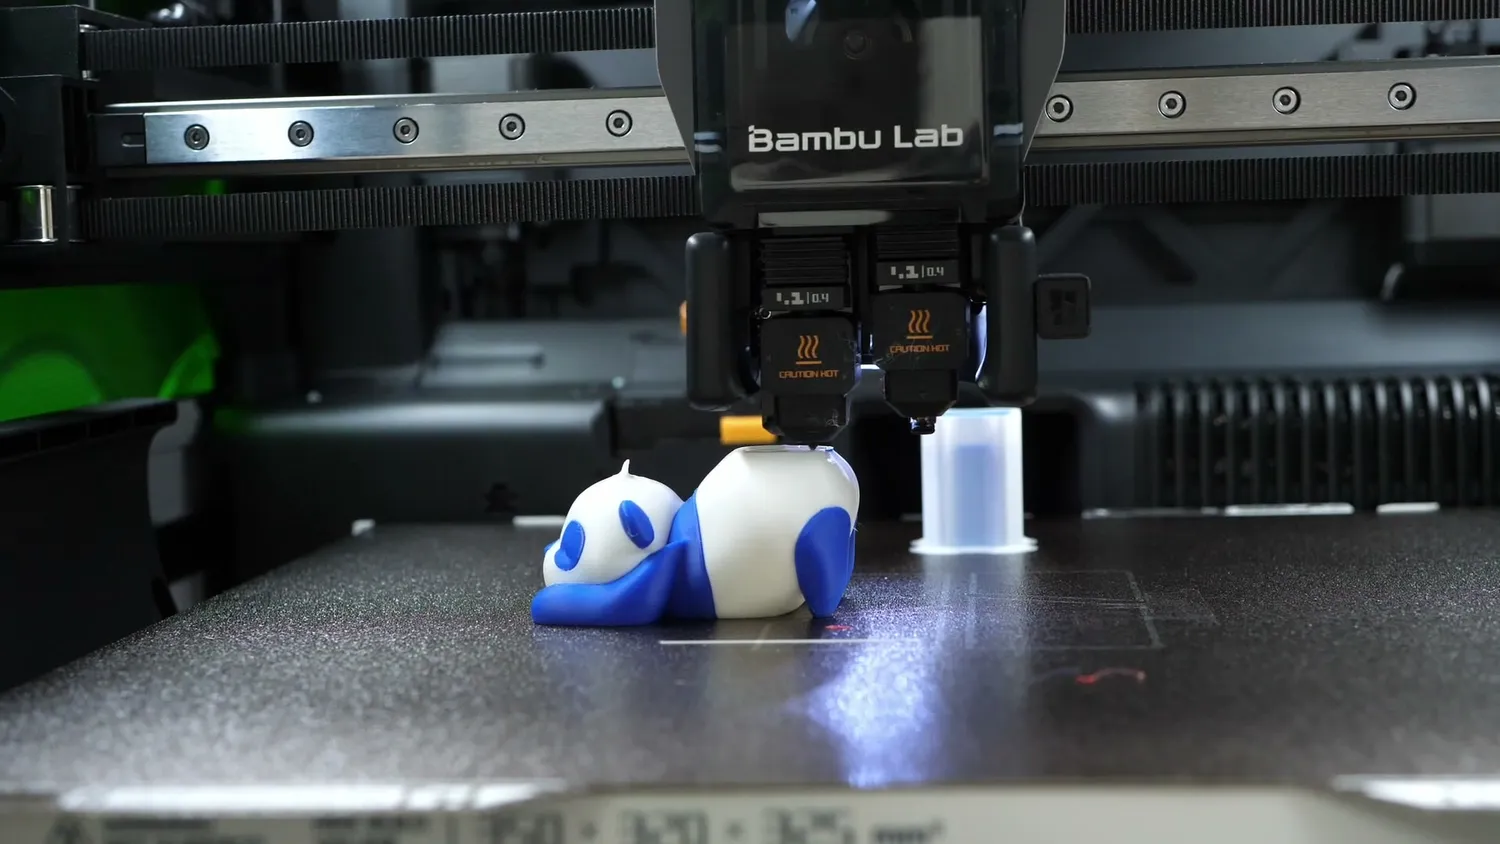
Printing the panda with both nozzles
Faster and less wasteful multi-color printing is nice and might be a great use case for some, but where this new toolhead really shines is multi-material printing. This means working with two incompatible materials that should not be printed through the same nozzle. If you want to learn more about this, I highly recommend checking out a recent video of mine where I compared tool changers with multiplexing systems. This could involve PLA with PETG supports for easy removal and clean bottom surfaces, minimizing additional printing time and importantly, preventing any weakening of your print from mixing the two incompatible materials in the nozzle. I thought this was an excellent example print, but I noticed that the dedicated support materials, unfortunately, do not print reliably.
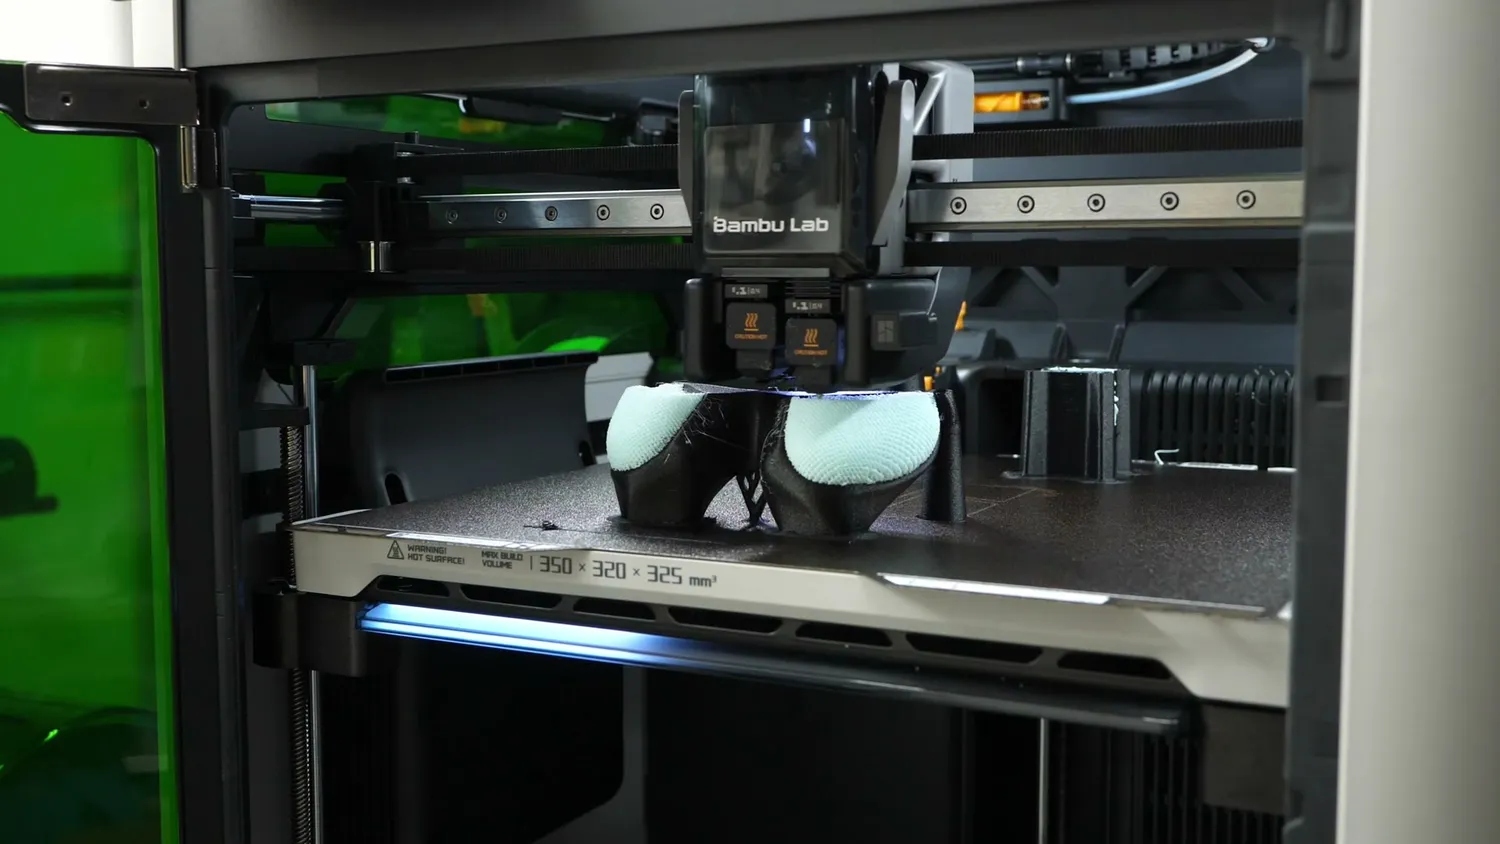
Two materials that shouldn’t share a nozzle, printed in one part
The TPU problem
Another use case is the combination of stiff and flexible materials within the same print. Here is a sample print provided by Bambulab, demonstrating a bike saddle where the structural parts are made from carbon fiber nylon and the cushioning parts are printed with flexible 90A shore hardness TPU. The print completed successfully and showcased the capabilities of Bambulab’s new machine; however, the TPU was a bit under-extruded. This under-extrusion is partly due to the H2D and partly my oversight for not properly following instructions. You see, the AMS can only feed Bambulab’s very stiff AMS TPU directly. Anything more flexible requires external feeding. On the H2D, you are instructed to remove the Bowden tube inside the print chamber from the filament buffer and push it through the designated “flexibles hole” in the back. Then, you can feed the TPU directly to the print head, which is not very simple due to friction and the lack of feedback on the screen. Anyway, I was lazy and placed the roll of TPU on the external filament holder, hoping for the best. Unfortunately, that created too much friction, leading to all that under-extrusion and ruining a long print. The Carbon Fiber Nylon printed beautifully, though. I didn’t want to abandon my TPU efforts and followed their recommended procedure for working with very flexible materials, which involves directly feeding the filament without any Bowden tube. So, I placed my H2D on the floor, trying to avoid back strain, then loaded the 90A TPU from the AMS HT out of the bypass hole and printed a shoe. This time, the results were exceptional, even though the process of working with TPU feels less than user-friendly. I was informed that they are working on improvements, and I hope more practical solutions will be available soon, but we’ll see!
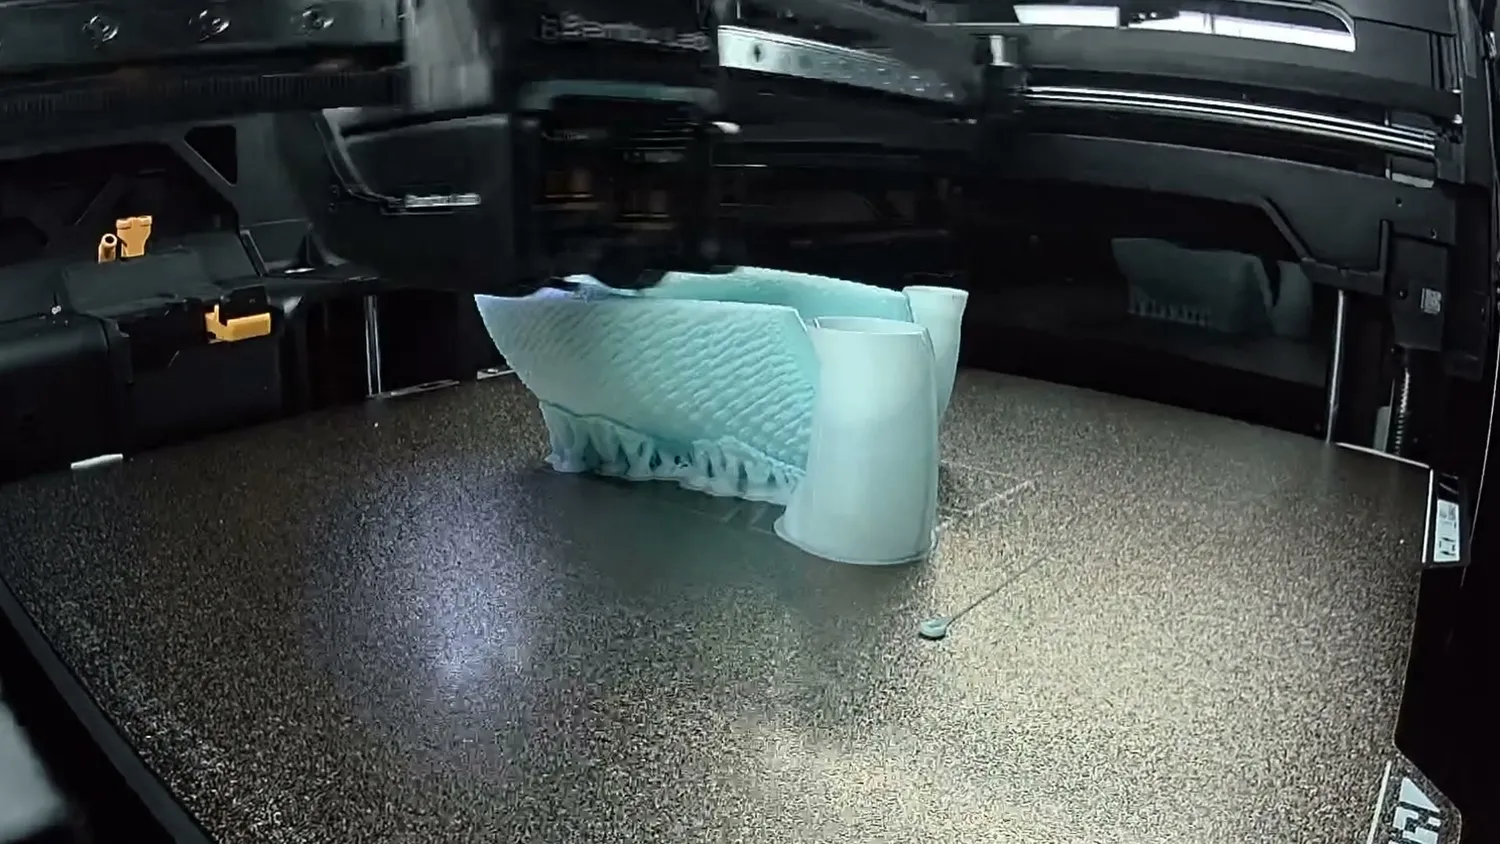
The saddle, with the TPU cushion clearly under-extruded
Printing more than two colors
But what happens if you want to print with more than two materials or colors? You can either use the traditional method with the AMS and a single nozzle, or take advantage of the new approach by combining the dual nozzles with the AMS! Bambu Lab’s approach is quite clever. Bambu Studio has undergone some significant updates, which are evident not only in the printer and materials selection but also in the new slicing modes for the H2D. By default, Bambu Studio operates in “Filament Saving Mode.” When working with two or more materials, the software indicates where to place each material or color to minimize filament waste from purging and optimize print speed. For my Flexi Octopus, it recommends placing the white PLA on the external spool holder and the other colors in the AMS. This also highlights that you can now print five colors instead of four with one AMS, which could be really beneficial for some projects. Unfortunately, this means you may need to rearrange your filaments before each print, but that’s not too much of a hassle with the AMS. If you prefer not to swap materials manually, you can opt for “Convenience Mode,” which uses the filaments as they currently are in the AMS, potentially wasting both material and time. A nice feature of this mode is that it informs you how much material and time you’d waste if you don’t use the optimal configuration, which could serve as a good motivator. Finally, there’s a “Custom Mode” that allows you to mix and match materials as you wish. However, in this combined mode with the dual nozzle and AMS, you will experience fast material changes when switching between nozzles, but slower changes when changing materials within one nozzle, resulting in the familiar purging waste. Nevertheless, this method is consistently faster than before, solely with the AMS. For the Octopus, we reduced printing times from 23.5 hours to 18.5 hours, for instance. However, due to the slow changes with the single nozzle, we still can’t match the speeds of a tool changer like the Prusa XL, which can print the five-color Octopus in even five hours less.
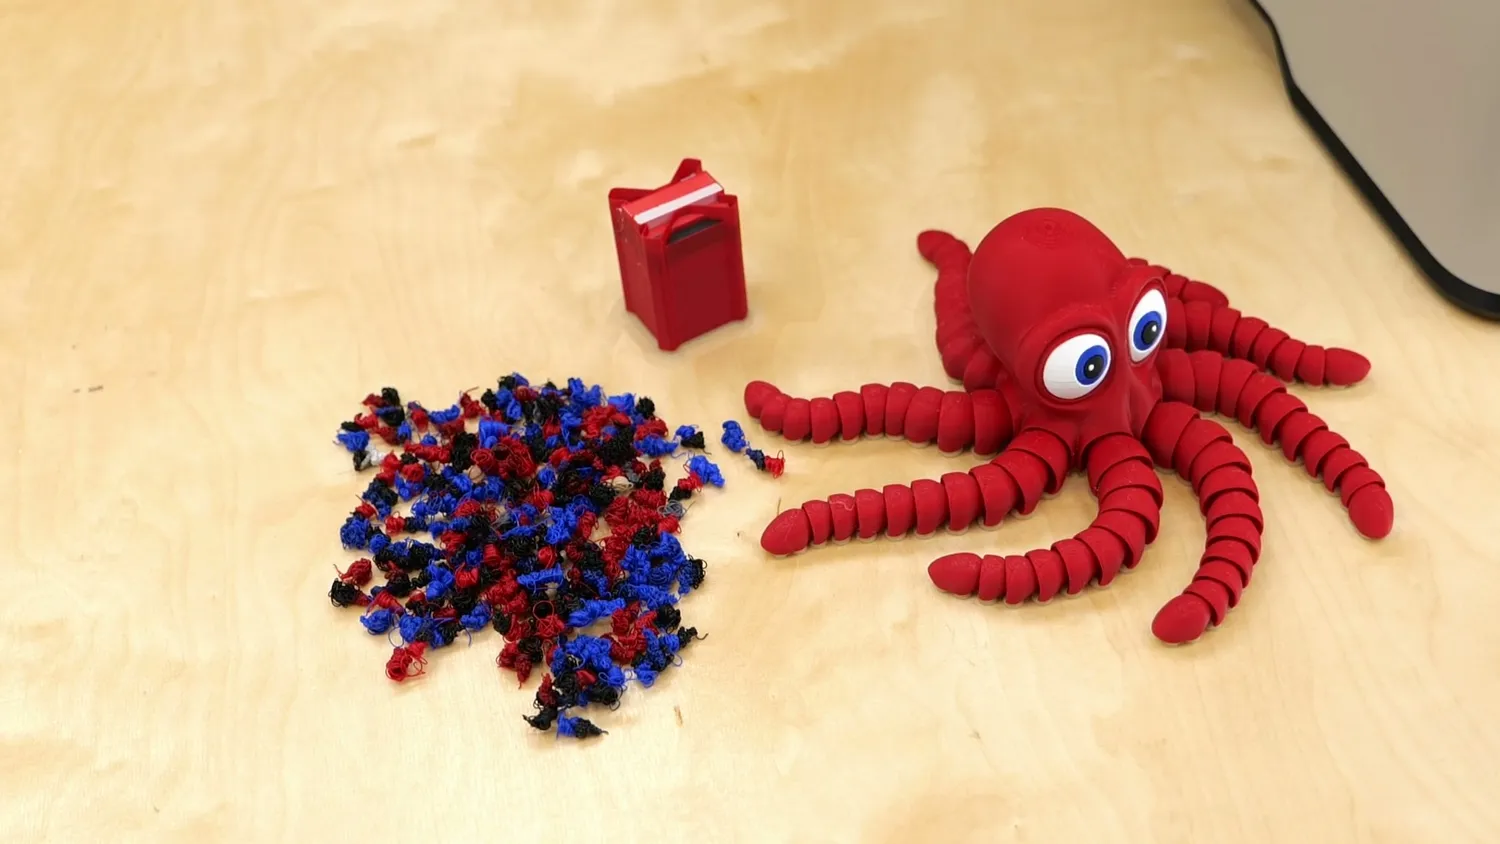
The five-color octopus and the purge waste it left behind
The print quality is excellent with very few issues. The alignment of the nozzles is effective, especially when separating light and dark colors, preventing any color bleeding. Print times are significantly cut down with the dual nozzles and smart slicing optimization. When printing with just two colors, the print times can approach those of tool changers, but you still end up wasting material and time due to the purging requirements.
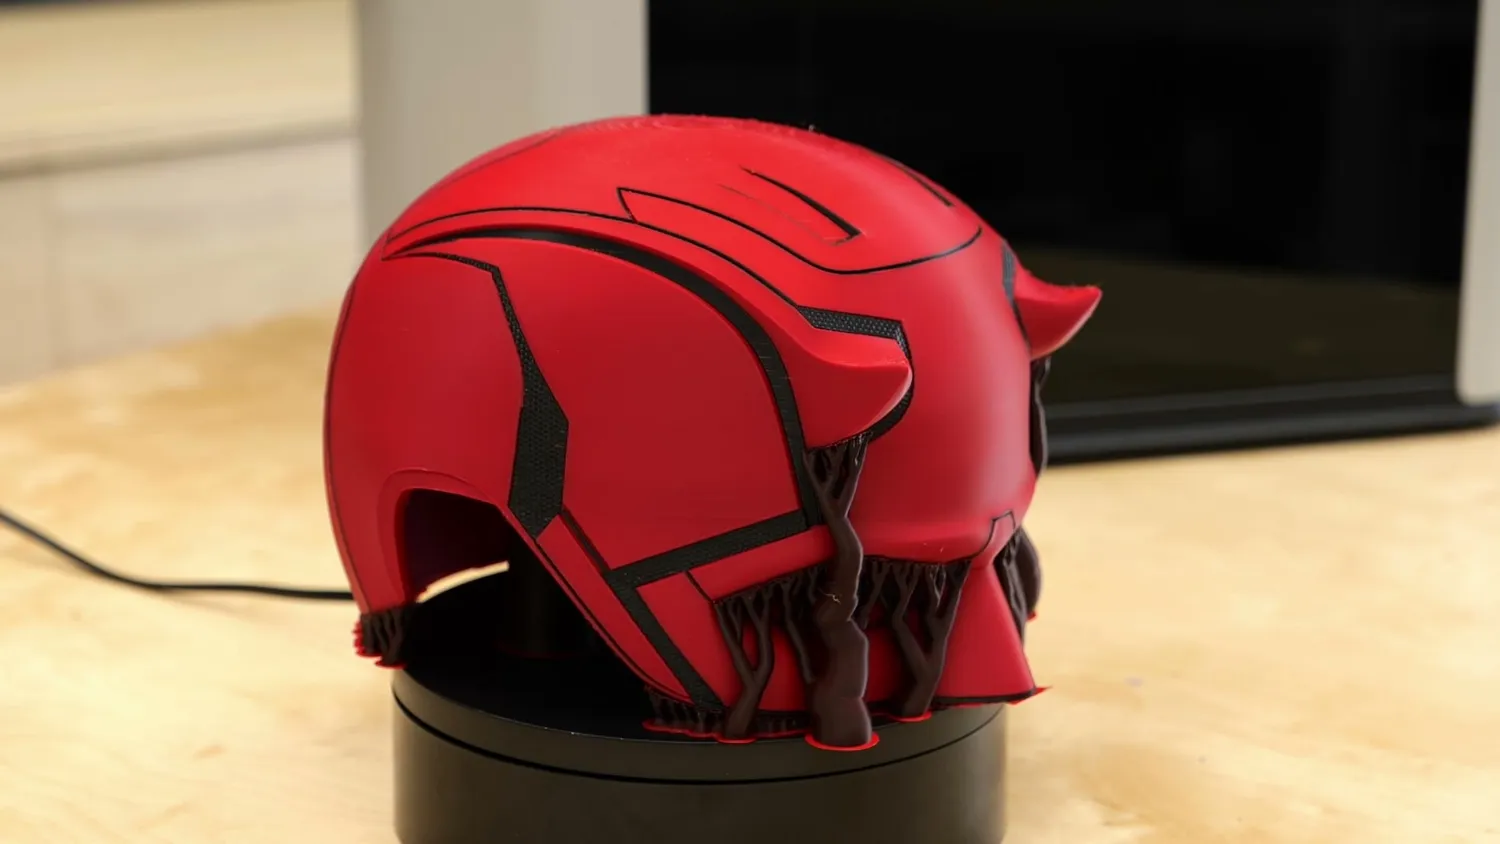
Daredevil helmet, printed with both nozzles
The Vision Encoder System
Before I start voicing any complaints, let me briefly discuss another tool that Bambu Lab has introduced: This is the Vision Encoder System, designed to enhance the precision of your prints. Every motion system has tolerances, and many of you might already have tuned your steps per mm or adjusted your printer’s skew. The Vision Encoder plate* will automate this process for you. It is a precisely printed build plate with thousands of aruco data matrices. This accessory, once placed in the printer and the calibration process initiated, allows the camera on the print head to scan the entire plate, correcting its movements to perfectly align with the precision plate. This mechanism auto-corrects skew and claims to enhance the motion system’s precision to 50 micrometers over the whole printplate. However, keep in mind that it won’t account for material shrinkage, so don’t expect your parts to be perfectly precise, but they should be closer. I tested the difference before and after calibration using Vector3D’s califlower and didn’t notice a significant difference, likely because the machine was already well-calibrated. I view this as more of a novelty since thermal shrinking is probably much greater than mechanical tolerance, but I’m curious about your opinions on this. Would you invest in such a calibration plate?
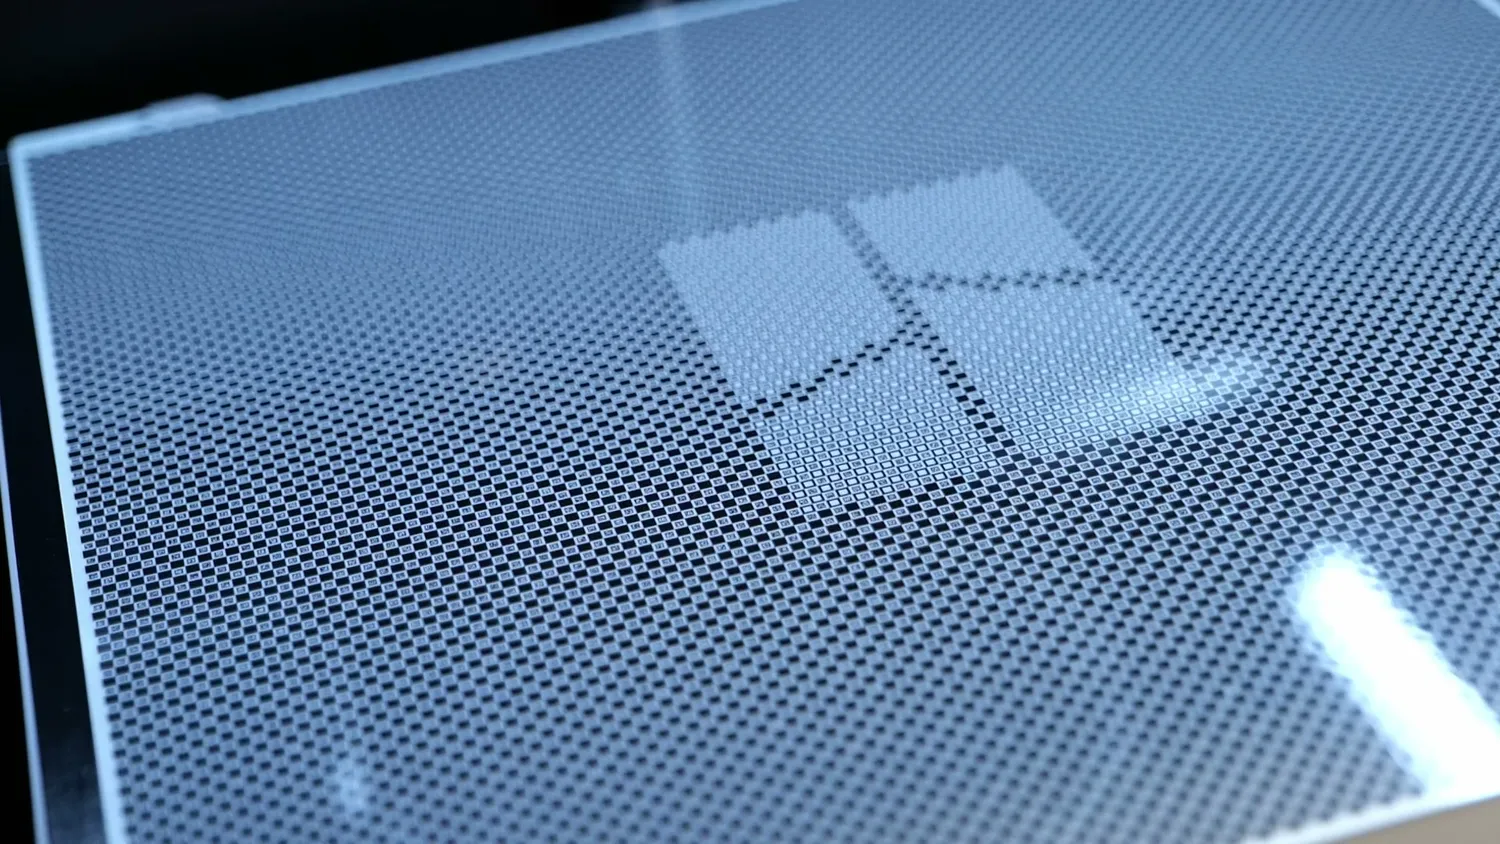
Thousands of aruco data matrices on the Vision Encoder plate
Where the H2D still needs polish
Now, for a little complaining! In addition to my TPU feeding issues, I also encountered some other aspects that weren’t quite perfect. First, I frequently faced bed adhesion problems. When I printed a single-layer sheet, I noticed it wasn’t perfect. It turns out they now have an auto bed leveling check by default to save print start time. The H2D probes certain points, and if they are within a specific tolerance, it uses the existing bed mesh and begins printing. After I manually activated bed leveling before the print, it probed the entire bed and printed a perfect first layer sheet. I thought the problem was resolved. However, I continued to experience bed adhesion issues with difficult geometries, consistently in the same area. When I used my thermal camera to check the evenness of the heated bed, I discovered that the H2D appears to use a heating element similar to the A1, leading to a relatively uneven temperature distribution, especially with a cold spot where I had adhesion issues. Additionally, the temperature was about 10°C lower than the setting. I know emissivity can be a problem with thermal cameras, but I checked with a thermocouple, which reported even lower temperatures. After adjusting my PLA temperatures 5°C higher and avoiding those critical areas, I finally succeeded in printing my flexi octopus! Bambu Lab has since fixed the too-low bed temperature in a firmware update that came right after release, so that part isn’t a problem anymore. Another issue that drove me mad was experiencing a blocked hotend twice after feeding two low-temperature filaments following an ASA print when the chamber and components were still reasonably hot. Both times, the material softened in the extruder and caused a jam. While this alone wouldn’t be a major issue, clearing that jam on the highly complex printhead was quite a hassle. Keep in mind that the more complex these machines become, the harder they are to debug and fix yourself. This applies to both the mechanical system and the electronics, so if this is important to you, a DIY printer or a more maintenance-friendly machine might be the better choice. I also had several instances of material bleeding on the first layers after switching between filaments. Here, I would love to see a smarter filament change routine that purges more material when switching between incompatible filaments. They have all the information, so this should be easy to implement. Lastly, I would really appreciate a delayed print start in conjunction with the new drying function of the AMS. Sometimes, I want to initiate a print at the end of the day, but the material isn’t properly pre-dried. Why not activate the drying cycle and, after two hours when the outer layers of the spool are dry, begin printing while continuing to dry? That could save a significant amount of time and improve print results.
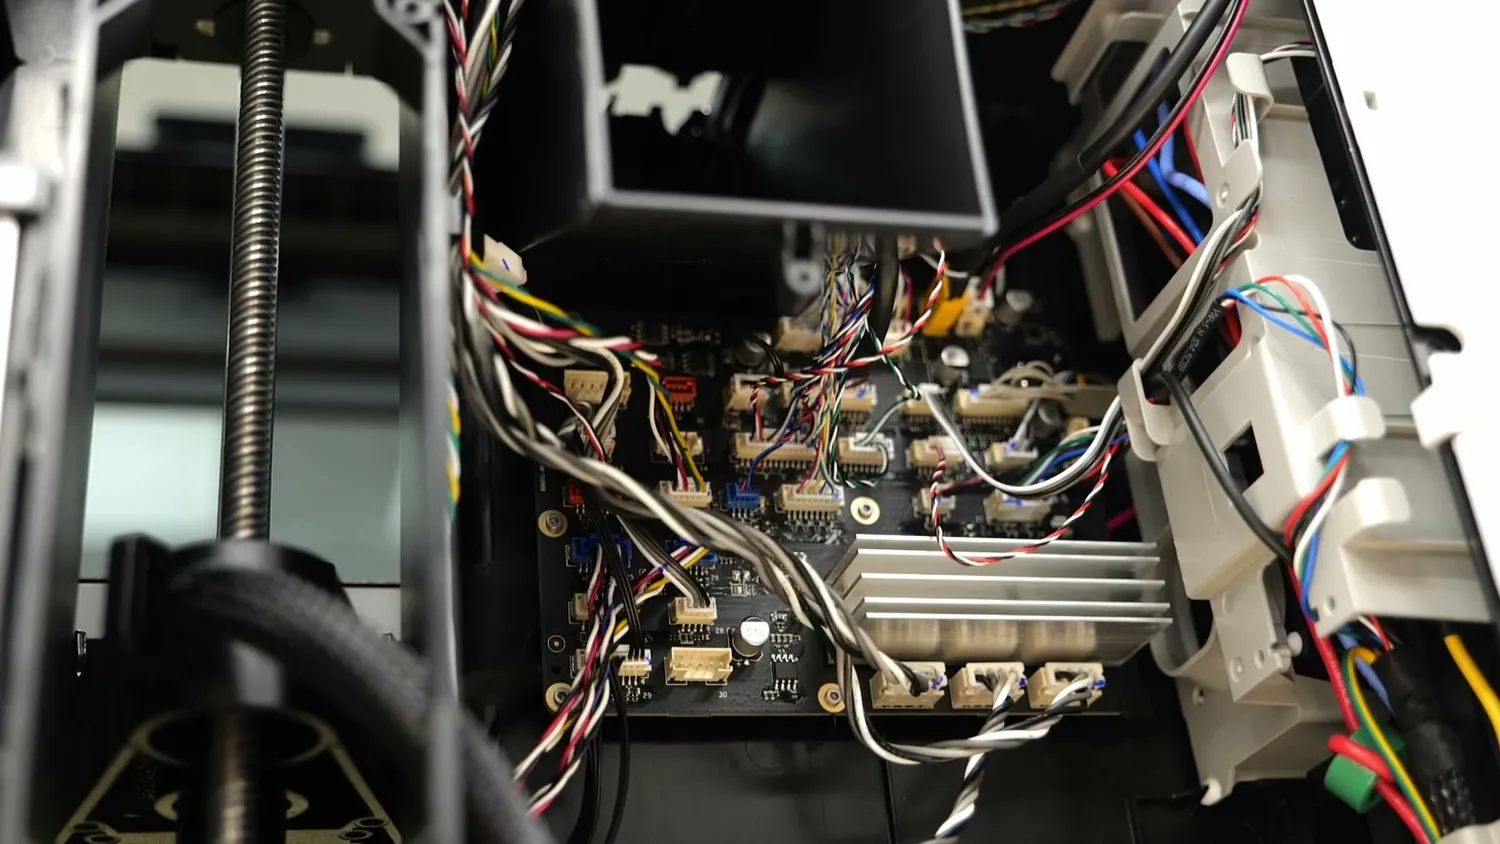
The more complex the machine, the harder it is to fix yourself
Laser, drag knife and pen plotter
Oh boy, that was quite a bit about the 3D printing capabilities of the H2D, but as you’ve already noticed, Bambu Lab’s new machine is more than just a 3D printer. It doesn’t aspire to be a full jack of all trades like the Snapmaker*, but the H2D features a rail that allows you to attach a laser, drag cutter, and pen plotter to the printhead. It’s worth discussing because Bambu Lab has finally engineered this right. The laser won’t blind you, they provide an air purifier, and the software they created for these tools, despite being in its first version, already functions quite well. So, if you get the H2D Laser Combo, your machine will look a bit different. You’ll receive the green-tinted plastic windows and door, an additional camera for alignment, an air pump for laser air assist, a nice EStop button, the new toolheads, and suitable build plates.
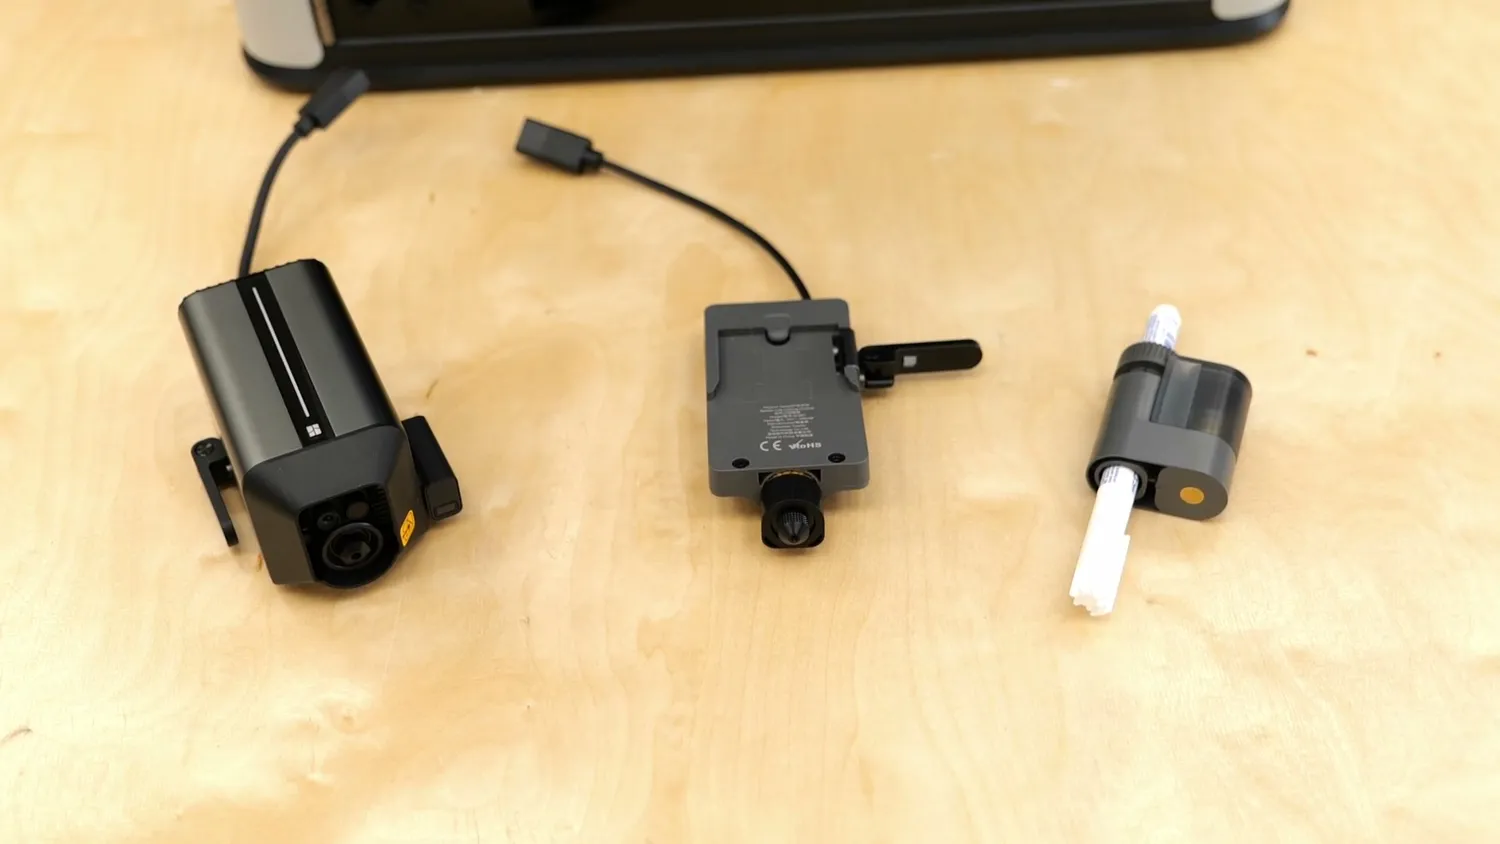
The three extra toolheads: laser, drag knife and pen plotter
When you want to laser or cut something, you’ll need to do a bit of conversion. Let’s begin with the laser. First, remove the toolhead cover to reveal the installation rail. Next, slide the module into place and secure it with a lever. A cable plugs into the back of the toolhead for communication and power, and the air assist hose connects to the pneumatic coupler. You screw a hose shroud onto the printer’s exhaust to connect to the optional air filter or directly exhaust through a window, if possible. Then, simply replace the print sheet with the laser tray, and you’re ready to go. The calibration wizard will guide you through the setup process, ensuring that everything functions correctly. The focus position is measured each time by engraving lines onto a piece of cardboard and then scanning that with the tool head camera.
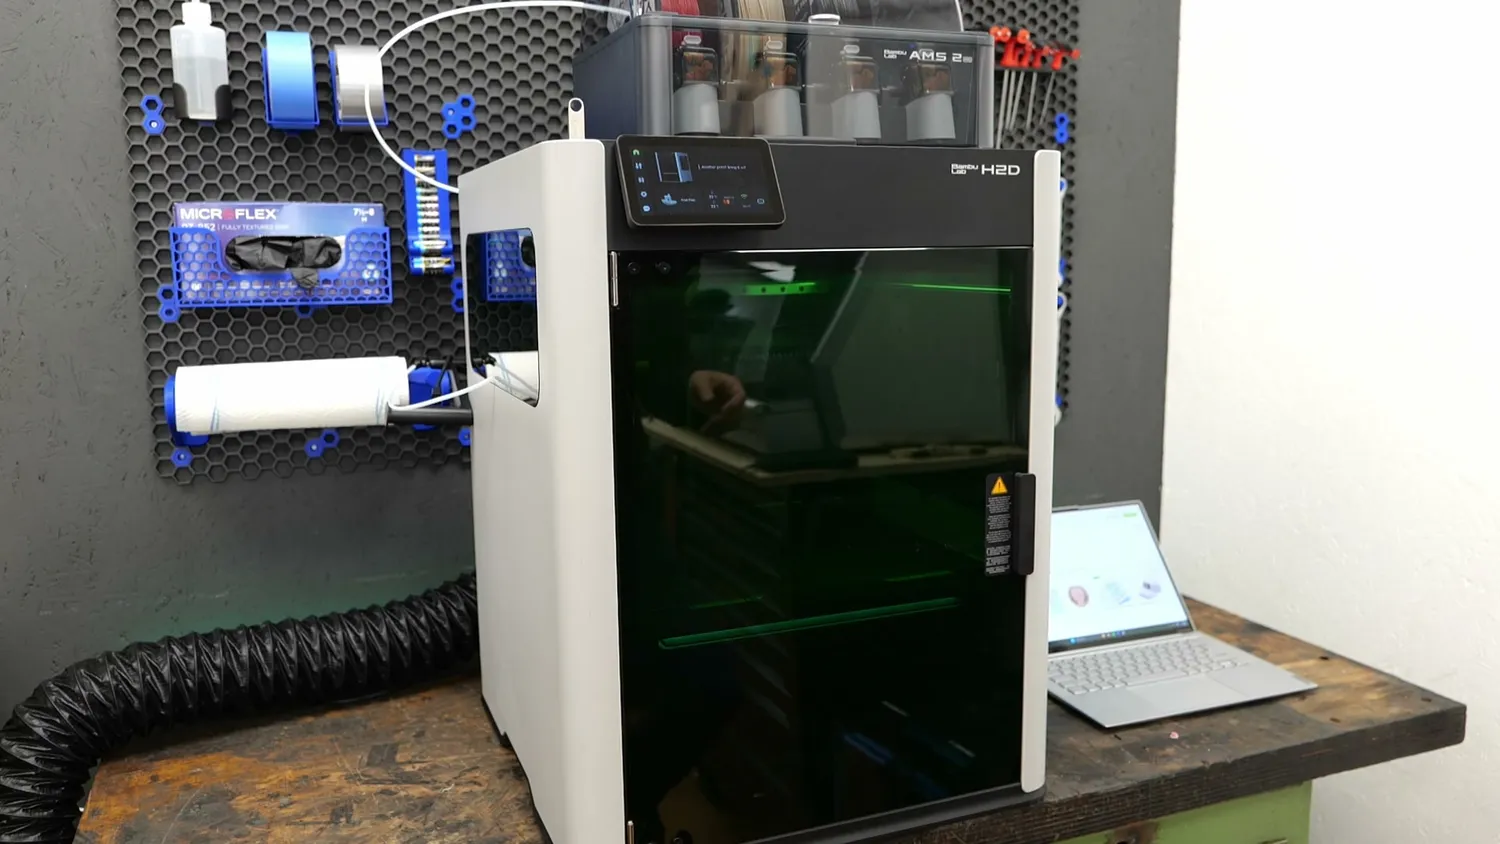
The H2D set up for lasering, exhaust hose attached
Then it’s off to Bambu Suite, a new software tool specially designed to work with the laser, drag knife cutter, and plotter. As far as I know, there isn’t currently the option to use third-party tools like Lightburn, and I’m not sure if this would even be easily feasible due to the deep integration that Bambulab implemented. Nonetheless, for a first release, it already functions quite well; the only feature I’ve been missing so far is the ability to import vectors from a PDF and z-adjustment for multi-pass laser cutting. When you start it for the first time, a well-made guide shows you how each step works and how to create your first parts, which is pretty neat. You can add general shapes, text, or even grayscale images to engrave. Once you’ve completed your design, you move to the preparation workspace to select your material. Bambulab includes parameters for a set of materials they will be selling, but if you prefer to use your own raw stock, you can easily do that as well. It’s crucial to set the thickness of your piece here so that the image captured by the Birdseye camera aligns properly. You can then arrange and position your design on the part, adjust parameters if necessary, and send it over to the machine for production. I’ve mentioned it before, but Bambulab has taken extensive measures to ensure this is a safe laser machine, including protective windows, an emergency stop button, a filtration unit, and several flame sensors surrounding the machine and laser head. Still, you’ll need to be present at the machine while it’s working, as you can’t remotely start a job due to the inherent fire hazard with lasers. They ensure safety by requiring you to push the start button on the machine before it begins operation. Once started, it’ll open the vents, activate the air pump, and laser your part. Unfortunately, Bambulab’s air filter does not automatically activate when the machine begins lasering. This is a bit disappointing given all the technology they have! The 10W laser is excellent for engraving and cutting light materials up to 5mm thick wood. Because it uses a blue laser, you won’t be able to cut clear acrylic, but you can even engrave metals, which a CO2 laser can’t do, for example. The 40W laser is significantly larger and more expensive, but it will also cut materials up to 15mm of wood faster and with greater ease. However, if you’re already spending that much more, you should probably consider investing in a dedicated laser cutter. The ventilation system effectively removes most of the smoke and fumes, but there will always be some residue inside your printer, especially in the motion system. Bambulab states that with proper maintenance, it shouldn’t impact the lifetime of your printer, but excessive buildup will definitely affect performance. That said, I believe the system should be perfectly adequate for occasional engraving and cutting tasks, but if you plan to do this daily, you might want to consider purchasing a dedicated unit. I didn’t notice any laser light leaking through the unit, even in a dark room, which gives me confidence in recommending the system if you have a need for it.
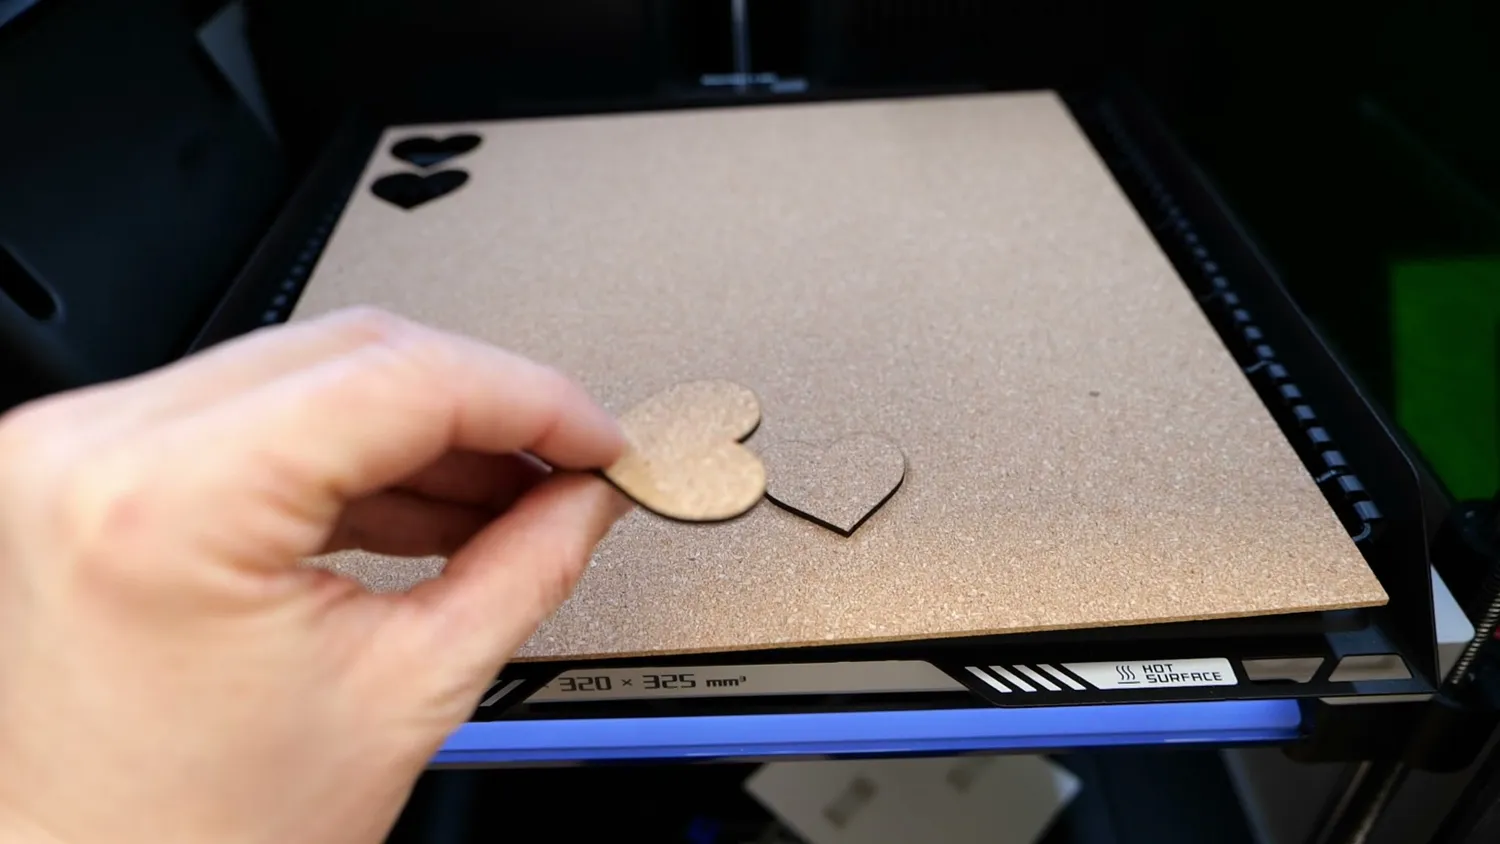
Hearts cut out of thin wood with the 10W laser
The drag knife cutter is another accessory that comes standard with the H2D Laser Combo and will allow you to cut paper, stickers, or decals. It’s installed similarly to the laser, minus the air assist. Instead of the laser tray, you install this tacky double-sided build plate. The software workflow is similar to the laser, but instead of adjusting the laser power, you can adjust the drag knife pressure, which essentially determines your cutting depth. My first attempts at aligning the cuts with my design were a bit off, but Bambulab claims an accuracy of under 0.3mm if you set everything up correctly.
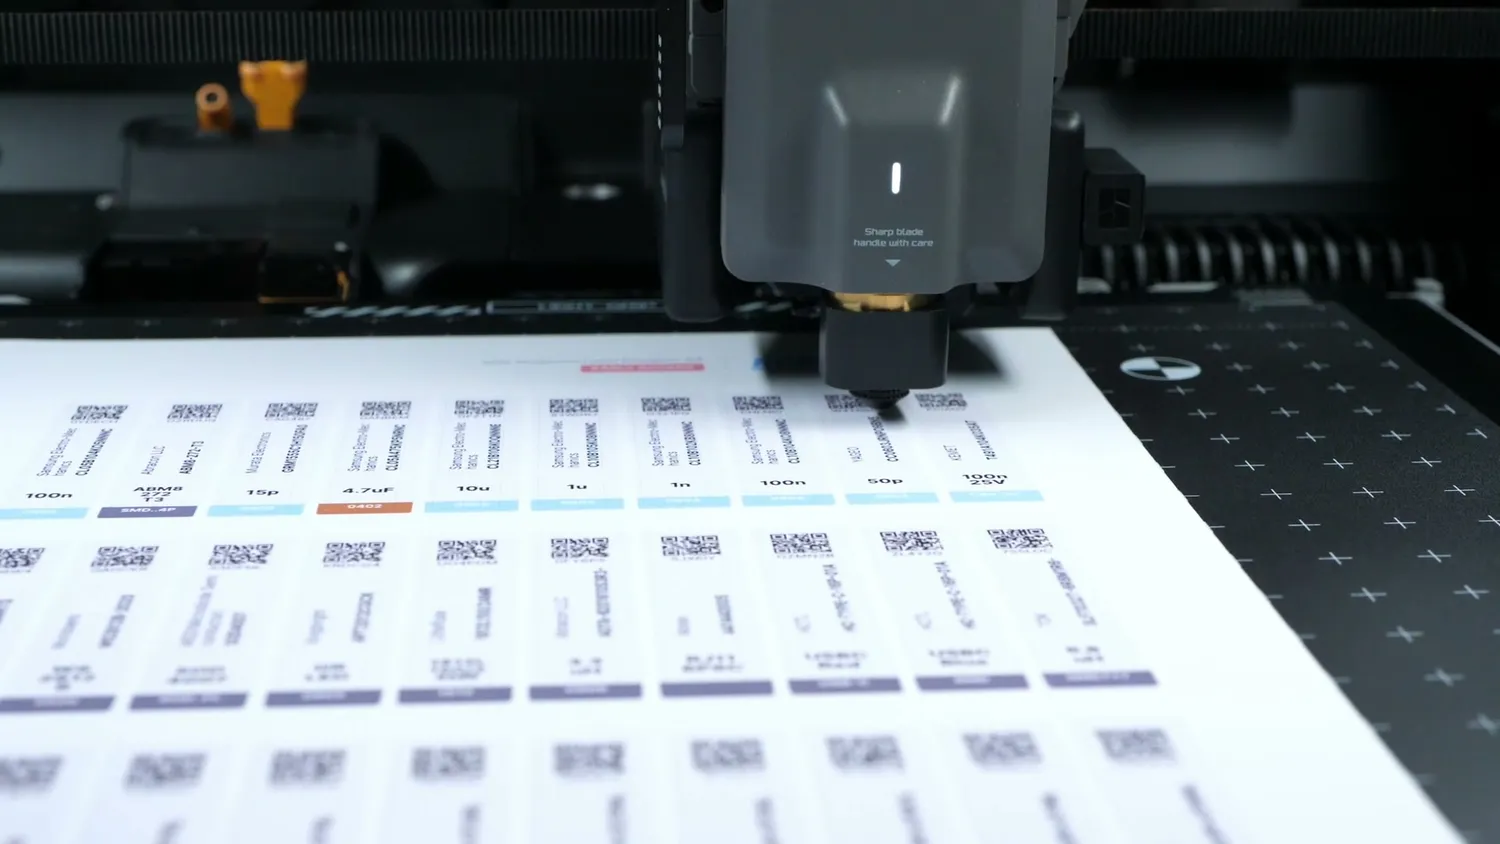
The drag knife cutting a sheet of printed labels
You will also be able to use the machine as a pen plotter, and the process is again pretty straightforward, but I haven’t done that yet, so I can’t provide much information about it.
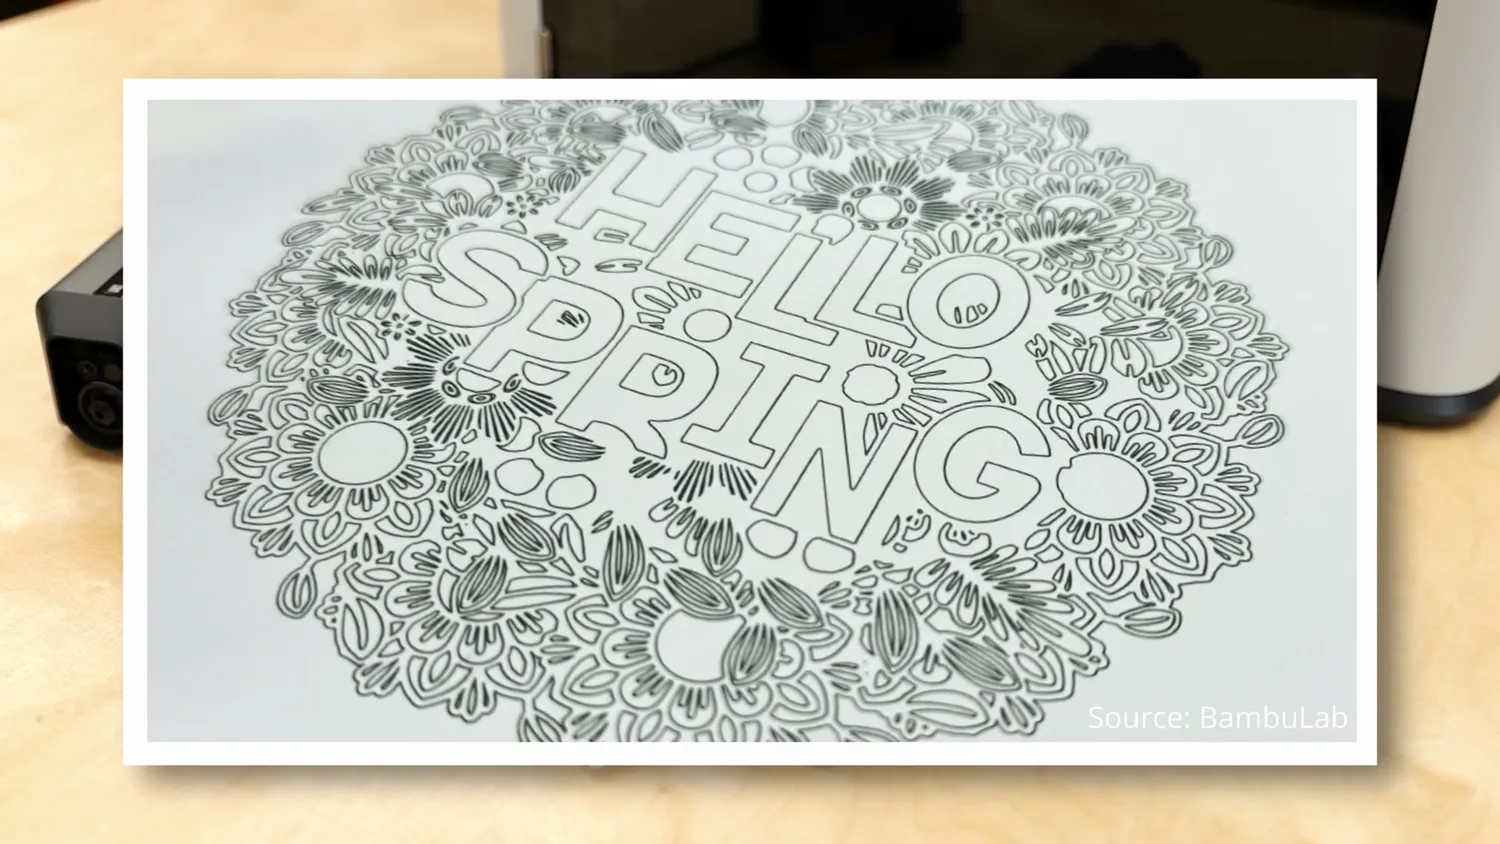
Pen plotted artwork (BambuLab)
So, this was a quick rundown of the non-3D printing features of the H2D. I think the implementation of these features is one of the best I’ve seen so far, especially with the laser safety precautions, as well as the smart features and an adequate software solution right at the start. Getting started, even if you’ve never worked with these tools, is easy due to the tutorials, but I believe it will really shine once we can find more and more projects on Makerworld that users can do themselves and learn from to realize their own ideas. This could transform such a gadget into a useful tool because, in many other systems, the learning curve was pretty steep, which Bambulab will address with their own pre-made projects and the entire ecosystem on Makerworld. I’ve met some of the higher-ups at Bambulab, and many of them are makers at heart who build their own RC projects with a huge passion. So, even though I’m still unsure whether it was a good idea to create a machine that tries to do everything or to focus on their core competence in 3D printing, I think they’ve produced a machine they want. It not only 3D prints but also combines it with sheet fabrication and decorative decals. But what’s your opinion on this? There will be an update kit in the future to add the laser to a regular H2D, but that will likely cost more than the current markup. I believe the less expensive upgrade for the drag knife cutter might be more appealing to some, but we’ll see!
Back to 3D printing duty
So, is the H2D the machine to get?
So there we have it! That’s Bambulab’s new H2D: a powerful Makerstation with a new generation 3D printing system and capable laser cutter and plotter. I didn’t get the impression that they compromised on the 3D printing aspect in order to integrate several technologies into one machine, other than sacrificing some visual appeal due to the green plastic windows. I think many people will be very happy with what Bambulab is bringing to the market, although the price point might be too high for those who hoped for a second-generation X or P series machine at a significantly lower price. Yet, if you’re paying the price, you’ll receive a machine that’s exceptionally well-built and comes with all the bells and whistles you can imagine. It can work with almost all materials on the market, from regular PLA to high-temperature Nylons or PPS, thanks to a better hotend and the climate-controlled chamber. It’s faster in multi-color printing than its smaller siblings, but if you plan to use more than 2 colors or materials, it doesn’t quite match the speed and versatility of a toolchanger, which may only be important to a small minority. It has other strengths and is obviously smaller, so it definitely doesn’t make the Prusa XL obsolete. I rather fear that the better dual-nozzle system will be a big challenge for Ultimaker and the Laser and Drag Knife will convert some from a Snapmaker to Bambu Labs new machine! One of my highlights are the new AMS systems with their drying capabilities, and I love that they are fully backward compatible with older printers once the firmware update arrives and will even work on the A1!
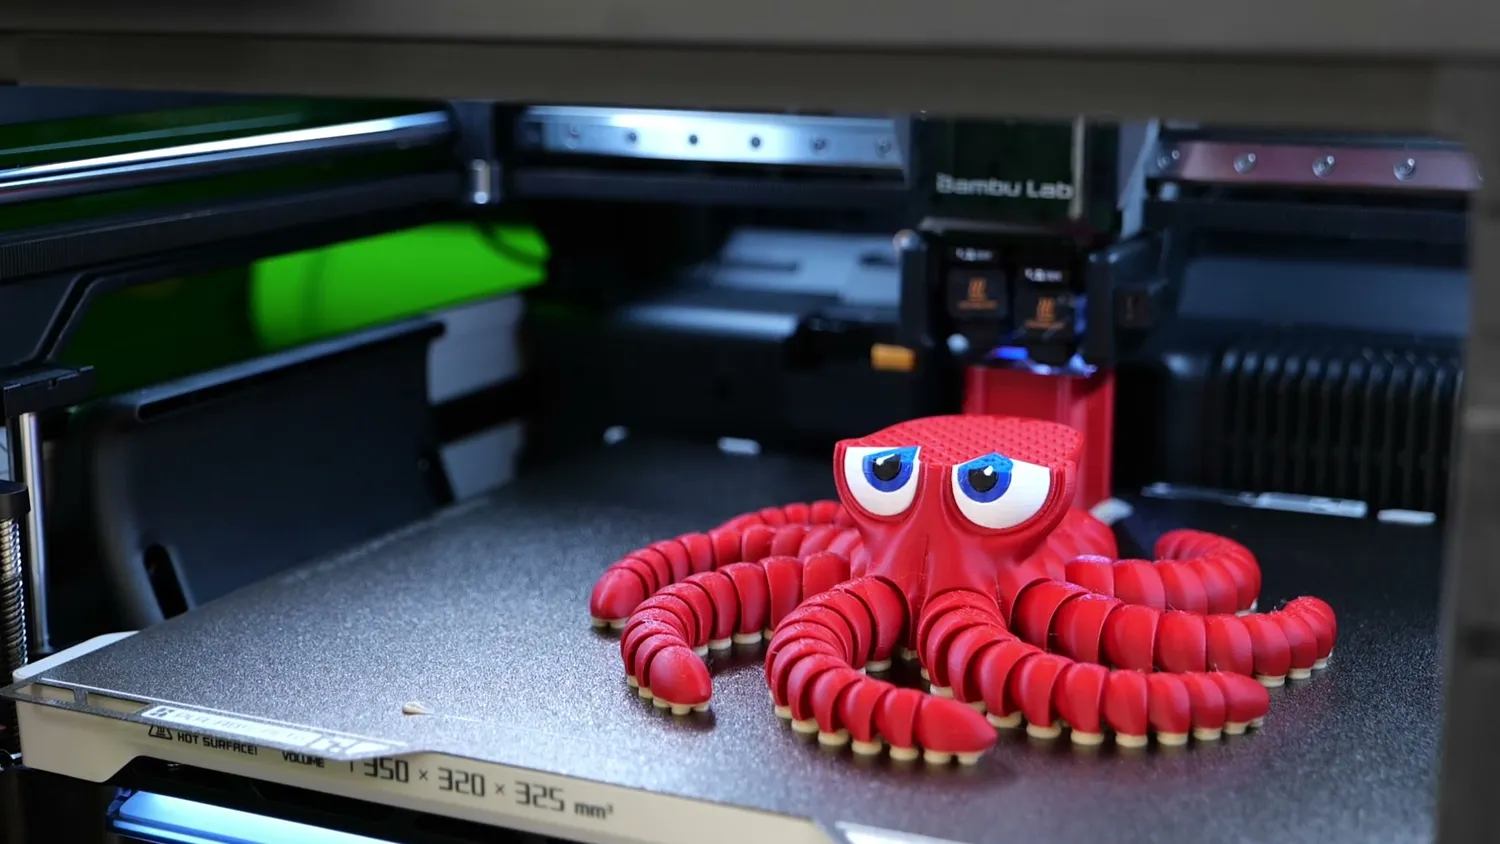
The finished flexi octopus on the H2D’s plate
I’m definitely putting the H2D through its paces and am really looking forward to seeing what more talented people than I will do with its unique capabilities!
🐼 Get the Bambu Lab H2D ($1,899 printer / $2,199 Combo / $2,799 Laser Full Combo): https://geni.us/BambuLabH2D*
* Links marked with an asterisk are affiliate links — if you buy through them, I earn a small commission at no extra cost to you. As an Amazon Associate I earn from qualifying purchases. Thanks for supporting my work!