
Bambu Lab H2S – The XL Printer Everyone Asked For
Bambu Lab H2S review: the H2D's big build volume without the dual nozzle, $800 cheaper, 340 x 320 x 340 mm, and what the single-nozzle head costs you.
TL;DRthe short version
- The H2S is a slightly stripped-down H2D: same frame, same electronics, but a single-nozzle extruder instead of the dual-nozzle head, which makes it $800 cheaper at $1,499 for the AMS Combo.
- The build volume grew to 340 x 320 x 340 mm, 15 to 40 mm wider than the H2D depending on its nozzle mode and 15 mm taller. That is more than twice the volume of the X1.
- Multi-color still works with the AMS, but with a single nozzle it creates a lot more purge waste and the machine isn't really capable of multi-material printing anymore.
- The new toolhead uses a high-torque servomotor for the extruder and finally prints flexibles properly. A 3DBenchy in 30D TPU was no problem at all, something I couldn't do on the H2D.
- What you lose: the side windows, the nozzle camera, and the 40 W laser option. What you gain besides volume is speed: the default profiles go from 8,000 to 10,000 mm/s².
- Print quality was excellent in PLA, PETG and ASA, but the less powerful fan on the new toolhead shows on small 70 and 80° overhangs compared to the H2D, and the spikes eventually got stringy.
- If you mostly print single-color, single-material parts and just need the build volume, the H2S is the one to get. Only go for the H2D if you really need dual-nozzle multi-material printing.
🐼 Get the Bambu Lab* H2S ($1,249 printer / $1,499 AMS Combo / $2,099 Laser Combo): https://geni.us/BB-H2S*
When I heard Bambu Lab was launching another big 3D printer, I assumed it would be a stripped-down version of the H2D, something like how the P1P followed the X1. But what they’ve released looks almost identical to the H2D from the outside. This is the H2S, a large-format printer that’s significantly cheaper because it ditches the dual-extruder setup for a single hotend. So did you get your H2D too early and is this the large-format Bambu Lab printer people have been waiting for? Let’s find out!
The H2S in a quick Q&A
Since many of you are already familiar with Bambu Lab’s first XL dual-nozzle printer, the H2D, let’s kick things off with a quick Q&A to answer the main questions you probably have before we dive into the details.
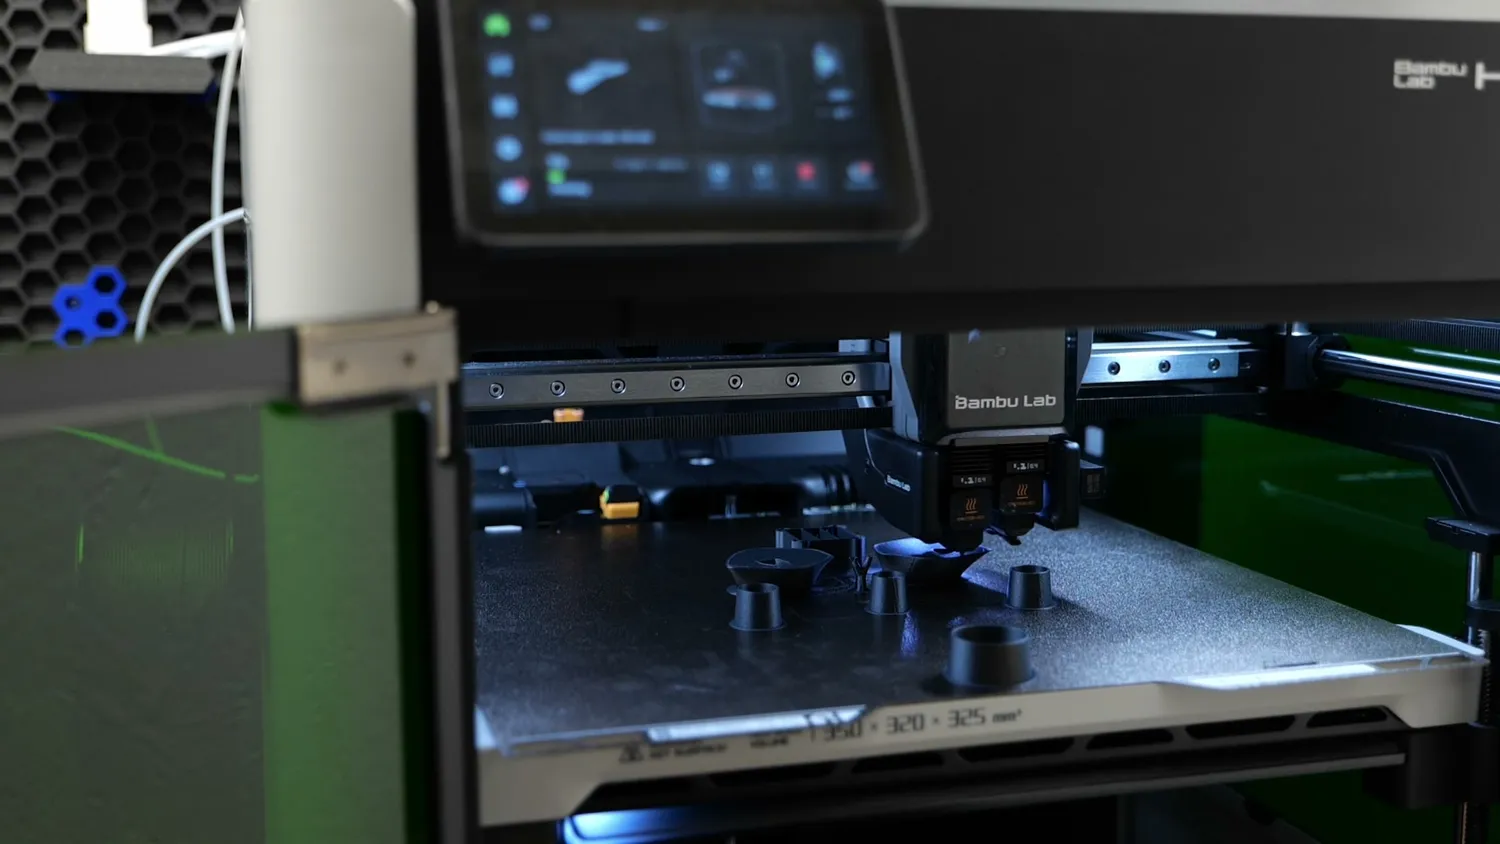
The H2D’s dual nozzles and its 350 x 320 x 325 mm plate
So, what is the H2S? It’s basically a slightly stripped-down version of the H2D, with the main change being a new single-nozzle extruder. That’s what the “S” stands for.
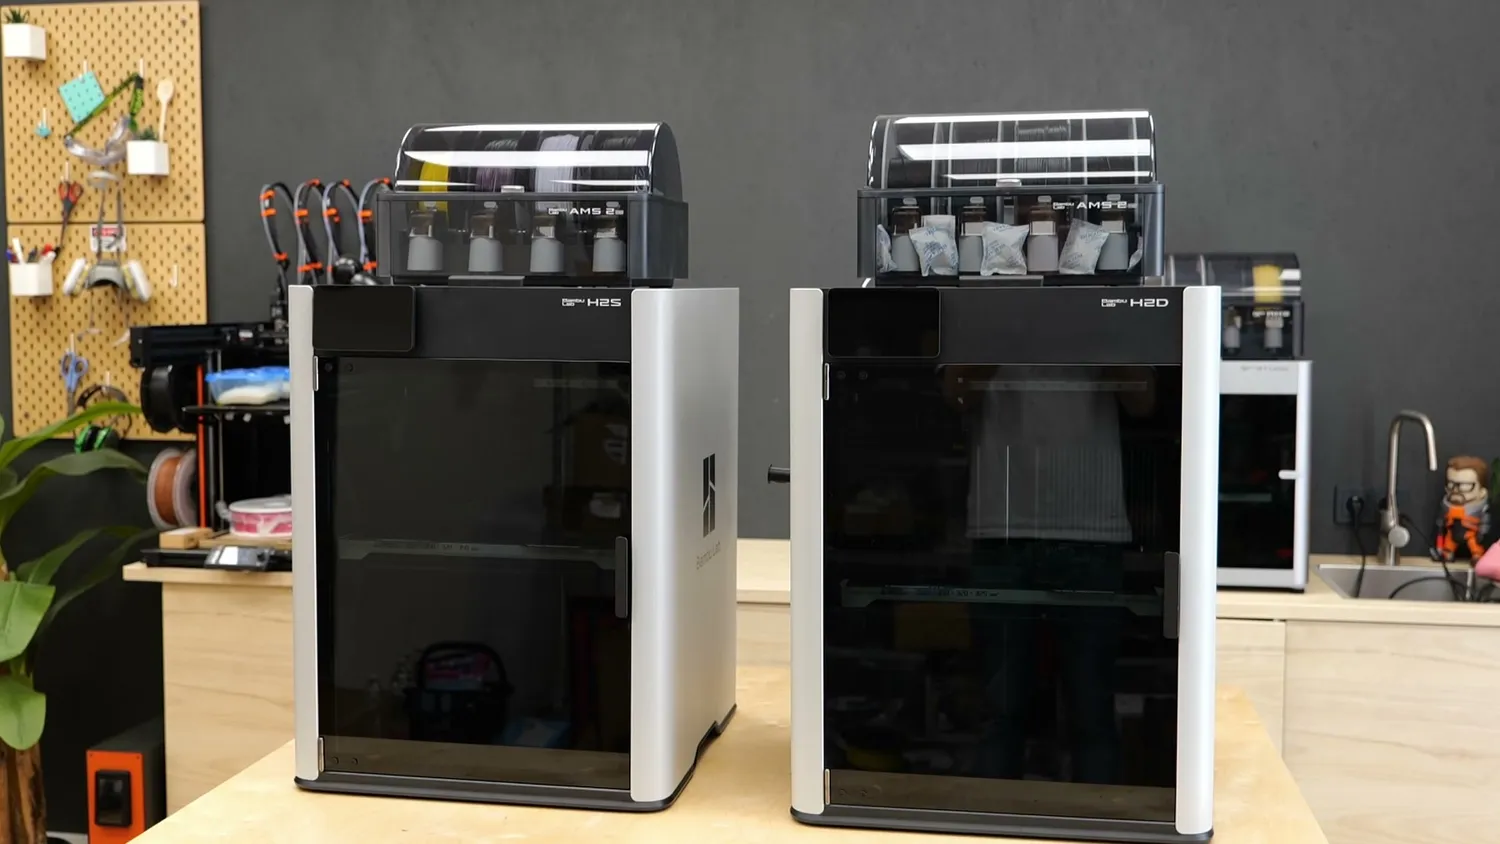
(left) the H2S, (right) the H2D
Is the build volume the same? It uses the same print sheets, but the printable area is actually a bit bigger. Thanks to the new extruder, you get 15 mm more in Z-height and up to 40 mm more in print width. That’s more than twice the volume of the X1!
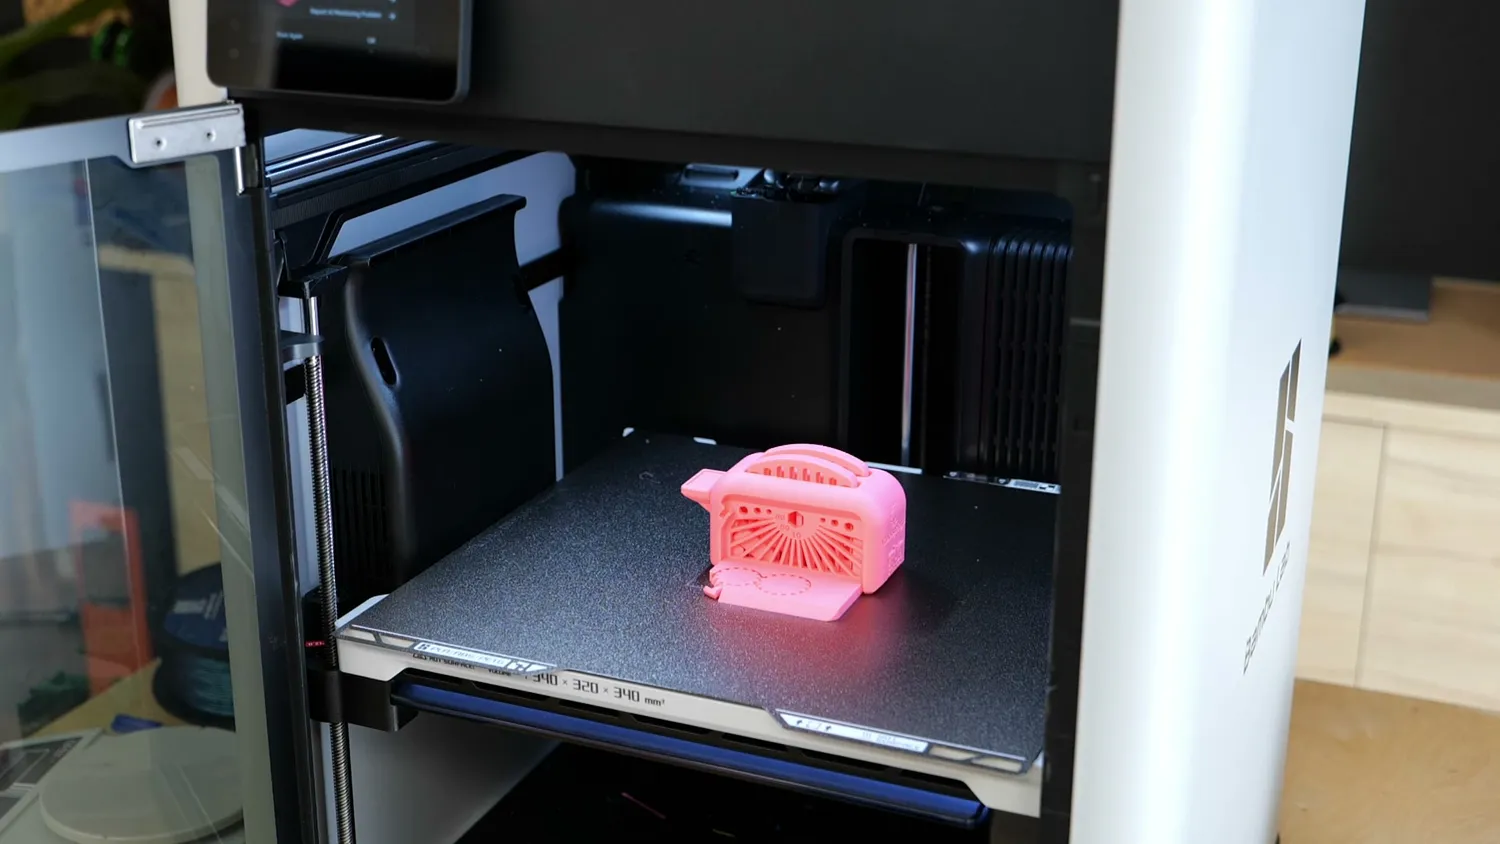
The H2S has a fixed 340 x 320 x 340 mm build volume
Can you still do multi-color prints? Yes, using the AMS but with only a single nozzle. It creates a lot more purge waste and it is not really capable anymore of multi-material printing.
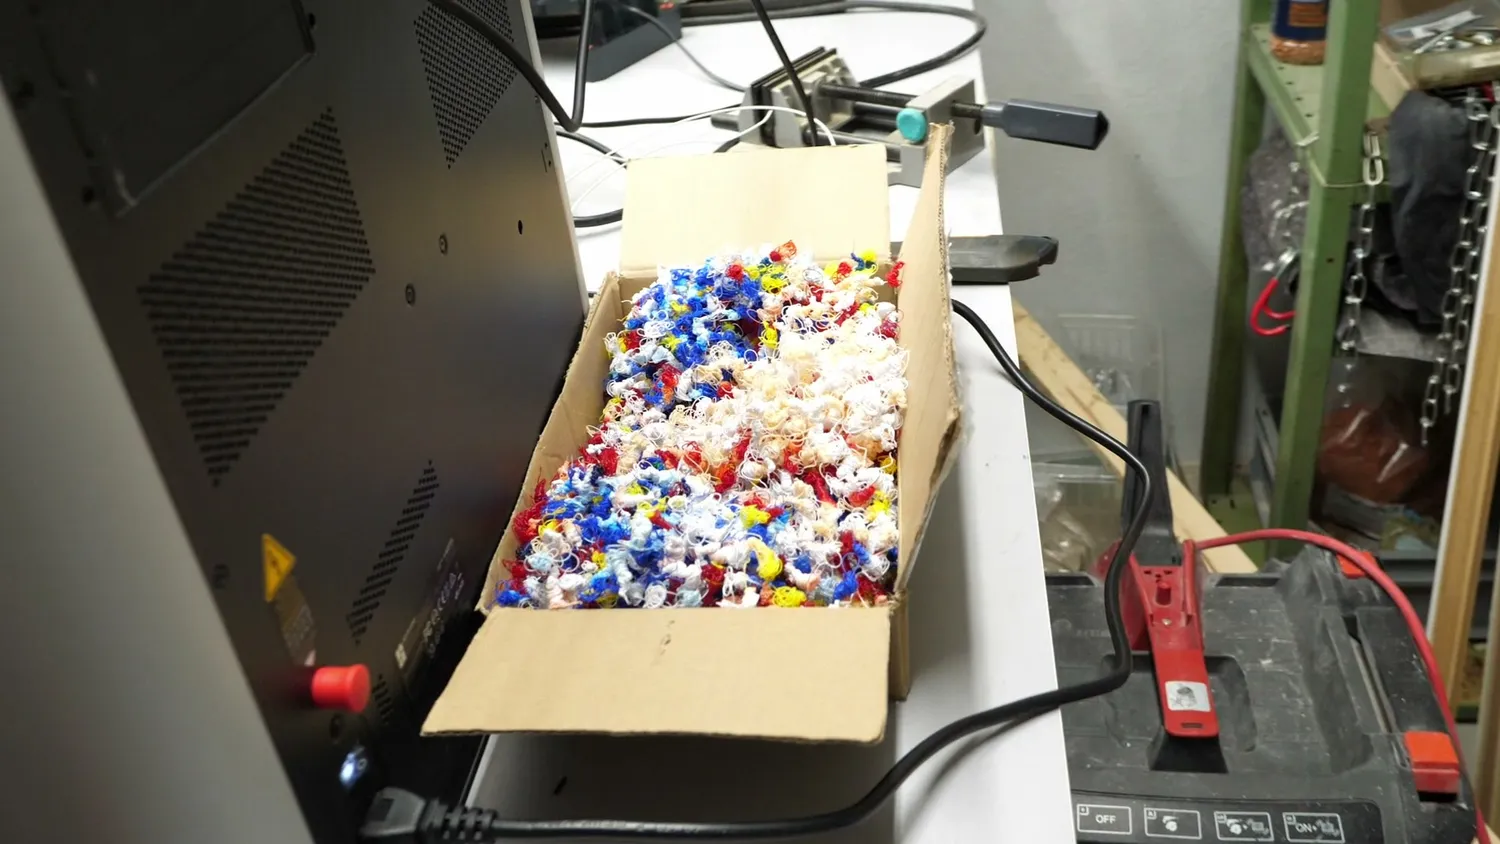
Multi-color on one nozzle means a lot of purge waste
Can it still laser cut and use the drag knife? Yes it is still a Hybrid printer with a mounting rail for accessories - but only the 10W laser is compatible with the H2S.
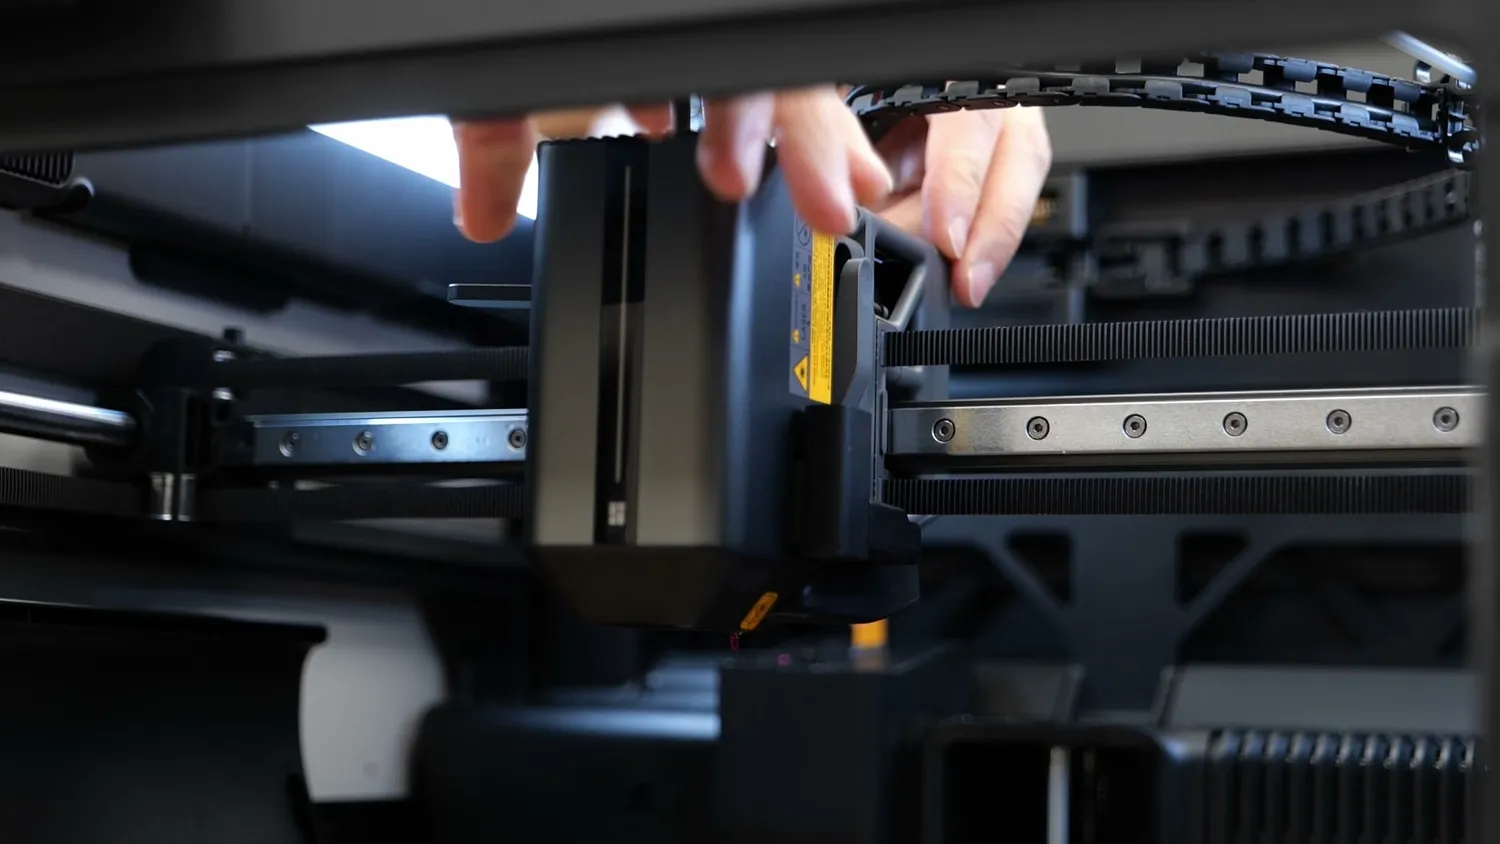
The toolhead keeps the mounting rail for accessories
But is it just a downgrade compared to the H2D? Not entirely. It does have a slightly larger print volume, and because the new printhead is smaller and lighter, it can also print a bit faster. From my experience it also prints flexibles better.
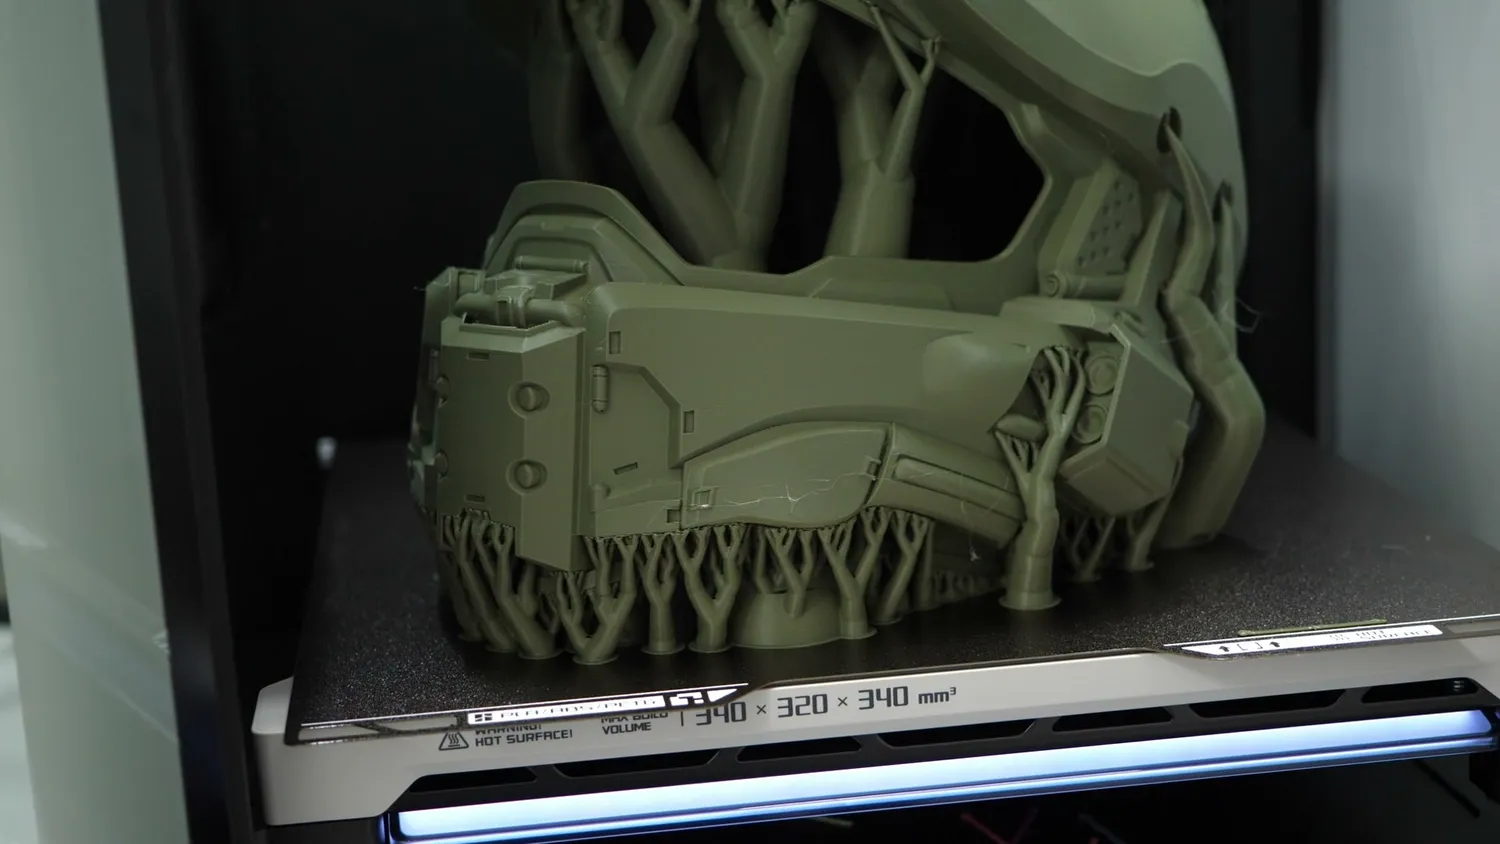
The extra build volume, put to use
How much cheaper is it? At the time of filming, the combo with the AMS 2 Pro is $800 cheaper than the H2D starting at $1,499. The combo with the 10W laser is a $600 addon which makes it still $200 cheaper than the base H2D. Of course, prices can vary with import duties or special offers.
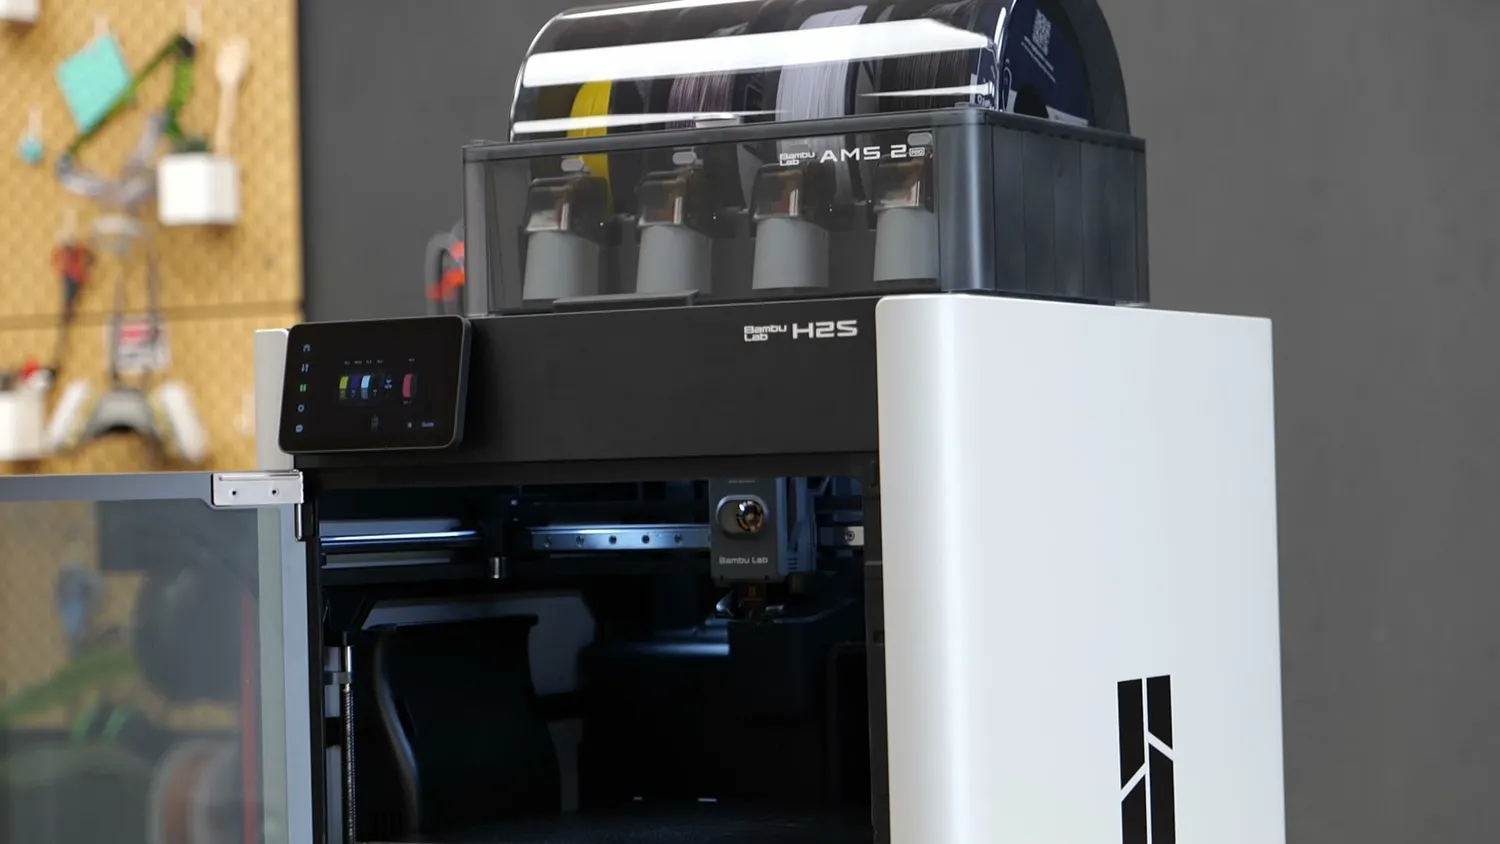
The H2S Combo with the AMS 2 Pro
So, who is the H2S for? In short: anyone who wants a big Bambu Lab printer but mostly prints in single colors or single materials. That simple.
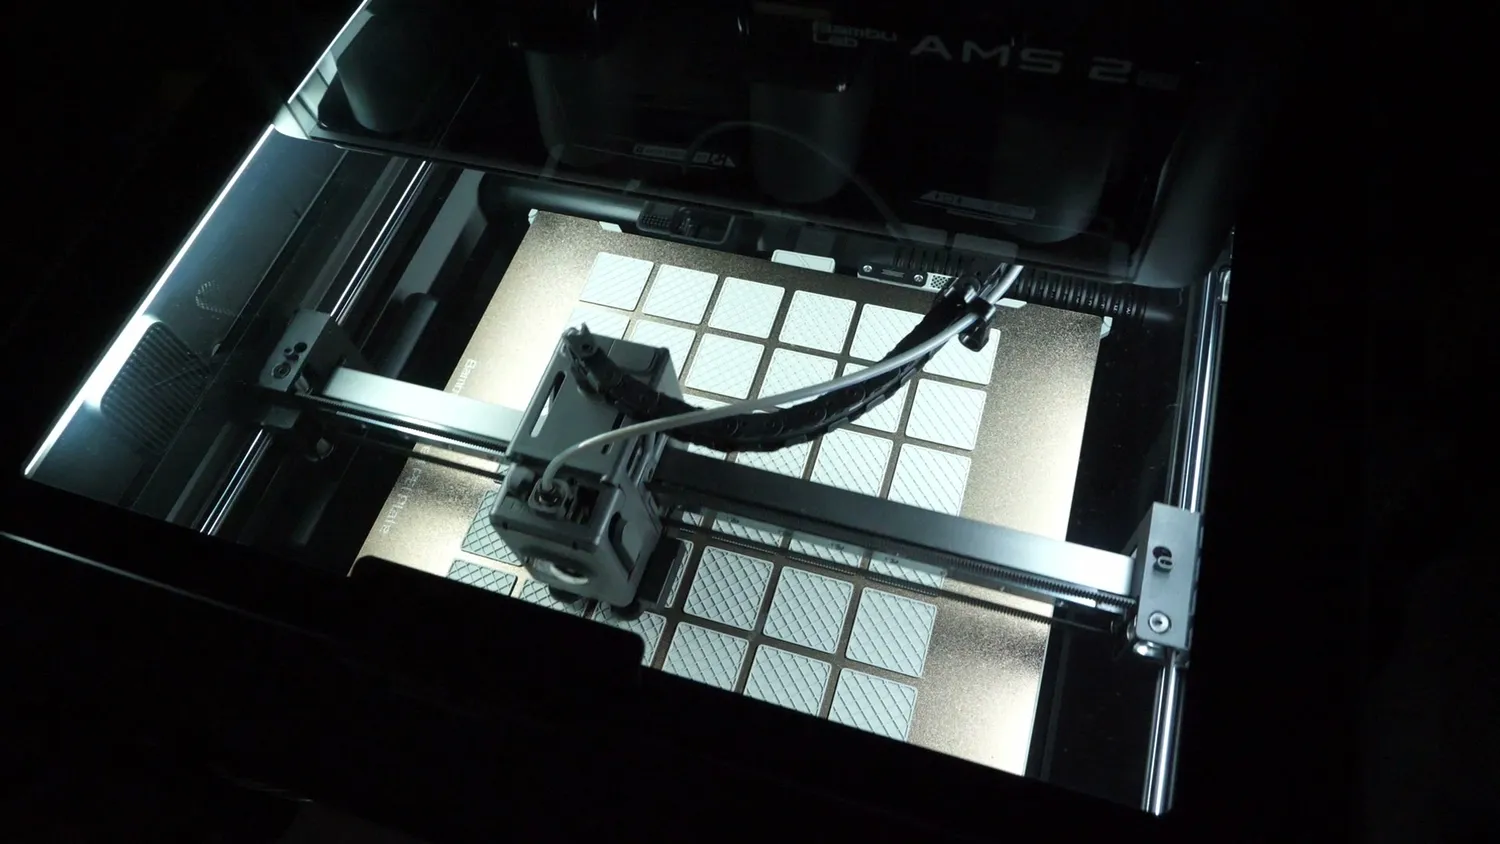
A full plate of parts in the H2S
And finally - why are some shots from my dirty basement and some from the studio? I got this machine a month ago so that I had enough time for testing but under NDA and with a release embargo. Since I’m not alone in my studio I did most of the prints in my basement at home and only moved it last minute here to prohibit that any information gets leaked early.
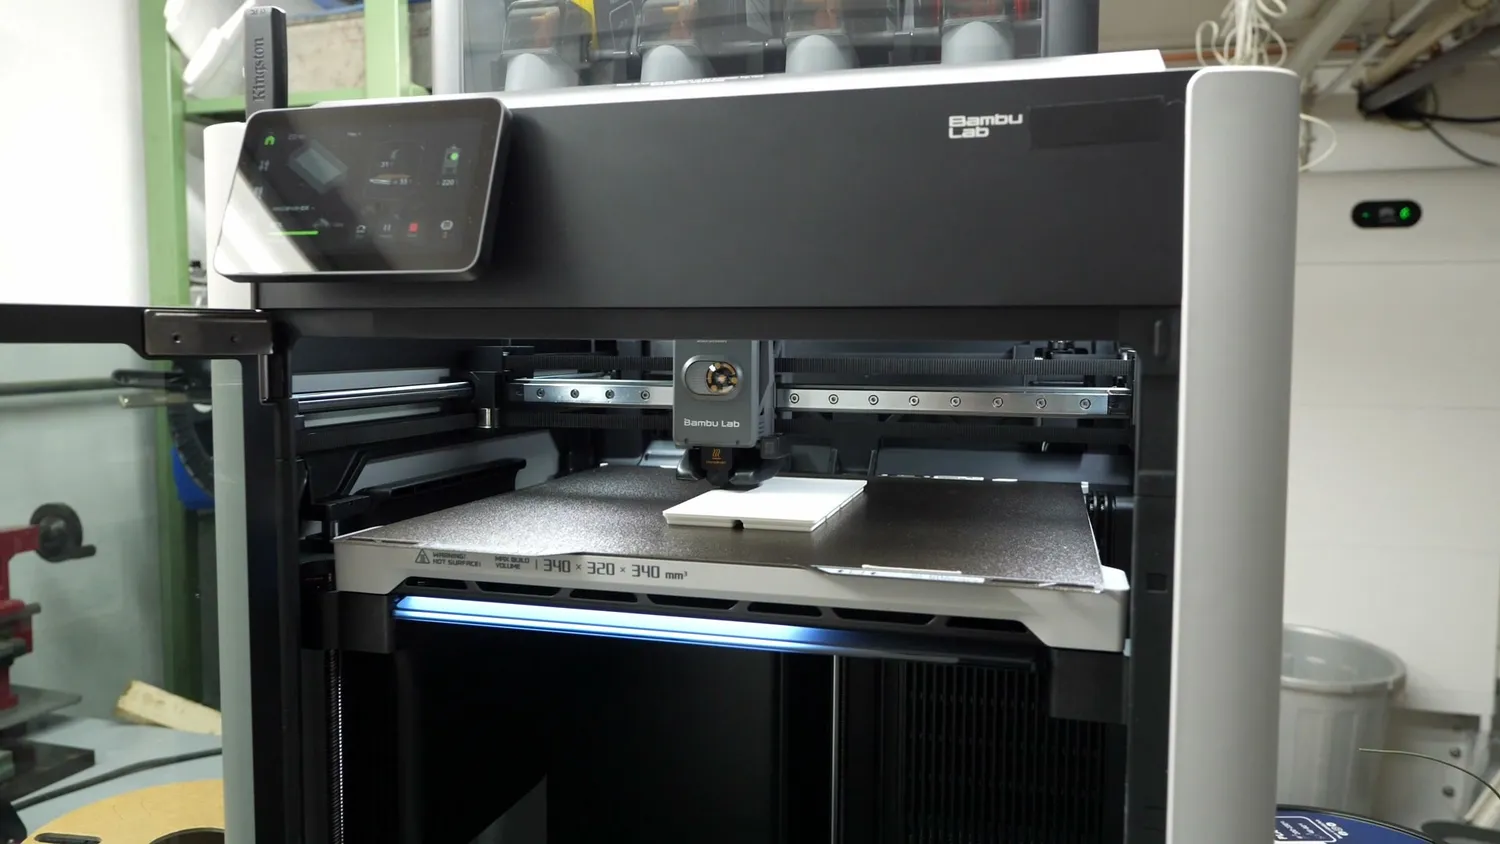
Most of the test prints ran down in the basement
With that out of the way, let’s dig into the details and take a closer look at the not-so-obvious changes.
What changed on the outside
If you put the H2D and H2S side by side, you’ll hardly notice any differences besides the name. That’s a contrast to when Bambu Lab first released the budget version of the X1, the P1P, where they stripped away almost everything that wasn’t strictly necessary. With the H2S, they didn’t go that far, and that’s a good thing because you still get all the same hardware and electronics making this machine capable of printing almost any material but you save $800 on the complex extruder most probably don’t even use.
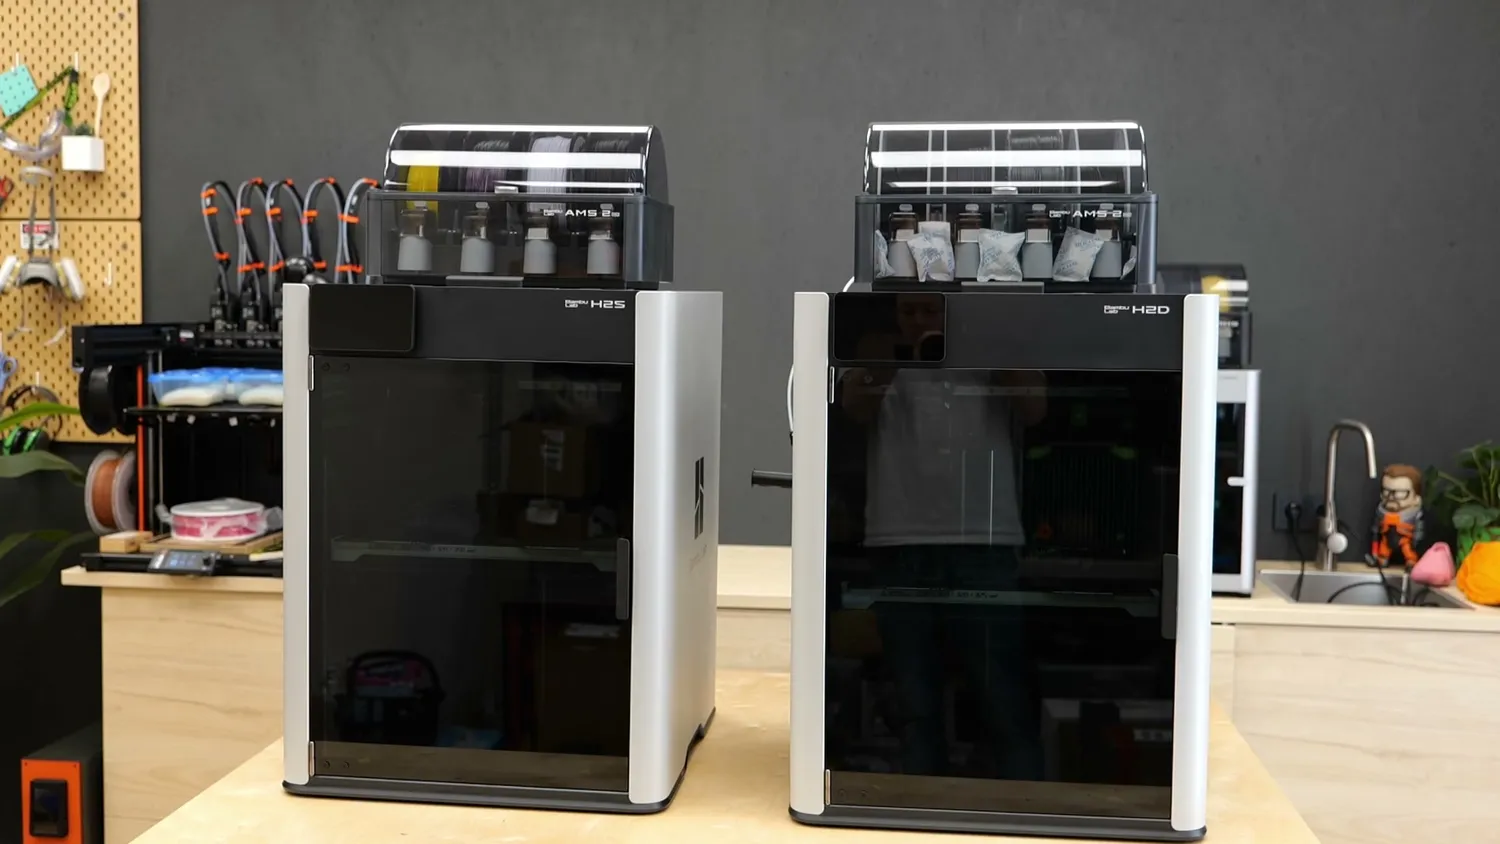
You can hardly tell them apart besides the name
The first clear difference you’ll spot on the outside is that the H2S no longer has side windows, probably just a simple cost-cutting measure. Once you open the machine, both models look nearly identical, since they share the same bed size. But this is where the subtle changes start to appear. The dual-nozzle H2D was often criticized for its confusing build volume, which varied between 300 and 350 mm in width depending on which nozzle configuration you used. The H2S, on the other hand, has a fixed build volume of 340 × 320 × 340 mm. That is 15 mm to 40 mm wider than the H2D depending on the mode and another 15 mm taller overall, thanks to the redesigned printhead.
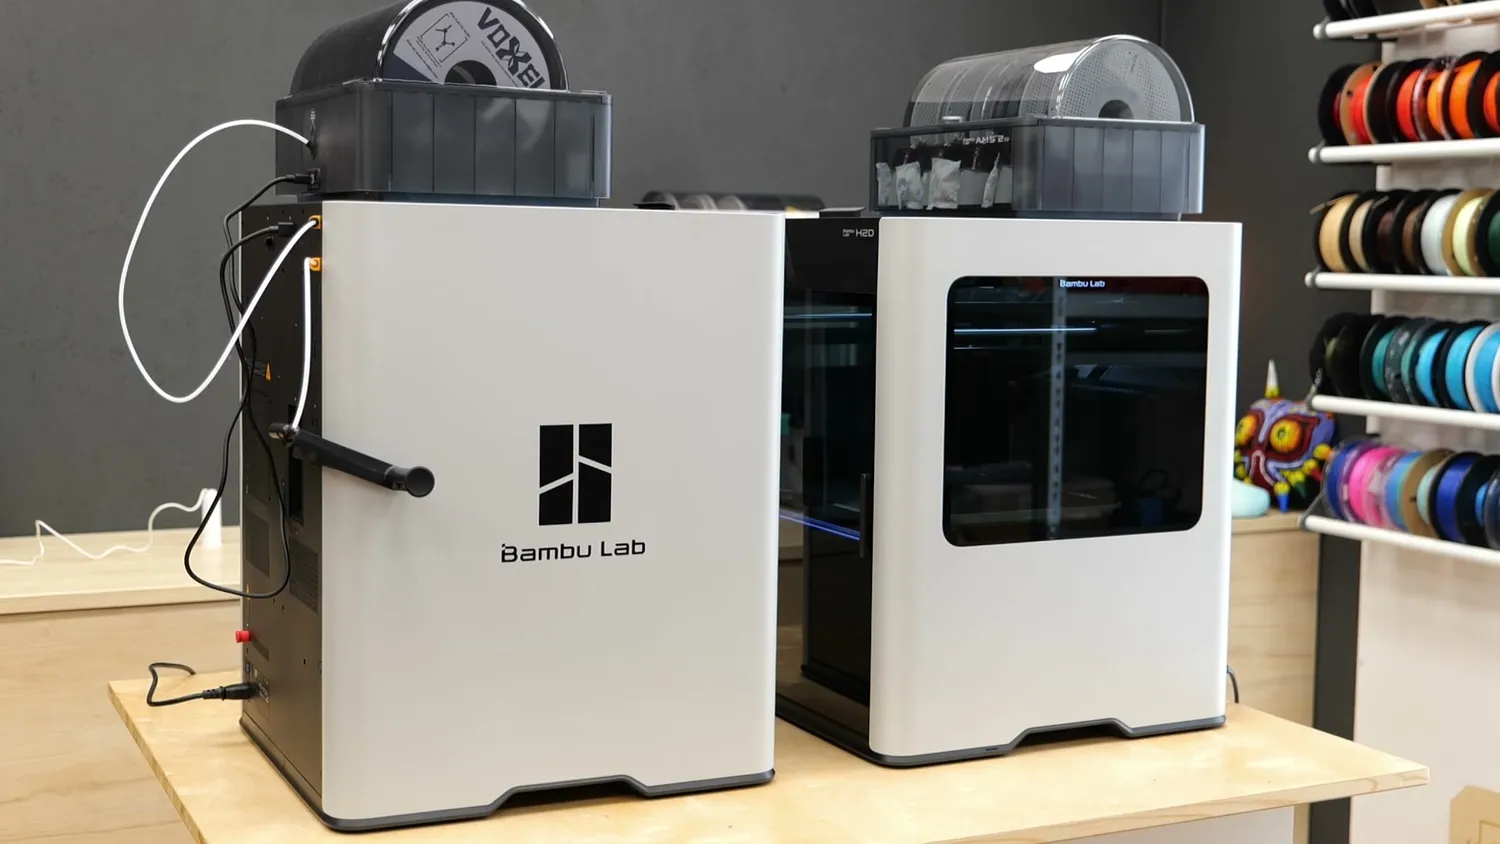
The H2S no longer has side windows
The new single-nozzle printhead
So yes, the printhead is really what sets the two big Bambu Lab printers apart, and it’s the reason for the “S” in H2S. The “S” stands for Single because Bambu Lab dropped the dual-nozzle system from the H2D in favor of a much simpler single-nozzle extruder.
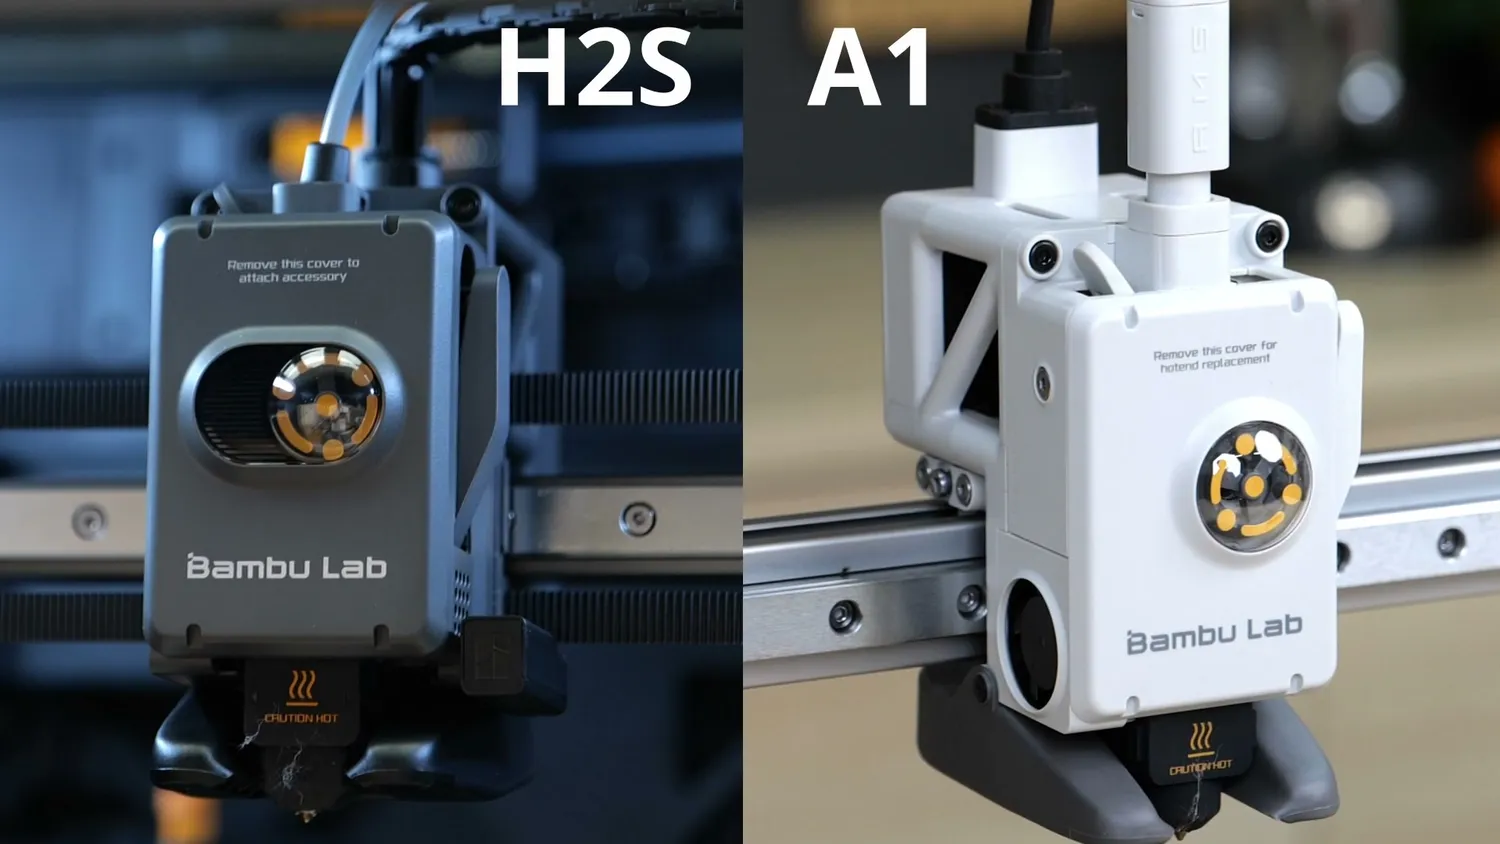
(left) the new H2S toolhead, (right) the one from the A1
At first glance, the new toolhead might look familiar if you’ve seen or owned one of the A-series printers. But under the hood, it’s almost completely different. It now uses a high-torque servomotor for the extruder, which gives the printer tons of feedback data to calibrate flow, improve reliability, and even warn you about clogs or jams.
The nozzle swap procedure is the same as on the A1 and H2D: remove the silicone sock, release a clip, and tilt the hotend out and everything in reverse to install a new one.
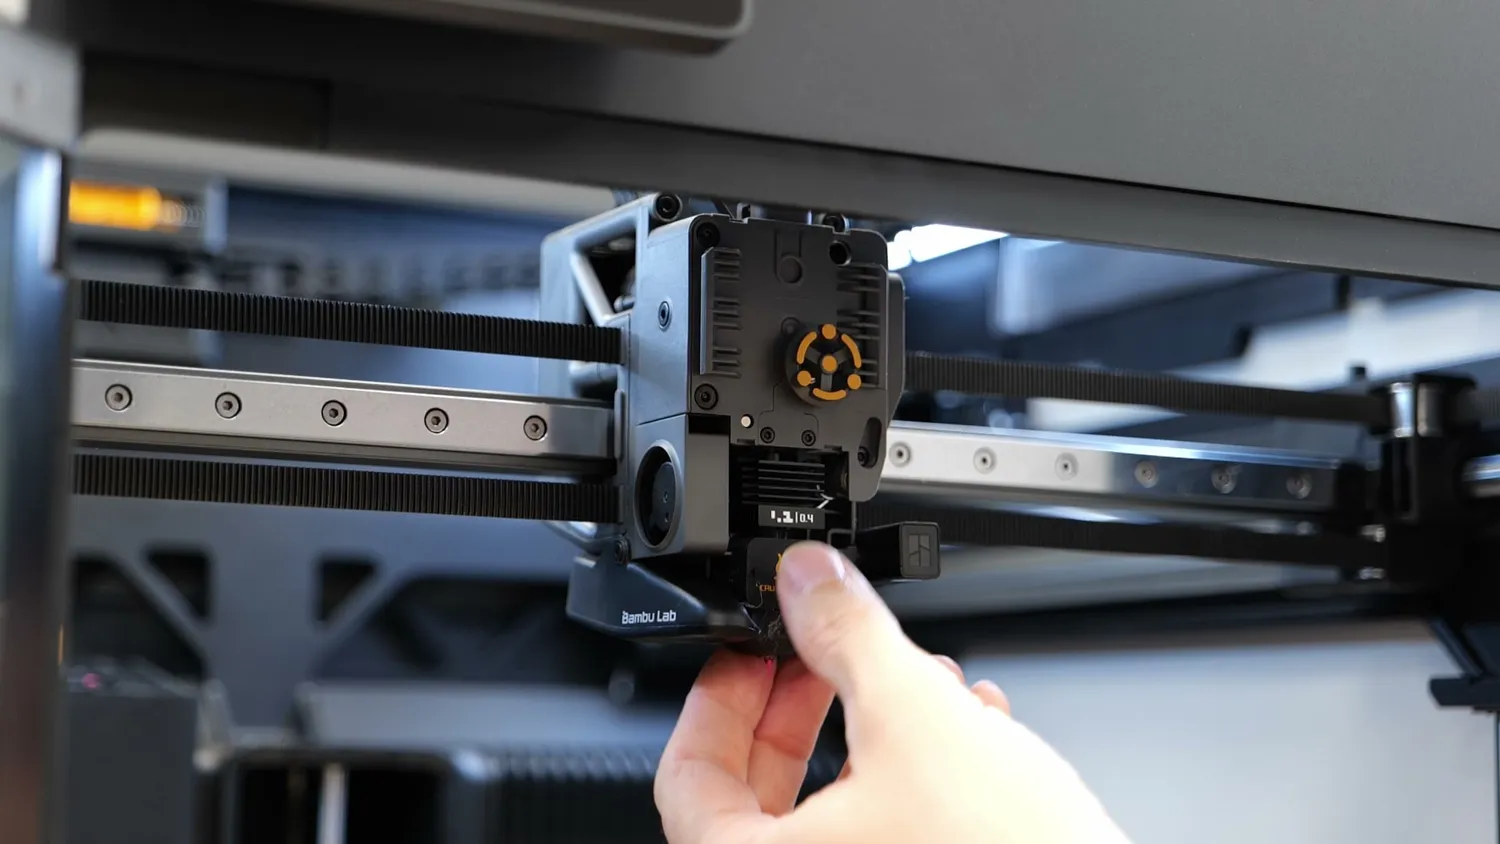
Releasing the hotend for a nozzle swap
Another positive change with the new extruder seems to be the capability of printing flexibles. It seems that the feeder gears engage very well with even very floppy materials, and printing this test 3DBenchy in 30D TPU was not a problem at all, something I couldn’t do on the H2D.
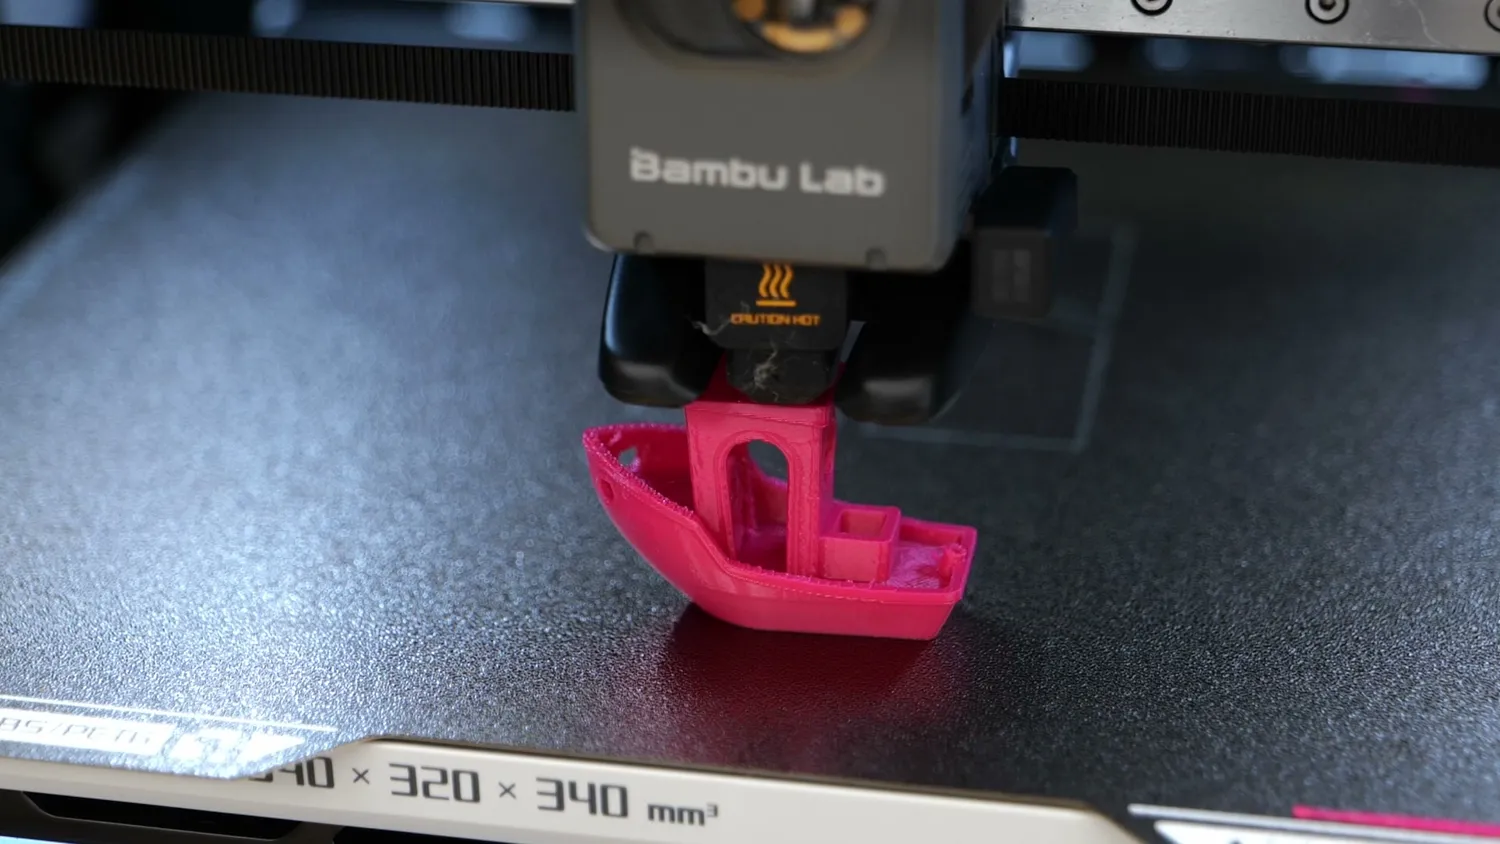
A 3DBenchy in 30D TPU, printed without a single problem
Lasers, accessories and the missing nozzle camera
The toolhead also keeps the mounting rail from its bigger brother, so you can attach accessories. Whether those are included depends on if and which combo you buy. The unit I’m testing here is just the printer with an AMS, which is why the windows are clear. If you go for the laser combo (or upgrade later), you’ll not only get the 10W laser and the drag knife but also the green laser-safety windows, which in my opinion kind of spoil the clean look.
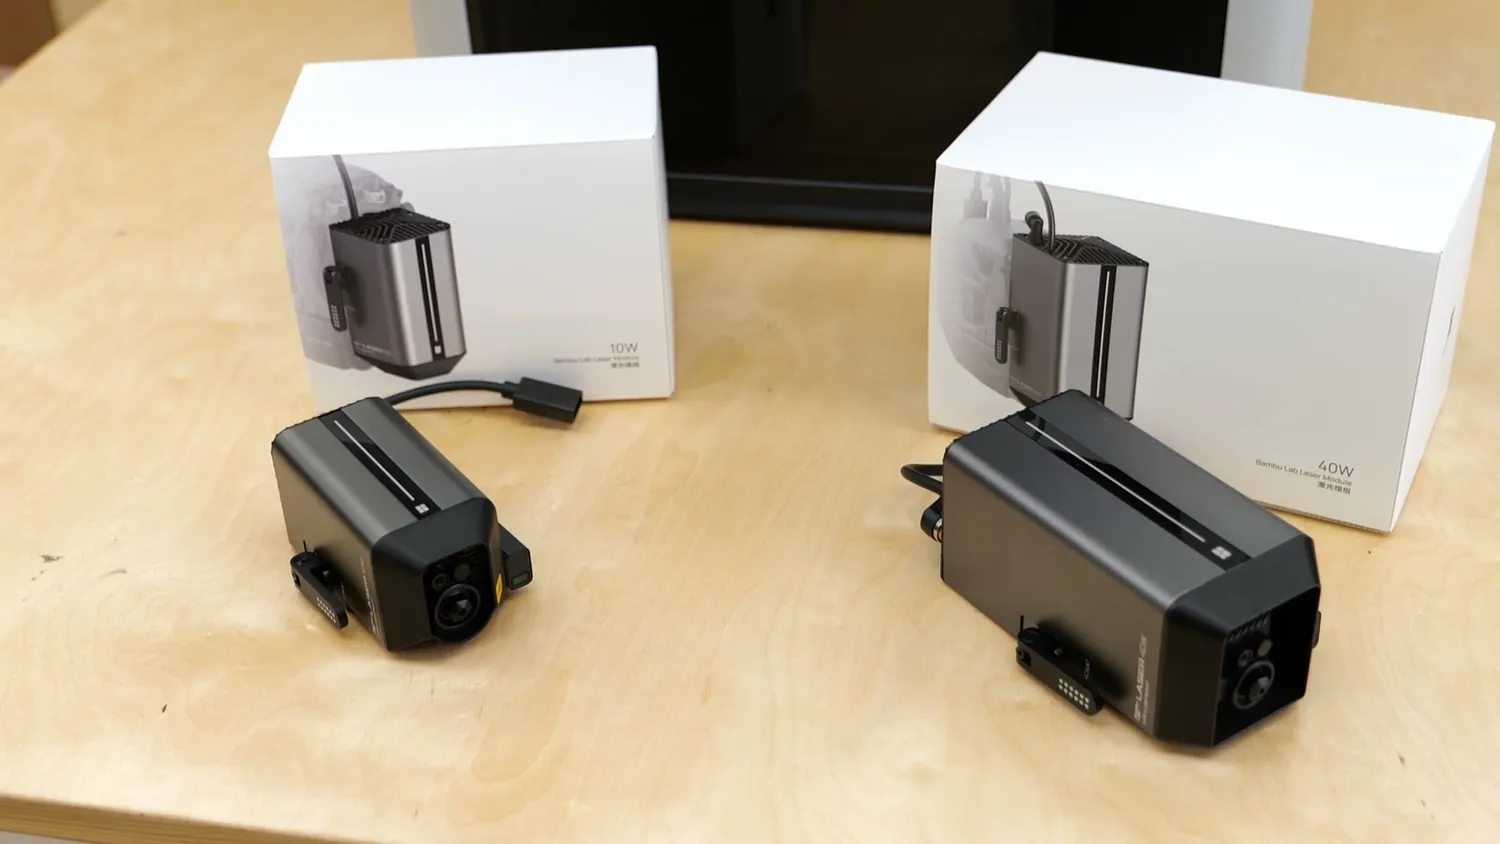
(left) the 10 W laser module, (right) the 40 W one
Speaking of lasers, the H2D supported both 10 W and 40 W modules, but the H2S only works with the 10 W version. That’s probably more about product differentiation than technical limitations. And if you really needed a high-power laser, I’d anyways recommend buying a dedicated laser cutter before spending $1,300 on the 40 W upgrade.
Back to the printhead. There’s another small but important difference: the H2S no longer has a nozzle camera. You couldn’t view that camera during printing, but it was used to detect residue on the hotend and warn of a potential failure and that’s unfortunately missing. The H2S still has the build-chamber camera, which handles print-failure detection, and already saved me from a real mess several times, either if my supports failed or I accidentally tried to print PETG onto a PLA part. Sometimes it can be a bit oversensitive but you can tweak that sensitivity in the settings. There’s also still the downward-facing toolhead camera for detecting the build plate and calibrating the motion system, especially if you use the optional Vision Encoder plate*.
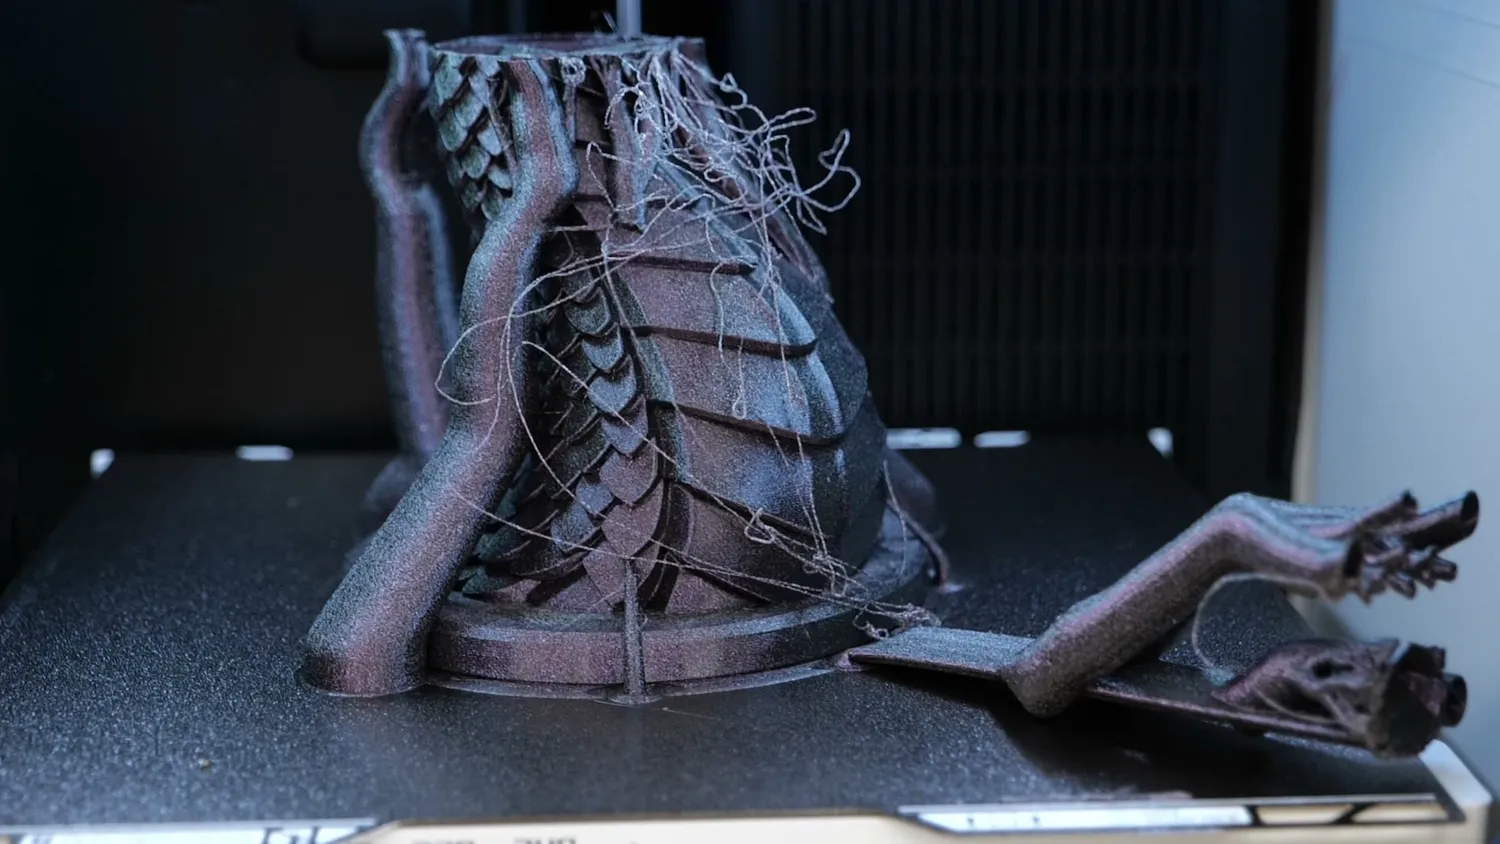
The kind of mess the chamber camera catches for me
A lighter head and a bit more speed
Aside from that, the H2S toolhead uses a lot more plastic than the more expensive H2D. Done right, that’s not a problem. It reduces weight, which helps the head accelerate and decelerate faster, potentially improving print speed.
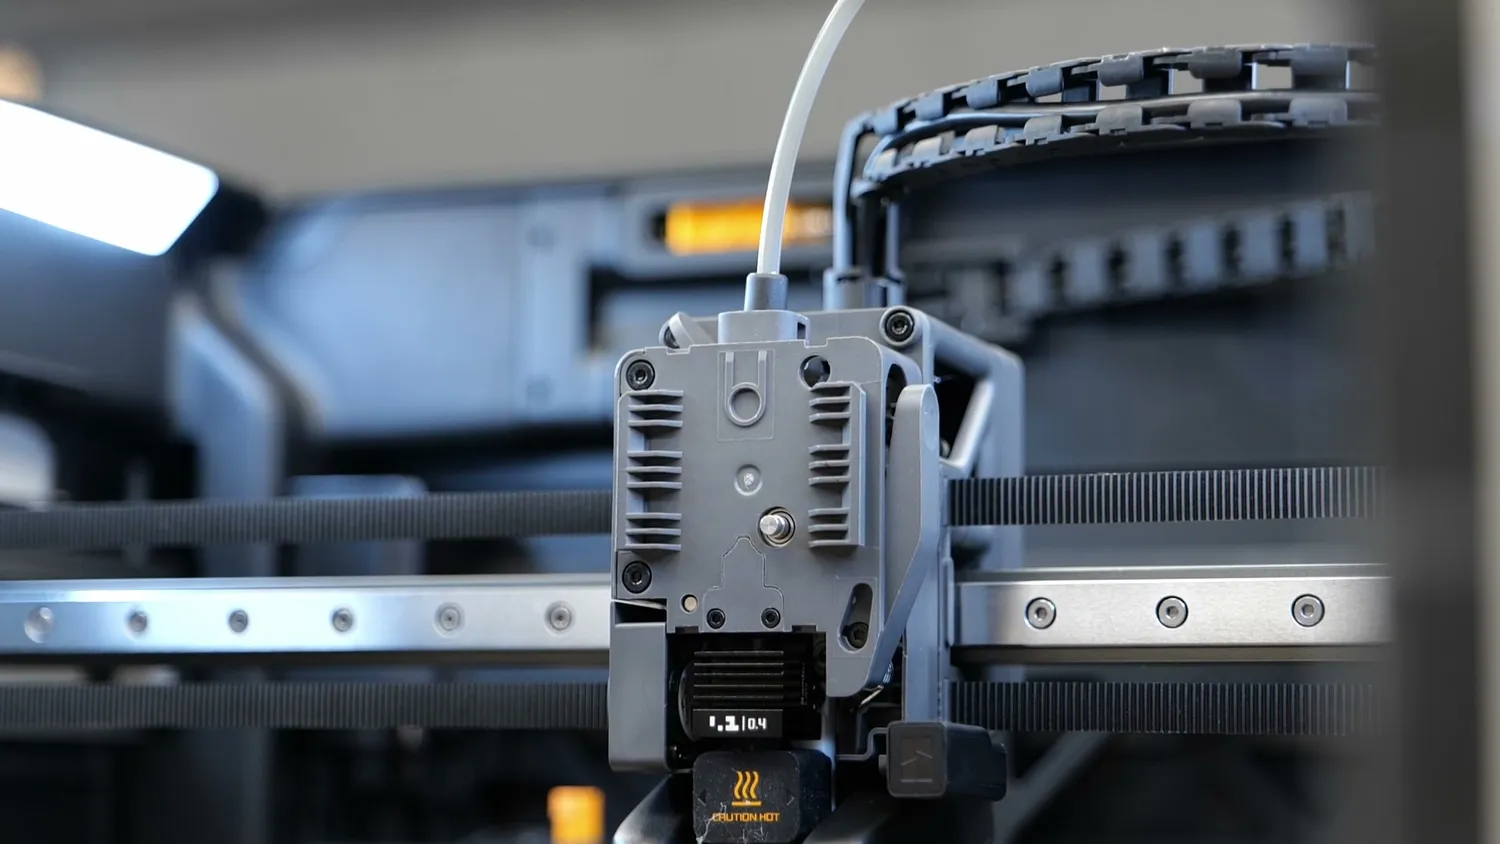
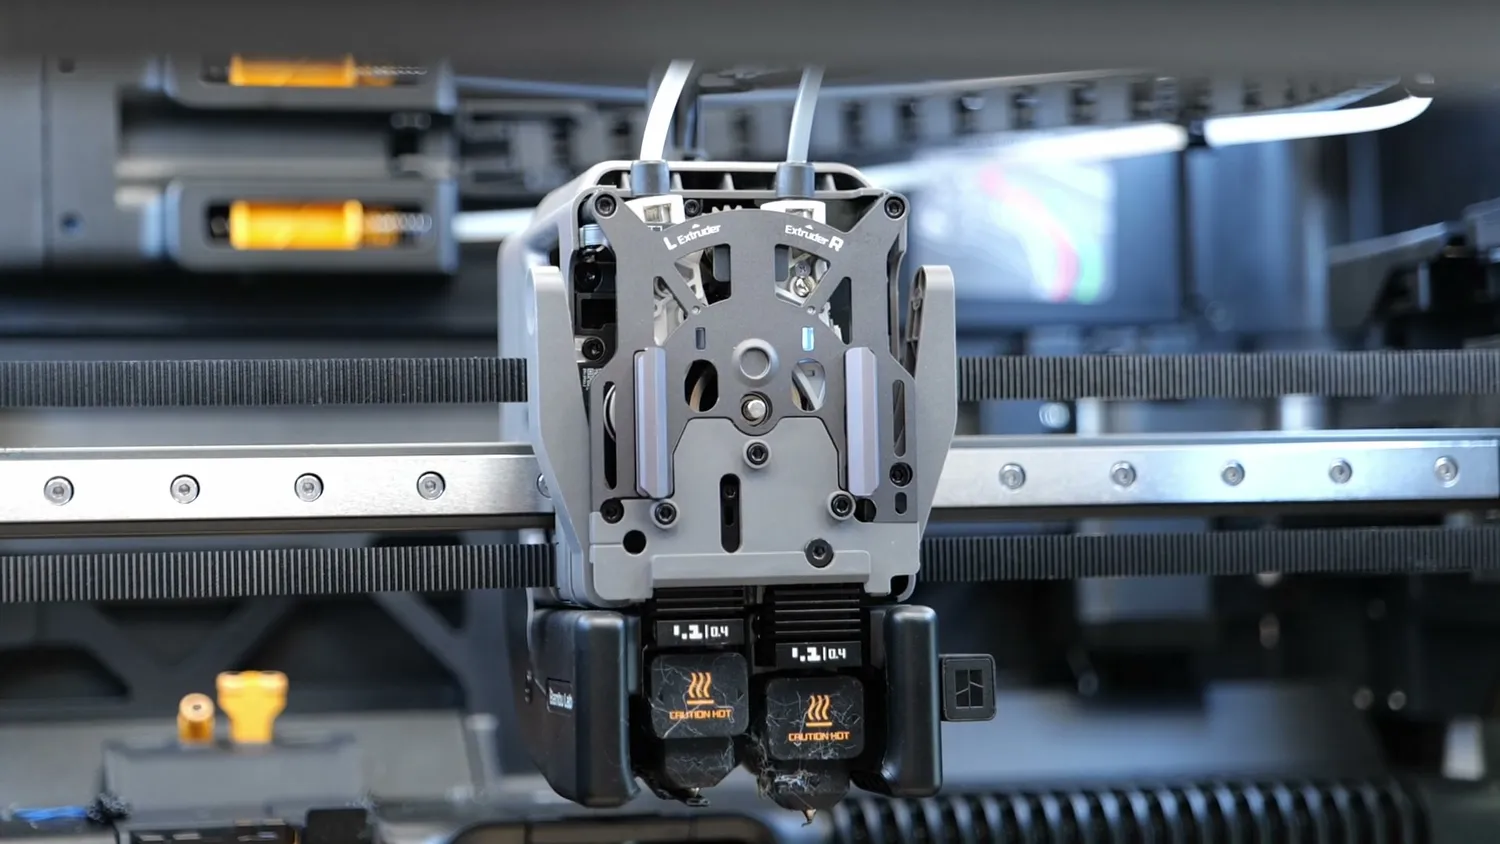
Thanks to the lighter printhead, it is faster than the dual-nozzle version. Not by a huge margin, but the default print profiles increase normal accelerations from 8,000 to 10,000 mm/s², which can shave off a few minutes on longer, more detailed prints.
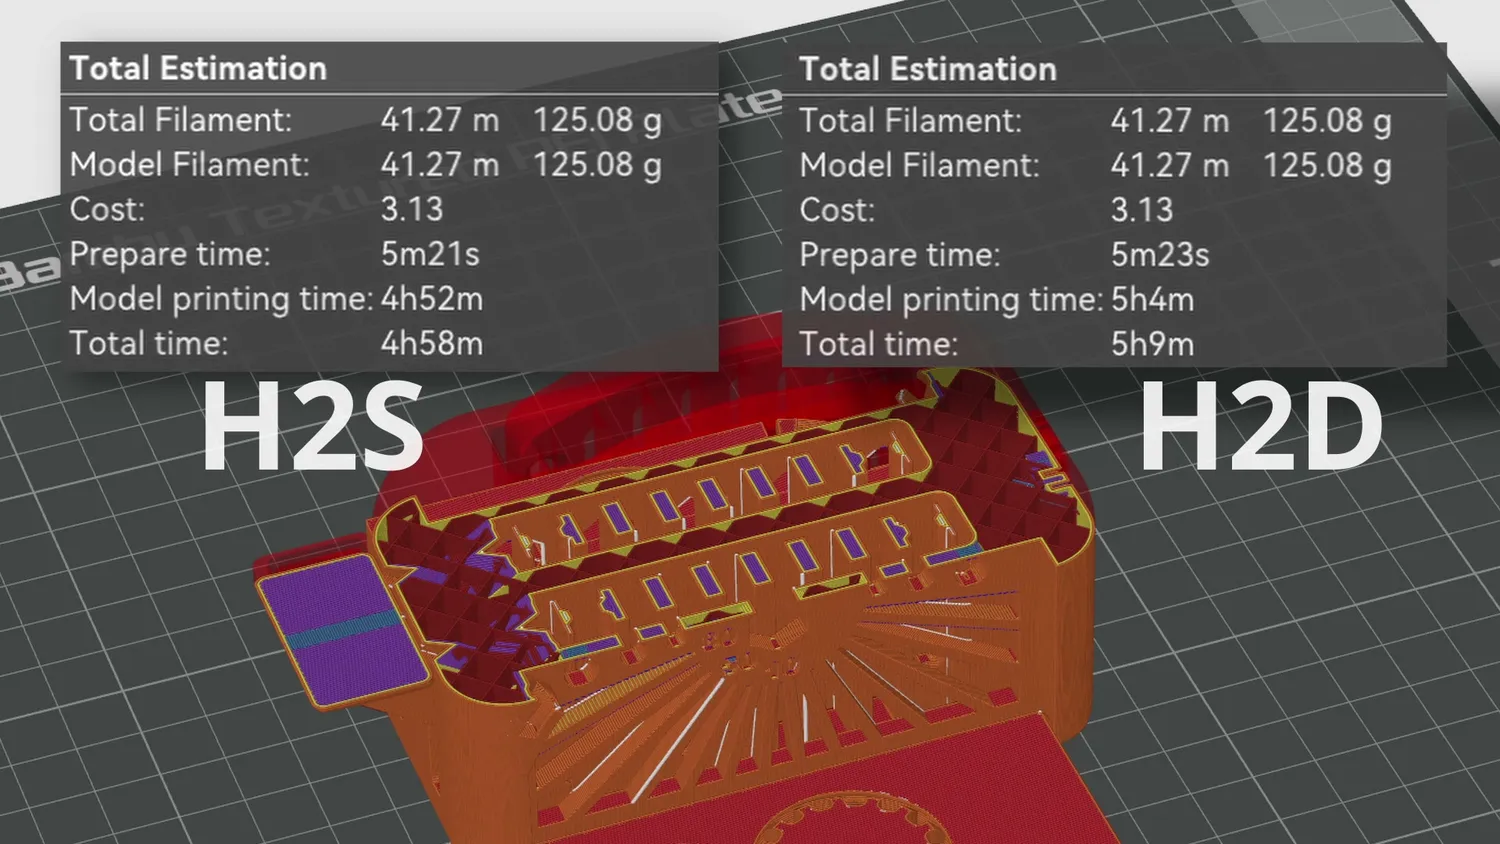
The same print: 4h58m on the H2S, 5h09m on the H2D
Its speed and acceleration always make me smile when I stand in front of the machine and watch and especially listen to it print. First, the printer itself is pleasantly quiet, especially when you close the front door. But some of the remaining noise is just satisfying. The fast travel moves remind me a lot of the Swiss-made pick-and-place machine we have here in the studio. The H2S uses a linear rail on X and guide rods on Y, and the sound they make without squeaking or rattling makes the machine appear simply premium, and I wonder what would happen if I put my finger in there.
Print quality and test prints
So let’s take a look at the actual prints from the H2S. Overall, they turned out very well, and I have very few complaints. The few issues I encountered were entirely my fault, such as supports that were too thin or selecting the wrong filament type during setup.
The 3D Benchy looks nearly perfect, with smooth surfaces, no VFAs, and barely any ringing. The overhangs appear good, and the top layers are perfectly extruded. The only noticeable artefacts are the shiny and matte surface textures caused by changes in print speeds.
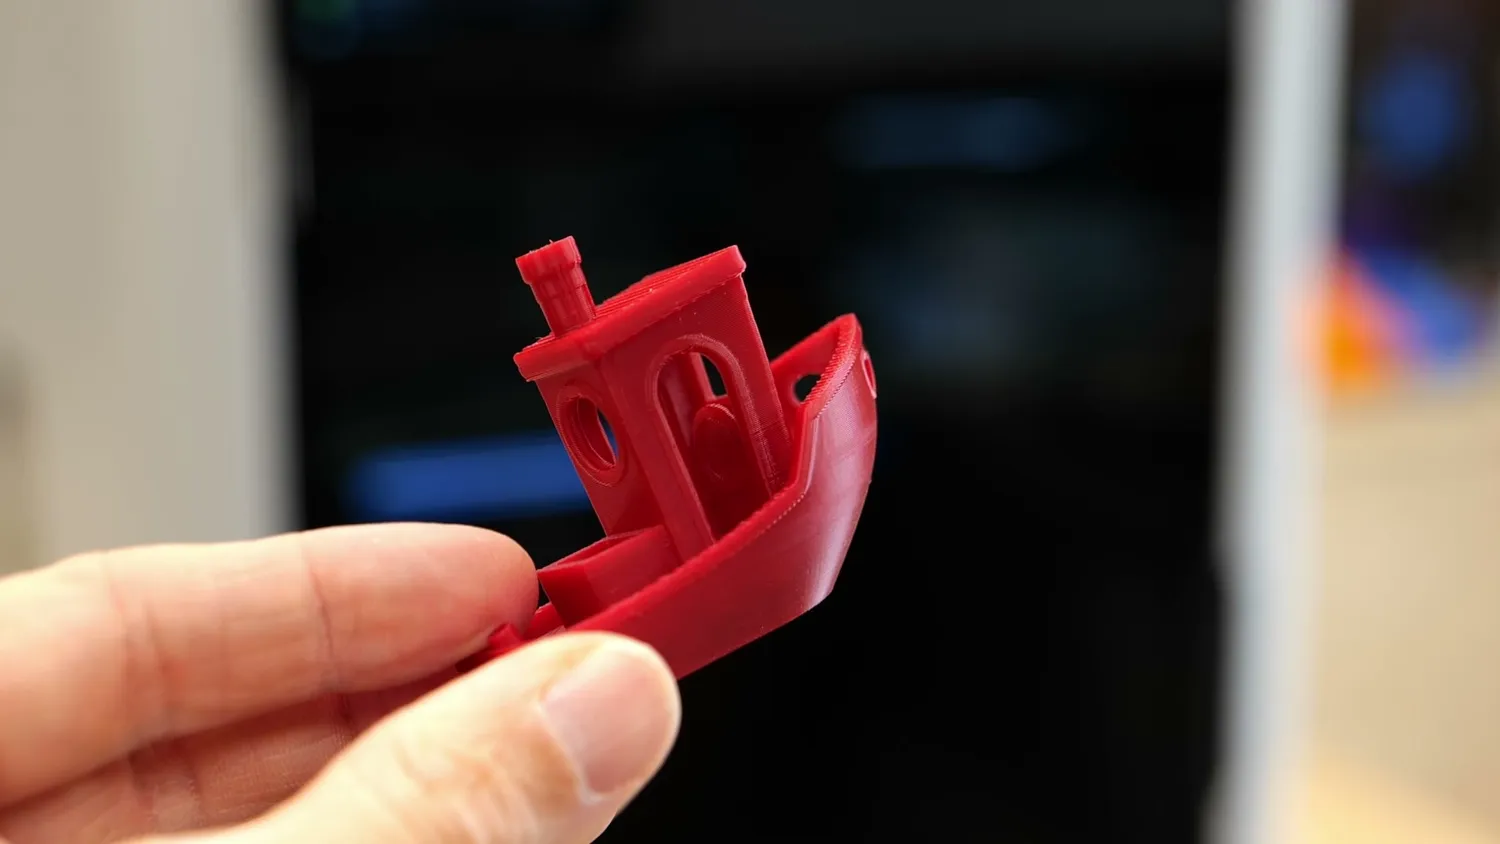
Smooth surfaces, no VFAs and barely any ringing
Results from my mini-me are very similar- just look at that crotch.
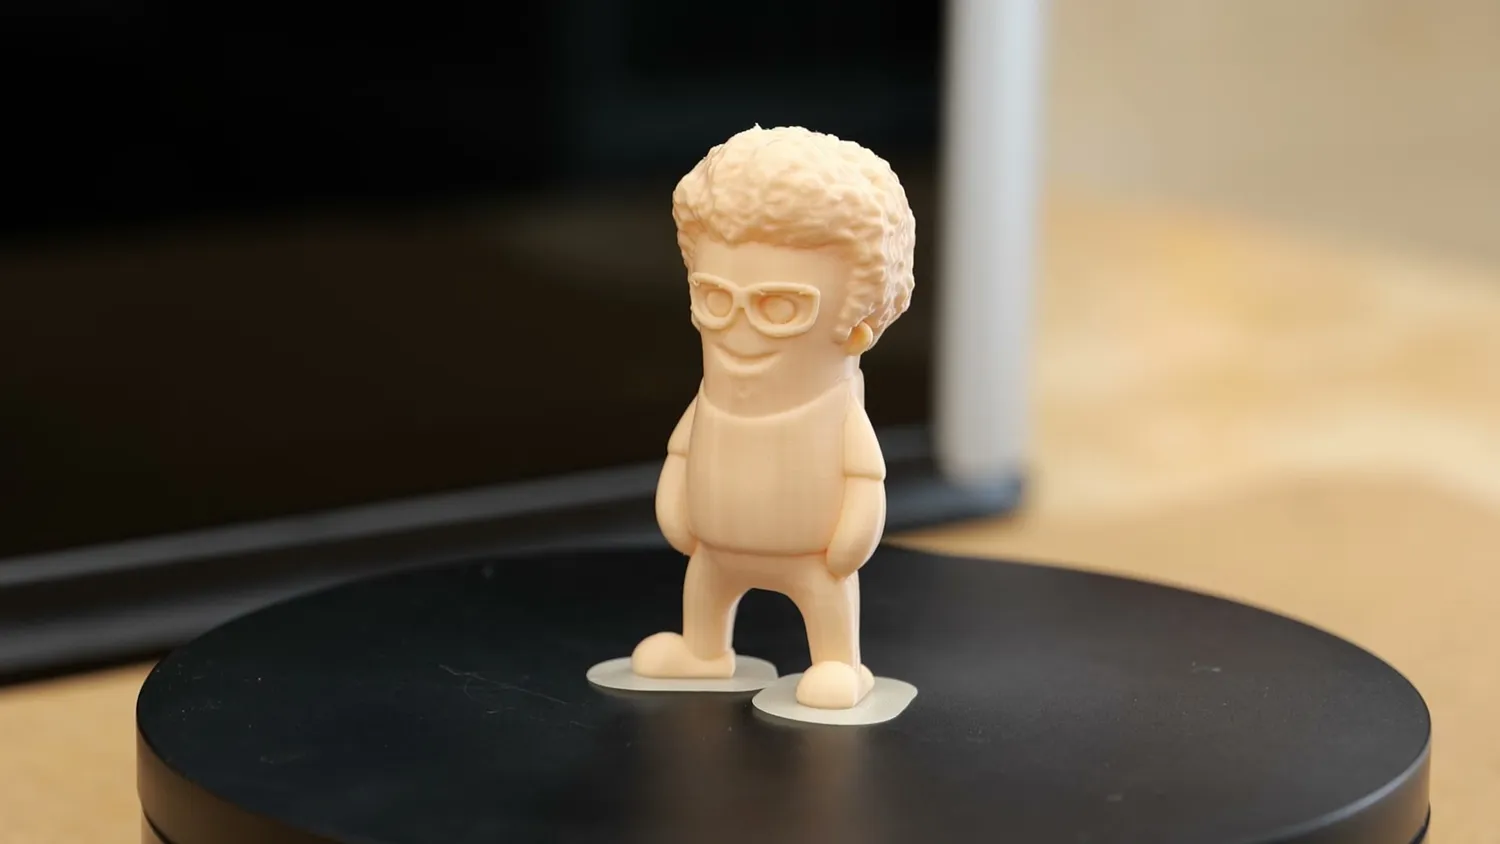
Mini Stefan by Wekster
The 3D Maker Noobs tolerance test printed beautifully, with all parts freely spinning down to 0.1 mm.
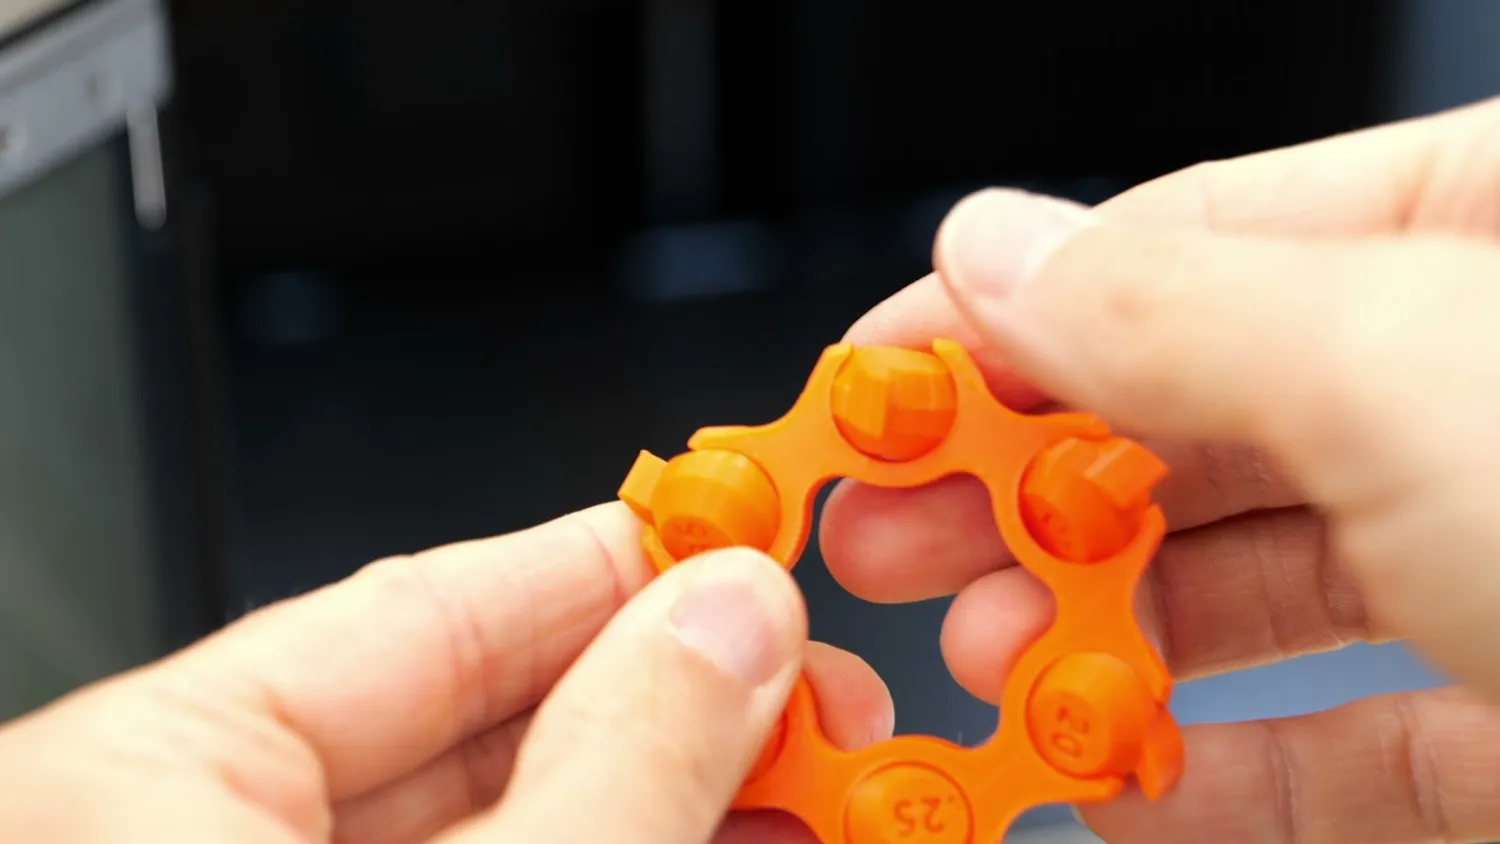
Every part spun freely down to 0.1 mm
The KSR FDM test looks okay. All the pins were loose, and the overhangs and bridges are well done, but I noticed some cooling problems, and I even printed this with Bambu’s own filament and profile to be sure I didn’t mess up. The spikes printed also well initially, but eventually became quite stringy- something I also observed on the H2D. This may be due to the longer melt zone in the hotend, which tends to ooze more.
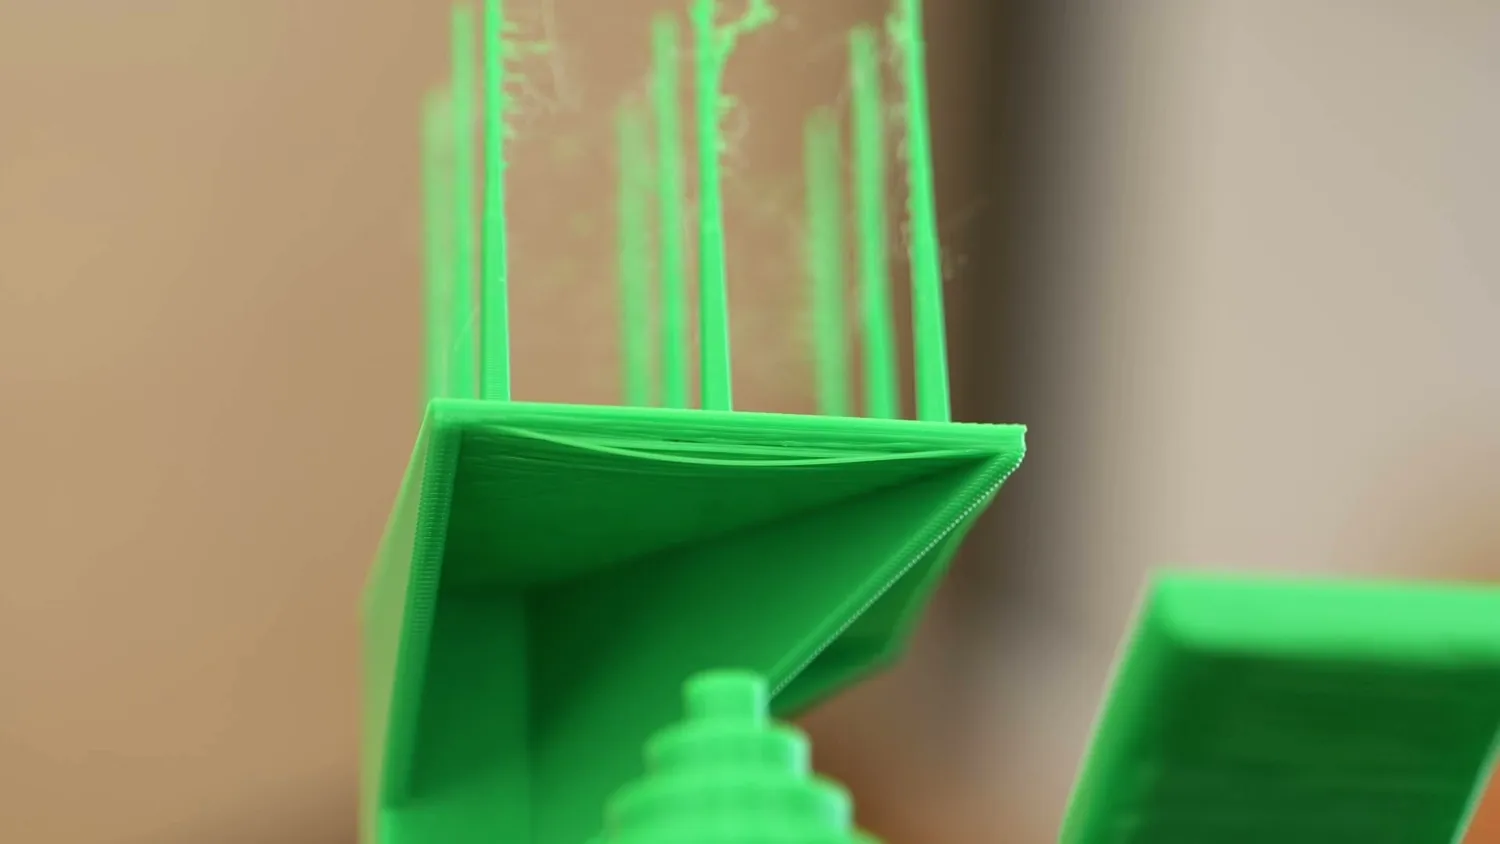
The spikes started well but eventually got stringy
Clockspring’s torture toaster also printed very well, with only the 0.1 mm tolerance test remaining stuck. Still I noticed that the small 70 and 80° overhangs didn’t look as good, especially compared to the ones I printed on the H2D. This is probably because the less powerful fan on the new tool head slightly compromises cooling performance. Something to keep in mind.
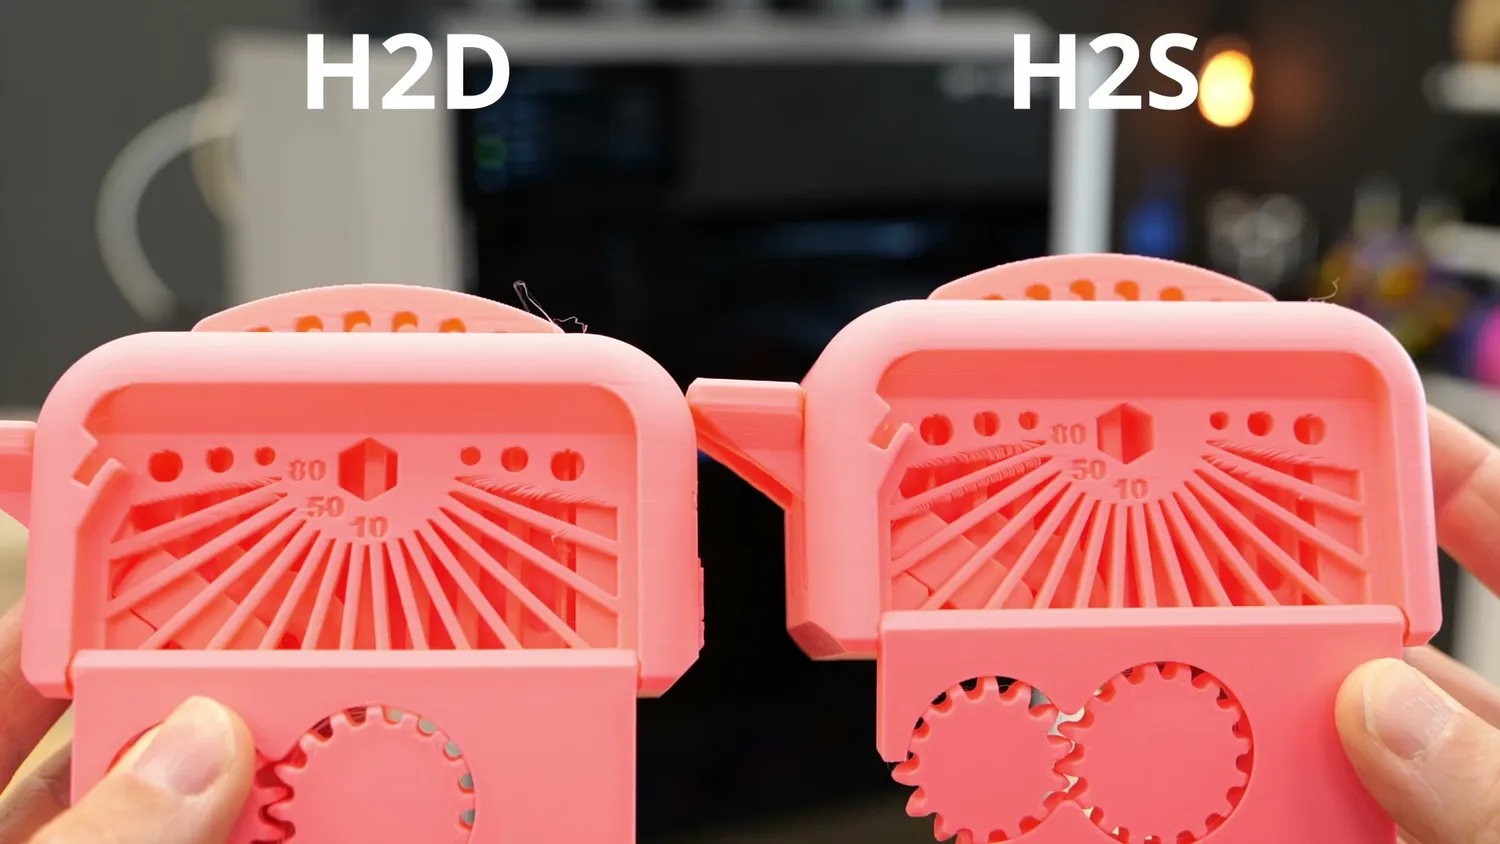
(left) H2D, (right) H2S. Look at the small overhangs
I printed a tower over the entire print height to check for Z wobble or any other inconsistencies, but I didn’t find any.
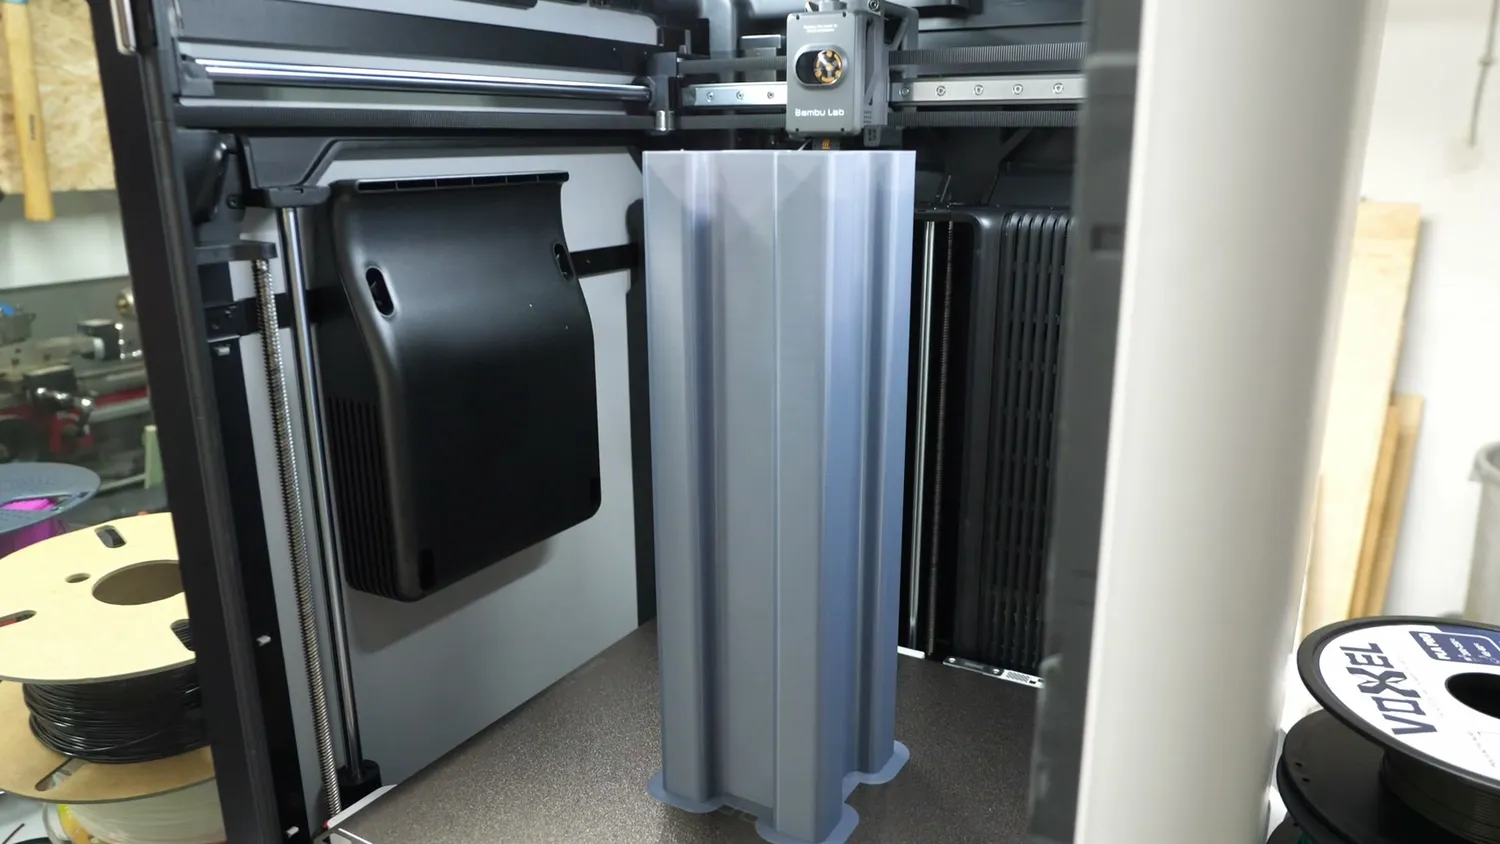
A tower over the entire print height, without any Z wobble
The highlight was definitely the Master Chief helmet, which took nearly 2 days to print and used about a kilogram of material, with substantial support. The final result was incredible and really demonstrates what this machine can do and is good for. I scaled it down to 80%, but it still fits my head.
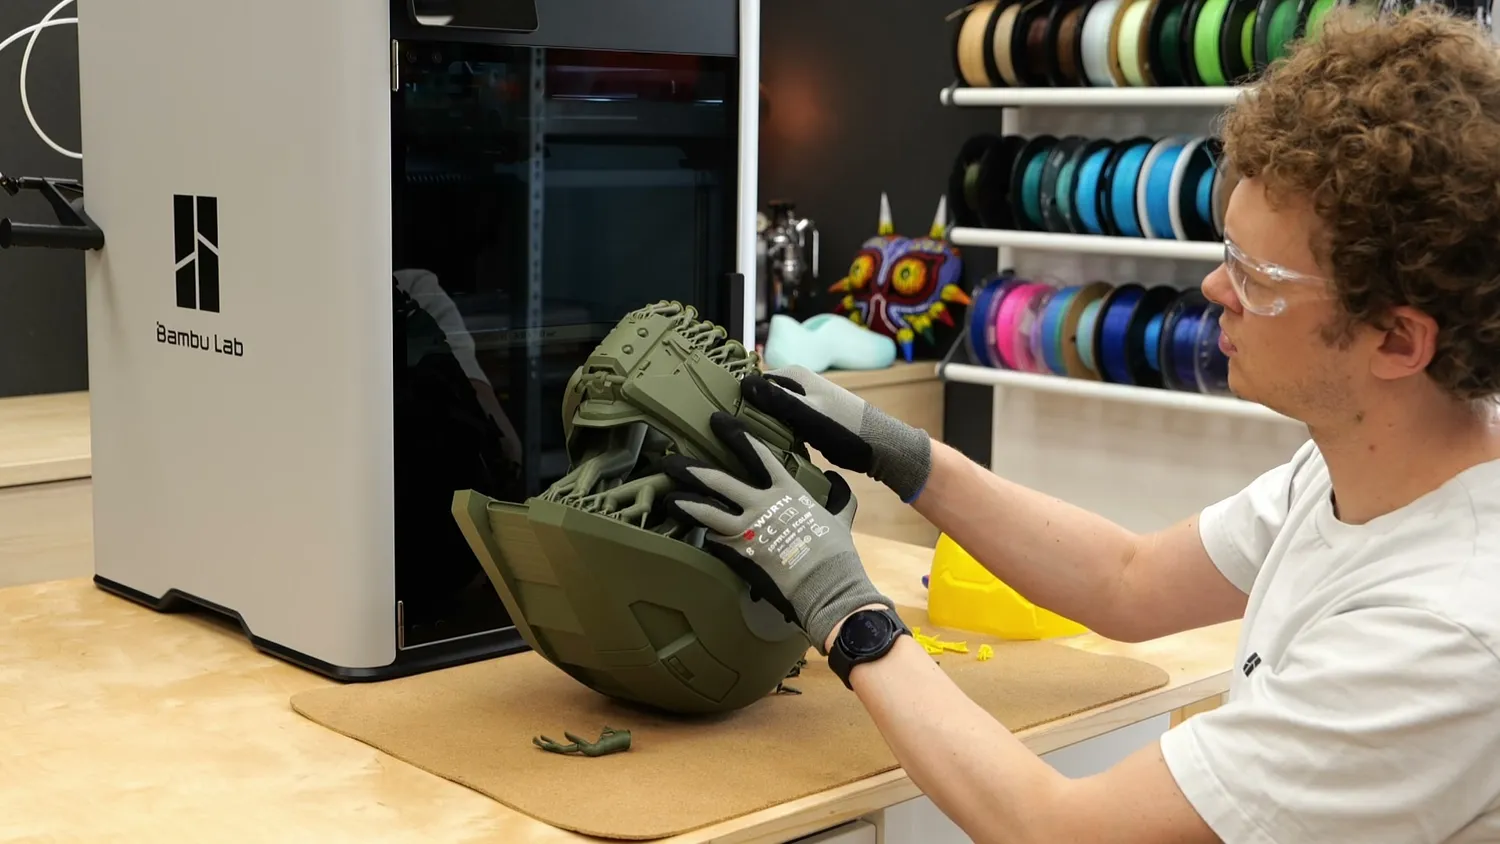
Nearly 2 days of printing and about a kilogram of material
Still keep in mind, larger machines tend to have higher power consumption because of the bigger heated bed. I printed a 3DBenchy, and the H2S used over 60% more energy than the same print on the X1.
The multi-color highlight was the Earthworm Jim figurine by Wekster, printed in five colors with an AMS 2 Pro and the AMS HT. The print took 37 hours and generated a lot of waste, but the final result looks fantastic! The same applies to the dual-color articulated Panda.
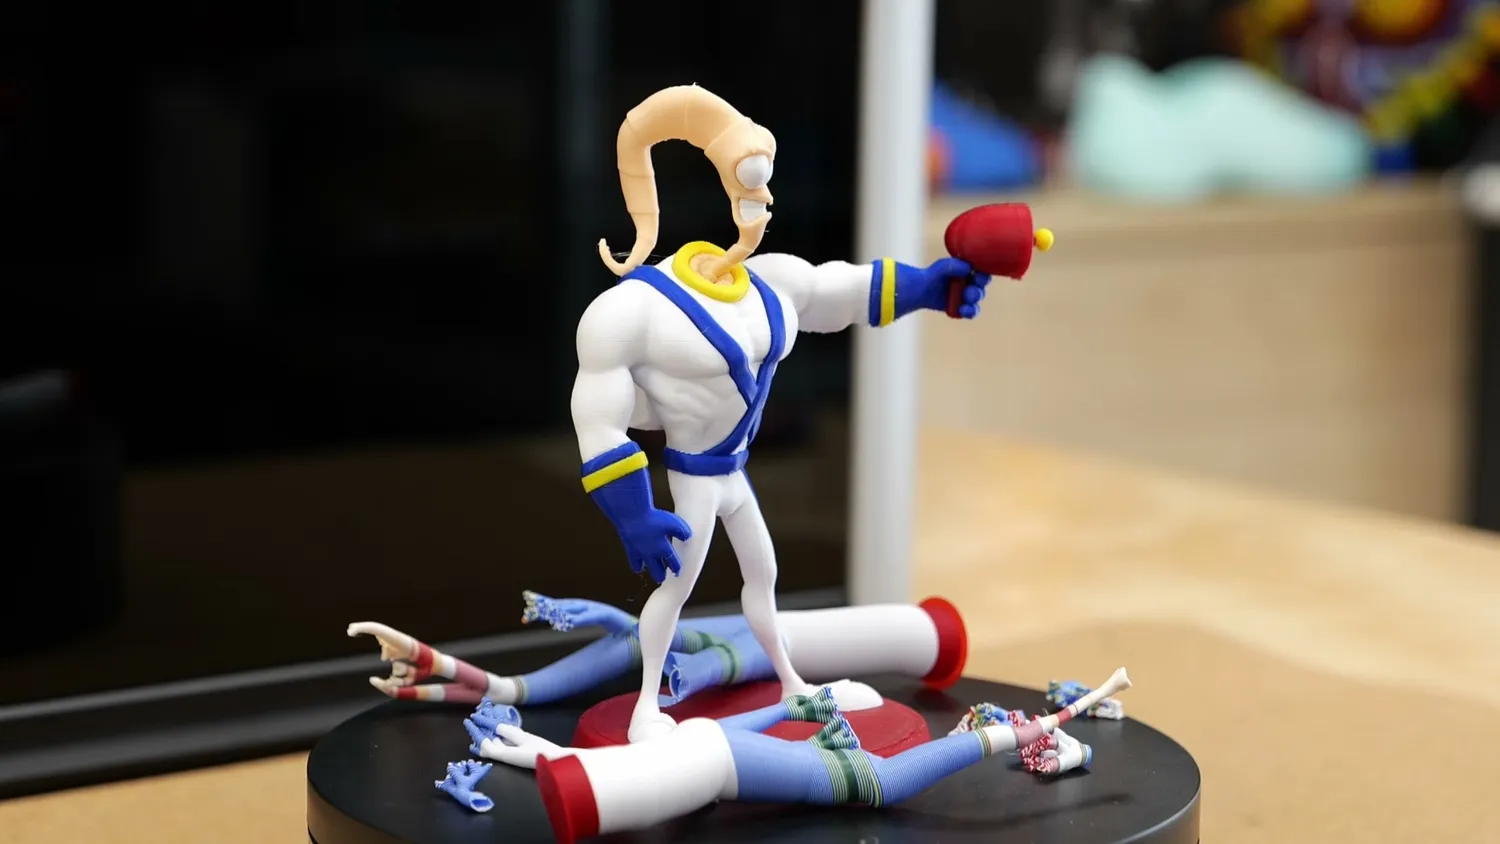
37 hours and a lot of waste, but a fantastic result
Most of these prints were PLA, but I also ran PETG and even ASA parts for my Positron V3 build, and they all came out great, with no warping (also thanks to the heated chamber) at flawless quality.
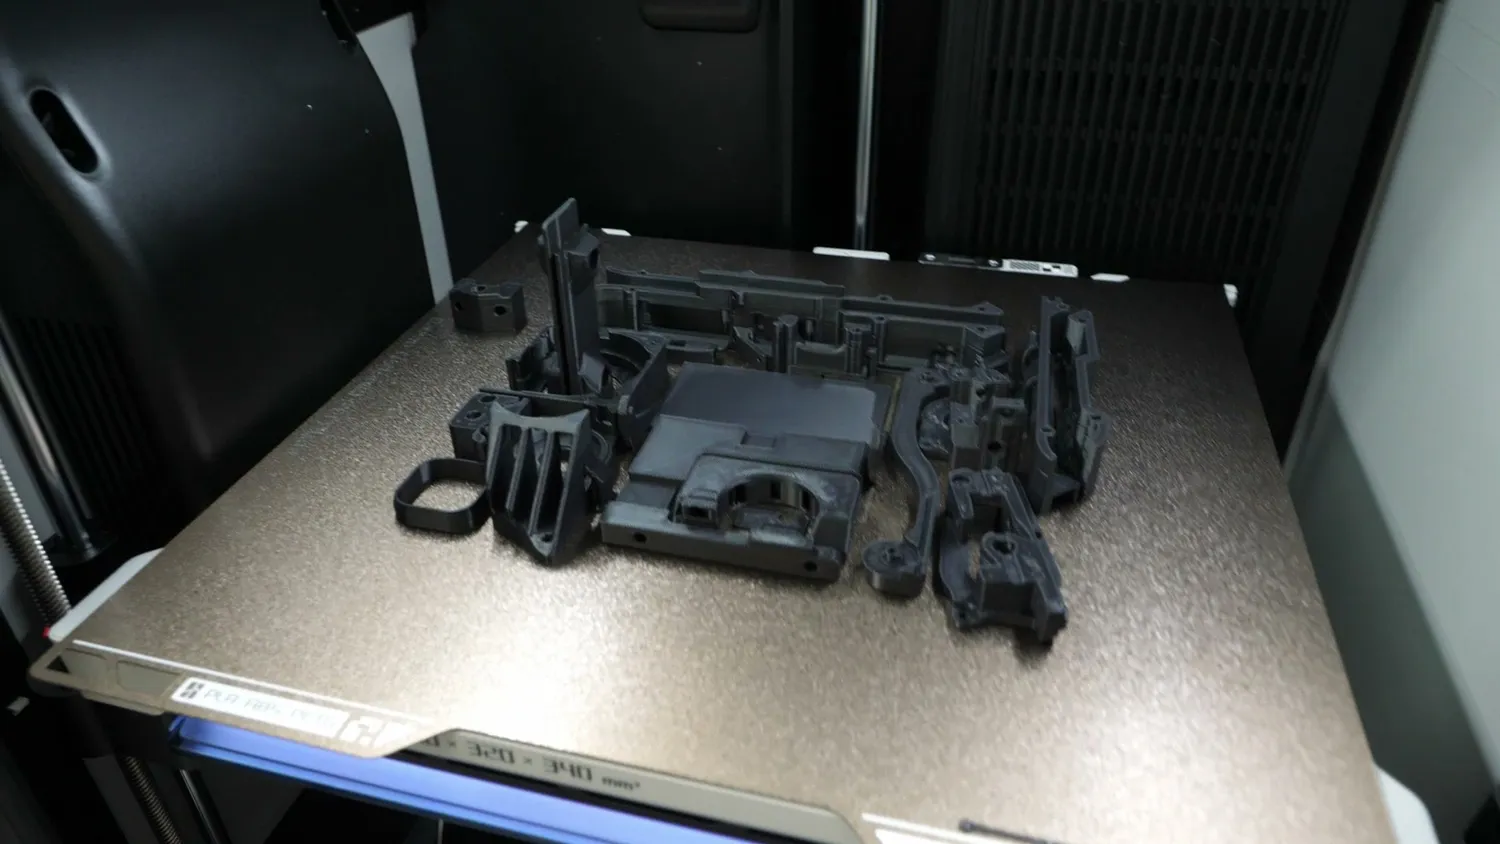
ASA parts for my Positron V3 build, without any warping
Reliability after 200 hours
In terms of reliability, I’ve already logged over 200 hours of printing on the H2S, and combined around 1,000 hours on my two H2Ds here in the studio. And even though the performance of the H2D doesn’t tell us a lot about the reliability of the new toolhead on the H2S, due to the same motion system and electronics, it still tells me a lot about the overall reliability of the H2 series. And they have certainly been the fire-and-forget machine you expect at that price point from BambuLab. One of the H2Ds has, for example, done serial production of Robin’s Pixelpump with no issues at all. I’ve been throwing tons of different materials and tasks at the machines, and most errors were honestly user-related.
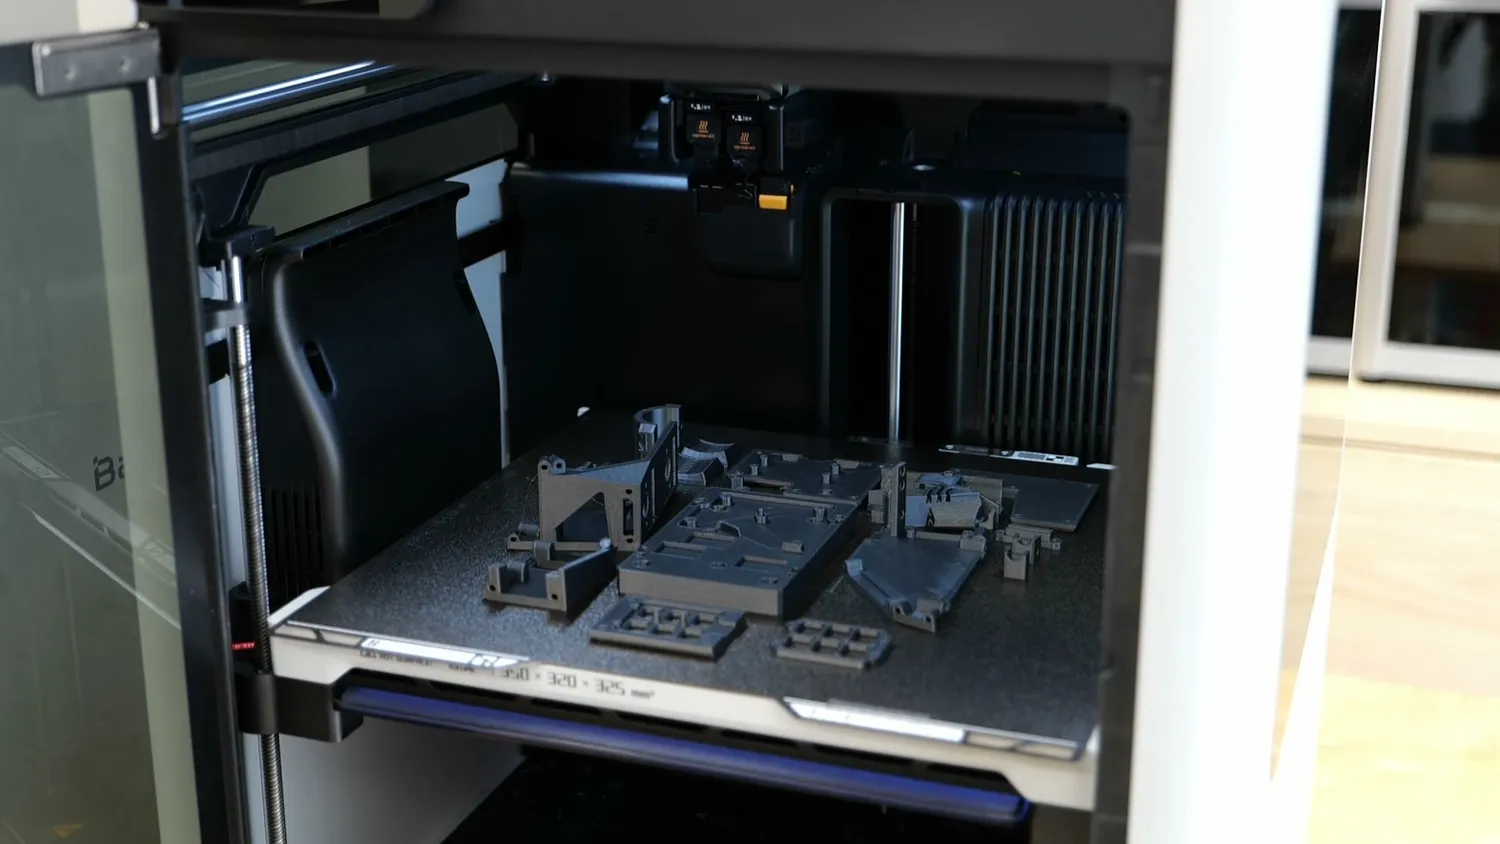
Serial production of Robin’s Pixelpump
What I don’t like
There are still a few minor things that annoy me. First of all, the sheer size and weight of the machine make it a pain to move around, but that’s something you just have to expect when you buy a large printer with such a sturdy frame.
The bigger issue for me is filament feeding from the back. Using the AMS is super convenient, and even the side spool holder works great for rolls that don’t fit in the AMS, thanks to the Bowden tube that routes to the back. But when you’re printing with flexibles or very stiff and brittle materials, you’re supposed to feed them directly into the back without any bends. With TPU, you even remove the Bowden tube from the buffer and push the PTFE directly through a hole in the back of the printer. On my desk setup, that’s not too bad, but once the machine is against a wall, feeding filament this way becomes really awkward unless you physically turn the printer, which isn’t easy because of the rubber feet and the weight.
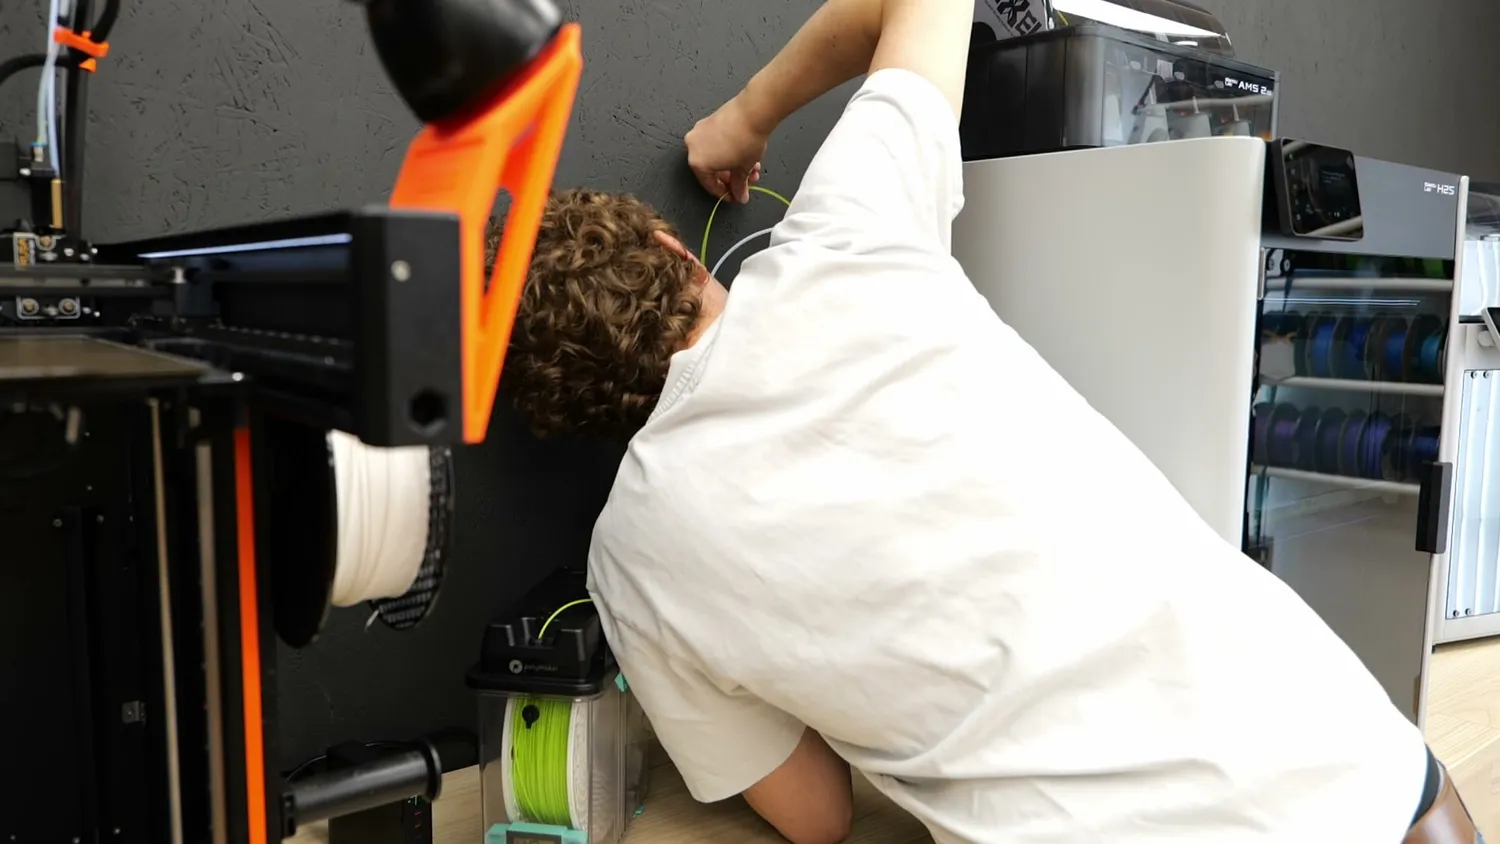
Feeding filament from the back, with the machine against a wall
Another thing that’s not perfect is the heated bed. There is still around 10°C difference between center and corners that can cause worse bed adhesion at the extremities. To their credit, at least they’ve fixed the temperature readings so when you set 100 °C, you now actually get 100 °C at the bed surface. That wasn’t the case on the early H2Ds.
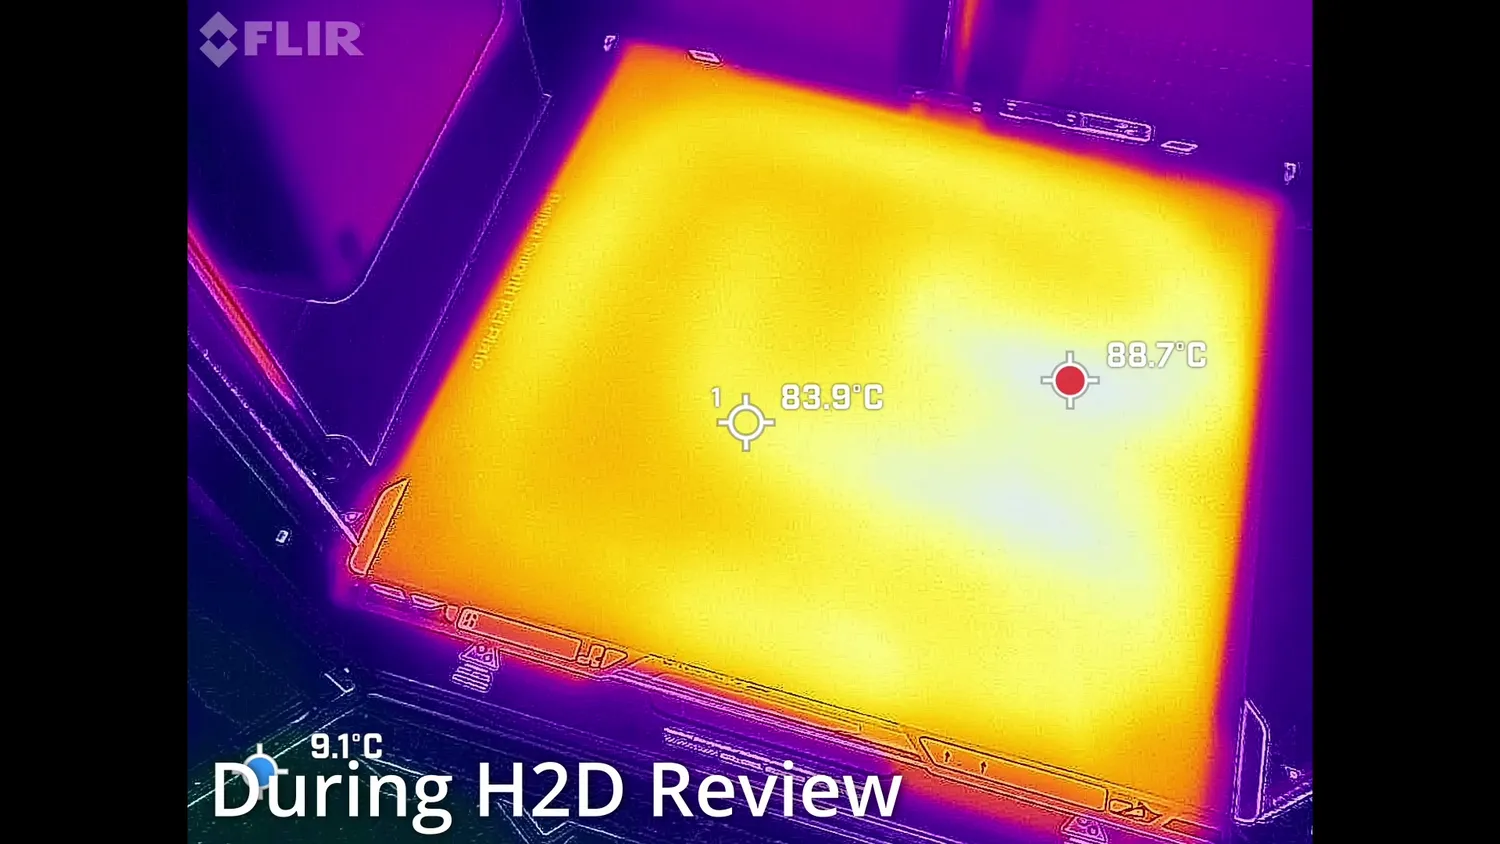
Thermal image of the bed, taken during my H2D review
And finally, something I’d call straight-up false advertising: Bambu Lab claims that when printing low-temperature materials, the exhaust air is filtered through the HEPA and carbon filter. But on both of my H2Ds and also on the H2S, that’s simply not happening. The PLA and PETG fumes are just blown straight out the back. I asked Bambu about this, and they told me it’s planned to be implemented later this year, but for now, it’s just not working.
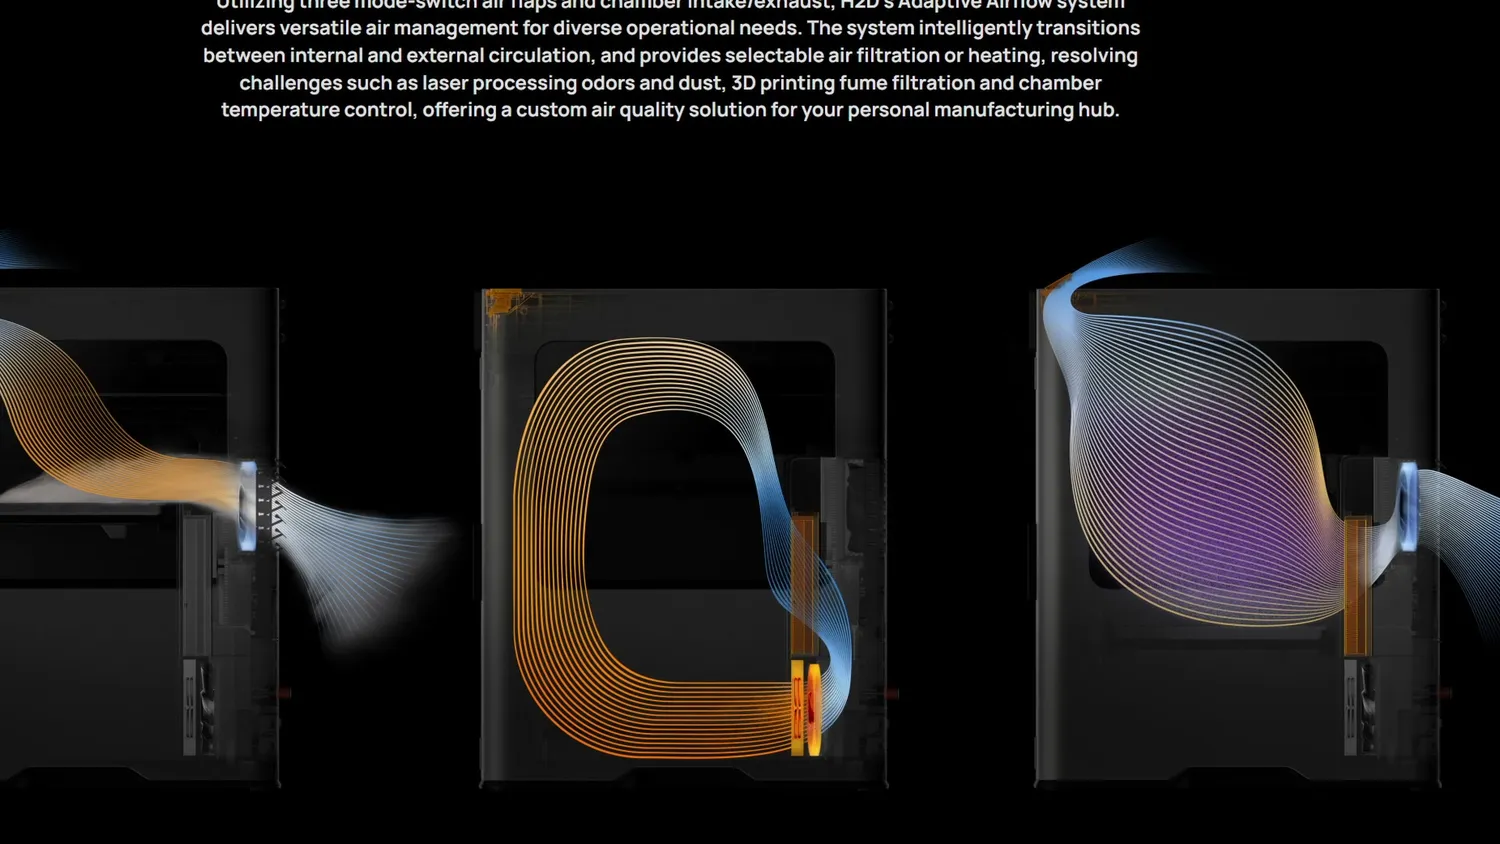
Bambu Lab’s own illustration of the air management
I could go on and list every single detail from my H2D review, but almost everything else is identical between the H2D and H2S. It still reaches 350 °C on the nozzle, 120 °C on the bed, and has an actively heated chamber that can get up to 65 °C, making it suitable for a wide range of technical materials. If you want a deep dive into how the AMS, the laser, or the cutter work, check out my H2D review as well as mpoxDE’s videos on the laser module and the plotter module. They’re in German, but worth watching with the auto-dub.
The Bambu Lab problem
So here’s the real question you need to ask yourself if you’re torn between the H2D and H2S: do you actually need proper multi-material printing? Because the H2S isn’t really designed for that. Instead, it feels more like a second-generation XL version of the X1 even if it’s more than that. The dual-nozzle printhead on the H2D is powerful but overengineered, which drove up both the price and the complexity, and it was more than most Bambu users really wanted if all they needed was a larger printer. I think the $800 lower price of the H2S finally makes this machine appealing to a broad audience that wanted this form factor, but the H2D was just too expensive.
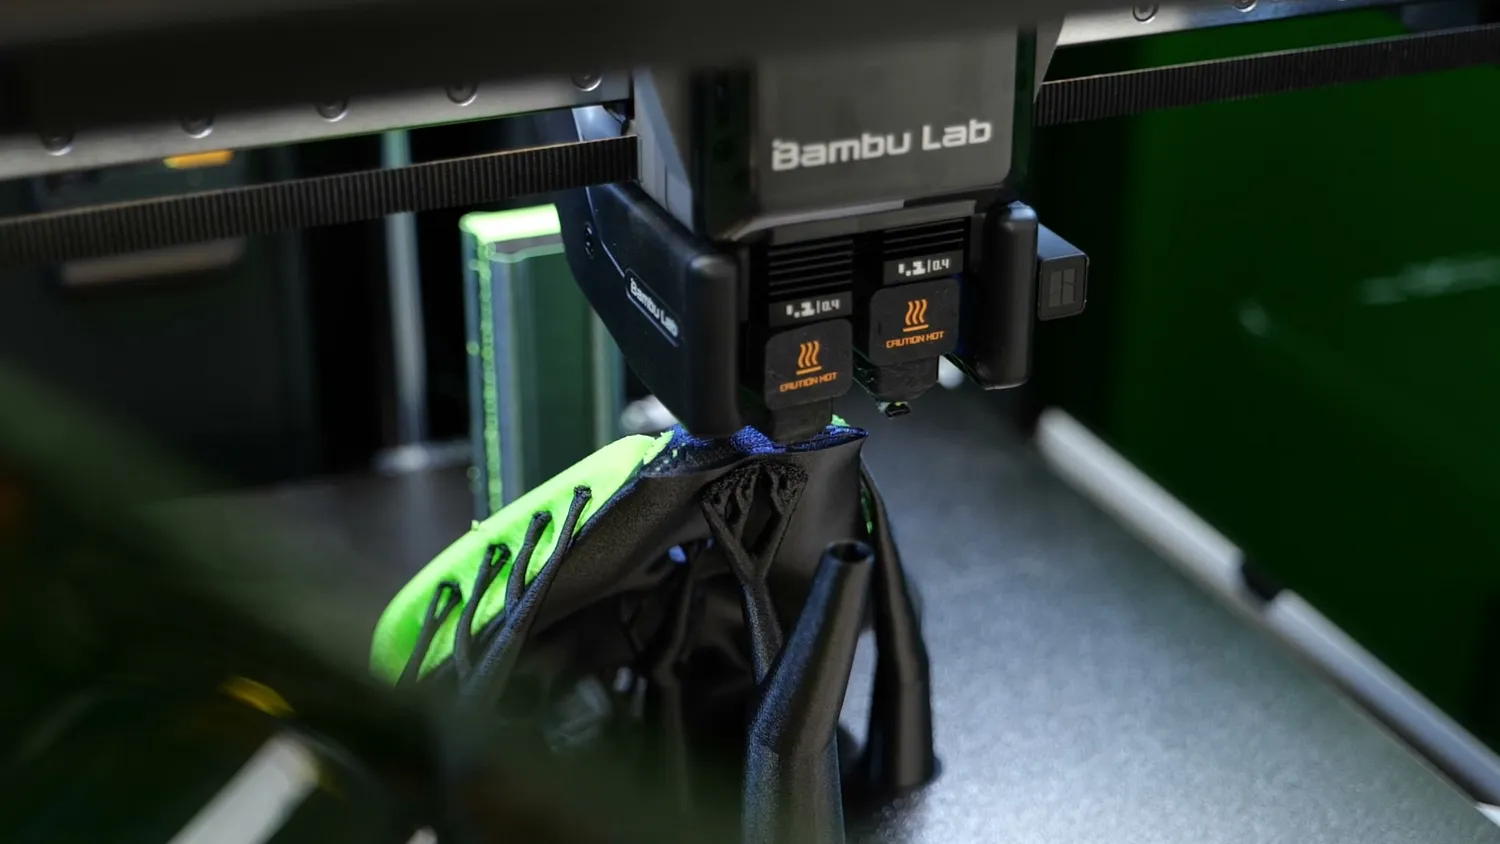
Two nozzles, two materials: what the H2S can’t do
If you were not a fan of Bambu Lab’s policies and their fairly closed ecosystem, the H2S isn’t going to change your mind. There are alternatives out there with similar features that run on open-source firmware and let you use the slicer of your choice. That’s just not what Bambu Lab is, and it’s not what they’re aiming to become. They’re following a path similar to Apple, controlling the ecosystem so that everything works together as conveniently as possible for the user.
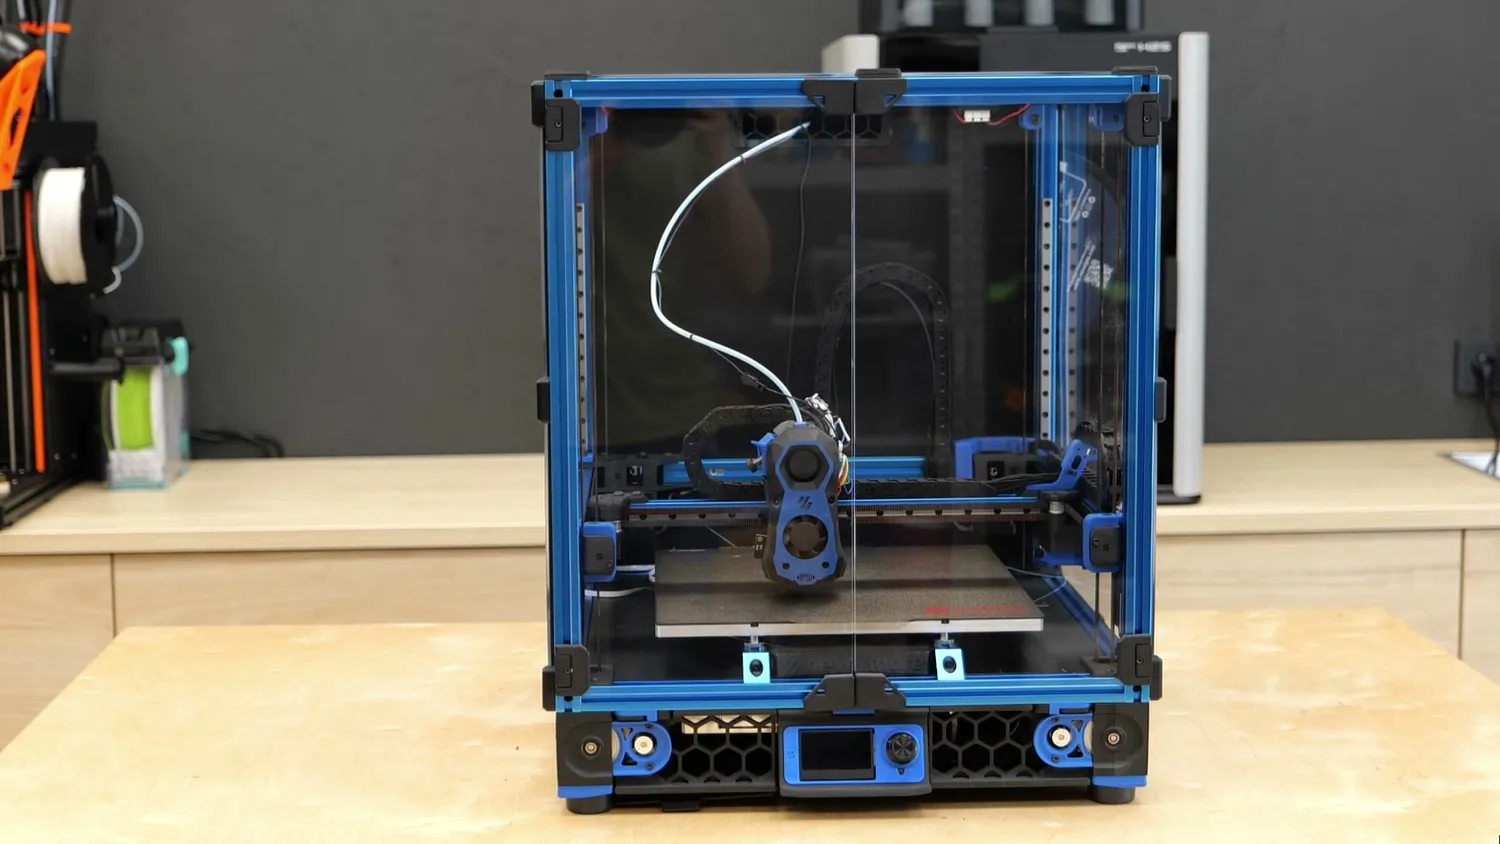
My Voron: open, but a project of its own
For example, I couldn’t hand my mum my Voron, explain Thingiverse, OrcaSlicer, Klipper, and how to swap materials, and expect her to succeed. But I could give her Bambu Handy on her phone, show her how to pick a model from Makerworld, and she’d have it printing at the push of a button, especially with how easy the AMS makes material changes. And when it comes to usability, I think Bambu Lab does one of the best jobs in the industry right now at the cost of some freedom.
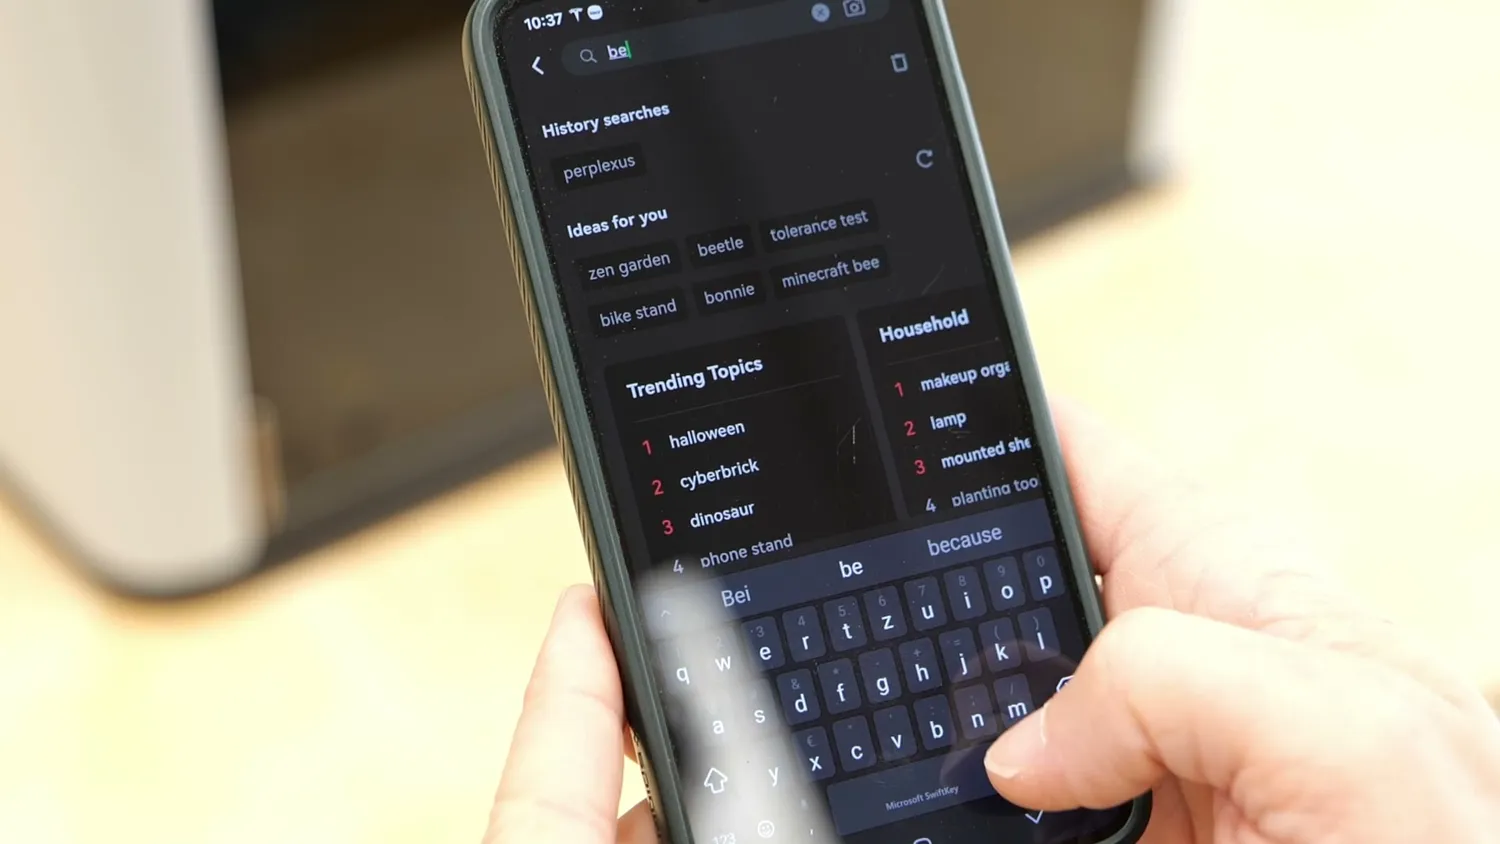
Picking a model from Makerworld on the phone
Another thing I appreciate is that they don’t pump out dozens of printers only to abandon most of them months later. Just look at my pre-Kickstarter X1 Carbon: it still prints beautifully, recently got a completely new user interface through the regular firmware updates, and now supports all of the new AMS units. That level of long-term support is rare and only Prusa* comes to my mind that still give you firmware updates even after 7 years.
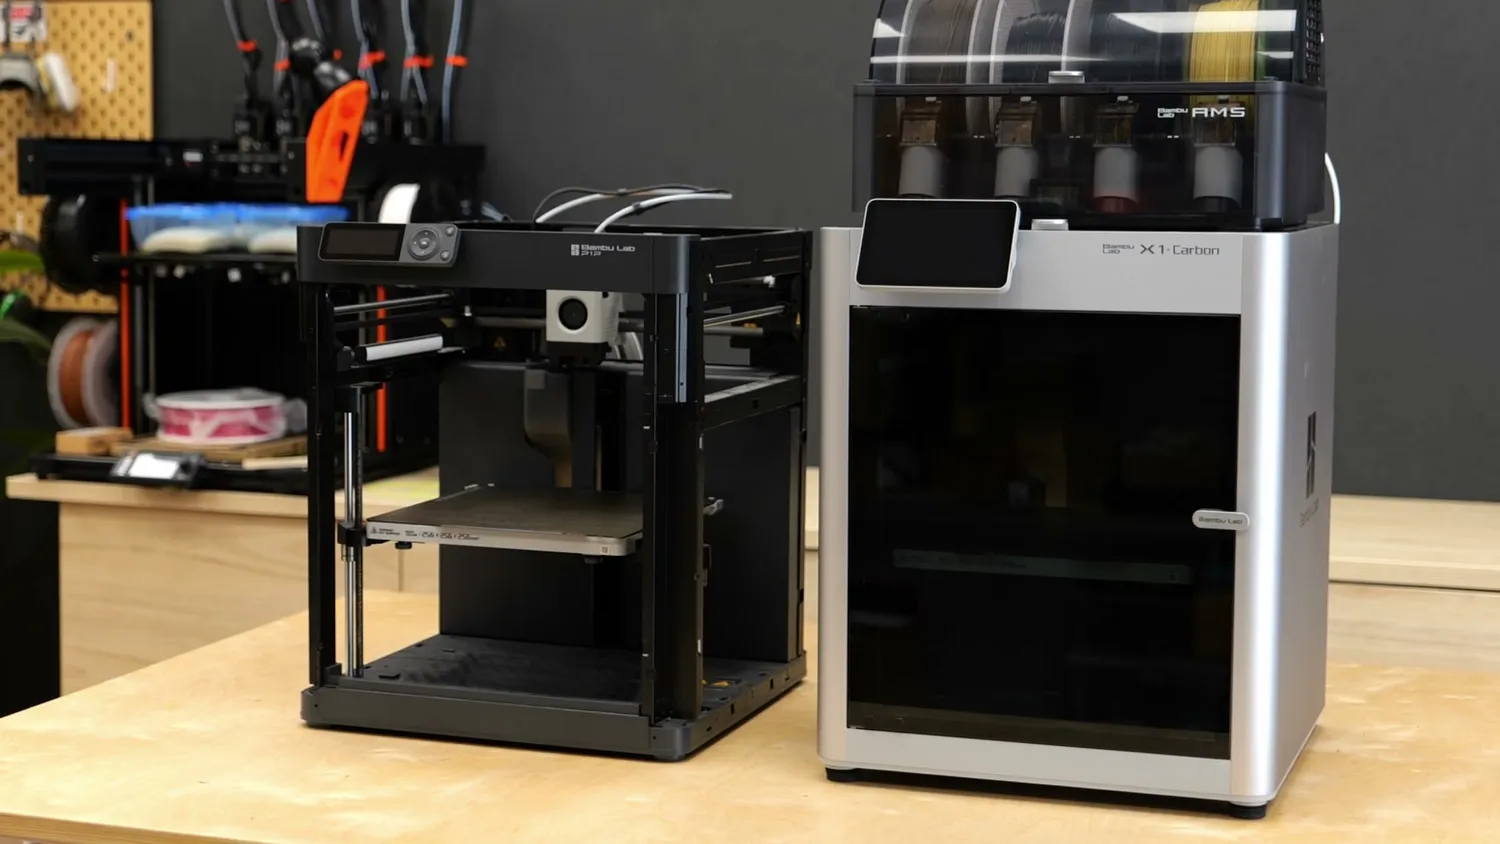
(right) my pre-Kickstarter X1 Carbon, still going
For me, if I just want to print something (meaning I want to use the printer as a tool), I’m perfectly fine staying in the Bambulab eco system. I can still use my own materials and the slicer has all the features I usually need and the machine is reliable, and just works. I can also be hiking in the mountains and check the status of my print in real time. But if I want to experiment with bleeding-edge software features or tweak every little detail of the firmware, I’ll grab a more open machine. But in that case, though, the printer itself becomes a project, not just a tool.
So here’s the bottom line: if you want a fully open 3D printer where you control every aspect and your data, don’t buy the H2S, or any Bambu Lab printer for that matter. But if you’re after a reliable tool that just works, no matter what material or model you throw at it, Bambu’s machines are among the best on the market. And the H2S continues that and finally gives you that large build volume, without all the extra features you probably wouldn’t use 99% of the time anyway.
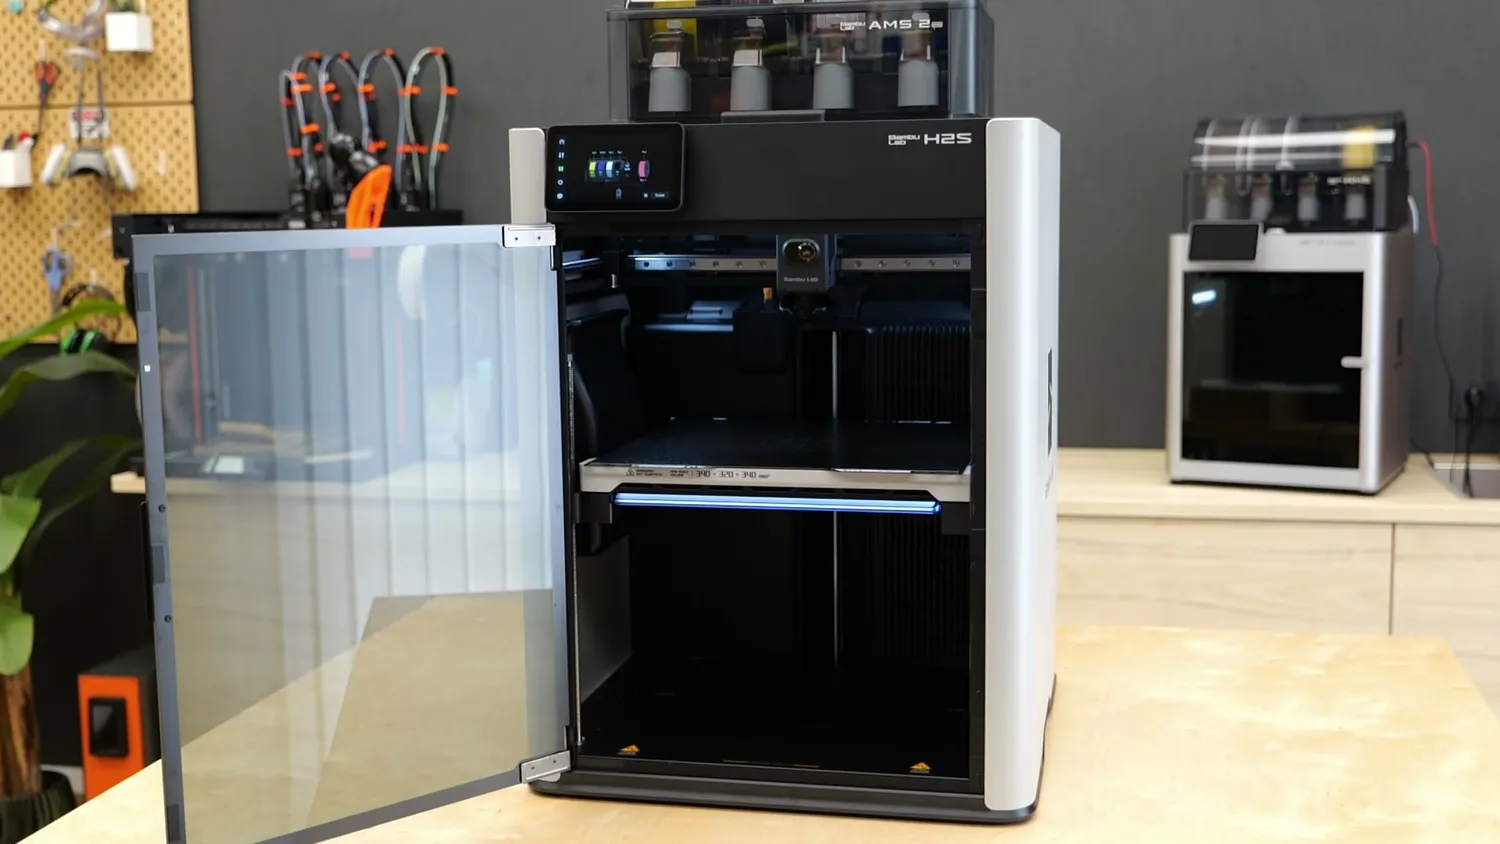
A tool that just works
But that’s just my take. What do you think?
H2D or H2S?
So if you have decided that you want to get a big Bambu Lab printer, which one should you get? The H2S or the H2D? It really comes down to your use case. If you mostly print single-material, single-color parts and just need the larger build volume, the H2S is a fantastic choice.
And if you’re wondering whether you need an AMS or not, let me be totally honest here. I love the AMS, but 95% of the time I use it purely for convenience. It means I always have four materials or colors ready to go without swapping spools, and the AMS 2 Pro doubles as a dryer. I very rarely use it for true multi-color prints. Whether that’s worth the extra money is up to you, but personally, I wouldn’t want to be without it.
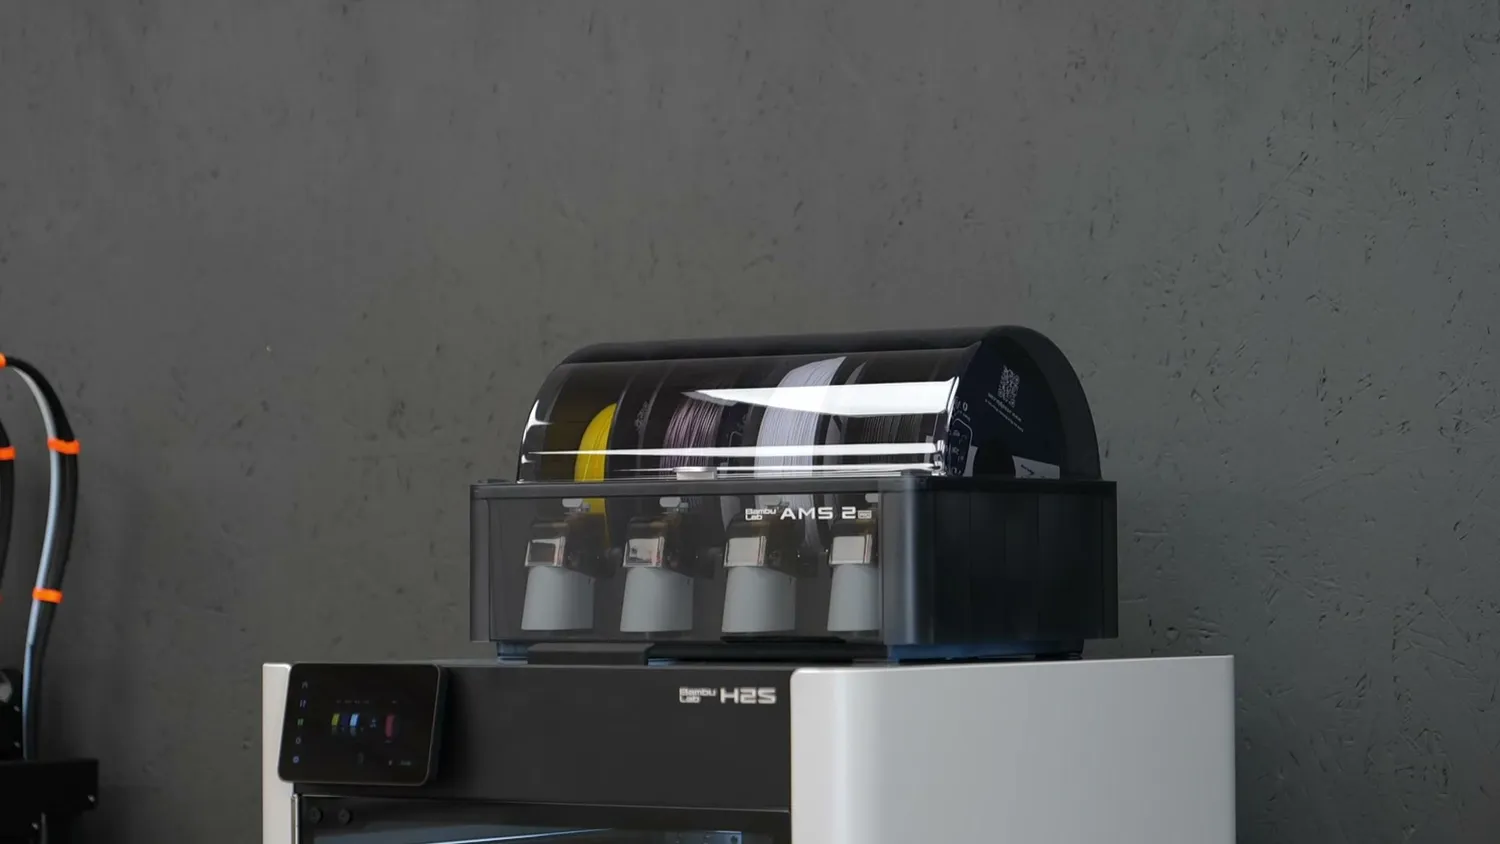
The AMS 2 Pro, which doubles as a dryer
So when does the H2D make more sense? If you frequently want to do real multi-material printing, like mixing flexible and rigid materials, using a dedicated support filament, or regularly doing multi-color work, that’s where the dual-nozzle toolhead really shines. It cuts down purge waste dramatically and makes certain prints possible that simply aren’t practical on a single-nozzle system. The 40 W laser could also be a reason to go with the H2D, but you’ve already heard my opinion on that.
So to sum it up: if you want a large-format Bambu Lab printer, the choice is simple: do you need dual nozzles or not? Answer that, and you’ll know exactly which one to get.
🐼 Get the Bambu Lab H2S ($1,249 printer / $1,499 AMS Combo / $2,099 Laser Combo): https://geni.us/BB-H2S*
* Links marked with an asterisk are affiliate links — if you buy through them, I earn a small commission at no extra cost to you. As an Amazon Associate I earn from qualifying purchases. Thanks for supporting my work!