
Bambu A2L: My Honest Review After 400 Hours
Bambu Lab A2L review after almost 400 hours: build volume, print quality, the cutting module, and whether it really earned the 2 in its name.
TL;DRthe short version
- 330 by 320 by 325 mm for $469 standalone or $569 with the AMS Lite. That is roughly twice the A1's volume, and you could buy three of them for the price of one H2S.
- Assembly takes under 30 minutes, and there are lovely details in the frame: granular dampers in the top brace that turn vibration into heat, and a 22 mm belt where half the length has no teeth at all, to keep a toothed belt off the idler.
- The bed only reaches 80 °C, which effectively limits it to PLA, PETG and TPU. Temperature spread across it was only about 3 °C, and dedicated corner magnets stop the whole plate lifting on big parts.
- Print quality is near the top of anything I've measured: a 38-minute Benchy with basically no VFAs or ringing, Gridfinity bins with near-perfect side walls, and only 0.04° of skew, though the closed firmware means you can't compensate what's left.
- Where the bed-slinger hurts is tall, slim parts, which get less stable as they grow. Orientation matters a lot and "Slow Down at Height" helps, but granular dampers stabilize the frame, not the print. The heavy moving bed also shook my whole workbench enough that tools fell off it.
- The hotend has a shorter melt zone than the H-series machines, which is a cost-cut you can feel: the A2L runs 10 to 20% slower than the CoreXY H-series, partly from that and partly from limited accelerations.
- The $60 cutting module finally makes sense on a machine like this. The plate takes A4, and a cosplayer can print a helmet and cut its decals on the same printer, where on a $2000 H-series it always felt like a gimmick.
- About the name: the servo extruder, the blob-detection flap and the accessory rail are the only truly second-generation parts. This is a very good, large A1. And on the company (this was a review sample and I'm in Bambu's affiliate program): their handling of the AGPL question, third-party slicers and legal threats against a developer deserves real criticism. If open software and data privacy matter to you, buy elsewhere; voting with your wallet does more than another drama video.
🐼 Get the A2L Combo ($569 / 489€): https://geni.us/BBL-A2L*
🐼 Get the A2L standalone ($469 / 379€): https://geni.us/BBL-A2L-SAL*
This is Bambu Lab*’s new A2L: a single-nozzle bed-slinger with roughly twice the build volume of the A1, the ability to mount accessories like a vinyl cutter, and a price low enough that you could buy three of them for what one of Bambu’s bigger printers costs. I’ve put almost 400 hours on it over the past month but it’s arriving at maybe the worst possible time to be a Bambu Lab fan, when a lot of the community is furious with the company over how it’s treated some of its most dedicated users and the open-source work it was built on. So why am I reviewing it anyway? Why does the vinyl cutter finally make sense on this machine? And why, despite some cool innovations, am I not convinced it earned the “2” in its name? Let’s find out more.
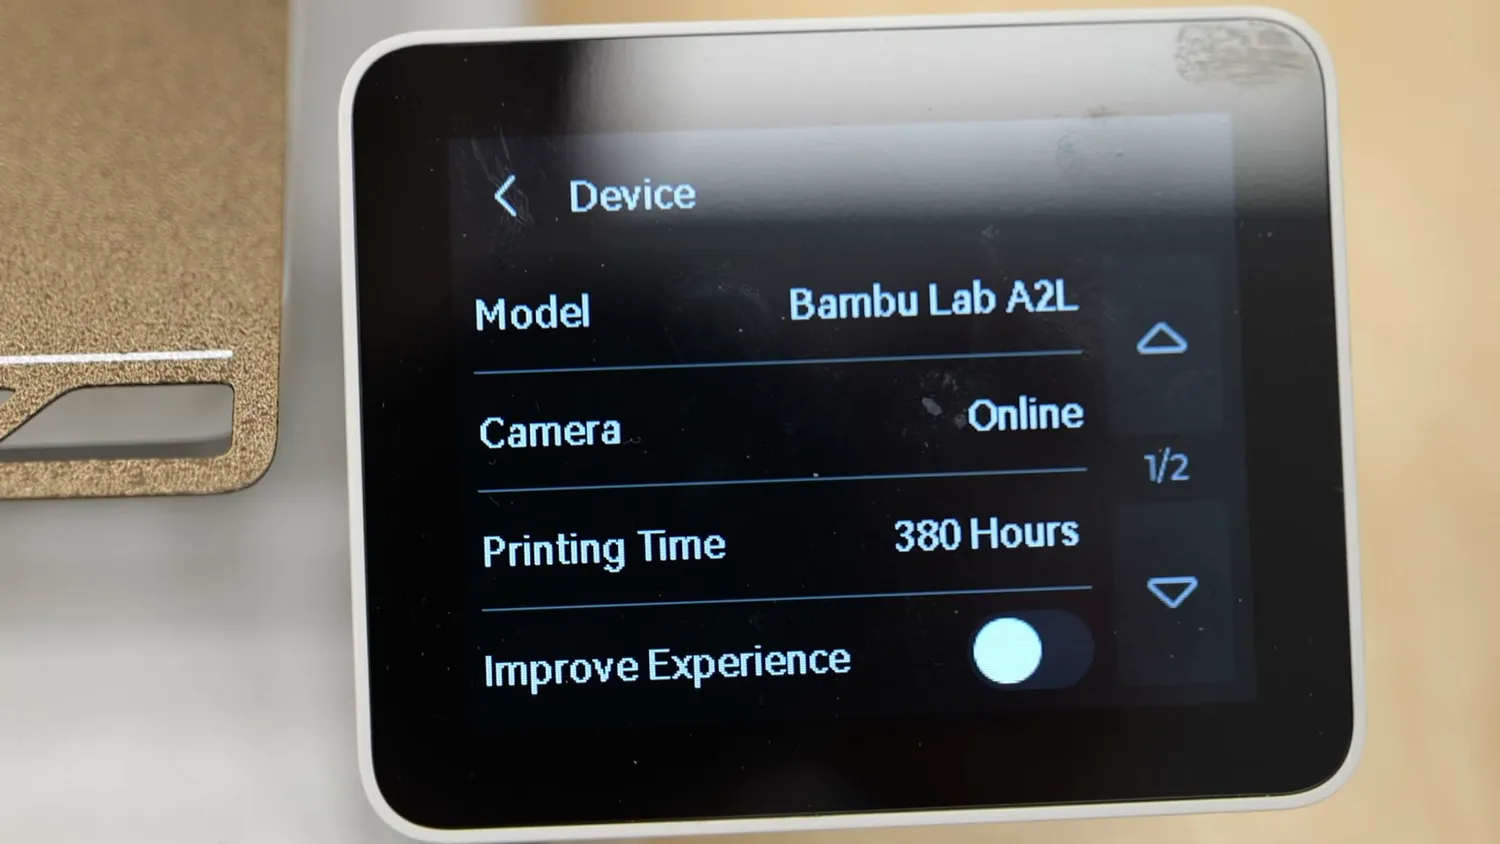 380 hours on the clock by the time I stopped counting
Why I am reviewing this printer anyway
Before we talk about the A2L itself, I need to address the obvious question: why am I reviewing this printer at all? This machine was provided by Bambu Lab as a review sample, I, at least until now, have a good business relationship with them and I am also part of their affiliate program. That makes transparency here very important. I think Bambu currently deserves a lot of criticism for how it has handled parts of the community, open source, and the direction in which their 3D printing ecosystem is developing. But at the same time, many people are still buying these machines, and those people should get an honest technical review but also be informed about whom they are buying from. So this article is not an endorsement of every decision Bambu Lab makes as a company. It is my attempt to look at the product objectively, while also informing you about the system around it and the concerns that currently exist. I hope you can appreciate that.
The short version of the current controversy is this: Bambu Studio, which is their Slicer, is based on open-source software, but the tightly integrated network plugin that provides access to Bambu’s cloud remained closed-source. Many people see that as non-compliant with the AGPL license that Bambu Studio is built on. Last year, Bambu also restricted cloud access for third-party slicers. Then, just recently, after a developer managed to restore cloud communication in an OrcaSlicer fork, Bambu threatened legal action.
 The firmware update that restricted third-party access
I am not a lawyer, so I won’t pretend to give a final legal judgment here. But Bambu Lab actively chose the shortcut of using open-source software, and they will need to deal with the consequences. And this isn’t the only example. We had similar things happening in the past with projects stemming from the community being marketed as their own, and this saddens me. I simply cannot understand why they constantly keep shooting themselves in the foot by mistreating the community that made their company, up to the point of legally threatening them! Not only do they anger their most dedicated customers, but all of that has now come back to haunt them through a pretty classic Streisand effect, where more issues are being discussed publicly now, and bigger names have joined the fight against Bambu Lab.
I have also shared my position with them in the background because I simply hate public drama, and I think this can have more impact than making the 100th drama video sometimes, maybe also just for the sake of views. I hope the whole AGPL debate eventually goes to court, because without a clear legal precedent, I don’t think the community and companies will ever come to a common understanding. And that precedent would also matter for many other companies that do not play fair in the open-source space.
What we should keep in mind is that we would probably still be printing at half the speed with the Ender-3 V8 and the Prusa* Mk7S Plus Ultra if it weren’t for Bambu Lab completely changing the market over the last 4 years! And even though I’m very grateful for this, it doesn’t excuse the bullying behavior we see more and more from them!
And if you are another company, this is your time to shine. Bambu Lab is only getting away with this because the hardware and user experience they provide is the best on the market. Don’t focus on pushing AI slop onto your customers; make your experience with the machine as best as you can, innovate, and don’t just copy and work with the community. This will pay out in the long run!
This is the A2L
But with that said, let’s get to the actual printer. So, this is the A2L. Or should we call it the A1L? Well, more on that later. I received the A2L in the combo version, including the AMS Lite. I got the machine about a month ago, and in that time I was able to put close to 400 hours on it, printing everything from small test parts to large functional prints. The “L” in the name stands for large, because this is finally the bigger version of Bambu Lab’s more affordable A-series printer. The build volume is 330 by 320 by 325 millimeters, which is very close to the volume of the H-series machines. That might not be as large as some people hoped, but Bambu has said before, when talking about its flagship H-series, that their research showed a roughly 320-millimeter cubed build volume covers most customer use cases, from shoes to cosplay parts. Anything bigger increases cost disproportionately and makes it mechanically harder to handle. But what do you think about this format? Is it still too small, or is it just about right for the kinds of parts you print?
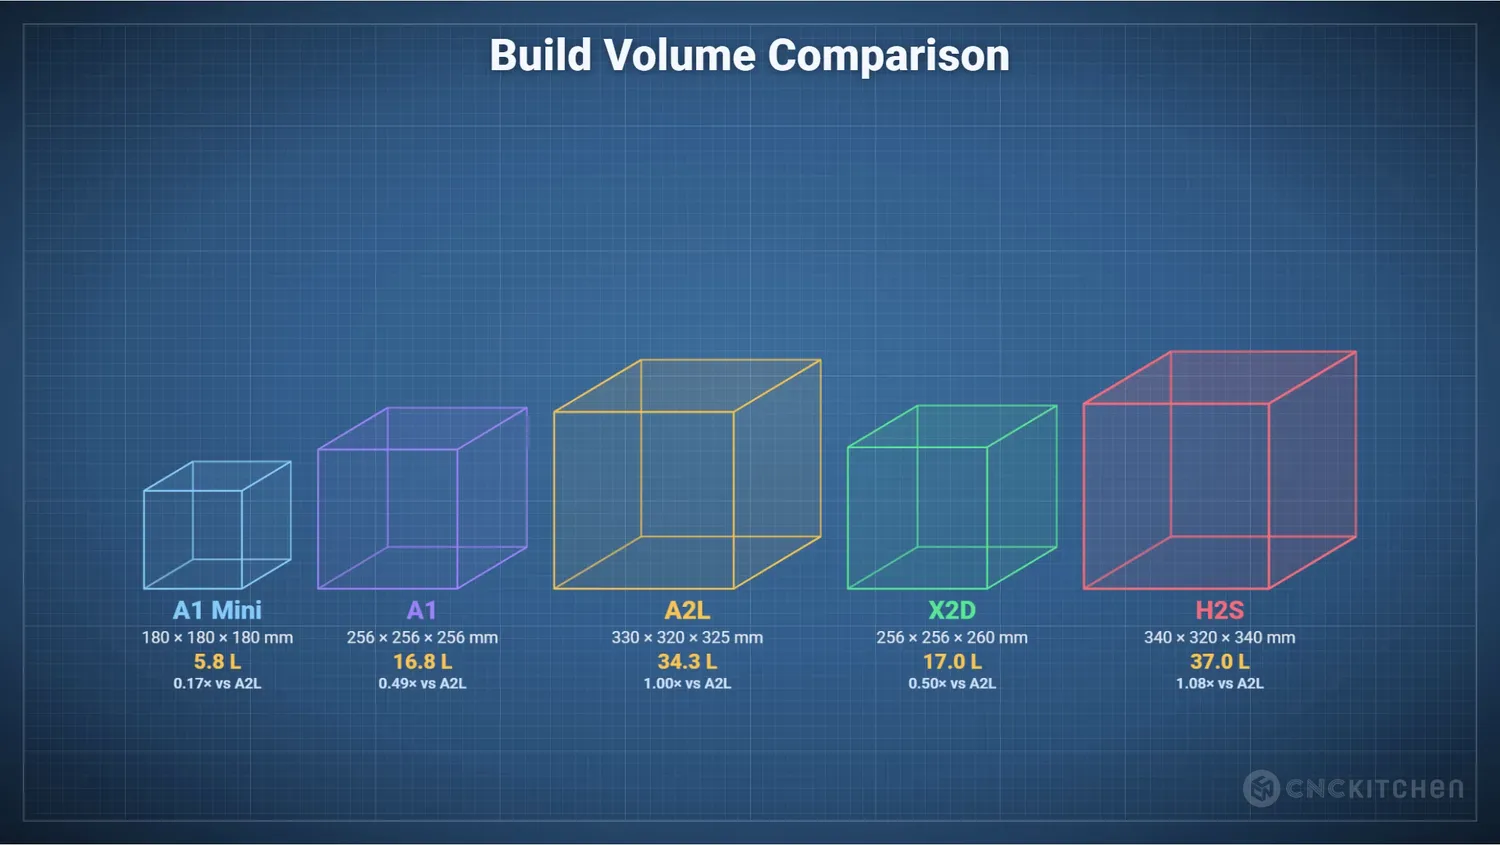 Build volume next to the rest of the A- and H-series
Mechanically, the A2L is a Cartesian printer with a moving bed. That makes the mechanical system simpler and cheaper, but it also comes with some downsides, which we will see later when we look at the print results. At 469 dollars for the standalone version, and 100 dollars more for the combo with the AMS Lite, it is very competitive compared to Bambu’s own larger H-series printers. You can buy three A2Ls for the price of one H2S. Of course, there is also competition from brands like Elegoo*, Anycubic and Creality, and some of those machines undercut the A2L on price.
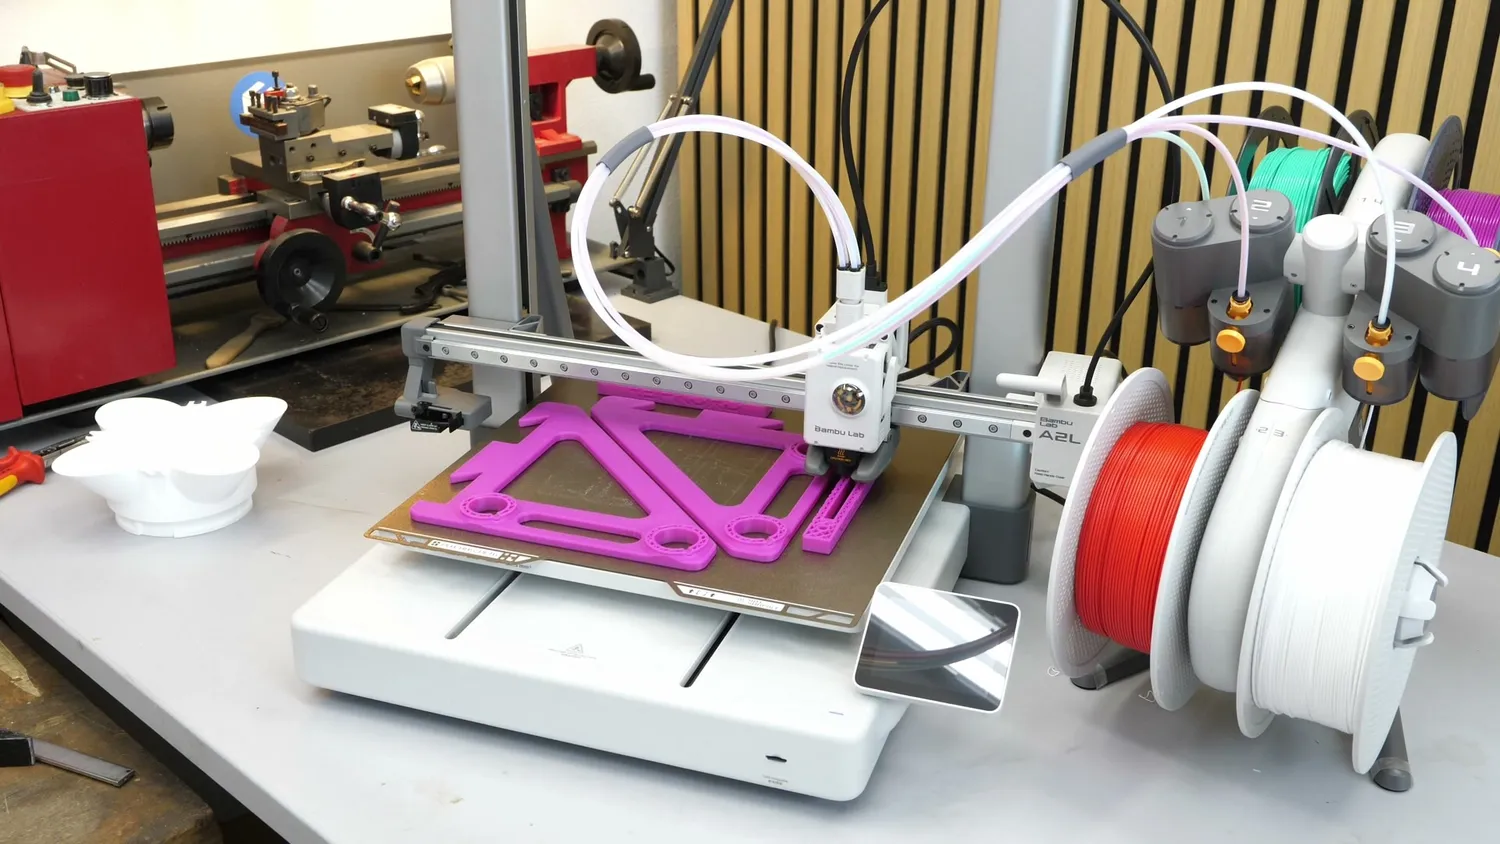 A Cartesian bed-slinger, just a much bigger one
Like many larger Cartesian printers, the A2L does not arrive fully assembled. To save shipping volume, the frame comes detached from the base of the machine. Everything is packed very well, and the box includes everything you need for assembly, including a tiny amount of filament that is just enough for your first print. If you do it carefully, assembly takes less than 30 minutes. But I would strongly recommend properly reading the manual, because there are quite a few screws to install, and they come in different sizes and lengths. On Bambu Lab’s other machines, the accessories usually came in a simple but still nice accessory box. I still use those boxes to store spare parts and tools from my other printers. On the A2L, it looks like Bambu did a bit of cost-cutting, because the accessories are just packed in a bag. That is not a deal breaker, and I’m sure they assume you can just print your own storage box, but it does slightly spoil an otherwise very nice unboxing experience.
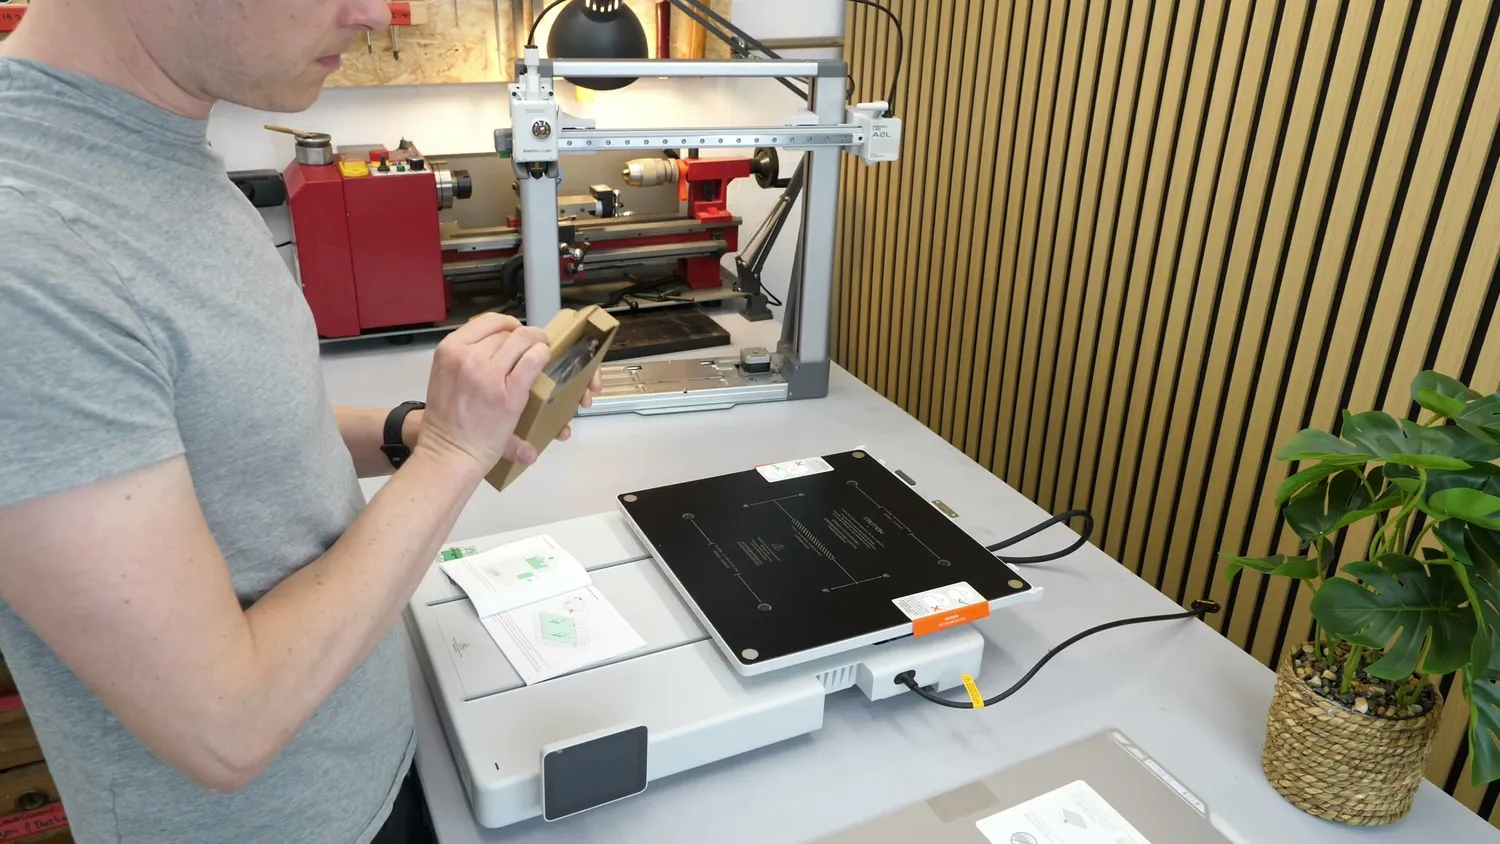 The accessories now just come in a bag
During assembly, three details stood out to me. The first one is the diagonal support braces at the back of the machine. They help stabilize the significantly larger frame, and this is something you commonly see on larger Cartesian printers. The second detail is in the frame itself. At first, it almost sounds as if something is loose and rattling around. But this is not a flaw. It is intentional. Bambu Lab added so-called granular dampers in the top brace of the frame. These are small internal containers that are probably filled with metal balls. When the frame starts shaking, the balls move around, friction converts some of that motion into heat, and that dissipates vibration energy. Whether that actually helps is really hard to judge and I wasn’t able to do comparison prints with and without, so we simply have to believe it helps. The third thing I noticed was this very wide, 22-millimeter belt. Like the X-axis belt, it has a 1.5-millimeter pitch, which should help reduce VFAs. But what I found even more interesting is that half of the belt has no teeth at all. That removes another possible source of VFAs which is a toothed belt running over an idler. I have not seen this before, and I seriously enjoy seeing details like that.
How a granular damper turns vibration into heat
If you buy the standalone printer, you get a spool holder that mounts on top of the machine. If you buy the combo version with the AMS Lite, the AMS sits next to the printer and connects with four PTFE tubes. With the standard spool holder or the AMS Lite still it only holds the typical one-kilogram rolls. On an A1 or A1 Mini, the main reason to buy an AMS is usually multicolor printing. But on a large printer like the A2L, it also makes sense for another reason: large prints can quickly use more than one spool of filament. The AMS allows you to load several spools of the same material and automatically switch from one to the next when a spool runs out. For long prints, that can be extremely handy.
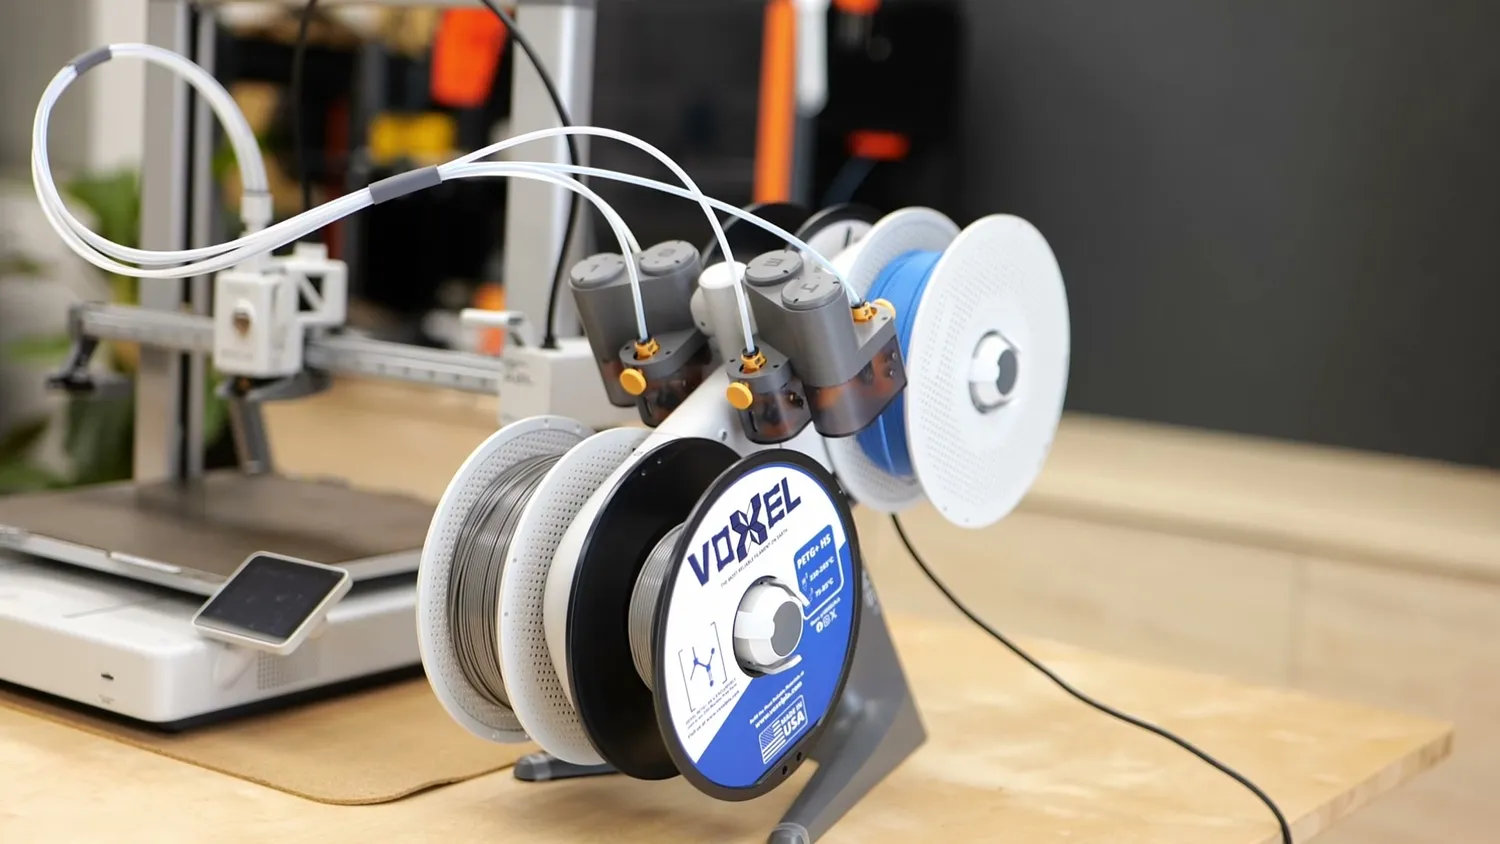 The AMS Lite sits next to the printer
Setup and specs
Now let’s power the machine on. The screen guides you through the setup process. The preferred way to use the printer is to connect it to Bambu Lab’s cloud using your Bambu account. That gives you remote monitoring and control from anywhere. But especially after the current controversy, I want to point out that you can also use the printer in LAN-only mode, without connecting it to Bambu’s cloud. In that mode, you cannot use the phone app, but you can still send print jobs over your local network from Bambu Studio, and even from OrcaSlicer. The third option is to use the printer completely offline and only feed it print jobs and firmware updates from the included microSD card. How you use the machine is up to you. But the further you move away from Bambu Lab’s own services, the less convenient the experience becomes. And that convenience is honestly one of the main selling points of these printers for many users.
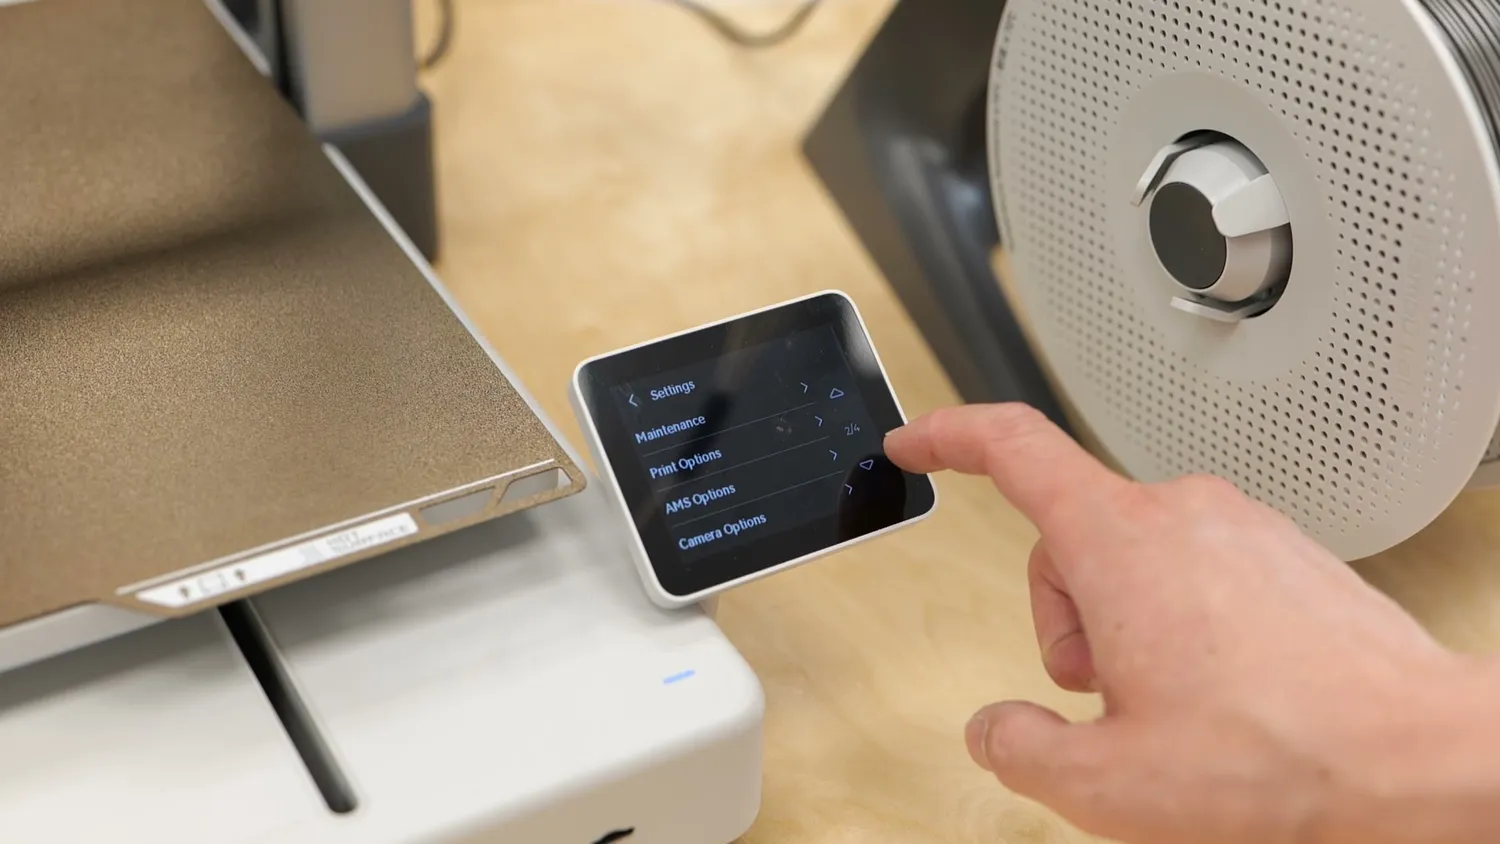 Cloud, LAN-only or fully offline is your choice
After setup, the printer runs through a calibration routine. It does vibration tuning, motor noise compensation, and a very detailed bed leveling process. In total, that takes around 45 minutes. Once that is finished, you can either start printing the files included on the microSD card or slice your own models. Speaking of the microSD card: this is also where your files are stored for reprinting, and where timelapses are saved if you enable that feature.
But what you can print depends on the specs, so let’s look at those. The most obvious feature is the build volume, which is 330 by 320 by 325 millimeters. That is roughly twice the volume of the smaller A1. And if you care about serial production of smaller parts, the build plate of the A2L is about 60% larger than the A1’s. The H2D and H2S build plates do not fit the A2L, but the H2C, with its narrower bed, uses exactly the same sheet. That means the A2L can benefit from that existing ecosystem. The bed itself only heats to 80 degrees Celsius, which pretty much limits this machine to PLA, PETG, and TPU. That might be a downside for some users, but printing ASA or other high-temp materials on a large open-frame printer is usually not what you want to do anyway. For those materials, I would rather use an enclosed machine. But for the typical casual 3D printer user, an 80-degree bed is not a huge problem or limitation in my opinion.
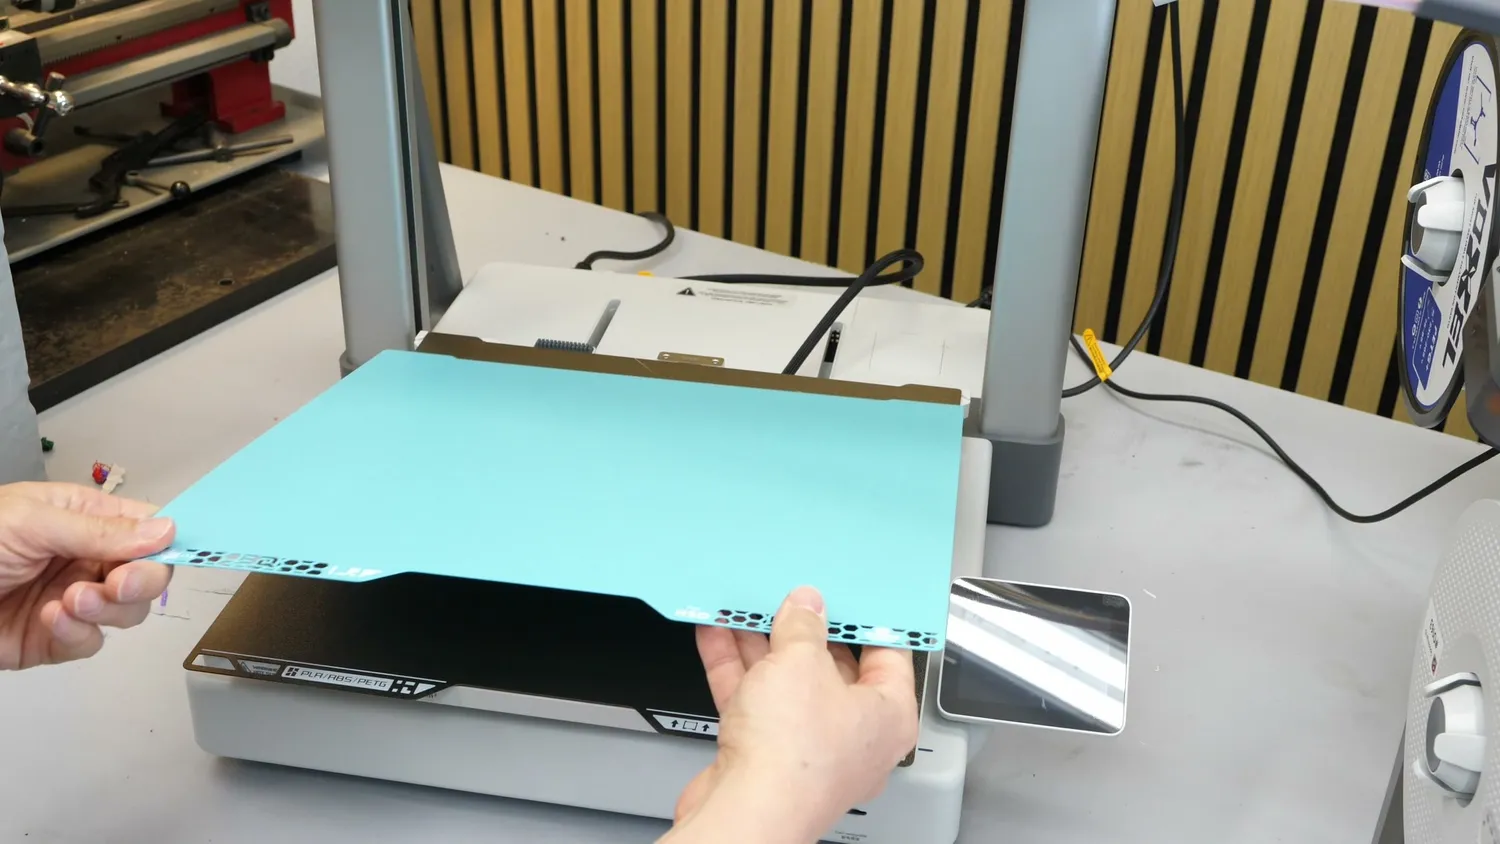 The A2L can use sheets from the existing ecosystem
One feature I am sure we will see on more printers soon is the hybrid magnetic bed. Usually, printers use a magnetic sheet glued to the bed. But on large prints, especially with anything other than PLA, the magnetic force holding the print plate down might not be strong enough. Instead of the part lifting from the plate, the entire plate can lift from the bed. Bambu’s solution is to add stronger dedicated magnets in the corners. That is a clever idea for a bed this size.
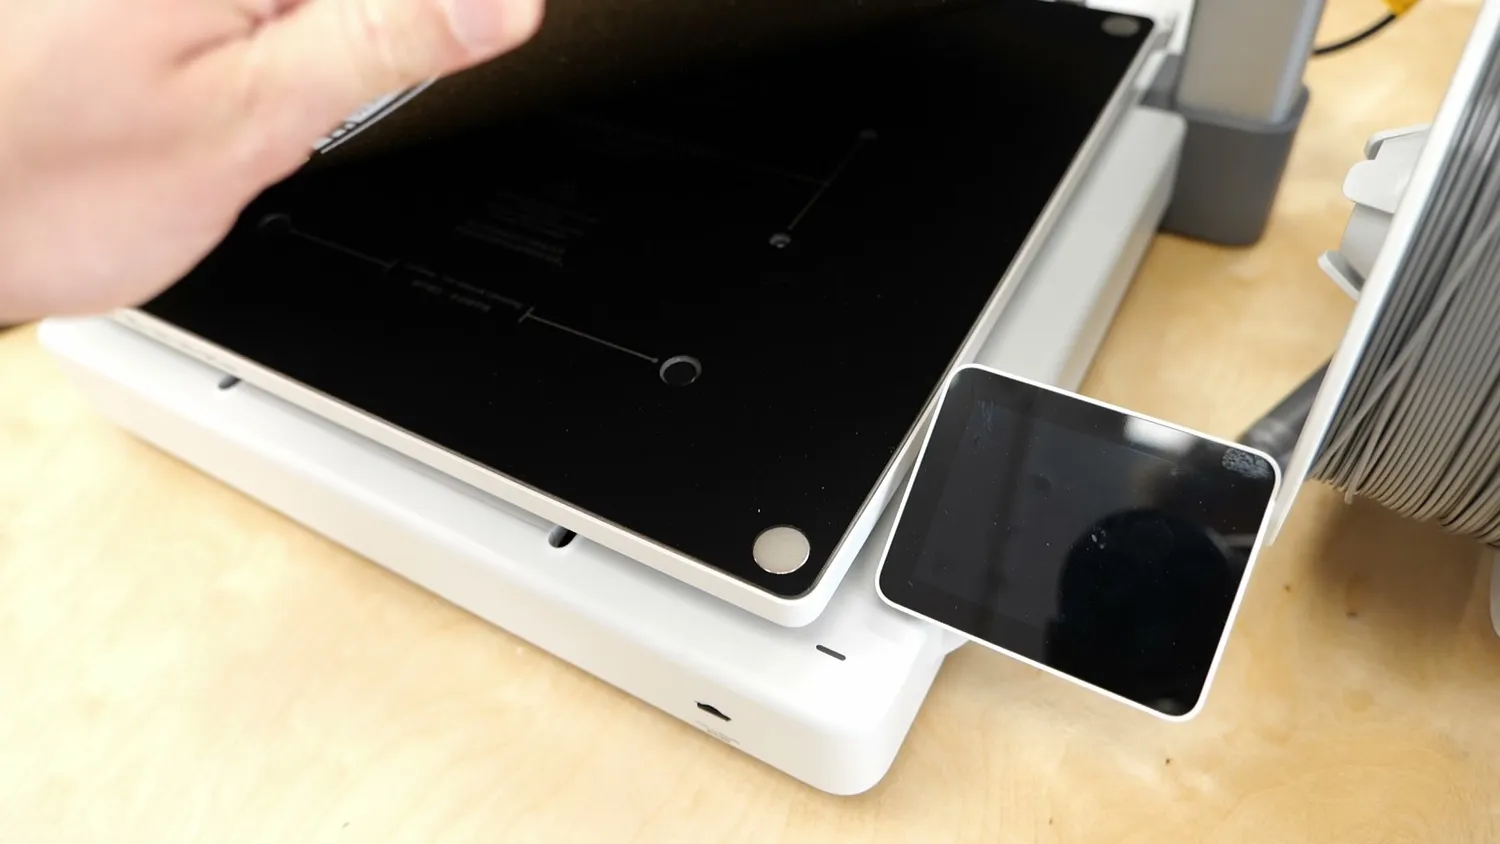 Extra magnets in the corners hold the plate down
Temperature distribution was also better than I expected. You can no longer directly see the heater rods through the surface, and I measured only about a three-degree difference across the bed, which is quite acceptable.
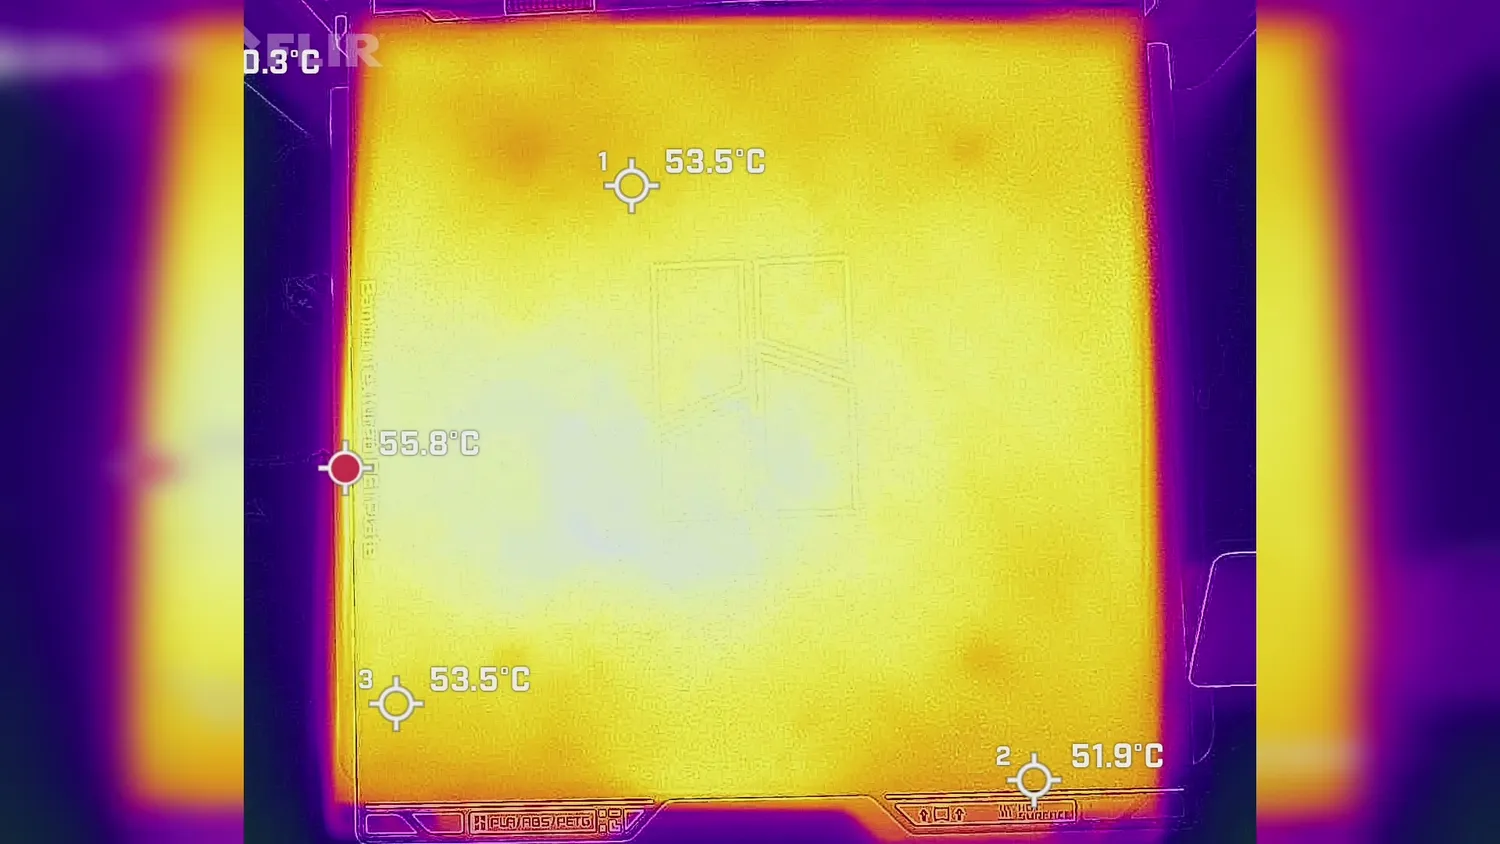 Only about three degrees difference across the bed
It is hard to judge how flat the bed actually is, because the machine does not give you the measured bed mesh values. But the first layer it printed was flawless. This was a one-layer sheet, and it peeled off perfectly.
Because the A2L is a Cartesian printer with a moving bed, you need more desk space, especially behind the printer. A similarly sized H-series printer roughly needs a minimum of 500 by 600 millimeters on the desk. The A2L needs around 600 millimeters in width, but once you account for the full bed movement, it needs at least 650 millimeters in depth. And even then, the bed still moves over the edge. If you also want to place the AMS Lite next to the printer instead of mounting it to the wall, you need almost 800 millimeters of width. So definitely keep the footprint in mind if you’re tight on space.
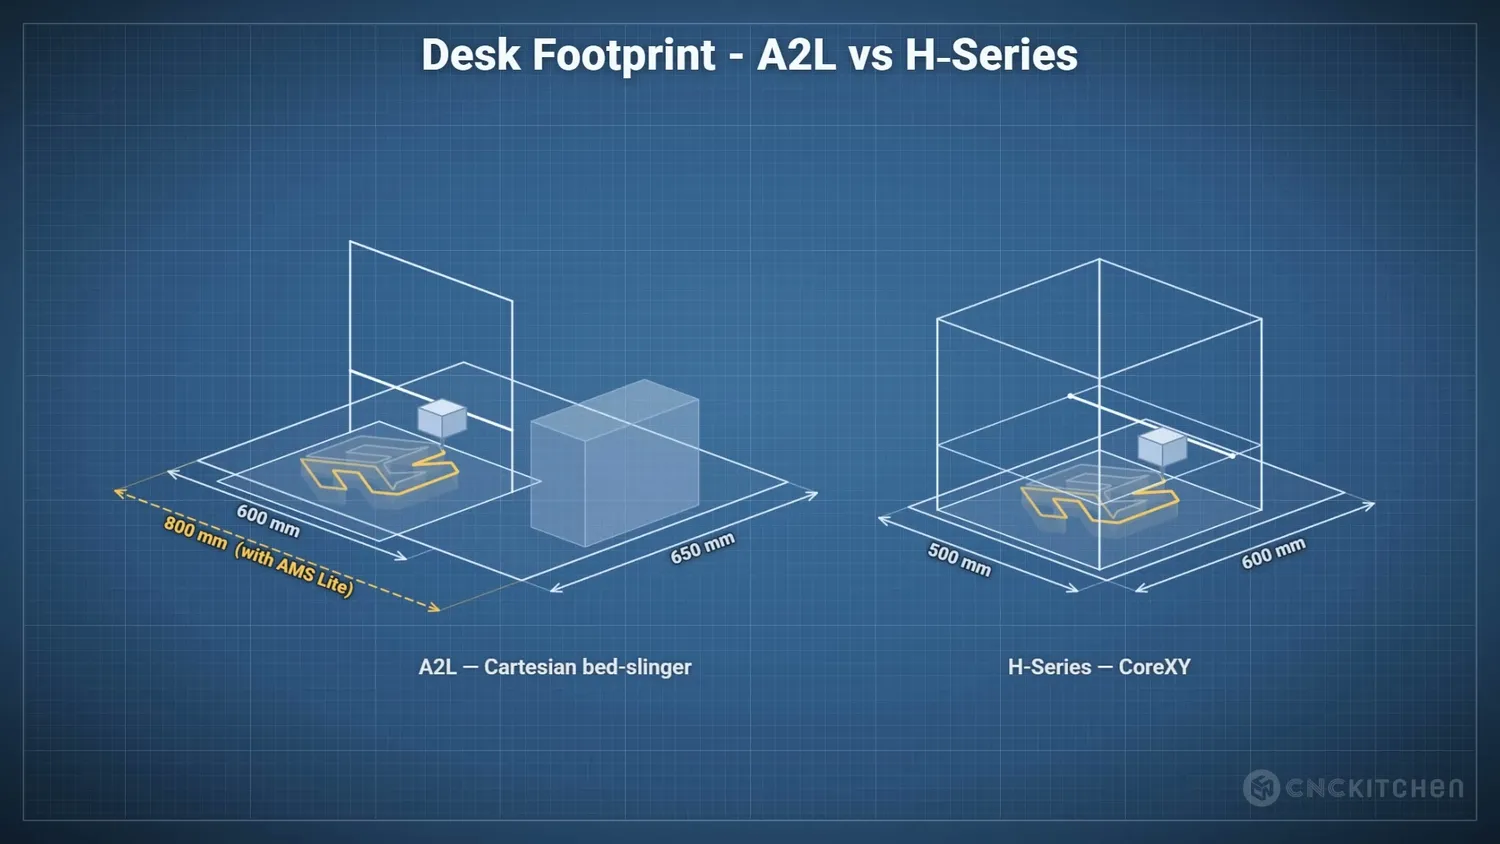 Desk space needed compared to an H-series machine
The printhead, multicolor and the camera
Apart from the rear bracing, the A2L looks very much like a scaled-up A1. Even the screen appears to be the same. The extruder also looks almost identical to the A1 extruder and also uses A1-style nozzles capable of 300 degrees Celsius. By default, the printer comes with a stainless-steel nozzle. So if you want to print anything abrasive, like fiber-filled filament or even glow-in-the-dark materials, you should get a hardened-steel nozzle. Even though the A2L hotends closely resemble the hotends used on Bambu’s newer machines, they are not the same. The melt zone is shorter, which you can also see in the slicer, where the A2L cannot melt as much plastic as, for example, the H2S. That seems to be a cost-cutting measure, but especially on a printer with this build volume, high-flow nozzles would have been nice.
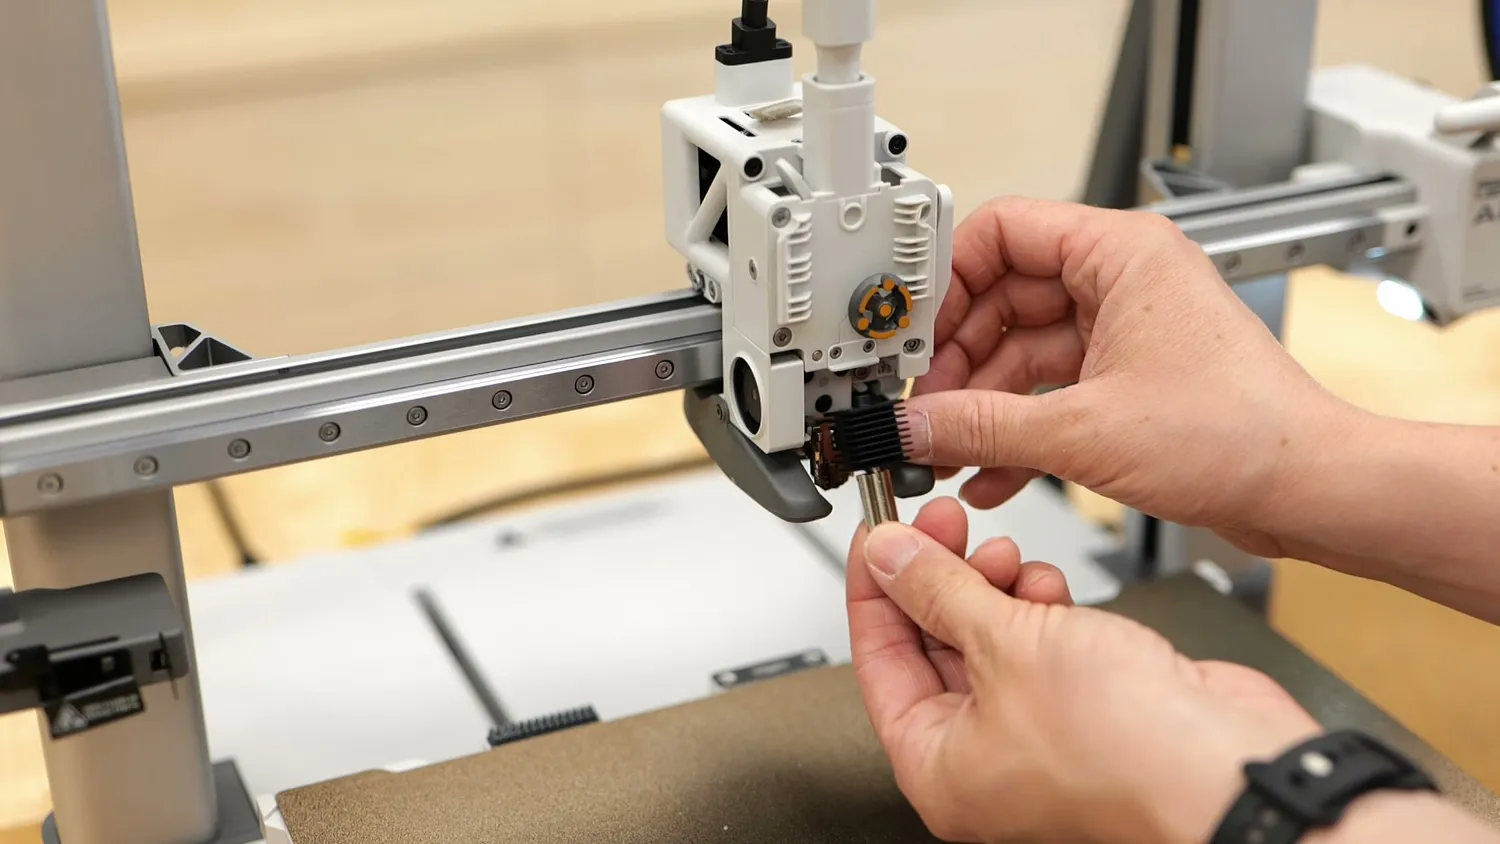 A1-style nozzles rated to 300 degrees
There are, however, two notable changes on the printhead. First, the A2L now uses a servo motor for the extruder, similar to Bambu’s other second-generation machines. That should provide higher torque and also gives the printer additional data to detect jams or clogs in the nozzle. The second major change is this rail system at the front of the printhead. You might know it from the H-series machines, where it is used for accessories. It is also the reason those machines have the “H” in their name, for “Hybrid.” So technically, the A2L is also a hybrid machine. The laser module will not work on it, for obvious safety reasons, but you can use the cut and draw module. On the A2L, the cutter and cutting sheet have to be bought separately, but the upgrade is reasonably priced. It could be very useful for making custom decals, labels, or iron-on tags for your projects and we will look at that more closely later.
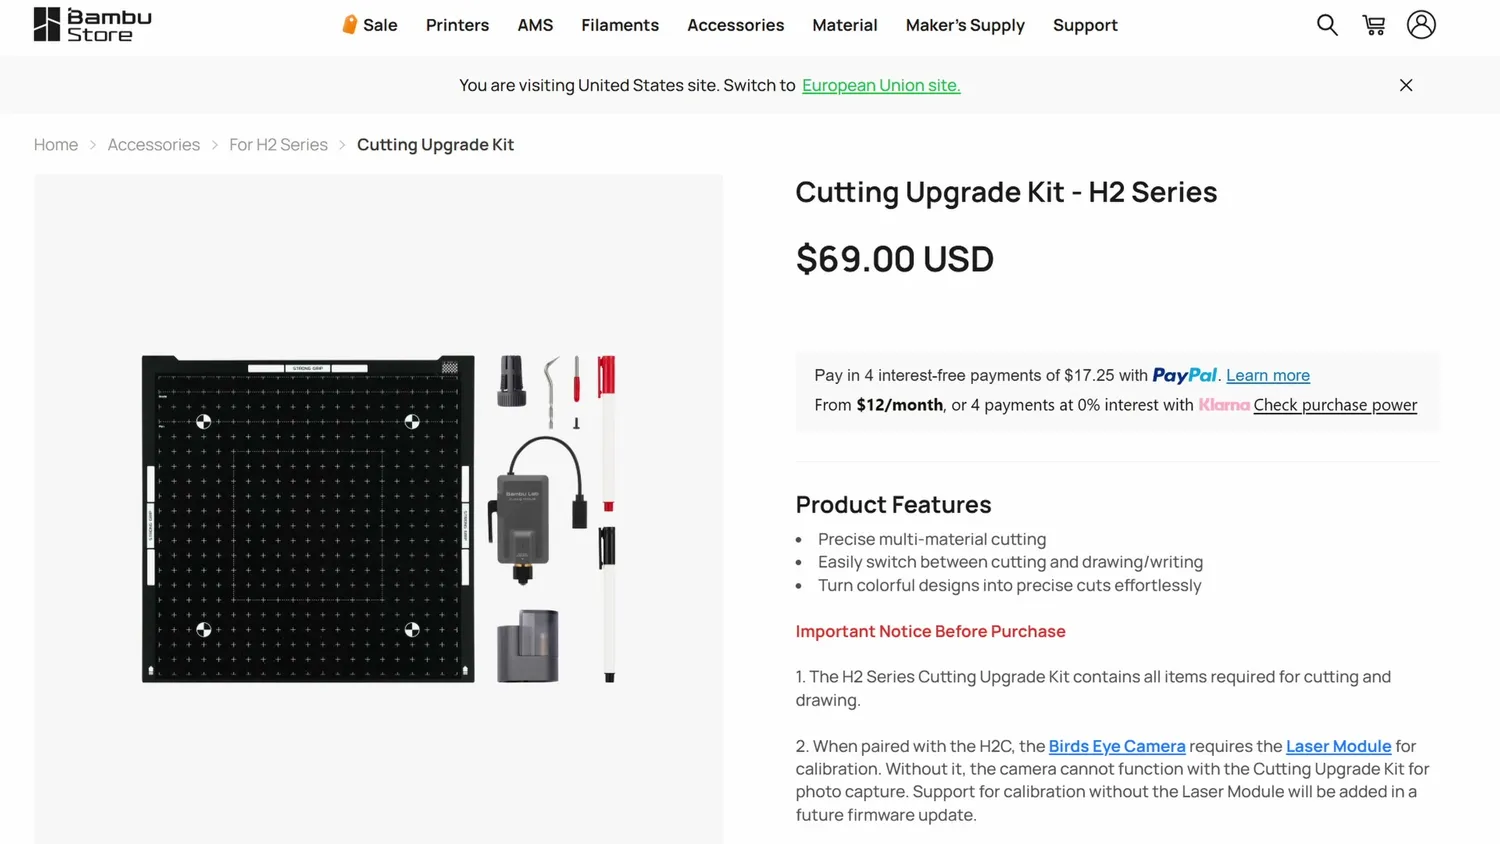 Sold separately, but reasonably priced
The A2L does not reinvent multicolor printing. It is still a single-nozzle multiplexing system, which means different filaments are fed into the same nozzle. During a filament change, the filament is cut, and the remaining material has to be purged out. That purge process happens at the left end of the X-axis. The purge station looks almost the same as before, but it now has a new trick: an additional flap at the front, which acts as a blob detector. If a print partially fails and material starts accumulating on the nozzle, the blob can trigger this flap when the printhead moves to the purge station. In theory, that can save you from a blob of doom.
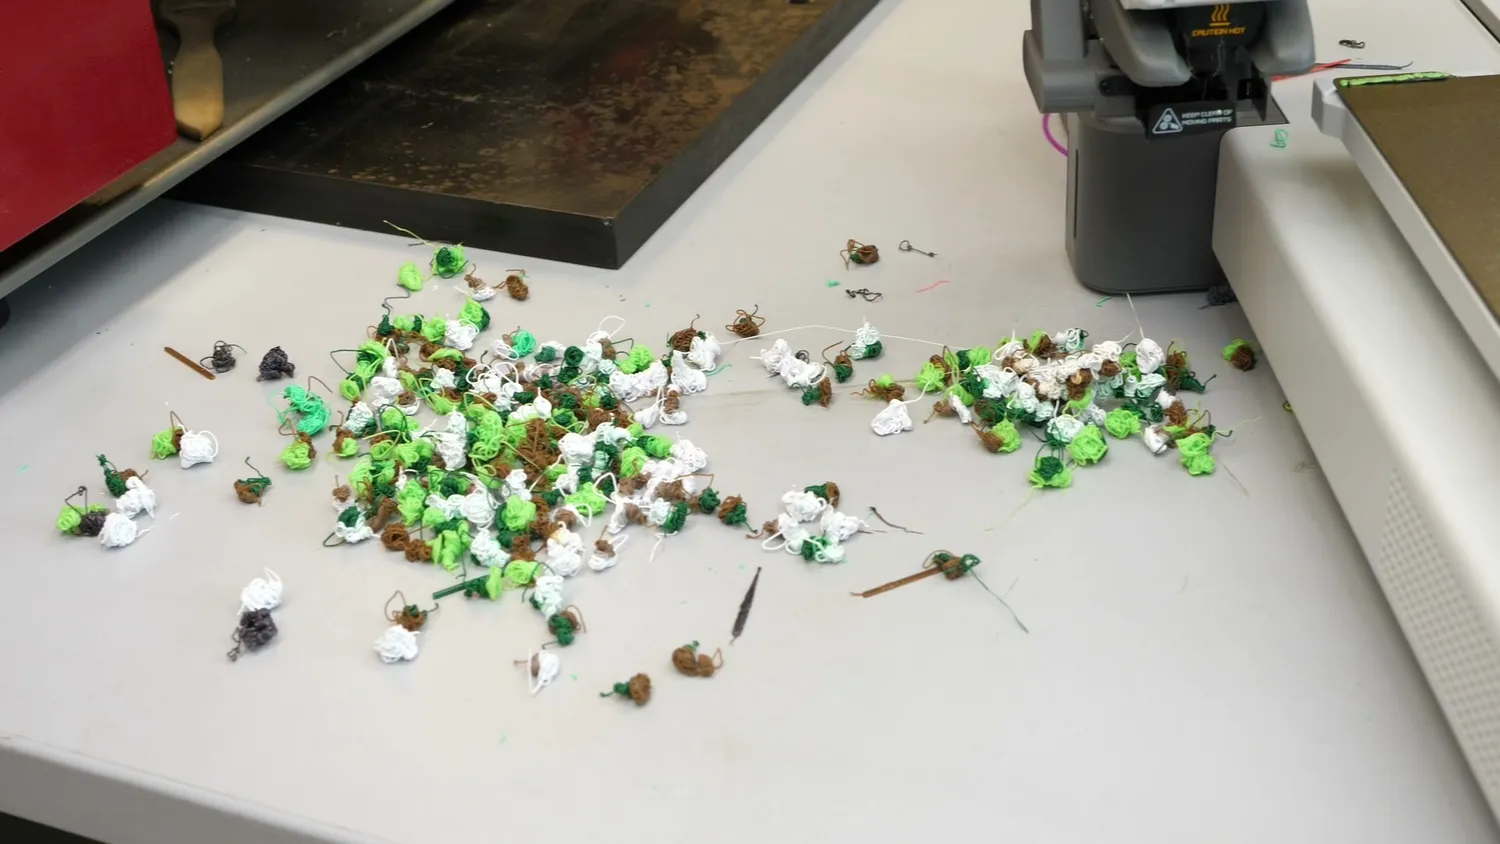 Purge waste from a single-nozzle color change
I never had such a failure during my tests, so I tried to activate it manually during a print which didn’t do anything. Maybe it’s just active when the printhead moves to the purge station. I can imagine it being useful on large prints. The current limitation is that the printhead only moves to the purge station during multicolor printing. So on a large single-color print, the printer might never check for a blob at all. I wonder if Bambu will add a quick move to the purge station every few layers, just to check for this type of problem. Still, it is another interesting and innovative feature.
Or maybe it is partly a workaround, because even though the machine has a camera, it does not have spaghetti detection like some of Bambu’s other printers. And the camera is still as bad as the one on the A1 and A1 Mini. The frame rate is poor, the position is not ideal, and the built-in light does not help much if the room is dark. This is fine for very basic print monitoring, but if you want to properly check your prints remotely, you should get an external camera*.
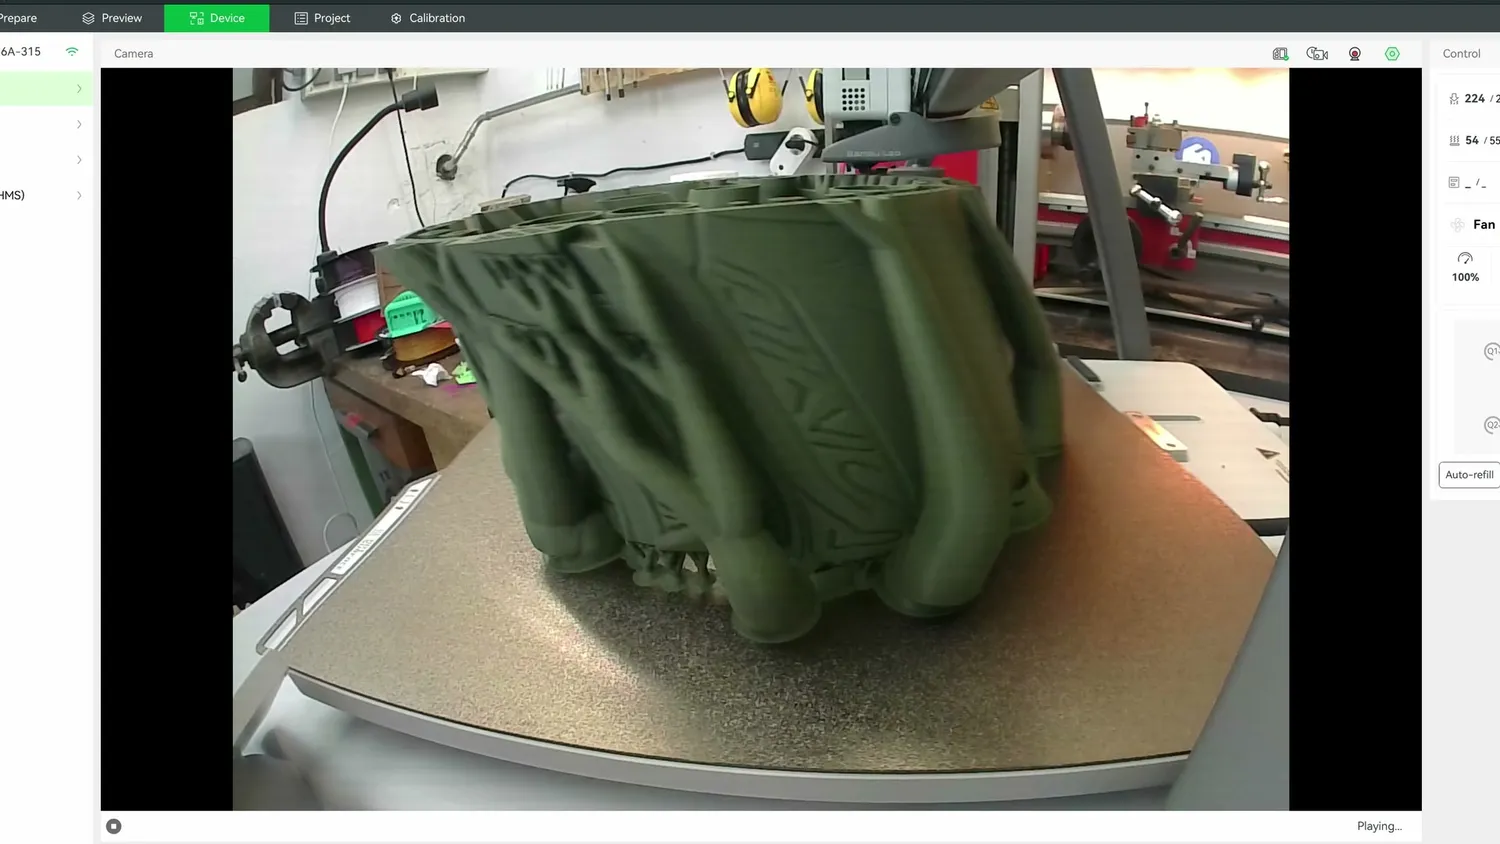 Fine for basic monitoring, not much more
Does it really deserve the “2”?
And this brings me back to the name: A2L. The “2” suggests that this is a second-generation machine. But the only second-generation features I really see here are the servo extruder motor, maybe the blob detection sensor, and maybe the cutting module. Everything else feels much closer to the A1 and A1 Mini. The wider belt, the braces, and the additional magnets in the bed are not necessarily “second-generation” features. They are mostly things you need when scaling a printer up. You could argue that the A1 and A1 Mini were already second-generation machines because of their newer toolhead and nozzle system compared to the X1. Or you could argue that Bambu simply added the “2” for marketing reasons. What do you think? What would you have wanted to see on the second generation of the A Series printers?
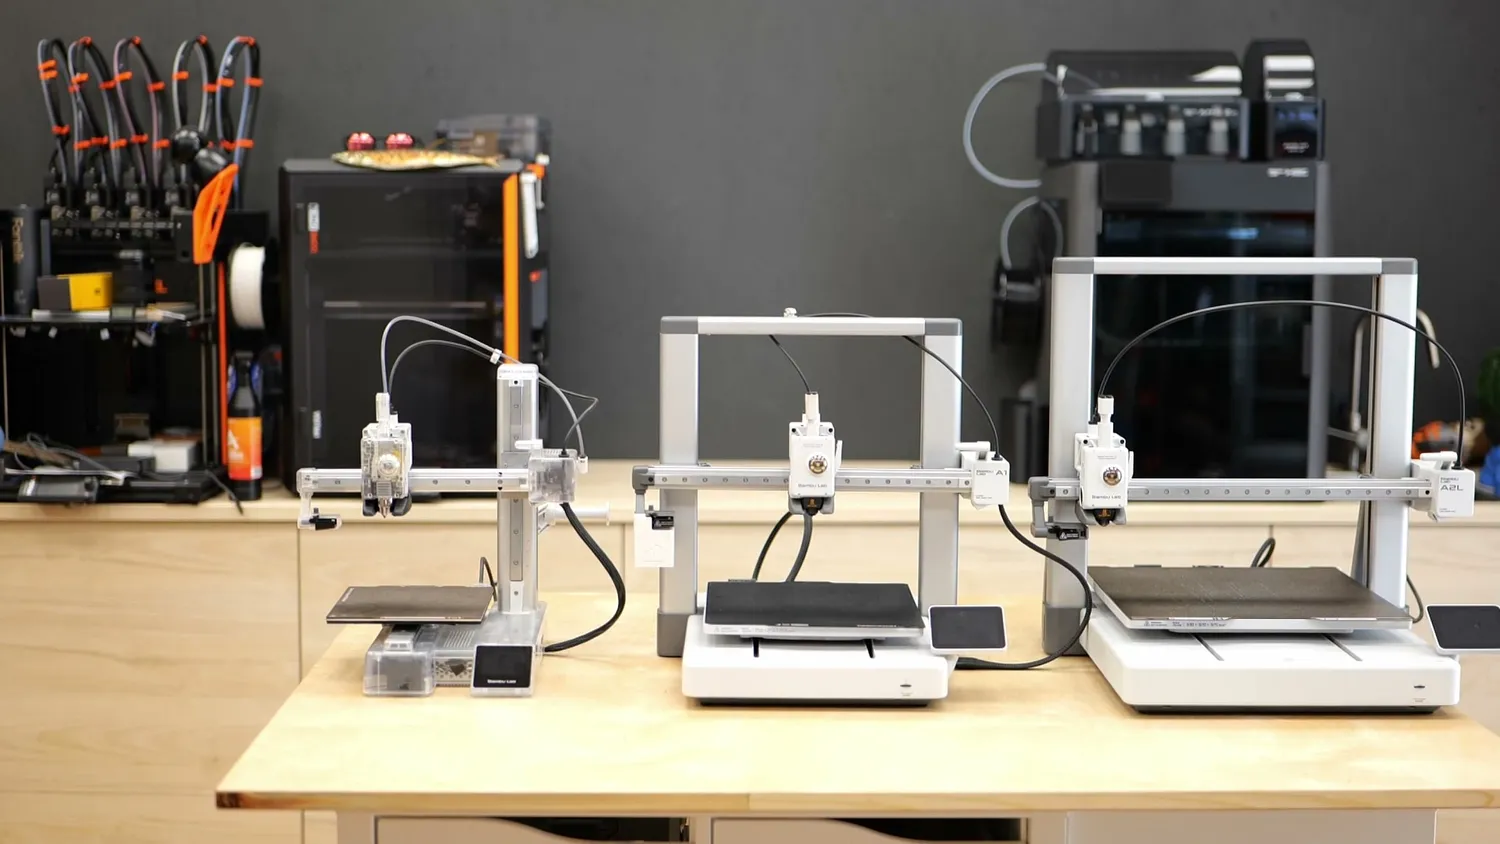 A1 Mini, A1 and A2L
For me, there is no second-generation AMS Lite. There are no major innovations like Anycubic, for example, introduced with its Kobra X* and its more efficient multicolor printhead. And Bambu still uses plenty of old hardware, like the weak camera. If this machine had launched two years ago alongside the A1, it would have simply looked like the bigger version of that printer.
Print quality
But do we actually need a completely new second-generation A-series printer? Isn’t what matters most how it prints? I put more than 350 hours of printing on this machine, and almost everything turned out really well.
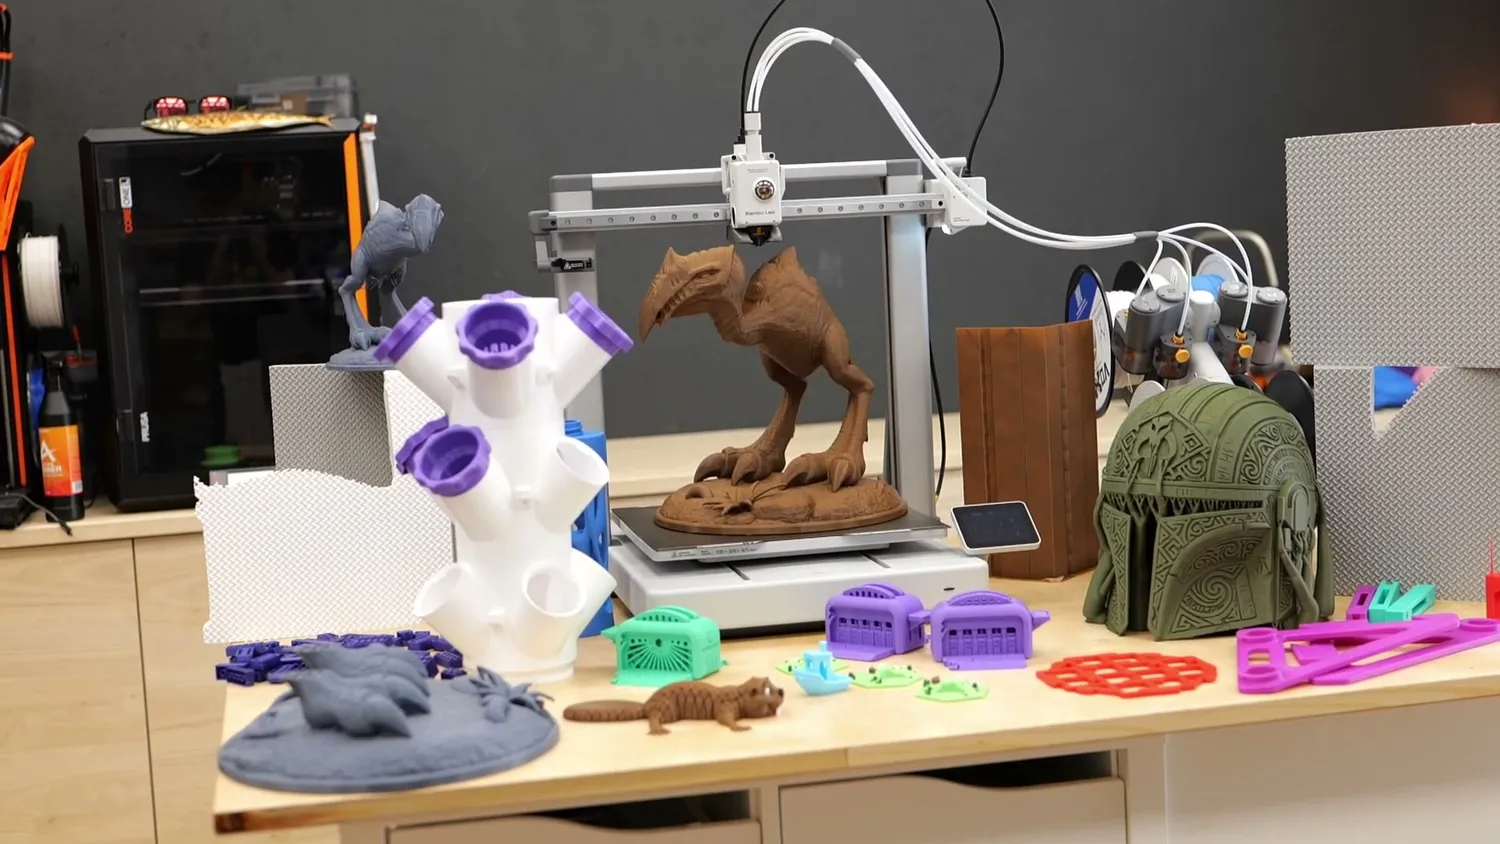 Almost everything I printed on the A2L
Let’s start with the basics: a 3D Benchy in PLA. It printed in 38 minutes and looked almost perfect. The extrusions were very consistent, the details sharp, and I could see basically no VFAs or ringing. The top layer was nicely extruded, and the first layer had the perfect thickness.
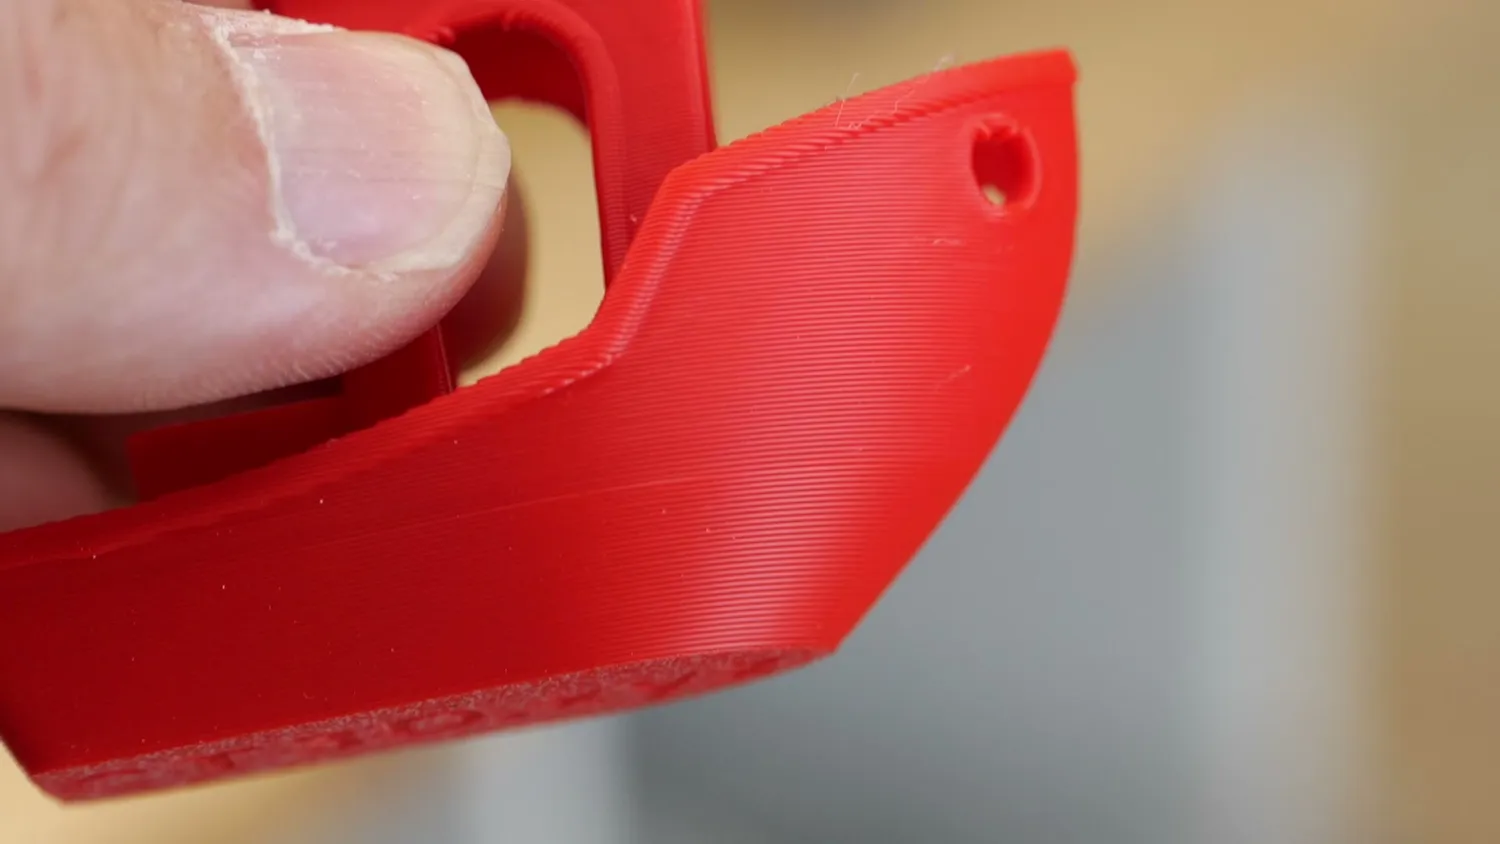 Very consistent extrusions on the Benchy
Next, I printed Clockspring’s torture toaster. The only real complaint I have is that the 0.1 and 0.2-millimeter tolerance tests were stuck. Everything else was again very smooth, and the overhangs looked good, which they also should on an open printer where you do not have to fight the heat of an enclosure.
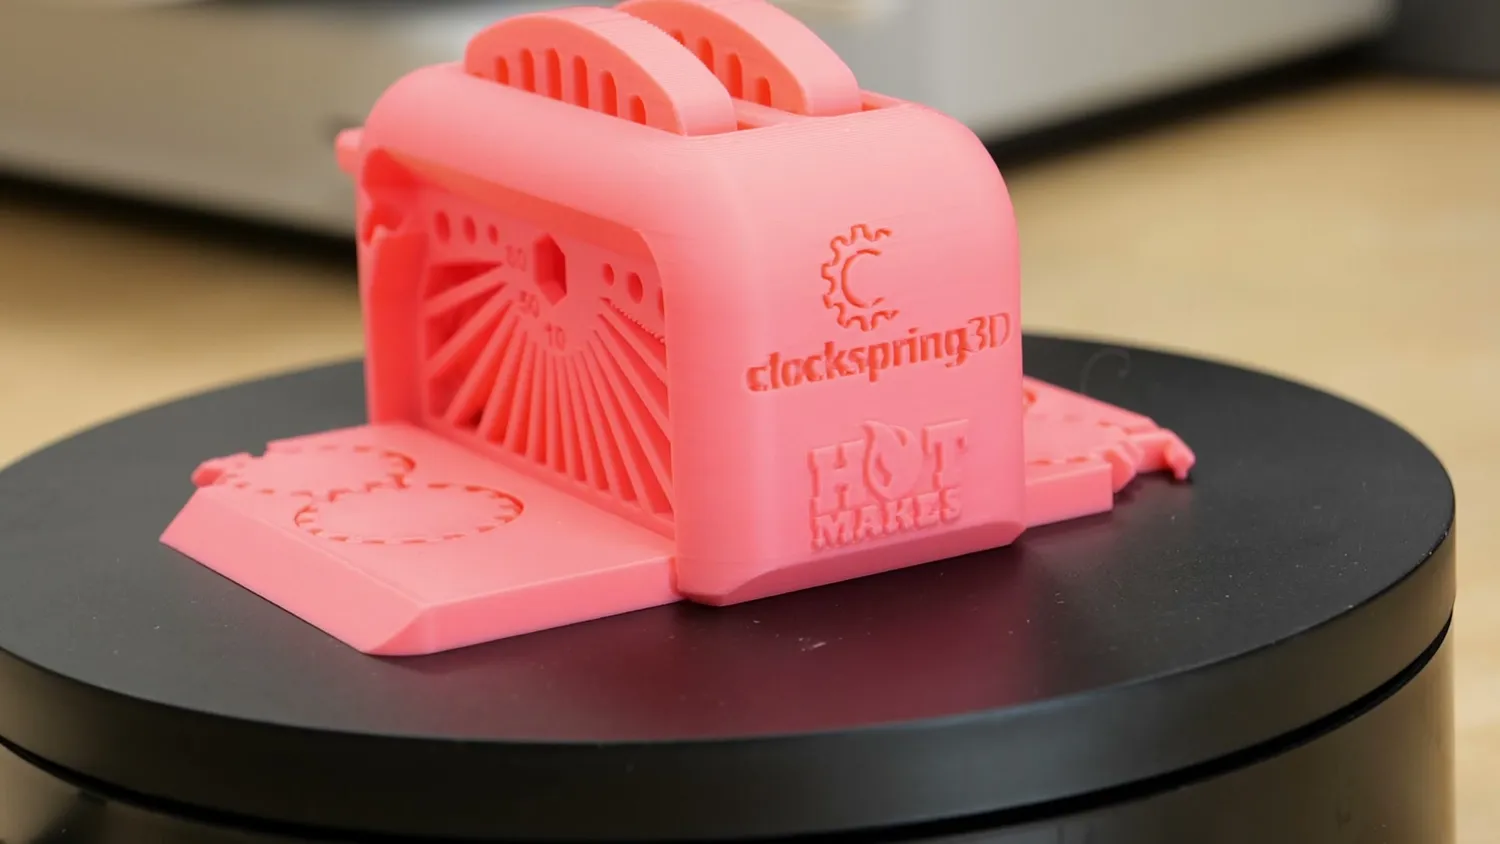 Clockspring’s torture toaster
The KSR Print test also looked great, and here even the 0.2-millimeter pin was loose. The surfaces were smooth, and the pins were almost perfect.
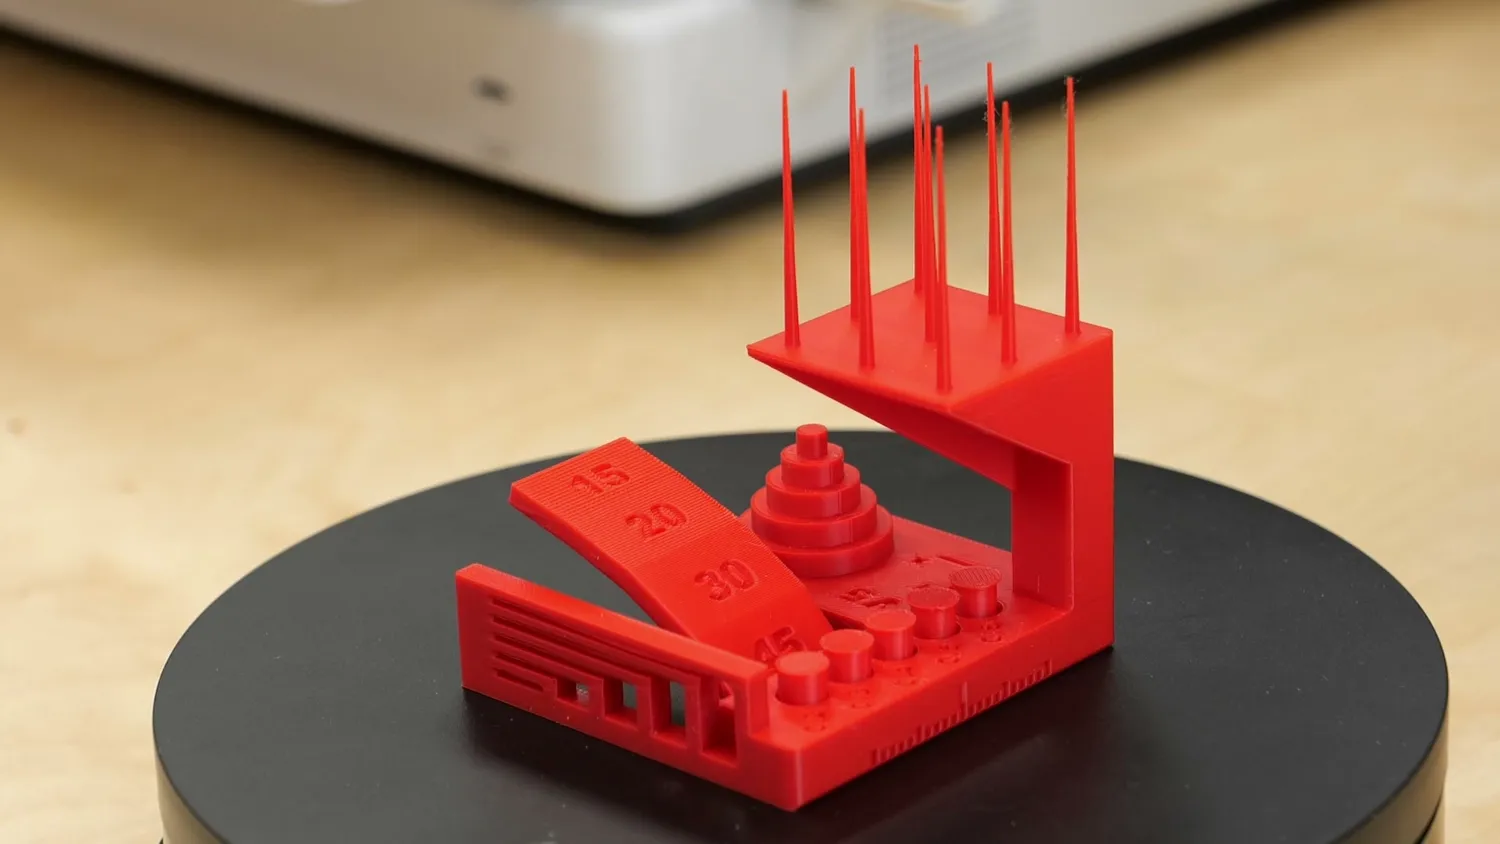 Even the 0.2-millimeter pin was loose
I also printed a few Gridfinity bins. Those usually show VFAs very clearly, but the side walls were basically perfect. In terms of surface quality, this printer is probably near the top of the list. The 1.5-millimeter pitch belts seem to do their job, and Bambu’s print profiles are very well tuned.
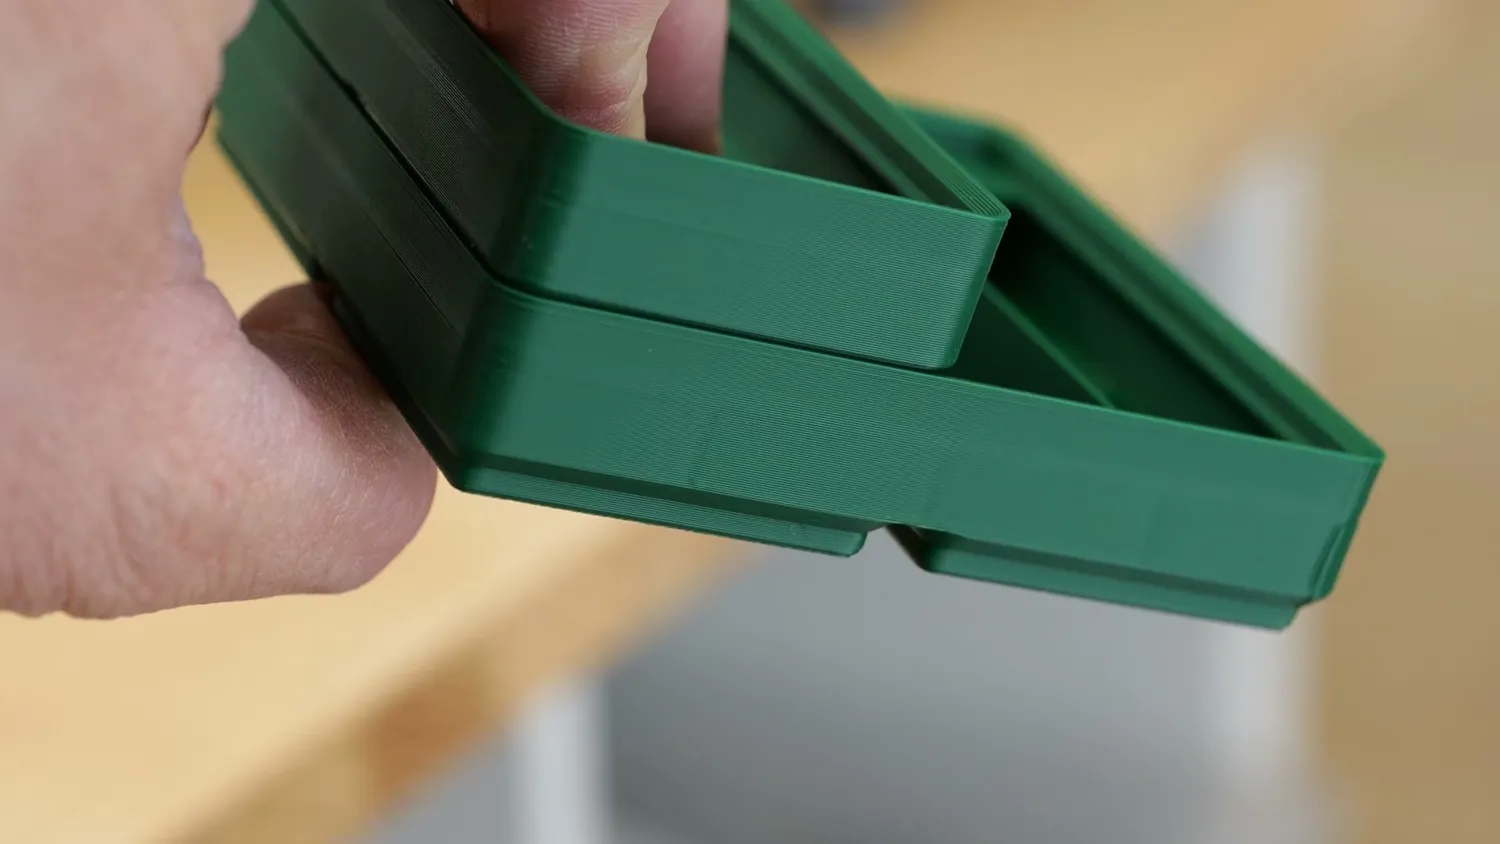 Gridfinity bins with basically no VFAs
After that, I moved to larger prints, because everything we had printed so far would also have fit on an A1 Mini. I printed a few parts for my hydroponics tower in PETG, and they came out great, with very smooth surfaces.
Then I wanted to show another use case for the large build plate: printing many parts at once without having to restart the printer regularly. The print went well and the parts looked good, but I wanted to demonstrate the cancel-object function. That feature allows you to deactivate one or more parts during a print if there is a problem, instead of stopping the whole print. Unfortunately, you cannot do that directly on the screen on the A2L or inside Bambu Studio. You have to use the Bambu Handy app. And if you have more than 64 objects on the plate, I printed 79 here, the feature does not work either. That was a bit of a bummer. So keep in mind that cancel-object is possible, but not if you fill the plate with too many small objects.
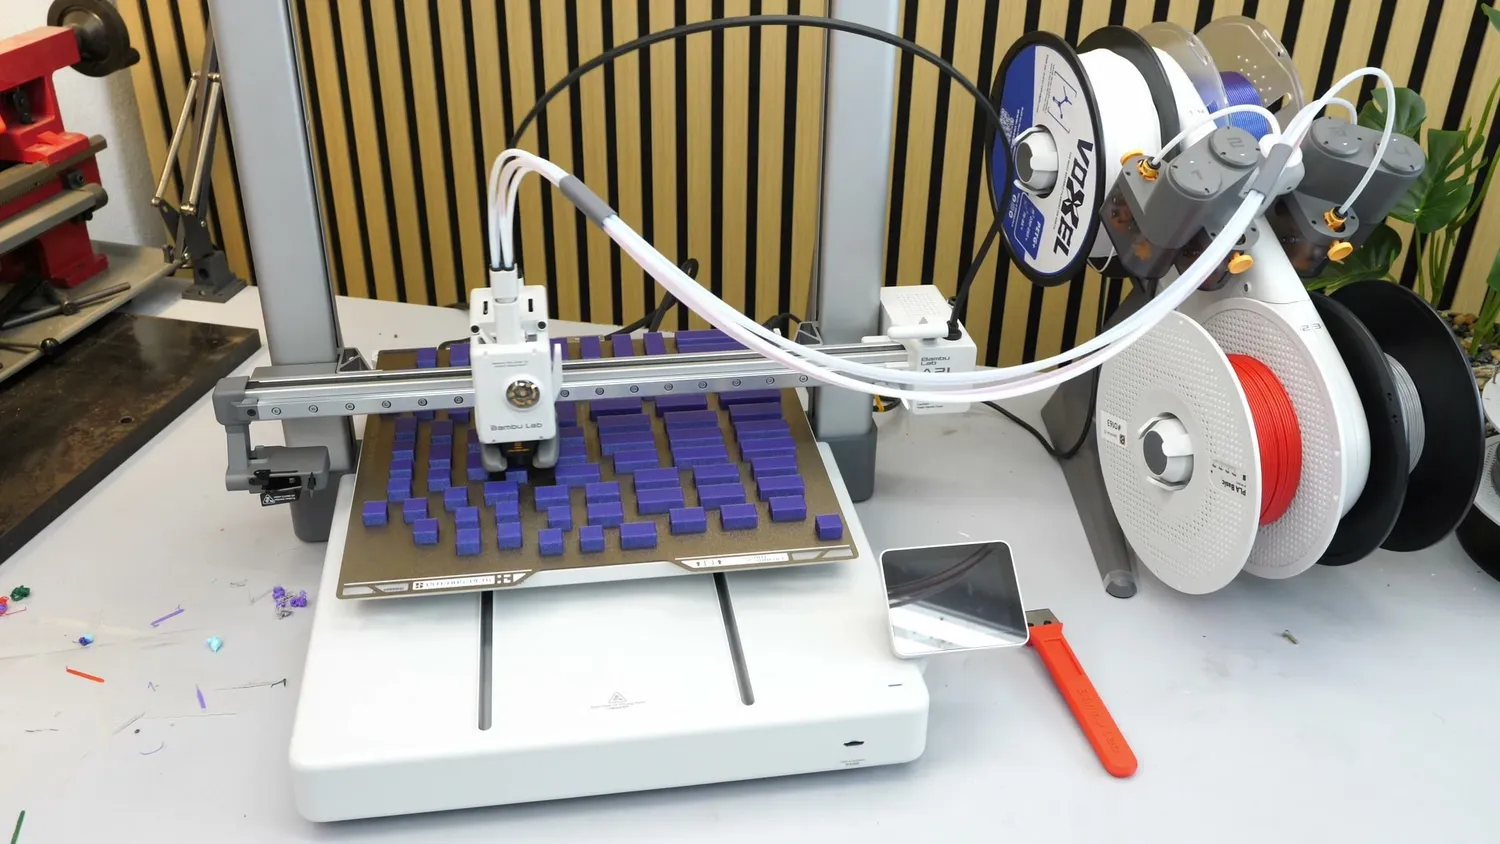 79 parts on one plate
Now let’s go bigger. For large parts, skew can become important. In other words: how close the X and Y axes are to being perfectly perpendicular. To check that, I printed Vector 3D’s Califlower test. With a skew of 0.04 degrees, the machine is pretty accurate. But because of the closed firmware, you cannot compensate for the small remaining error yourself.
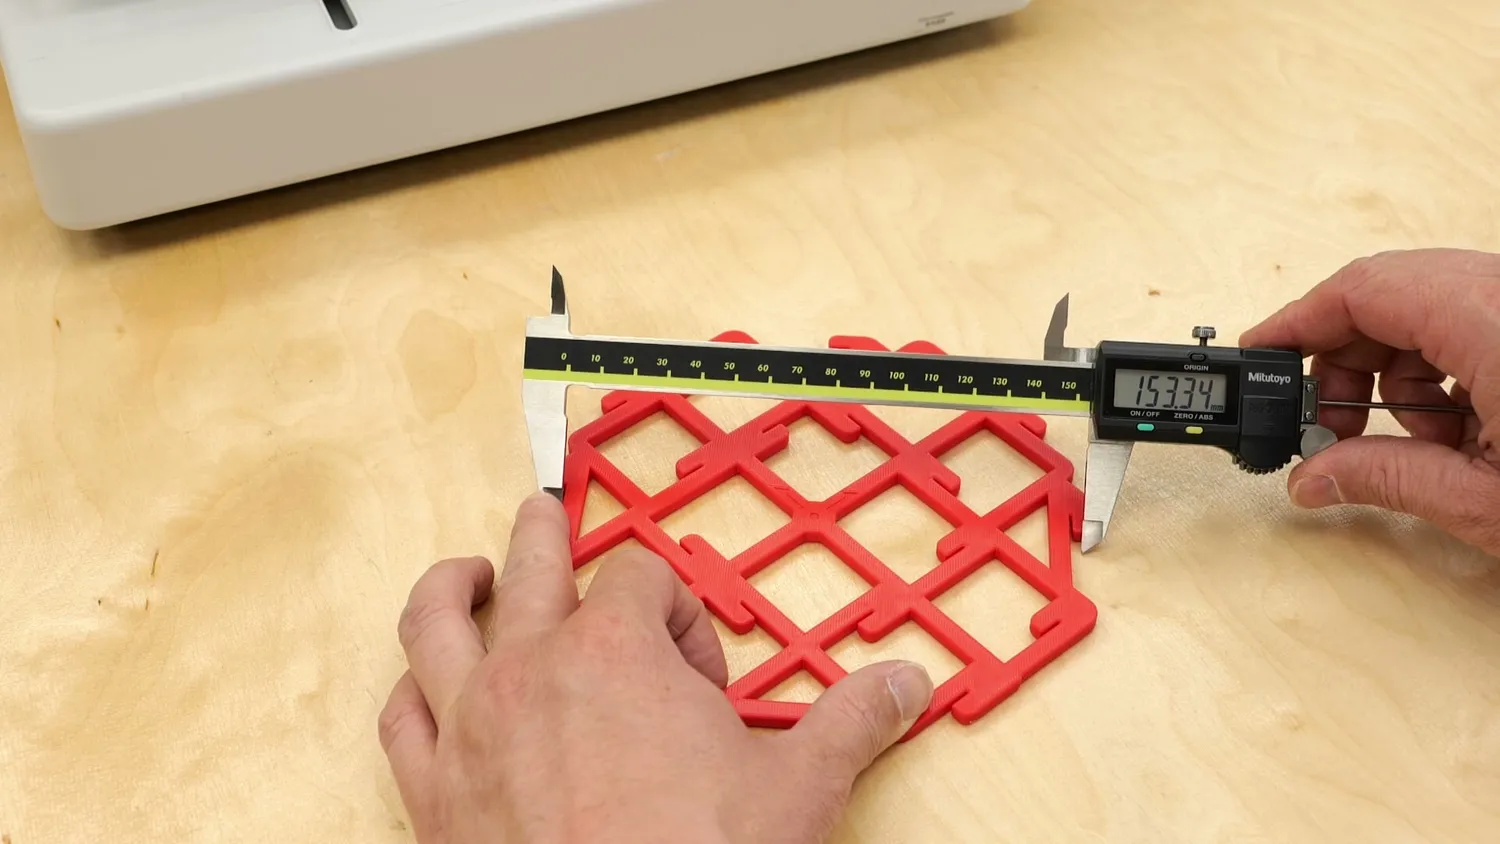 A skew of 0.04 degrees
The big prints
Now to my favorite print! I recently stumbled upon one of the most iconic animals from one of my favorite childhood games, which is getting a remake very soon. This is a Scavenger from Gothic, an action RPG I played a lot as a kid, and I wanted to print a really large version that would use most of the A2L’s build volume. The print should have taken more than 30 hours. Unfortunately, the first two attempts did not finish.
Both failures were caused by firmware bugs. The first print randomly paused after about a day, and I was not able to continue it. Bambu fixed that issue and sent me new firmware. For the second attempt, I wanted to use the AMS Lite’s filament backup function. If you load two or more spools of the same material into the AMS, the printer should automatically switch to a new spool once one runs out.
Unfortunately, that feature was broken as well. Again, I received new firmware that fixed the issue. For the third attempt, I still used a fresh spool and tried again. And this time, third time’s the charm: the model turned out amazingly well. There was no lifting from the build plate, nothing came loose, the supports released cleanly, and now the only thing missing is me learning how to properly paint models like this. But that is a story for another day.
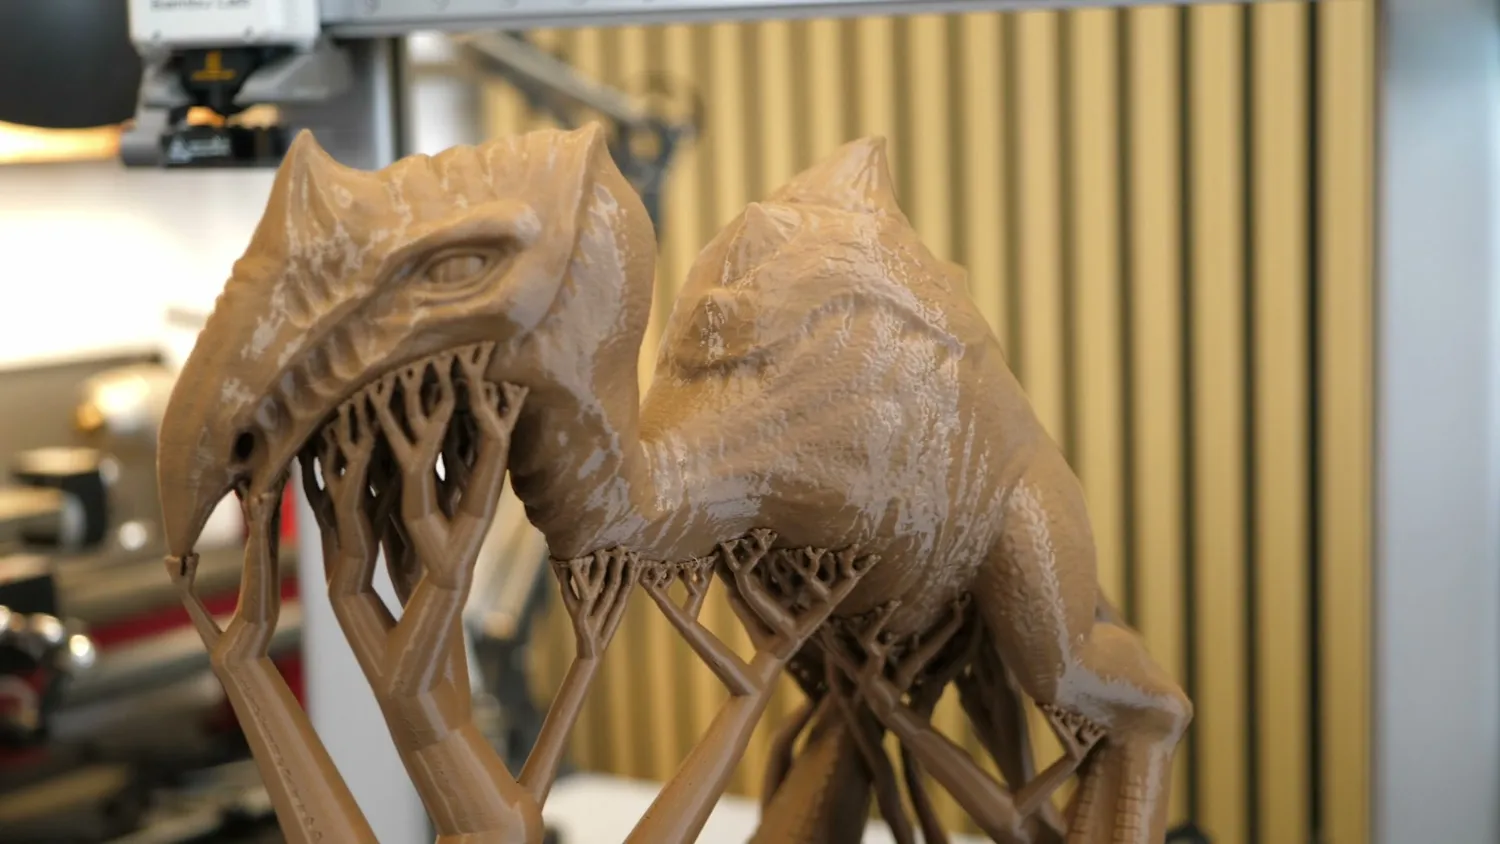 Third time’s the charm
The Mandalorian helmet took almost two days to print and also looked great, without any real issues. It shows how well this machine can work for cosplay, especially if you are not an expert. It was as simple as loading the model into Bambu Studio, enabling supports, and sending it to the machine.
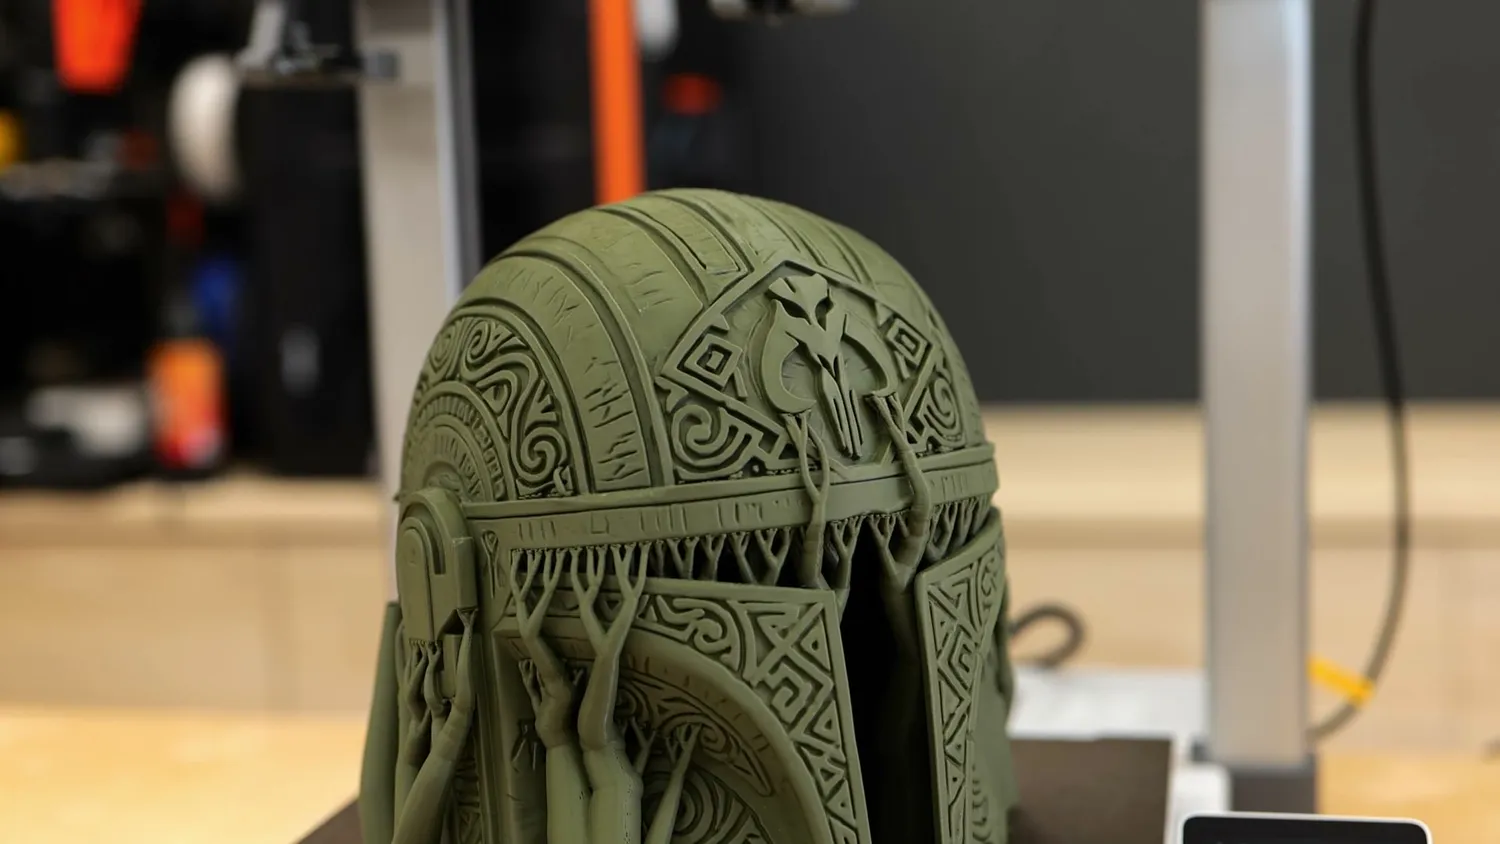 Almost two days of printing
Then I started my biggest project: printing a ramp for my garden so that my electric lawn mower* can drive from the front to the back of our yard by itself, instead of me carrying it around twice every day. I 3D scanned* the step, designed a ramp around it, added a texture to the top using BumpMesh, which you should definitely try out as well, cut the ramp into pieces, and started printing them from PETG.
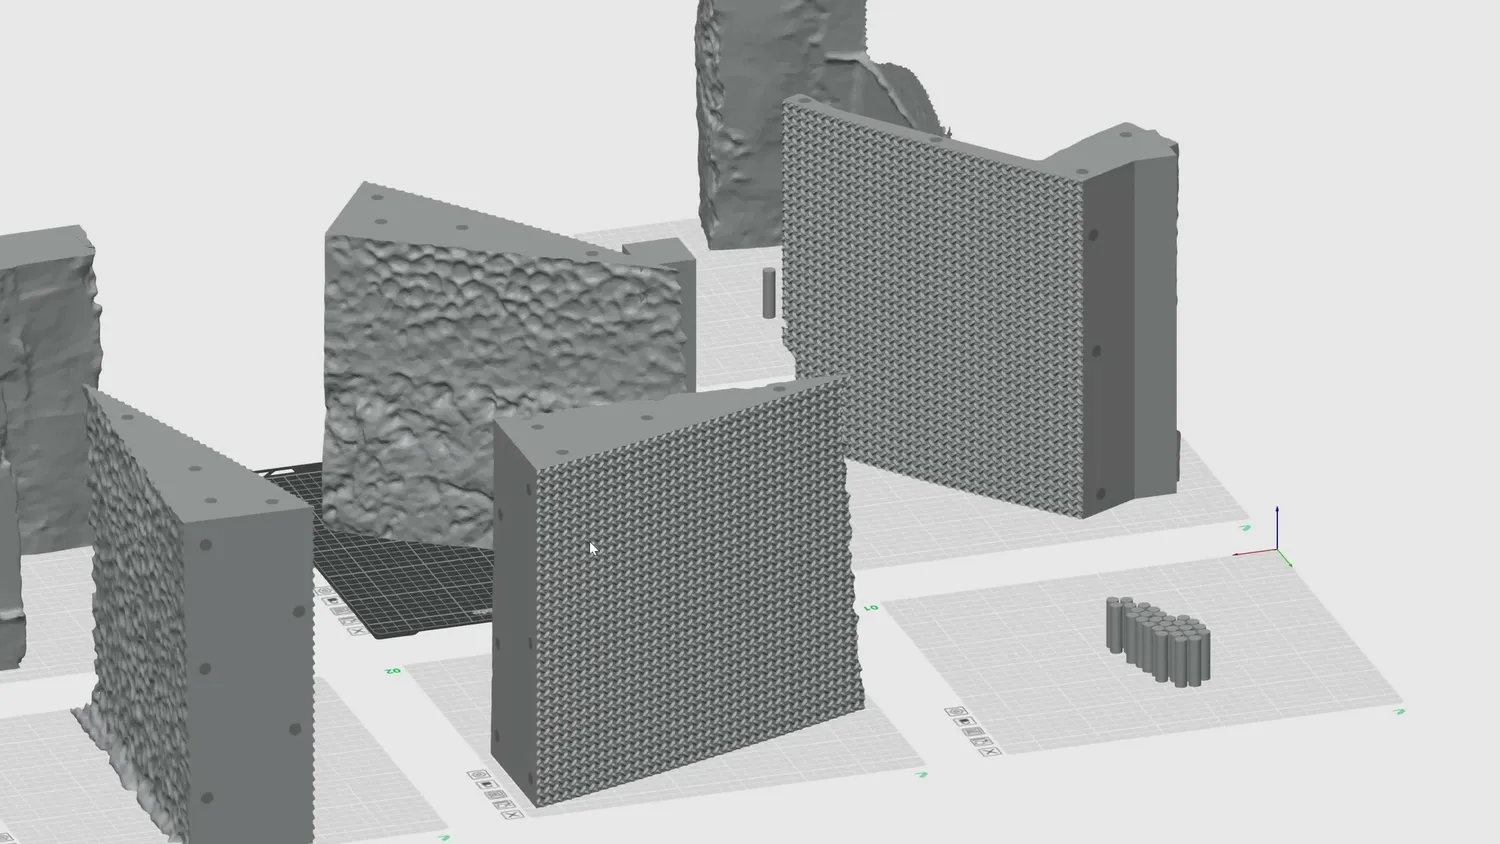 The ramp cut into pieces and textured with BumpMesh
This project revealed a few problems. First, large parts, especially when they are not printed from PLA, can warp. For the next part, I added a layer of Build Plate Adhesive to the bed and used a brim. That finally held everything in place. You could also really see the corner magnets doing their job, because the part tried to lift the build plate, but the plate stayed down.
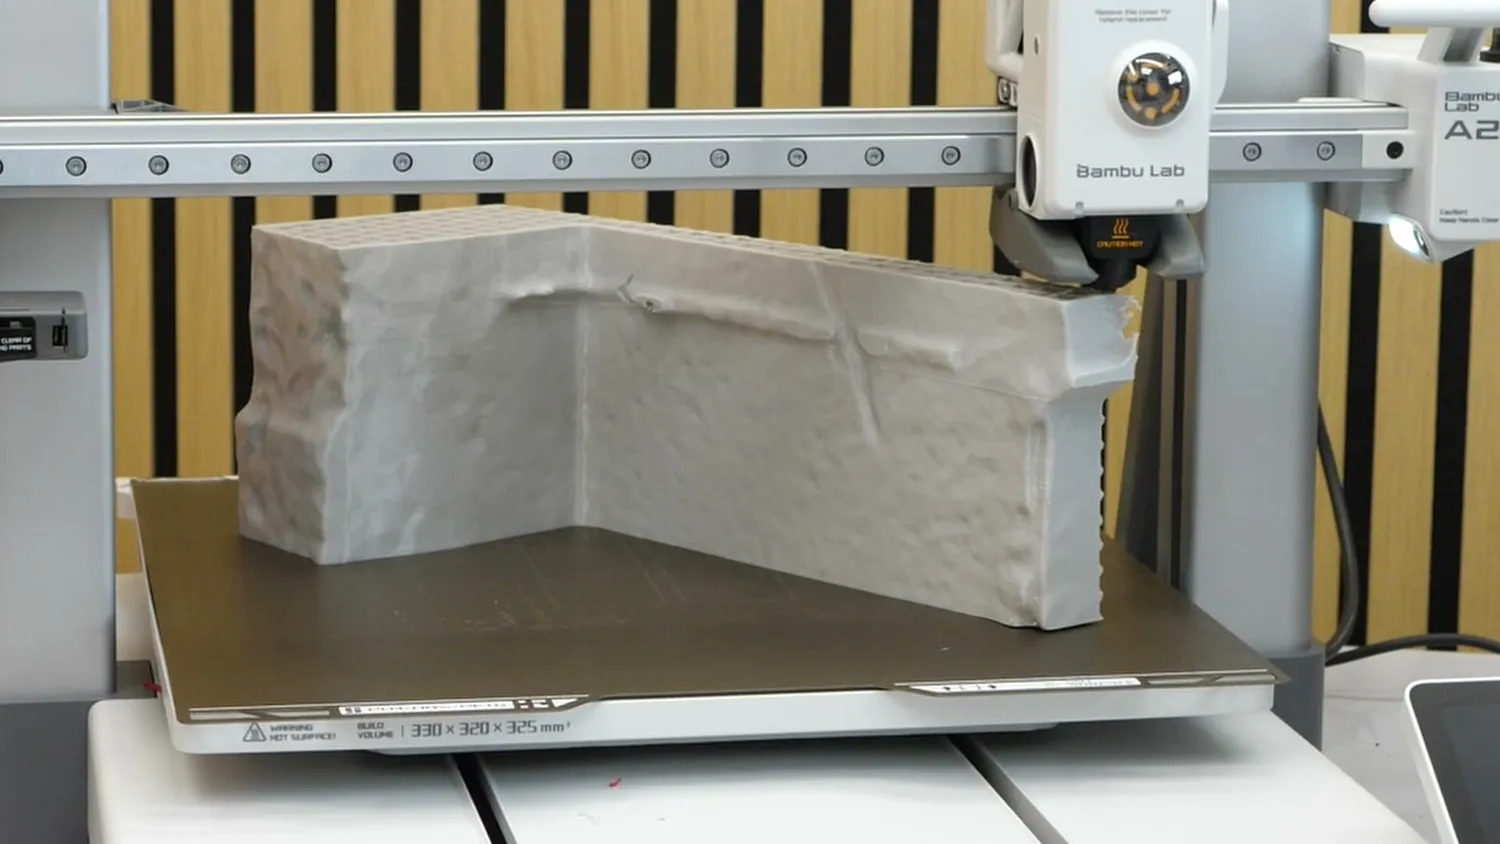 Large PETG parts can warp
Where the moving bed hurts
The second issue was surface quality on taller parts. The higher the print got, the more artifacts appeared on the surface. I had not seen this on the other large prints, and it was probably caused by the kinematics of the printer. A Cartesian printer moves the bed, and therefore the print, back and forth. A CoreXY machine, like many enclosed printers, keeps the part stationary and moves only the toolhead in X and Y. When parts get taller, they become less stable. And since my ramp pieces were relatively slim, the print orientation mattered a lot. If the large side of the part faces the bed movement direction, it becomes especially unstable. So, whenever possible, you want the more stable orientation aligned with the movement direction of the bed.
Why a tall slim part wobbles on a bed-slinger
Bambu Lab tries to mitigate this with something they call “Adaptive Vibration Compensation” where they seem to actively adjust the input shaper values depending on the weight you already printed on the bed and how tall the print is. But this doesn’t help much if the print itself is unstable. One feature in Bambu Studio that did help though is “Slow Down at Height.” When enabled, the printer reduces speed and acceleration as it gets higher on the part. So it simply prints more slowly and with less harsh movement the higher the part is. Changing the orientation, enabling that feature, and also using the latest firmware seemed to do the trick, because the last part came out really well.
But this still shows one of the limitations of large Cartesian printers, and why a CoreXY design can be beneficial for tall or unstable parts. And this is also not something where granular dampers help, because they stabilize the frame but not the actual part.
By the way, another side effect of the large and heavy moving bed is that it introduces more vibration into the workbench. In my case, it was enough that parts and tools on the bench started moving around, and more than once I had things falling down during a longer print. During editing, I even noticed that my good camera was also almost about to fall down the workbench, so it might be worth looking into some decoupling.
The AMS Lite, TPU and print speed
Finally, I printed one of my usual color test models: the wool hex tile from a 3D-printed Catan set. The A2L supports up to 19 colors if you combine four regular AMS units with one AMS Lite. And yes, the A2L is compatible with the box-style AMS, the AMS 2 Pro, and even the AMS HT if you work with materials that need to stay dry.
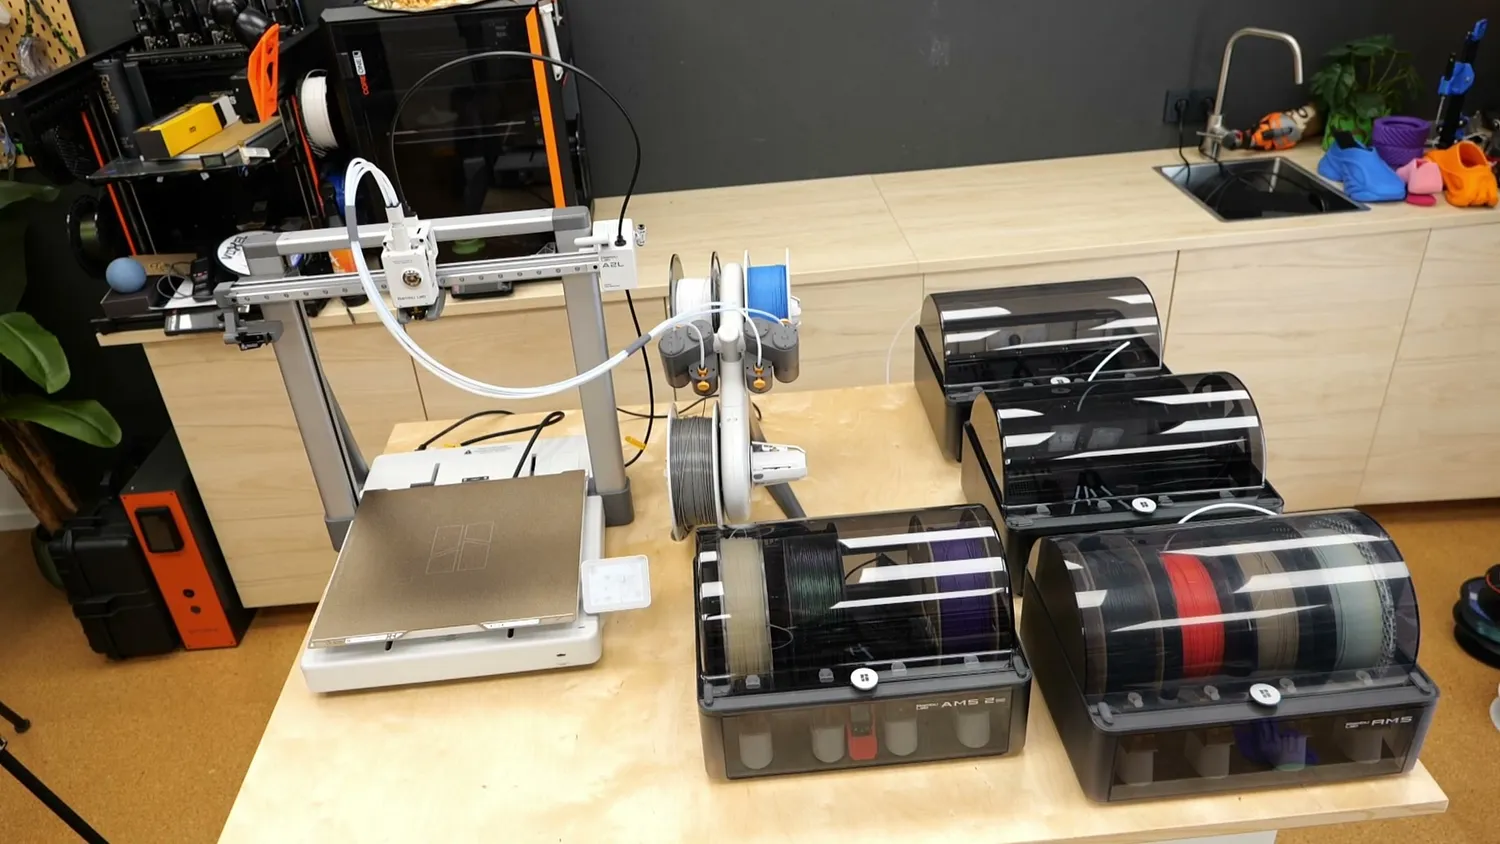 The A2L works with the box-style AMS too
For my testing, I exclusively used the included AMS Lite. In terms of print quality, it performed well. But it has the typical purge waste you get from a single-nozzle color-change system. Printing really large parts in multiple colors is not what this machine is best at. It creates a lot of waste, and because the filament changes are slow, it also takes a long time. If multicolor printing is your main goal, especially for large parts, a multi-tool or multi-nozzle system still makes much more sense. That said, color changes with the AMS Lite can be faster than with the box-style AMS, because the filaments are already loaded very close to the printhead in the four PTFE tubes. They do not need to be retracted all the way back into a closed AMS unit every time.
But that can also be a downside. If you use a filament that is prone to breaking under stress, like some PLA+ materials, the filament pieces inside the PTFE tubes can shatter into many small pieces. Cleaning that out is a real pain.
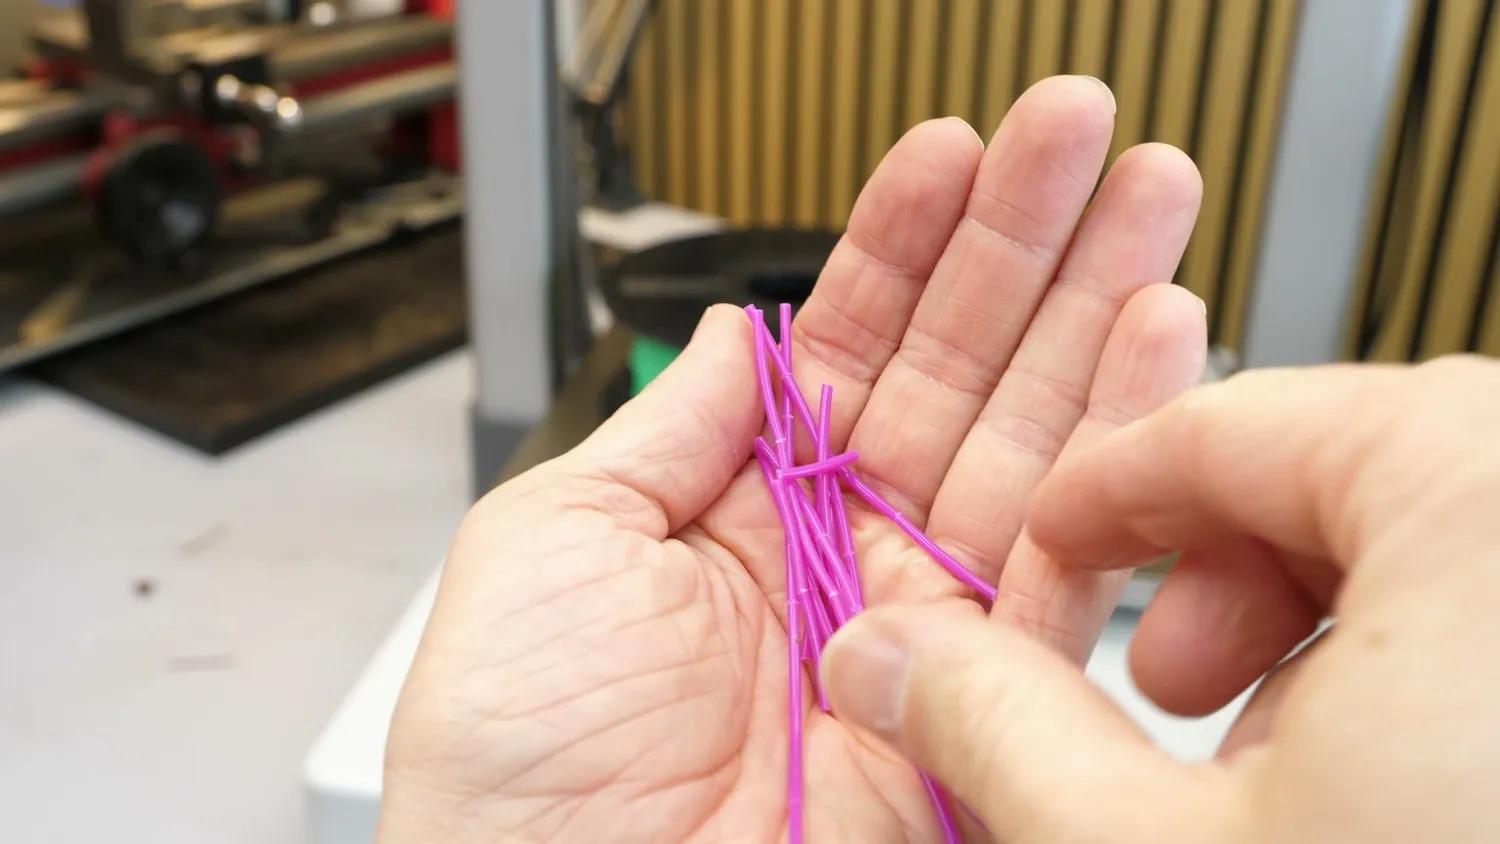 Brittle filament shattered inside the tubes
The third material you would probably print on the A2L is TPU. You will not win any speed records with it, but if the filament is dry, the results are great. This was 90A TPU, fed directly from the top spool holder, and the Benchy printed in only one hour and thirteen minutes.
Let’s also have a word on print speed. Generally, the A2L is a pretty quick machine, and in my tests it was about 10-20% slower than the CoreXY H-Series machines. There are two reasons for that. Due to the motion system, Bambu Lab limits speeds during infill and travel moves and, probably more significantly, limits accelerations. The other limiting factor is the hotend melt rate, which is a bit lower on the A2L’s older and cheaper hotends, which might be the more critical difference in the end.
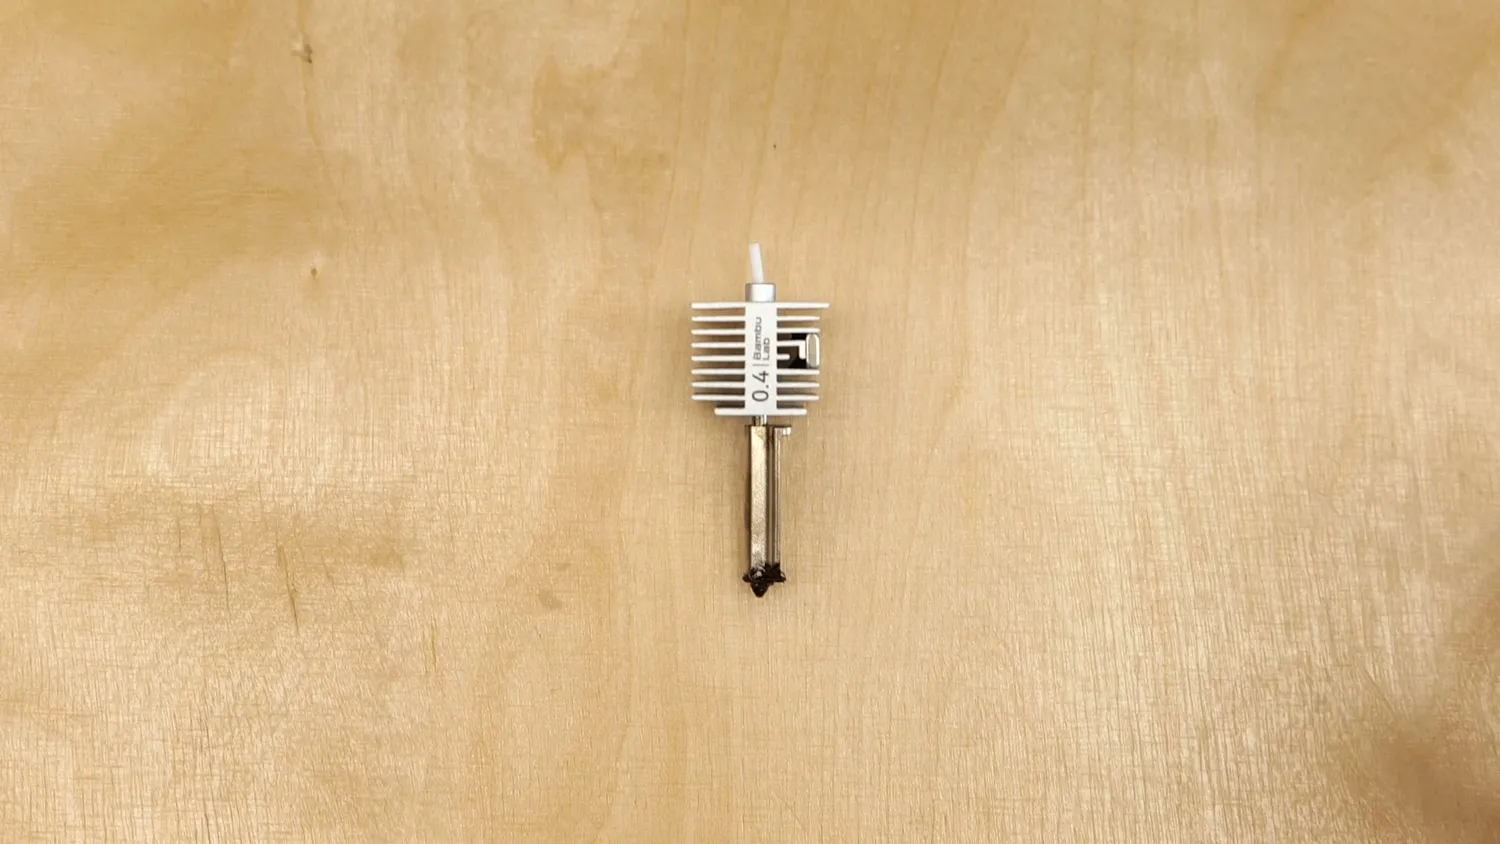 The A2L hotend has a shorter melt zone
Overall, after close to 400 hours of printing, the part quality was very good. Many of the bugs and problems I encountered were fixed in firmware during my testing, so hopefully you should not have to deal with them by the time the printer is available.
Electronics, power and noise
Speaking of reliability, one topic that recently got a lot of attention because of the Streisand effect around Bambu Lab is the issue with NTC thermistors on the A1, and supposedly also on the P1. On some units, especially on 110-volt systems, these components reportedly failed catastrophically. Bambu changed the design at the end of last year and removed that component entirely. So you might be wondering how this is handled on the A2L. I partially disassembled my 230-volt version and noticed that Bambu added a lot of protection around the electrical systems. Not sure if that is touch or fire protection, but I also found that there is no NTC thermistor on the AC board anymore. So at least that specific point of failure should no longer be present. If you have an older A1, you should keep an eye on it.
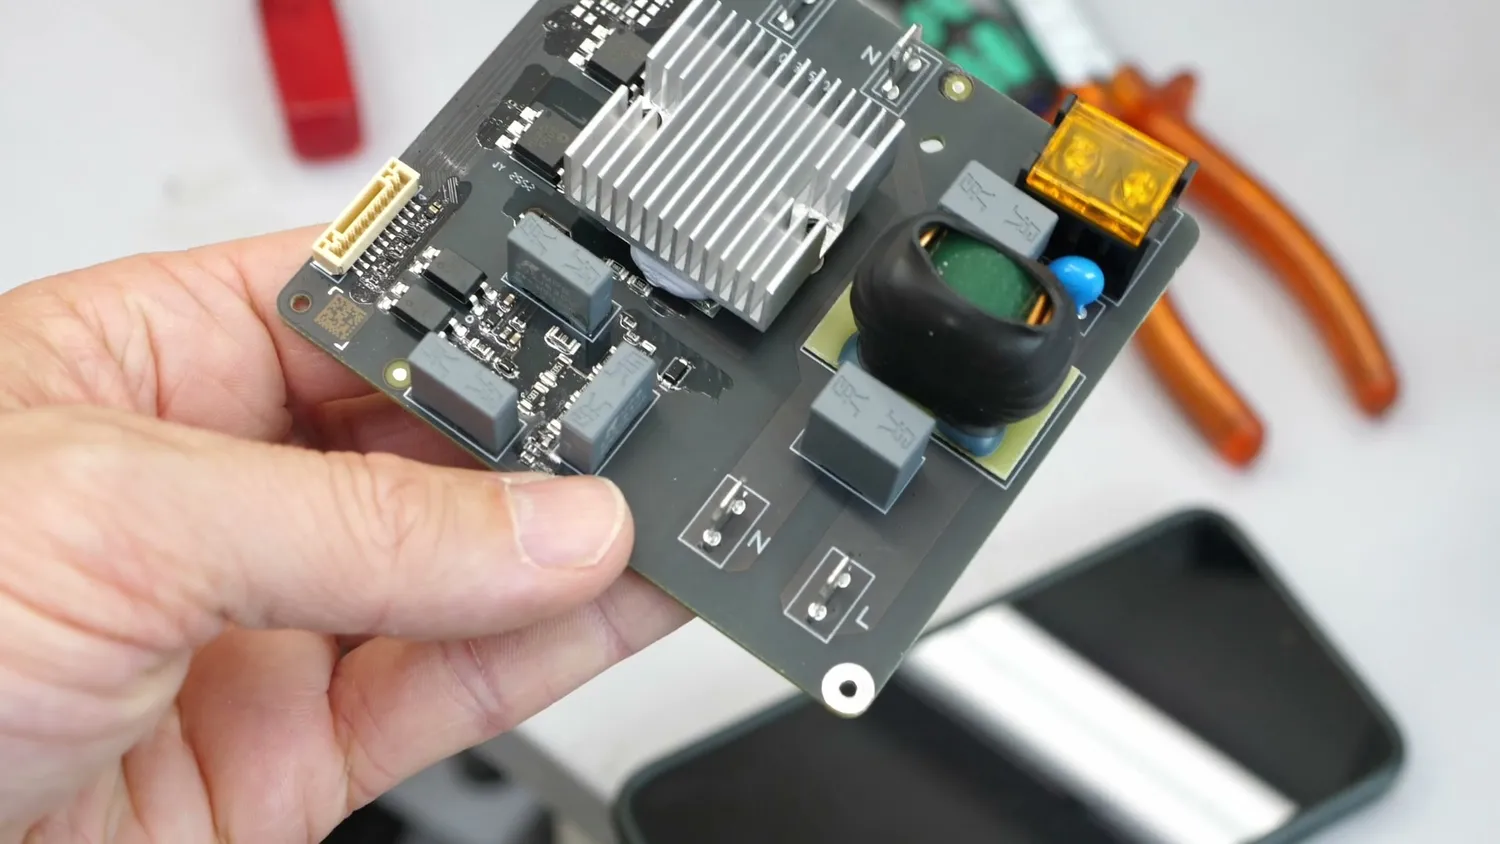 No NTC thermistor on the A2L’s AC board
I also had the A2L connected to a smart socket during my whole testing period, which allowed me to monitor power consumption. When heating the bed and hotend, the printer briefly draws around 900 watts. During printing, depending on the print job, it averages around 120 watts for PLA and around 140 to 150 watts for PETG at the higher bed temperatures. That is less than I expected for a printer with such a large bed.
During printing, the machine is relatively quiet, hovering around 50 decibels. The loudest component is usually the part cooling fan. It is not fully on during normal printing, but it ramps up for overhangs and bridges.
Because the machine is fully open, there is no air filtration. So make sure your print room is properly ventilated. And please do not print in your bedroom or let kids run printers in their rooms.
Using the A2L as a plotter
So enough 3D printing. Even though there is no “H” for Hybrid in the A2L’s name, it is Bambu’s first non-H-series machine that supports accessories. There is no laser module for it, and there will not be one, but you can use the cut module. And on this machine, I think that makes a lot of sense. The cutting upgrade* costs around 60 dollars if you buy it with the A2L. It includes the cutting platform, the cut-and-draw head, and some accessories. The sticky cutting plate has a working area of 300 by 300 millimeters, which is large enough for A4 or letter-size sheets.
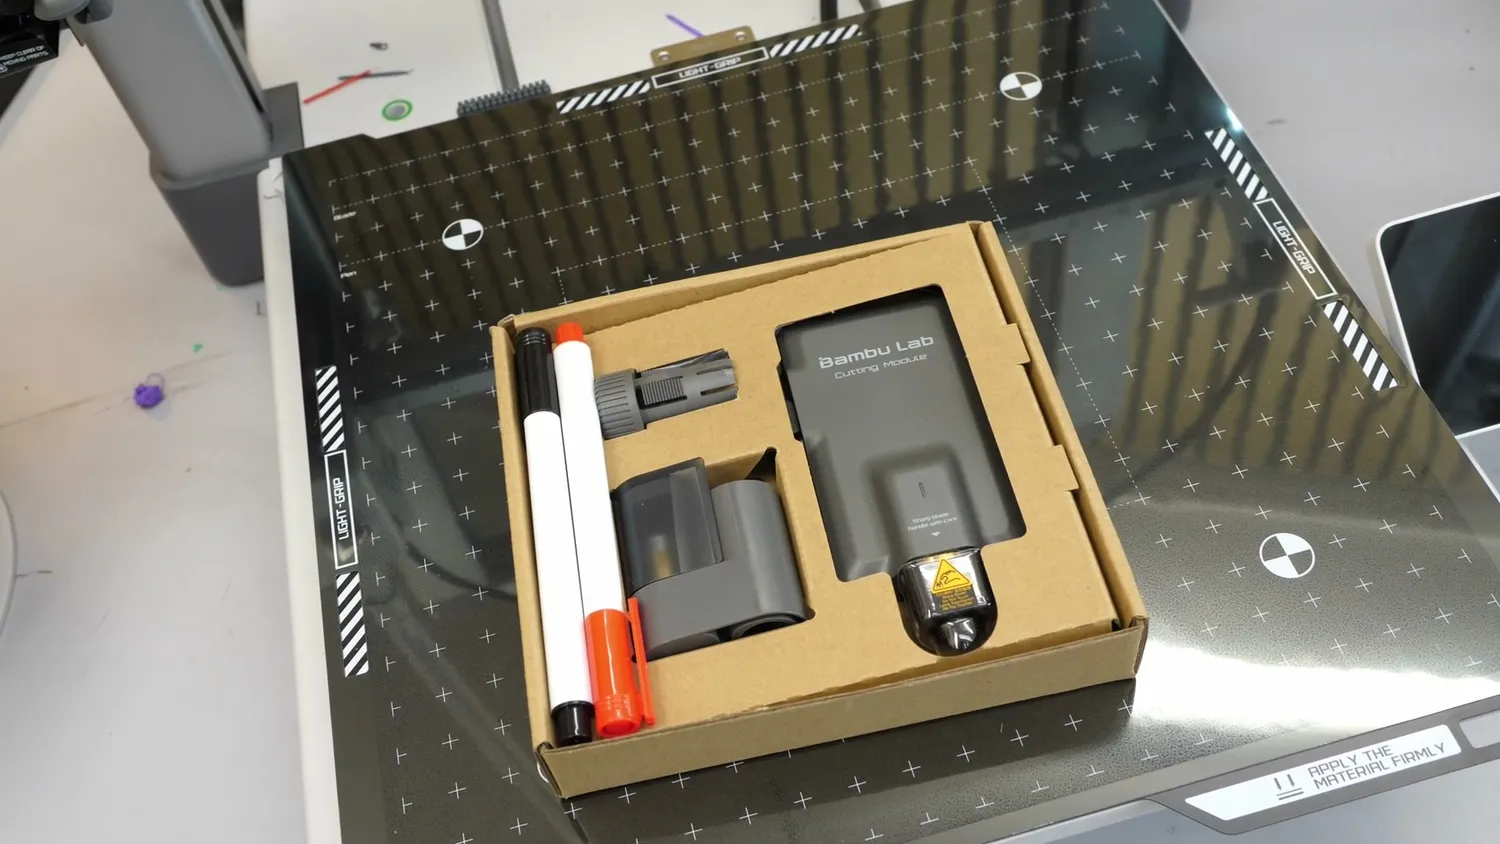 What comes in the box
I never used the cutting module on my other Bambu printers, so I finally wanted to try it here. I wanted to make some swag, and also a T-shirt I have secretly wanted since I was a child. After removing the front cover, you slide the module into the front rail, lock it in place with the lever, and plug in the cable at the top. The cable is necessary because the cutting module has a force sensor. That sensor is used for leveling and for precisely controlling the pressure on your workpiece so it stays consistent during cutting.
After installing the cutting module and the plate, the printer performs a quick calibration and is ready to go. Cutting is prepared in Bambu Suite, which is a separate tool available for Mac and Windows. It works fairly well. The A2L does not have the bird’s-eye camera from the H-series, so precisely placing a cut on existing vinyl is more difficult. But Bambu says there will be an option to use your phone to capture the cutting plate and help position designs. In my case, I stuck heat-transfer vinyl to the cutting plate, prepared the design in Bambu Suite, selected a material profile, and sent it to the printer, which at that point is basically a plotter. After the design is cut, you use the weeding tool to remove the vinyl you do not need, and then transfer the design to a shirt with an iron.
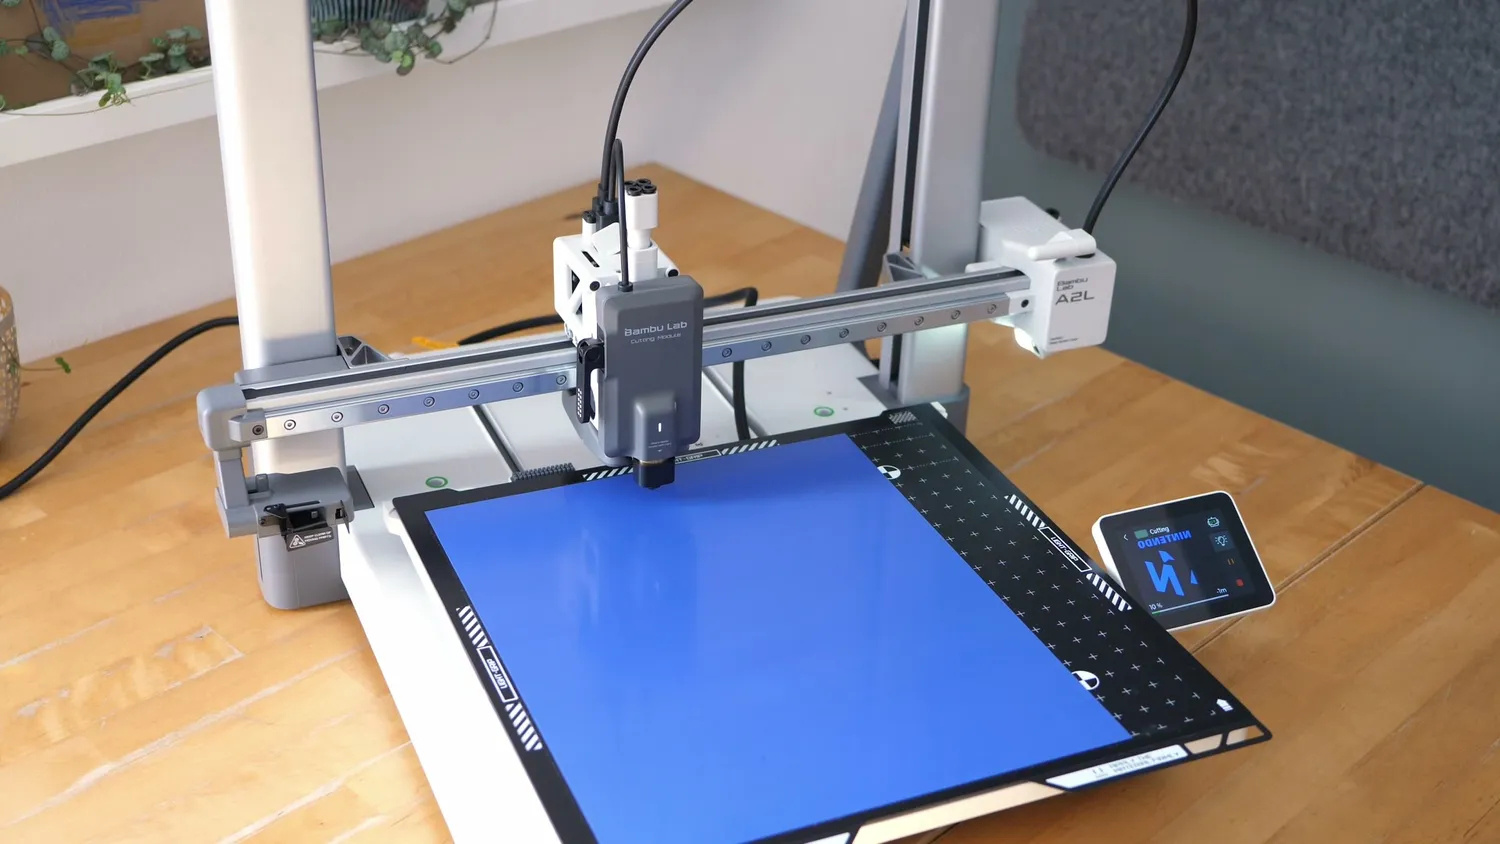 The printer working as a plotter
One sheet did not cut properly the first time, so I had to redo it. Everything else worked fine. For a first try, I think it looks quite good, despite the E that I messed up with the iron and some things not perfectly aligning.
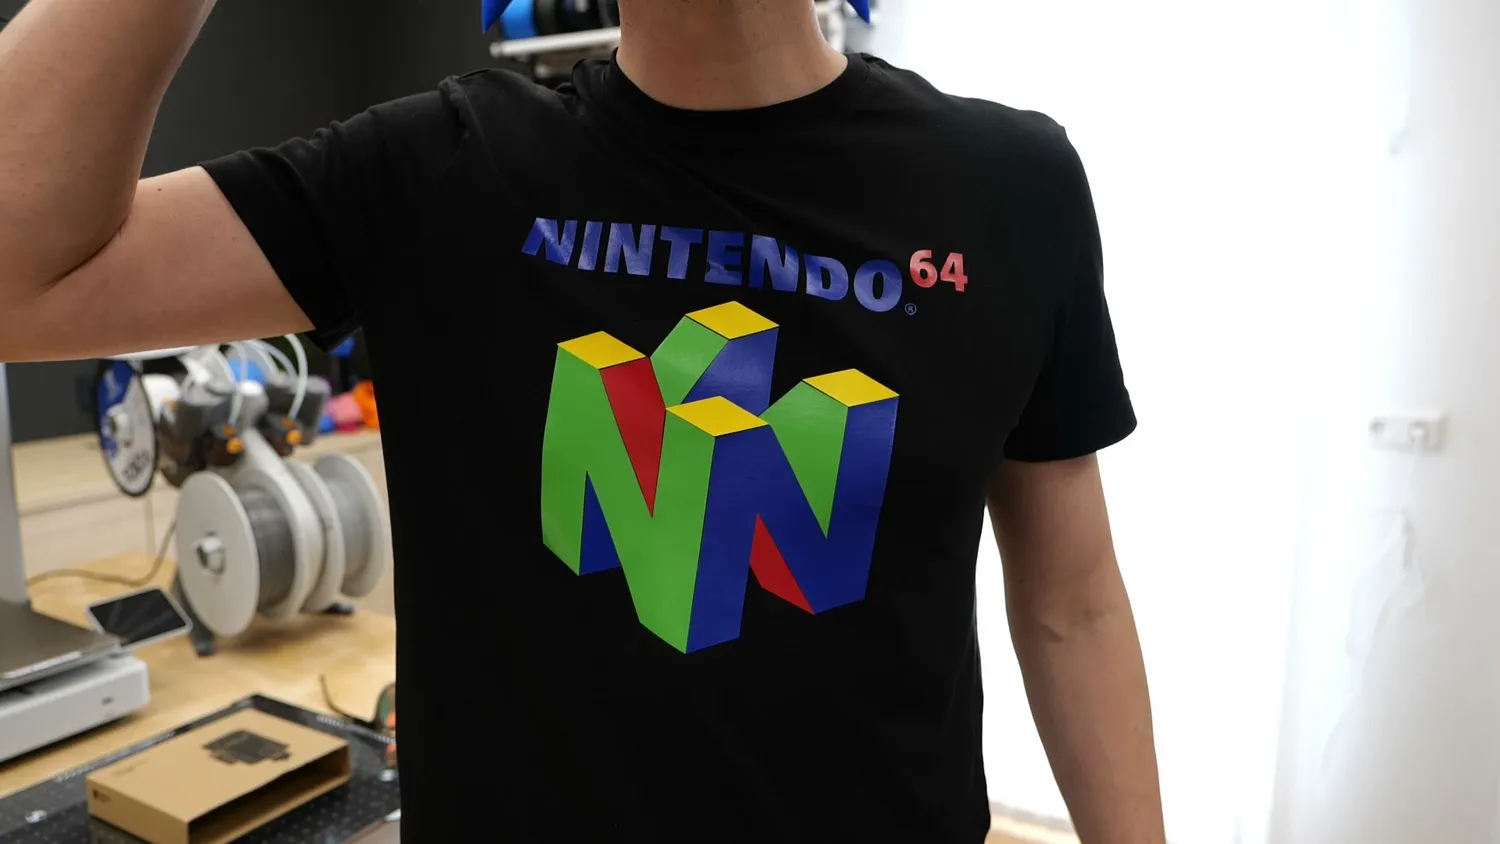 The shirt I secretly wanted since I was a child
There are many more things you can do with the cutting module, and MakerWorld already has a lot of prepared projects for it. On the H-series machines, I saw the cutting module as more of a gimmick. Those are around 2000-dollar high-performance 3D printers, and using them as a plotter felt a bit strange. But on the A2L, it makes much more sense. The bed is big enough for common paper sizes, and the machine itself is more casual and accessible. For example, if you are a cosplayer, you no longer need both a 3D printer and a separate plotter. You can print your helmet and then cut the decals for it on the same machine.
To buy or not to buy
Everything is neatly integrated and explained on the A2L and nothing feels like you need expert knowledge. And this is both the blessing and the curse of Bambu Lab machines. They work really well, and they are extremely approachable, as long as you stay inside Bambu’s ecosystem and cloud. The moment you try to step outside it, things get complicated. No cloud means no convenient remote monitoring through the app. No Bambu filament means materials are not automatically recognized, and you do not know how much is left on a spool.
And I want to be clear that these are not just minor annoyances. I also fully understand the concerns about Bambu potentially abusing open-source software, about an increasingly closed ecosystem, and about where your data goes once it is processed through their cloud. If those things matter to you, then you should not buy this printer, or any of Bambu’s machines. You will likely have a better experience, and more peace of mind, with one of the competitors that takes Open Source and data privacy more seriously and to be honest, voting with your wallet will probably have a longer-lasting impact on the company than another drama video ever will. For a lot of people, the relationship with Bambu Lab feels like the relationship with Nvidia or Tesla: the products are often excellent, but the company behind them can be questionable.
So with all of that on the table, here is my recommendation.
Buy the A2L if you want a big, approachable, relatively affordable workhorse for PLA, PETG, and TPU (for cosplay, functional parts, and the occasional cutting job) and you are comfortable living inside Bambu’s ecosystem. The print quality is excellent, the large build volume is useful, the AMS Lite adds real convenience on long prints, and the cutting module finally feels like more than a gimmick on a machine like this.
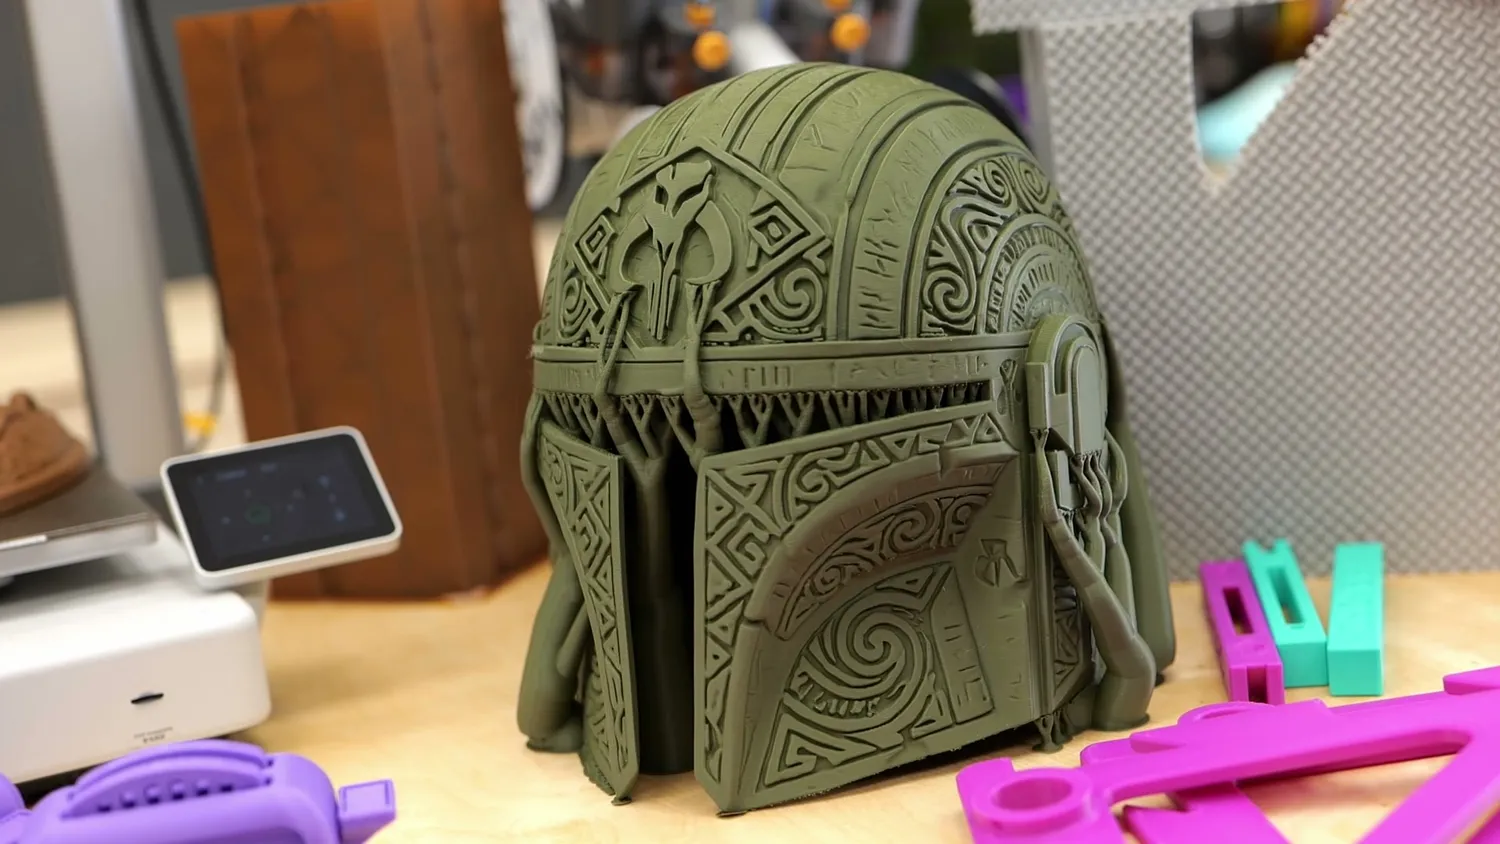 Cosplay, functional parts and the occasional cut job
Don’t buy it if you need open software, if you mainly print engineering materials, if you want the least possible dependence on the cloud, or if you simply do not want to support Bambu Lab in its current direction. And go in with realistic expectations: the open Cartesian design means tall, slim parts can suffer from the moving bed, the camera is still basic, and the firmware still had some hiccups during my testing.
At the end of the day, that “2” promised a second generation and what we actually got is a very good, large A1. So maybe they really should have just called it the A1L. As a piece of hardware it is excellent. As a purchase, it depends just as much on how you feel about the company as on the machine itself. And that decision is yours to make. My job is not to patronize you, it is to inform you about the product, the software, and the company as honestly as I can, given my position. The rest is up to you, and I hope you can appreciate that.
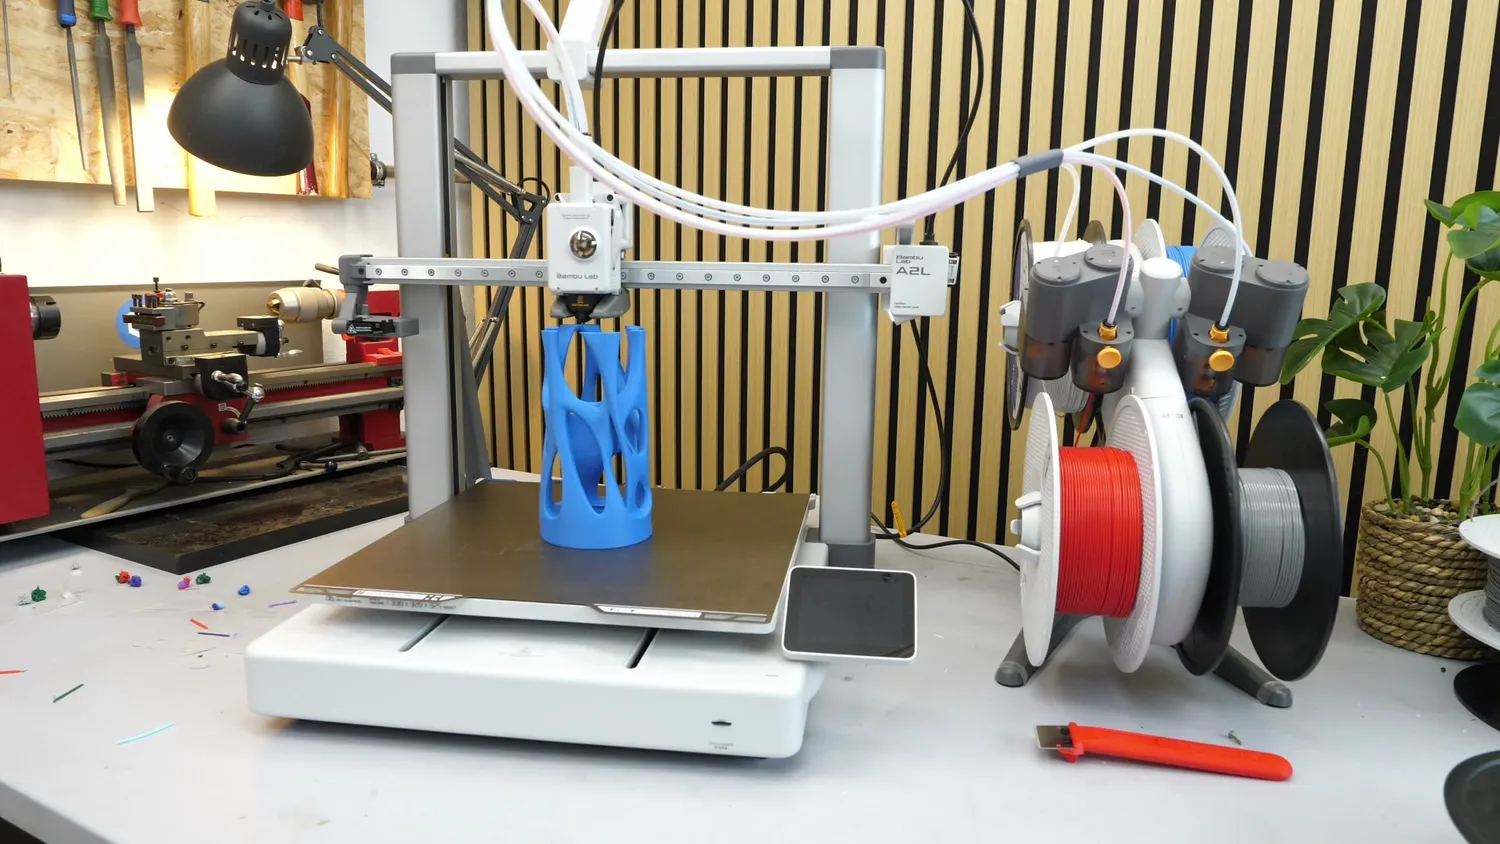 Excellent hardware, and a very good, large A1
🐼 Get the A2L Combo ($569 / 489€): https://geni.us/BBL-A2L*
🐼 Get the A2L standalone ($469 / 379€): https://geni.us/BBL-A2L-SAL*
* Links marked with an asterisk are affiliate links — if you buy through them, I earn a small commission at no extra cost to you. As an Amazon Associate I earn from qualifying purchases. Thanks for supporting my work!