
The H2C Review: Better Than a Toolchanger?
Bambu Lab's H2C swaps six induction-heated nozzles instead of flushing filament. Teardown, print times and waste compared to the Prusa XL and Snapmaker U1.
TL;DRthe short version
- The H2C is a nozzle changer, not a toolchanger: a rack of six induction-heated hotends on the right side plus the fixed left one, which makes seven colors without any flushing.
- It is not waste-free. You still print a purge tower, but it is about the same size as the one a toolchanger needs.
- A nozzle swap takes around 40 seconds including purging, against 10–15 seconds on a toolchanger and 1 to 2 minutes on a single-nozzle machine. The mechanical change is under 15 seconds; waiting for the AMS is the bottleneck.
- The induction nozzles reach PLA temperatures in under 10 seconds, four times as fast as a conventional hotend, and their temperature is read out wirelessly over two coils on a tiny PCB.
- I sanded one open: the body is brass with a steel sleeve around the melt zone doing the actual heating, which gives a much nicer temperature distribution than the Trident hotend I tested two years ago. Maximum flow was 37 mm³/s instead of 41.
- On the 4-color test cube the H2C needed 7 hours in Purge Saving mode while both toolchangers finished in under 4, but its 23 g prime tower is comparable, and the H2D flushes eight times more material.
- Print quality over more than 200 hours was very good, with only a very slight texture every few layers on flat sides when several nozzles are involved.
- My verdict: not a revolution, but a solid addition to the H2 series. For multi-color PLA the Prusa XL and Snapmaker U1 are faster and cheaper, but nothing beats the H2C's heated chamber, dedicated nozzles per material and convenience, at $2,399.
🐼 Get the Bambu Lab* H2C ($2,399): https://geni.us/BBL-H2C*
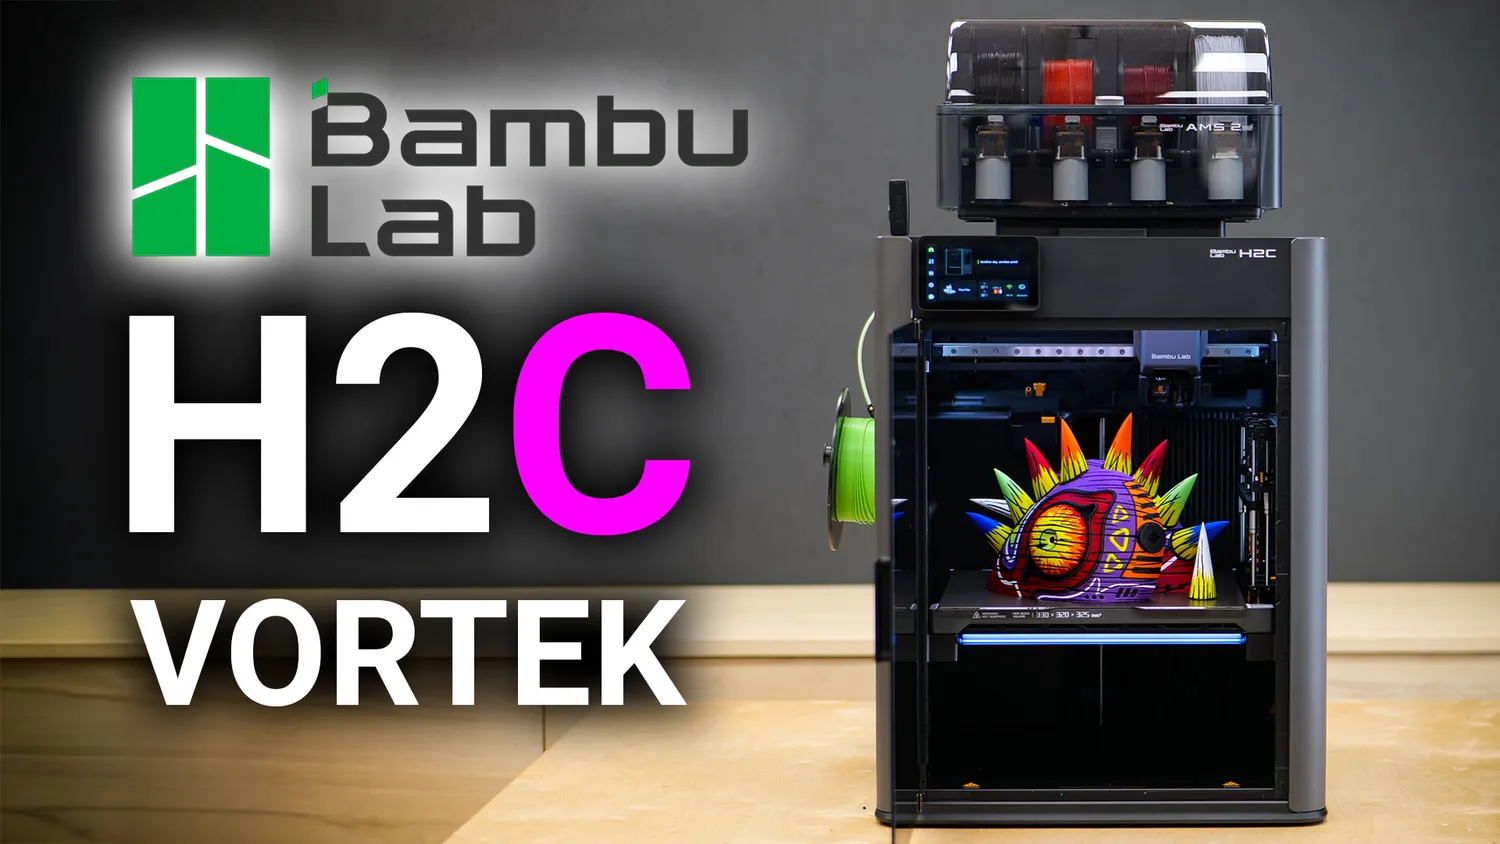
This is the Bambu Lab H2C with the bold claim to make multi-color printing faster and less wasteful. This 3D printer has a rack of six individual nozzles on the inside, which it can switch between, and they heat within seconds thanks to induction. But is this really the next big thing? Here we’ll take a look at Bambu Lab’s new Vortek system, dive into the engineering behind it, and compare it to other popular toolchanging solutions on the market. Let’s find out more!
The H2C in short
So what’s the H2C? The Bambu Lab H2C is a nozzle changer. It is almost identical in specs to the dual-nozzle printhead H2D, where the left hotend can be lifted and lowered. However, the right one can be automatically switched during printing. A nozzle rack on the side of the machine holds up to six hotends, so when you change from one color to another, you don’t have to flush all of the old filament out, creating the infamous poops. You simply pick up a dedicated hotend with that color and continue printing.
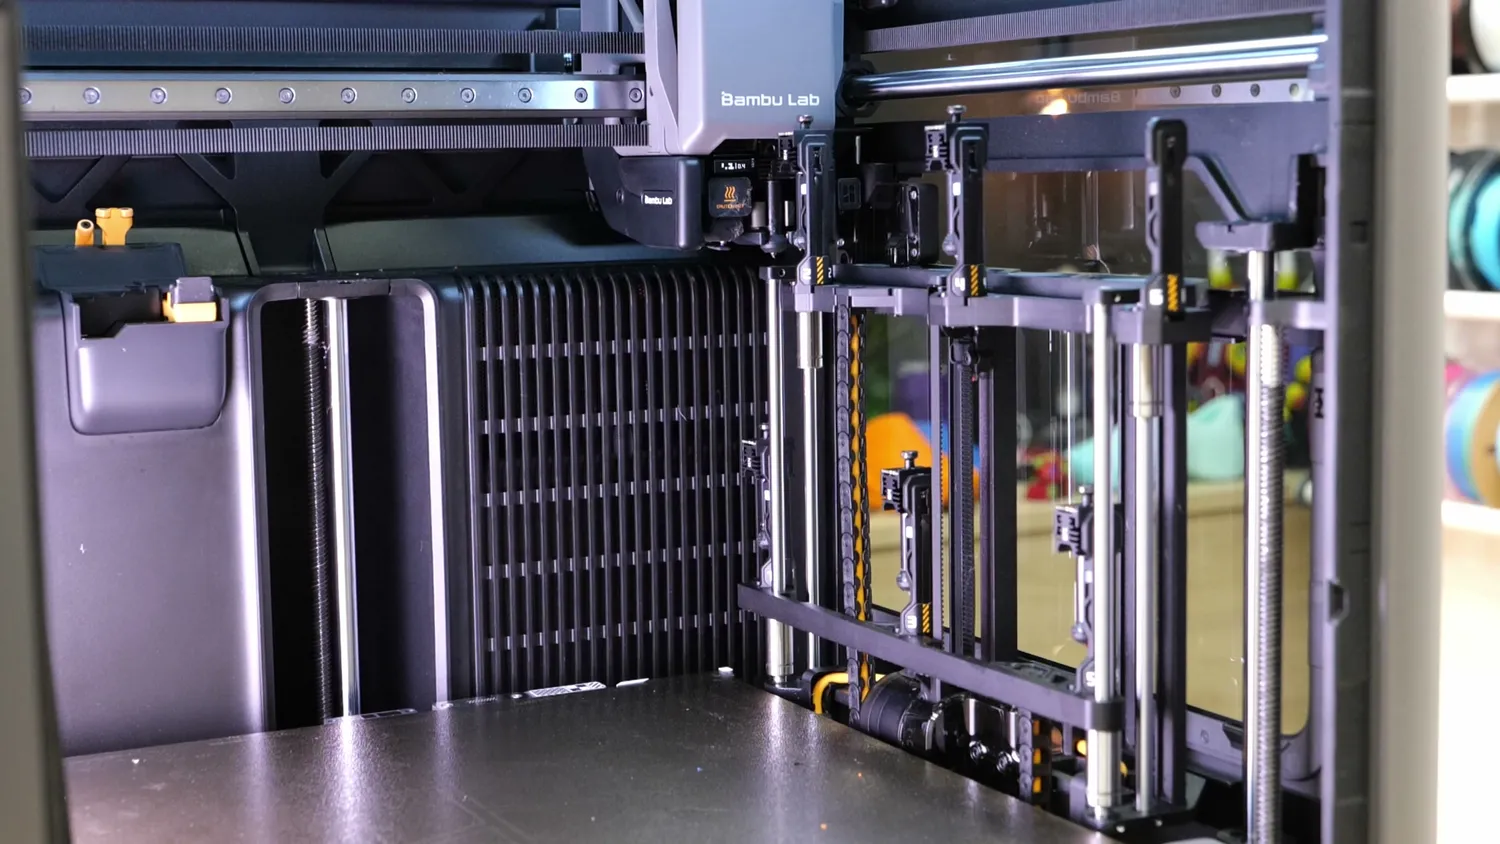
The nozzle rack sits on the right side of the build chamber
Is it really waste-free? No, it’s not. Because you cut the filament, you first need to push the new filament into the melt zone to essentially melt the ends together so you can then retract which is important for printing and you also need to purge out some or all of the material that has been sitting in the melt zone for a while and doesn’t print well anymore. That’s why you still have a purge tower, but the size is very comparable to what you also see on toolchangers.
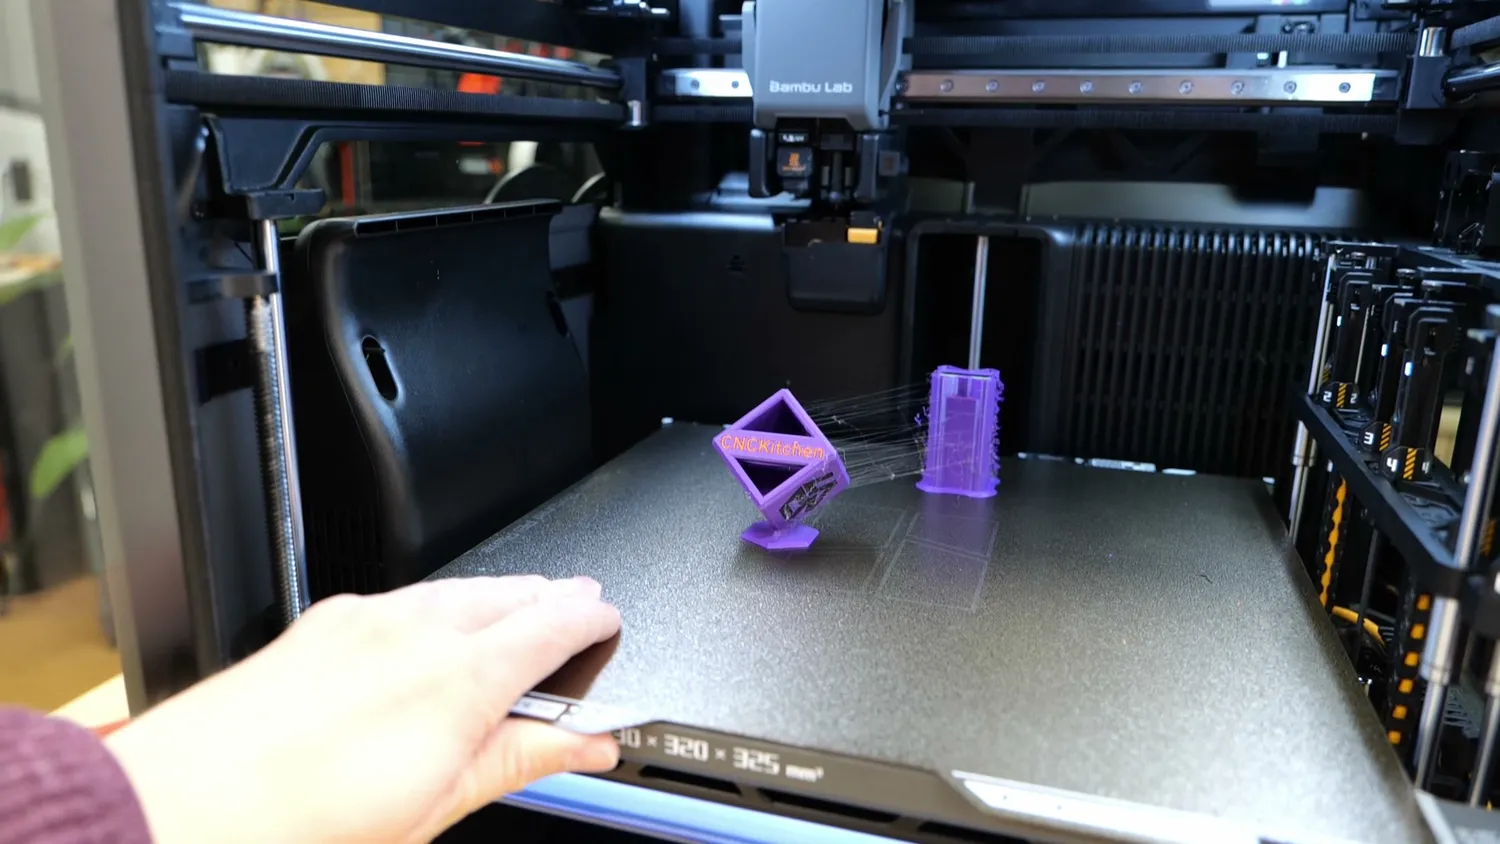
The purge tower is still there, just a lot smaller
How fast is it? Because it still uses the AMS system, when changing nozzles, it needs to retract the filament into the box and then feed new material to the hotend. Including purging, this takes around 40 seconds compared to 10–15 seconds on a toolchanger. Though this is still far faster than on a single-nozzle system, where a change can easily take 1 to 2 minutes. So depending on the model you print and the number of colors or materials, the print time is around 50–100% slower than on a toolchanger. But if you only print with two materials, only the left and right nozzles are used and no filament needs to be retracted, leading to print times just as long as on a toolchanger.
How many colors can you print? You have six swappable nozzles and one fixed, which makes seven colors without any nozzle purging. But you can print with up to 24 colors or materials in total if you are okay with a combination of nozzle changing and nozzle flushing. Any print with more than 5 colors will require at least one additional AMS unit, though. That’s all handled by the slicer, and it will also tell you where to put which filament to waste as little material as possible.
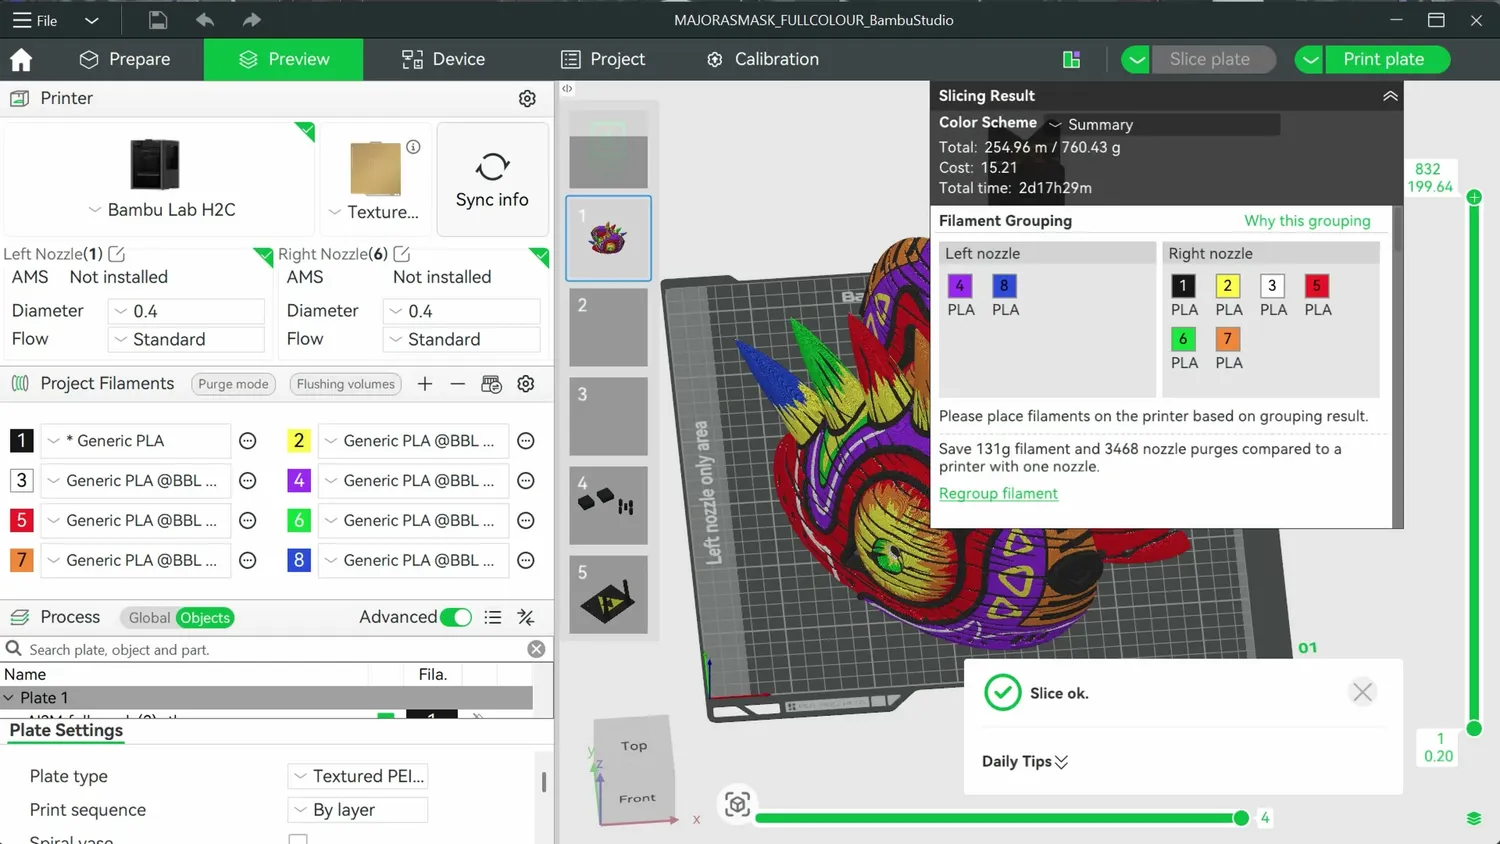
Bambu Studio tells you which filament goes into which slot
How fast is induction heating? It’s really fast: it takes below 10 seconds to heat the nozzle to PLA temperatures, where a normal hotend takes around 40 seconds. But I’ll do a deep dive on the new nozzles later.
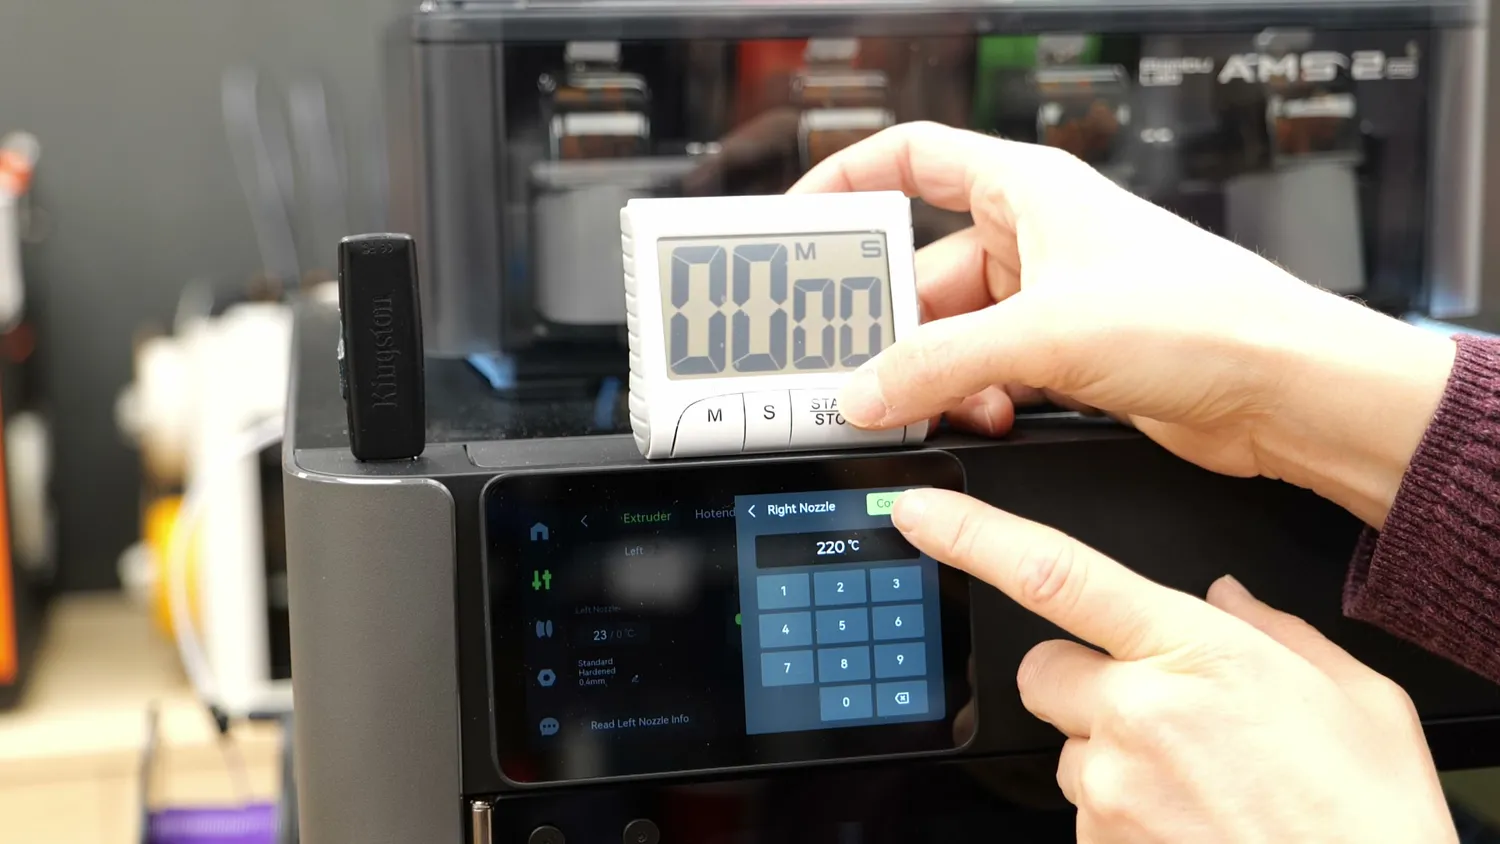
Heating the nozzle to 220 °C, timed the old-fashioned way
Do you lose printing space due to the nozzle rack? Yes, the print area is 20 mm narrower, and unfortunately, the H2D and H2S print plates don’t fit the H2C.
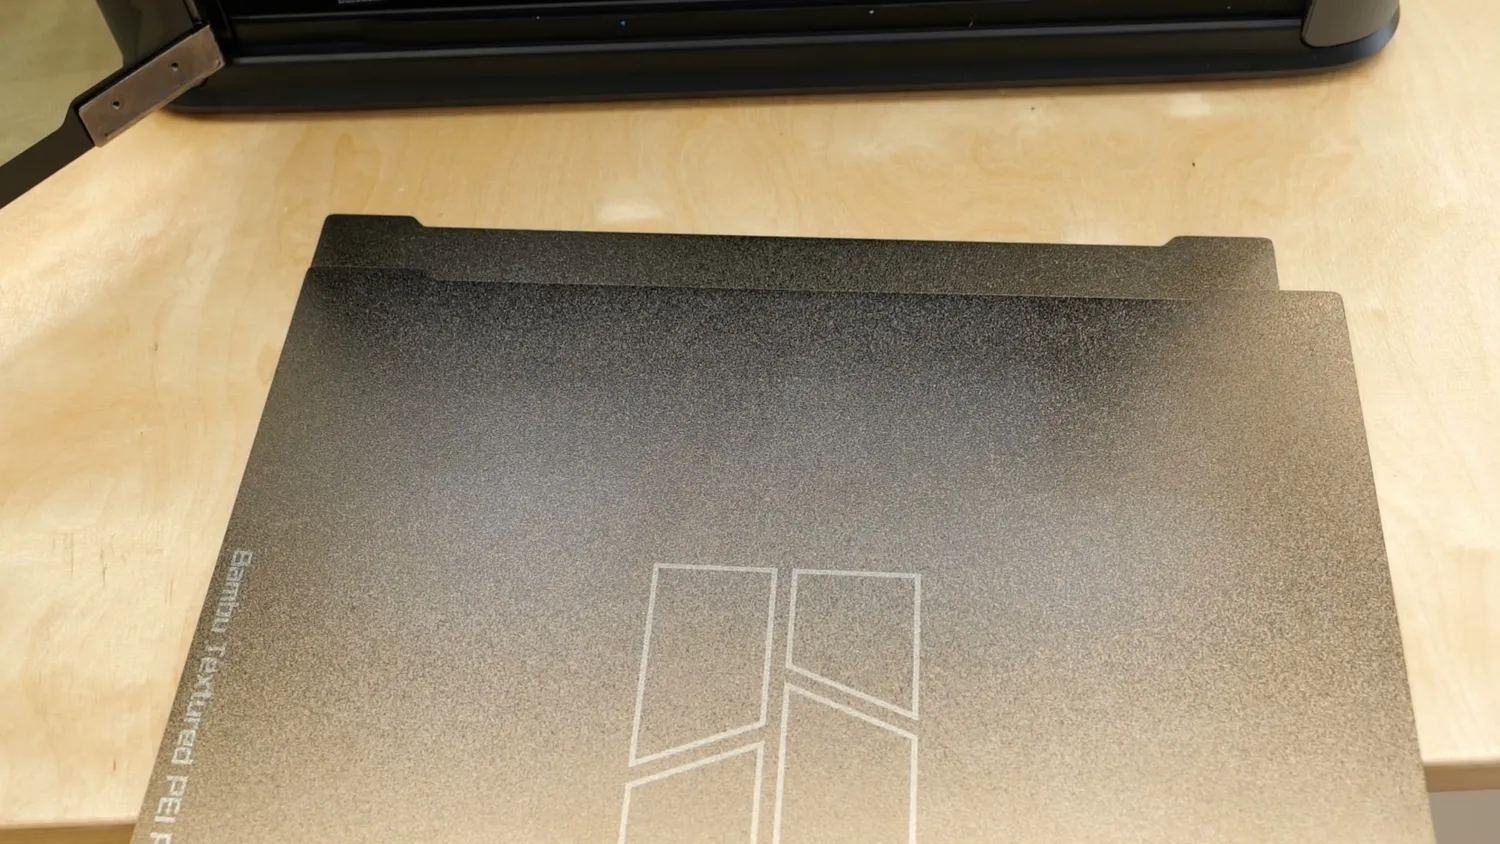
The H2C needs its own build plate
How much does it cost? At the time of release, the H2C is $ 2399, which is only $100 more than the MSRP of the H2D, but since that usually sells for less a realistic difference is $400, with which you get the additional tech and nozzles and you also get the new advanced toolhead fan that’s currently only on the H2D Pro. There will be an upgrade kit for the H2D and H2S in Q1 2026 but I don’t have any information on how much it will cost. The H2C and also the Combos with the Laser units are available now in local warehouses all around the world besides the US. But since the US shutdown finally ended, it might also be available there very soon.
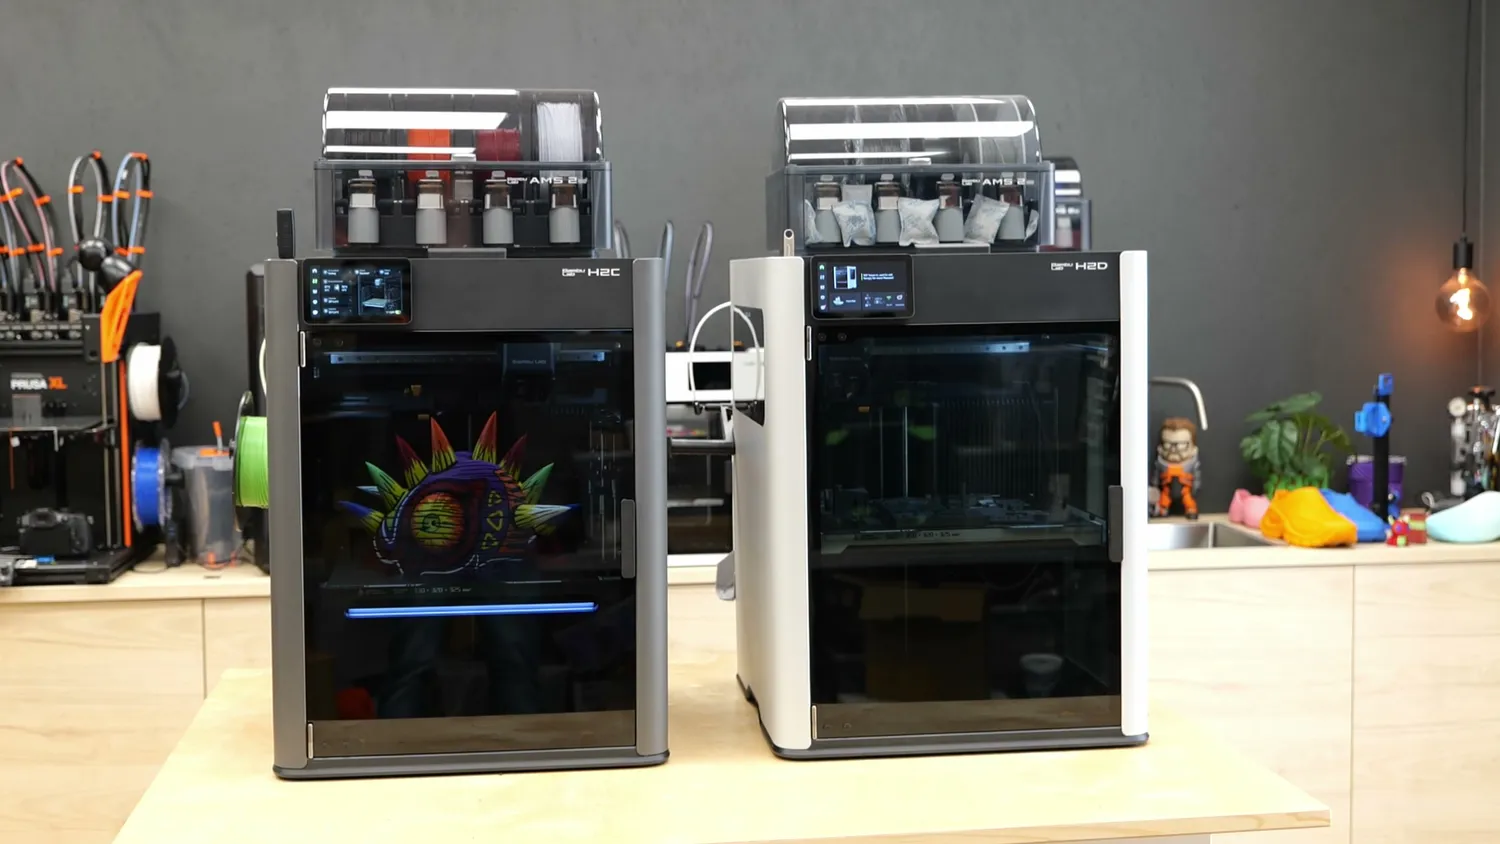
(left) H2C, (right) H2D
How a nozzle change works
So let’s continue with a deeper look at the H2C, and trust me, it’s interesting if you love tech! First of all, I need to say that I love the new look. Whereas the H2D had the light grey panels, the H2C has these nice dark ones that simply look better. But the interesting stuff happens on the inside, so let’s take a look at the choreography it performs when changing nozzles.
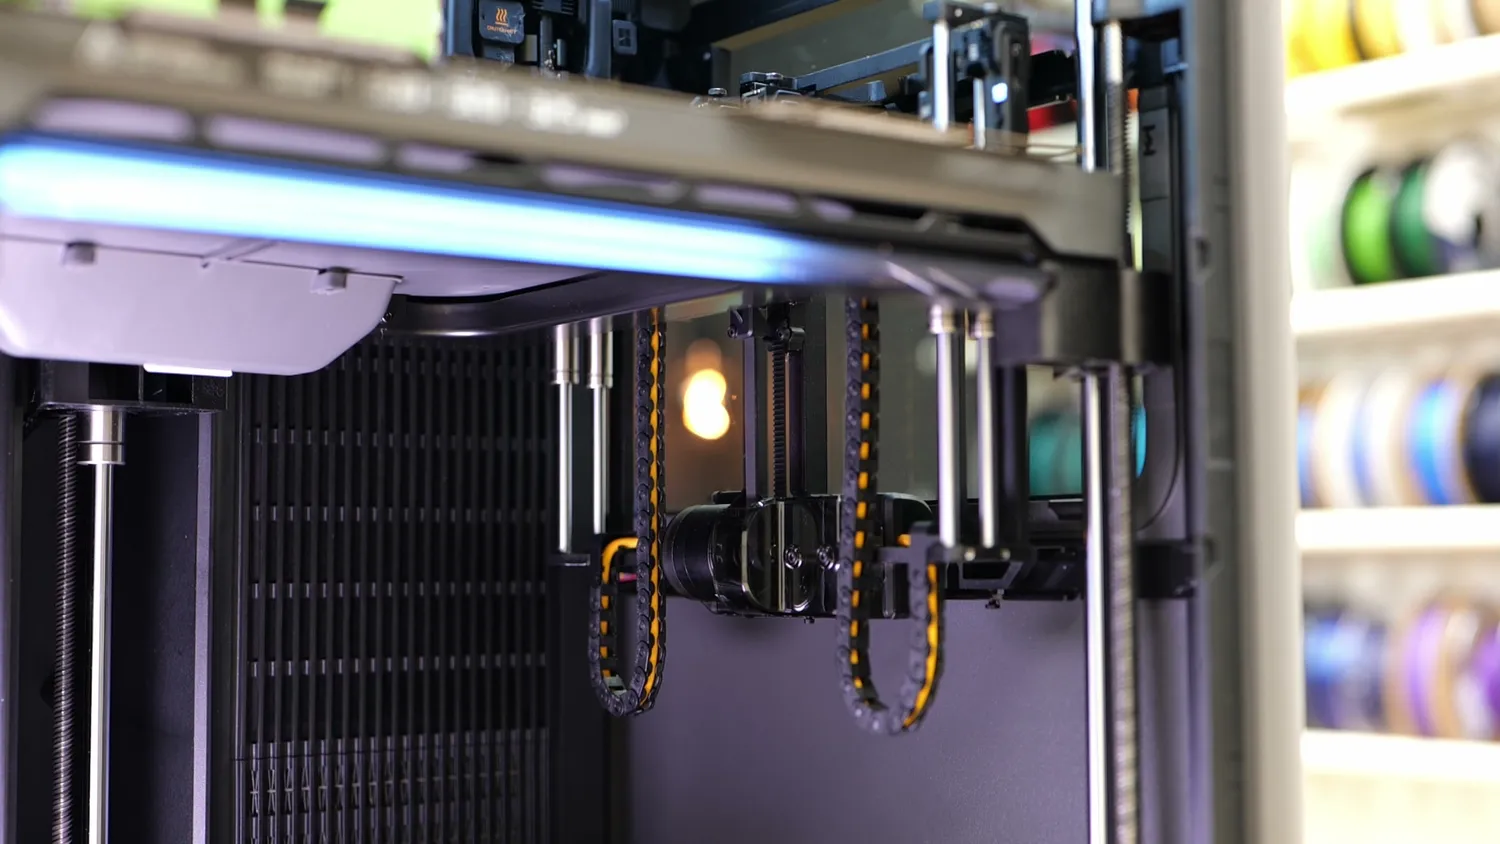
A closer look at the nozzle rack
First, it cuts the filament and retracts it to the AMS. Then it starts the nozzle-changing procedure by moving to the pin station. The rack actuates the pin so that the unlock mechanism can be triggered. Then the printhead moves back to release the tension, and the nozzle rack lowers. The printhead then moves to a free nozzle station, where the nozzle gets magnetically docked. After that, it moves to the station where the new nozzle is. The rack lifts and inserts the nozzle into the printhead, where it’s temporarily held by a magnet. The rack lowers, and the printhead travels to the pin station, where the locking mechanism is pushed in again to lock the nozzle securely and pull it into the taper that ensures the nozzle is precisely at the same height and exactly the same position.
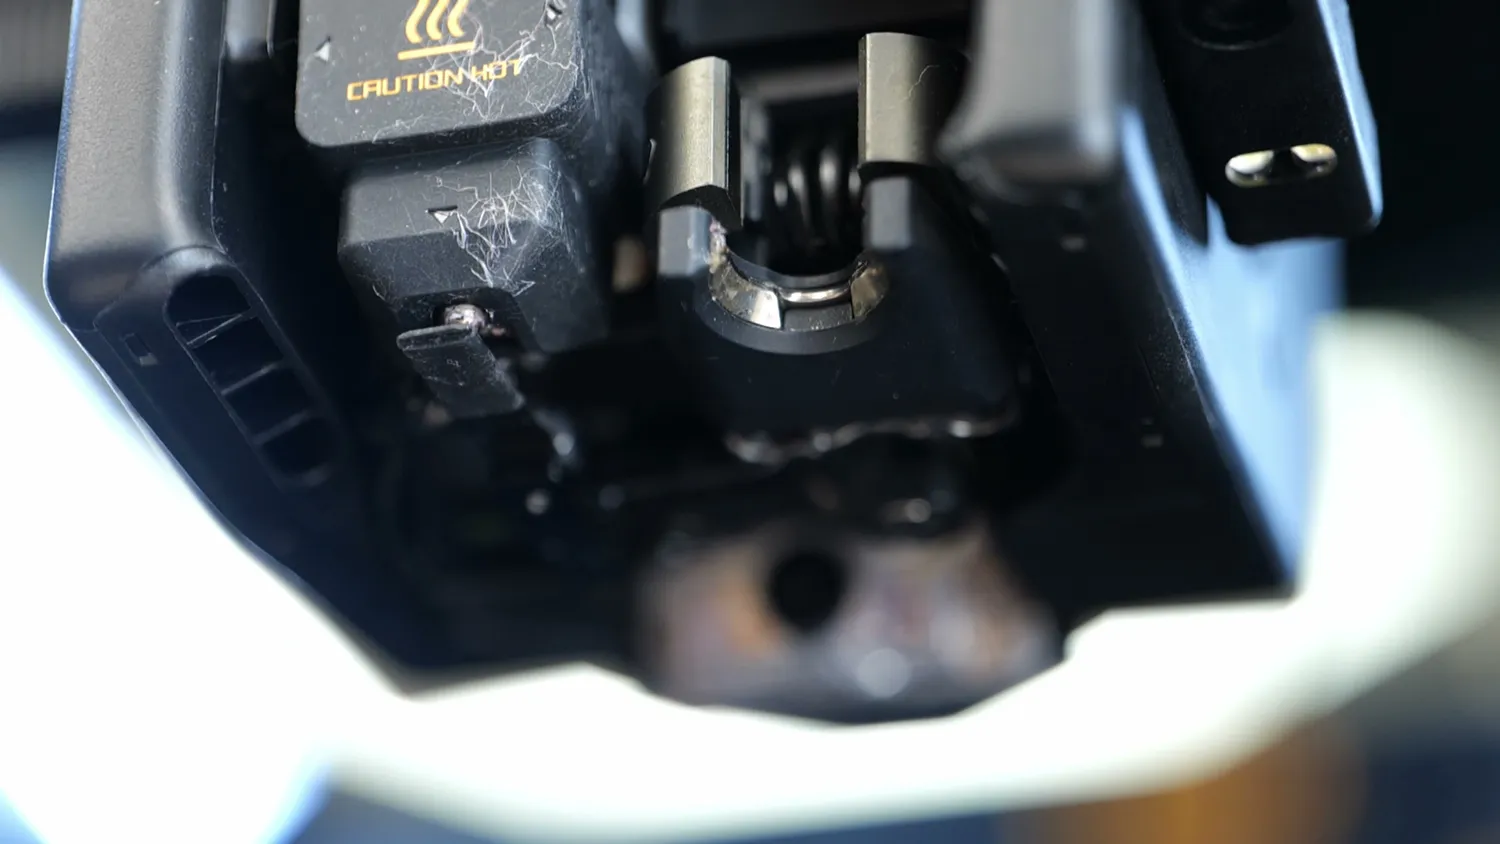
The taper in the printhead locates every nozzle in exactly the same spot
At that point, the induction heater kicks in to get the hotend to printing temperature. During the changing procedure, the AMS has already retracted the old filament and started loading the new one, which usually arrives at the new hotend a little bit after the procedure is finished and the nozzle is back to temperature. It then purges out some filament to establish nozzle pressure and remove some of the already degraded material on the purge tower, and continues printing.
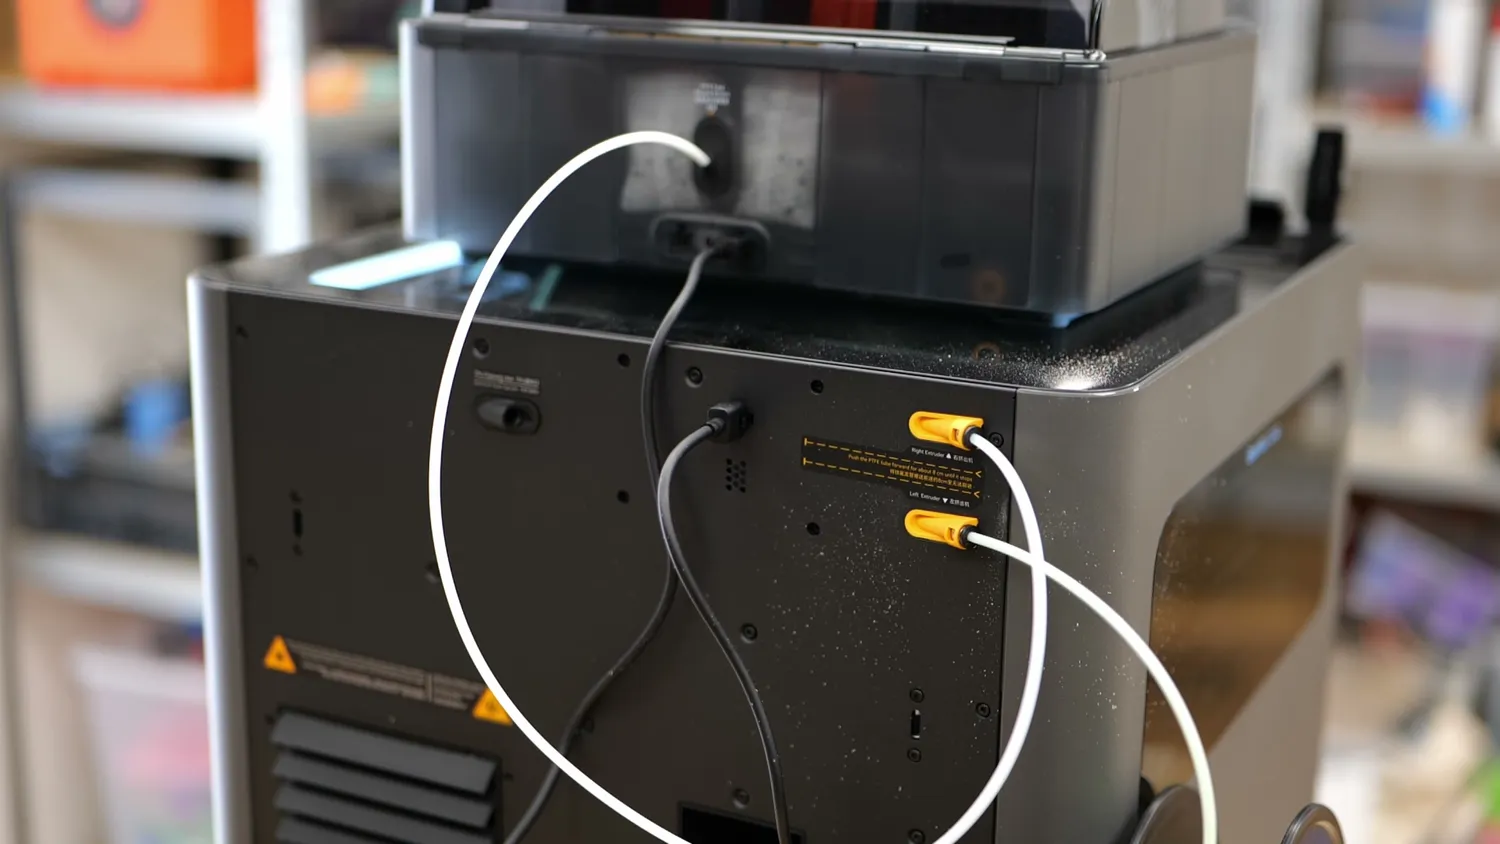
The filament path from the AMS into the machine
The nozzle-changing procedure itself doesn’t even take 15 seconds. The rest of the time is spent waiting for the filament from the AMS to arrive, which is almost an idle time of 20 seconds. Then there are around 10 more seconds to purge filament on the tower. So right now, AMS loading and unloading is the bottleneck, and I don’t know if they’re able to improve this time significantly. My AMS is already full of shaved off filament that I’m worried might jam something at some point, so they might already be pushing the machine as hard as they can. A way to make the nozzle changes faster might be to reduce the length of the PTFE tube, but I haven’t tried yet how much time that would save and that would also ruin the compactness of the system.
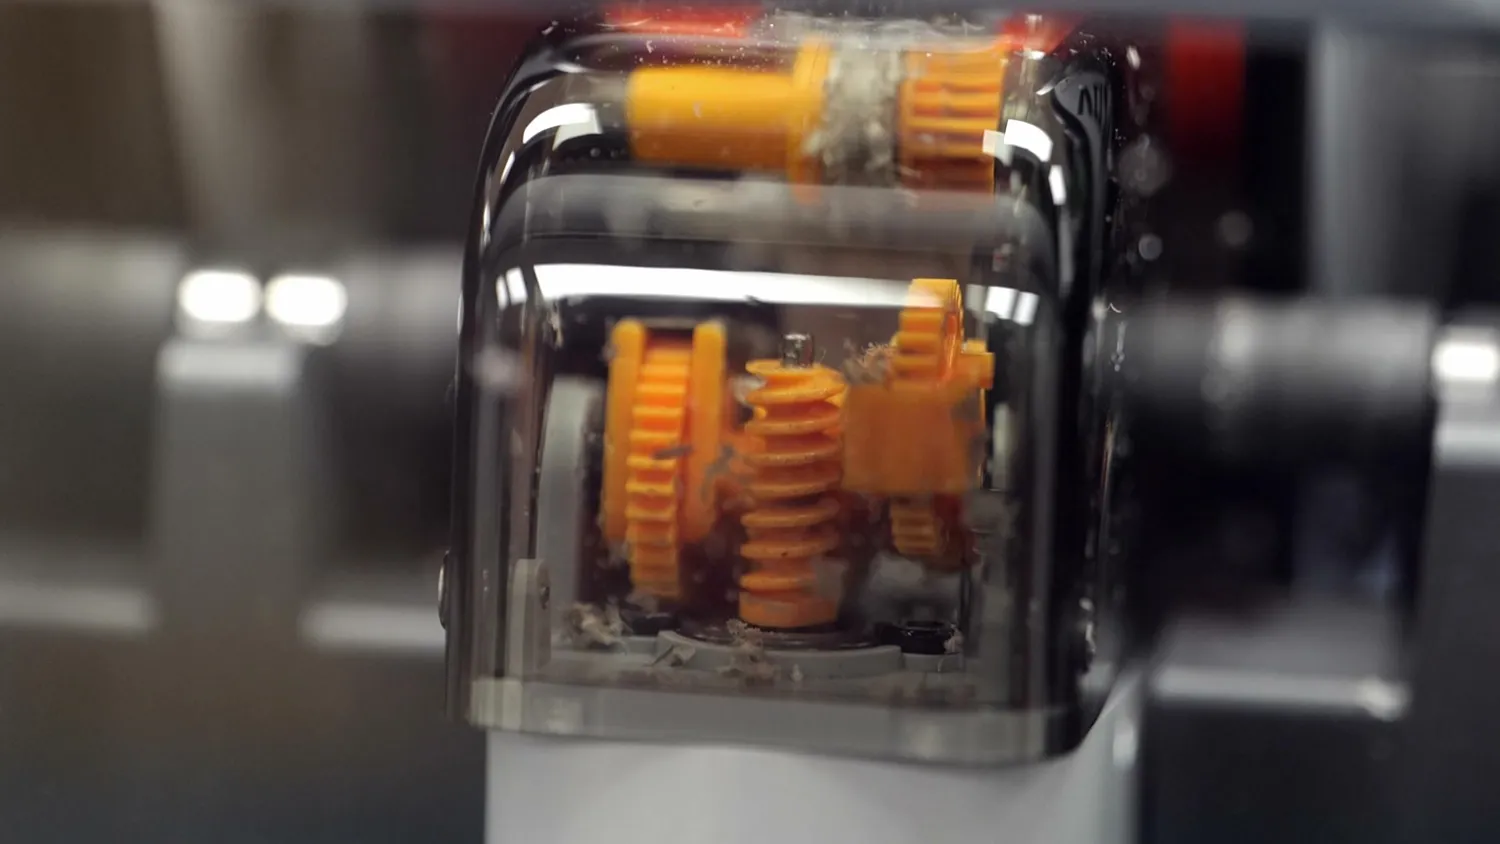
All that shaved off filament comes from thousands of loading cycles
The new induction nozzles
Something that’s not the bottleneck are the new induction nozzles. Yes, the H2C uses a completely new type of hotend, where there are only a few others on the market. This hotend doesn’t heat with a resistive heating element, but by induction. You might know that from your stove. A high-frequency magnetic field causes metals, especially ferromagnetic metals, to heat up by inducing eddy currents and hysteresis losses.
So the printhead on the H2C features a chunky electromagnet on the right side with a C-shaped core. The nozzle gets placed within the air gap of this core and is exposed to the magnetic field. Induction heating is fast: the new nozzles heat up to PLA printing temperatures in under 10 seconds. That’s four times as fast as a conventional hotend. And this is important: since nozzles cool down when they are in the rack, you need them to heat up as fast as possible once they are installed, because you can’t pre-heat them like on a toolchanger. The docks might look as if they are powered but I think this circuitry is only to detect if a nozzle is installed or not.
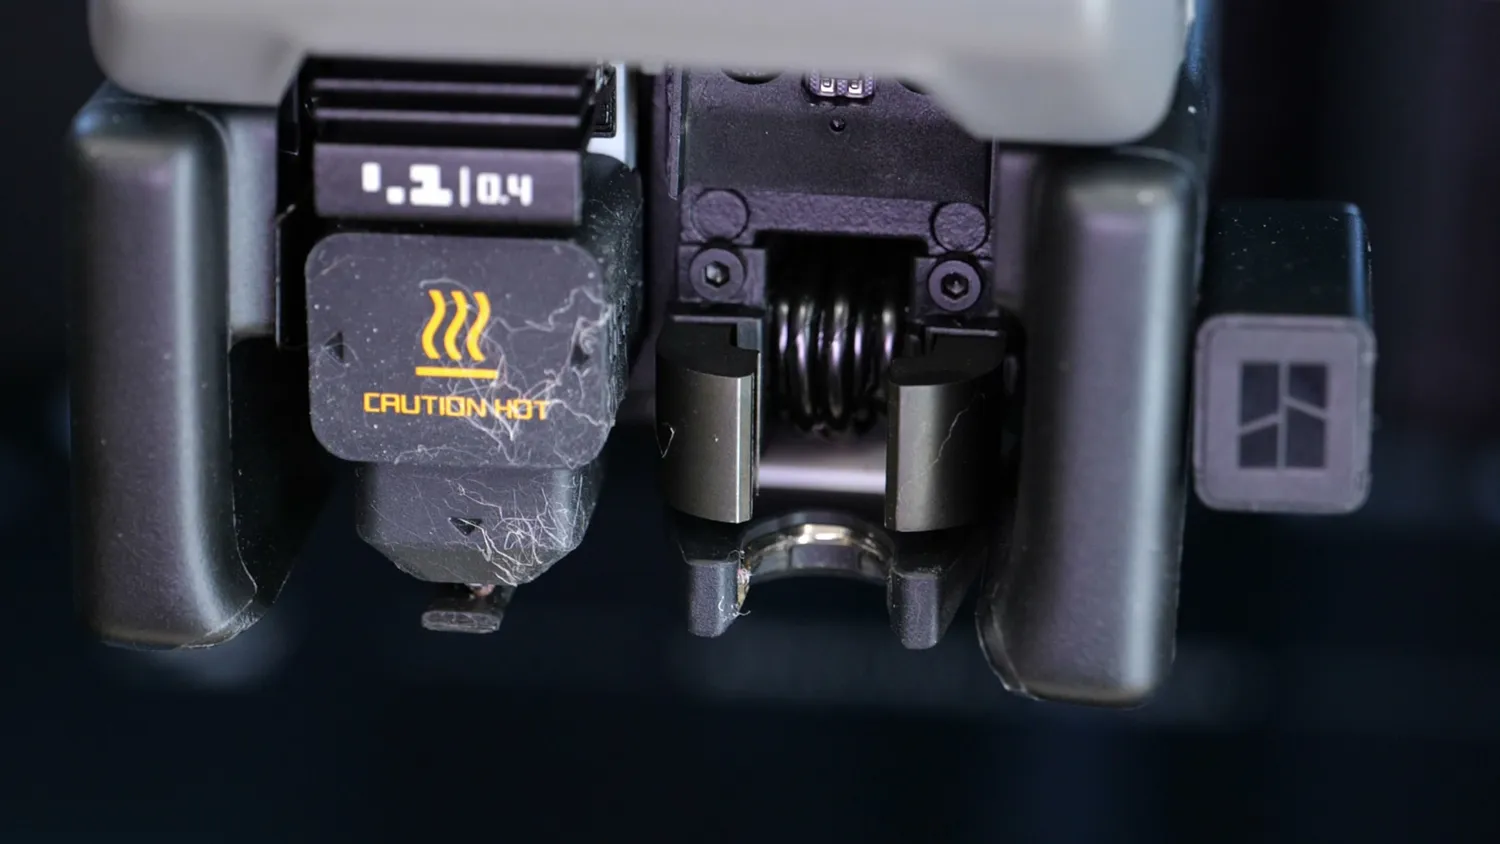
The nozzle sits in the air gap of the C-shaped core
But heating isn’t the only thing that a hotend needs to be capable of. You also need to sense its temperature so the printer can precisely regulate it. Bambu Lab solved this problem using a wireless connection between the hotend and the toolhead, which is interesting and also a bit concerning at the same time.
So let’s take a closer look at one of the new hotends. On the bottom, there’s the hardened steel nozzle tip, followed by a tiny silicone sock, probably preventing excessive material buildup. Then there is the taper that locates the nozzle precisely during every changing procedure. After that follows the melt zone, which we’ll look at in a bit, because I destroyed (I mean, disassembled) one out of curiosity. On the top, there is the aluminum heatsink, and on top of that there is a small PCB where the wireless magic happens.
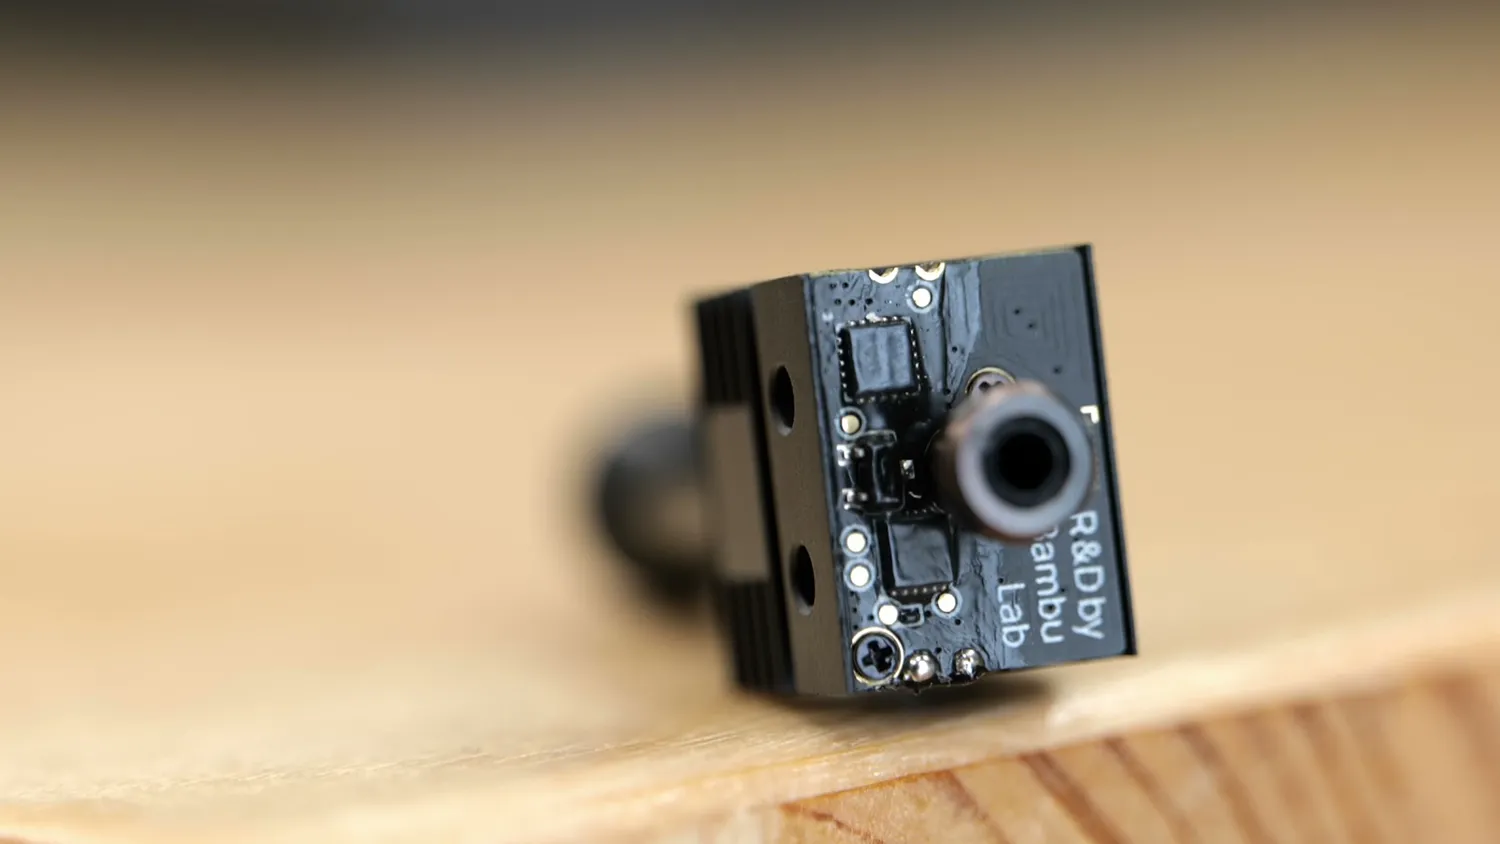
The little PCB sits right on top of the heatsink
The first thing you can spot are two coils, of which one is probably for transmitting power, just like your wireless phone charger, and the other for transmitting data. Keep in mind that these coils only need to transmit tiny amounts of power, because this circuitry is not for heating (that’s done by the beefy coil on the printhead), they’re just for sensing the hotend temperature.
There aren’t a lot of components on the PCB and only two QFN packages stand out, as well as a SOT component. Everything is covered in silicone for protection but it’s easy to scrape off, and I wouldn’t have expected that the components are labeled. I’m not an electrical engineer, so if you have more insight into what the components do, please let us all know!
The one chip on the right is labeled FM1230, which seems to be an authentication chip common in the Qi charging standard and might be used to make sure the nozzle you’re using is a genuine Bambu Lab nozzle. This is complete speculation but that could be a big hurdle for 3rd-party manufacturers if they don’t get the PCBs from Bambu Lab.
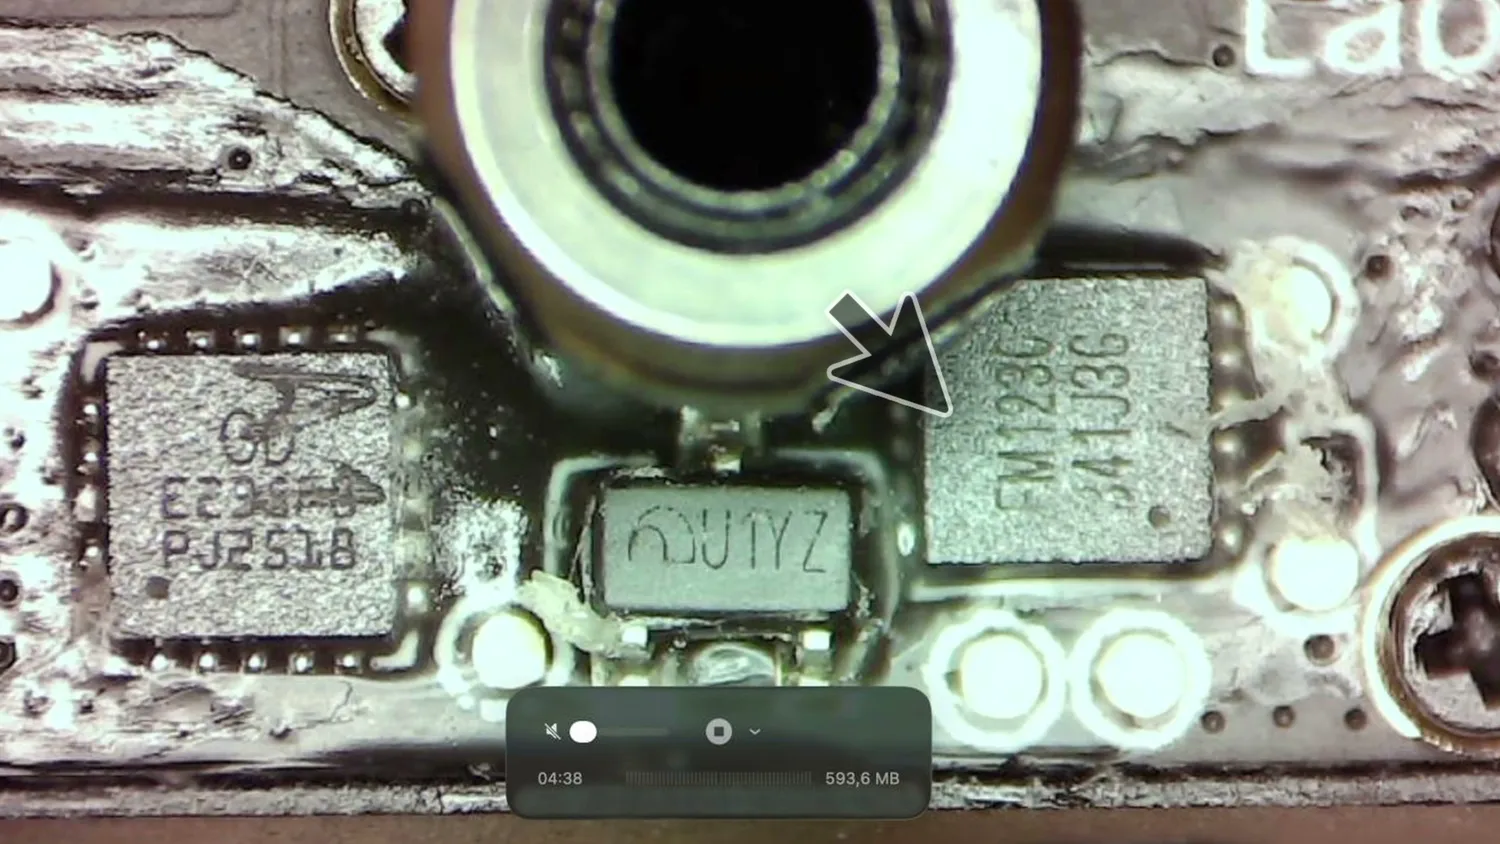
The FM1230 is an authentication chip from the Qi world
The other chip is labeled GD E23SF8, and I couldn’t find anything about it online. But I suspect it’s a small microcontroller that reads the two temperature sensors on the hotend, sends that data to the machine, and will also contain information about what kind of nozzle it is. I don’t know what the component in the middle is, but I suspect it’s a MOSFET for power regulation.
The bottom of the PCB is only populated with some passives. As I said before, there are two thermistors connected to the board. One sits in the heatbreak and makes sure the cold side is not getting too warm, and the other one is routed all the way to the lower end of the hotend and monitors the hotend temperature. It’s exciting to see how much tech they are able to squeeze into this small hotend, but I’m also a bit worried about how much that will limit others in making 3rd-party options. And with that tech and complexity you would expect that the nozzles are quite expensive, but a normal nozzle only sells for $39 and a high flow one for $69 which is quite impressive!
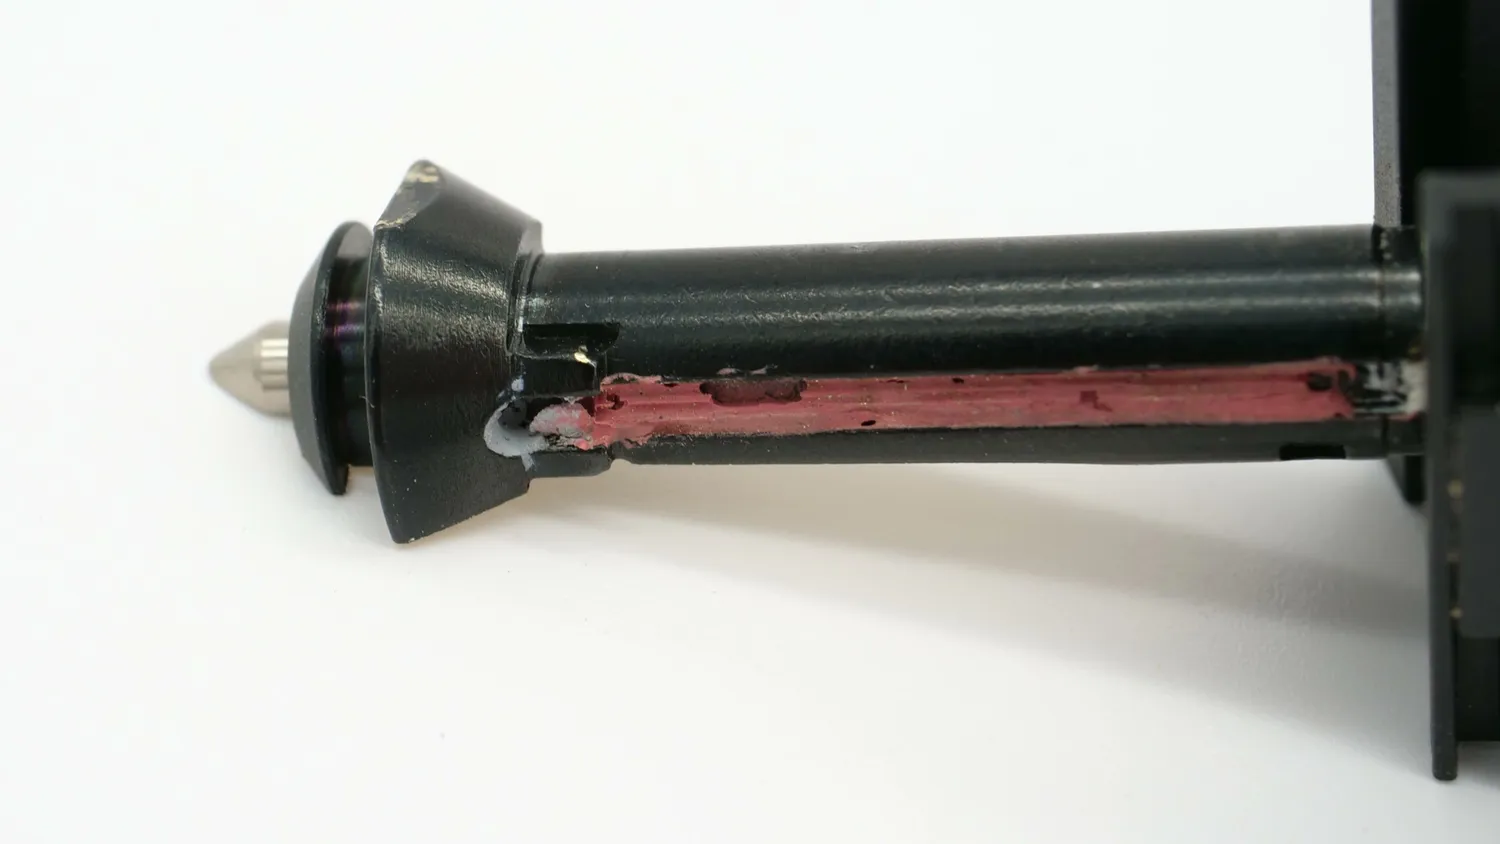
The second sensor runs all the way down to the tip of the hotend
Cutting an induction nozzle in half
I also want to quickly talk about the induction heating part of the hotend itself. Bambu Lab are not the first to release an induction hotend. I have the Trident Induction Hotend from Plasmics running on my RatRig, and we’ll also see induction heating on the Bondtech INDX system. I wanted to know where and how Bambulab heats the nozzles, so I sacrificed one and took it apart.
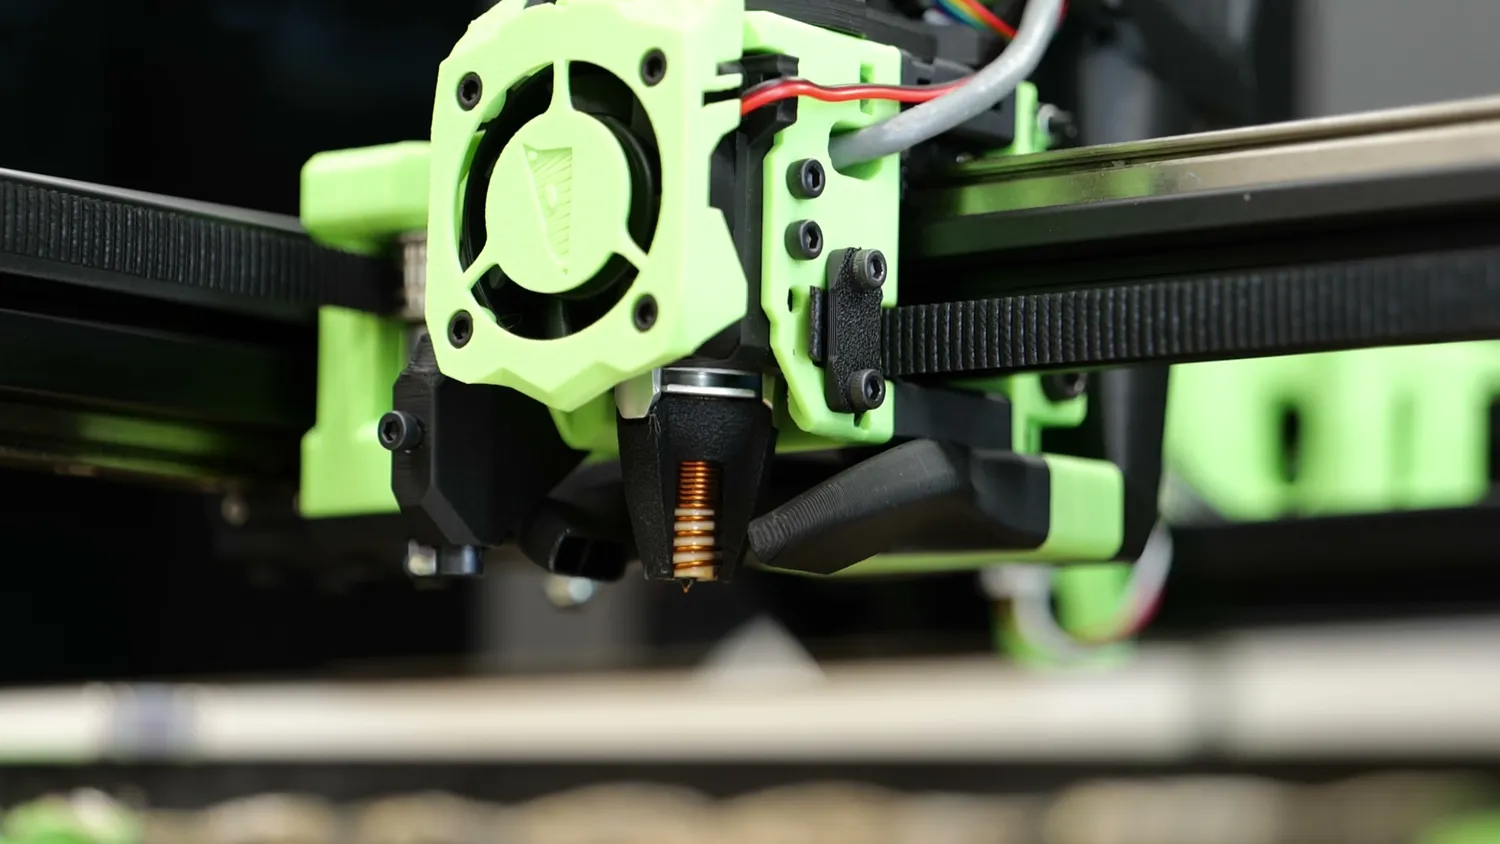
The Plasmics Trident on my RatRig
First there is an insulating sleeve around the melt zone. Under it there is a clip, which I thought was used to hold the thermistor wire in place. Under it there was a chunk of metal I assumed was steel, so it heats in the magnetic field. I was confused when I touched it with a magnet and it wasn’t magnetic. Scratching away the paint revealed something golden I suspected was brass, and since the hotend was already ruined, I took my belt sander and simply sanded away half the hotend to find out how it really looks from the inside. And here it is.
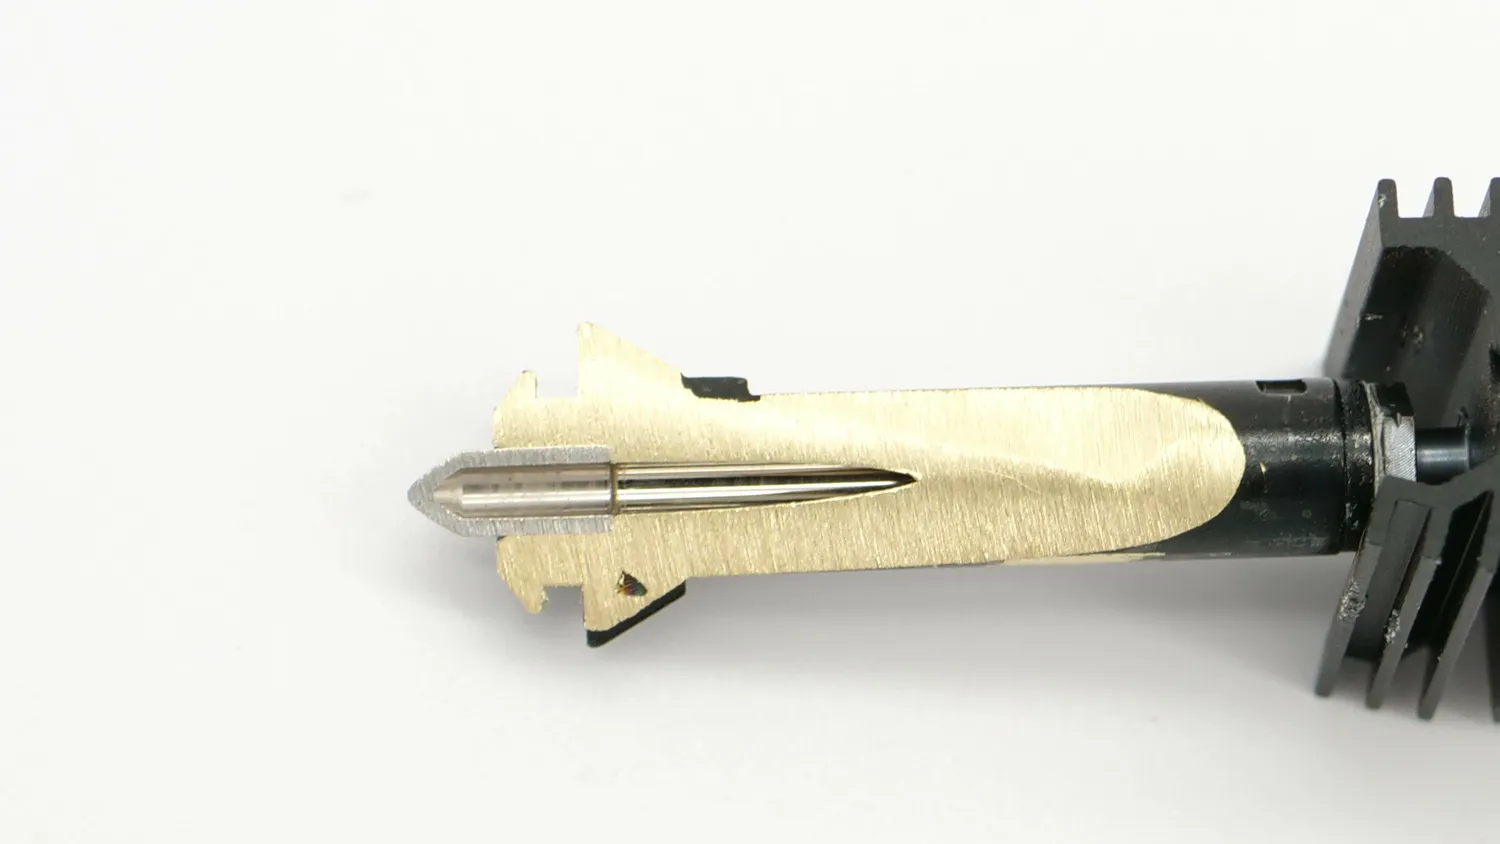
Half a hotend: brass body, hardened steel tip
So the main part of the hotend is brass, because it’s easy to machine and has good heat conductivity. Only the tip of the nozzle is hardened abrasion-resistant steel. But if the upper part is brass, how does the induction heating work? Well, first of all, induction heating also works with resistive losses caused by eddy currents in the material, but they are way lower than the hysteresis losses in ferromagnetic steel.
This was also the moment when I understood what the steel sleeve is used for. I think its primary use is not to hold the wires, but this is the main part that’s heated by induction and also nicely all around the melt zone, and the brass block below it will then distribute the heat in the nozzle and result in uniform and efficient heating. A very clever approach in my opinion, because when I tested the Trident hotend two years ago where only a thin metal tube is heated, the heat distribution within the melt zone was one of its biggest weaknesses.
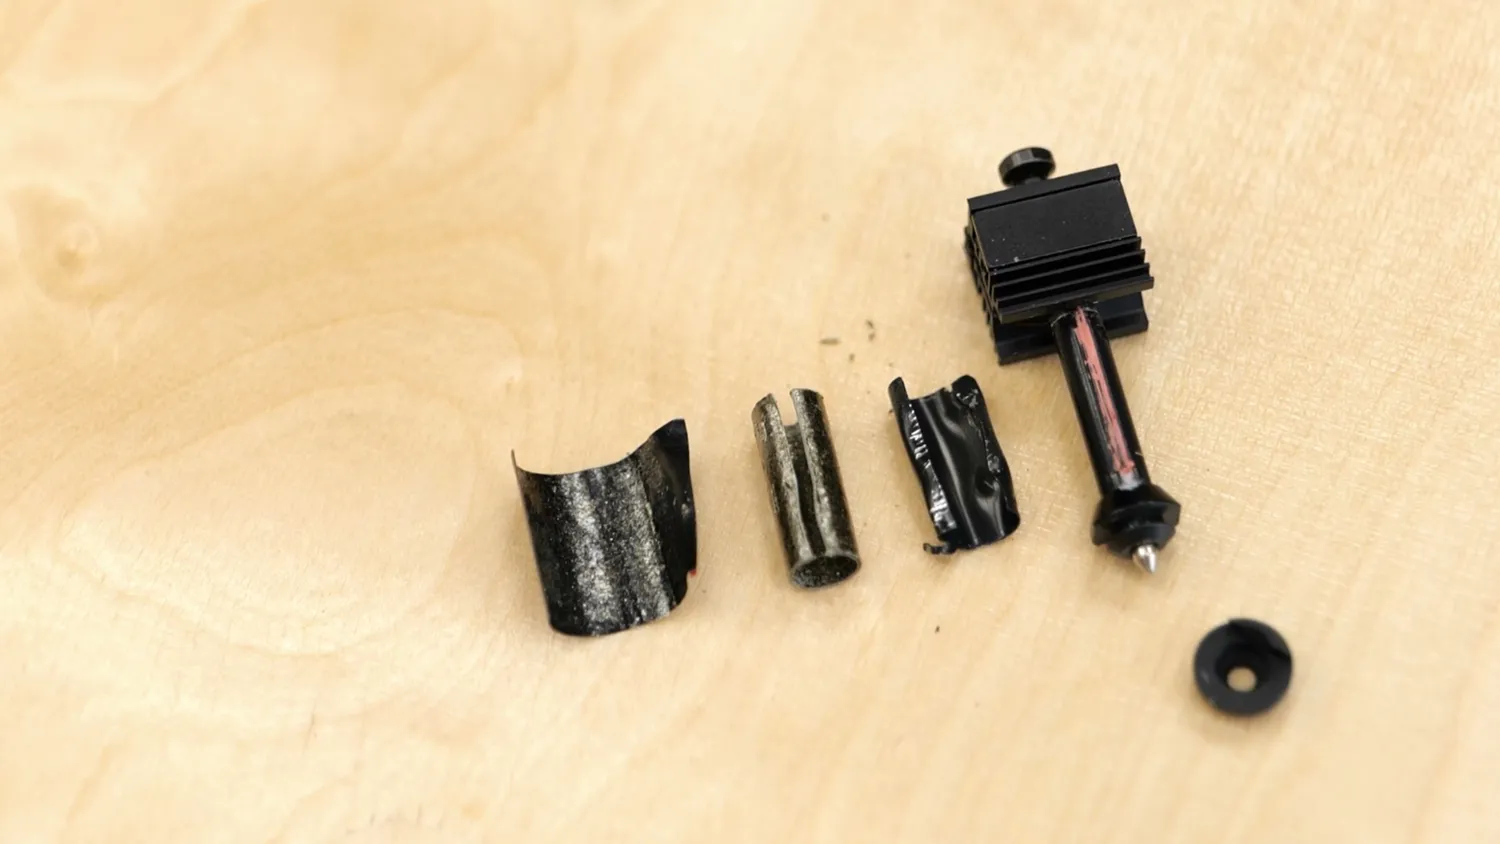
The steel sleeve is the part that actually gets heated
You want a very sharp transition between the hot melt zone and the cool side, so your material is either hard and can be easily fed, or molten. Anything in between just becomes squishy and causes problems. To confirm my suspicion, I put a thermocouple through the filament path all the way to the nozzle, then pulled it out in steps and marked the temperature. And the temperature distribution is really nice. It starts a little low at the nozzle tip, simply because it’s quite a bit away from the heated zone, but then rises to the set temperature and quickly plummets once the heatbreak starts. And this looks very similar to Bambu Lab’s standard hotend that I tested in the same manner.
It seemed as if the melt zone is a bit longer on the induction hotend, but when I did a flow-rate test, the induction hotend performed a little worse than a regular hotend, with a maximum flow rate of 37 mm³/s instead of 41 mm³/s which will probably not be noticeable in normal printing.
Nozzle alignment and purging
The last thing necessary to have a reliable tool or nozzle changer is a way to align the nozzles. Even though all the parts are precisely manufactured, there are always tolerances, so if you switch from one nozzle to another, the nozzle orifice might not be at the exact same location, which would result in different colors of your print not lining up.
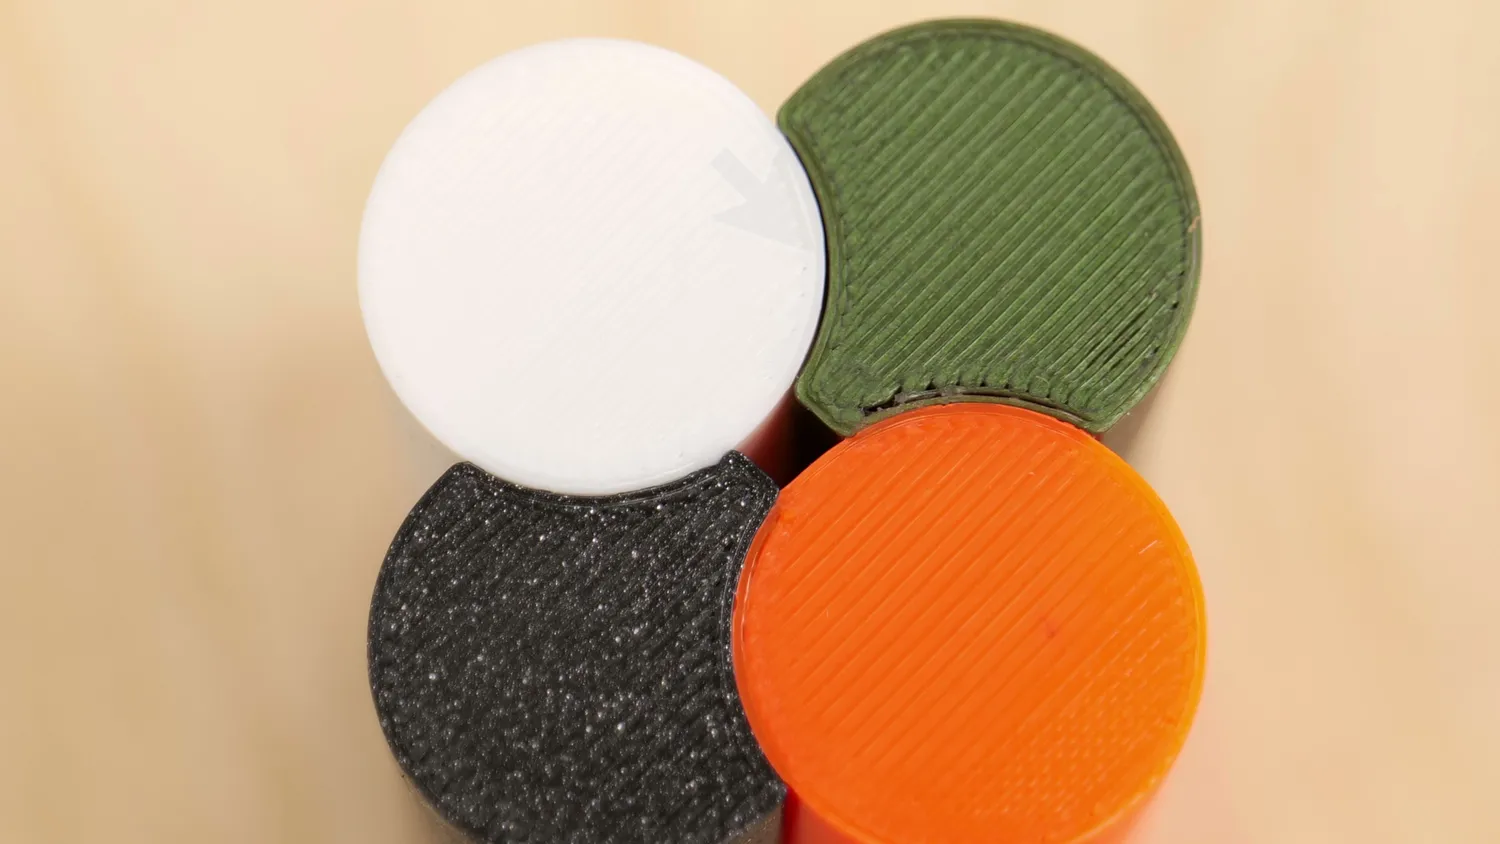
Checking whether the nozzles really land in the same spot
In the early days, we used to calibrate the offset via calibration patterns that you printed. The Prusa XL* and the Snapmaker U1* probe the nozzles on a feature in the bed to measure the nozzle offsets. The H2C uses, just like the H2D, an eddy-current sensor in the back of the bed over which the nozzles get moved one after the other to find the center. The H2C does that, if you don’t deactivate it, every time you start a new print. Unfortunately, this process can take a while. The complete print preparation with leveling takes around 15 minutes on a 4 color print and when I printed Majora’s Mask in 8 colors, it took over 20! This can be pretty annoying, but Bambu Lab prioritizes convenience and good print results over time.
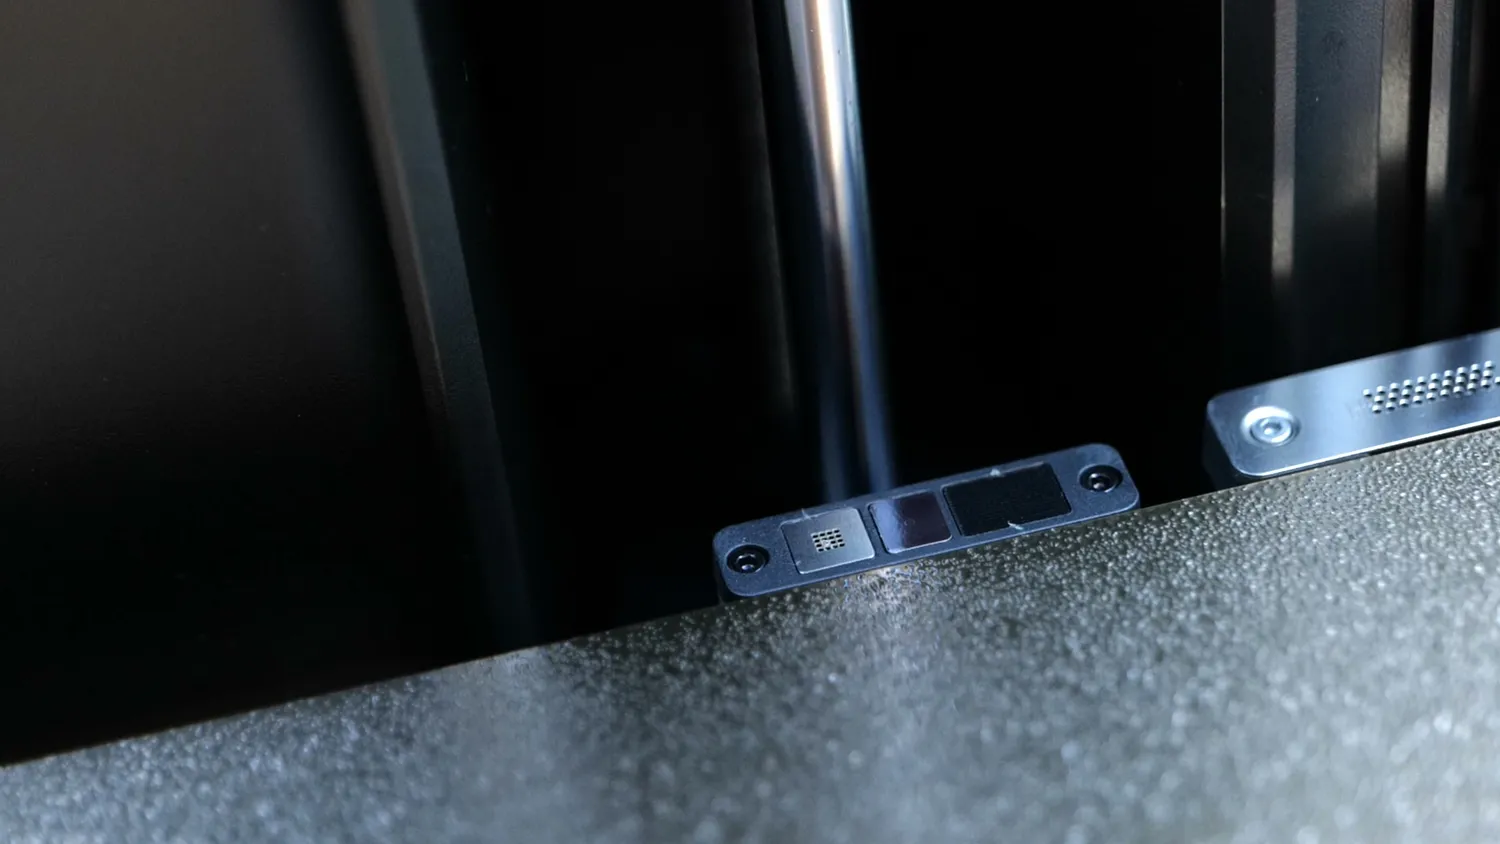
The eddy-current sensor that finds the center of every nozzle
This is the same thing with filament purging. As I said before, this is necessary to push the new filament into the melt zone so that you can retract and also get rid of the old filament that might have already been in there for a few minutes and degraded. Initially the purge amount was very excessive. I had some conversations about that with Bambu Lab during the review process, and at some point, they added an option into Bambu Studio to switch between standard purging and an eco mode.
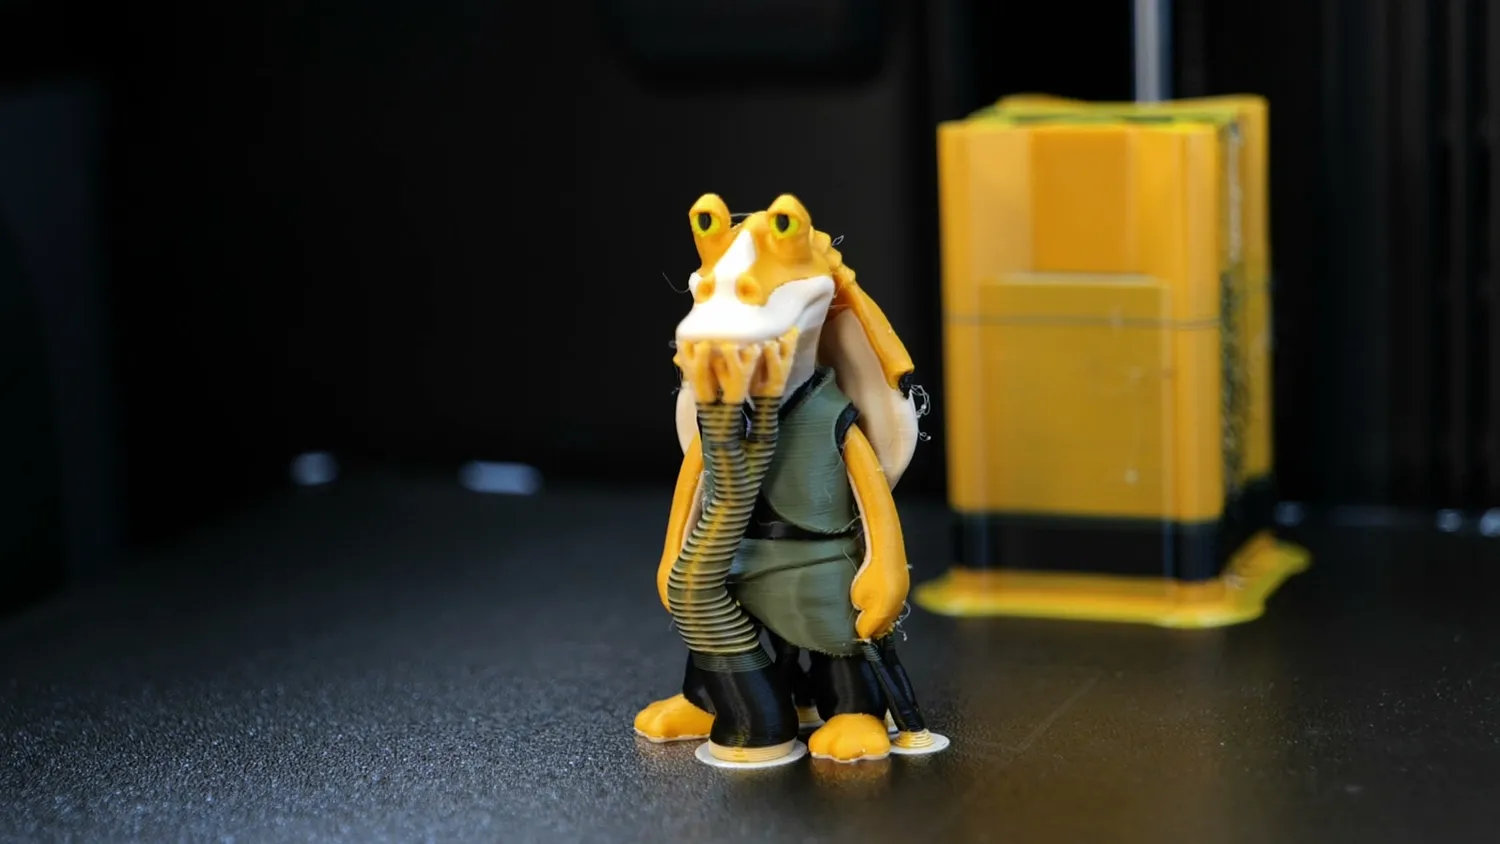
Every color change ends up on the purge tower
Standard is the conservative mode that should work with any material. Purge Saving mode reduces the purge amount by one third, and from my experience works mostly well. I only had some models where the material was a bit wet and my print temperatures were a bit too high where I got significantly more stringing in this mode. The nice thing here is that it doesn’t only reduce the amount of waste, but since purging takes time, it also reduces the nozzle change time by a few seconds. You can even remove the prime tower completely but that will result in holes in your print where the extrusion starts. Working with completely dry filament makes this a little better but you don’t reach the print quality of a print with a purge tower.
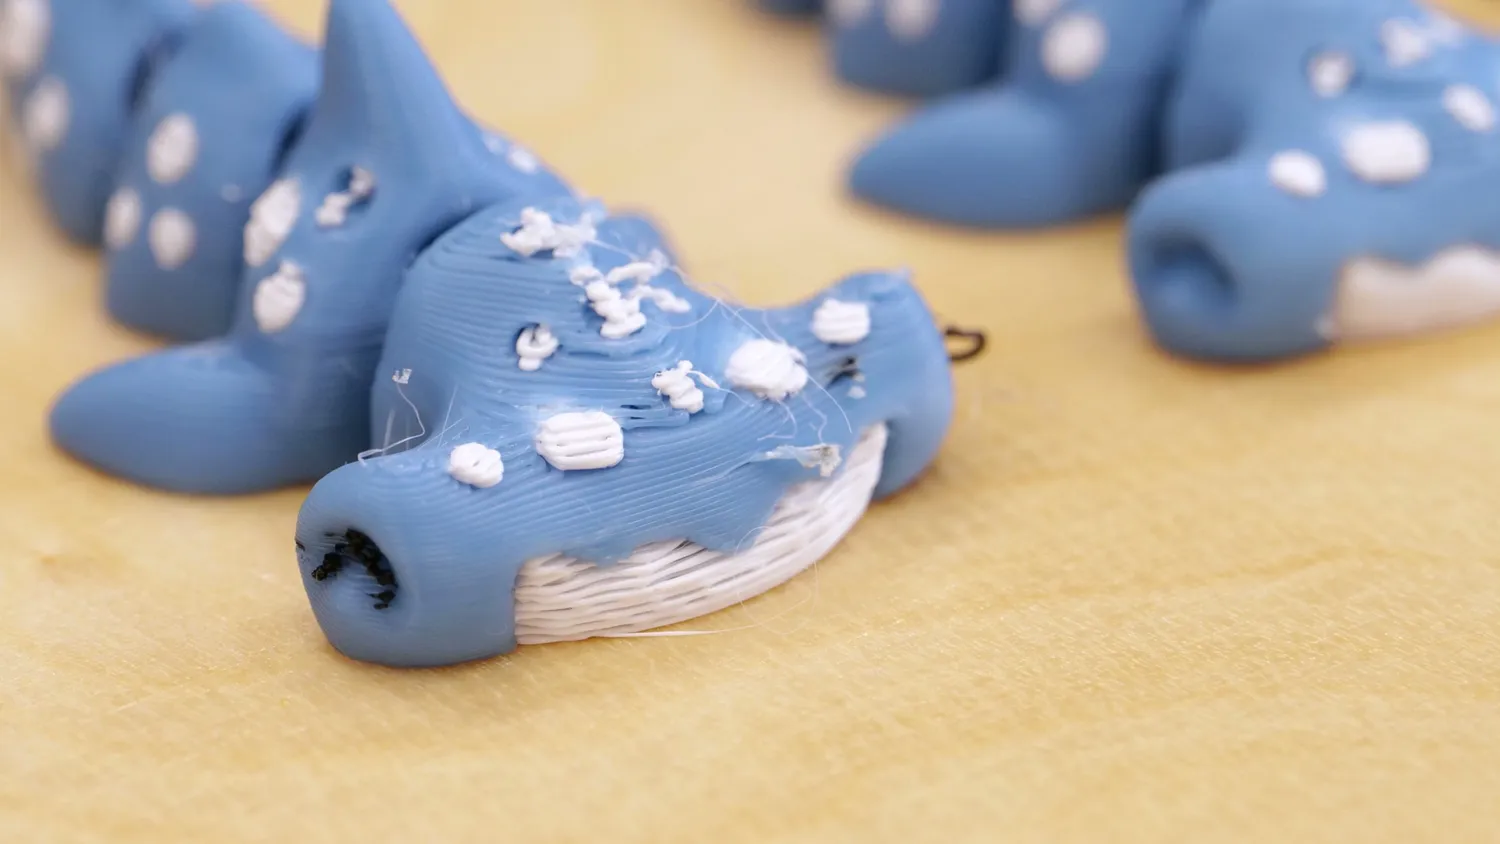
Without a prime tower the extrusion starts right on the model
Print times and waste vs. toolchangers
I think the nozzle change time is quite significant on the H2C. But how do the print times compare to toolchangers like the Prusa XL or the Snapmaker U1, single-nozzle filament changers like the P2S, or a dual-nozzle printer like the H2D? First of all, there is no single precise number; it always depends on the size of the model and the amount of materials you use but I’ll demonstrate that at an example.
The 4-color test cube, inspired by Extrutim’s MPOX Testcube, took 7 hours to print on the H2C in Purge Saving mode. The standard purging mode is, in this case, about 10% slower. Both toolchangers were around twice as fast and printed the cube in less than 4 hours. Printing it on the H2D took around twice as long as on the nozzle changer, and it’s only a little faster than the P2S because it doesn’t have to change and flush the nozzle every time but has the dual nozzles.
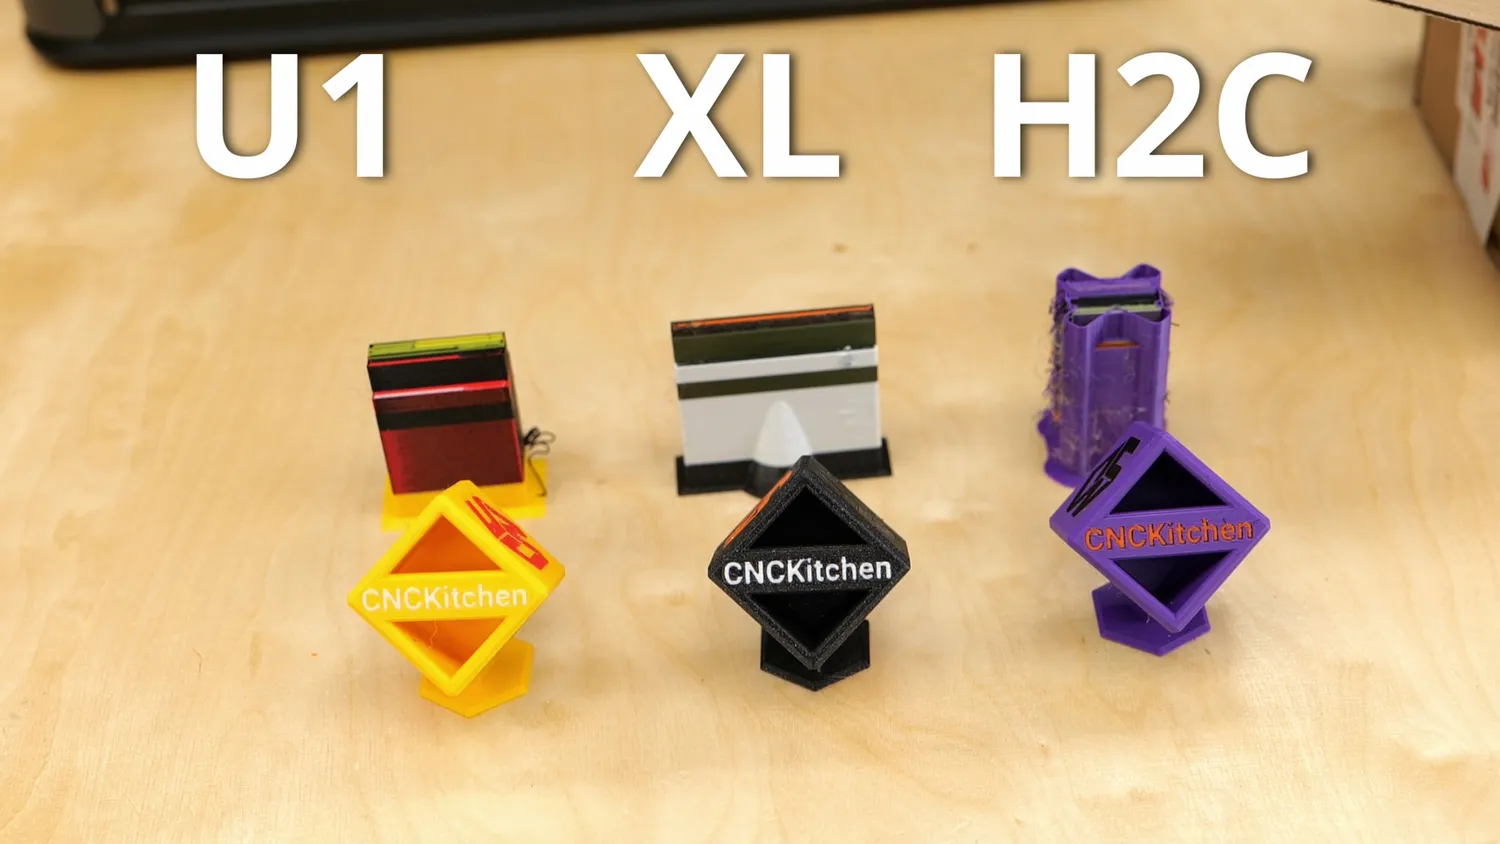
The same cube and its prime tower from all three machines
Regarding waste, the results look different. The waste produced on the H2C is the prime tower, which weighs 23 g compared to the 28 g of the model itself. In the normal purging mode, the prime tower is around 50% heavier. Since the toolchangers prime as well, the weight of their towers was more or less comparable, with the U1 wasting a bit more. The H2D purges and flushes eight times more material than the H2C, because three of the four colors need to be flushed during a change, and the P2S is obviously the most wasteful with over 320 g of poops and purge tower for a 28 g print.
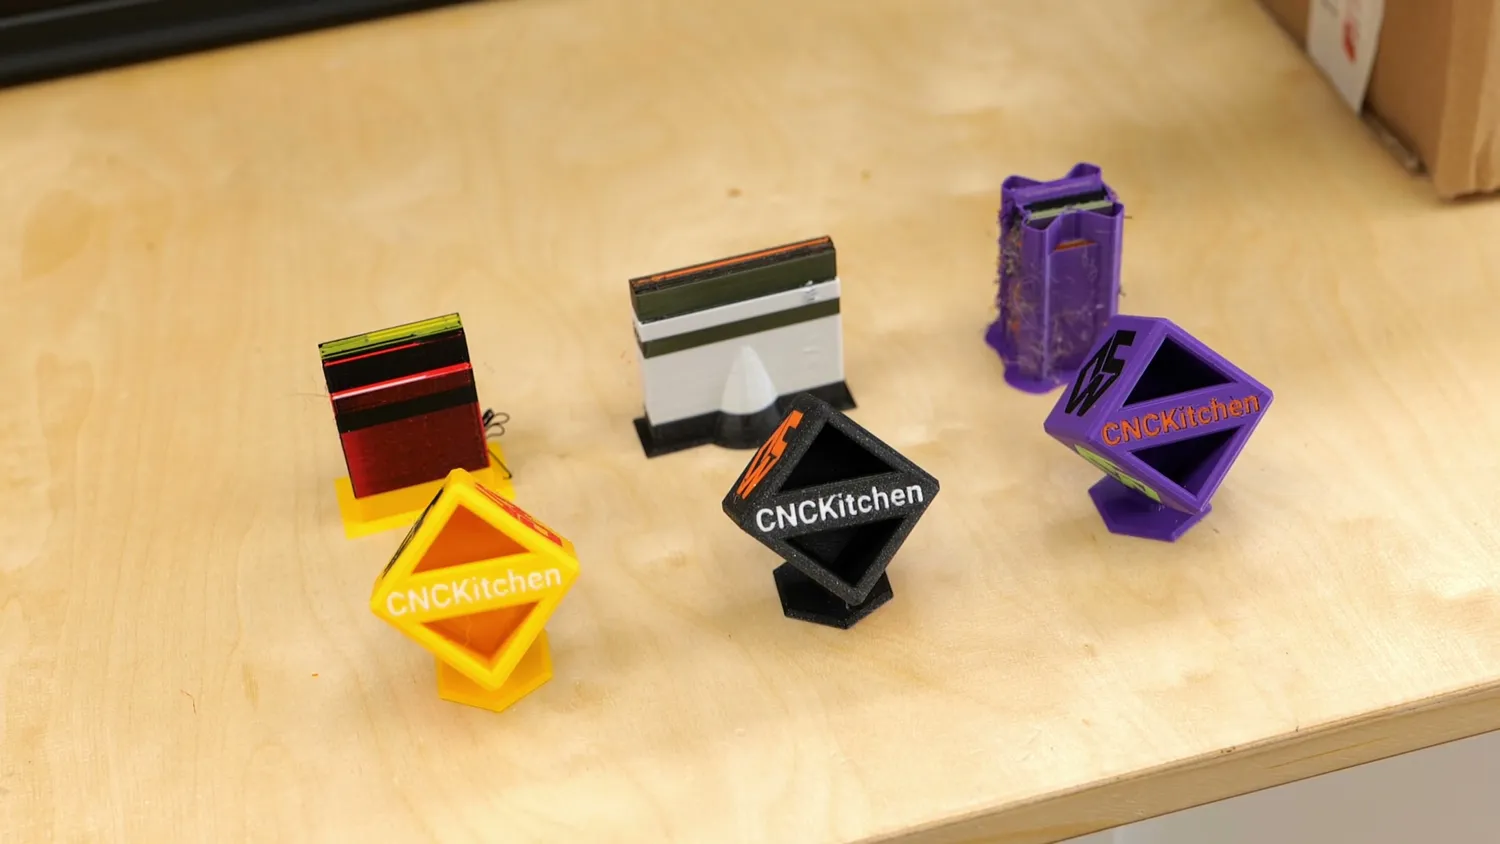
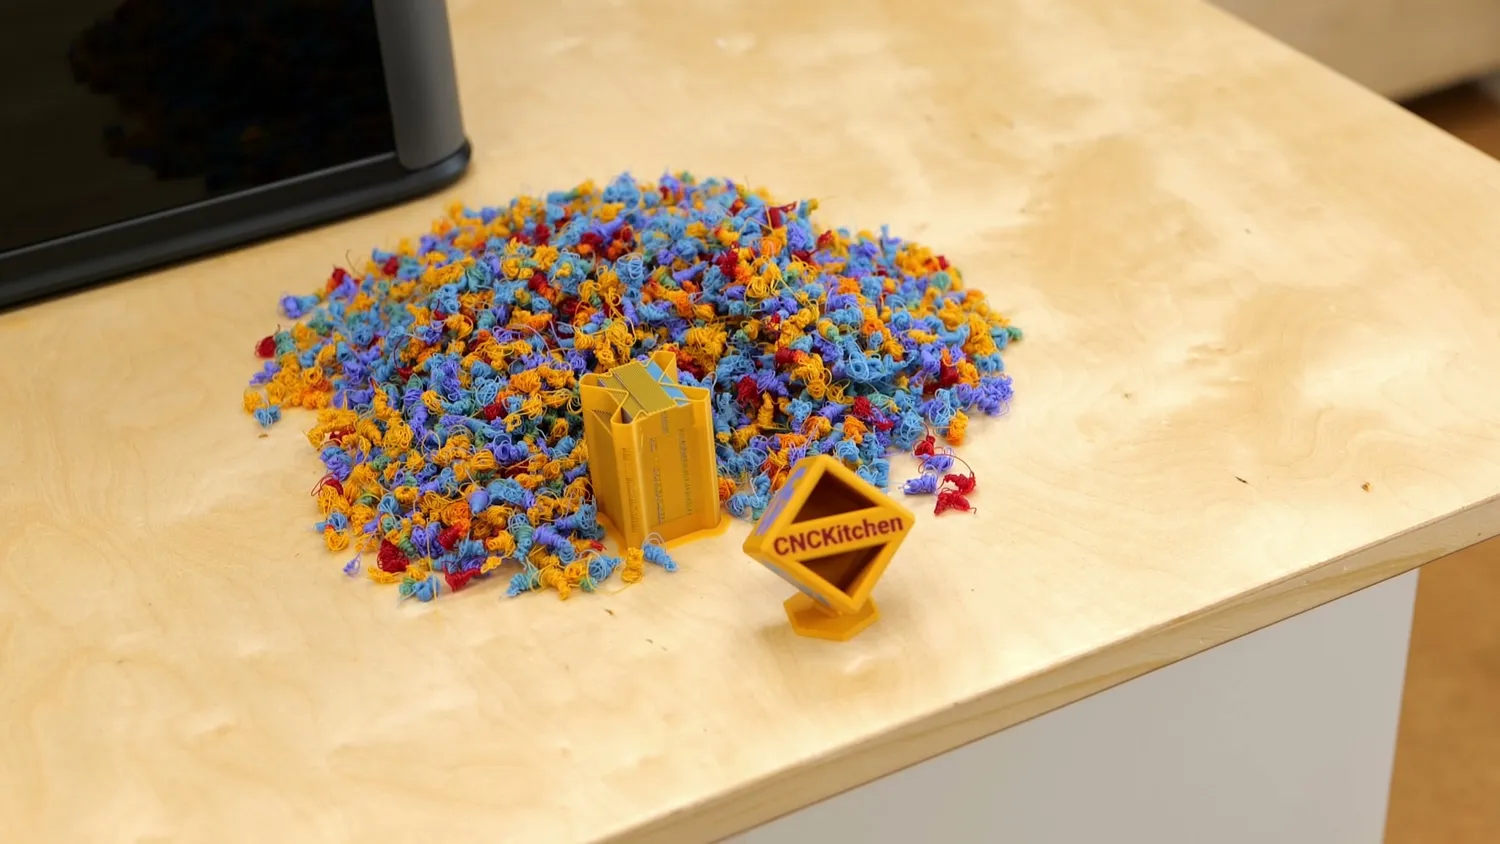
We could discuss many other examples, but the exact difference in time and waste highly depends on the model. The thing I want you to take away from this is that the H2C is slower than a toolchanger because a nozzle change simply takes longer, but in terms of waste it’s on par, because it also just purges the nozzle, as toolchangers usually do as well.
That said, it is more efficient in time and waste compared to Bambu Lab’s other machines, because they need to significantly flush filament, which takes time and generates waste.
Print quality
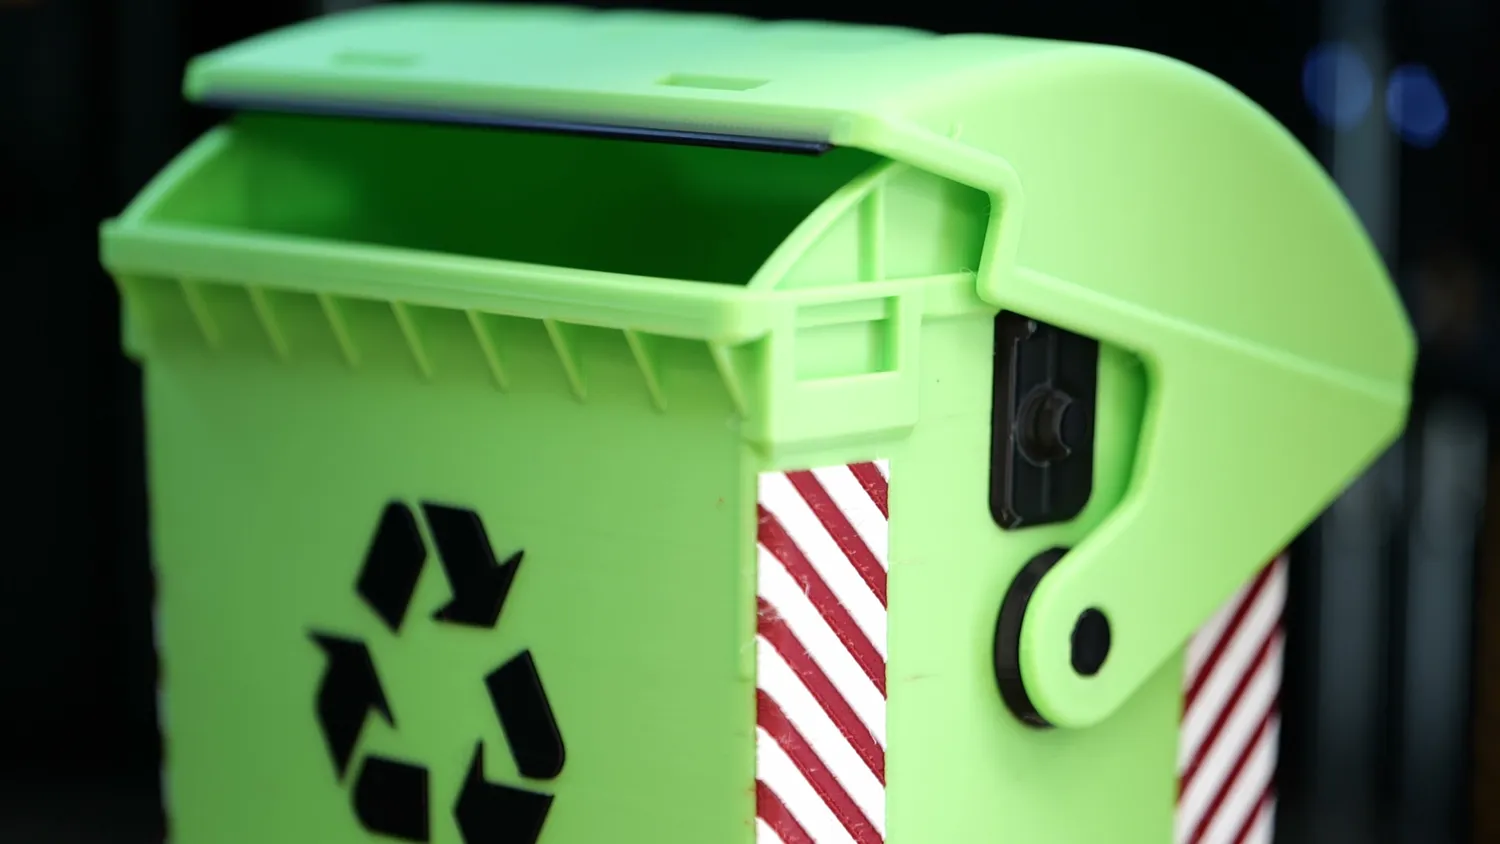
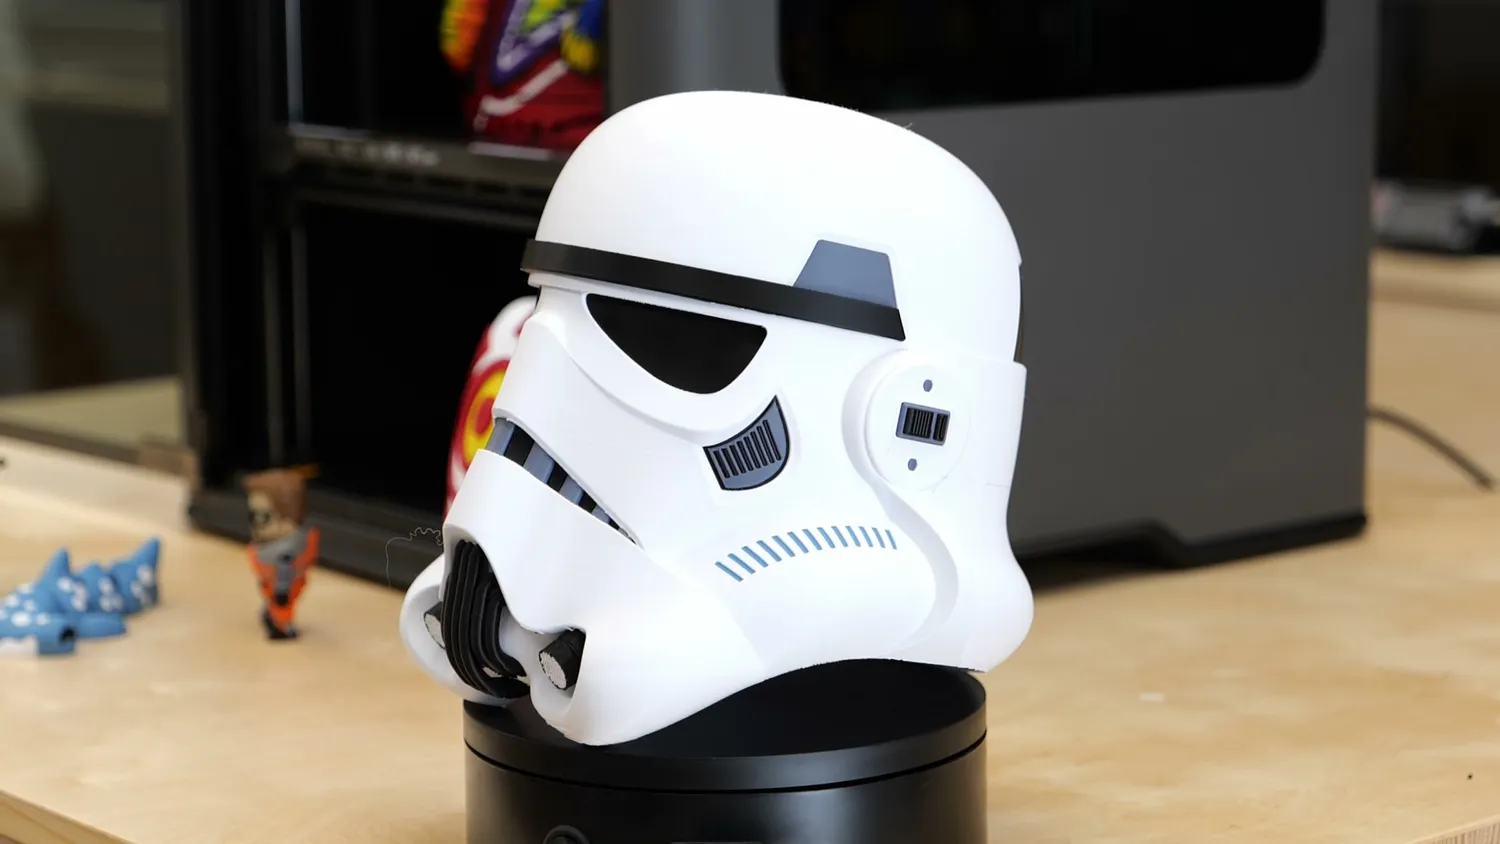
The quality of the prints is very good in general, and I printed a ton of different multi-color models. The extrusions are clean, and the layers mostly stack up nicely. The second Multicolor Bench Bin that I printed turned out also significantly better with only minor stringing, casters that stuck to the build plate and all mechanical functions work nicely. The only thing that I noticed are some very slight imperfections every few layers but only when you look really closely, and I think I had the same phenomenon on the H2D as well. This only happens if you print with different nozzles or tools. If you print just with one nozzle, the sides are very flat. And just as a comparison, the side surfaces of the same prints coming from the toolchangers also have a slight texture, and once the prints are bigger and more organic, this surface structure is not noticeable anymore. I had several multi-day prints and they all finished without any interference.
Who would benefit from the H2C?
Let’s finally come to the maybe most interesting part: who would benefit from the H2C? I mean, compared to a toolchanger, it’s significantly slower and also still generates waste, and for the price of one H2C you can get two and a half Snapmaker U1s! But where does it make sense as well?
First, there’s scalability. The U1 only prints four materials at once, the Prusa XL five. The H2C can print with seven materials in nozzle-changing mode, or if you are okay with purge waste, you can add multiple AMS units and print with up to 24 colors or materials at the same time.
The other point is convenience. The H2C comes in the box with four 0.4 mm and a 0.2 and 0.6 mm nozzle on the nozzle rack. So printing with a different nozzle size is as easy as selecting a size within the slicer, and the H2C will pick up the right one before the start. Yes, nozzle swaps are mostly easy and convenient these days, but I rarely find myself really changing them, because I need to walk to the studio, change it, print with it, and then remember to switch it back before the next print.
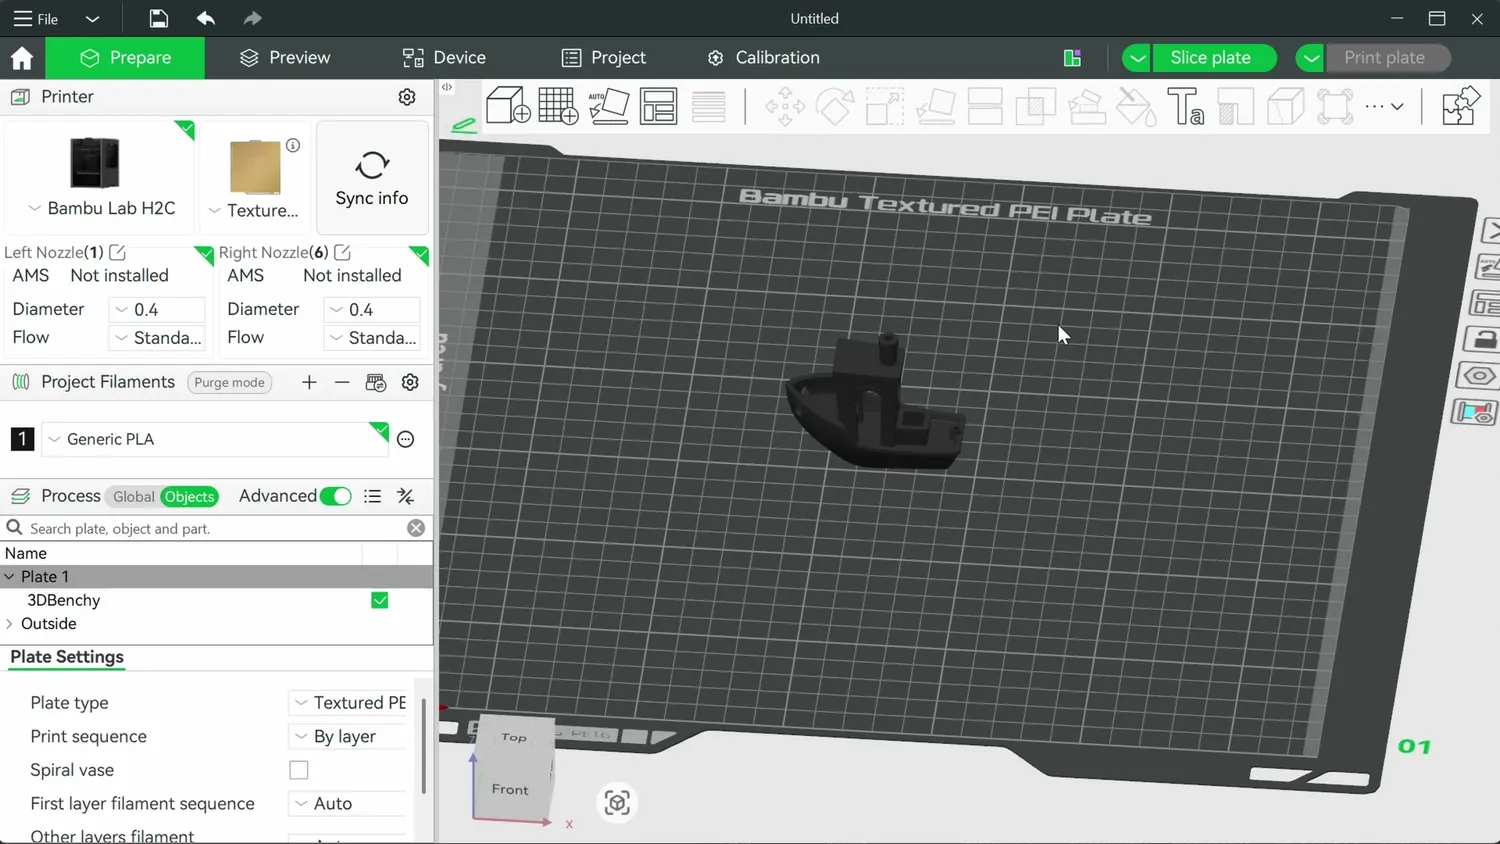
Picking a nozzle size is a dropdown, not a trip to the studio
The other convenience factor is that Bambu Studio is really good at optimizing your multi-color prints. You just load the model, and the slicer will tell you where to load the materials so it prints the fastest and with the least amount of waste. And this works so well that I didn’t have a single failure or problem during the over 200 hours of printing, besides the casters of the multicolor Benchbin not adhering to the bed. This machine and the ecosystem around it are designed so that even a non-expert can print such complex models without the slightest problem.
Then there is capability. If you compare the H2C with the other two famous toolchangers on the market, it’s lacking in PLA multi color printing efficiency, but once you go to technical materials, nothing beats the actively heated and compact chamber of the H2C. Toolchangers simply have to have those big wiring looms on the top, which require ridiculous enclosures to house them which makes heating a pain.
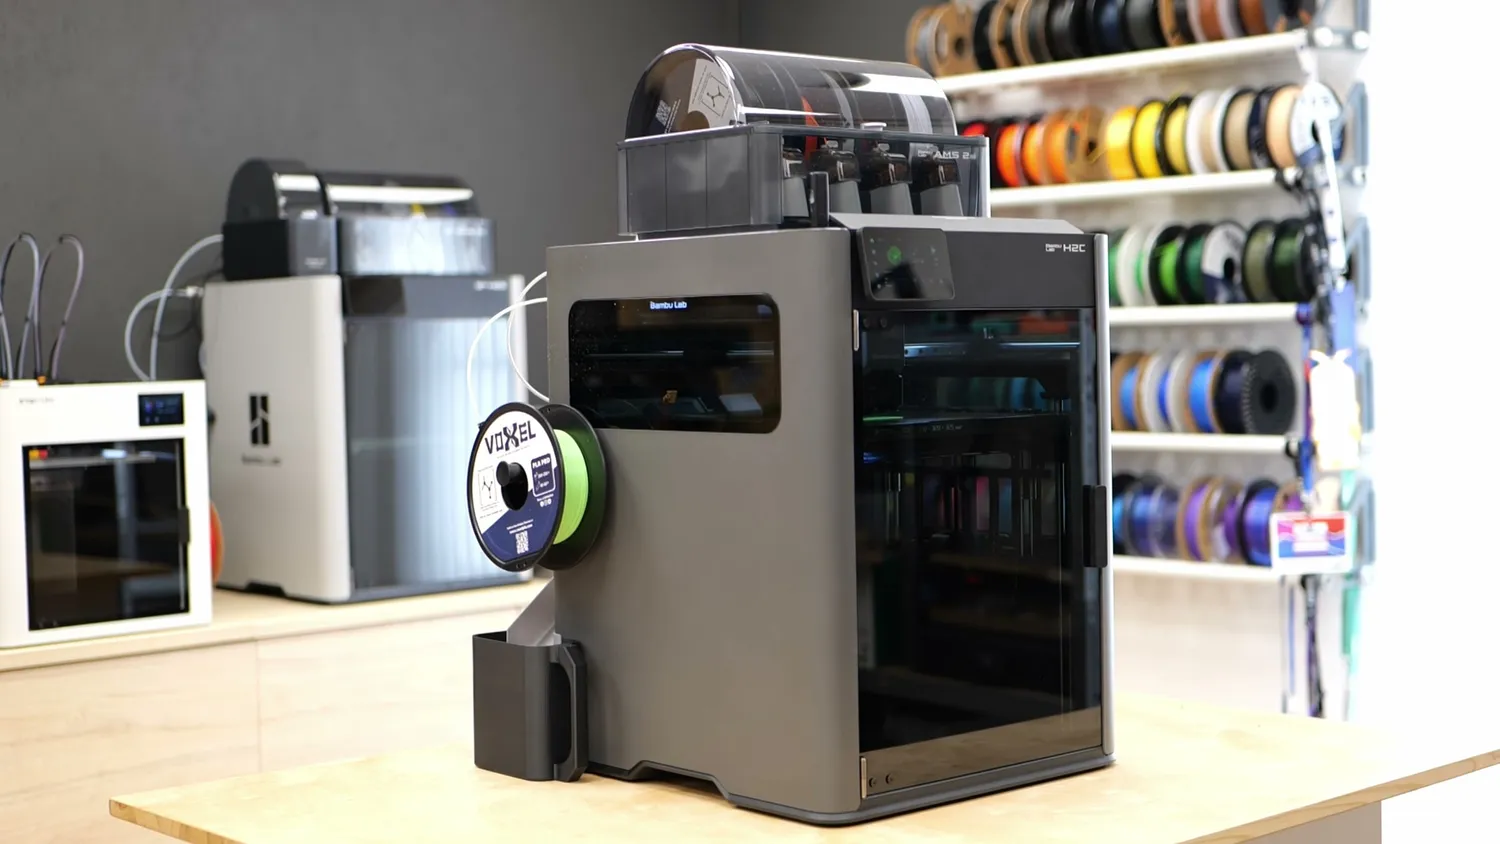
Everything fits in the same compact, heated box
The H2C still only has the one toolhead and the drag chain with the Bowden tubes that don’t require any additional height. So if you plan to print technical materials, the H2C is simply a better choice. But why would you then need a nozzle changer, because you rarely print nylon with PPS, ABS and polycarbonate at the same time?
First, again, different nozzle diameters that are directly available in the slicer. But the other thing is that Bambu Lab allows you to dedicate a material to a specific nozzle. I’ve shown in the past that you need to purge a tremendous amount of material if you switch from PLA to PETG, for example, otherwise the leftover of these materials in the nozzle will ruin the strength of your parts. It’s even worse if you have, for example, printed high-temperature PPS and then want to switch back to PLA. The printing or changing temperatures for PLA are so low that the PPS won’t even melt, so it will clog the nozzle, and you first have to switch to a transition material like ABS before you can print with PLA again.
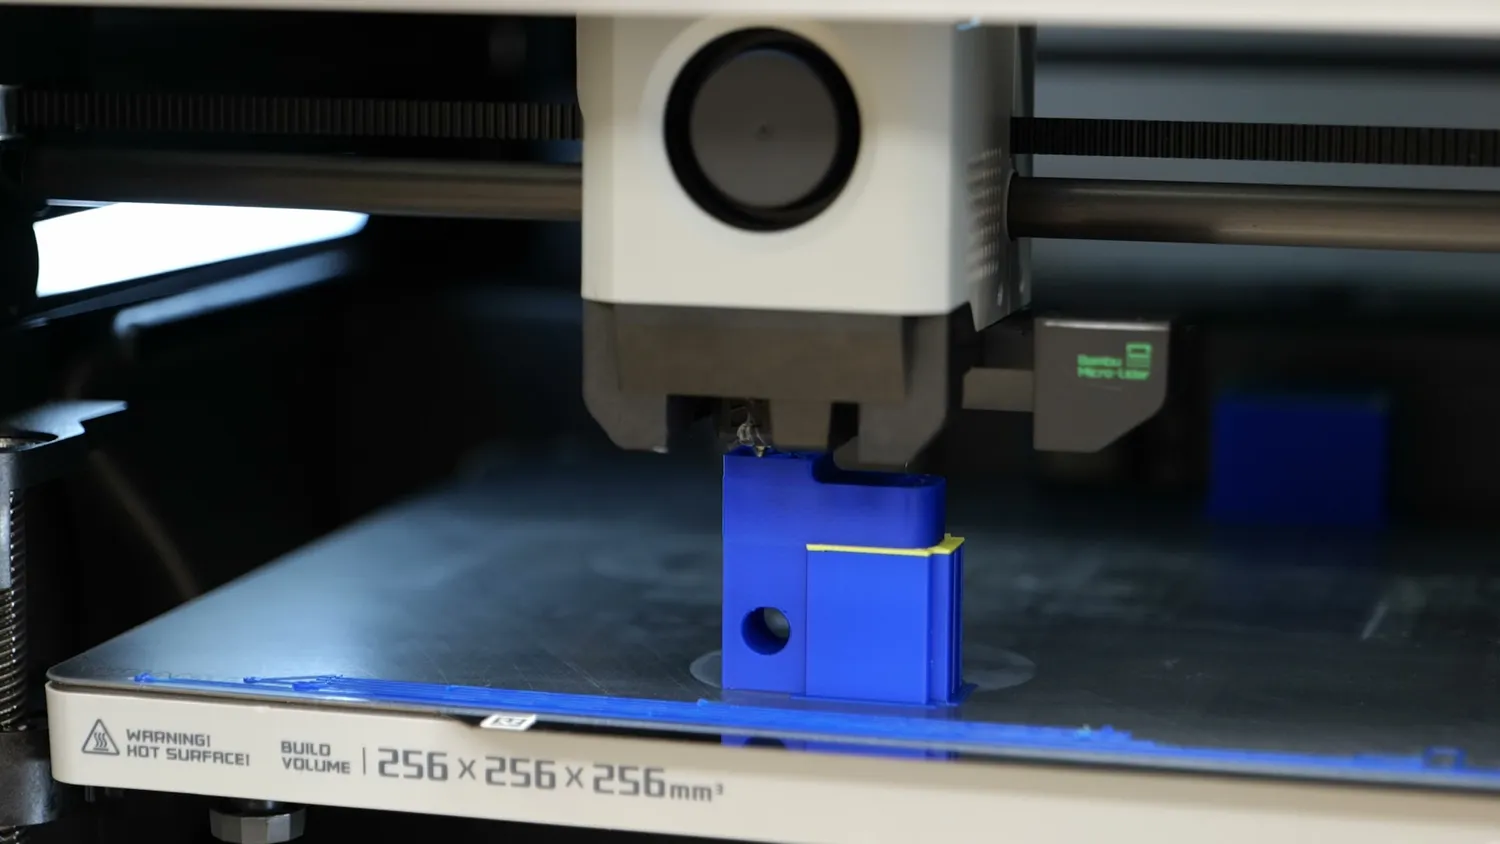
Leftover material from the last filament ruins the strength of the next part
If you have a dedicated nozzle for each material, you don’t need to worry about that. And this leads me to my conclusion. Yes, the H2C can do very nice multi-color printing, but so can the Prusa XL at a bigger size or the Snapmaker U1 at a significantly lower price, and those are even faster and produce less waste. So if you primarily want to do multi-color PLA printing or multi-material printing with PETG or TPU they are the better choice.
Not a revolution, but a solid addition
In my opinion, Bambu Lab’s H2C with its Vortek system is not a revolution, but it’s a solid and plausible addition to their ecosystem. With only a bit of extra hardware, they made the H2 series more efficient without needing to develop a completely new platform. Many might have wished for a tool changer from them, but I’m a bit happy that they built a nozzle changer, giving us all another option and not directly dominating another branch. The H2C can print almost any material on the market and only struggles with soft TPUs. In dual nozzle mode, you can very efficiently print models with easy break away support. The nozzle changing system can print multi-color parts much more efficiently than their other machines, but I see its greatest benefit in convenience: having a range of different nozzles available at the push of a button or dedicated nozzles for different materials. All of this fits in the same compact size as the other H2 series printers, with an ecosystem around it that works really well.
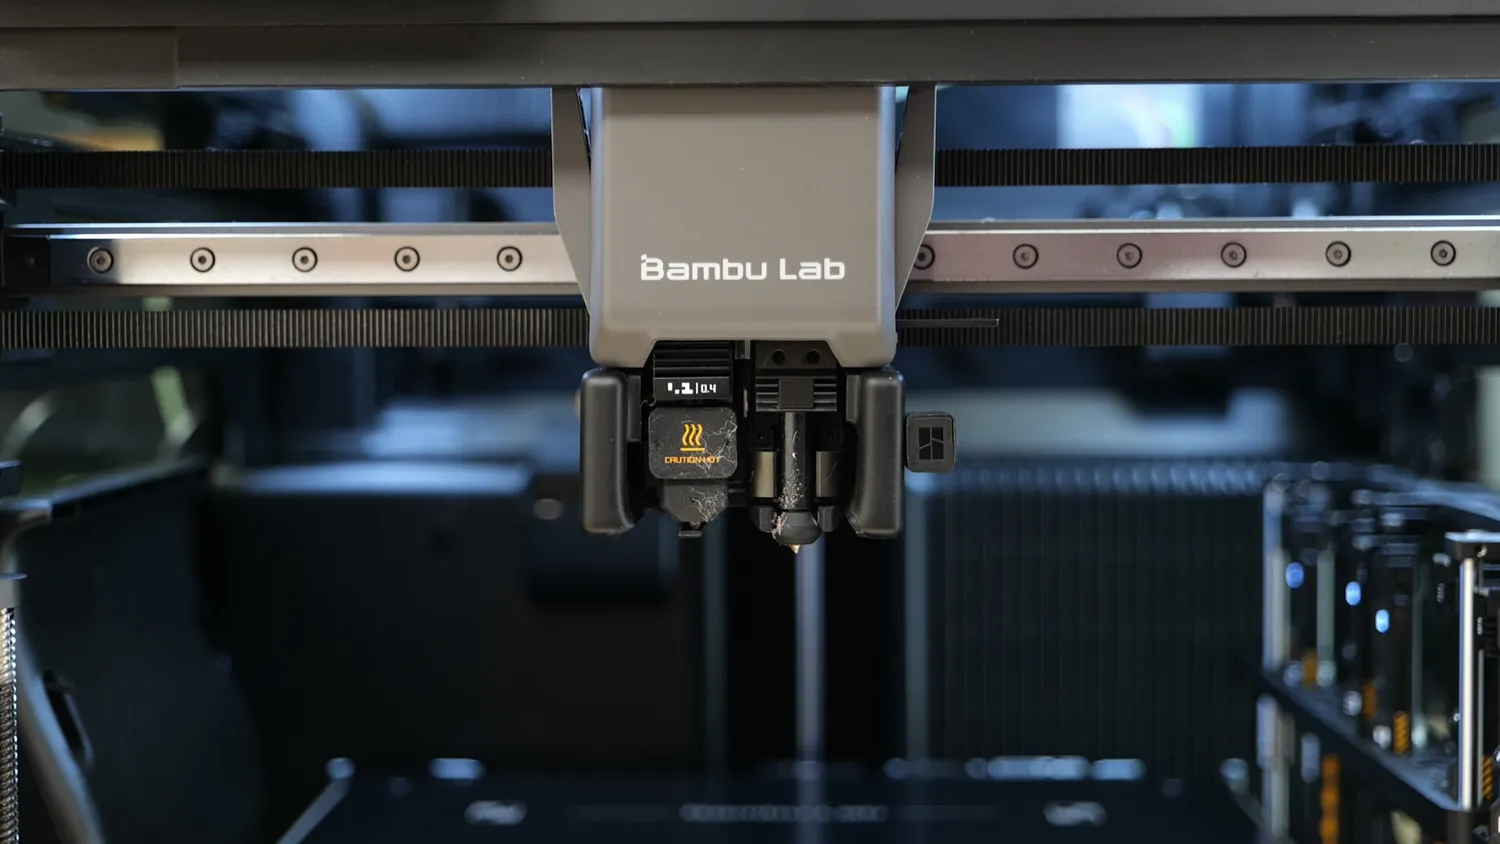
One toolhead, seven nozzles
For me, the H2C is an amazing, versatile business printer that comes at a price. If your budget is tighter, you don’t need that convenience factor, or if you’re not regularly doing complex multi-color projects, there are other, more affordable options inside and outside the Bambu Lab ecosystem. But if you have the budget, the H2C is one of the most reliable and capable 3D printers currently available!
I had a really hard time making up my mind who would benefit from this machine and who not. But what are your thoughts on the H2C? Are you stoked to see this evolution, or are you disappointed by its performance? Let me know!
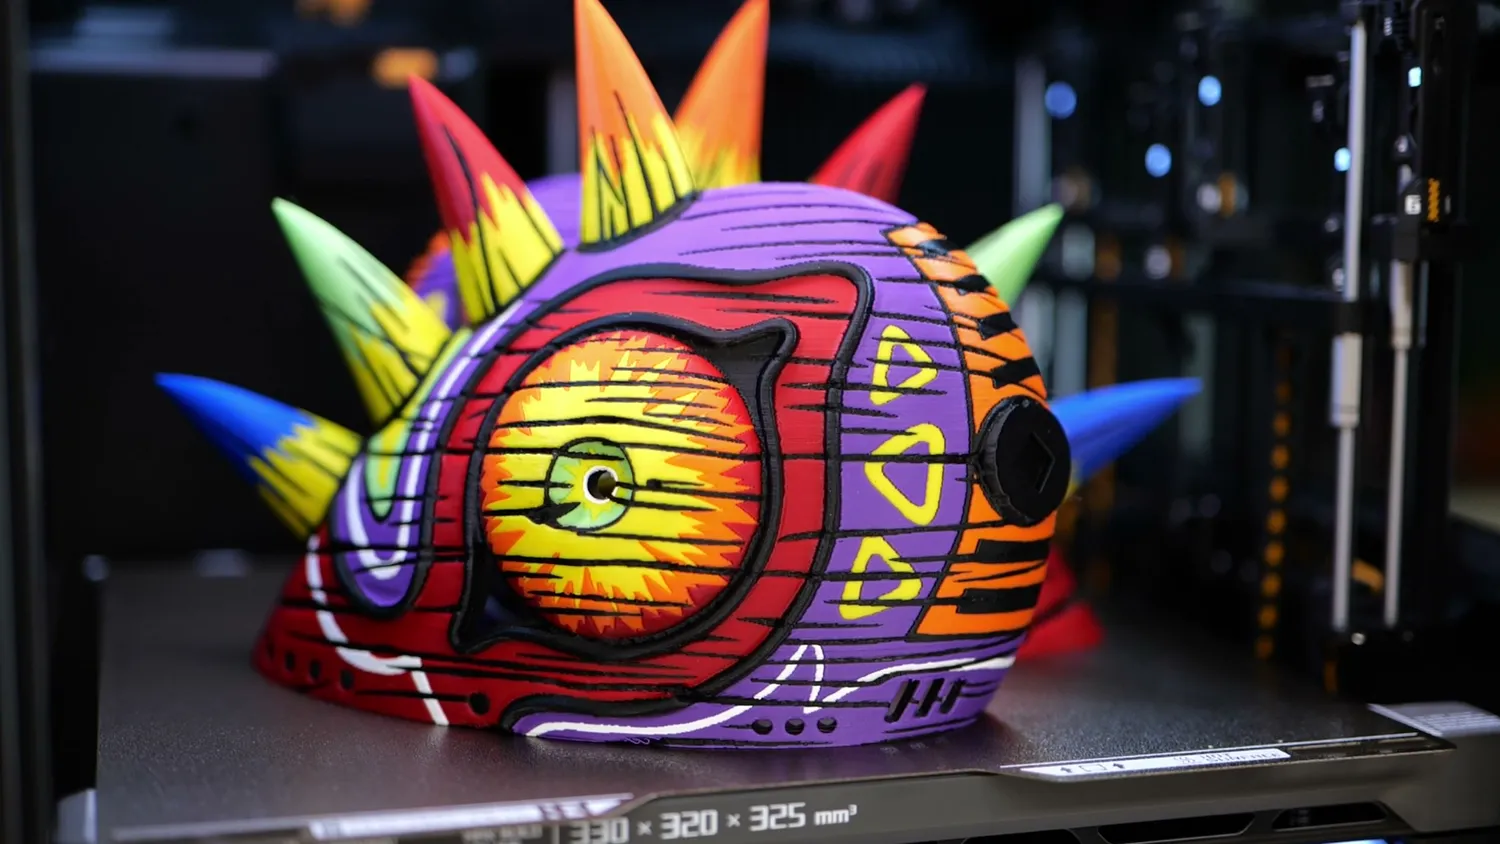
Majora’s Mask, eight colors, two and a half days
🐼 Get the Bambu Lab H2C ($2,399): https://geni.us/BBL-H2C*
* Links marked with an asterisk are affiliate links — if you buy through them, I earn a small commission at no extra cost to you. As an Amazon Associate I earn from qualifying purchases. Thanks for supporting my work!