
Creality Raptor Pro vs. Revopoint Metro Y Pro: Which 3D Scanner Should You Buy?
Creality Raptor Pro vs. Revopoint Metro Y Pro: I compared detail, accuracy and usability on real parts, from an N64 controller to a Vespa, and one clearly wins.
TL;DRthe short version
- Both the Creality Raptor Pro and the Revopoint Metro Y Pro cost around 1,500 euros or dollars and use laser lines to scan a huge range of materials, from dark plastic to machined metal.
- On small parts the Raptor Pro is clearly sharper: its parallel-line mode goes down to 0.07 mm resolution while the Metro Y stops at 0.15 mm, and you can see that in details like the Nintendo logo.
- Accuracy was very similar: on my DIY ball bars most measurements stayed within ±0.02 mm (Raptor) and ±0.03 mm (Metro Y) of the reference, and the two Vespa scans matched each other to around 0.1 mm.
- On the large, smooth Vespa bodywork the Metro Y Pro won: smoother surfaces, more detail overall, and even the reflective logo came out better.
- Revopoint gives you more for your money: a two-axis rotary table, battery handle and phone holder are in the box, while Creality's wireless Scan Bridge costs another $299.
- For scanning people the Raptor is clearly better: its infrared mode let Marius keep his eyes open, and the Metro Y couldn't capture his hair at all.
- Revopoint's software is the deal-breaker: a noticeable lag on every computer I tried, slower processing and regular crashes, while scanning with the Raptor is smooth and immediate.
- Right now I would pick the Creality Raptor Pro over the Metro X or Metro Y Pro: better results on smaller parts without tweaking any settings, and it sparks joy where the Metro series left me frustrated.
🔍 Get the Creality Raptor Pro ($1,999): https://geni.us/CR-RaptorPro*
🔍 Get the Revopoint Metro Y Pro ($1,759): https://geni.us/RP-MetroYPro*
I honestly regret not making this video earlier, because over the last two years it wasn’t necessarily the 3D printers that brought me the most joy. It was one engineering tool that I really wouldn’t want to miss anymore: a good 3D scanner.
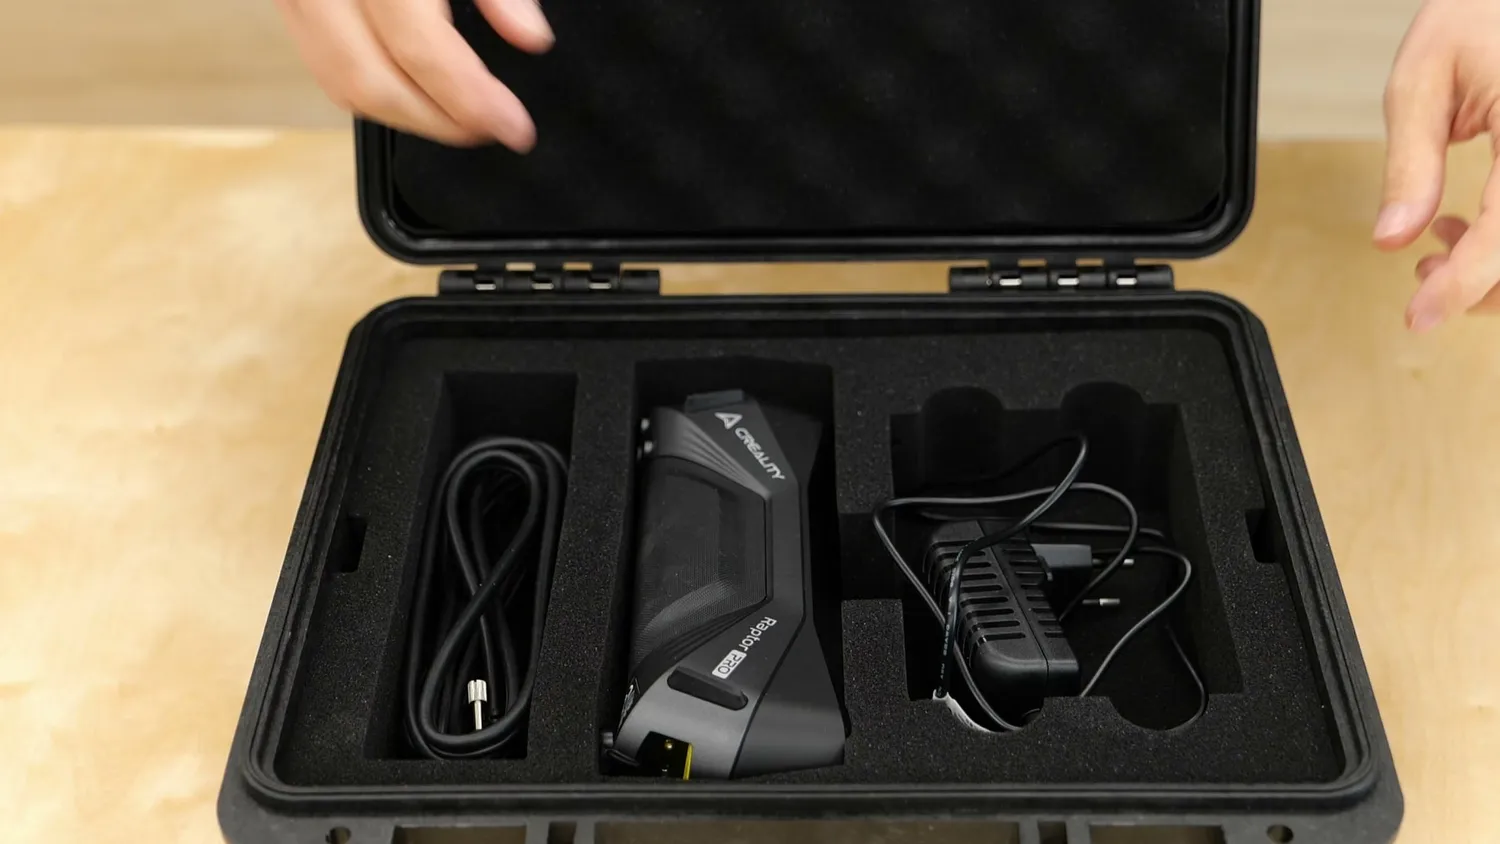 The engineering tool I wouldn’t want to miss
The scanners you can get these days are able to capture anything from tiny parts like this float valve needle all the way to full-size vehicles, with an amazing level of detail.
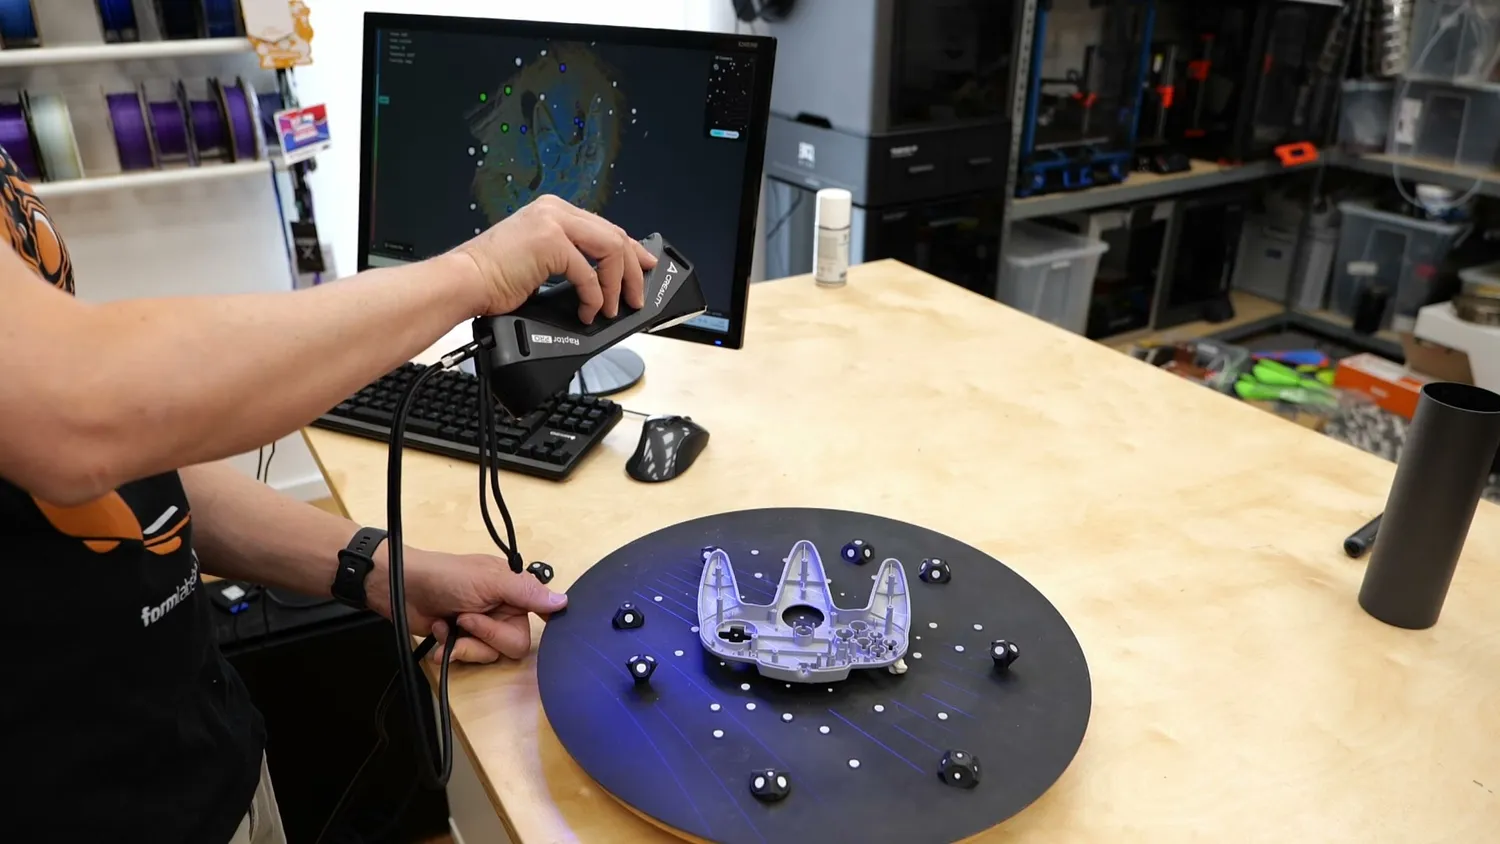 From tiny parts to full-size vehicles
But are they all created equal? In today’s video, we’ll take a look at the Creality Raptor Pro and the Revopoint Metro Y Pro, two scanners I’ve used quite a bit over the last year. And while one of them sparks a surprising amount of joy in me, the other can be quite frustrating. Let’s find out why.
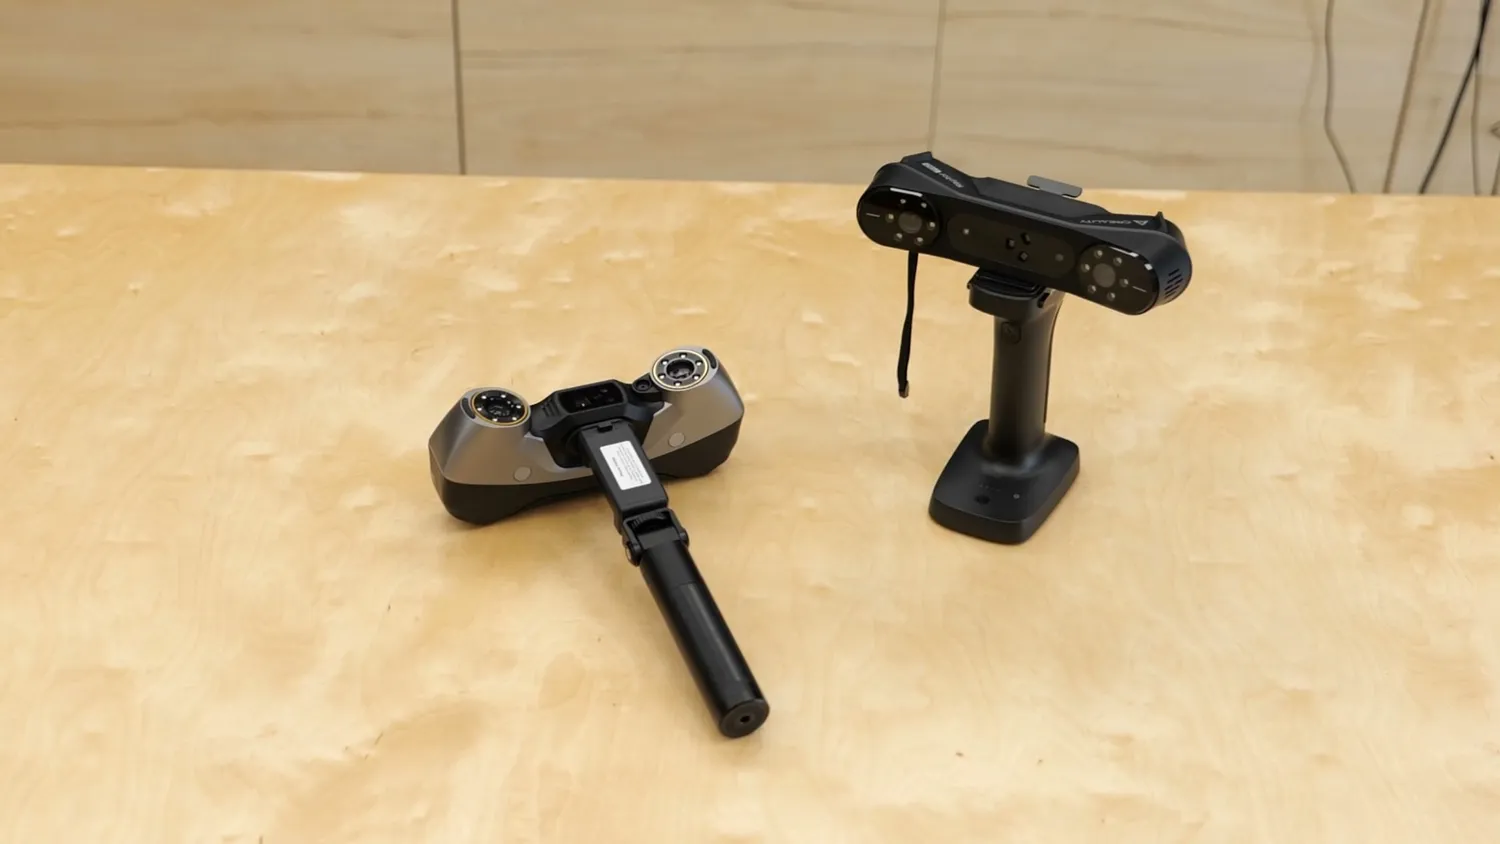 The two contenders
Why I love laser-line 3D scanners
3D scanners have been around in industry for decades, but usually with a serious price tag. I actually used one of those systems for many years at my former job for reverse engineering and quality control.
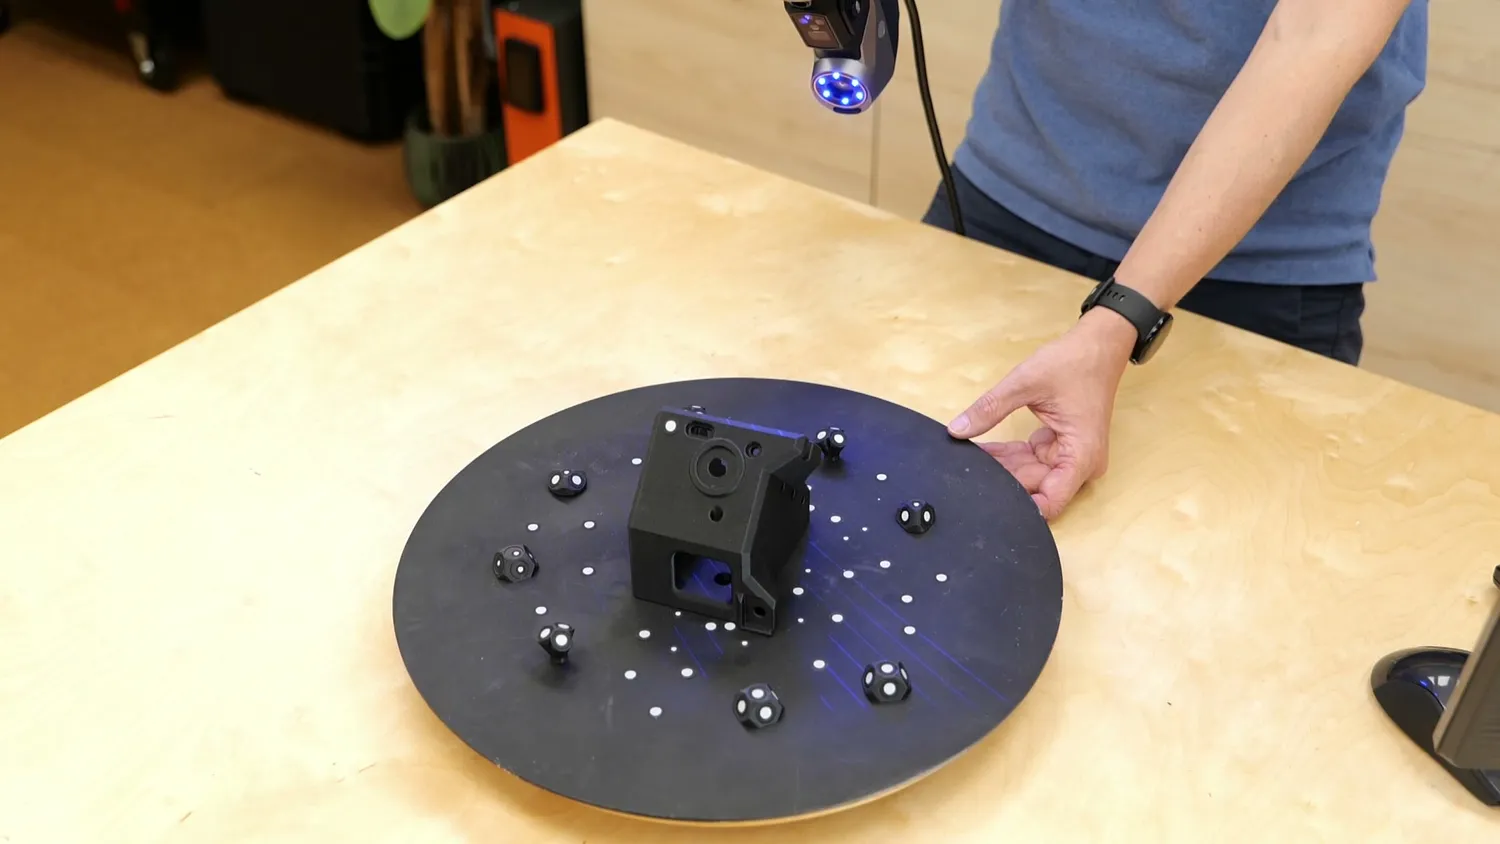
Over the last few years, though, more and more scanners have come onto the market at prices where even hobbyists might consider buying one.
 Serious scanners at hobbyist prices
If you have an iPhone, even the Face ID sensor is basically a small 3D scanner, and similar technology is used in many inexpensive scanners. These systems can work well for organic shapes, but they often rely heavily on a color texture to make fine details visible and can struggle with glossy or very dark parts.
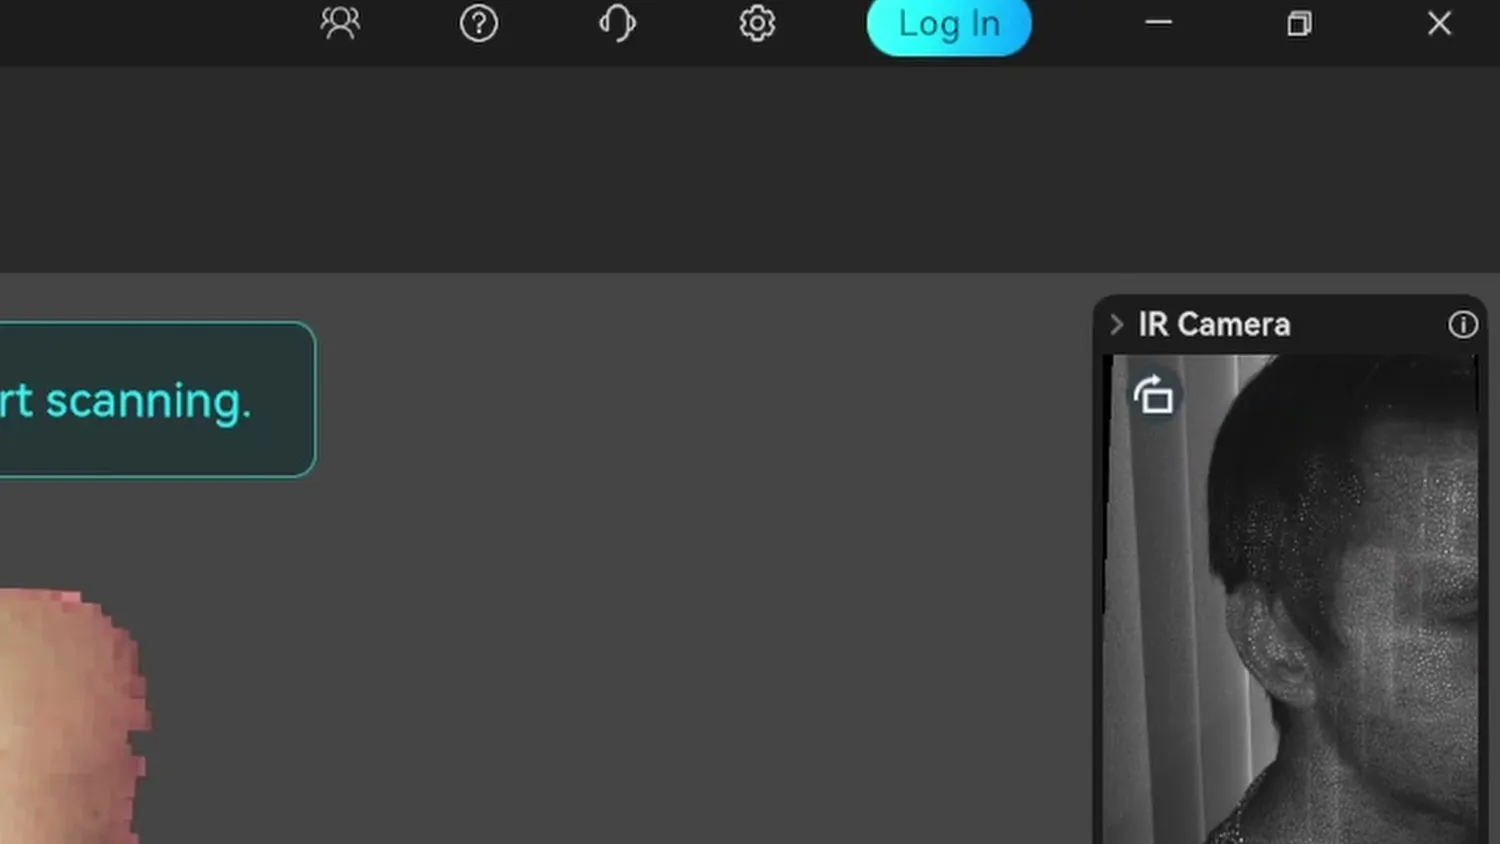 Face ID style: an infrared depth camera
Two years ago, I got my hands on a laser-line 3D scanner that projects bright laser lines onto a part and uses them to reconstruct its shape. And that honestly blew me away.
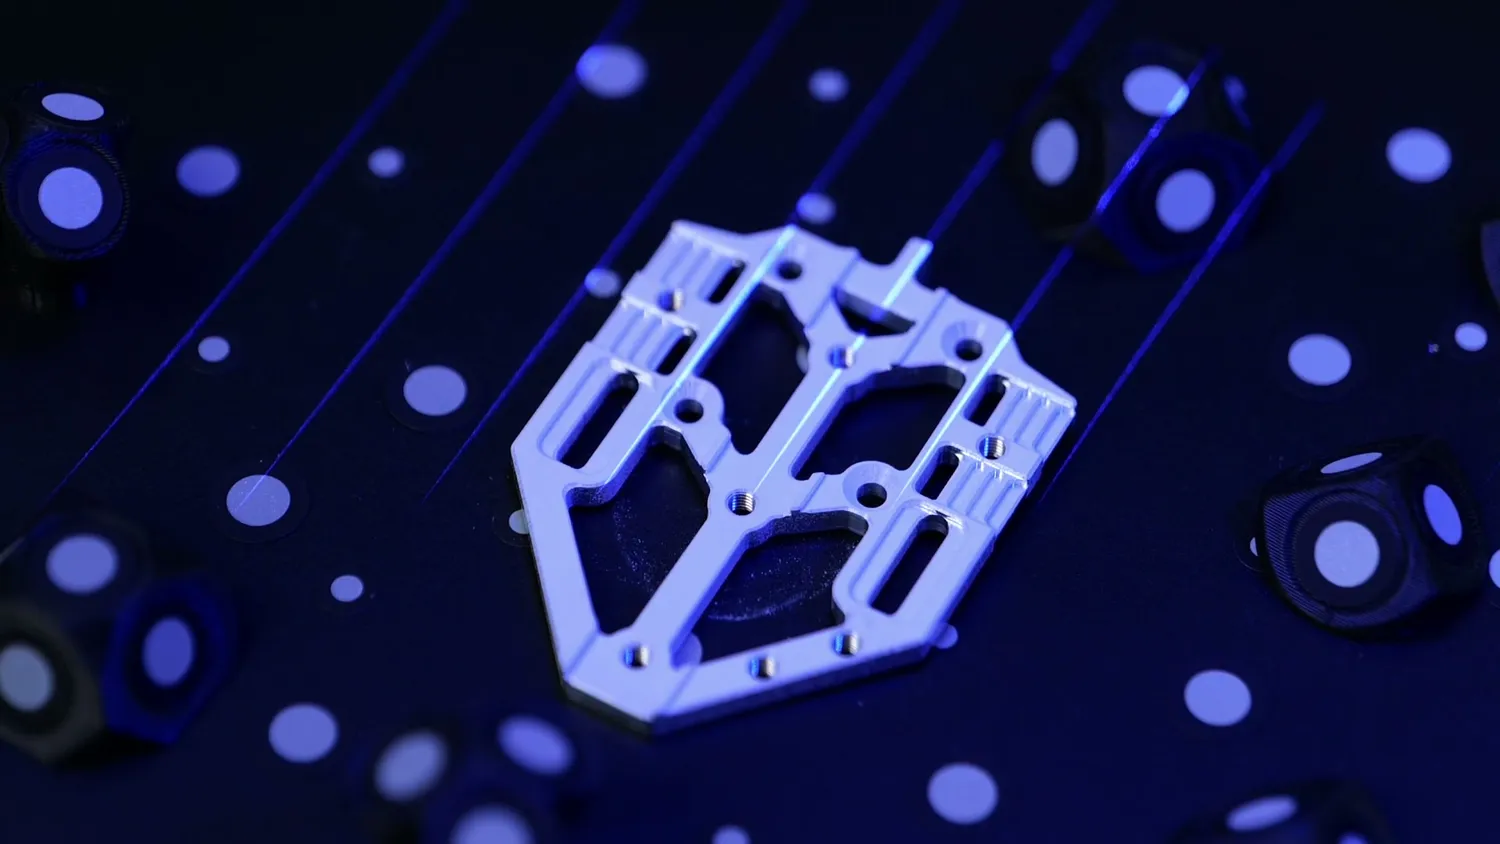 Laser lines projected onto the part
For the first time, I could easily and efficiently scan parts for my projects, sometimes even getting better results than with the roughly 150,000-euro system we had at work.
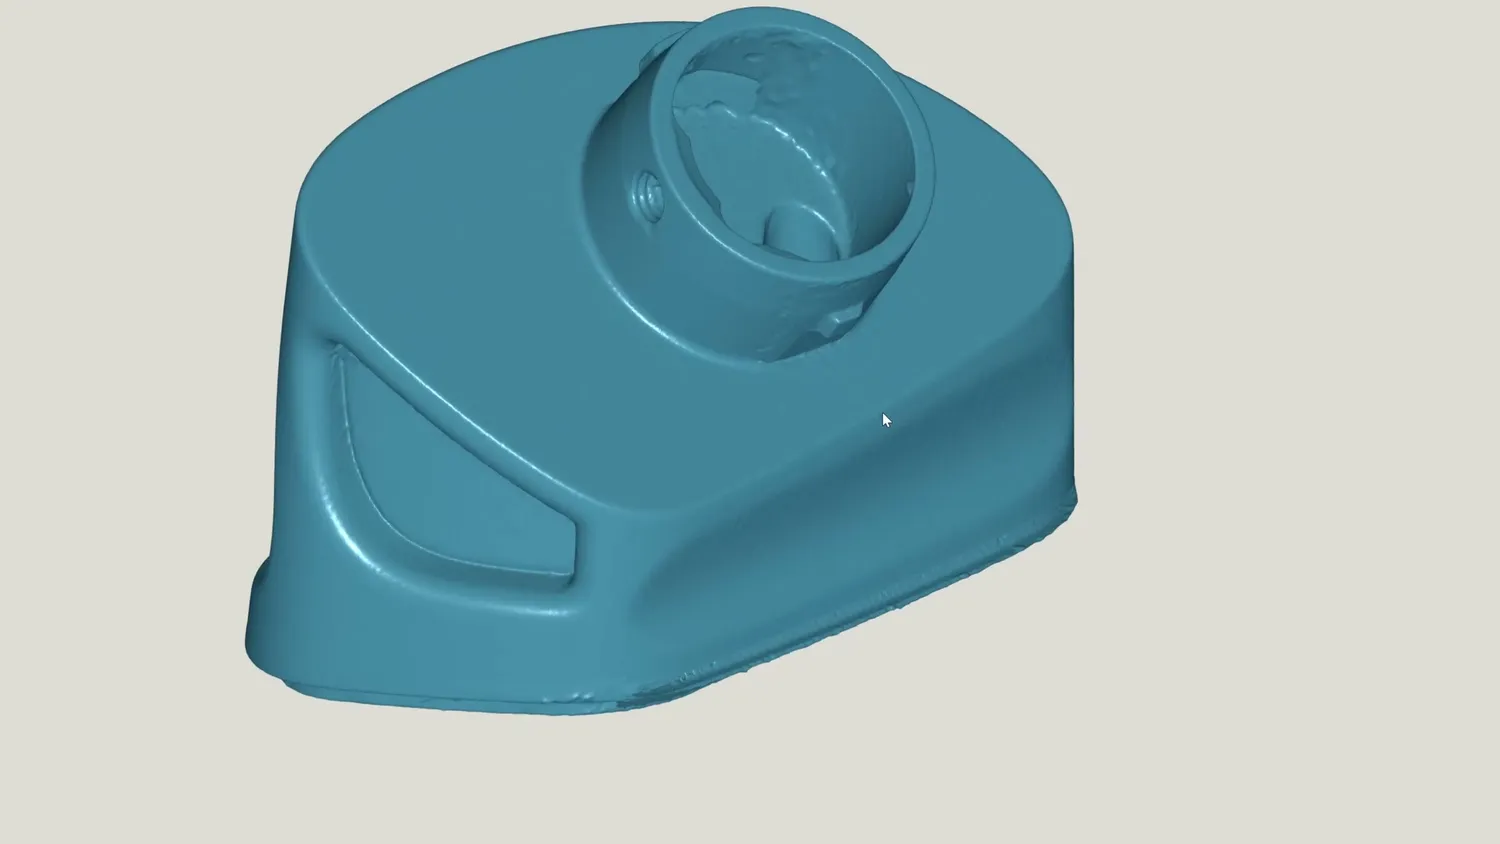 A result from my first laser-line scanner
The video I made back then was sponsored by Creality, so I know some people might not have taken my enthusiasm completely seriously. This comparison, however, is not sponsored by any scanner manufacturer. So hopefully you can finally believe me when I say that these devices can be amazing engineering tools, as long as you have an application for them and understand what you can realistically expect.
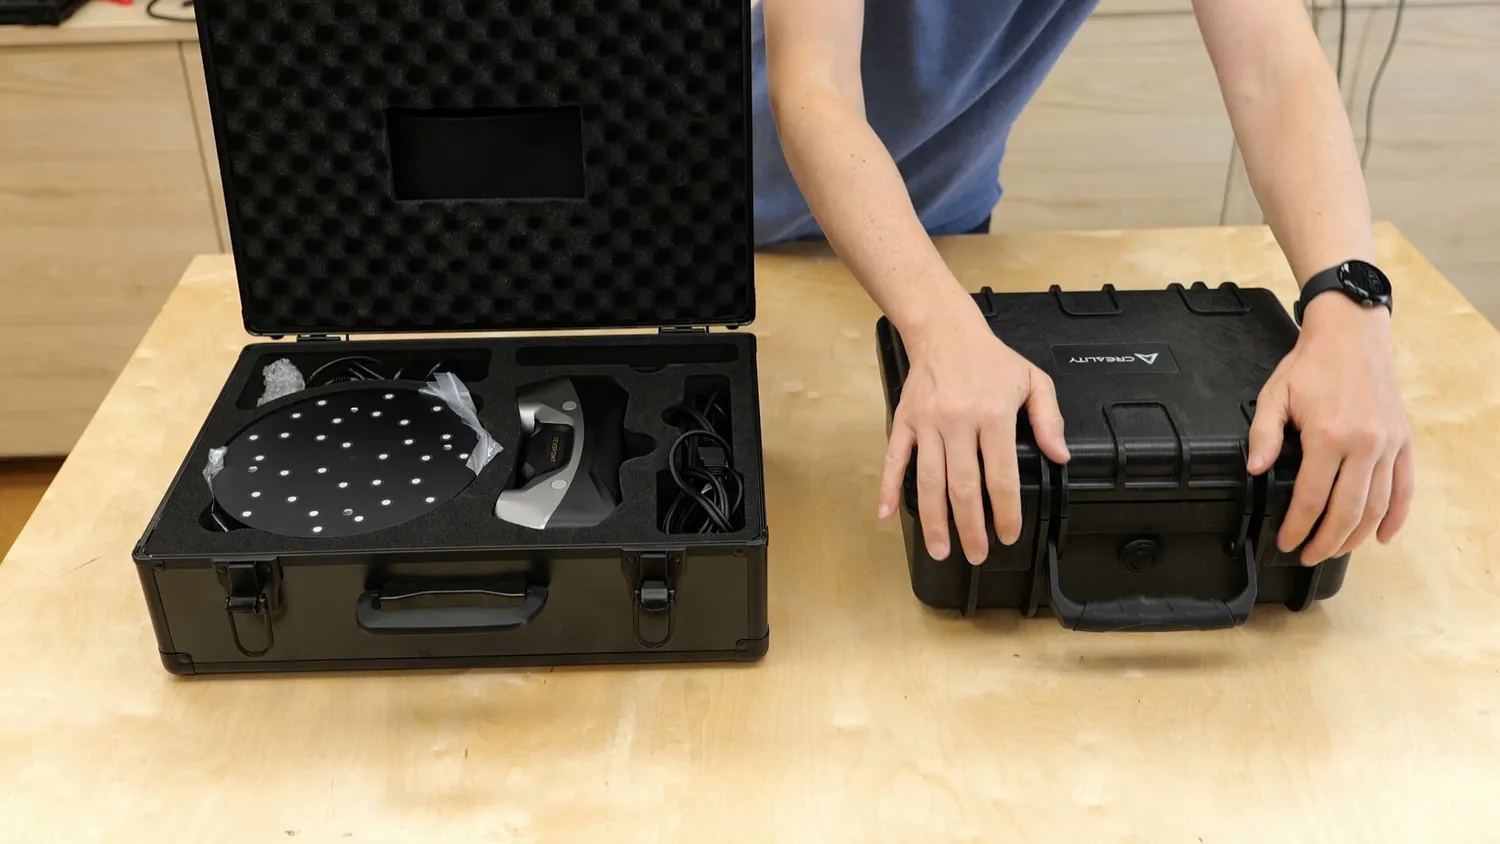 No scanner manufacturer sponsored this comparison
That’s why today we’re looking at the Creality Raptor Pro and the Revopoint Metro Y Pro. Both were provided for review. We’ll find out not only what they can do, but also how well they do it and how convenient they are to actually use.
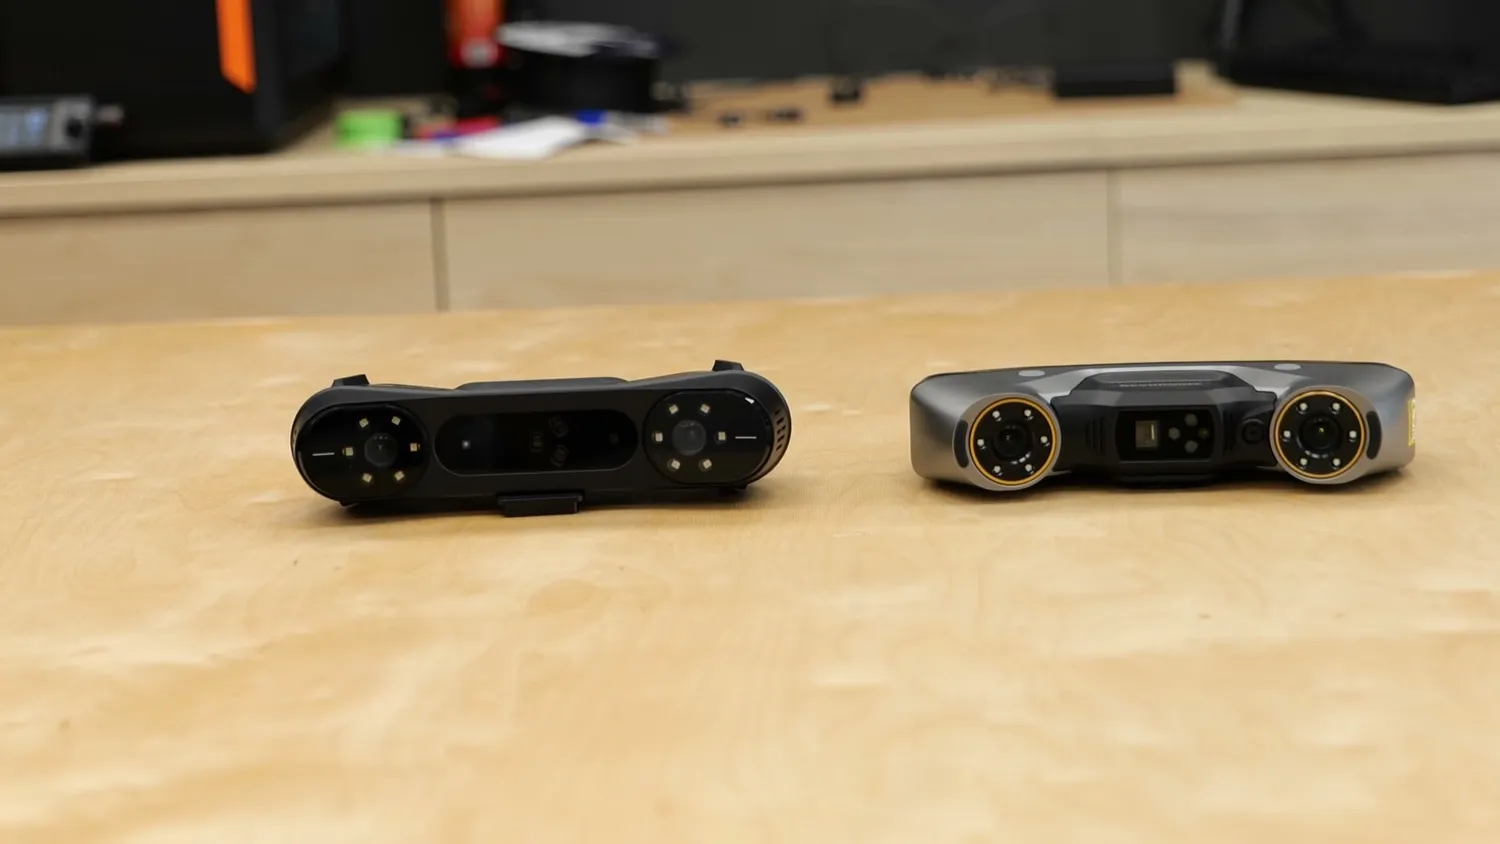 Creality Raptor Pro and Revopoint Metro Y Pro
Both primarily use laser lines for scanning. This allows them to scan a huge range of materials, from dark plastic to machined metal, often without any surface preparation and at an impressive resolution. In my experience, the results I got from both of them were vastly superior to anything I had achieved with other scanners before.
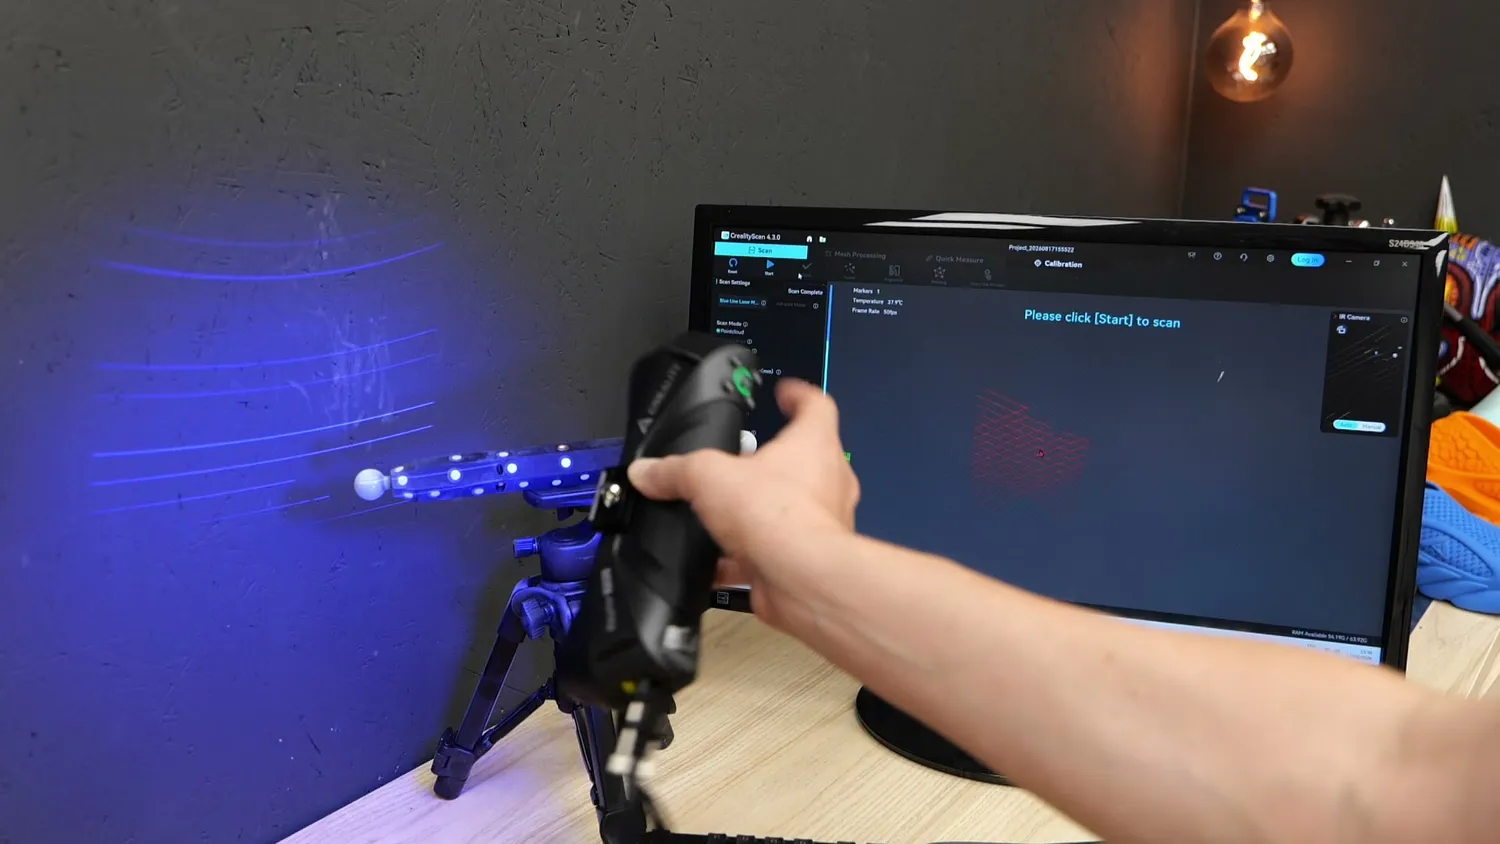 Both scanners rely on laser lines
The parts I’ve selected focus on technical applications. We’re not scanning a garden gnome that you want to copy. I’ve scanned several parts from my Vespa, injection-molded parts and 3D-printed parts that I would realistically use for reverse engineering or quality control.
What a 3D scanner can and cannot do
Before we start, though, I want to clear up two misconceptions I often see when people consider buying a 3D scanner, or sometimes only discover after scanning their first few parts. First, 3D scanning can be tricky.
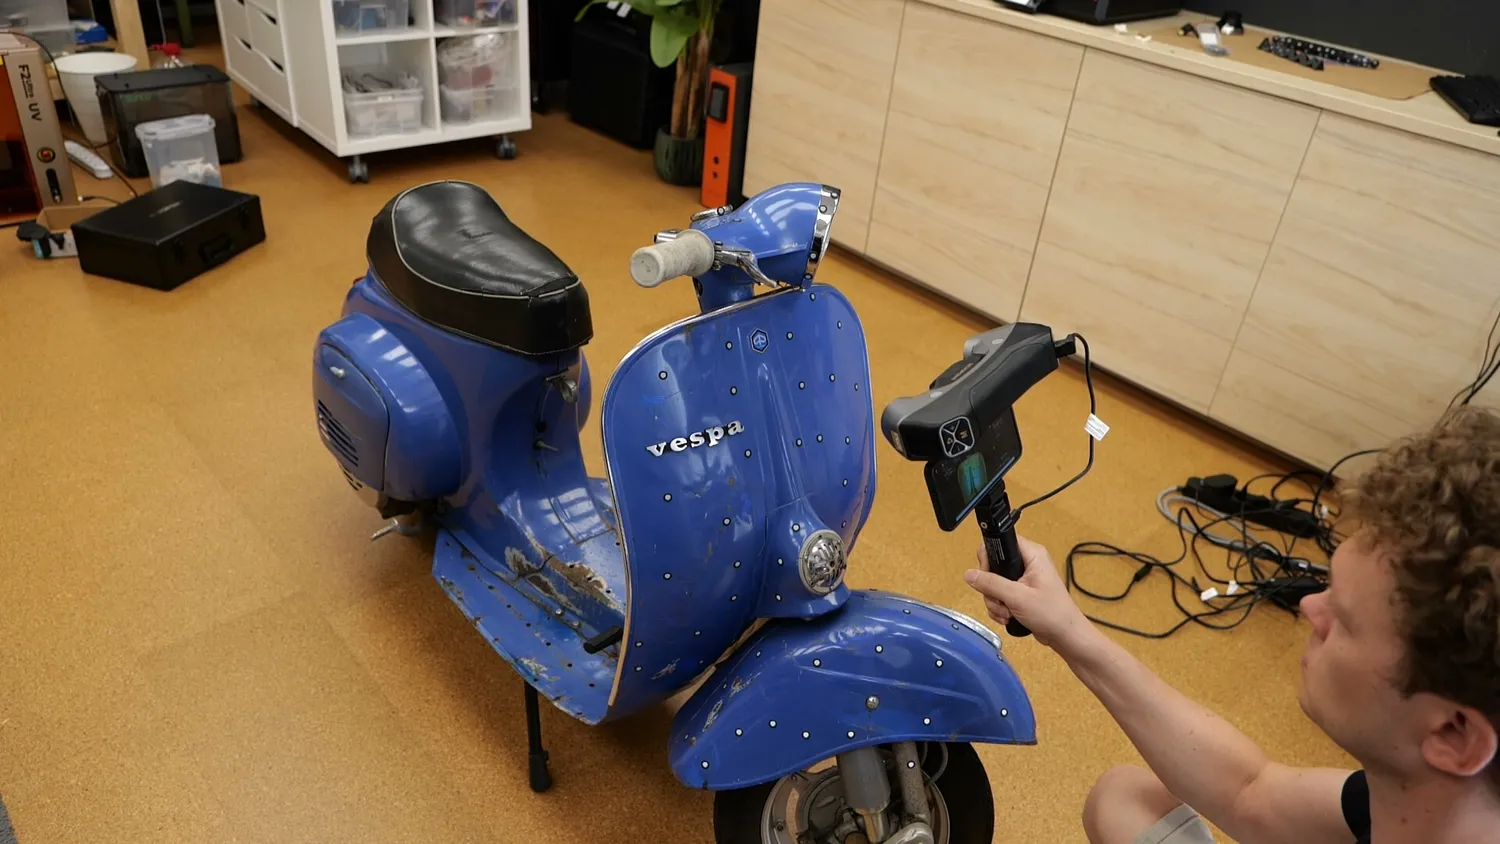 Good scans take some practice
Transparent, reflective or very dark parts might need some preparation before you get good results. I have a whole article with 10 tips for getting better 3D scans, which is worth reading if you want to get the most out of your scanner.
And second, the result you get from a 3D scanner is not a nice STEP file that you can simply open and edit in CAD. A scanner gives you a mesh, similar to an STL, and quite often it’s not even a closed mesh. You can perform Boolean operations on it, but directly adding, editing or removing features is usually difficult.
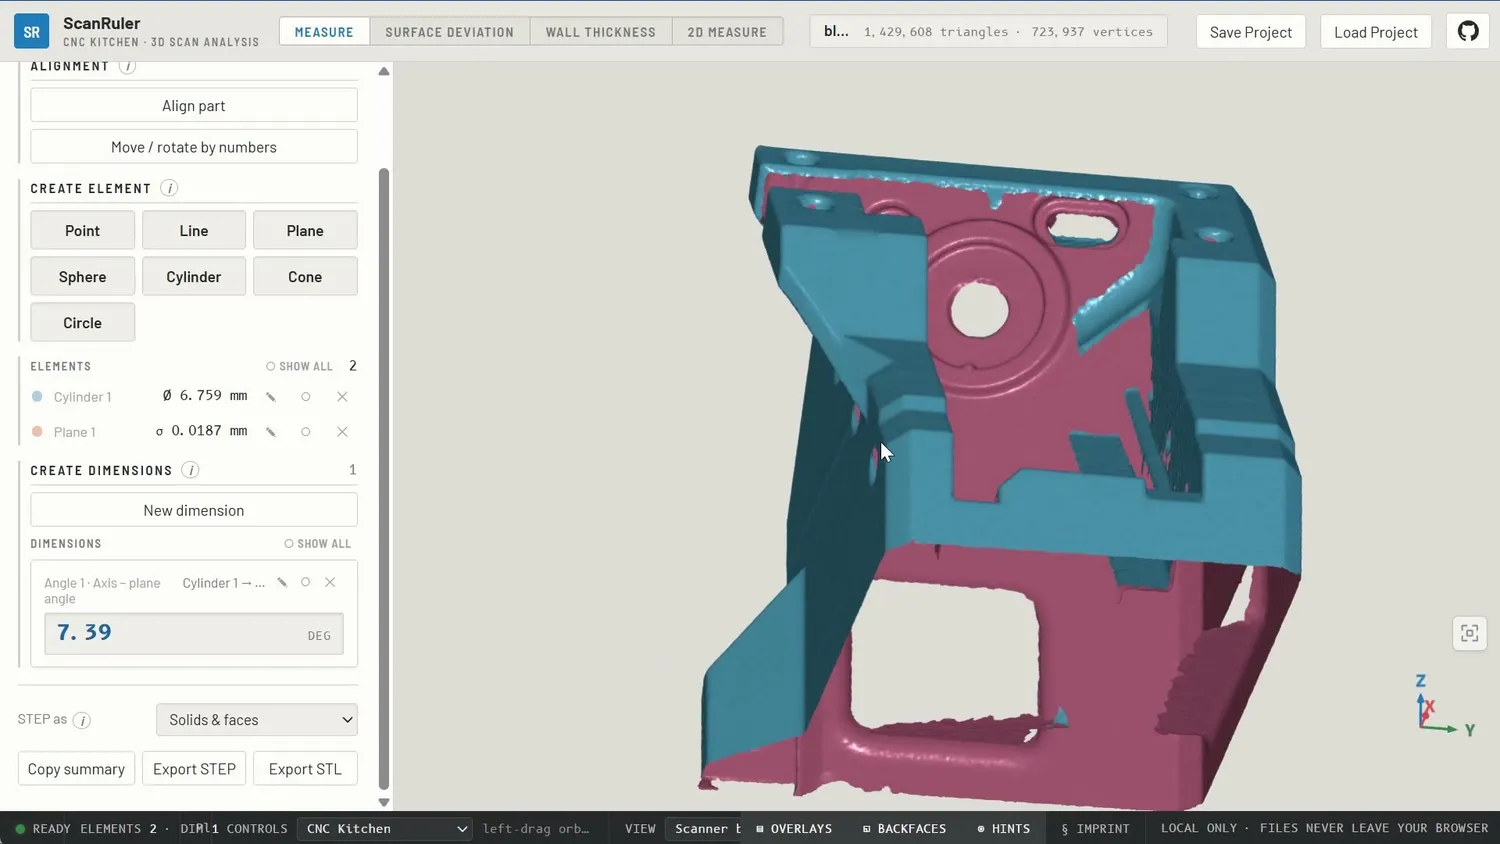 A scan is a mesh, not a STEP file
That’s why I always describe a 3D scan as a blueprint that you can load into your CAD software. You can design around it, take measurements from it or compare a manufactured part against your perfect CAD geometry.
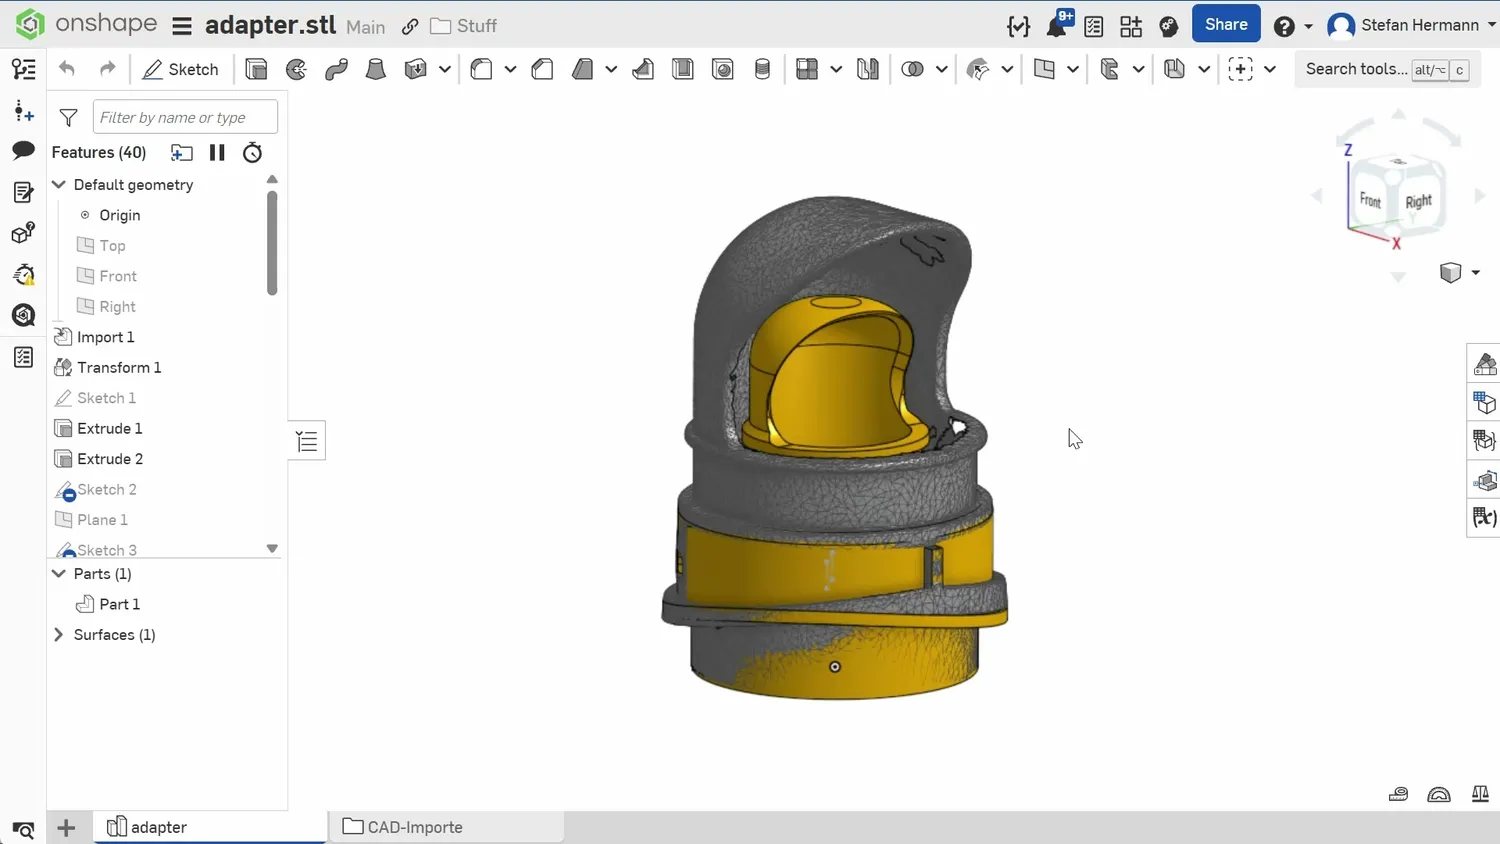 Designing around a scan in Onshape
You will rarely use a raw 3D scan to directly replicate a part. What it can do extremely well is help you reverse engineer complex geometry or validate manufacturing results. And only if you understand and accept that should you seriously consider buying one.
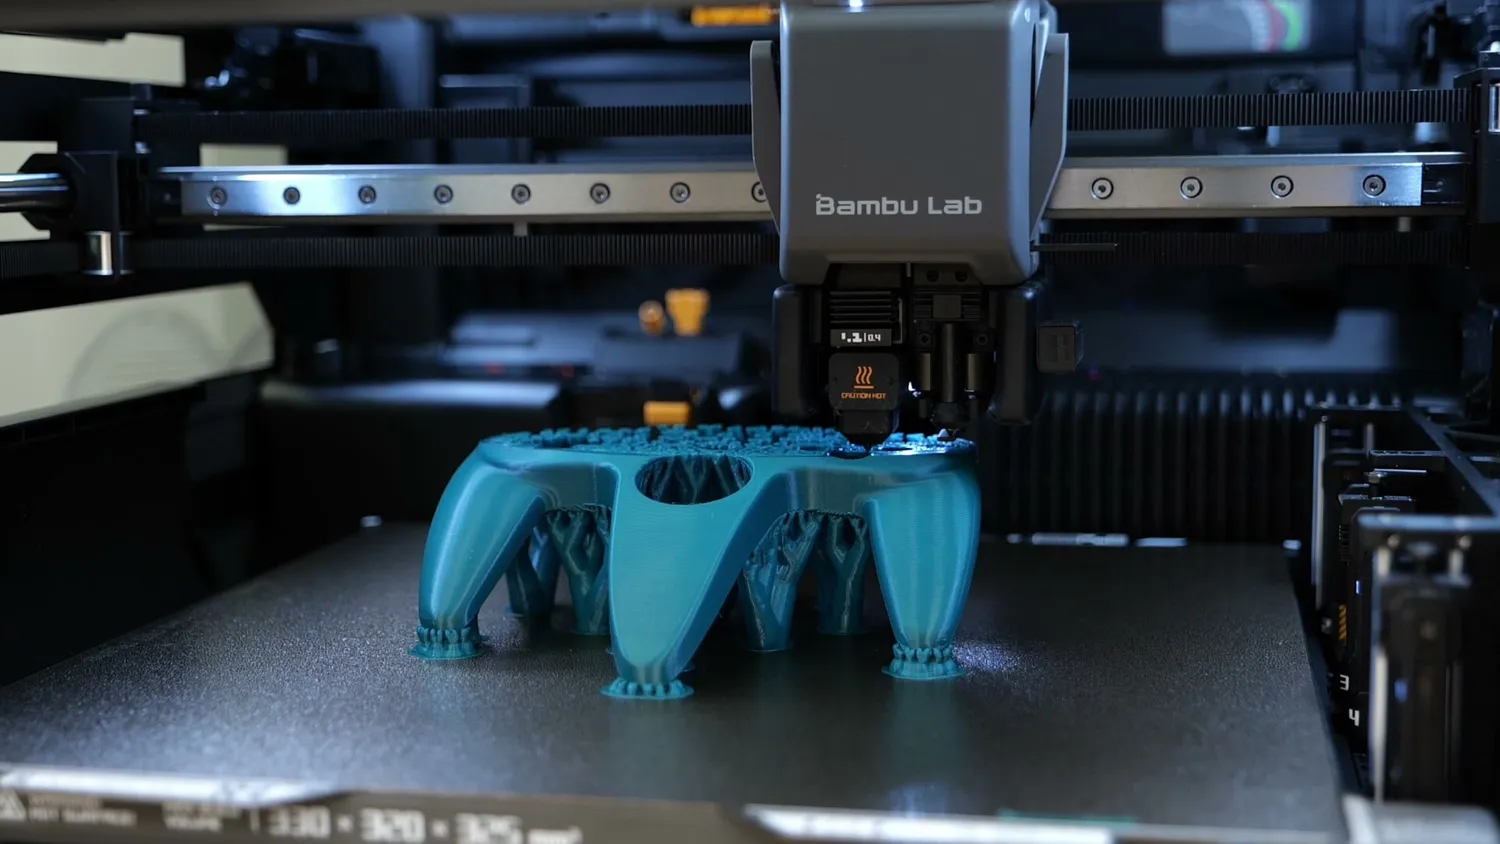 Printing a copied controller shell
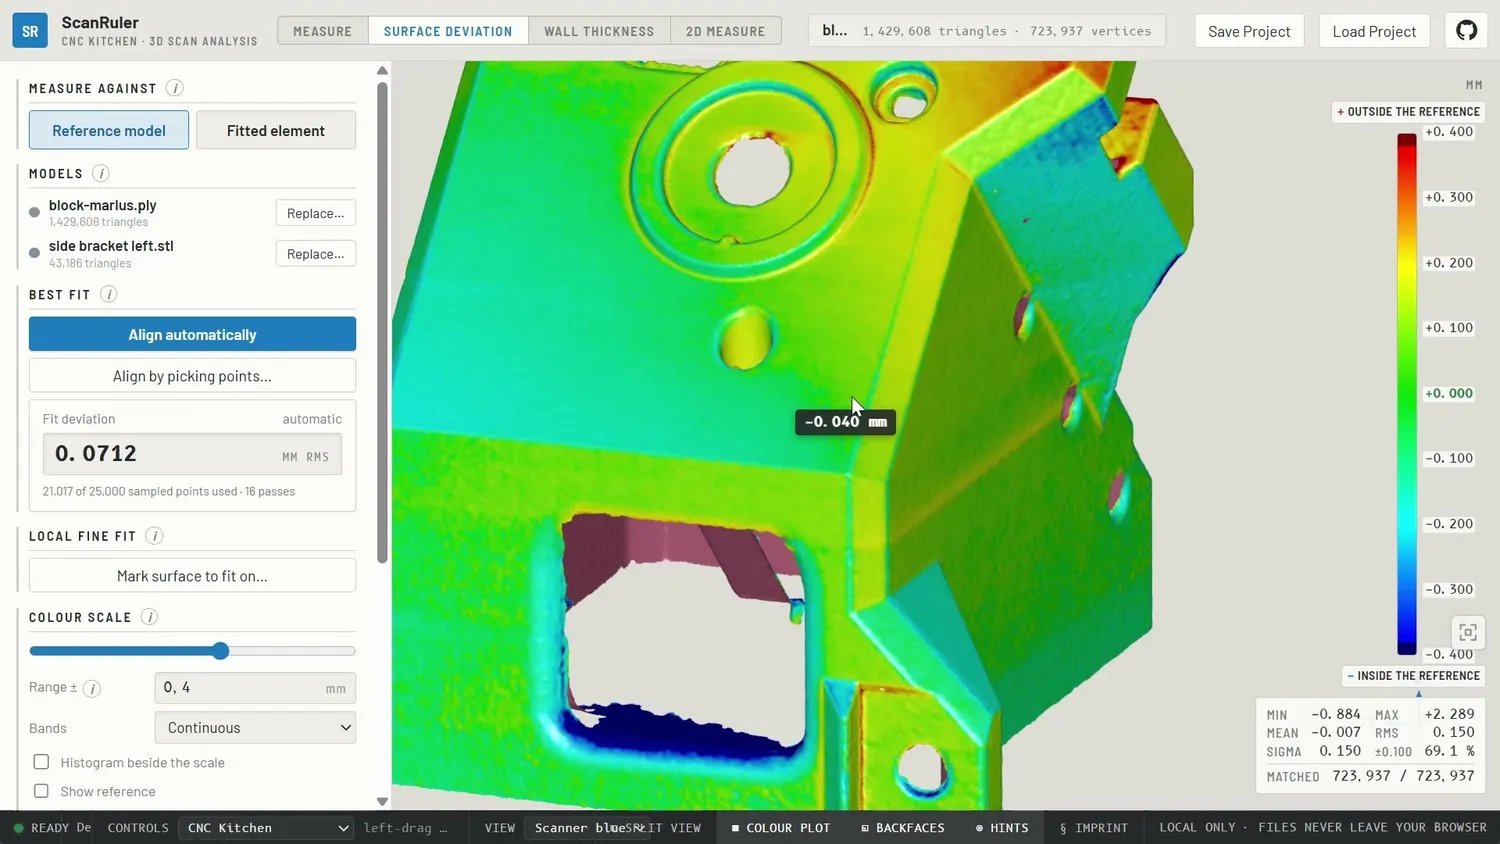 Validating a part against reference geometry
The two scanners and what’s in the box
But now, let’s get to the scanners. With its 3D scanners, Creality has continued its proud tradition of releasing so many different variants that I’m not sure customers actually get more choice. I think they mostly get confused and eventually go to the competition.
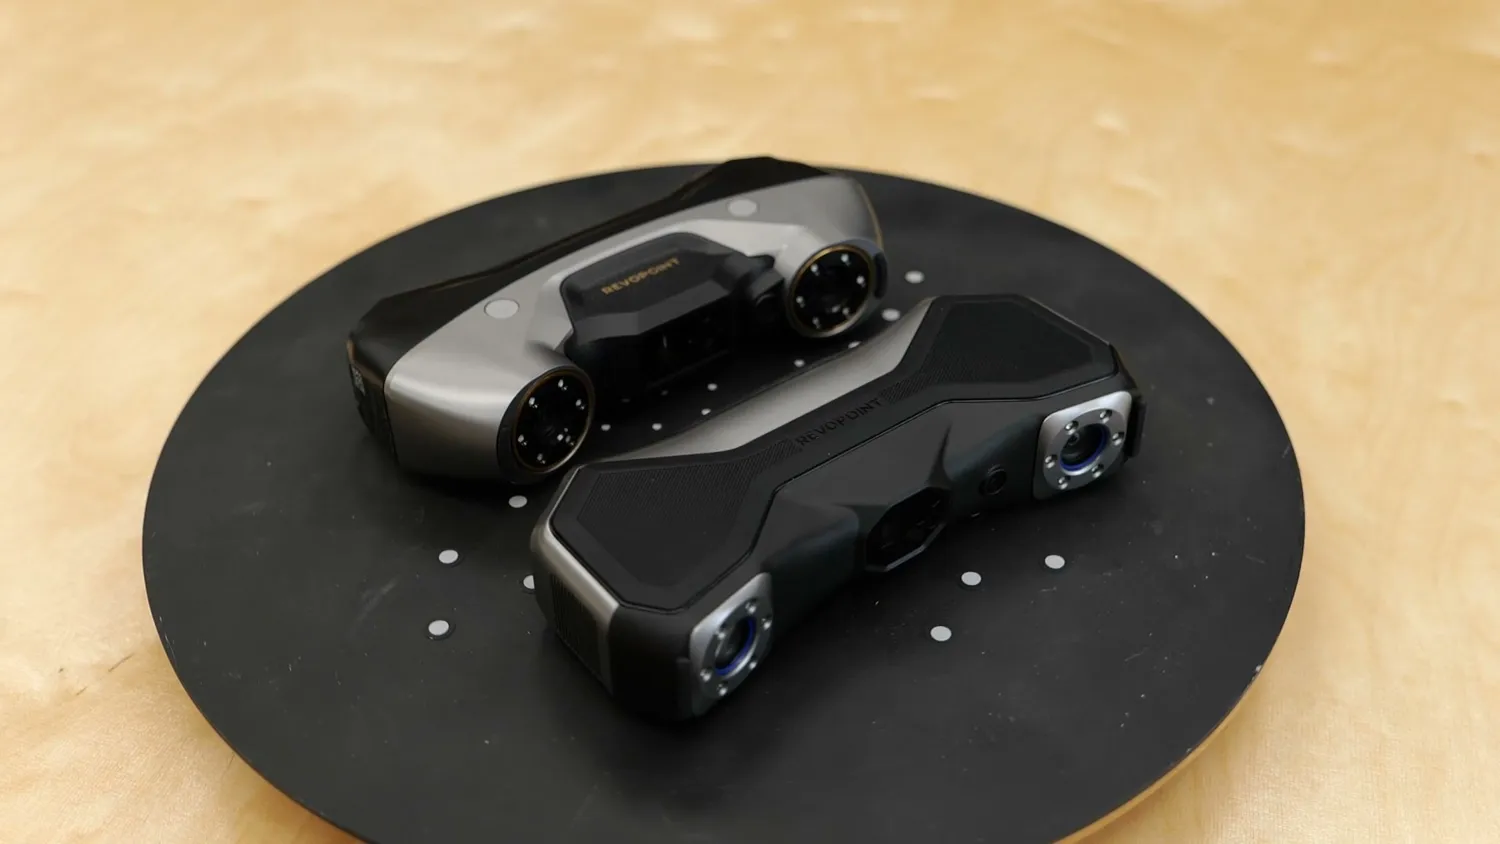
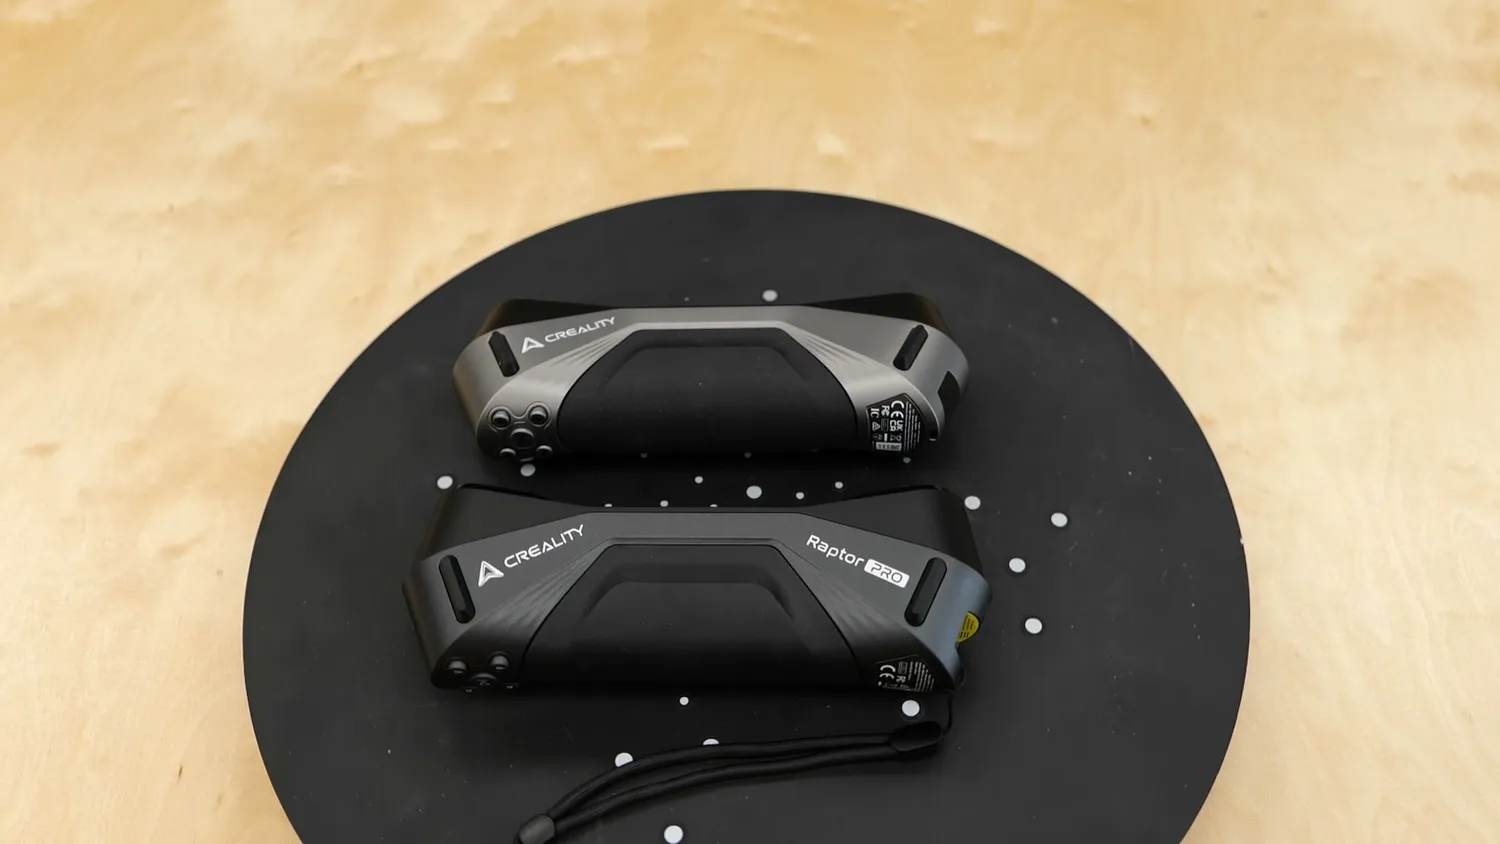 Two of Creality’s many scanner variants
There’s the Raptor, Raptor Pro, Raptor X, and now also the Sermoon S1, X1 and P1. Unfortunately, Revopoint isn’t much better. They have the Metro X, Metro Y, Metro Y Pro and Metro Y Ultra.
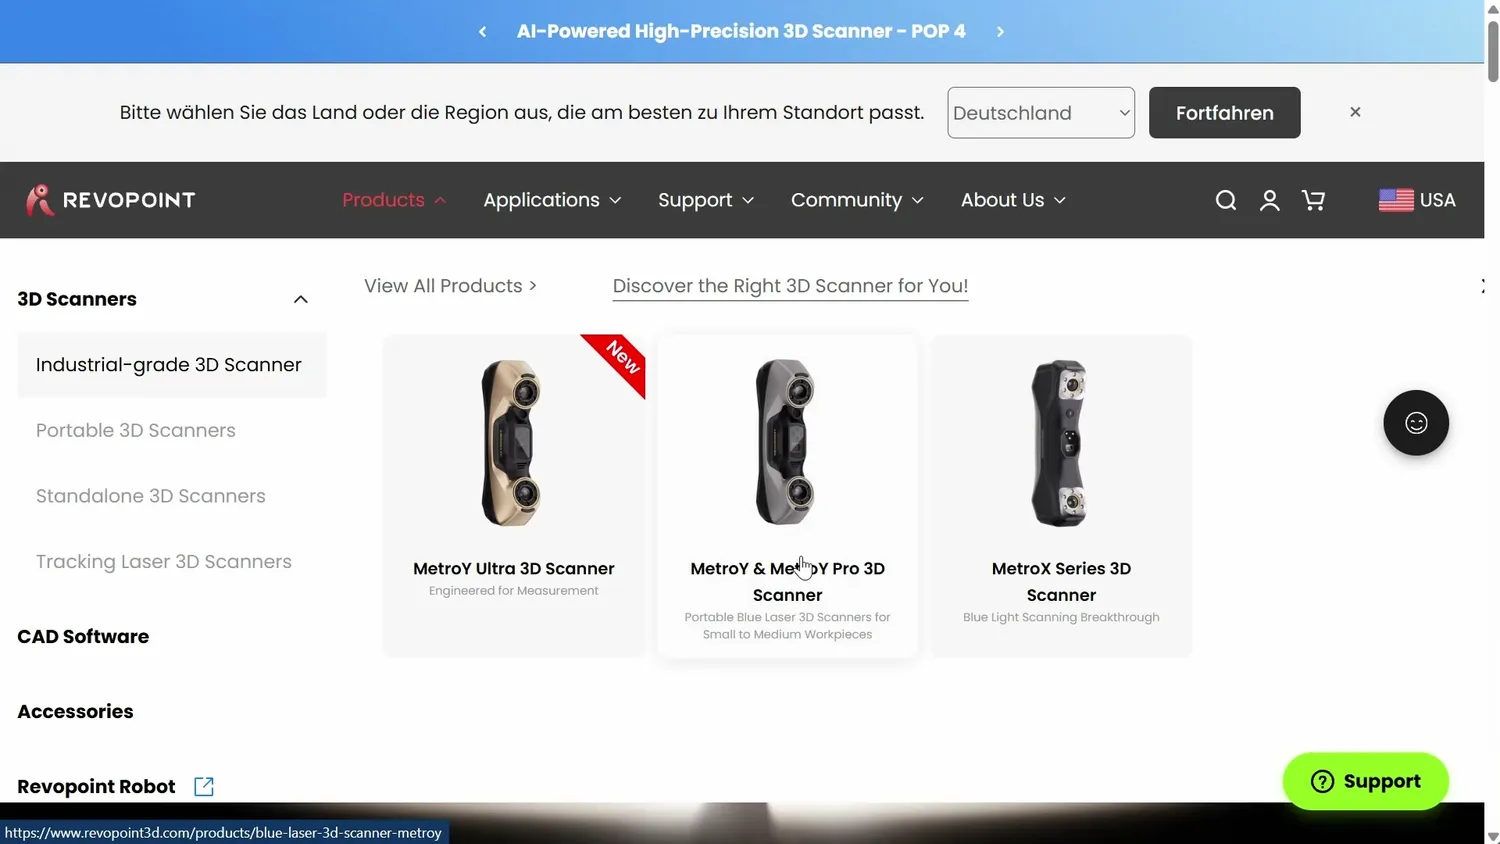 Four scanners, two confusing lineups
I went for roughly the middle ground from both companies with the Raptor Pro and the Metro Y Pro. Both cost around 1,500 euros or dollars.
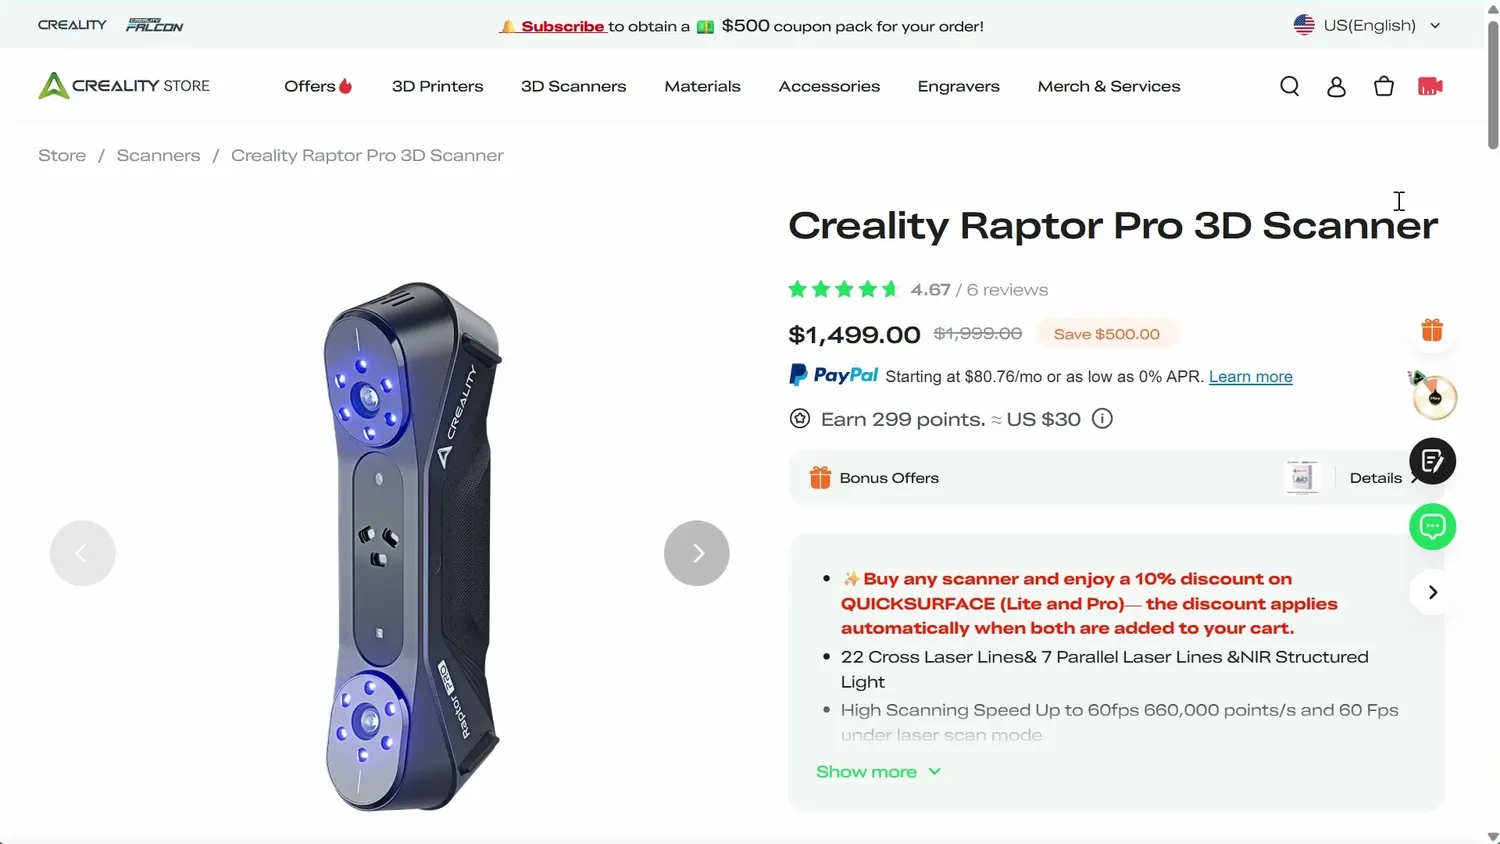 Both sit in the same price class
The Raptor Pro has 3 scanning modes: The parallel line mode gives you the most detail, but you also have to get pretty close to your part, with an ideal scanning distance of 200mm. For bigger parts, cross line mode is handy because you can scan from 300mm away, and the 22 cross lines cover a significantly bigger area to capture more data, but at a lower resolution. The 3rd mode is a structured light scanning mode using an infrared projector that allows you to scan without scan markers, but it’s meant less for technical parts and more for scanning people, art, or sculptures.
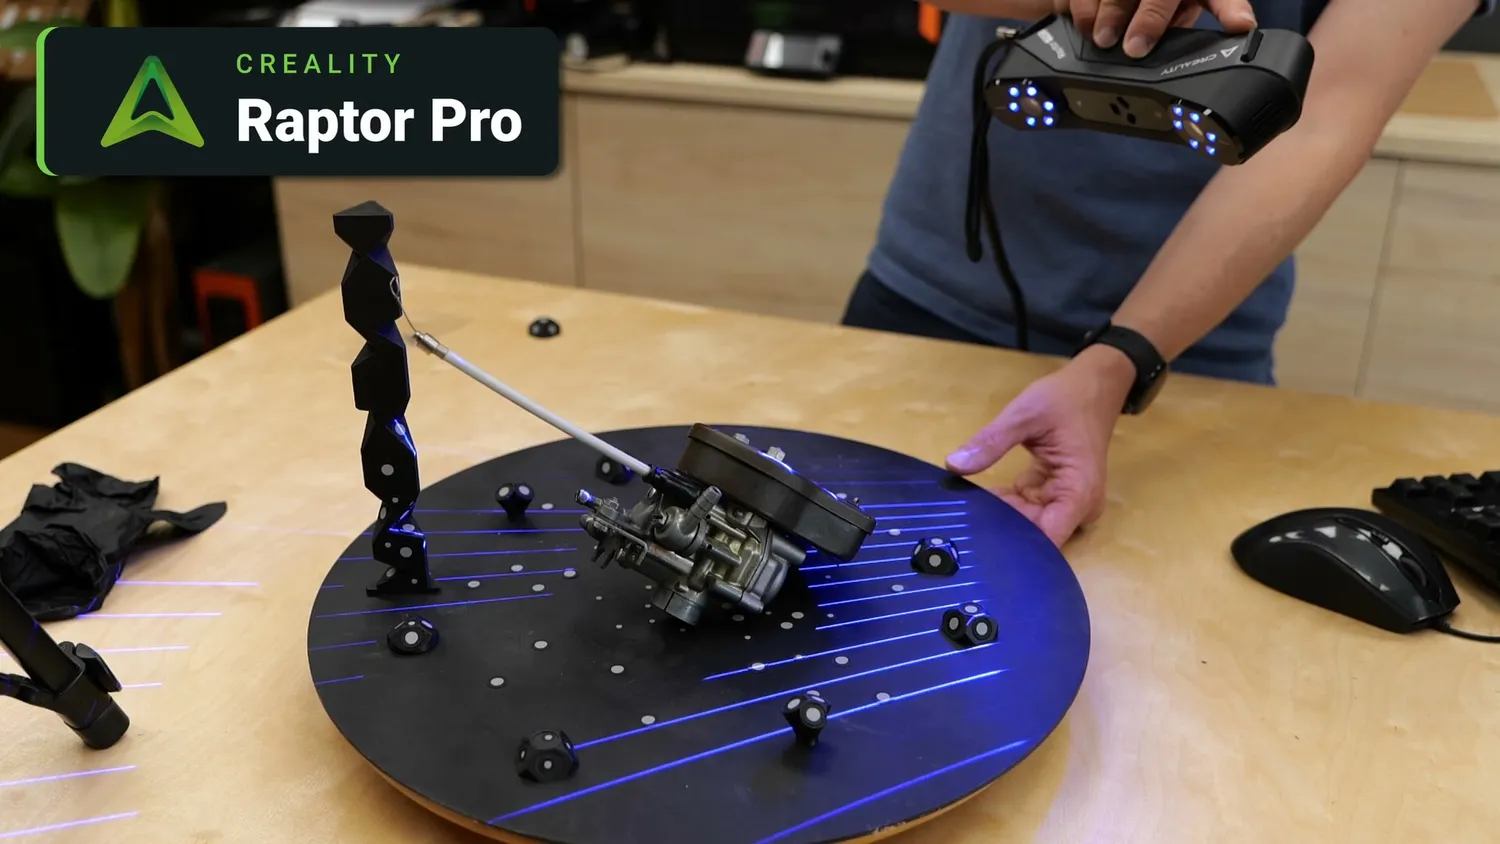 Cross-line mode on the Raptor Pro
The Revopoint Metro Y Pro has even 4 modes. There are 3 laser line scanning modes. You get 15 parallel laser lines or 34 cross lines for more data captured at once. They also have a single line laser mode for getting into deep holes. I’ve tried that out during my test. What confused and still confuses me to this day is why all laser line scanning modes use the same working distance of roughly 250 mm and therefore should give you the same scan resolution, instead of the approach that Creality does. You’ll see the results of that later. The 4th mode is full field scanning with blue structured light, which you can use to scan parts without the need for scan markers.
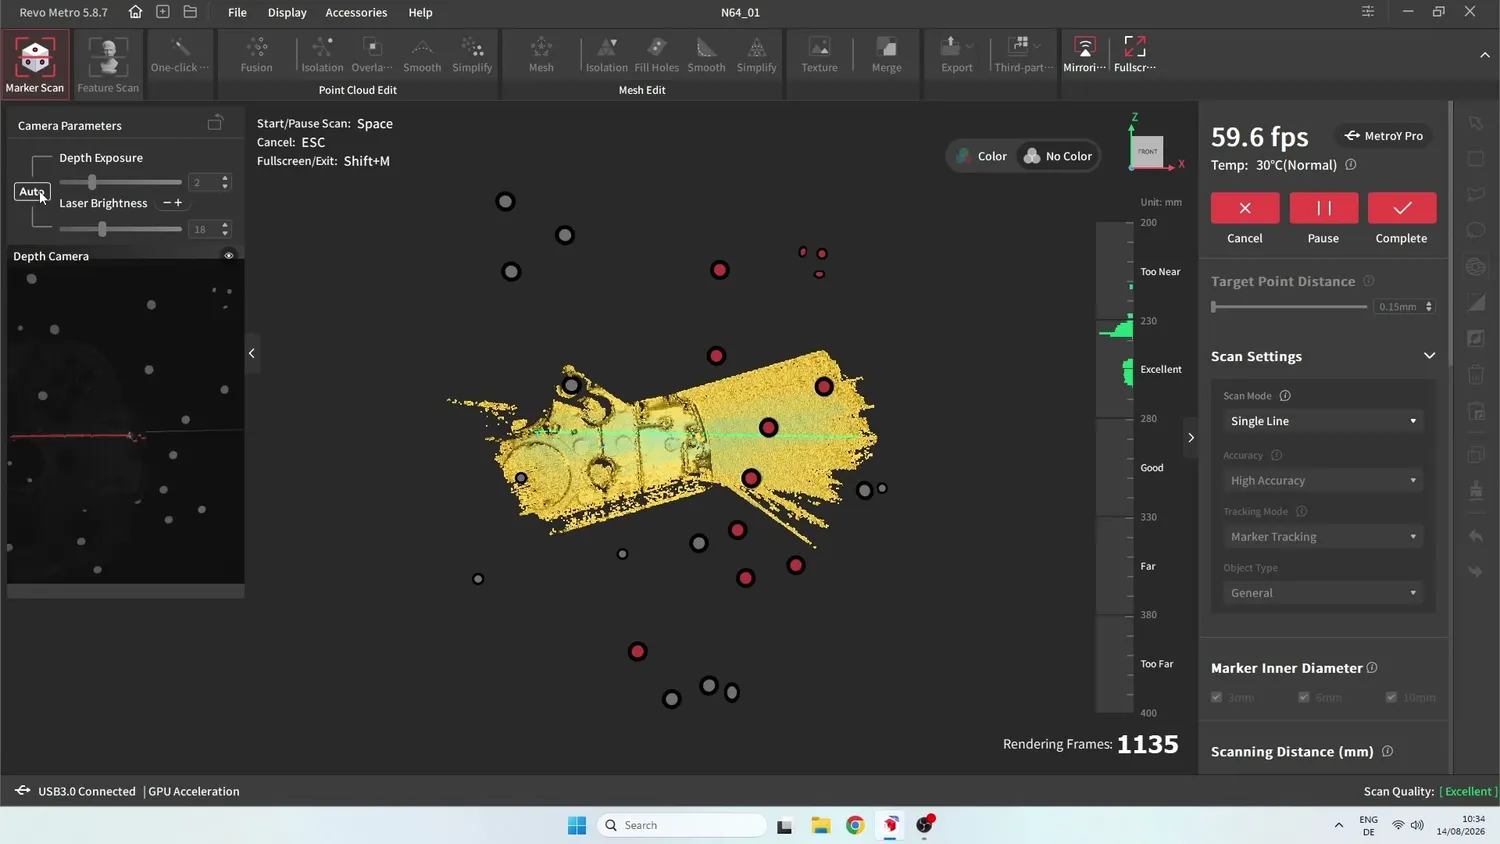 Single-line laser mode on the Metro Y Pro
If you go for Creality’s and Revopoint’s cheaper options, you typically lose scan modes, and if you buy the more expensive ones, you get more and sometimes also better accuracy in the scans. I know, the product lineups are confusing. I’ve tried to make things easier by putting together a comparison table, which you can check out right here.
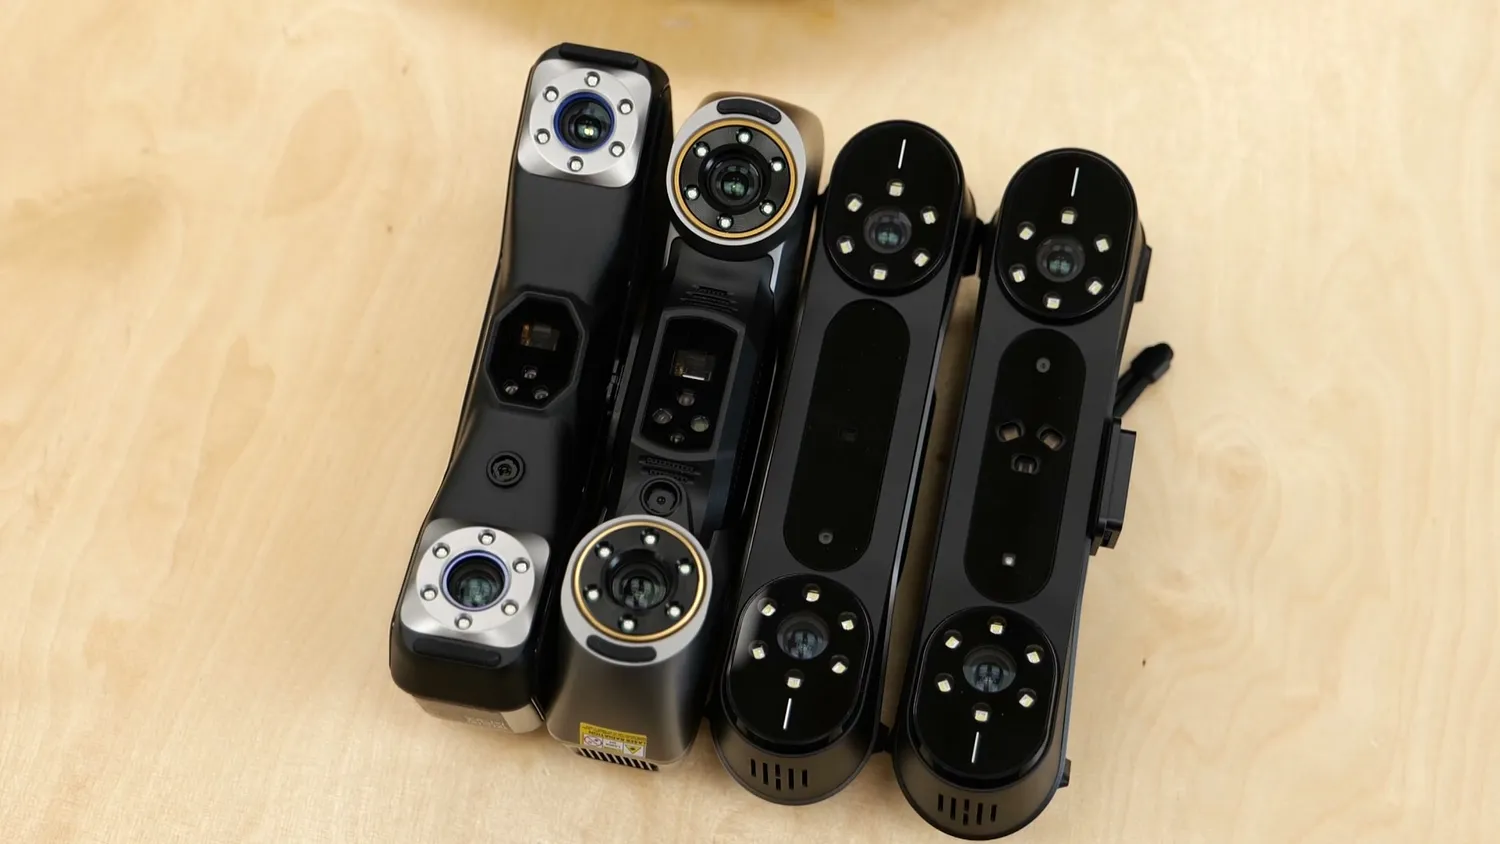 More money buys more modes and accuracy
| Model | MSRP | Single | Parallel | Cross | Additional modes | Accuracy | Vol. accuracy | Laser fps | Host-less |
|---|---|---|---|---|---|---|---|---|---|
| Pika | $699 | ✗ | 7 | ✗ | NIR | 0.03 mm | n/p | 110 (PC) / 40 (phone) | ✓ phone app; on-device capture, processing on phone/PC |
| Raptor | $1,499 | ✗ | 7 | ✗ | NIR | 0.02 mm | n/p | 60 | ✗ (phone = mirror only) |
| Raptor Pro | $1,999 | ✗ | 7 | 22 | NIR | 0.02 mm | 0.02 + 0.08 mm/m | 60 | ✗ (mirror only) |
| Sermoon S1 | $2,699 | ✓ | 7 | 34 | NIR | 0.02 mm | 0.02 + 0.08 mm/m | 90 | ✗ (mirror only) |
| Sermoon P1 | $2,999 | ✓ | 7 | 22 | dual NIR VCSEL | 0.02 mm | 0.02 + 0.06 mm/m | 100 | ✓ fully standalone (6″ screen, onboard processing) |
| RaptorX | $4,599 | ✗ | 7 | 34 | NIR | 0.02 mm | 0.02 + 0.06 mm/m | 60 | ✗ (mirror only) |
| Sermoon X1 | $5,999 | ✓ | 7 | 34 | NIR + photogrammetry | 0.02 mm | 0.02 + 0.04 mm/m (0.03 w/ scale bars) | 90 (70 cross) | ✗ (mirror only) |
Creality’s current laser scanner lineup
| Model | MSRP | Single | Parallel | Cross | Additional modes | Accuracy | Vol. accuracy | Laser fps | Host-less |
|---|---|---|---|---|---|---|---|---|---|
| POP 4 | $919 | ✓ | ✗ | 30 | NIR full-field HD, VCSEL, hybrid HD; 3DGS | 0.03 mm | 0.03 + 0.05 mm/m | 105 | ◐ NIR modes run on phone; laser modes need PC (mirror only) |
| MetroX | $999 | ✗ | 7 | 14 | 62-line SL, auto turntable | 0.02 mm | 0.025 + 0.05 mm/m | 60 | ✗ (PC only, USB) |
| MetroX Pro | $1,209* | ✗ | 15 | 30 | 62-line SL, auto turntable | 0.02 mm | 0.02 + 0.04 mm/m | 60 | ✗ (PC only, USB) |
| MetroY | ~$1,319* | ✓ | 15 | 30 | none (laser only, no color) | 0.02 mm | 0.02 + 0.04 mm/m | n/p (1.5M pts/s) | ✗ (PC, mirror only) |
| MetroY Pro | $1,759* | ✓ | 15 | 34 | 62-line SL, auto turntable | 0.02 mm | 0.02 + 0.04 mm/m | n/p (2.0M pts/s) | ✗ (PC, mirror only) |
| MetroY Ultra | $1,899 (CMM $2,499) | ✓ | 15 | 34 | 62-line SL, turntable, CMM verification | 0.02 mm | 0.015 + 0.04 mm/m | 90 (GPU) / 60 (CPU) | ✗ (PC, mirror only) |
| Trackit | $4,999 | ✓ | ✗ | 30 | optical tracking (marker-free) | 0.02 mm | 0.025 + 0.04 mm/m | n/p (1.5M pts/s) | ✗ (PC, cabled) |
| Trackit SR | €3,919 (≈ $4,300) | ✓ | 17 | 30 | wireless optical tracking (marker-free) | 0.02 mm | 0.025 + 0.04 mm/m | n/p (2.0M pts/s) | ✗ (PC, wireless) |
Revopoint’s current laser scanner lineup. * Revopoint publishes no clean MSRP for these models; their official store shows a permanent “sale” price, which is what’s listed here. Creality’s MSRPs are real list prices, but their street prices sit permanently 25 to 40% below, so don’t compare a Creality MSRP directly against a Revopoint sale price.
So let’s take a look at what you actually get. Both scanners come in carrying cases. Creality ships the Raptor Pro in a really nice rugged case, while Revopoint uses a more generic but also considerably larger aluminum case. And there’s a reason why it’s larger.
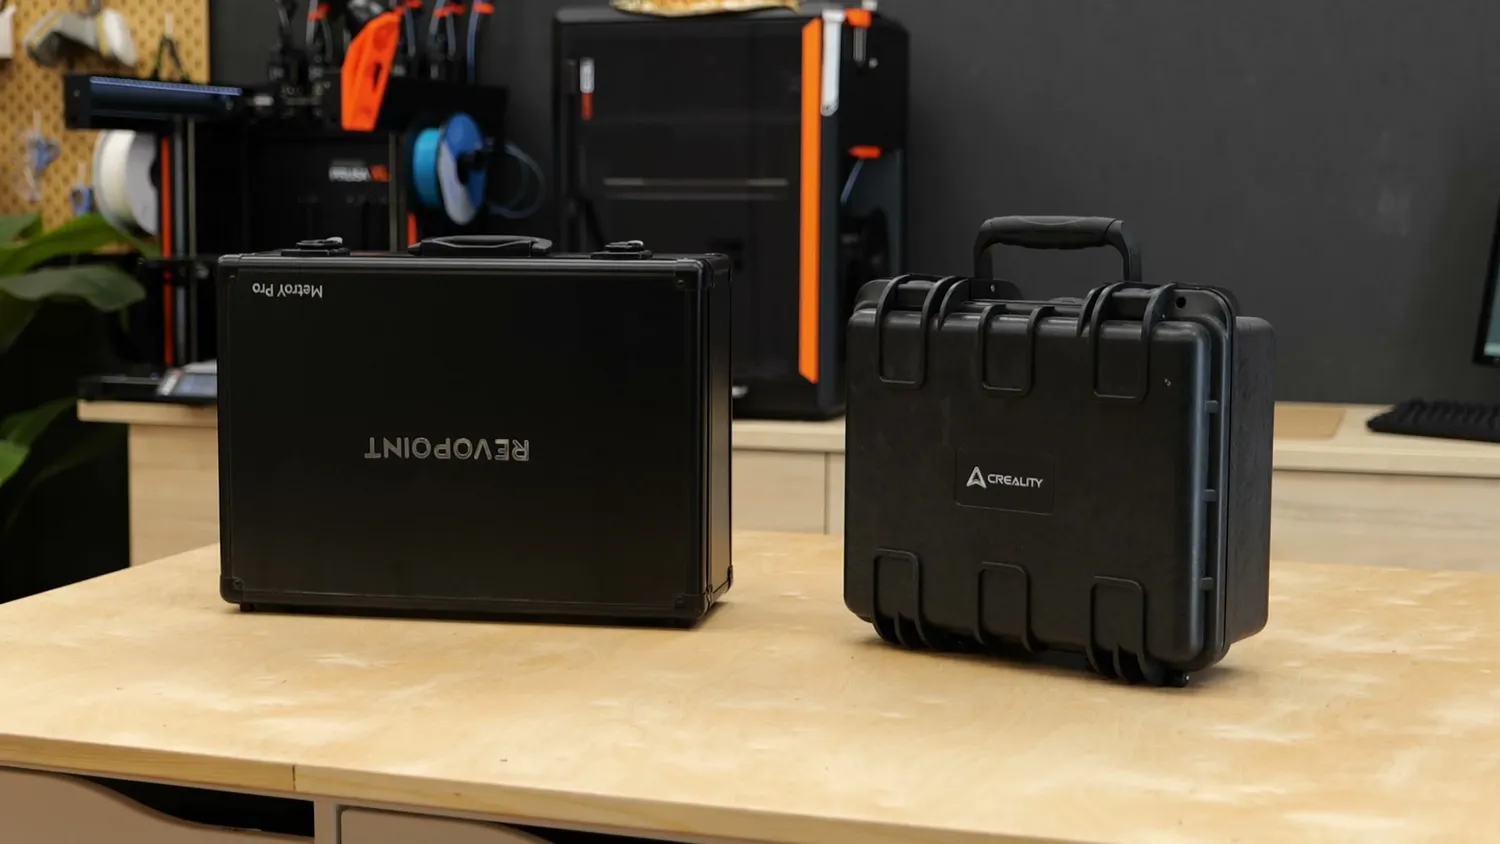 Both scanners come in carrying cases
With the Raptor Pro, you basically get the scanner, its cable, the power supply and a few sheets of scanning markers.
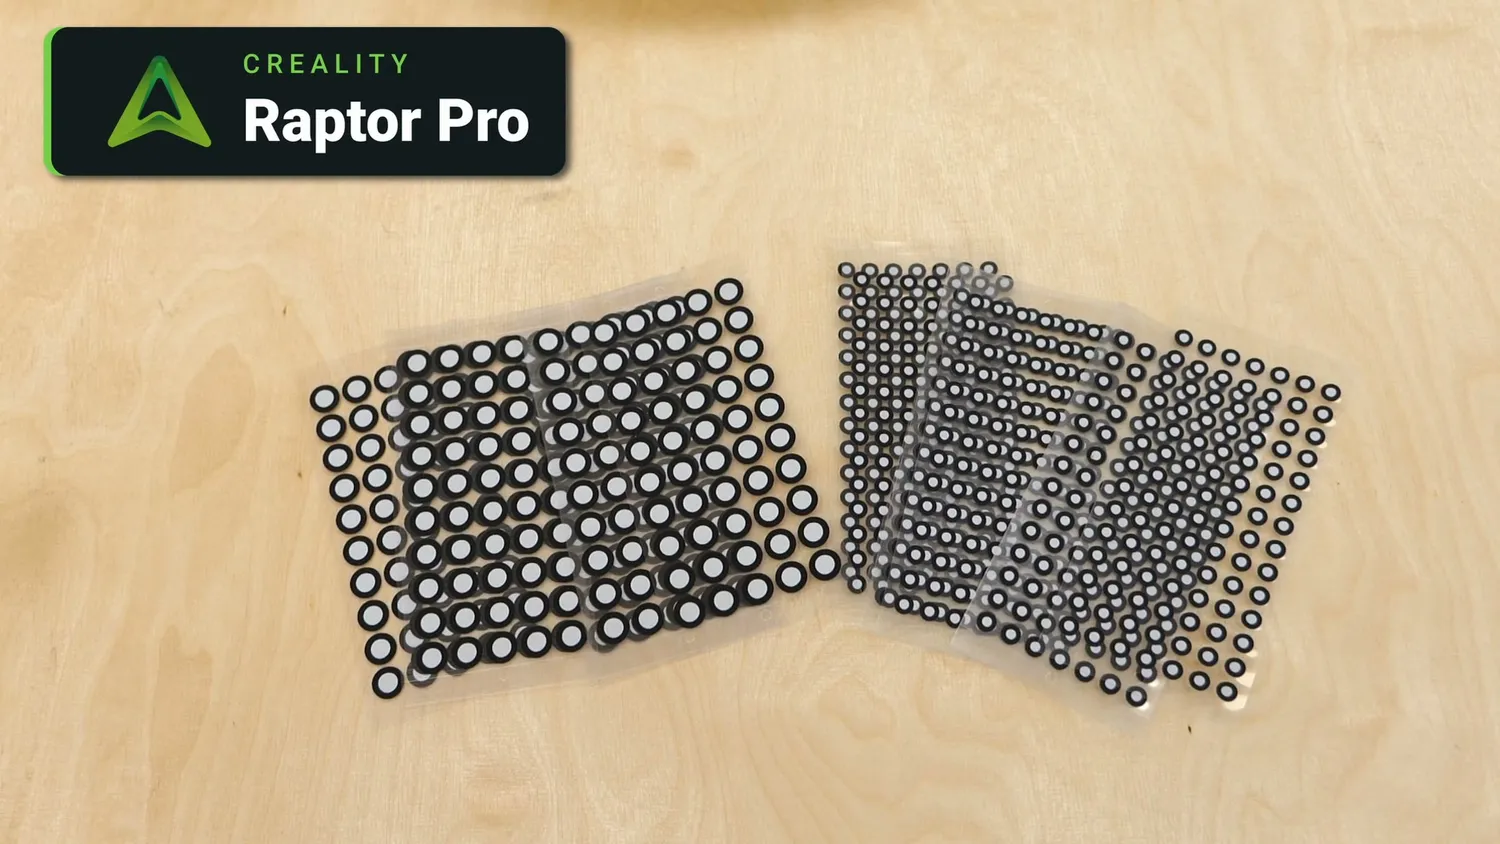 The Raptor Pro’s included marker sheets
Revopoint includes all of that, but also gives you a full two-axis rotary table for automatic scanning, a small tripod, a battery handle and a phone holder so you can use the scanner wirelessly. We’ll try that out later. For the Creality Raptor, a wireless handle costs another $299.
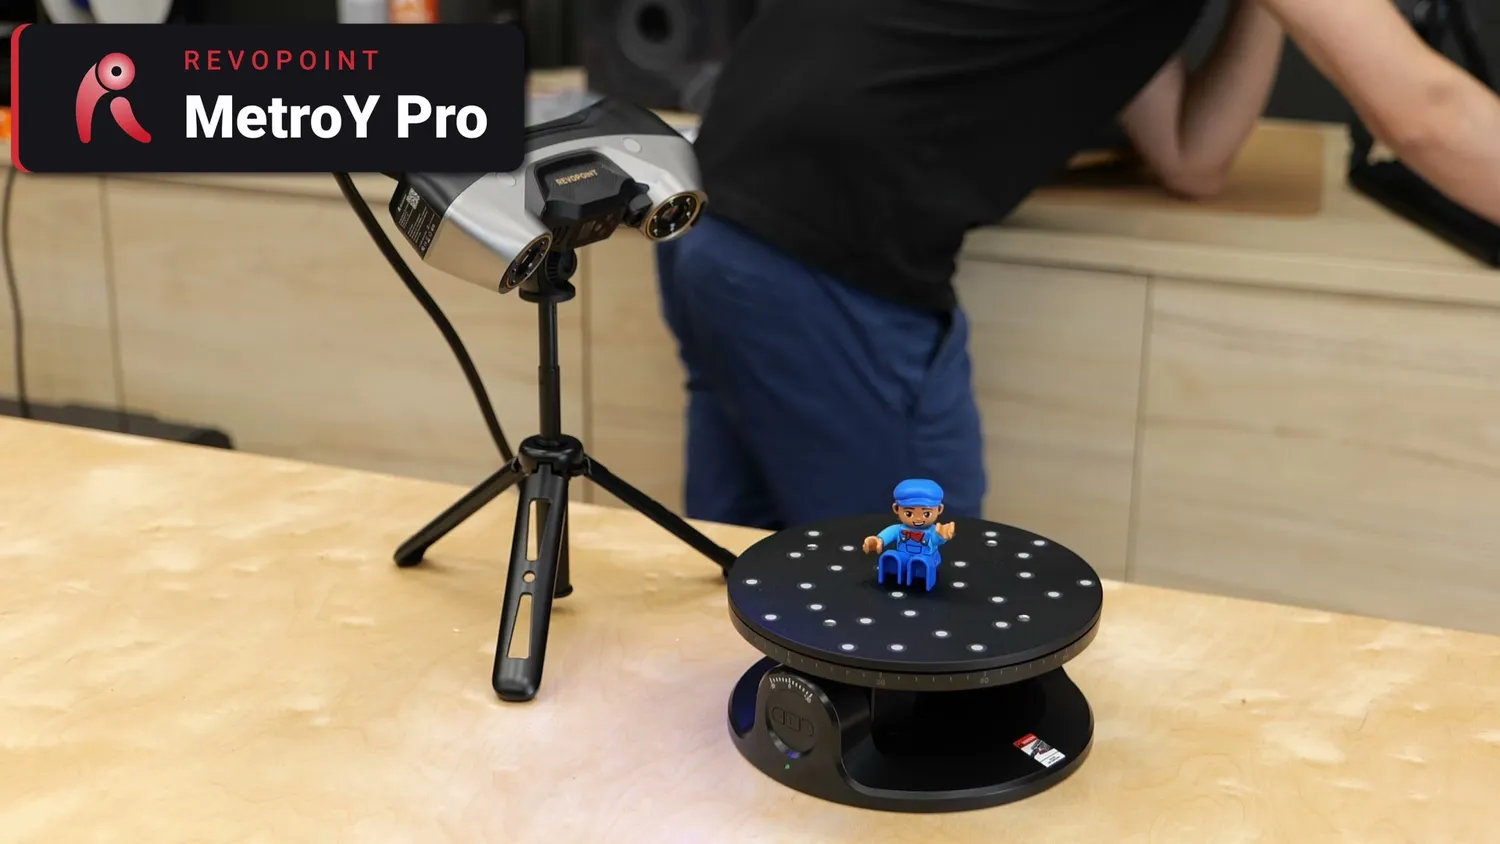 Revopoint includes a rotary table and tripod
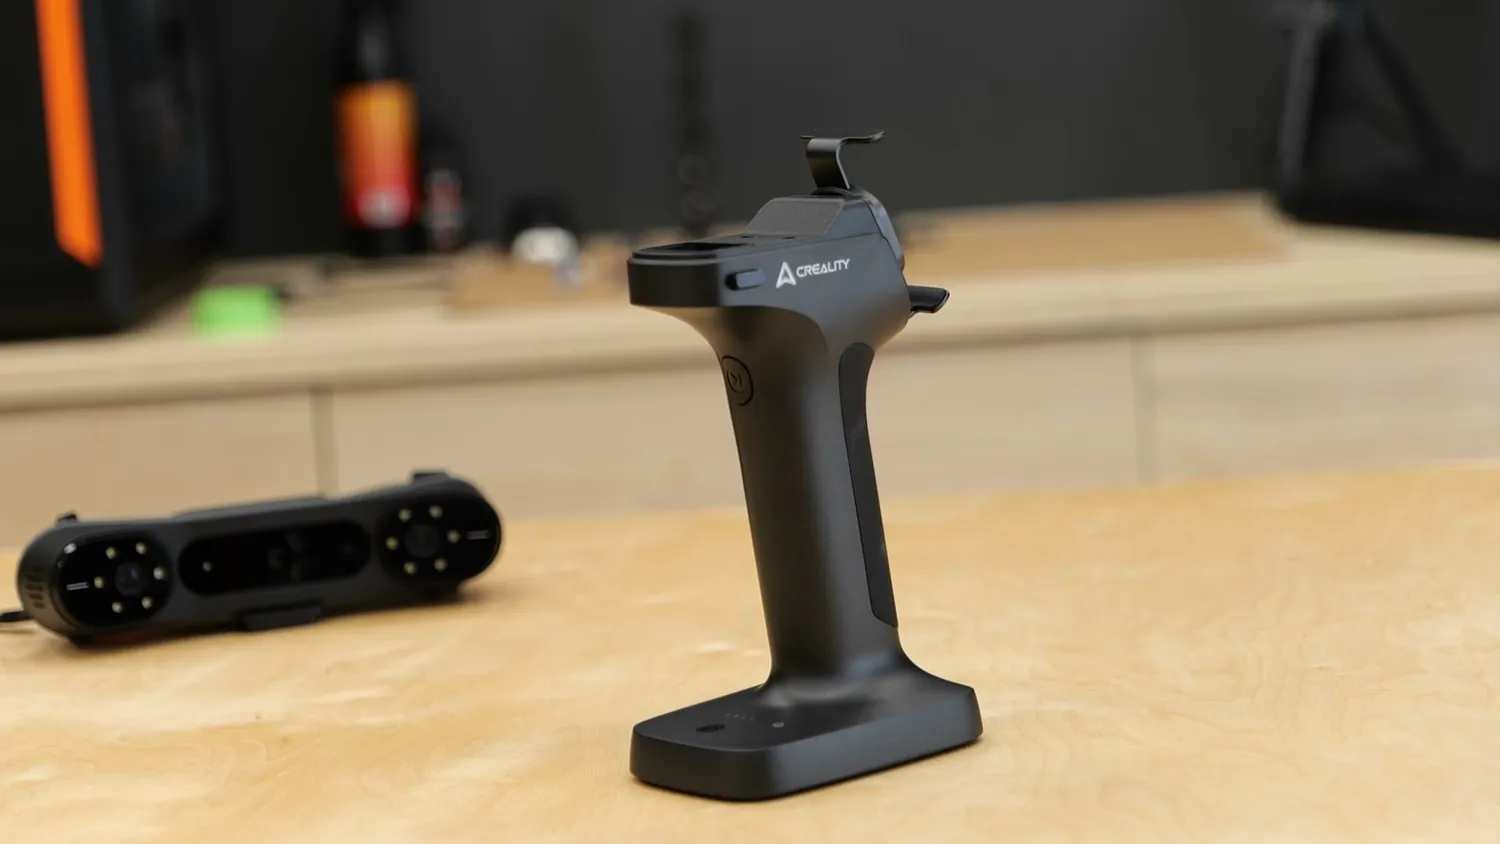 Creality’s wireless handle costs $299 extra
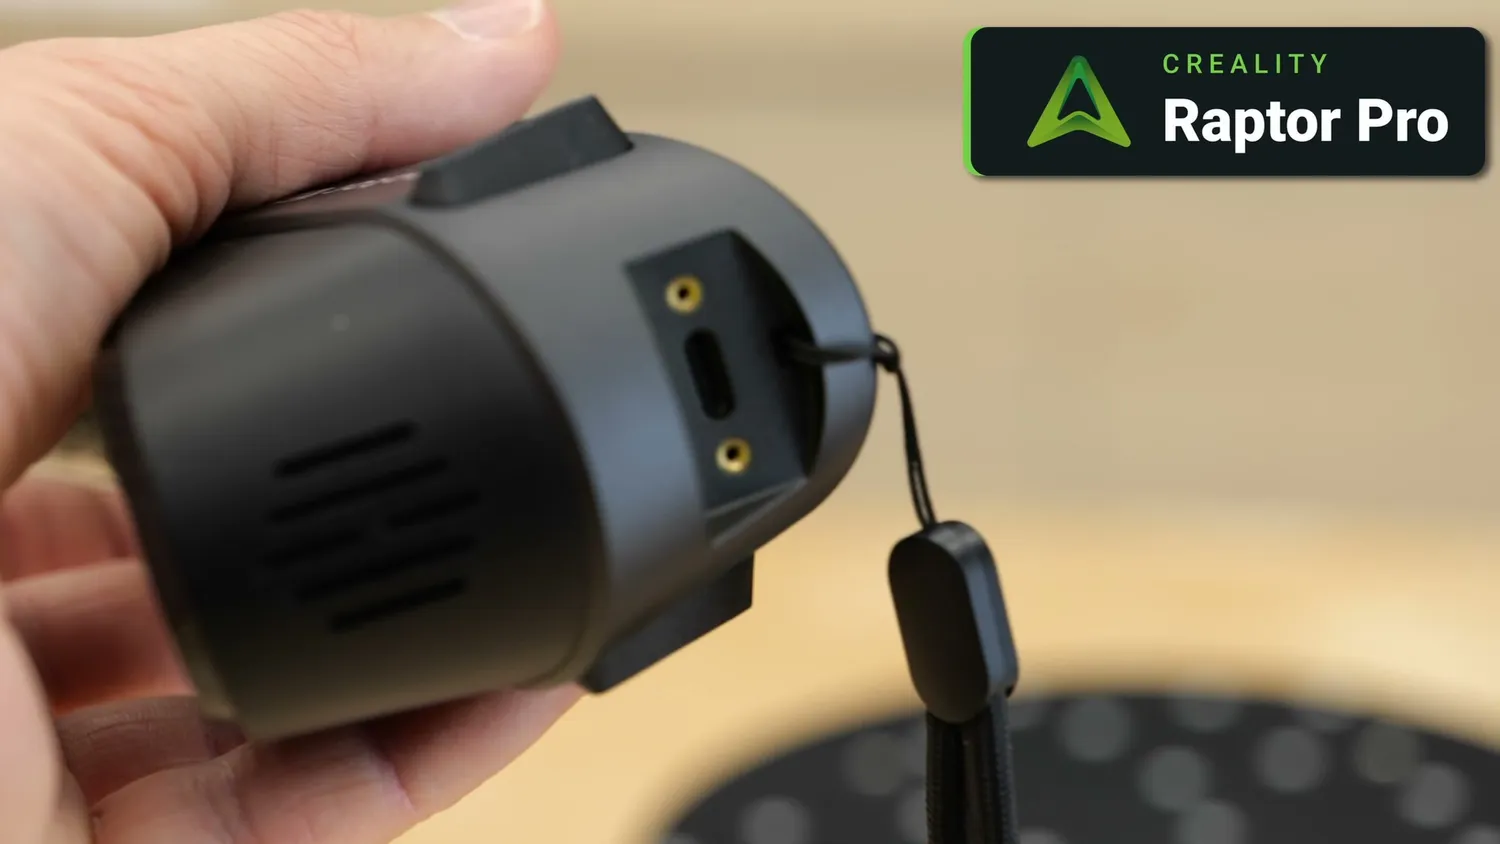
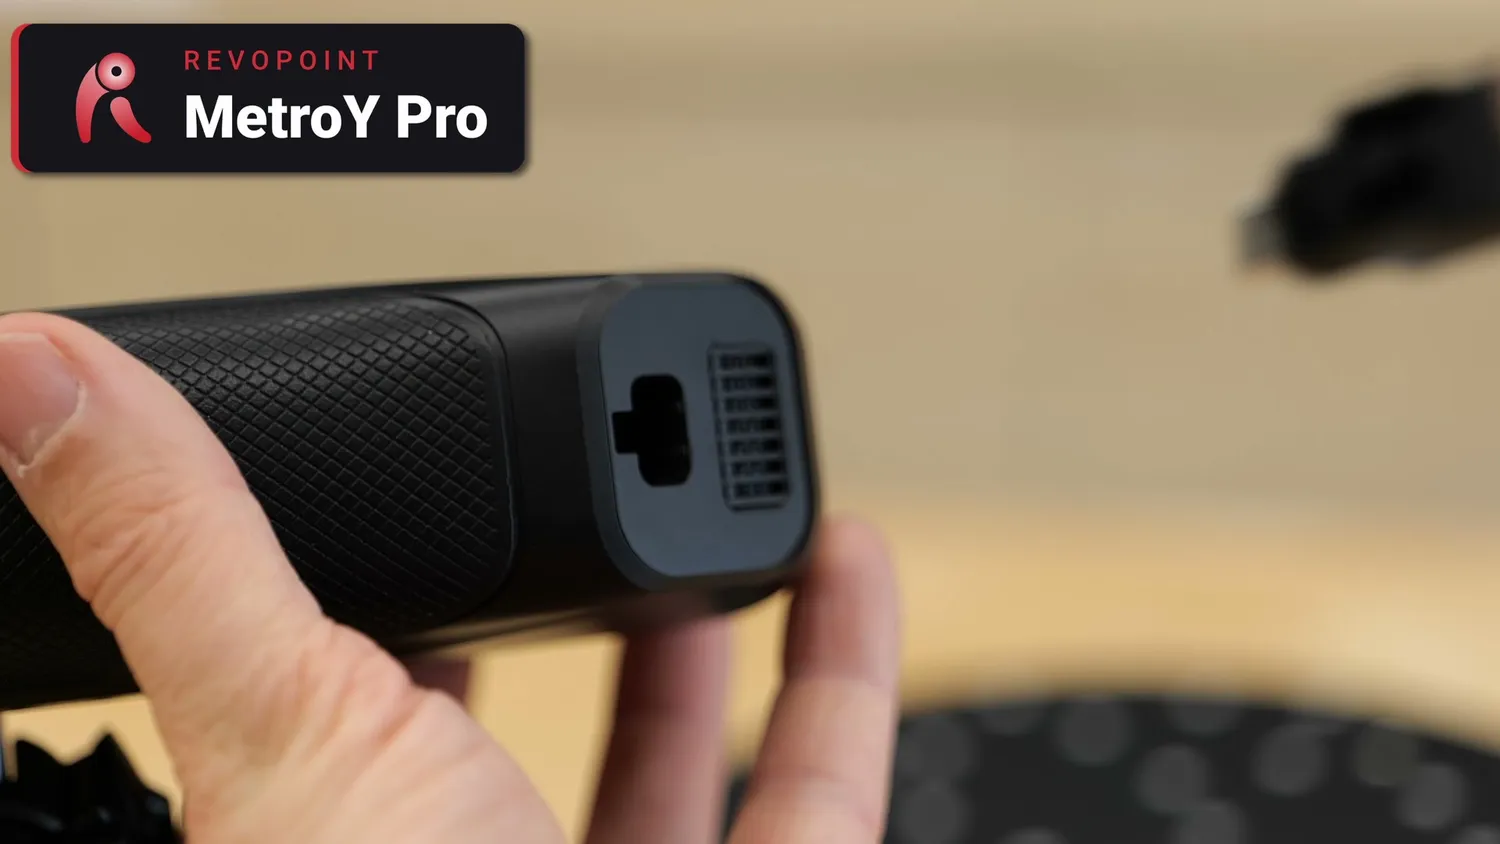
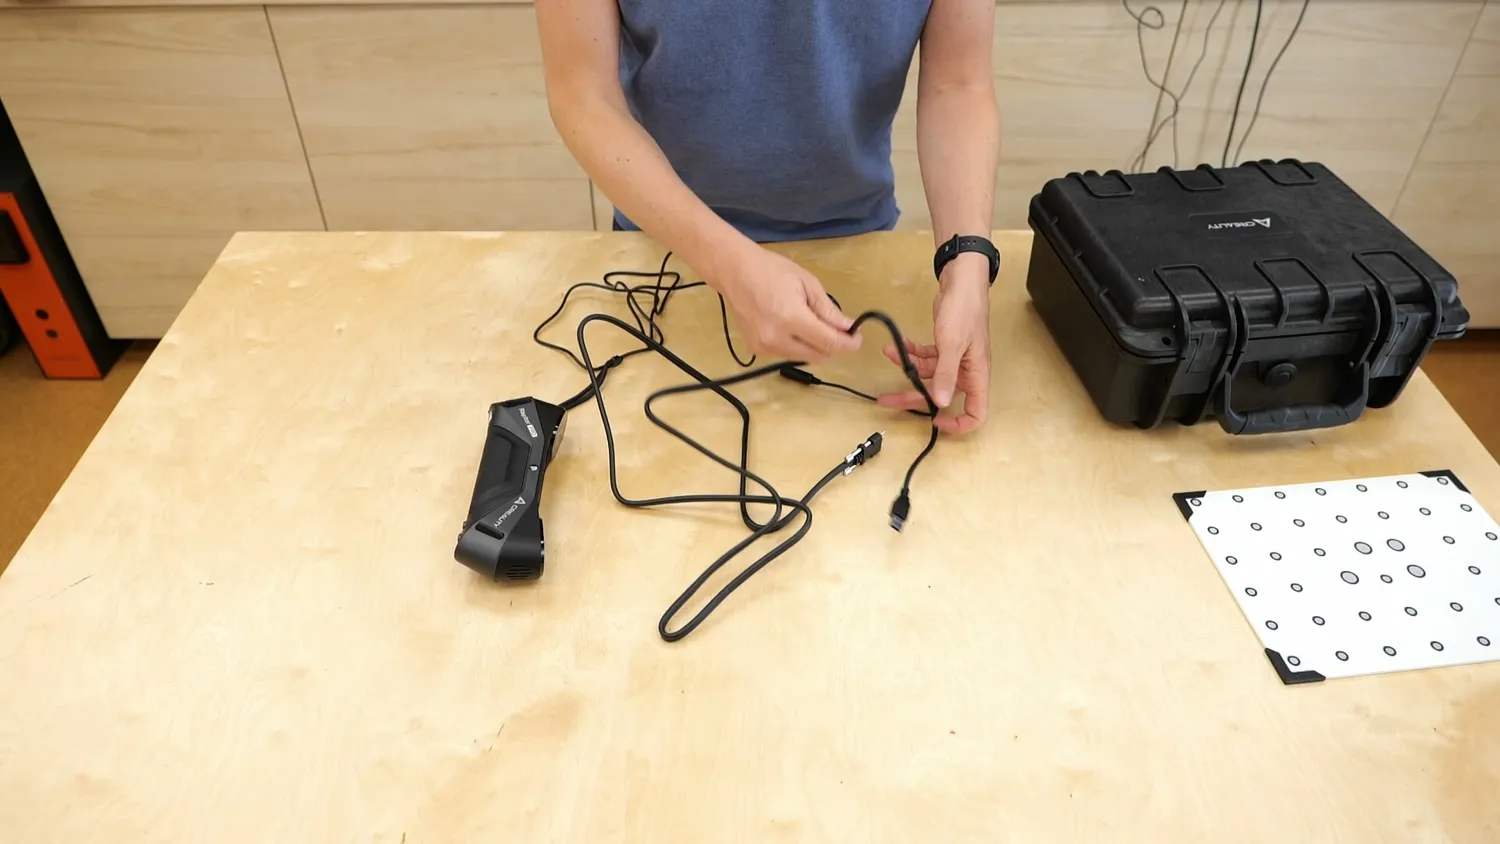
Something else worth mentioning is the cable. The one on the Raptor Pro is 2 meters long, while the Metro Y’s is 3 meters, which definitely helps when scanning larger parts. The connectors are also different. The Raptor Pro uses an annoying screw-lock USB connector, while Revopoint’s connector simply snaps into place. Both cables are pretty stiff, though. I really wish they would use a nice flexible silicone cable, similar to what you find on VR headsets.
There’s also something hiding inside both cases because it’s quite fragile, but extremely important: the glass calibration plate. You should use this regularly to calibrate your scanner and make sure you get the highest possible accuracy and repeatable results. And before we start scanning, that’s exactly what we’ll do.
 The fragile but important calibration plate
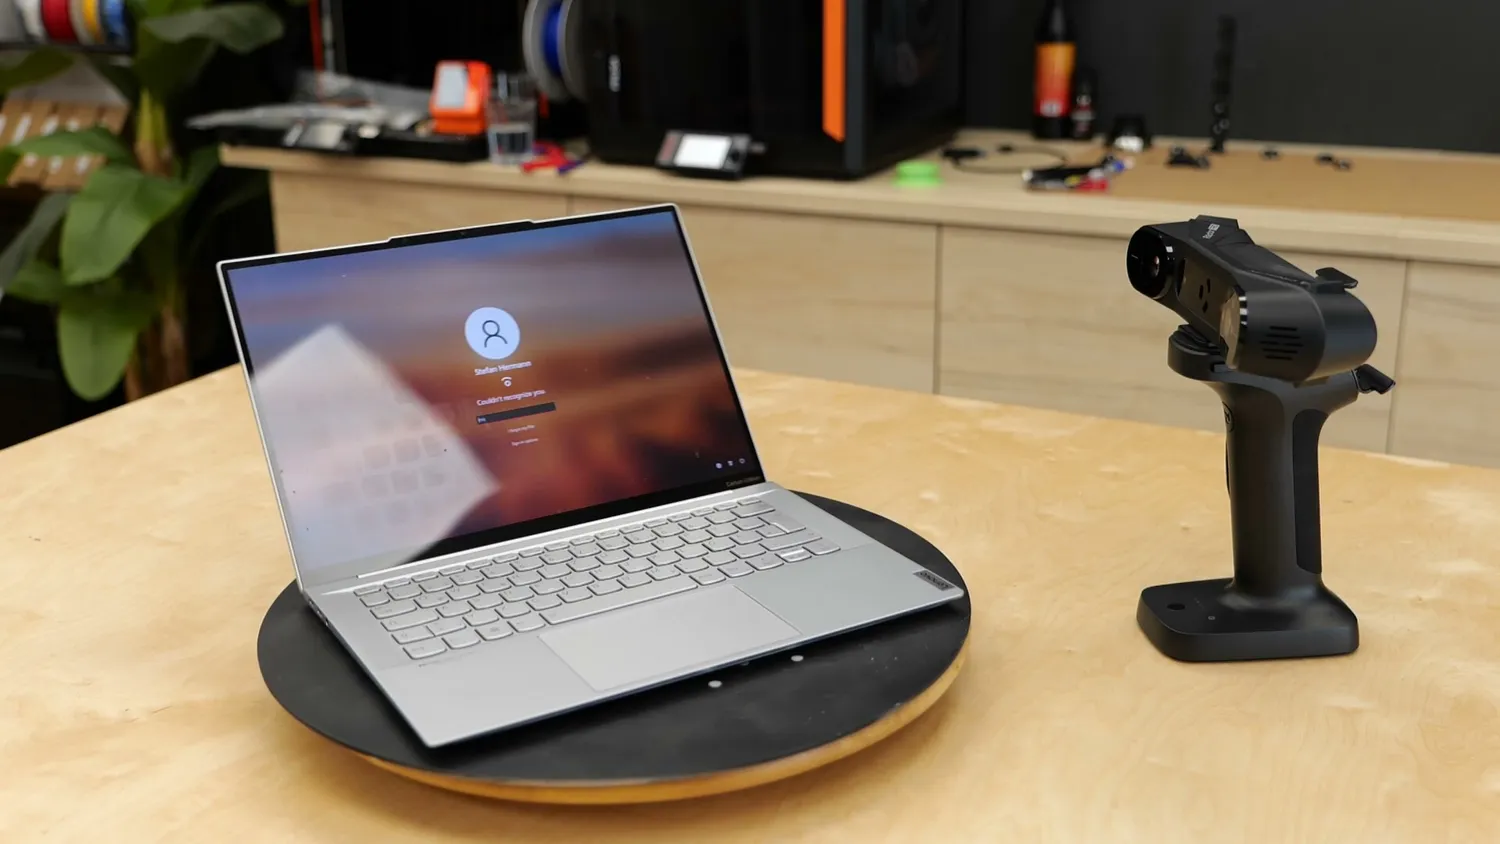
Both scanners need a PC or Mac to run their software, and I can’t stress enough that you need decent hardware. My M3 MacBook works fine. My older gaming workstation with a Ryzen 5800X3D and a GeForce 3080 also has no problems. My travel laptop without a dedicated graphics card, on the other hand, simply isn’t powerful enough.
 My travel laptop isn’t powerful enough
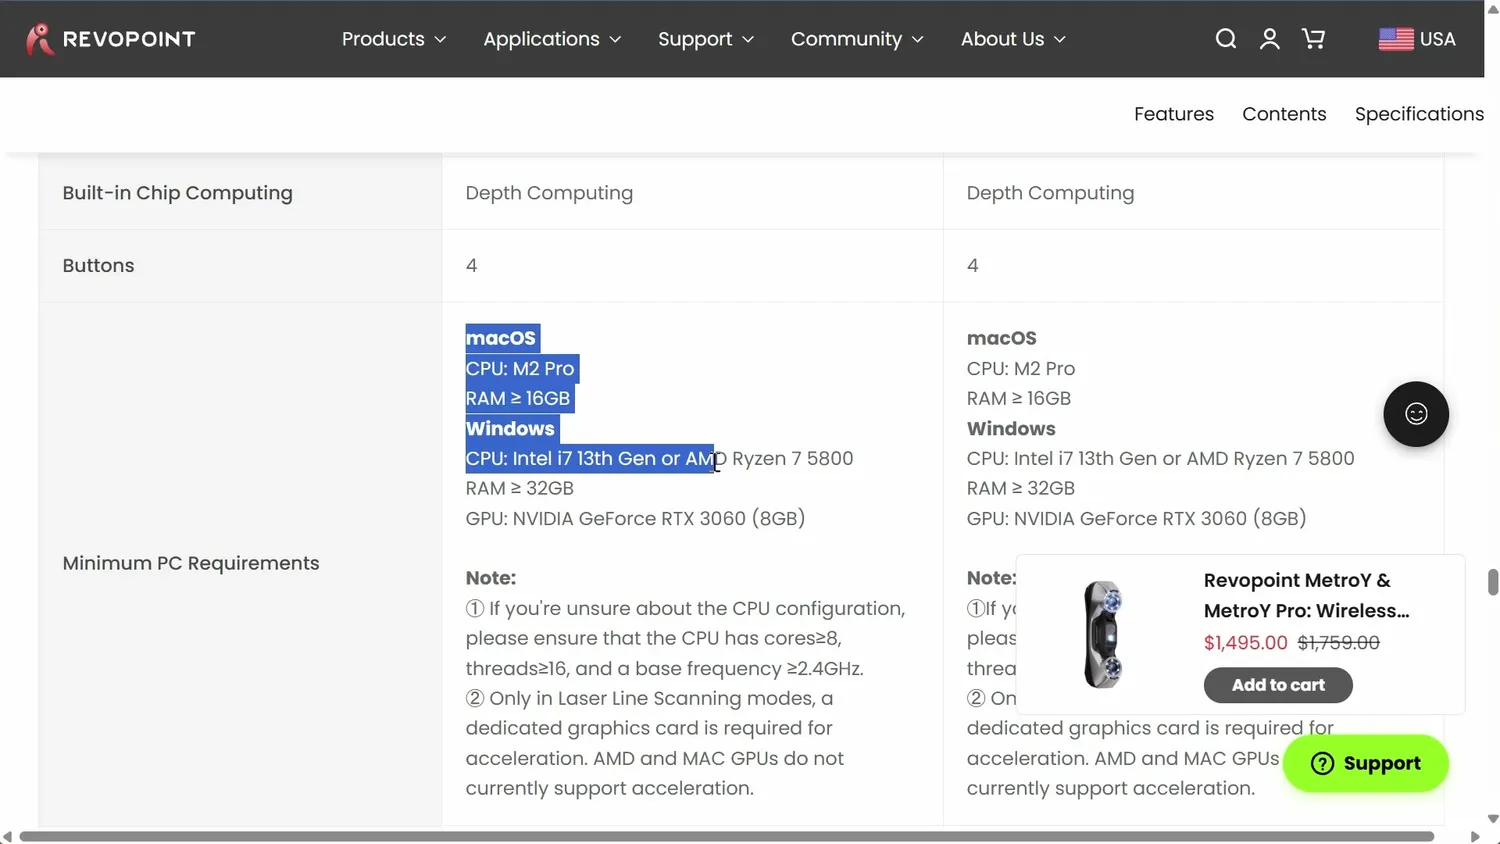
So definitely check the minimum hardware requirements before buying one of these scanners. The Creality Raptor can also run directly from a phone if you buy the scanning handle, but performance wasn’t great. I would currently only recommend using it that way if you really don’t have another option.
 Check the minimum hardware requirements
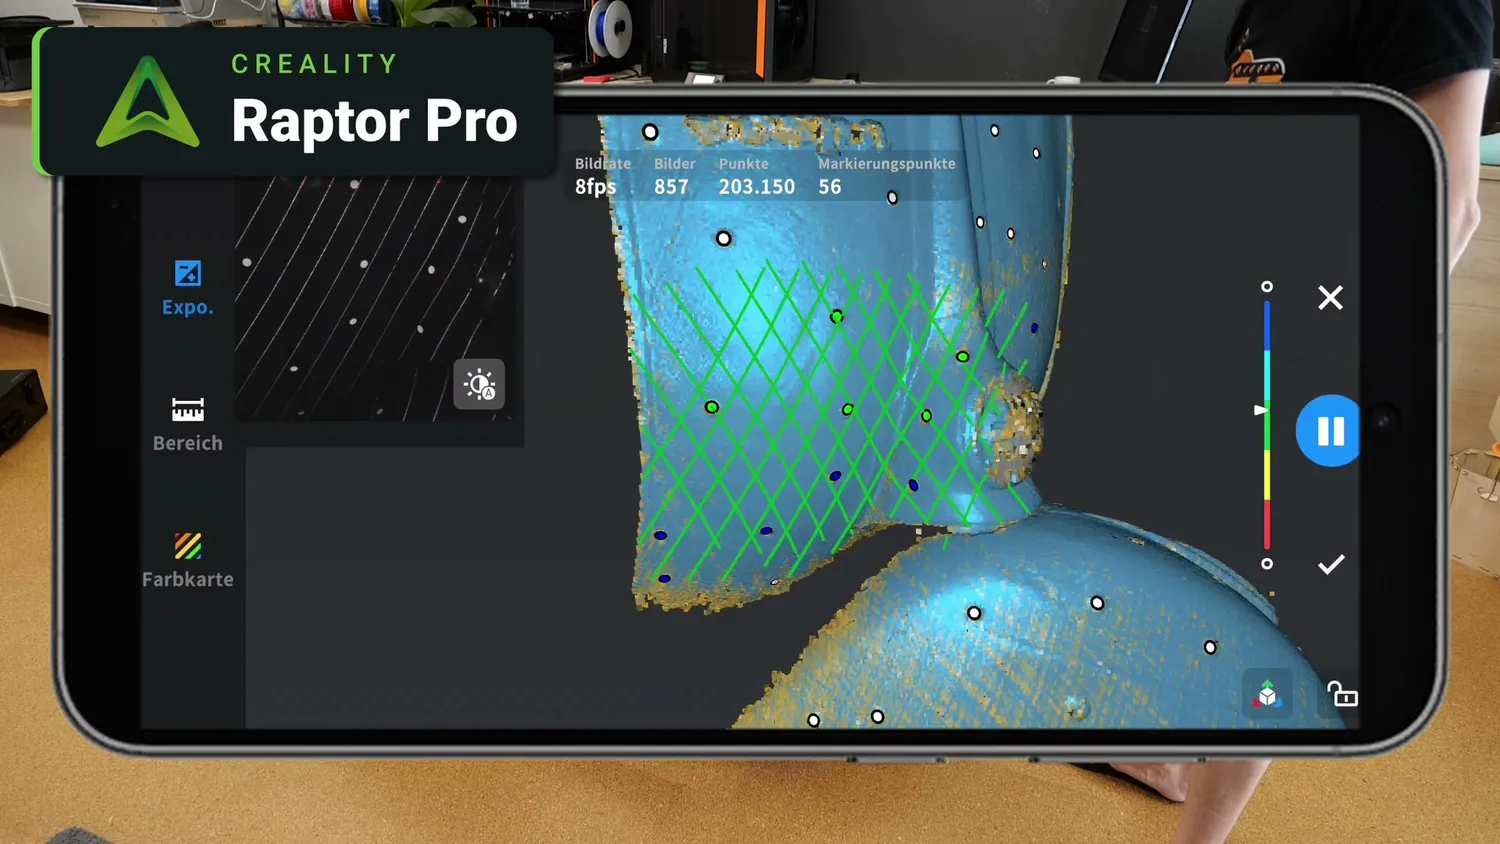 The Raptor can run from a phone
Calibrating both scanners follows a pretty similar workflow. First, you should let the scanner run for at least ten minutes so its temperature stabilizes. Ideally, the calibration plate should also have been sitting in the same room for a few hours. Then you scan the QR code on the back of the plate. This actually contains the precisely measured dimensions of the dot pattern, which the software then uses for calibration. After that, you move the scanner across the plate at different angles and distances. A few minutes later, you’re calibrated and ready to go.
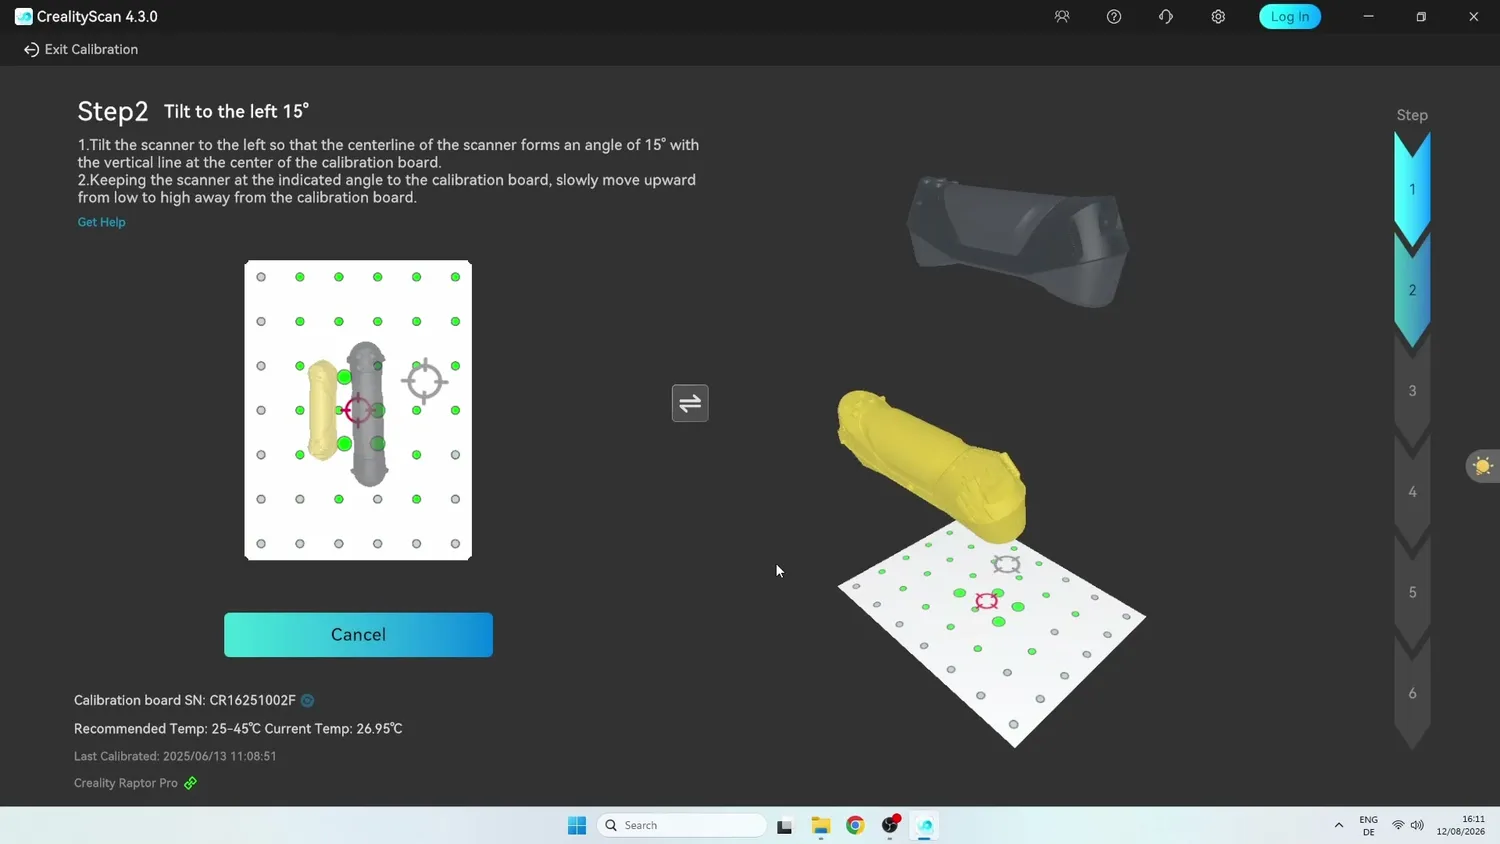 Creality’s guided calibration
Both workflows are fairly straightforward, but I found Creality’s approach easier because the software shows you a 3D representation of the next position. That made it much quicker for me to find the correct angle.
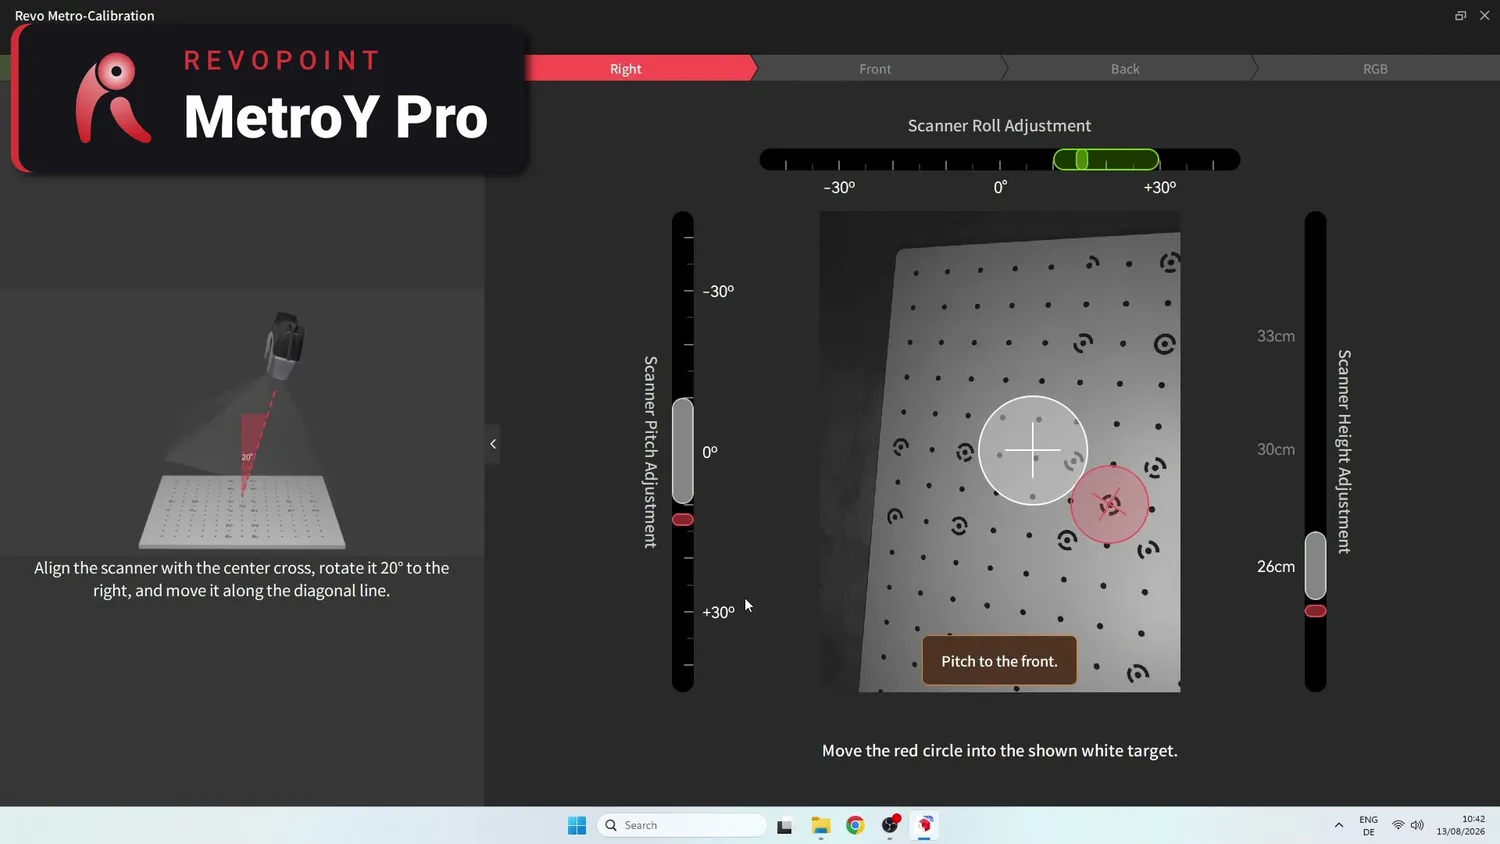 Revopoint’s calibration screen
Scanning an N64 controller
Before scanning my Vespa and some of its parts, I wanted to start with something that’s both easy and challenging at the same time. An original Nintendo 64 controller.
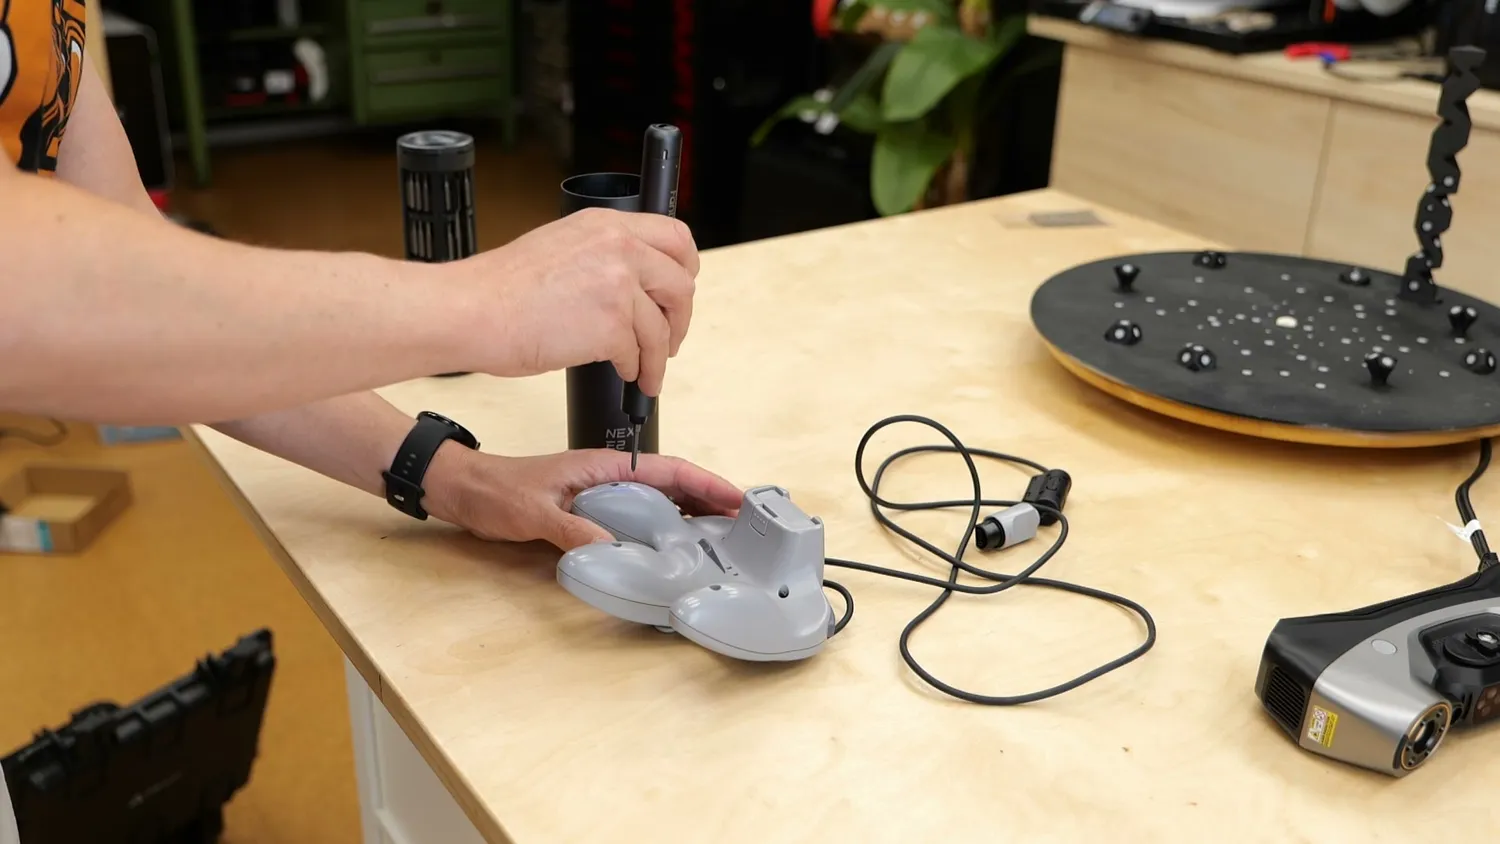 The test subject gets taken apart
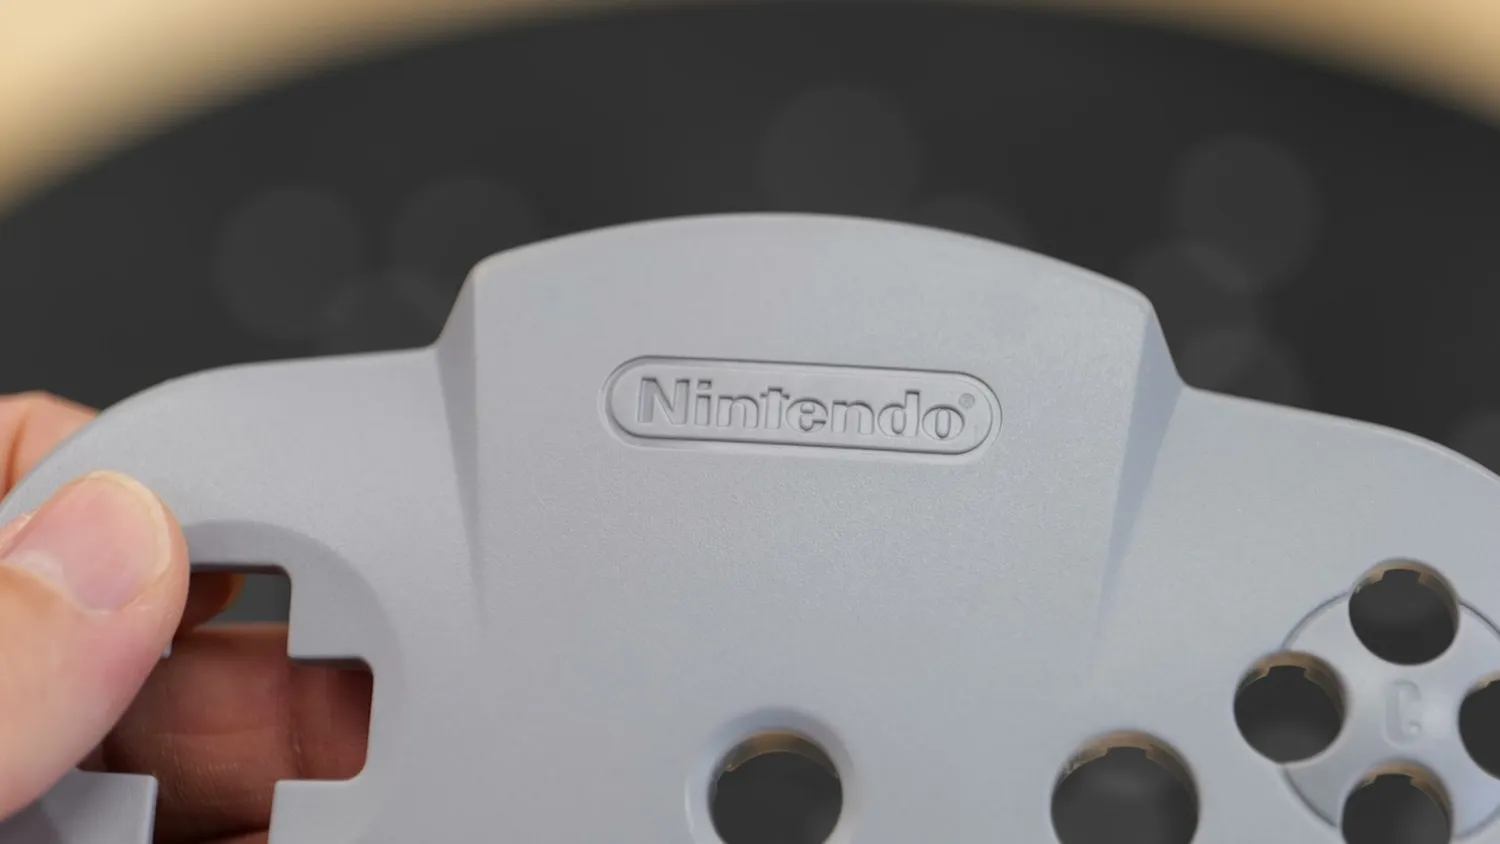
The matte gray housing makes it easy to scan because it provides great contrast for the laser lines.
 The matte gray housing scans easily
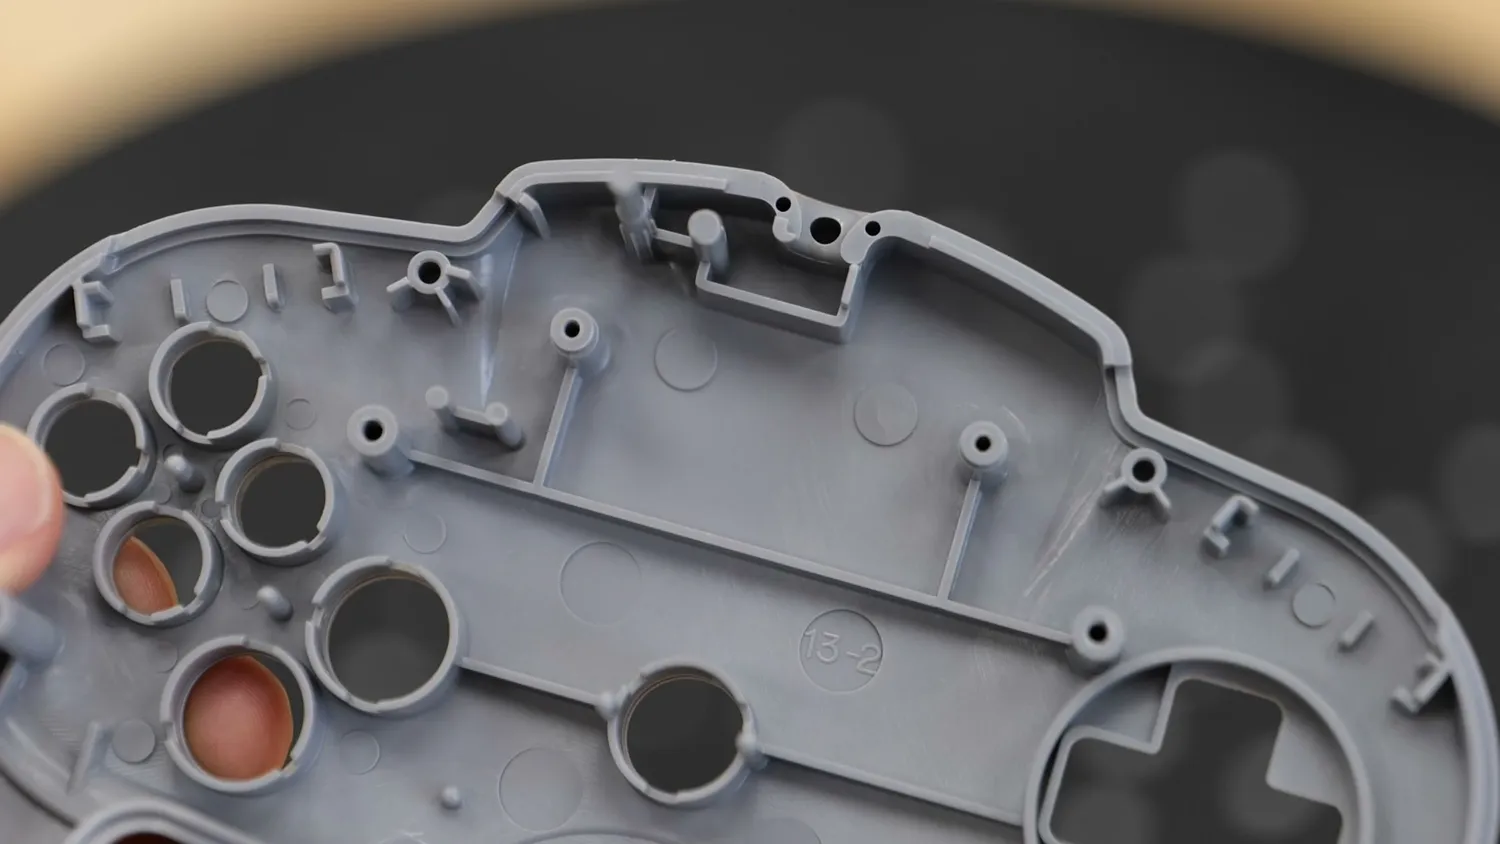
The back of the injection-molded shell, however, has lots of deep pockets and small features, which makes it much more challenging.
 Deep pockets make the inside challenging
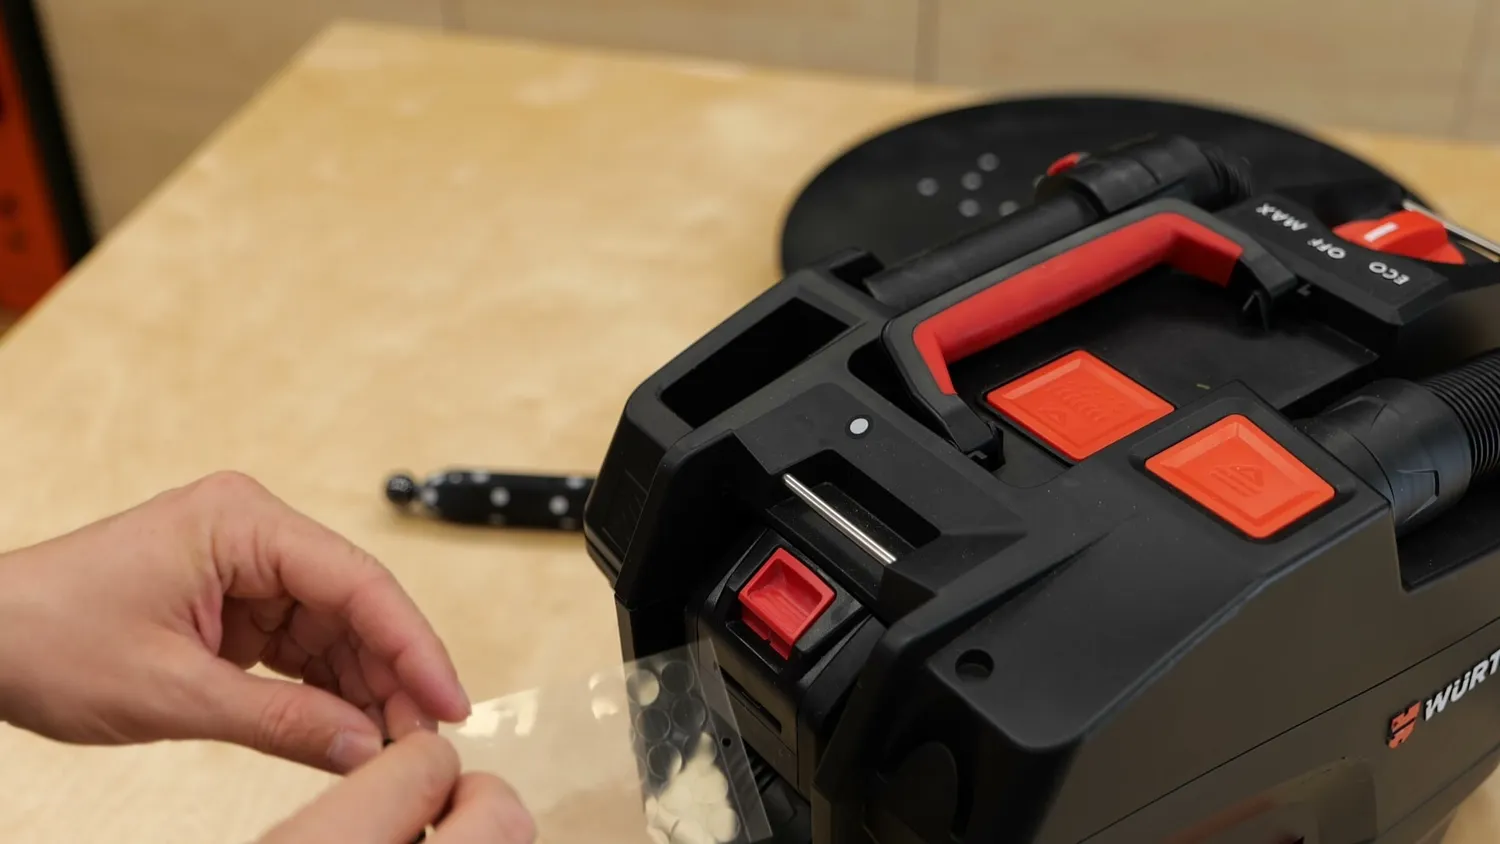
One thing you’ll have to get comfortable with when using the laser-line modes is scanning markers. These are small reflective dots that the scanner uses to calculate its position in space and correctly align the scanned data.
 Retroreflective scanning markers
You always need several of them in view. More importantly, there needs to be enough overlap in visible markers as you move from one scanning angle to another. Otherwise you’ll lose tracking.
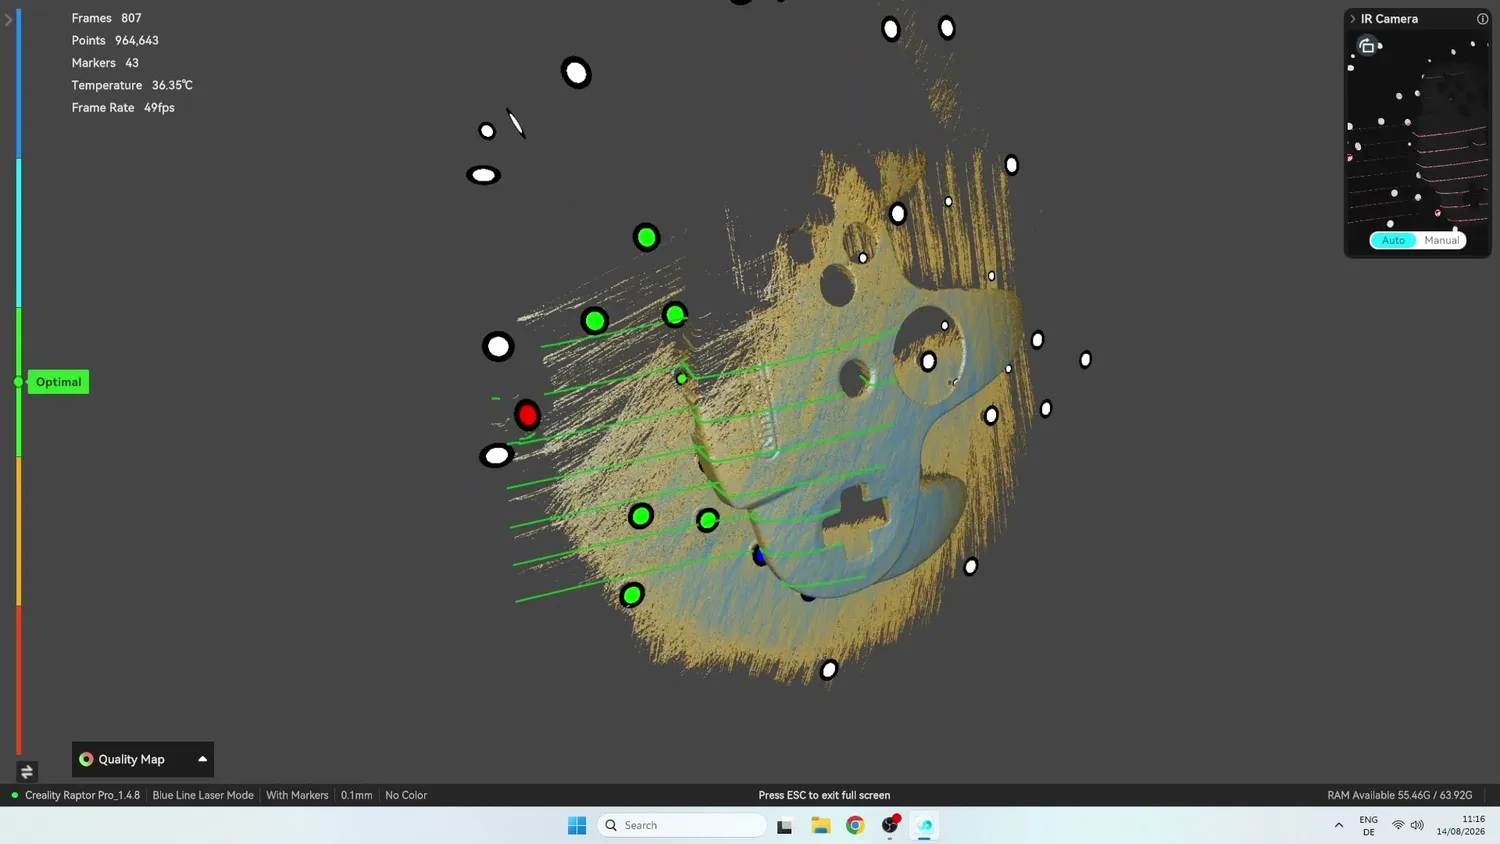 The software tracks markers in space
On larger parts, you usually stick adhesive markers directly onto the object. With smaller parts, you can often get away with putting the markers on the scanning table instead.
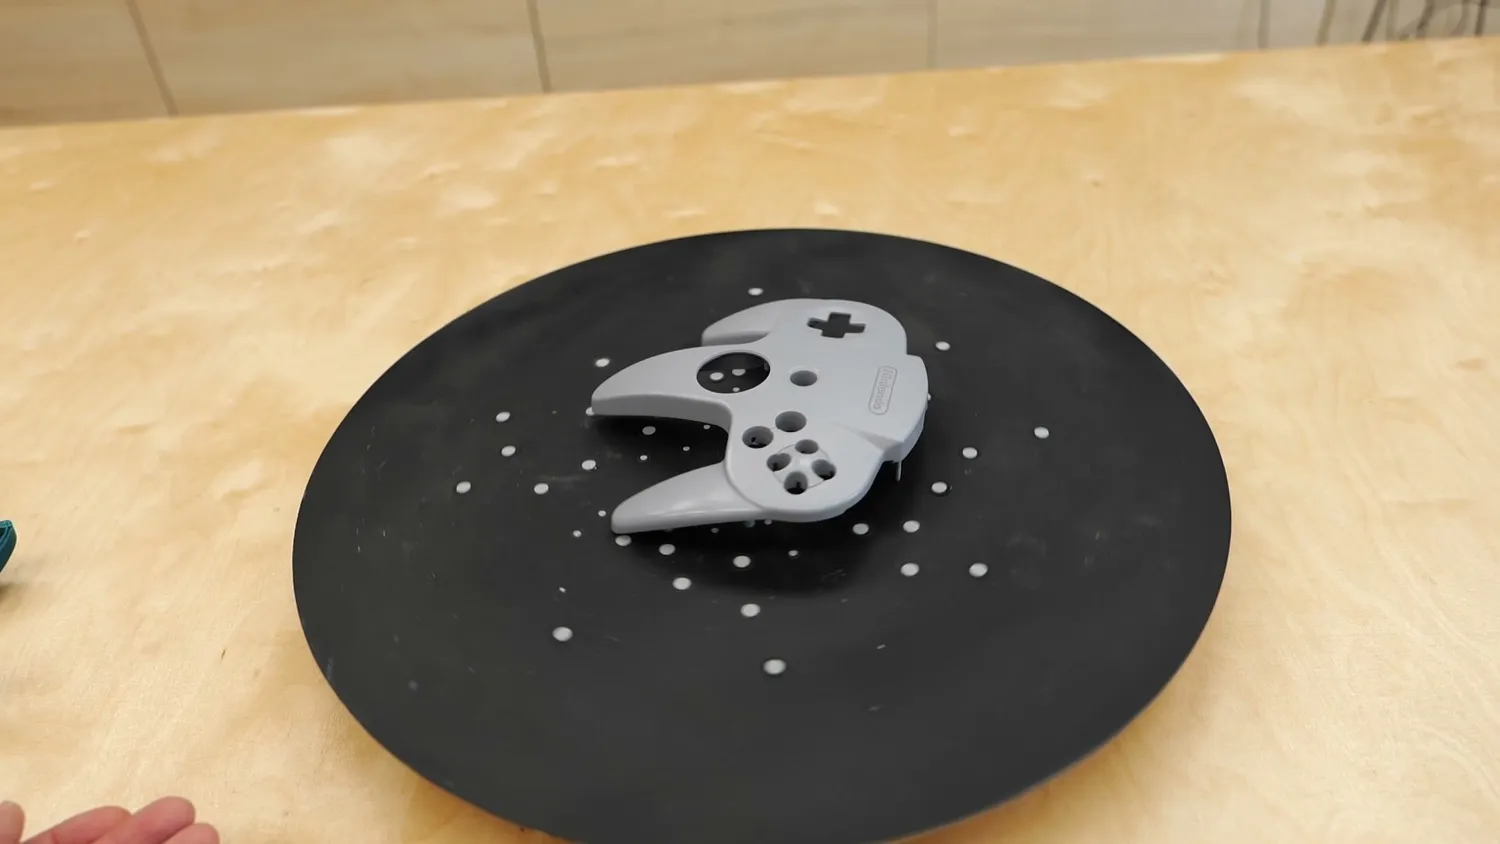 Markers on the table instead of the part
Mine is a simple 10-euro IKEA turntable with a matte-black spray-painted steel plate and a lot of permanently placed markers. I also tried Revopoint’s scanning table. It might be convenient for simple parts, but it’s relatively small, and for more difficult areas I still had to reposition the scanner. The final results weren’t any better than simply turning a manual table slowly by hand while holding the scanner in the other hand.
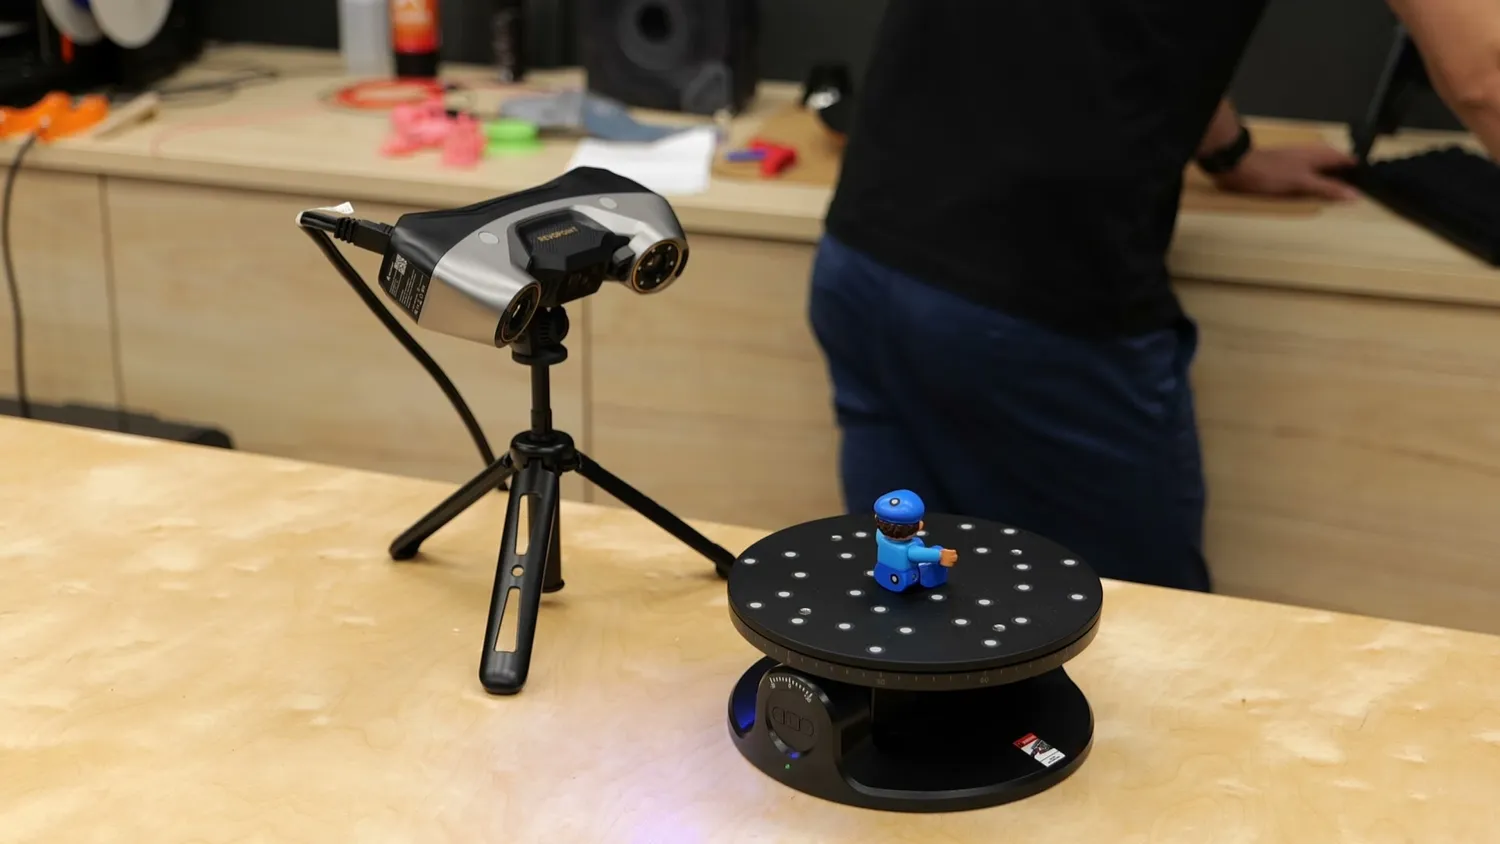 Revopoint’s little scanning table
To improve tracking even more, I usually add a few 3D-printed marker targets around the base. These give the scanner something to track when I’m scanning at shallow angles.
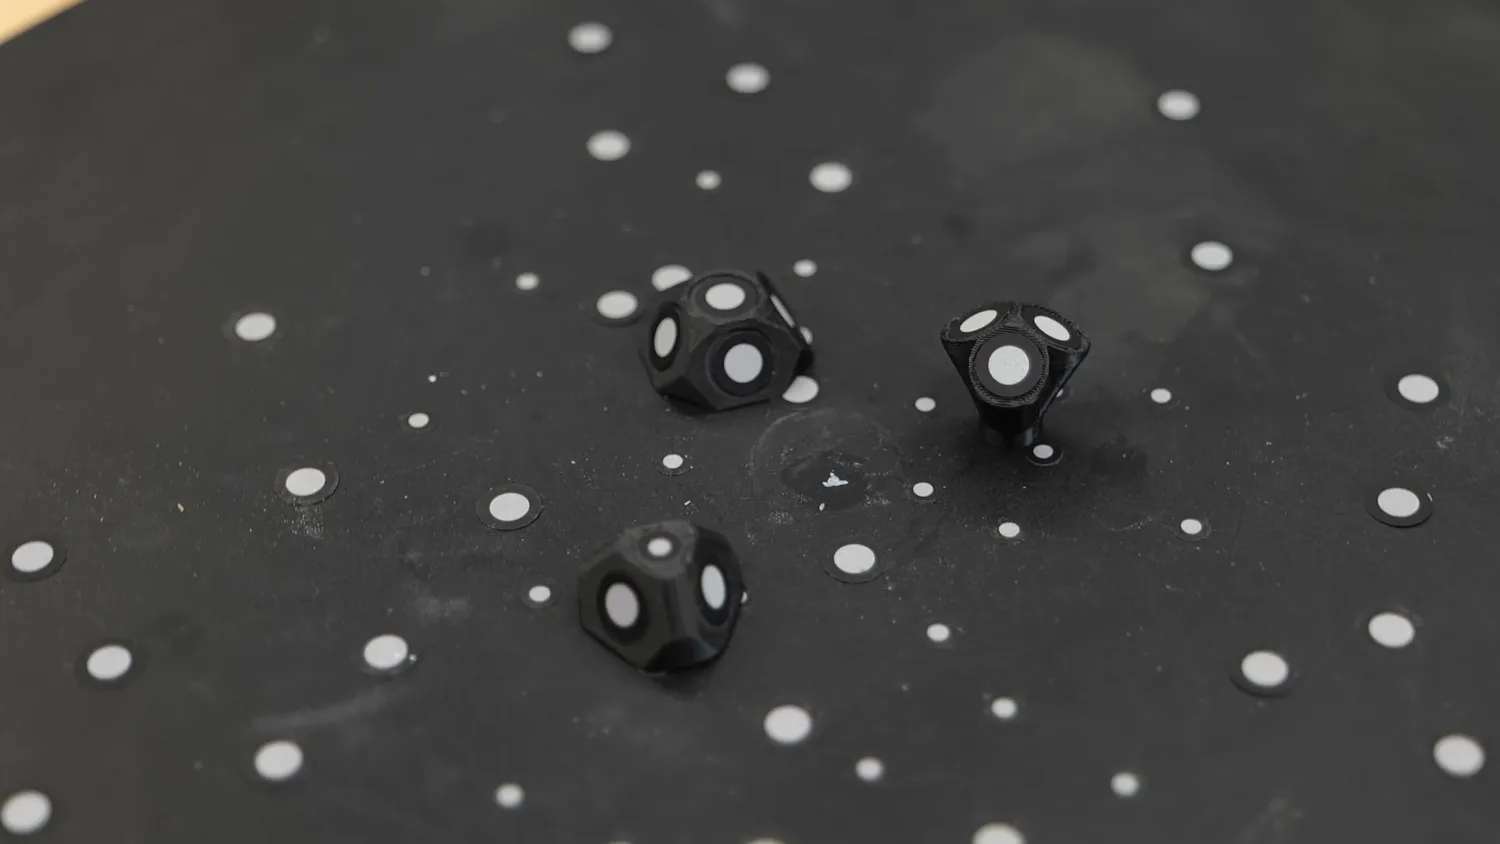 3D-printed marker targets
I placed the N64 controller shell in the center and started scanning it with both systems. Because of the matte injection-molded surface, both worked very well.
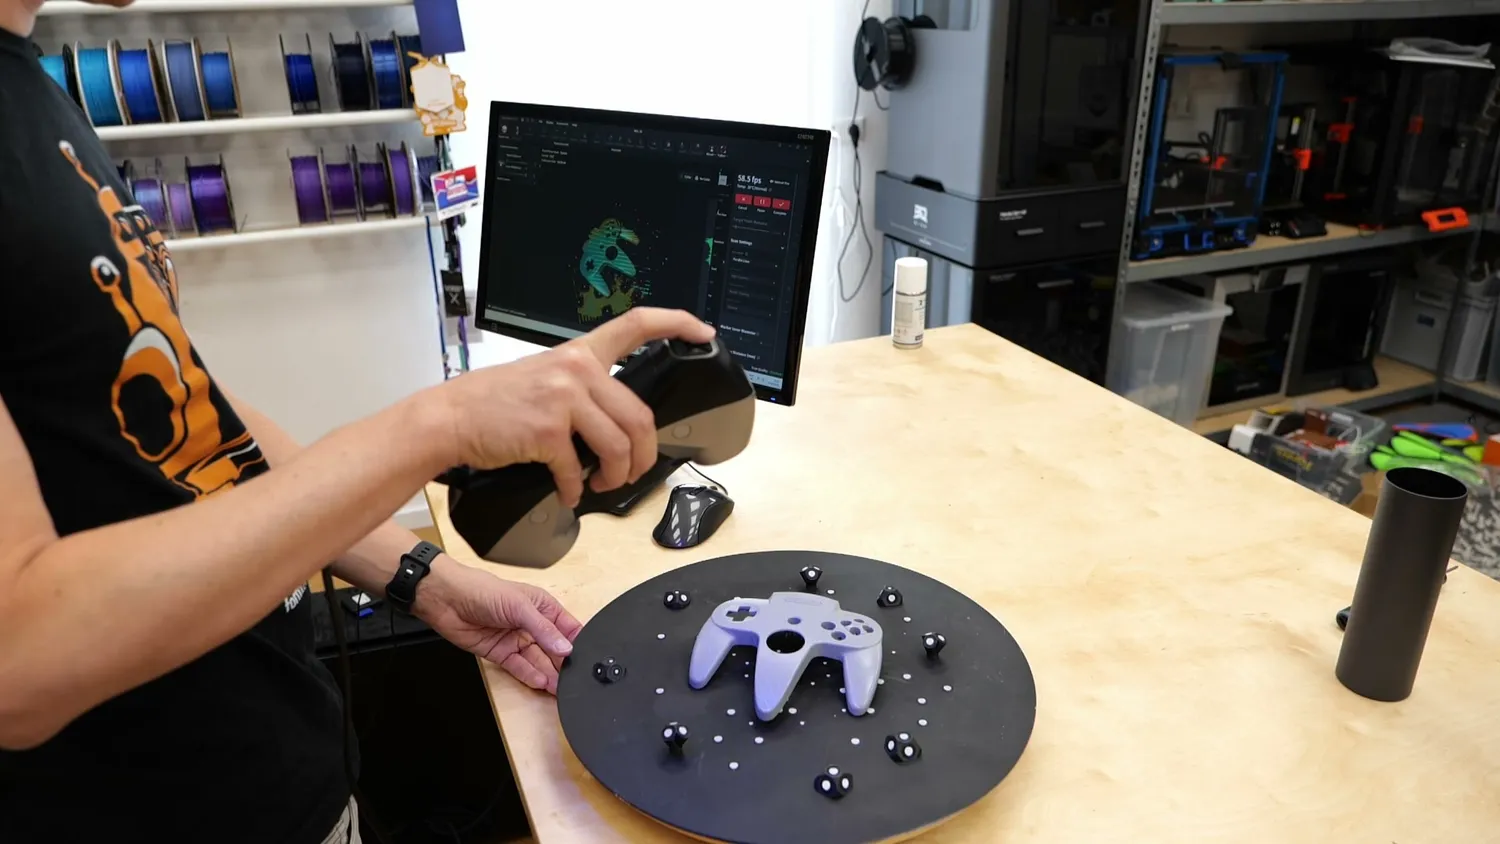 Scanning the first side
I started with the parallel-line laser mode on the Raptor Pro. This mode captures less area at once and you need to get closer to the part, but that gives you higher resolution. The downside is that the scan takes longer.
Once you start scanning, you can watch the geometry slowly appear on screen. I usually sweep the scanner from side to side while slowly rotating the table.
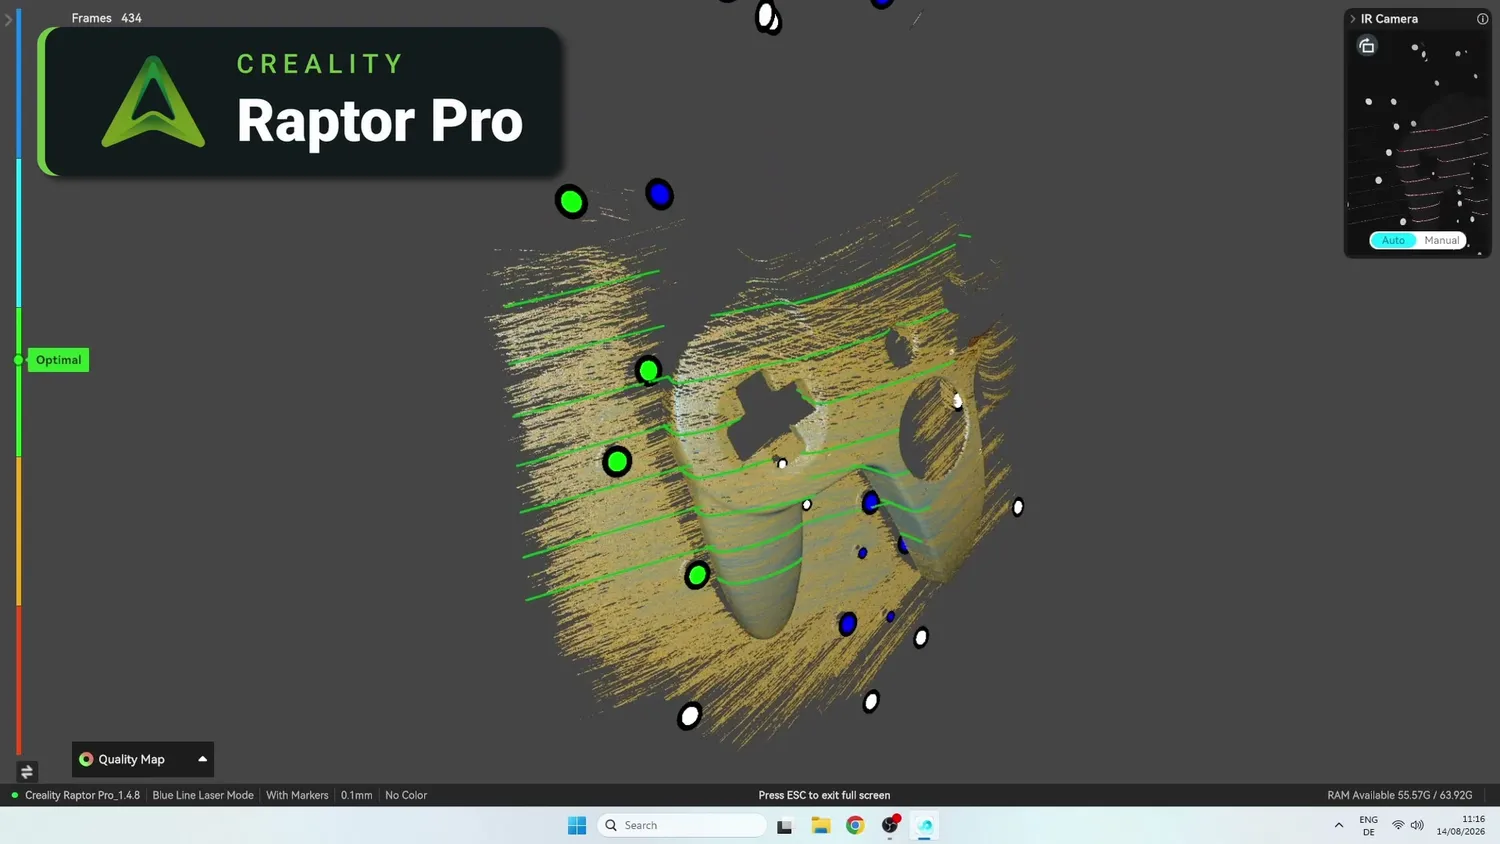 Sweeping the laser across the part
Both programs show you a bar on screen indicating whether you’re at the correct distance from the part. Creality Scan also color-codes the scanned points, which I found very helpful. The scanners themselves also have a colored light indicating the distance, but I didn’t find that super reliable.
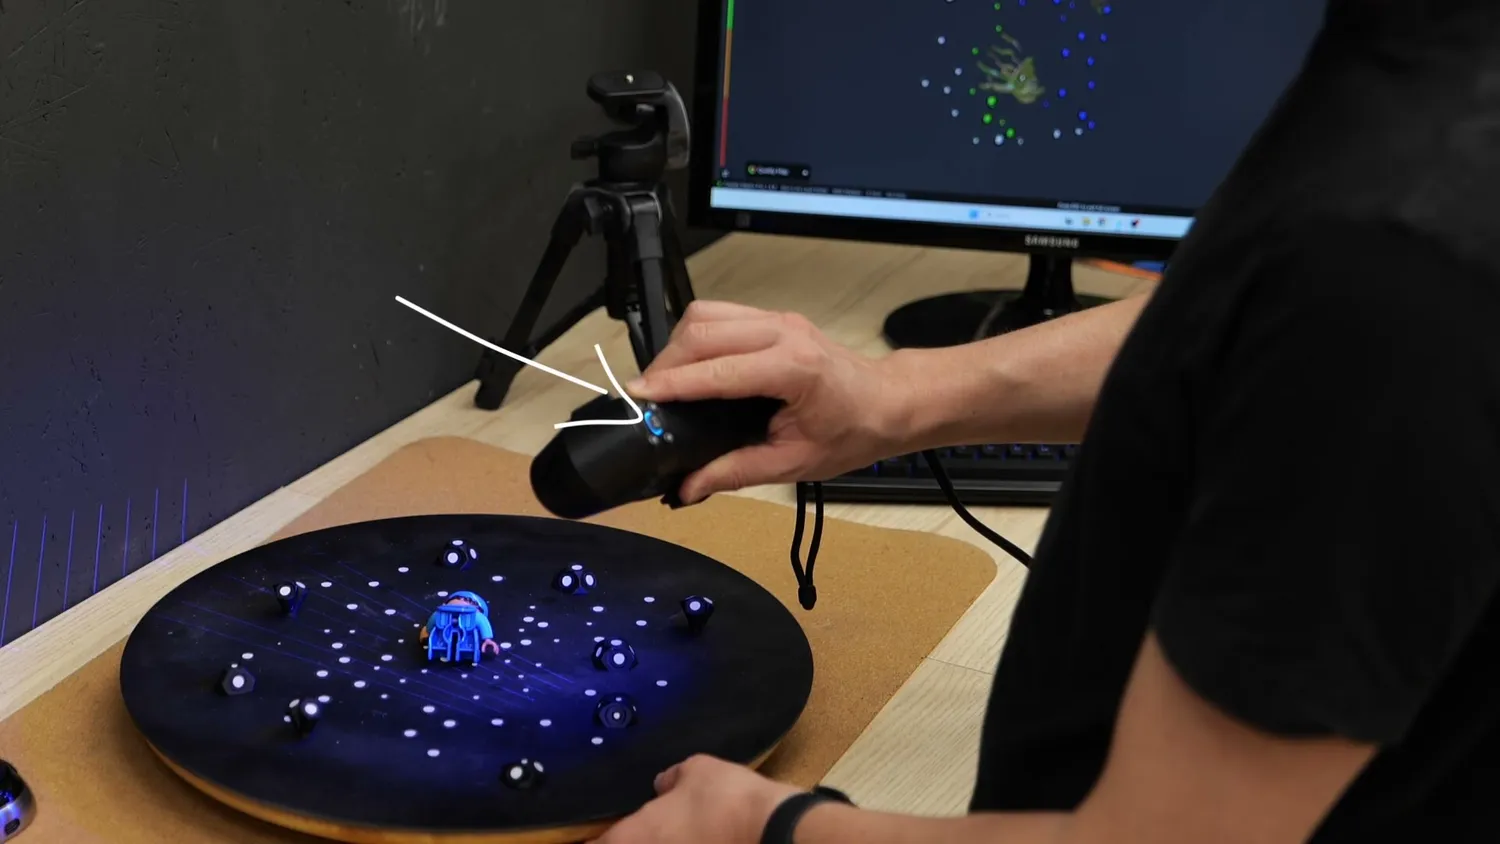 The distance indicator light
It’s much easier if you can see the screen and the part at the same time. That’s also why I often put the turntable right where my keyboard normally sits and scan directly at my desk.
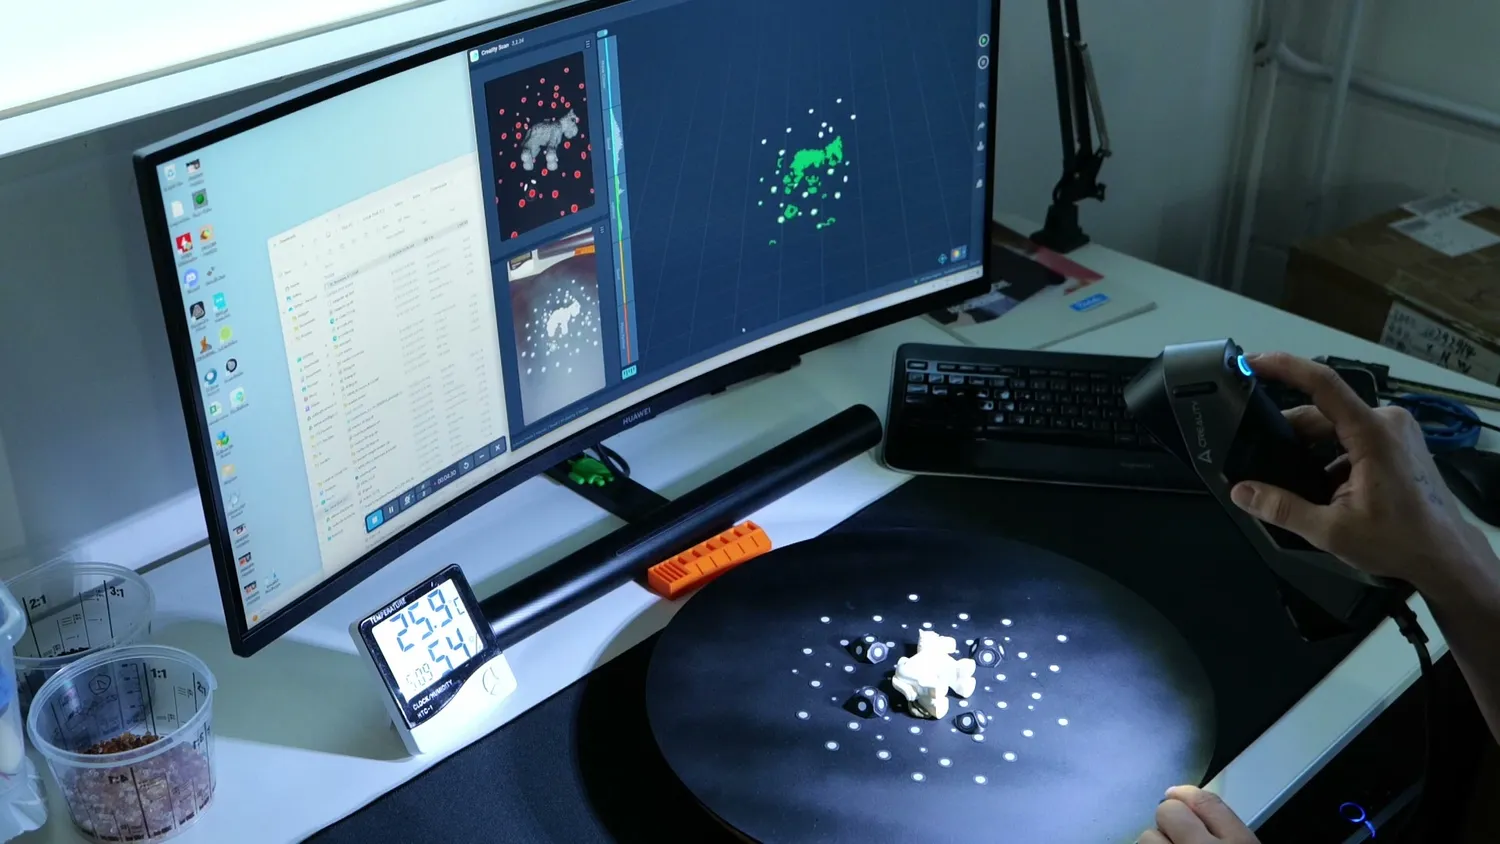 Scanning right at my desk
Laser-line scanners only collect data where the laser hits the part and is visible to the depth camera at the same time, so it takes some time to capture every angle. The software shows you which areas have already been scanned enough by changing the color of the points on screen.
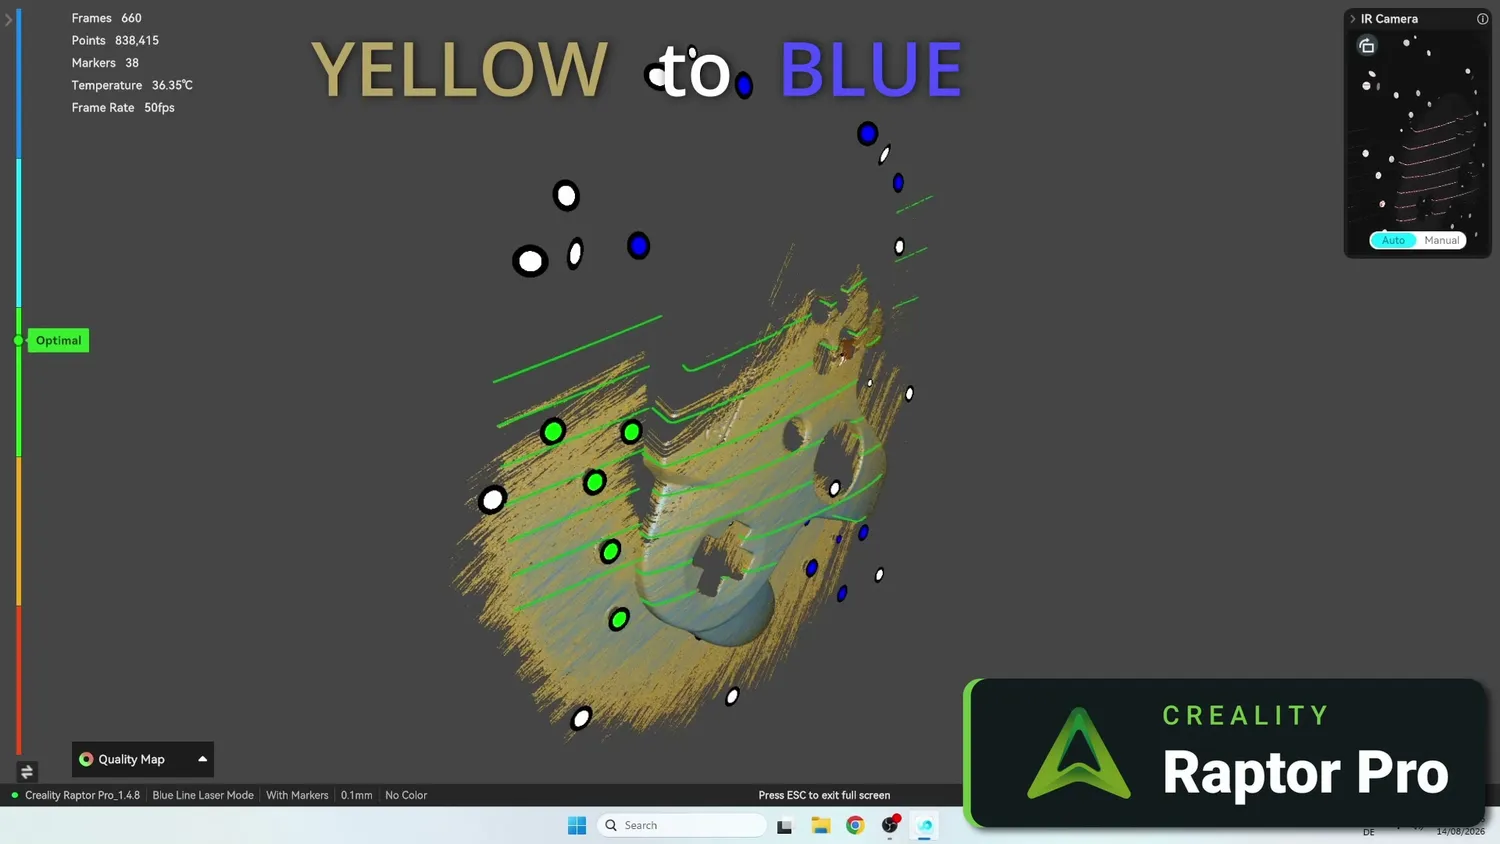 Yellow turns blue once an area is captured
Once the first side was finished, I flipped the shell around and scanned the more challenging inside. When using a scanning table like this, it’s very important that the object and the markers don’t move relative to each other. Because the top of the controller is convex, it wasn’t stable on its own, so I used a few blobs of modeling clay to hold it firmly in place.
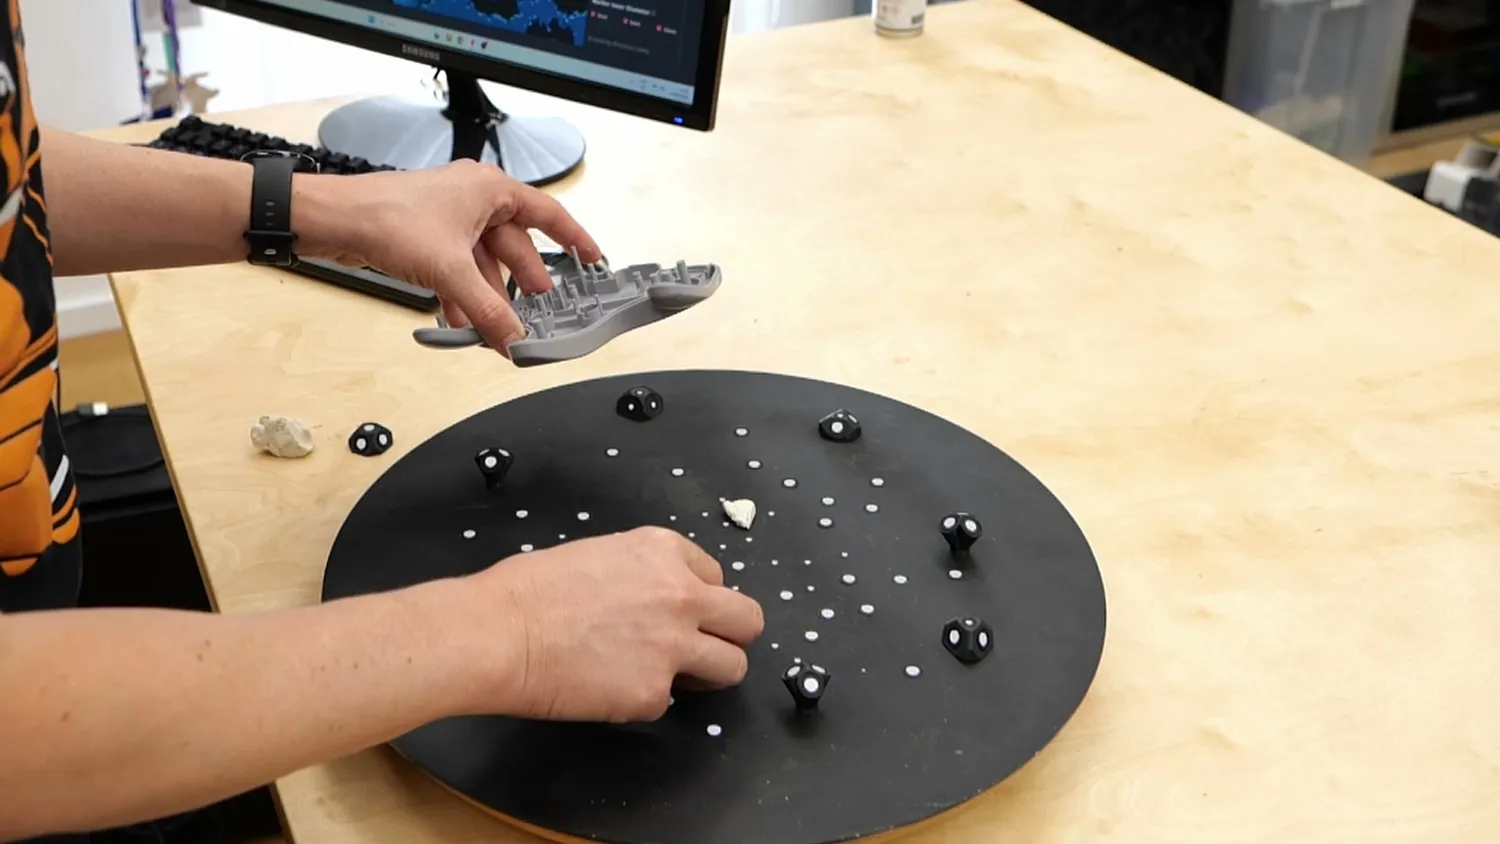 Modeling clay holds the shell in place
Neither scanner had major problems with the second side. It simply takes longer because you need to approach the geometry from more angles. And the deeper a cavity gets, the harder it becomes to capture.
This was also a good opportunity to test the single-line laser mode on the Revopoint Metro Y. It’s supposedly useful for applications like this. I tried it several times, also on other parts, but I never got significantly better results than with the normal parallel-line mode. Based on my experience, I wouldn’t buy the Metro Y specifically for that feature.
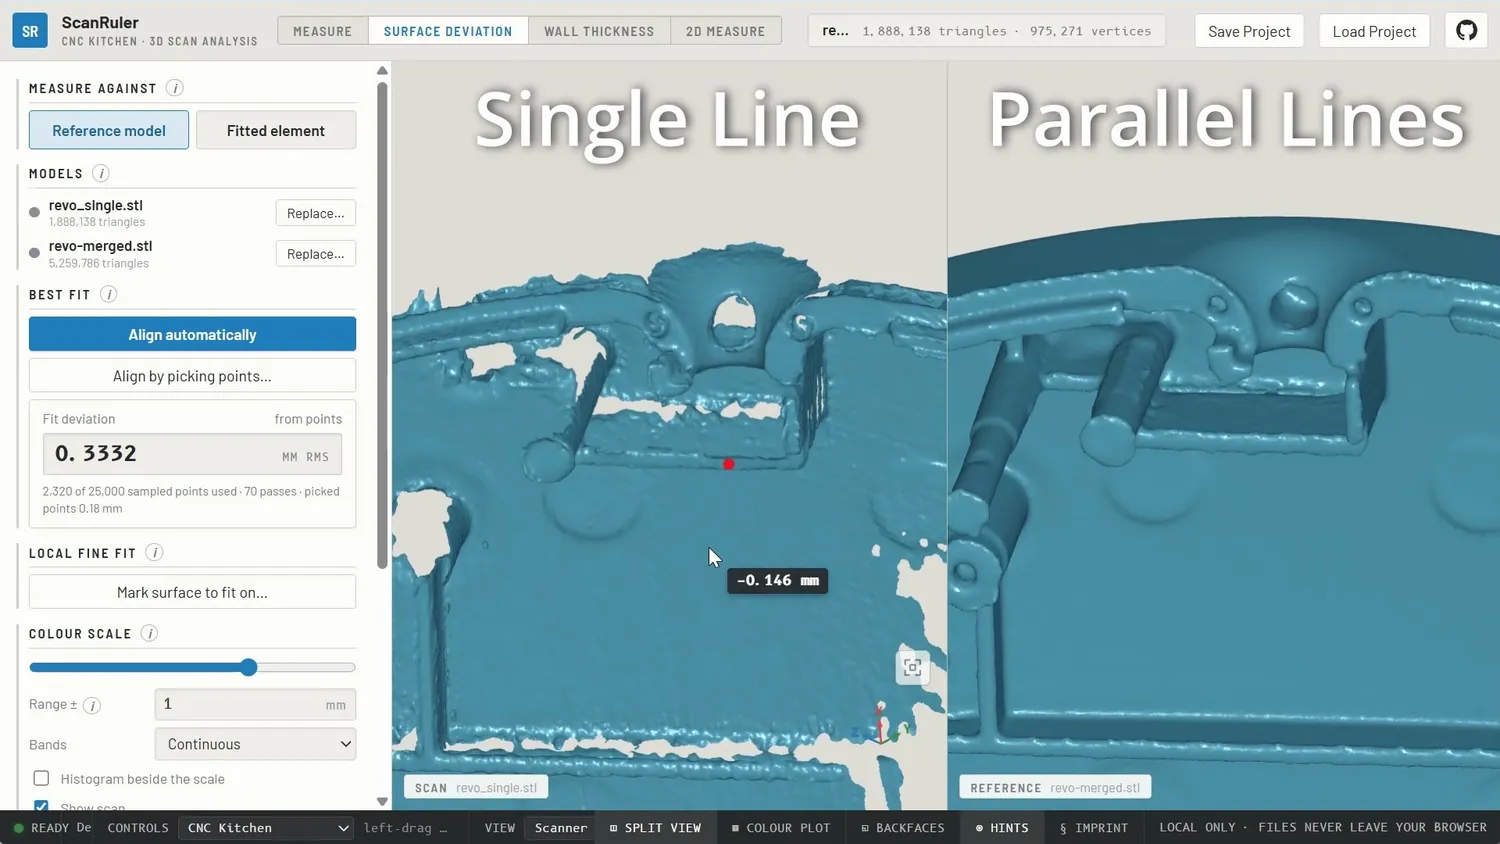 Single-line vs. parallel-line results
To create one complete model, you now need to merge the scans of both sides. The problem is that the software needs common geometry to properly align them.
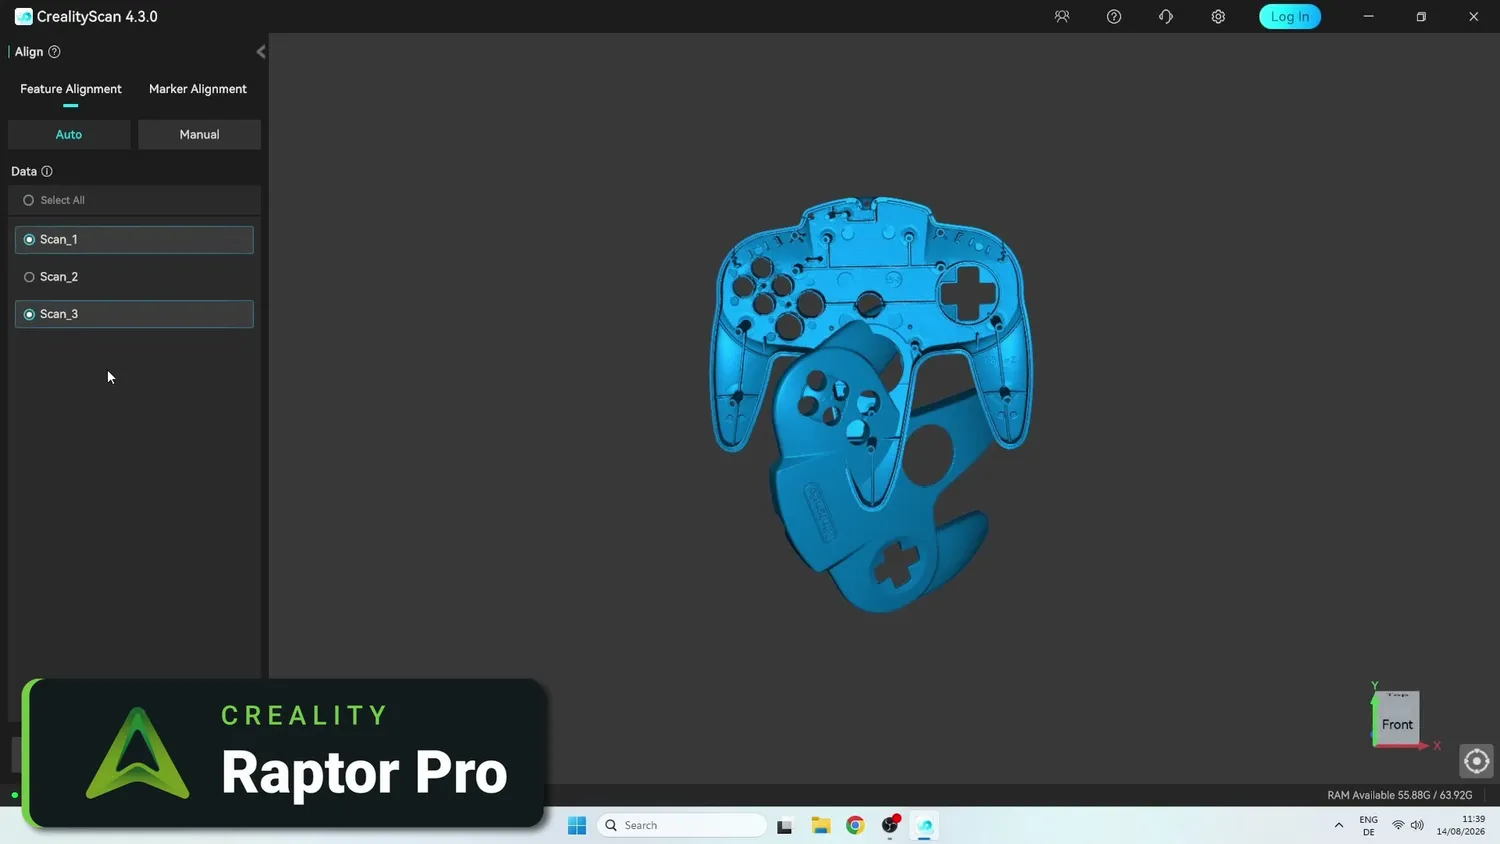 Aligning scans needs common geometry
My first scan only contained features from the outside and the second mostly contained features from the inside, so both programs struggled to align them automatically. I therefore made a third scan with the controller sitting at an angle. That scan contained geometry from both sides and acted as a bridge between the two main scans. Using that, I could merge everything into one part.
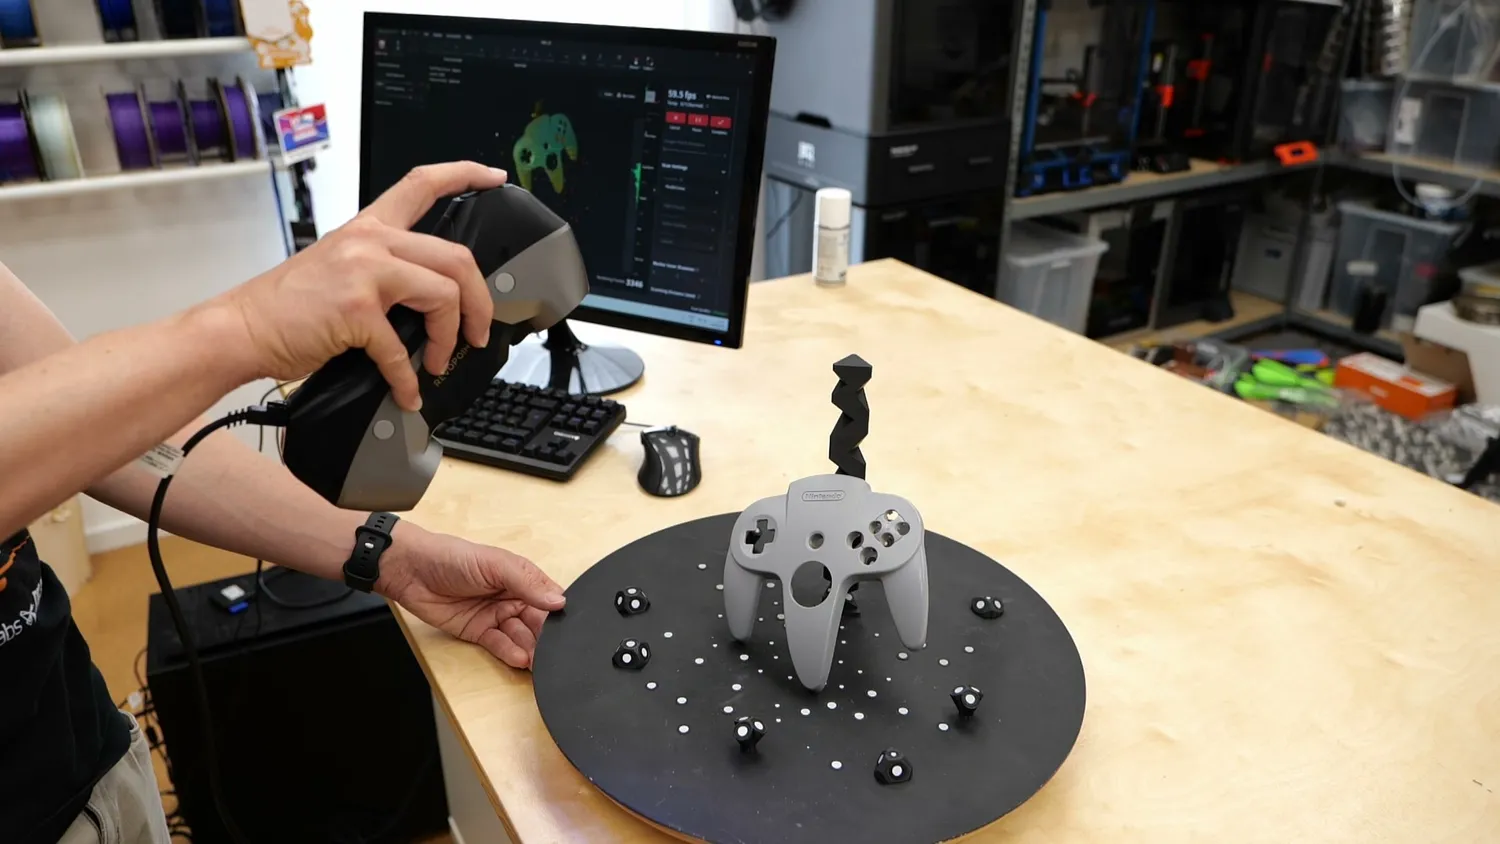 The bridge scan at an angle
When 3D scanning, there are usually three main steps.
From raw scan data to the finished mesh
During scanning, you capture a huge amount of data from the part and often some of its surroundings. At this stage, you don’t even have a mesh. You basically have millions of measured points in space, many of them overlapping.
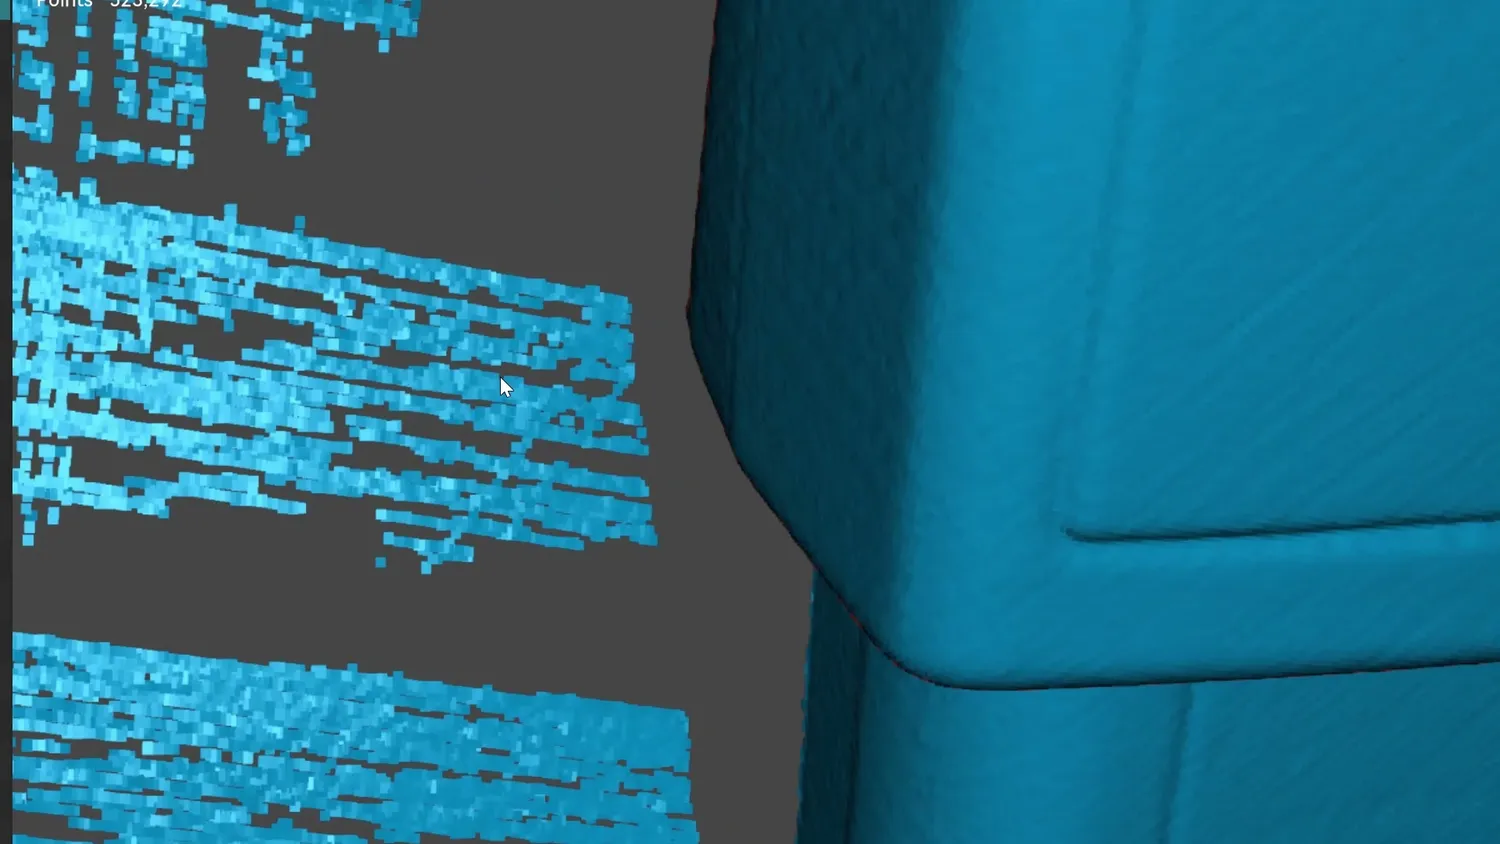 Millions of overlapping measured points
After scanning, the software takes all of this randomly distributed data and creates a more regular point cloud while also cleaning up some of the noise. You then remove any unwanted data.
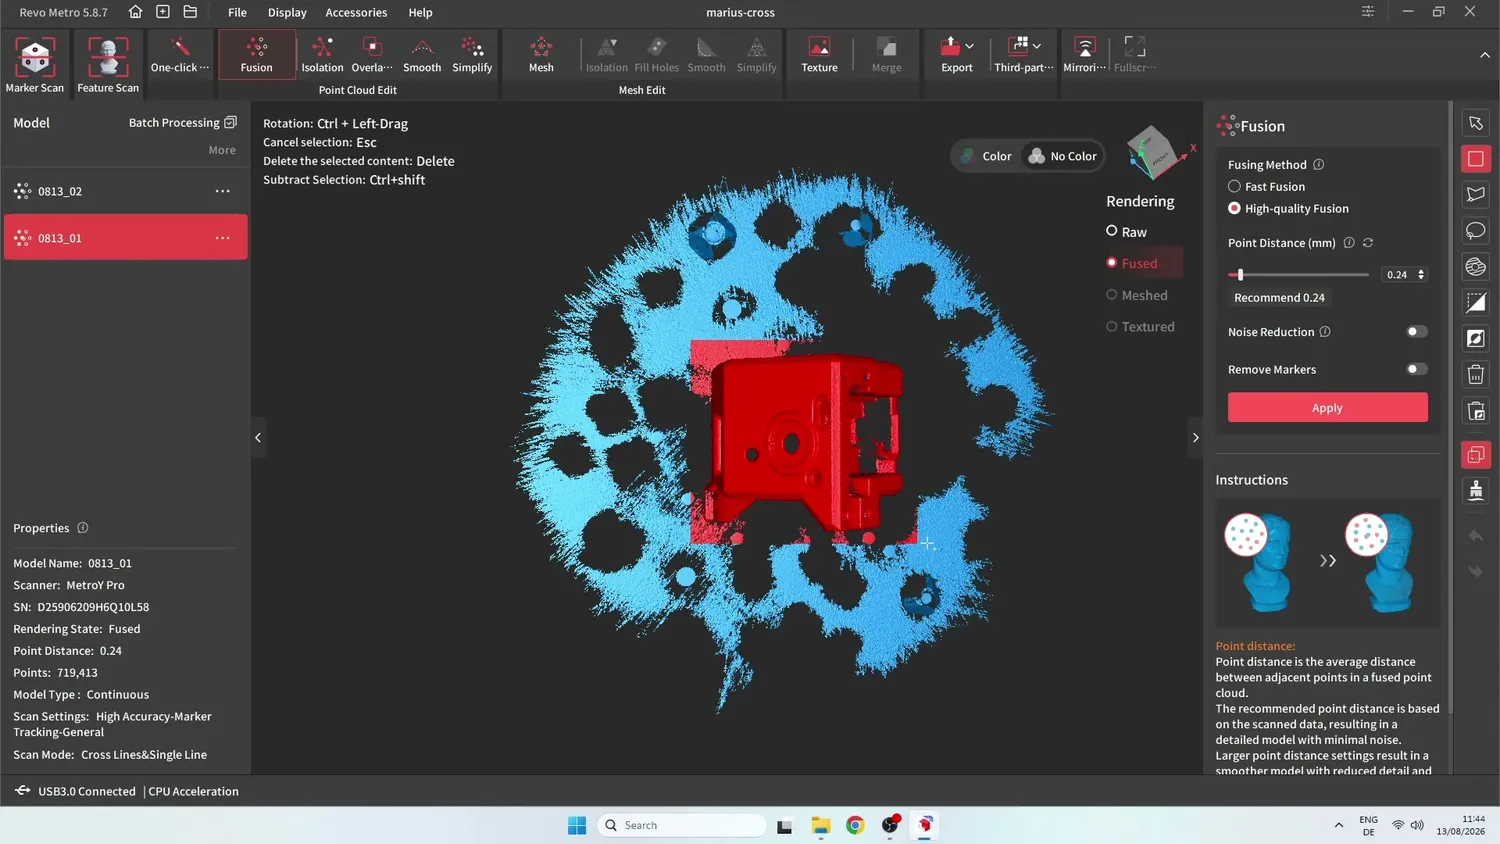 Removing unwanted data
Only from this cleaned point cloud do you finally generate the mesh. And that’s what I did with the N64 controller.
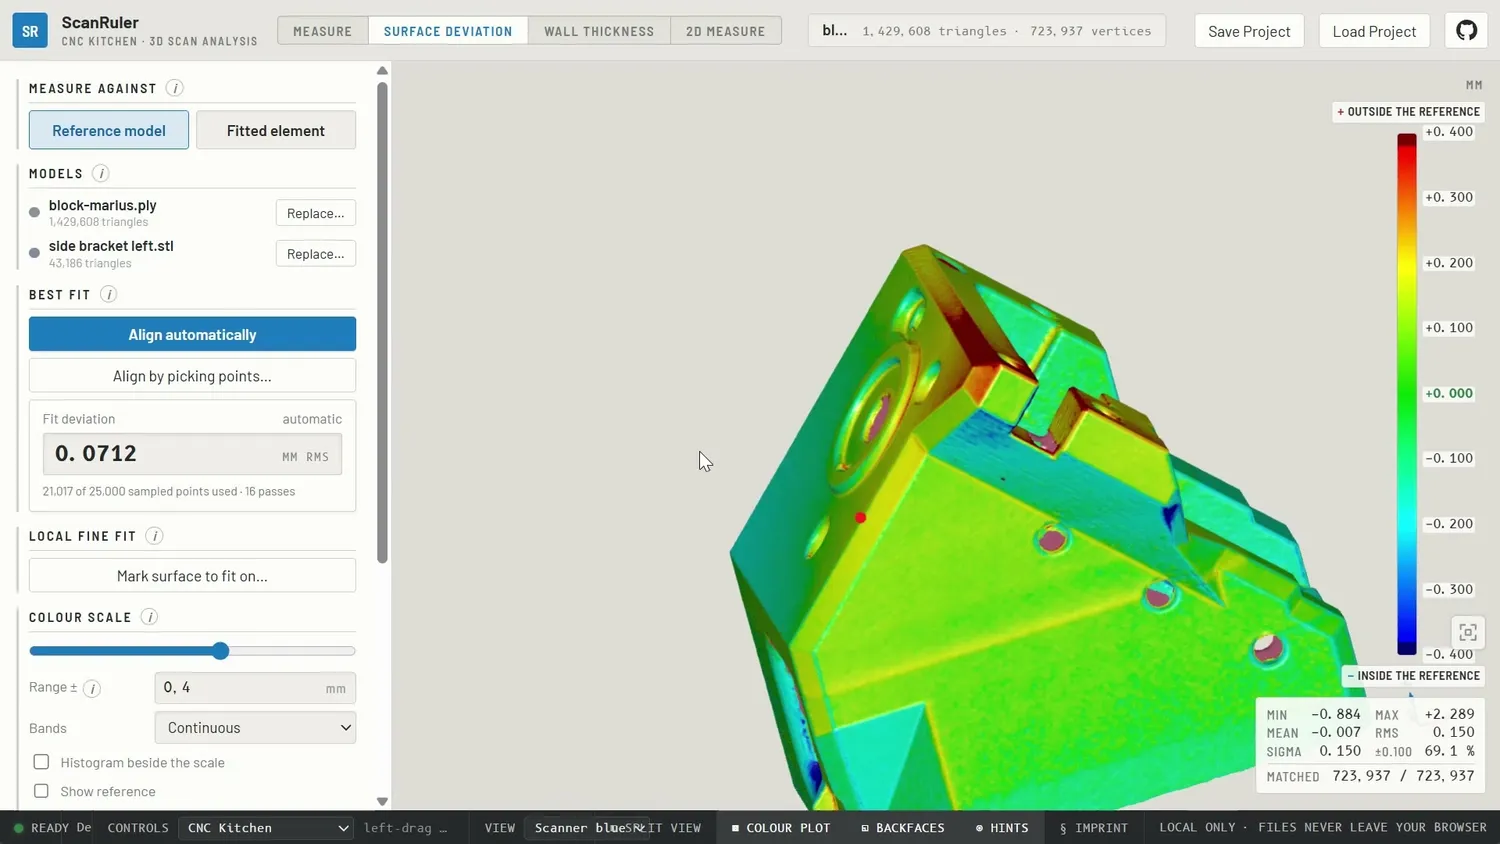
Comparing the scans in ScanRuler
I exported both meshes and loaded them into ScanRuler, my new free and open-source 3D scan analysis tool.
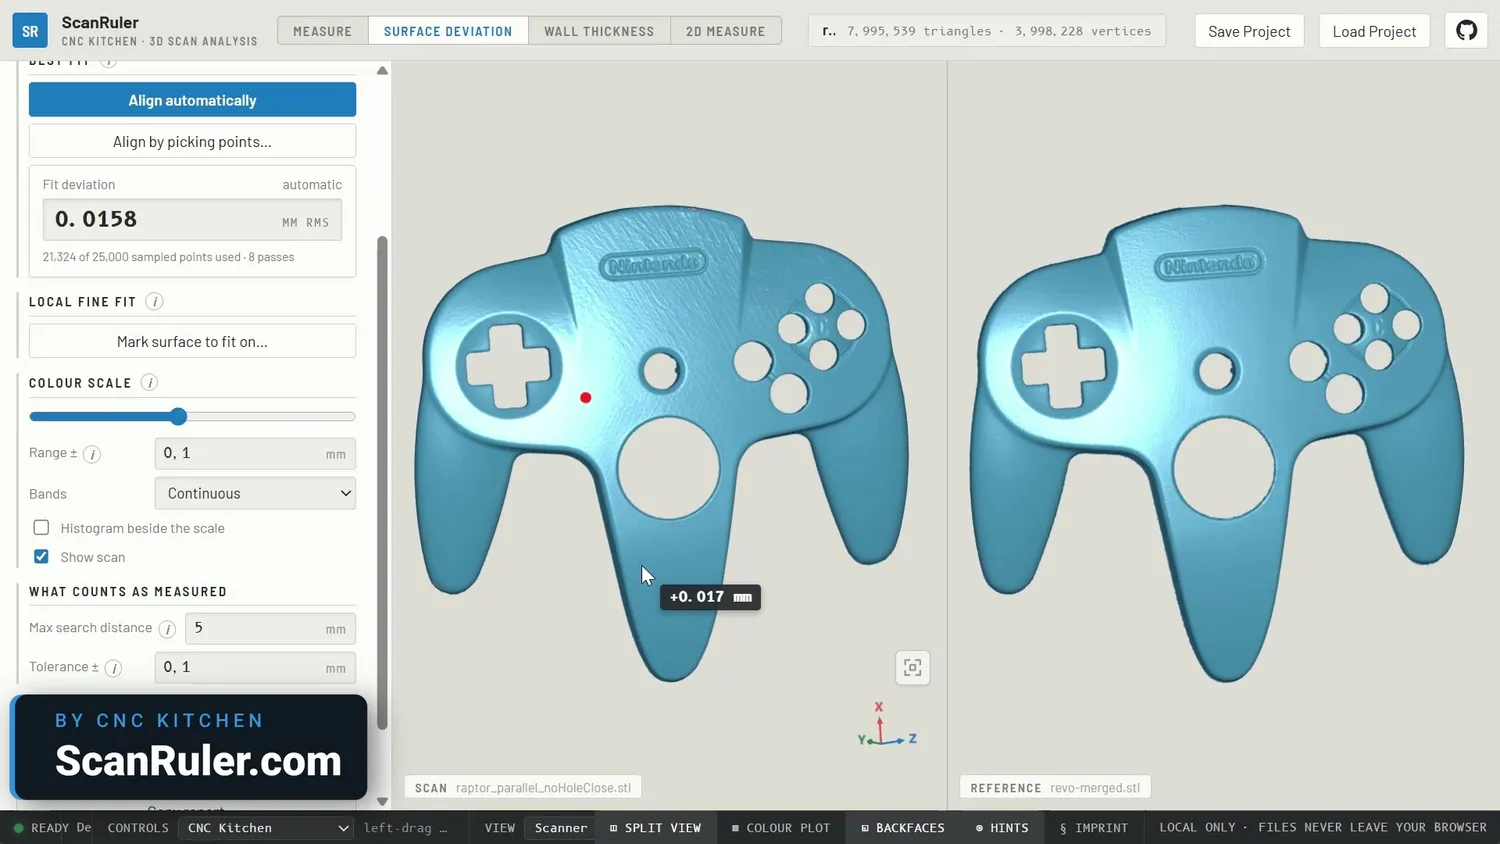 Both meshes loaded in ScanRuler
At first glance, both scans look very good. ScanRuler lets me directly compare the geometry, and I was honestly impressed by how closely they matched. What you see here is a color plot. If the two scans match perfectly the area is green, if one part is outside the other one the color becomes red and if it’s on the inside, its blue.
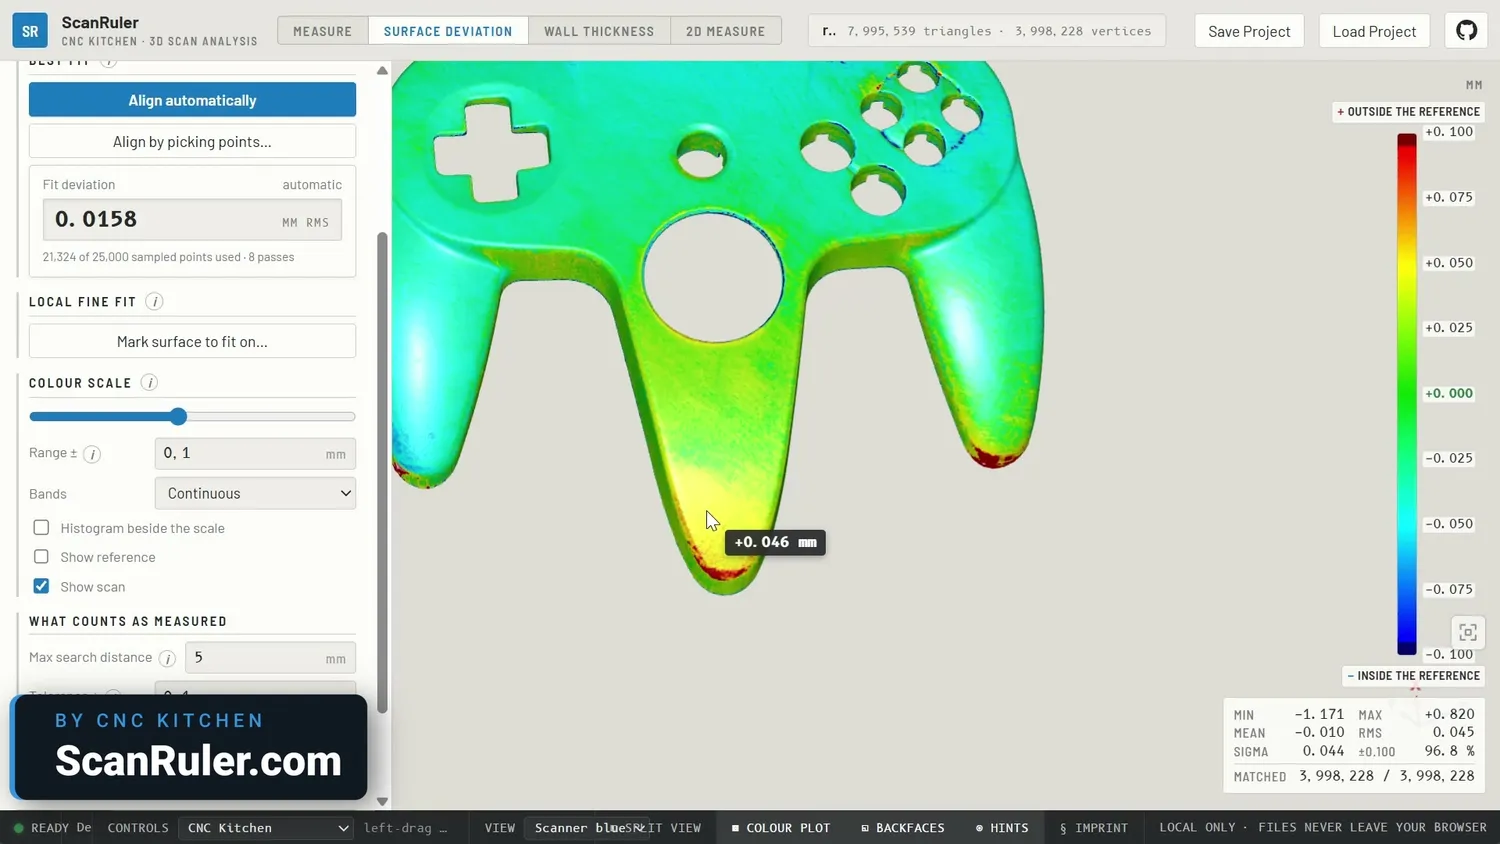 Green means a perfect match
Across most of the model, the difference was only around ±0.05 mm, which suggests that there isn’t any significant scaling difference between the two scanners. On the back, you can also see the areas where neither scanner captured data. These are basically holes in the mesh, which we could fill inside the scanning software if we needed a watertight model.
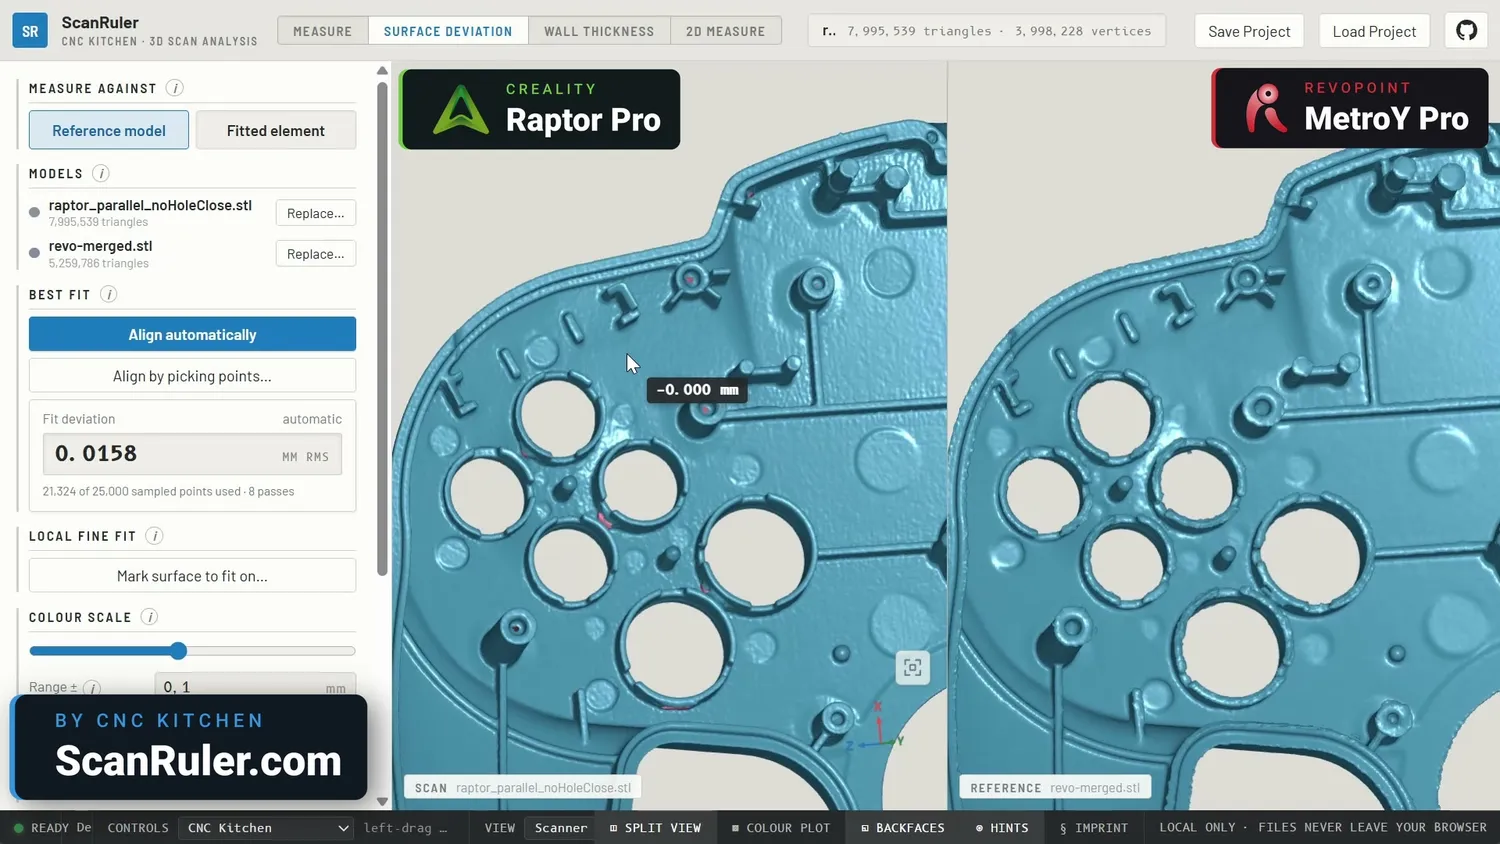 Uncaptured areas show as holes
But when we zoom in, there are two noticeable differences. First, the resolution and amount of detail I got from the Creality Raptor Pro are impressive, and better than with the Metro Y.
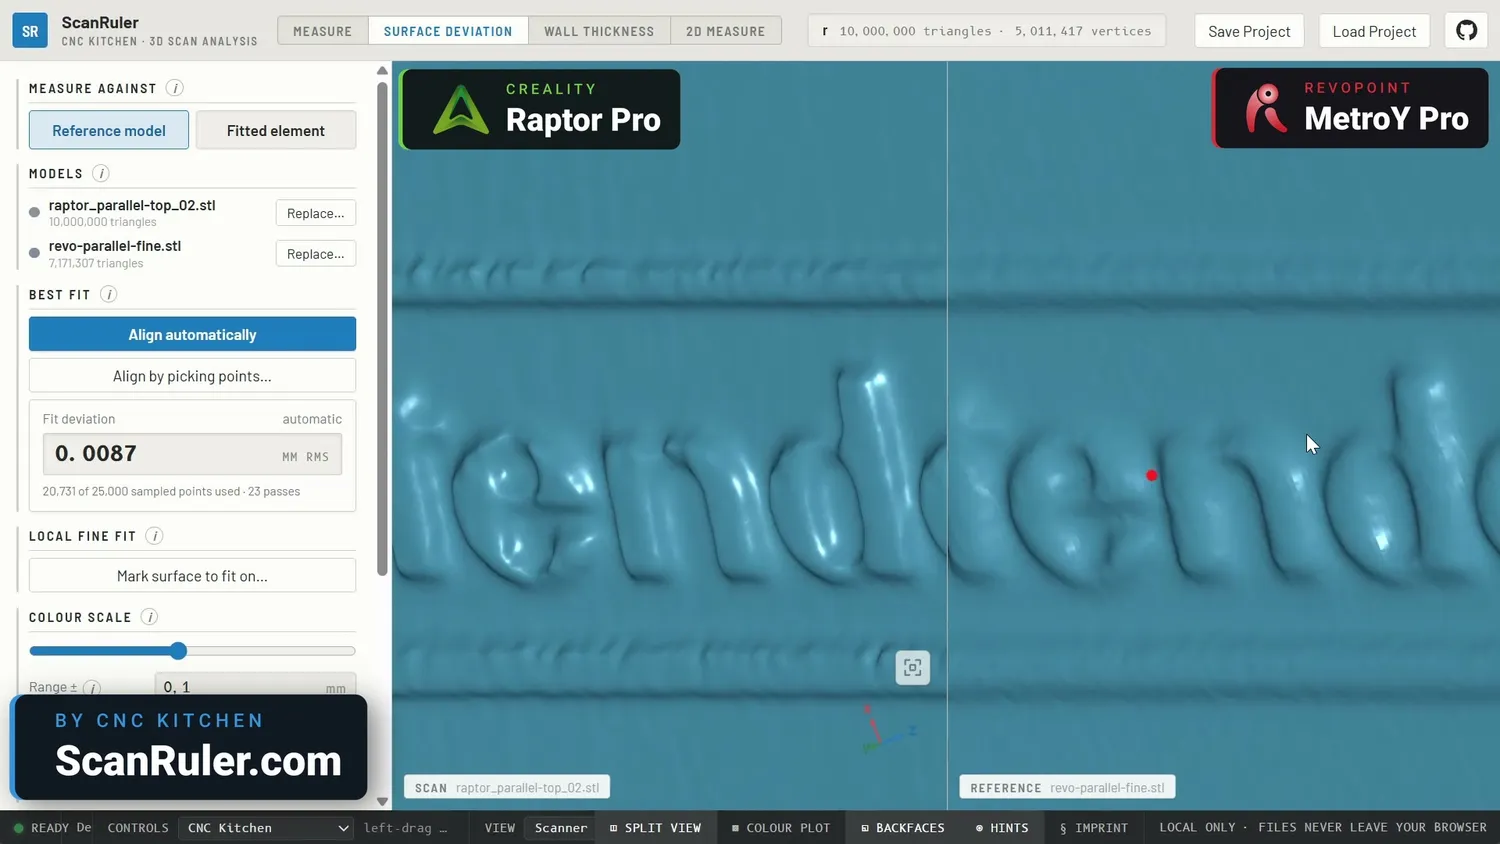 The Raptor resolves the logo more crisply
You can see it in several places, starting with the Nintendo logo. On the Raptor scan, the lettering is really crisp. On the Metro Y, it’s noticeably softer and smoother. The same thing happens on the back. The Creality scan even captures some of the very fine details left by the injection mold.
The second thing I noticed is that the Metro Y creates these strange burr-like structures or frayed edges around many sharp features.
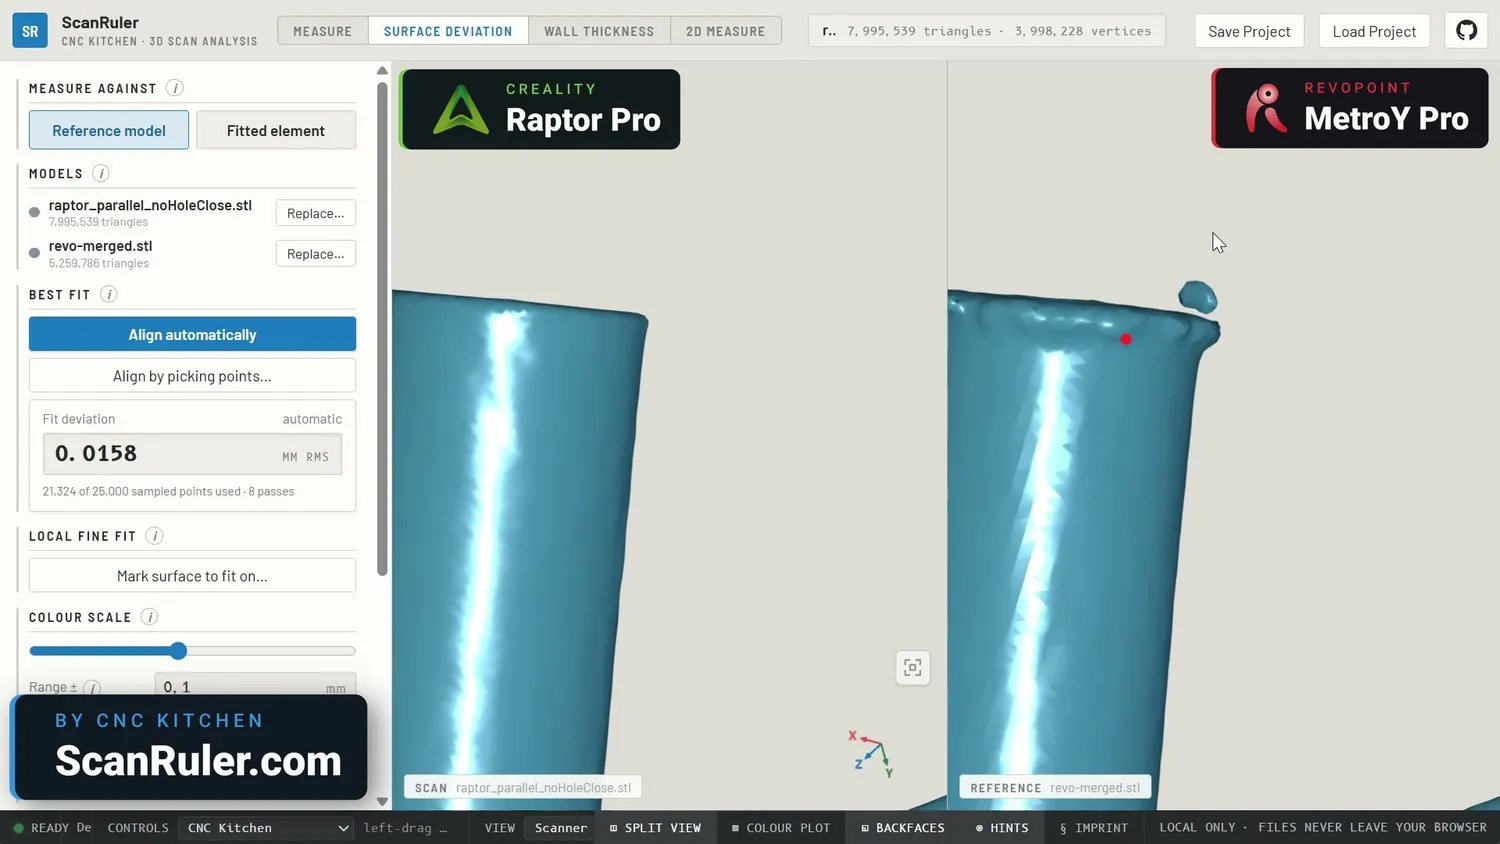
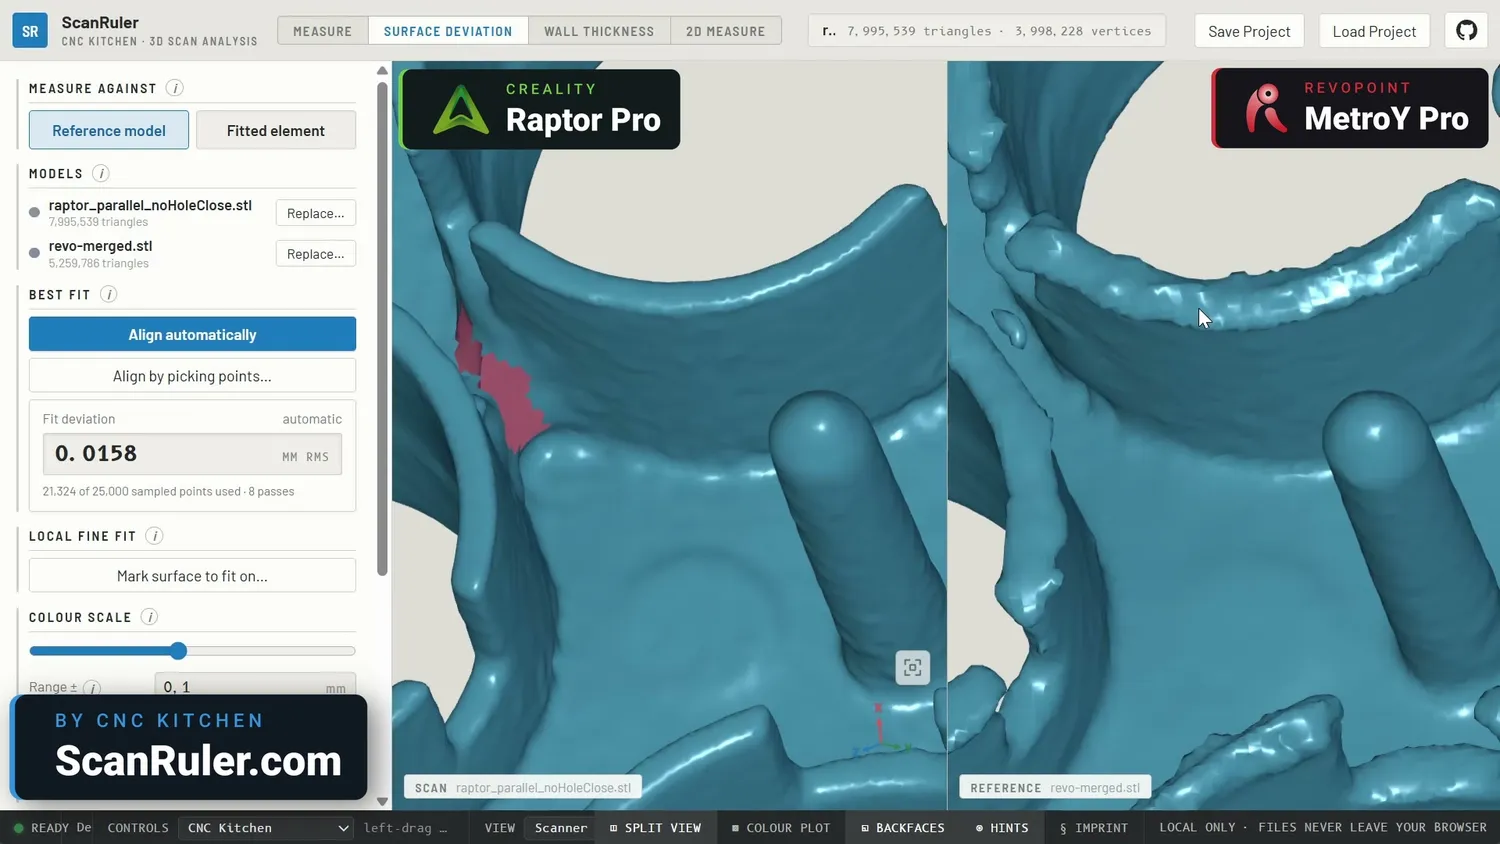
I’ve seen the same thing on several other scans. There might be a way to reduce this by tweaking scanning or processing settings, but I haven’t seen anything comparable on my Raptor scans.
I also scanned the top of the controller in all three scanning modes. Remember, the parallel-line mode gives you the most detail. It also takes the longest because you have to stay fairly close to the part. Cross-line mode captures a much larger area, and because you can scan from farther away, it’s generally faster. Full-field mode captures the entire frame at once. On a feature-rich object like this, it might not even need markers because the software can align the frames using the geometry itself.
There is a small difference in resolution between parallel-line and cross-line mode.
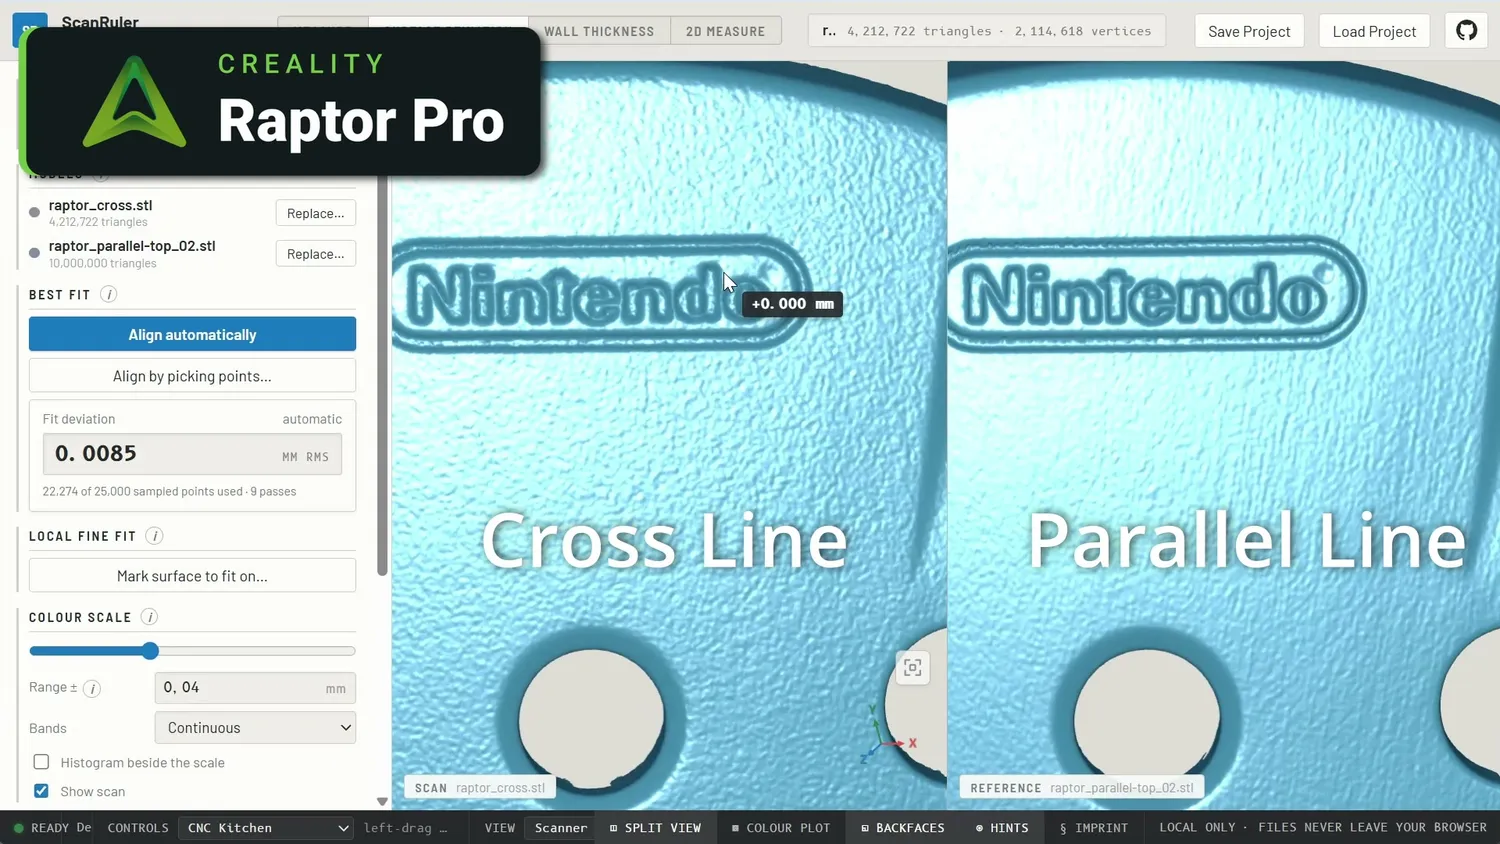 Cross-line vs. parallel-line resolution
But comparing either of those to the full-field scan is a completely different story. On a part like this, I personally don’t think the full-field result is worth using.
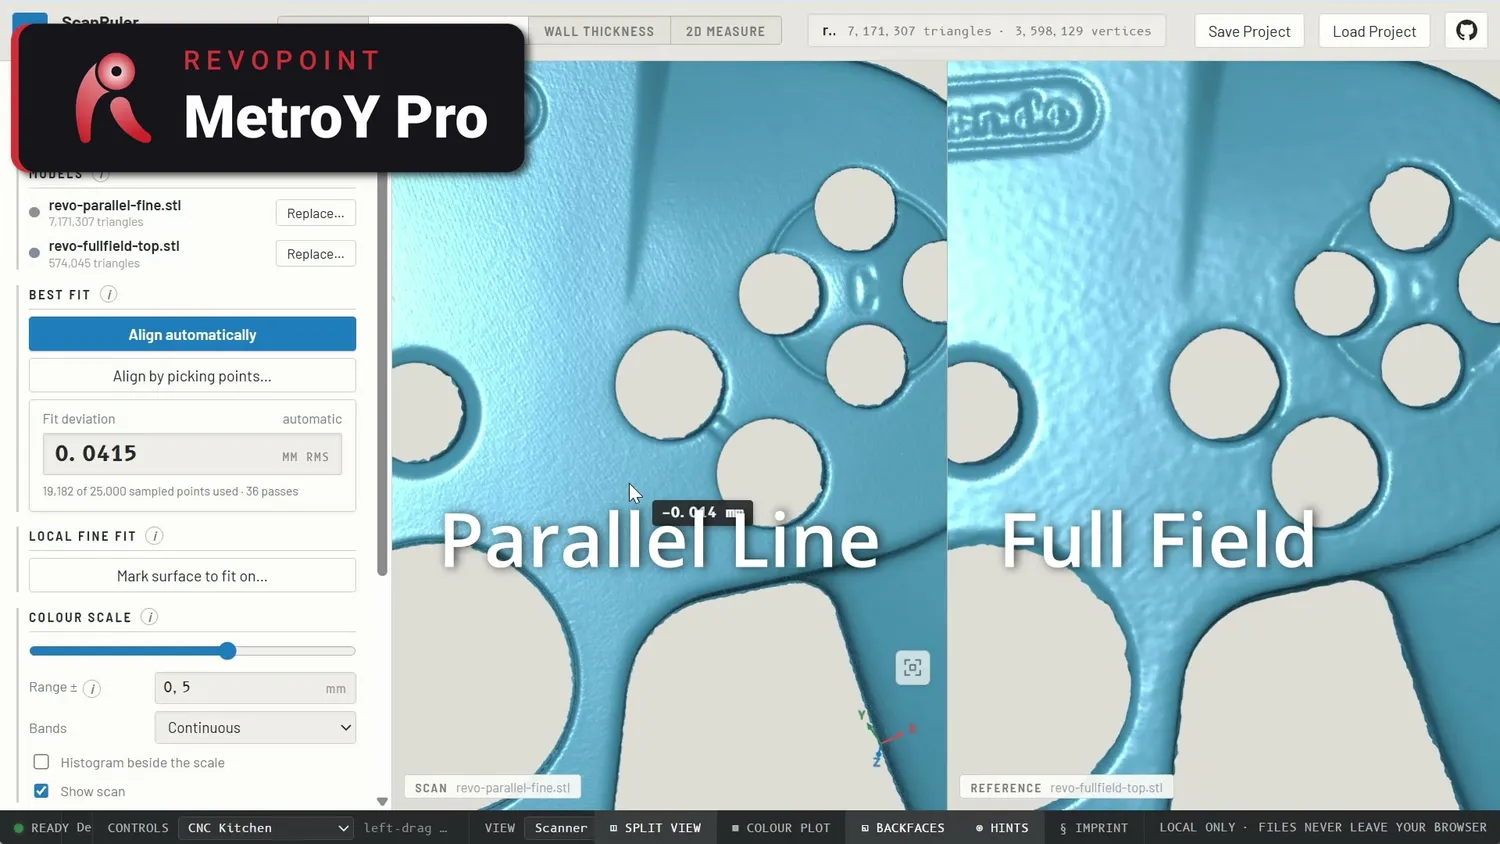 Full-field mode loses a lot of detail
Its main advantage is markerless scanning. In this case, you pay for that with significantly lower resolution and accuracy.
There is one improvement worth mentioning here. When I made my first Creality scanner video two years ago, I complained about very visible seams when merging scans from different orientations. The outer edges of each individual scan were slightly frayed, and once merged, those edges became obvious.
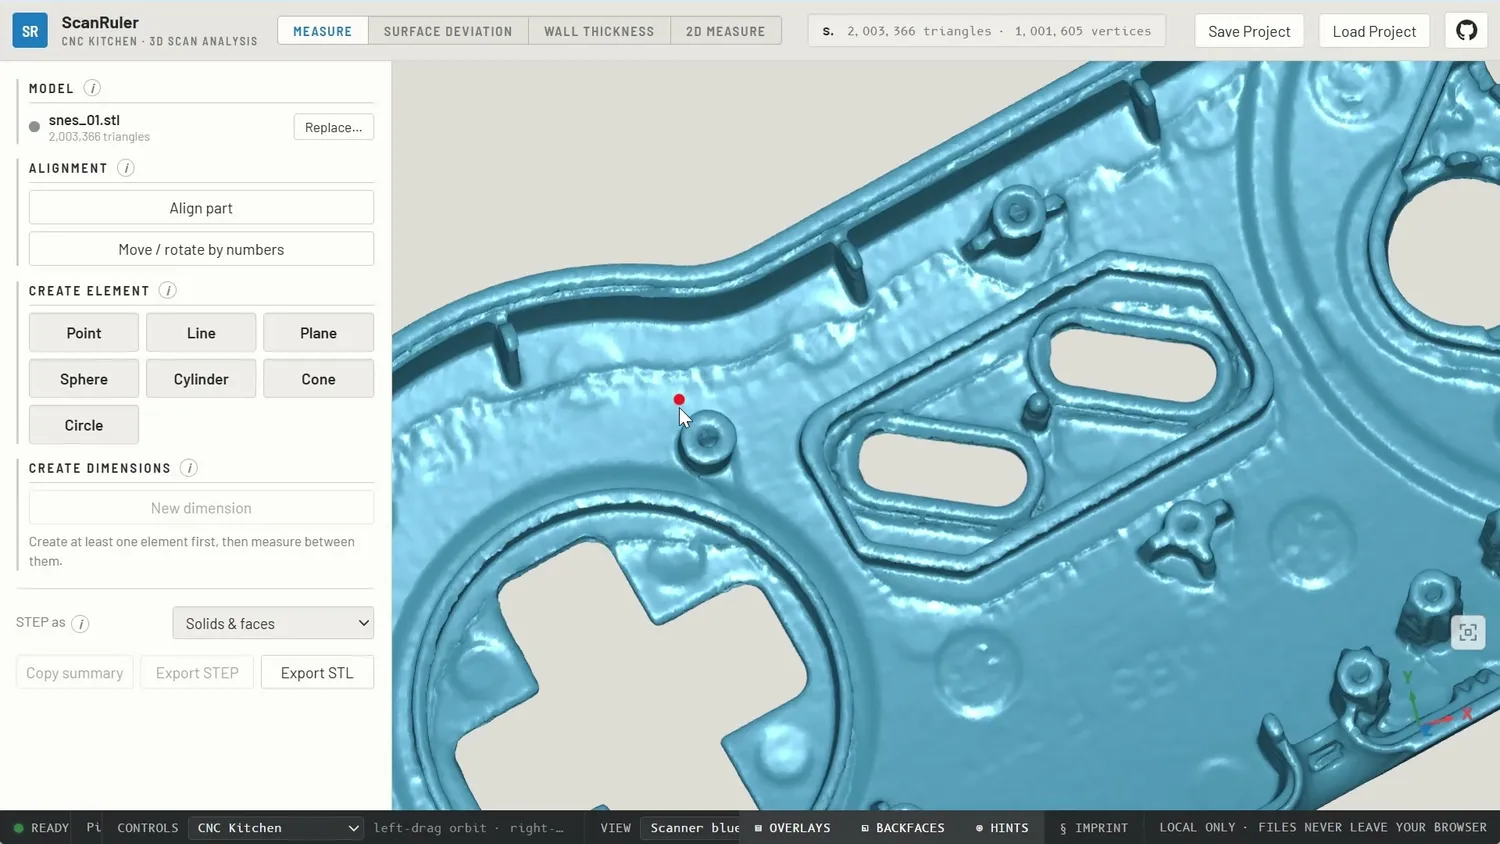 Frayed scan edges used to cause visible seams
I barely saw that problem with either of these scanners. I also scanned several other parts from different orientations, and the merging was especially clean with the Creality Raptor. You can take a closer look at all of these results in this article.
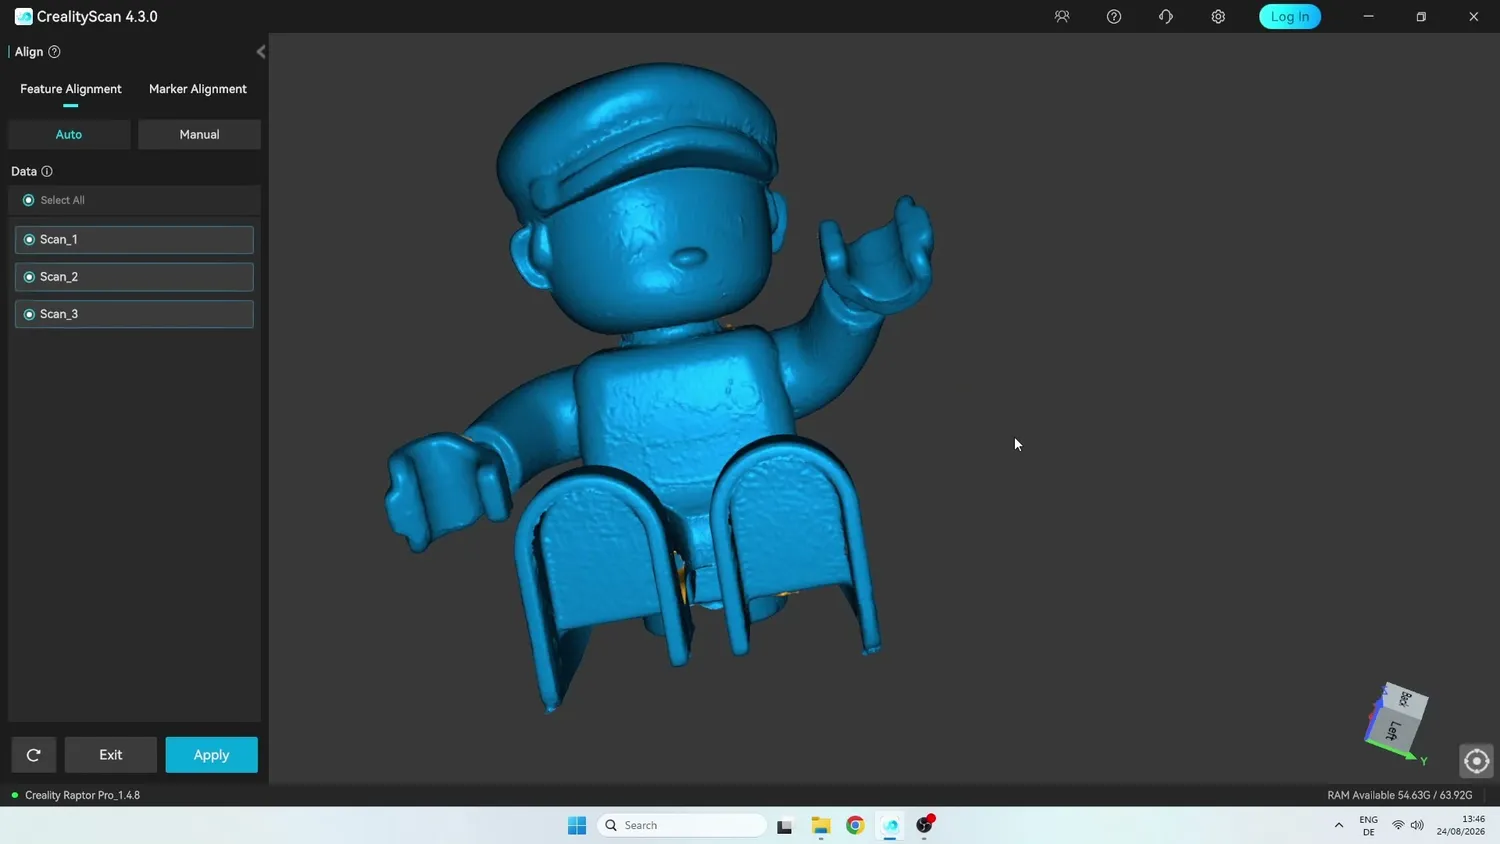 A cleanly merged multi-orientation scan
So for resolution and scan quality on this part, the clear winner is the Creality Raptor Pro.
How accurate are these scanners really?
But what about accuracy? Judging scan accuracy is difficult if you don’t have a proper reference. Even scanning a 3D print and comparing it against the original CAD model isn’t a great test. You might see significant deviations, not because the scanner is wrong, but simply because the printed part warped. That’s something people often underestimate.
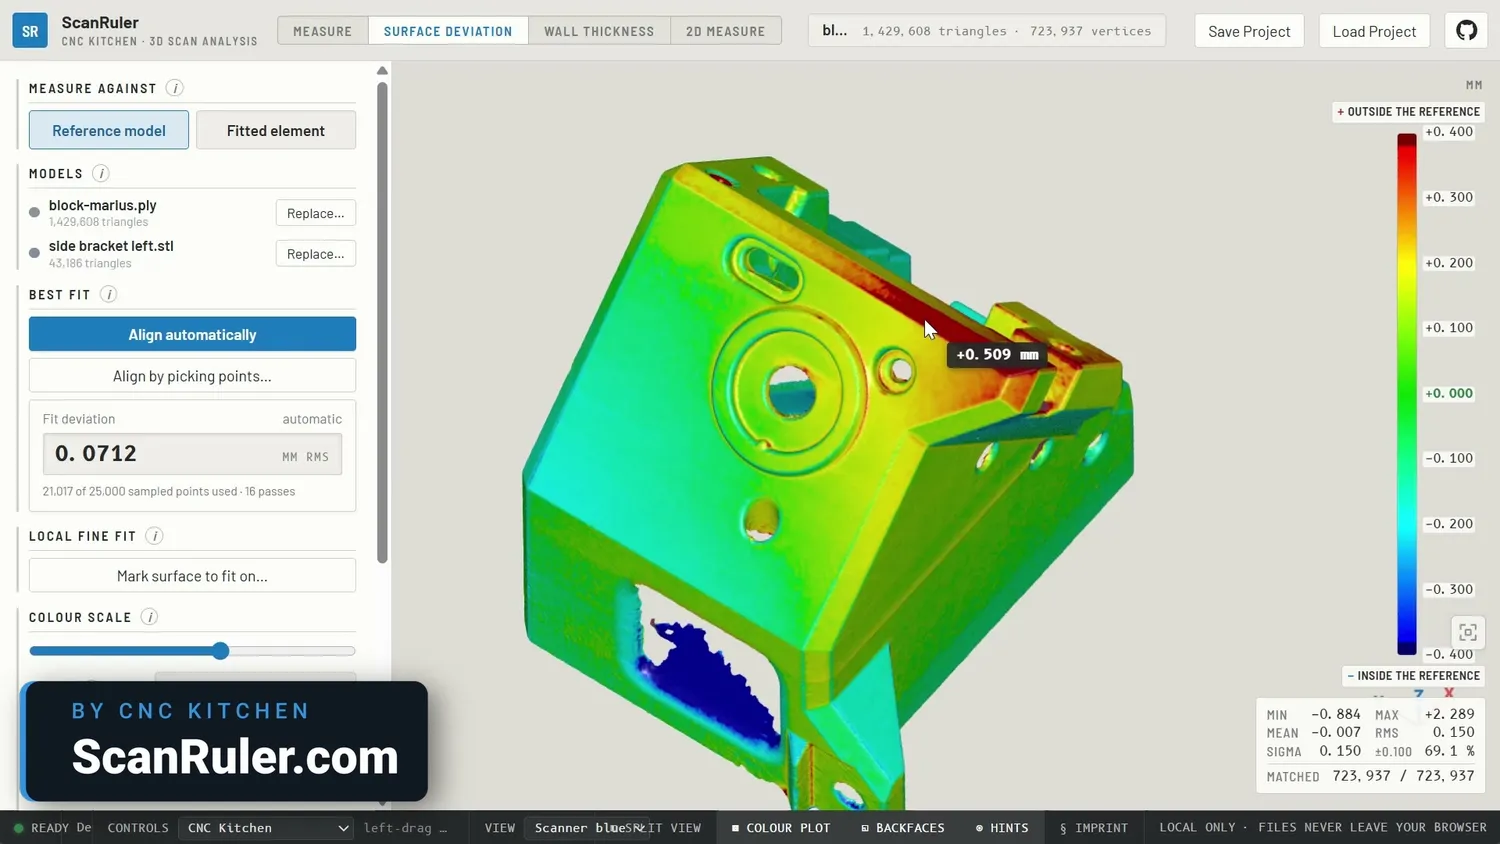 Print warp shows up as deviation
According to its datasheet, Creality claims an accuracy of 0.02 mm plus another 0.08 mm per meter of scan length. That means a one-meter-long part should still be measurable to around 0.1 mm. Revopoint claims an even better figure of 0.02 mm plus only 0.04 mm per meter.
Validating those numbers isn’t easy without a very accurate reference standard. Simply scanning your desk and checking it with a tape measure won’t tell you much because you don’t know whether the tape measure itself is more accurate than the scanner.
One calibration standard commonly used for 3D scanners is a ball bar. It’s basically two precision spheres connected by a rod.
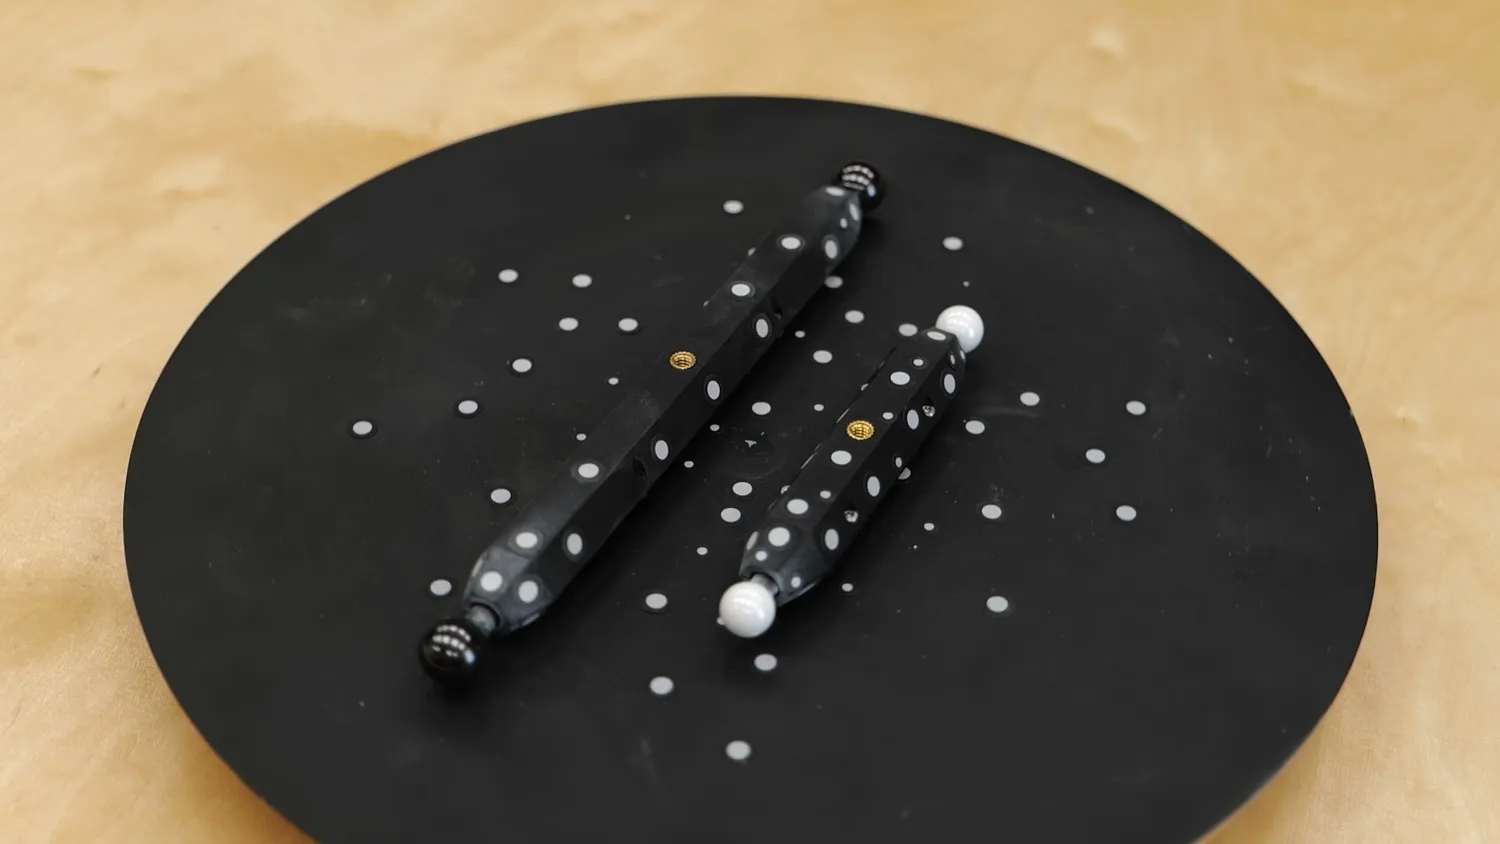 My DIY ball bars
You can accurately measure the diameter of both spheres and their total outside distance. From that, you calculate the distance between the sphere centers. And that center-to-center distance is something you can also measure very reliably from a 3D scan.
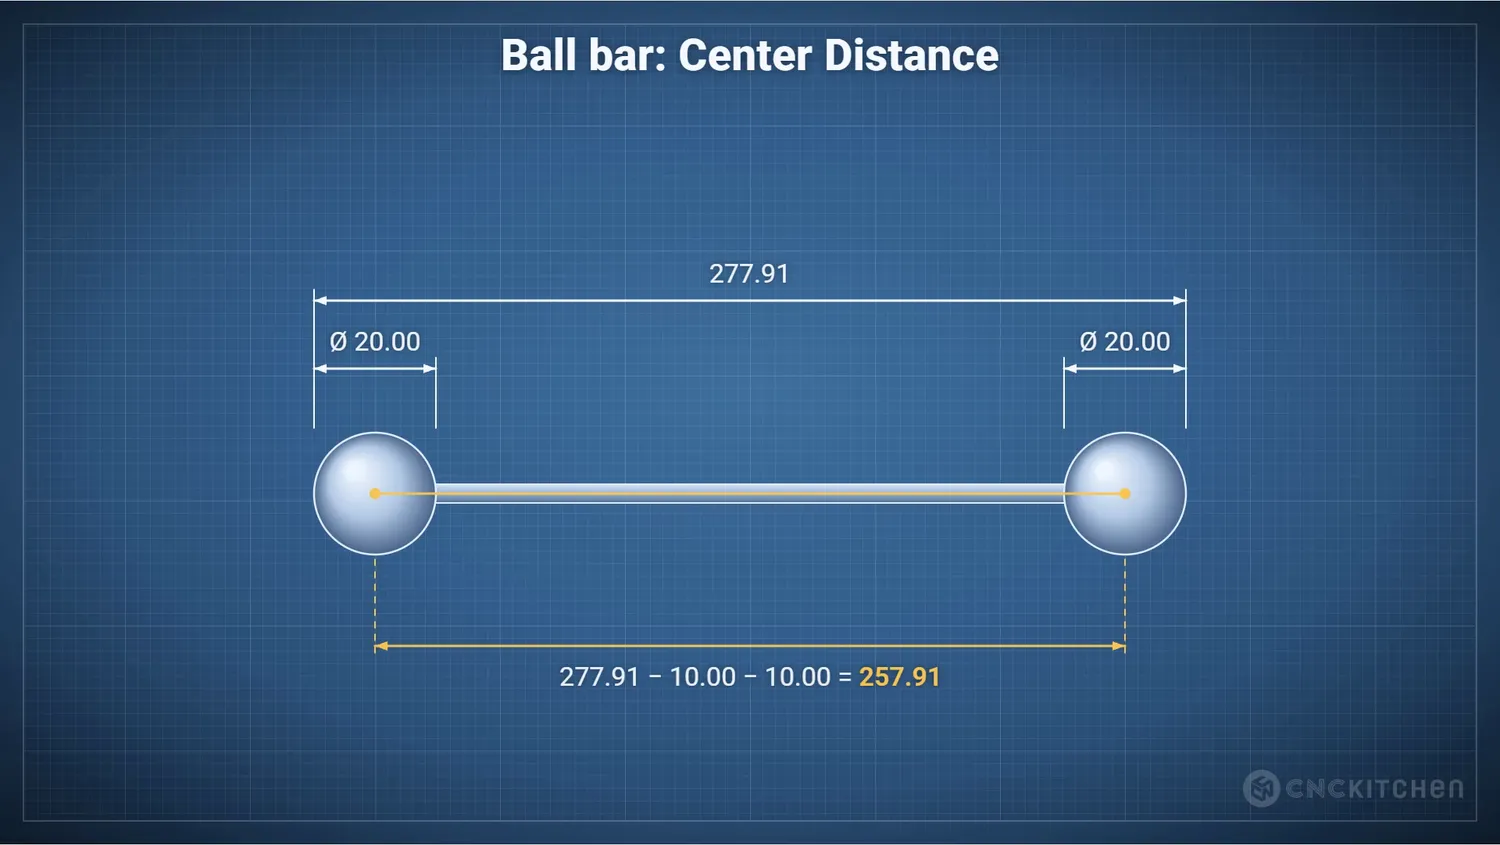 Center distance from two simple measurements
So I made two of them myself. I simply epoxy-glued two precision ceramic spheres onto a carbon-fiber rod and printed a housing around it with plenty of scanning markers. One has a sphere spacing of roughly 250 mm and the other around 150 mm.
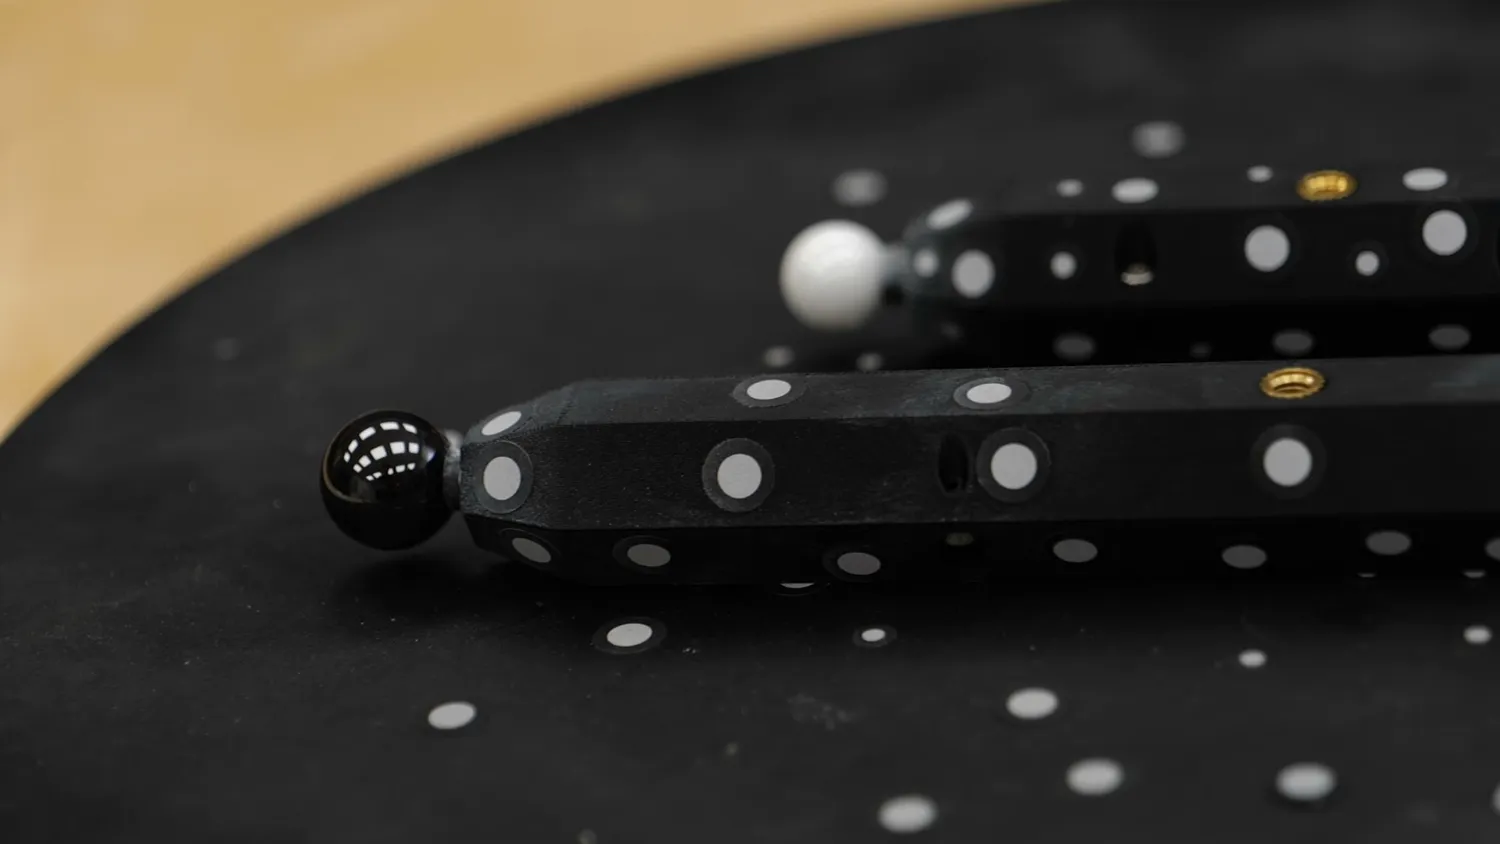 Ceramic spheres on a carbon-fiber rod
I then scanned both references several times with both scanners in parallel-line, cross-line and full-field mode. I repeated the tests on different days and with different scanning orientations.
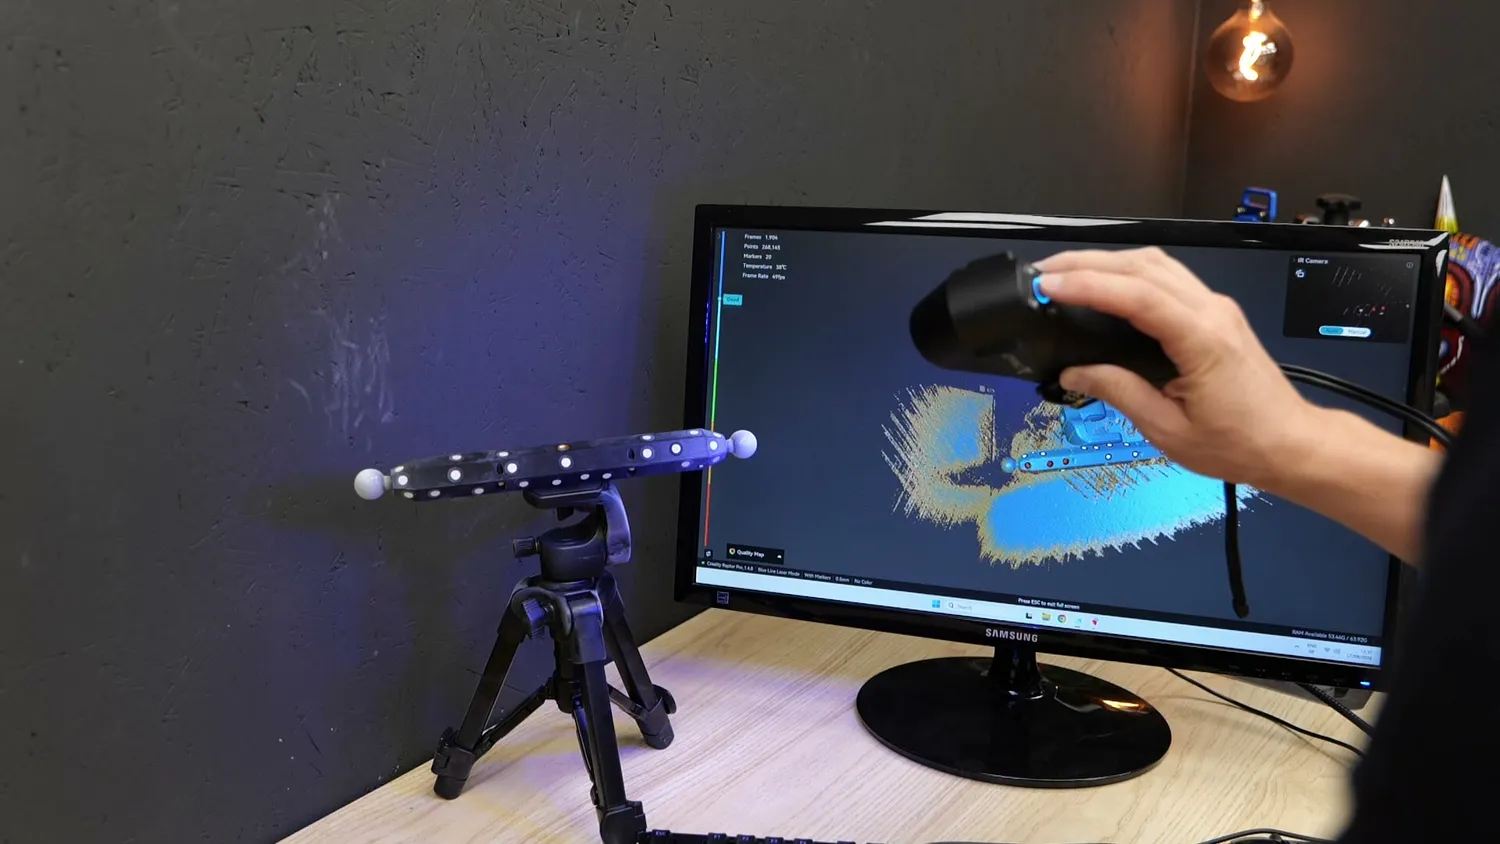 Scanning the references in every mode
Then I loaded everything into ScanRuler, fitted spheres to the scanned geometry and measured the distance between their centers. ScanRuler can by the way fit a range of different geometries on your 3D scan that you can use to simply measure features but also export those bodies as STEP geometry and then import that into for example my favourite browser-based CAD software Onshape where you can use this to easily and efficiently reverse-engineer your 3D Scan to either make a clean replicate or to modify it to your needs!
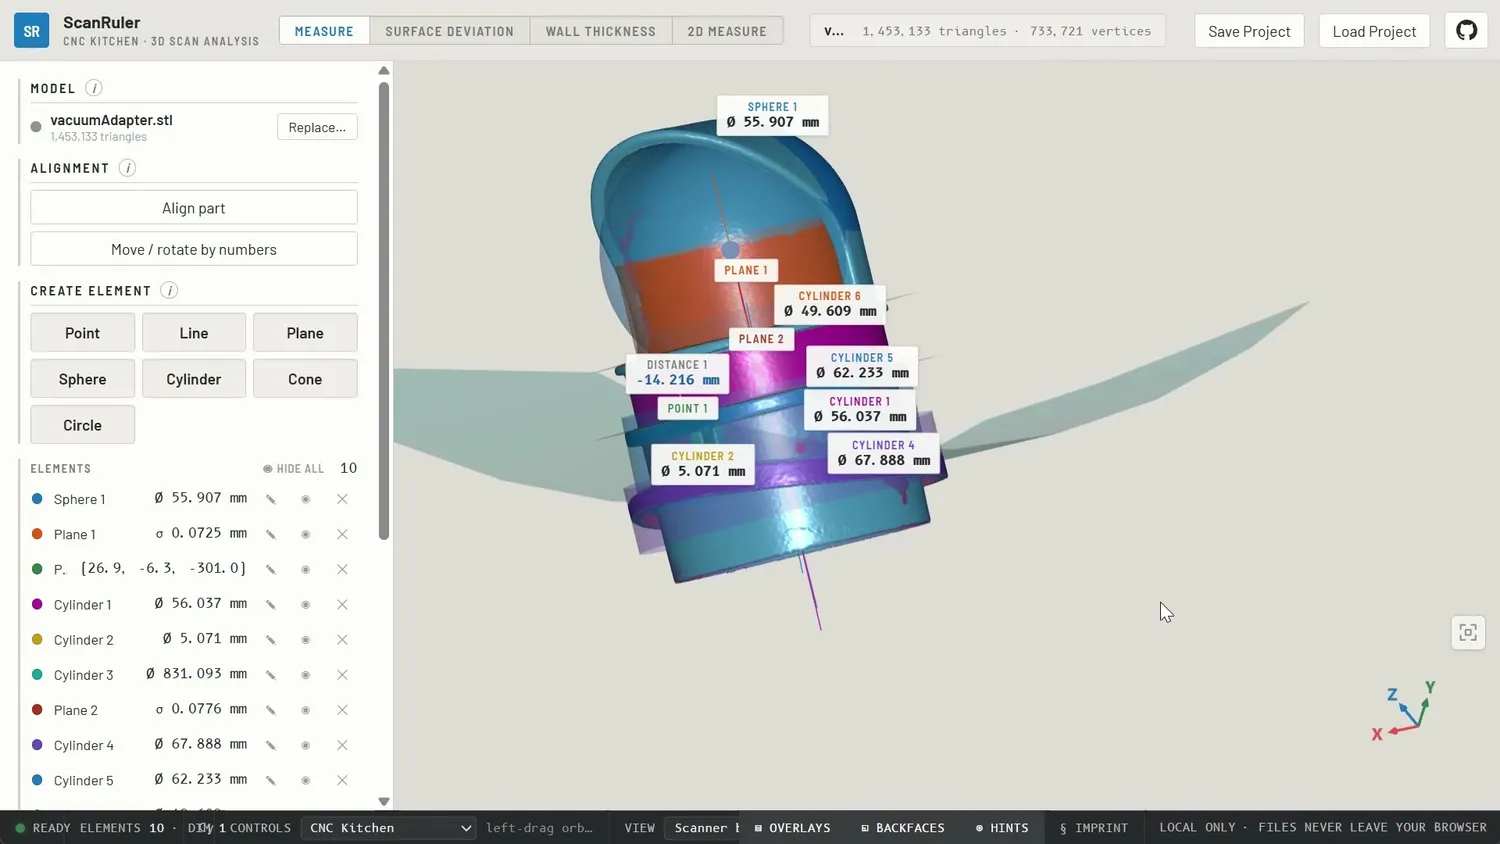 Fitting spheres and cylinders in ScanRuler
But now back to the ball-bar scans because those results were interesting. I’ve put my data in this plot right here. The bars are my measurements, and the orange areas show the accuracy that the manufacturers claim.
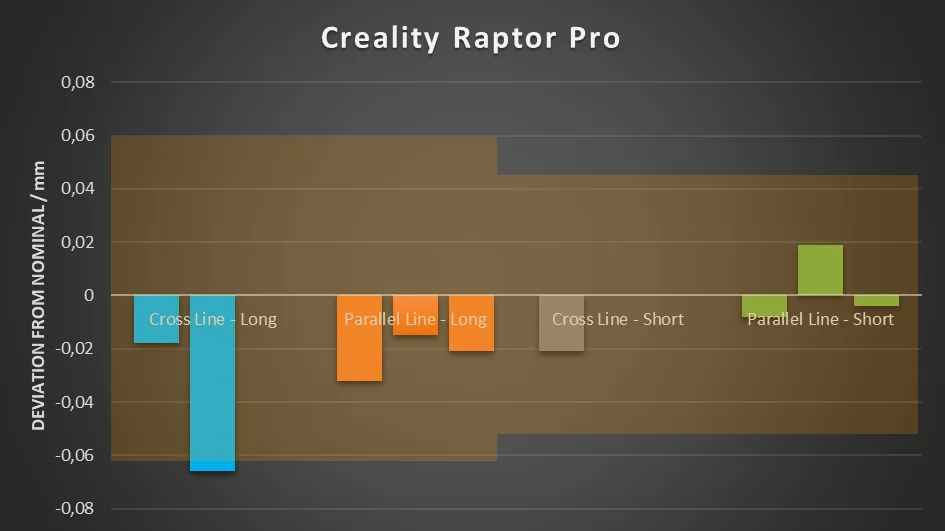 Creality Raptor Pro ball-bar results
On the Raptor Pro, I had one measurement slightly outside the specification. All others varied by about +/- 0.02 mm from the reference length. The Metro Y was generally similar, but two measurements on the short ball-bar were slightly outside the specification. The rest were within +/- 0.03 mm.
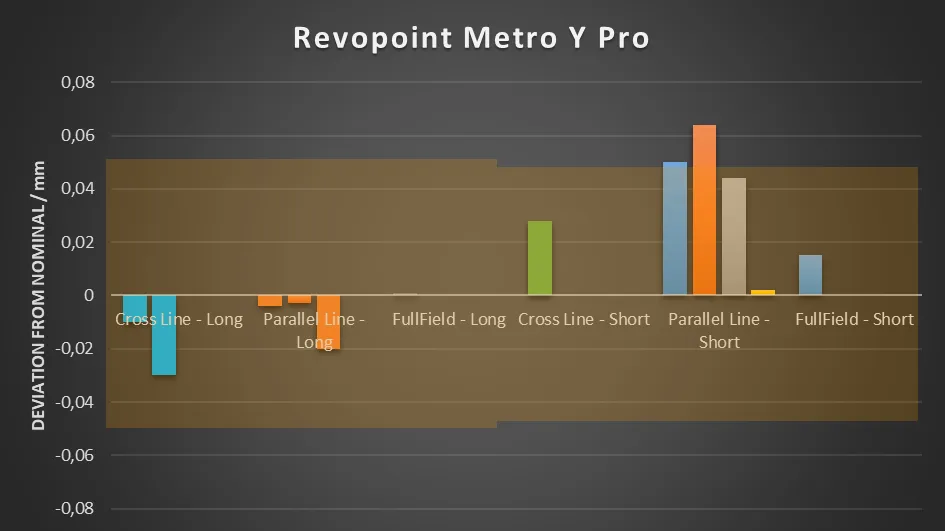 Revopoint Metro Y Pro ball-bar results
The Metro Y is noticeably more picky with the scan settings and also has these frayed edges, which could contribute to the deviations. This is simply something with what you need to deal with when using an optical measuring instrument.
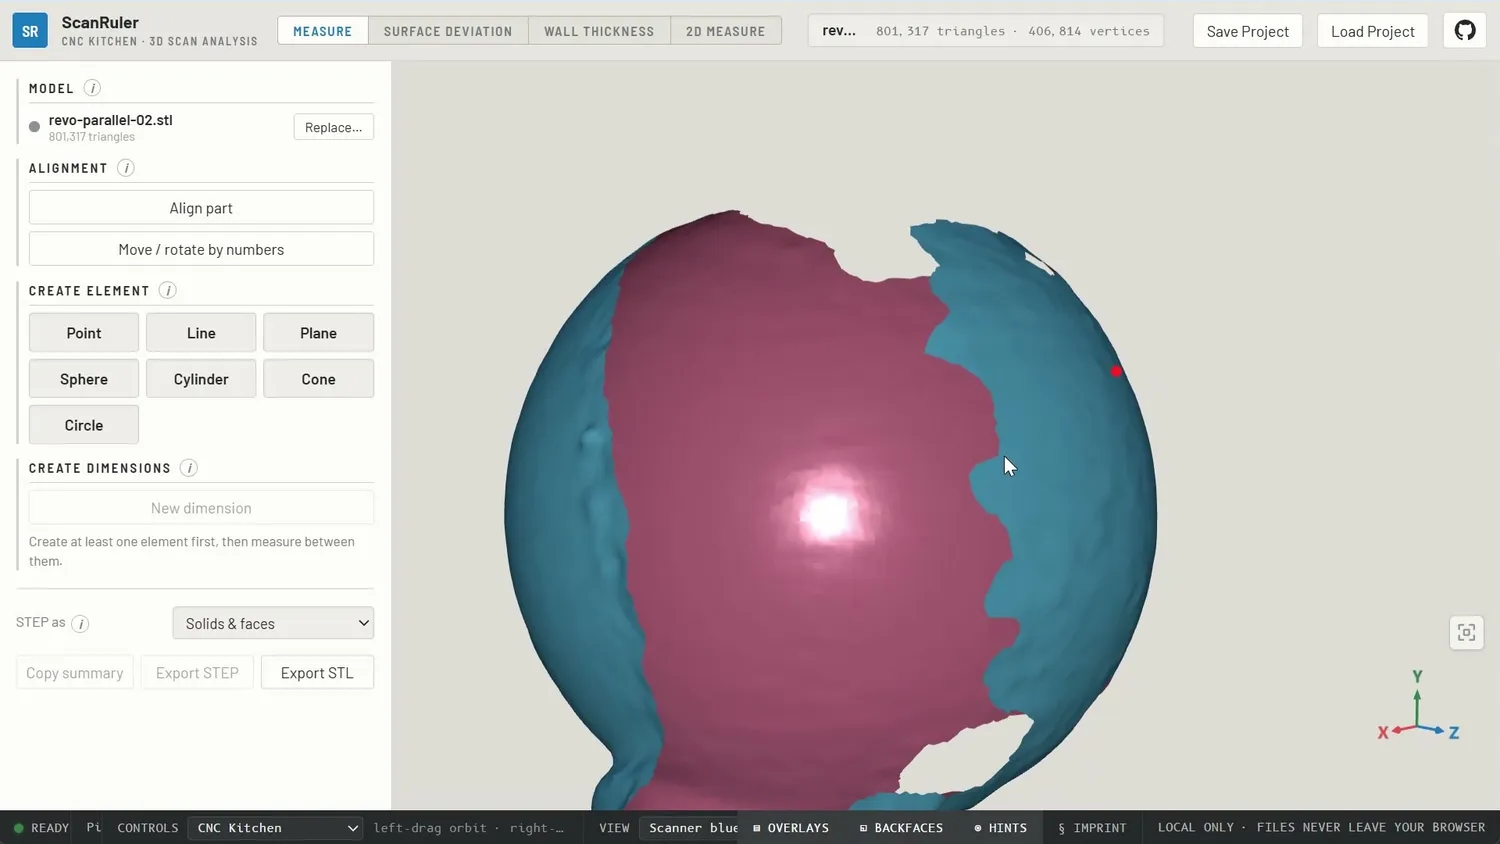 Frayed edges on a scanned sphere
For my applications, this level of precision is plenty. Whether it’s enough for your application is something you’ll have to decide yourself.
Another thing worth remembering is that scanning spray* adds a physical layer to the part. That layer might actually be thicker than some of the deviations I measured here.
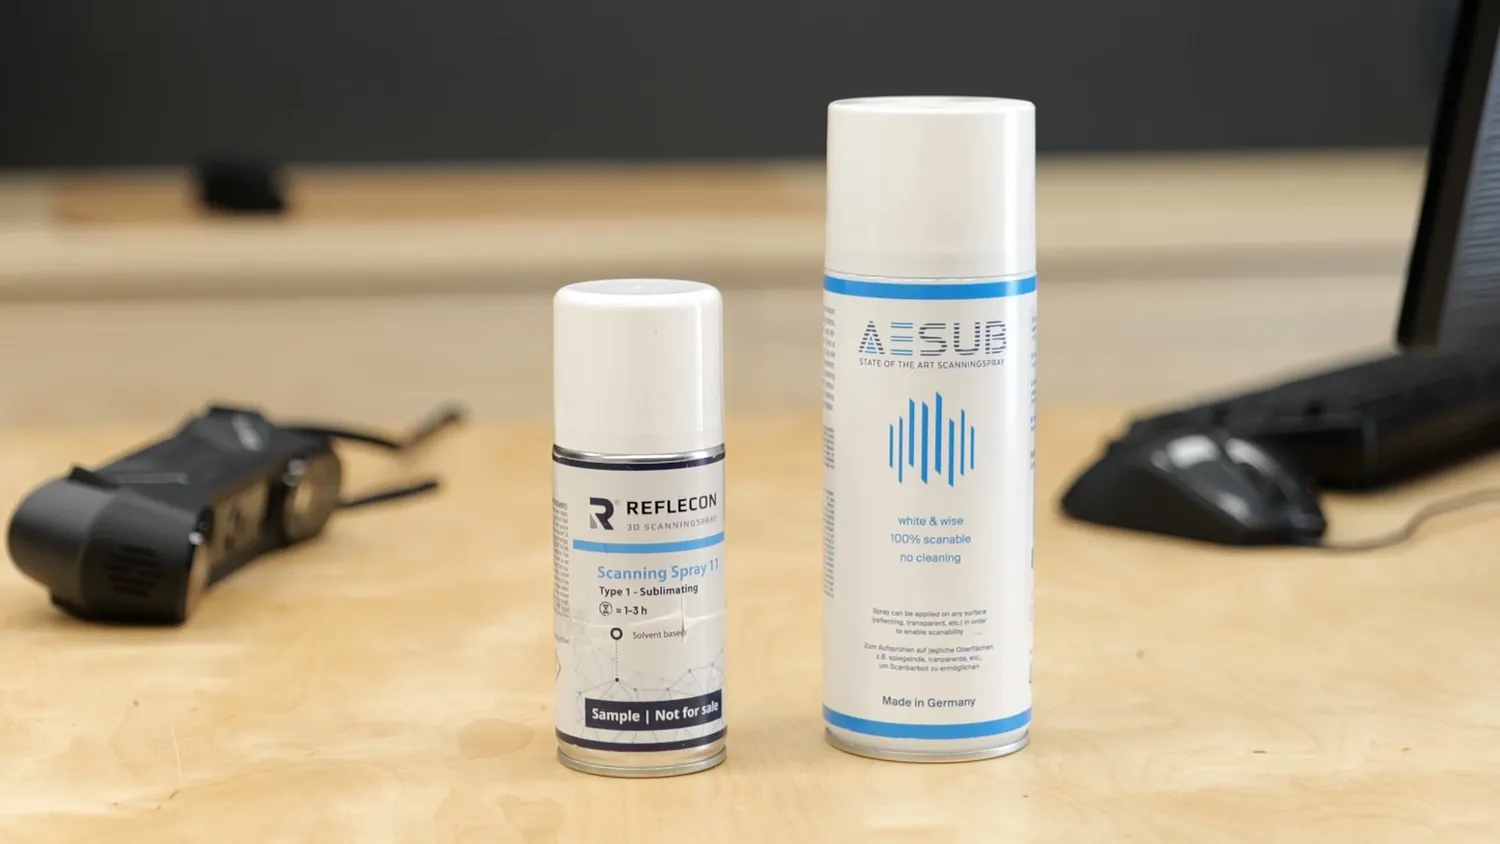 Scanning sprays add a physical layer
And this is something I often see people get wrong. They absolutely blast the part with a thick white coating. You usually only need to lightly dust the surface and wait a few seconds until the spray dries and you can see the final matte finish.
A tiny brass valve and a Vespa carburetor
Which brings me to the next part I tested. And this one is really small. This is a float needle valve from my Vespa carburetor that I need to replace.
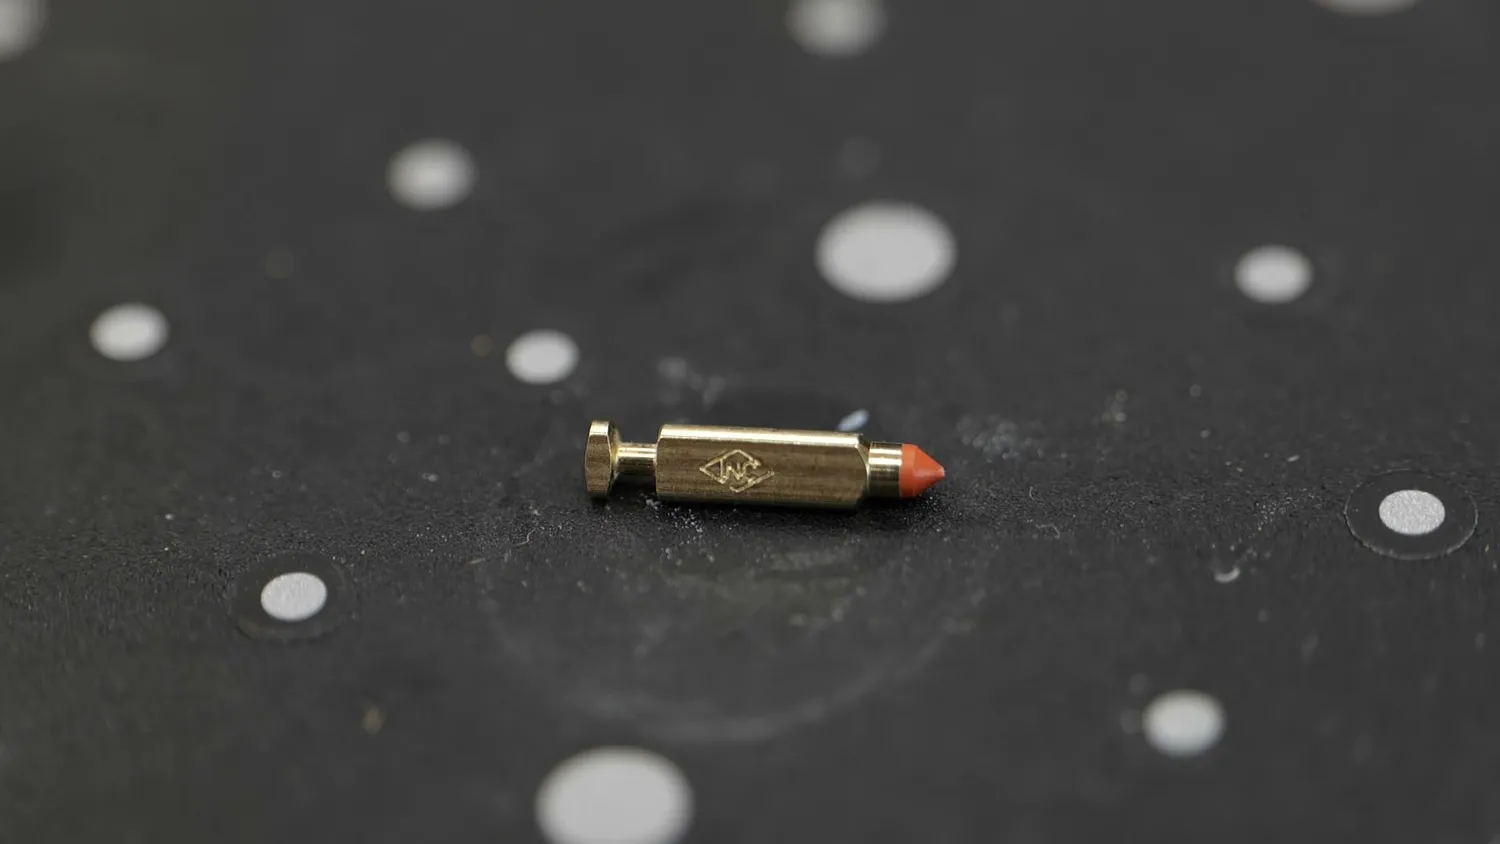 The next test part is really small
It’s challenging for two reasons. It’s tiny, and it’s made from shiny brass. So let’s see what happens if we try scanning it without any spray.
The Raptor Pro did a good job. Despite the reflective surface, it scanned the part without any surface preparation, and you can even see the stamped marking in the scan.
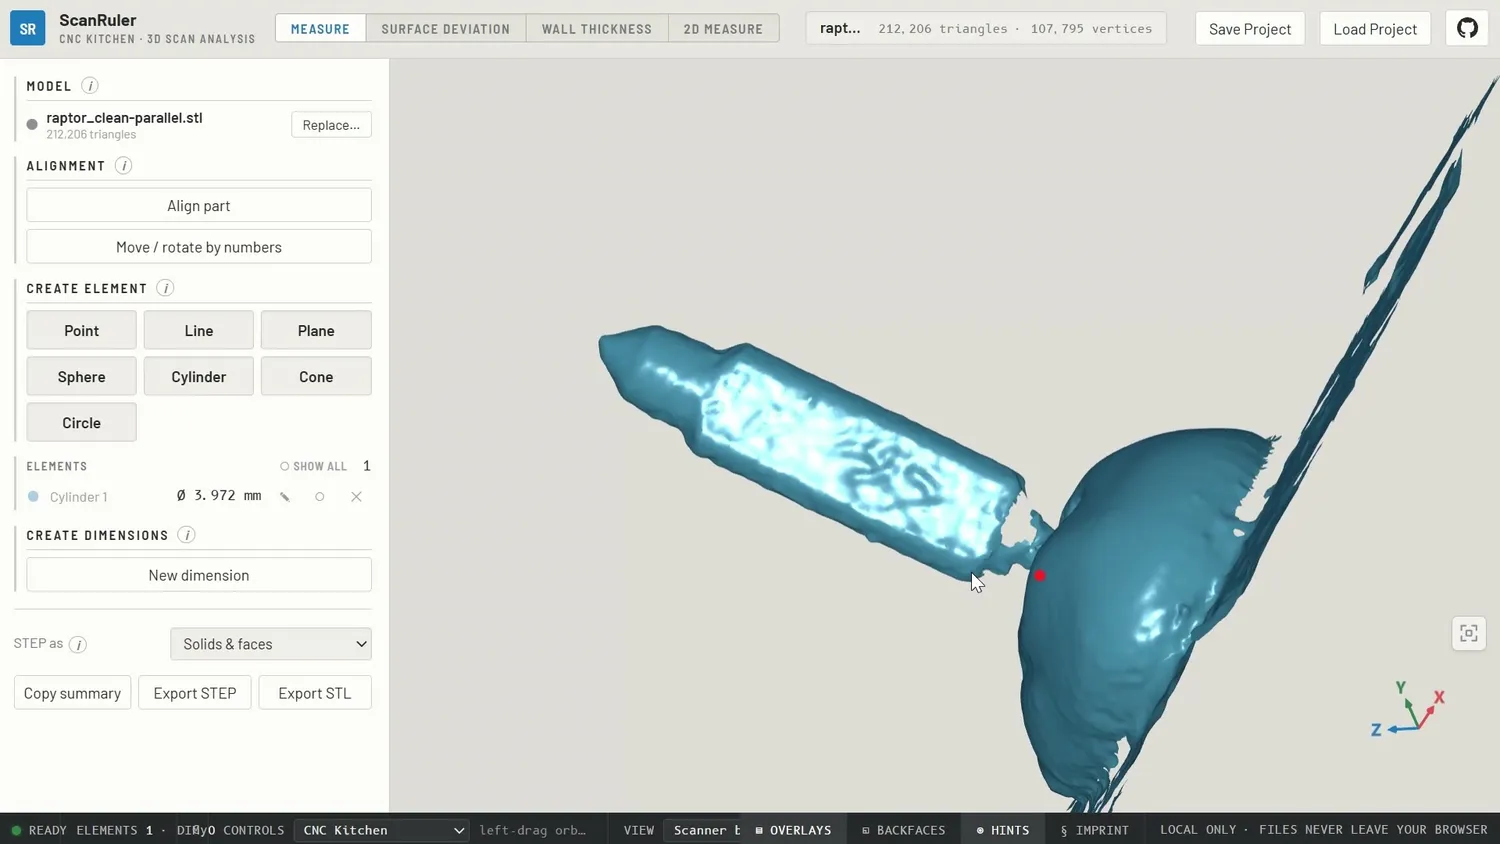 Even the stamped marking is visible
The Metro Y really didn’t like this part. On my first attempt, it basically captured nothing. I played around with the settings and eventually got usable results by significantly increasing the laser brightness. But once again, the Metro Y was missing some of the fine detail captured by the Raptor.
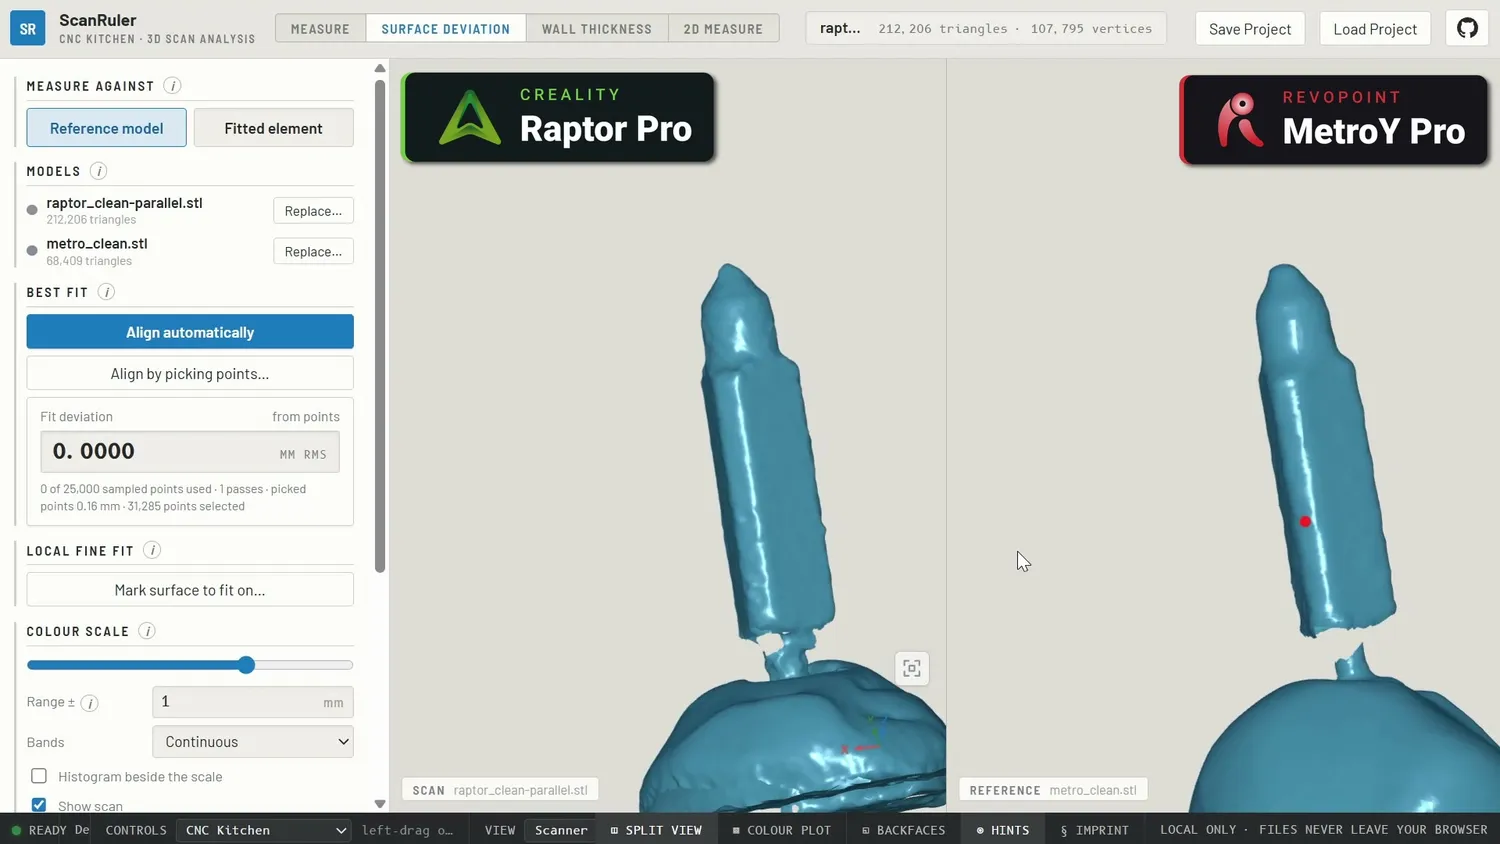 The Metro Y misses some fine detail
It’s interesting that the resolution setting on the Metro Y only goes down to 0.15 mm, while the Raptor allows up to 0.07 mm in its high-resolution mode. And you can see that difference in details like these.
Even though both scanners can, to some extent, capture shiny metal surfaces, you will still get better results if you spray them with scanning spray for a matte white finish, which reduces reflections. This typically improves scanning results but adds an extra preparation step. In the past, chalk sprays were used, which you had to clean off your parts later. These days, there are sprays that evaporate after a bit, making the process more convenient. From my experience, they can also be tricky to work with at higher temperatures because the coating can quickly flash off, making results hard to reproduce. There are “slower” sprays these days, but I haven’t tried those out yet.
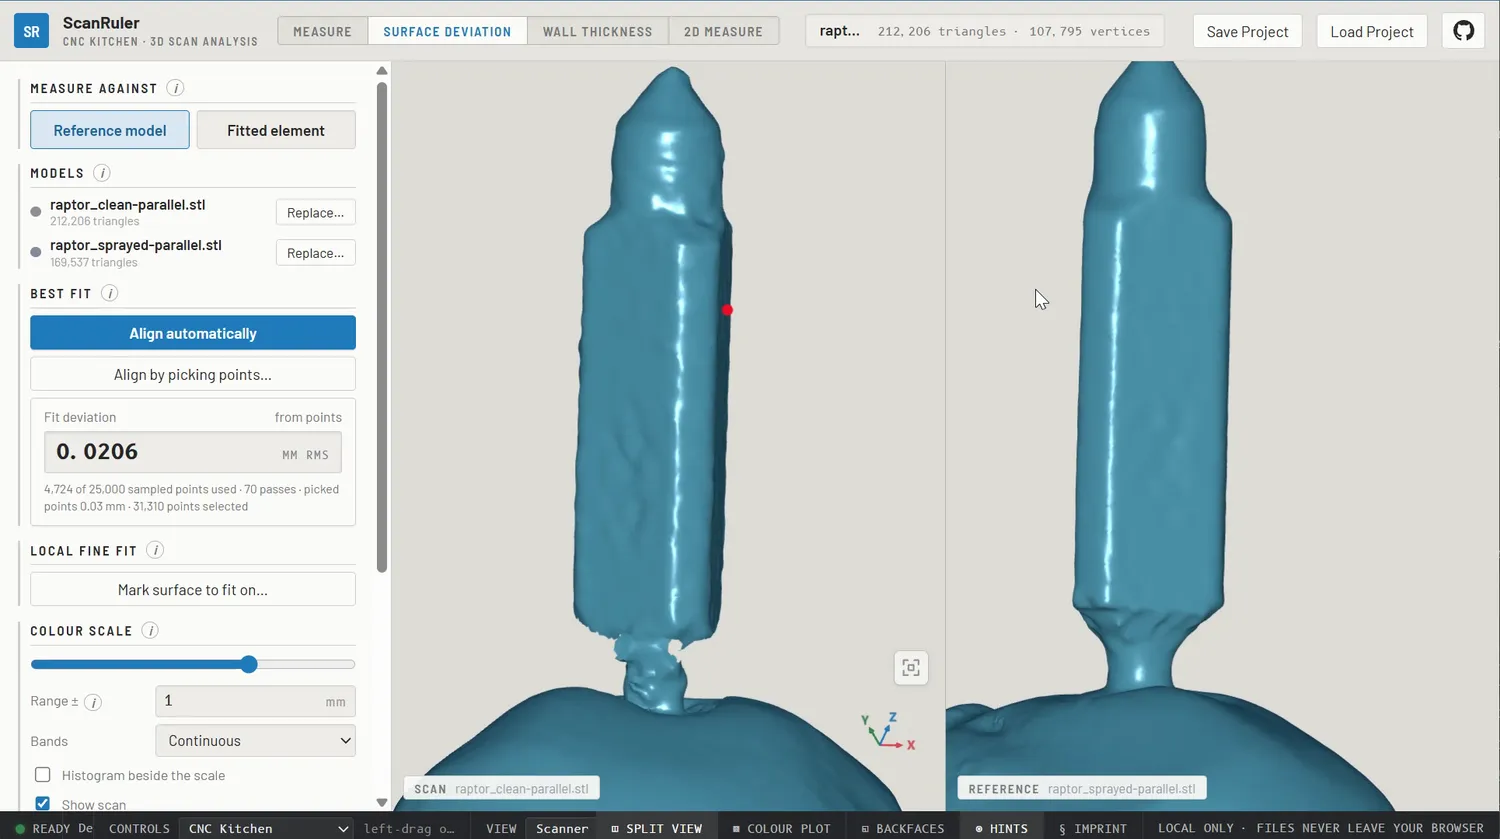 (left) without spray, (right) with scanning spray
Next, I scanned the carburetor itself together with the attached air filter. This is a nice technical test part because it combines lots of different surfaces. There is dark rubber, matte metal, shiny metal and small details like the springs.
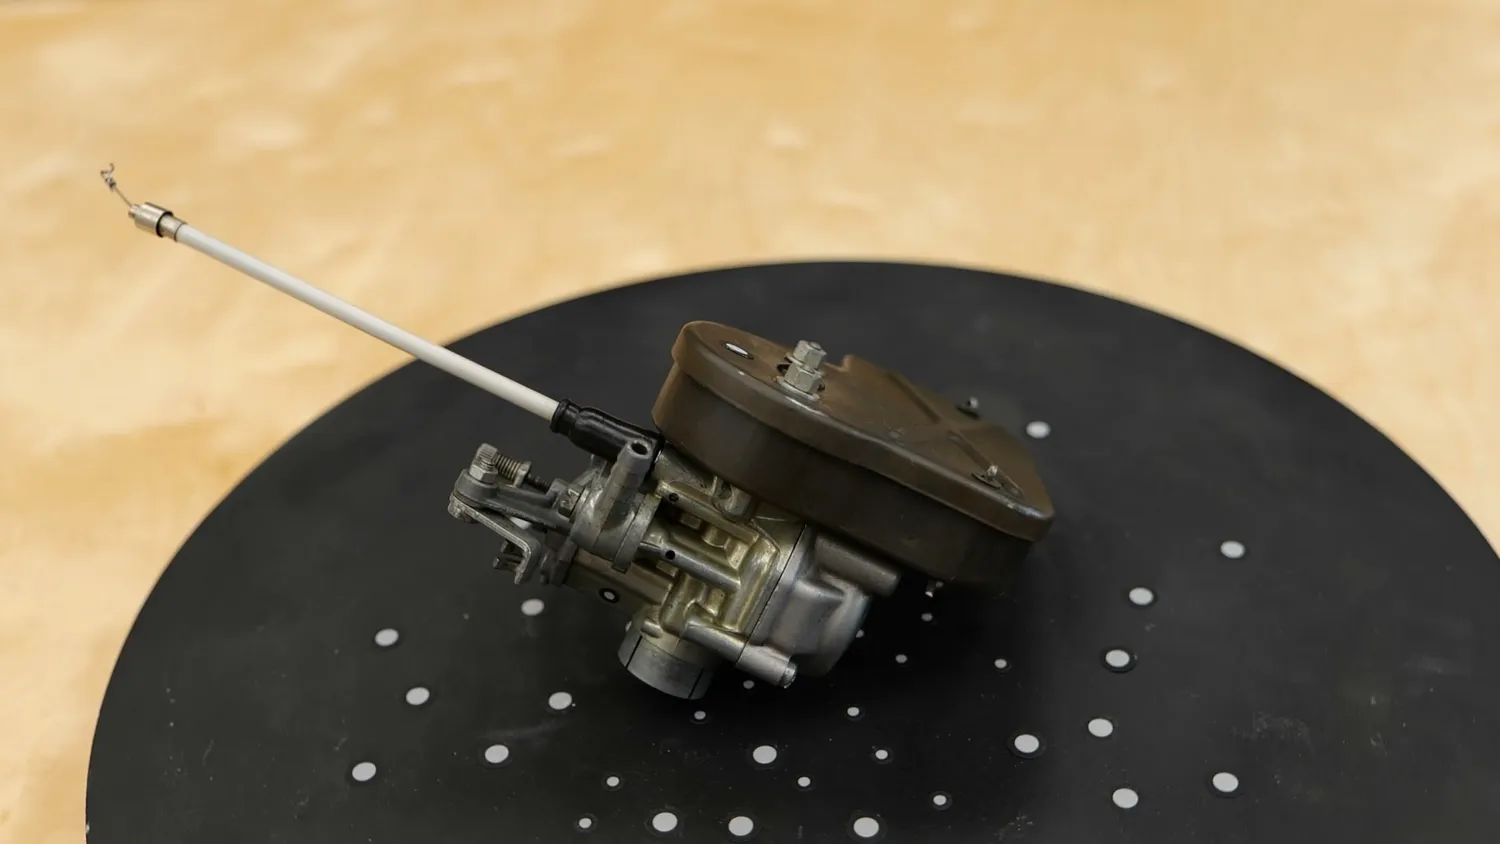 The Vespa carburetor with its air filter
I started with the Revopoint Metro Y Pro. Overall, it did a pretty good job. Its main problem was automatically adjusting the exposure between the reflective metal and the black rubber. I again scanned the part in all three modes.
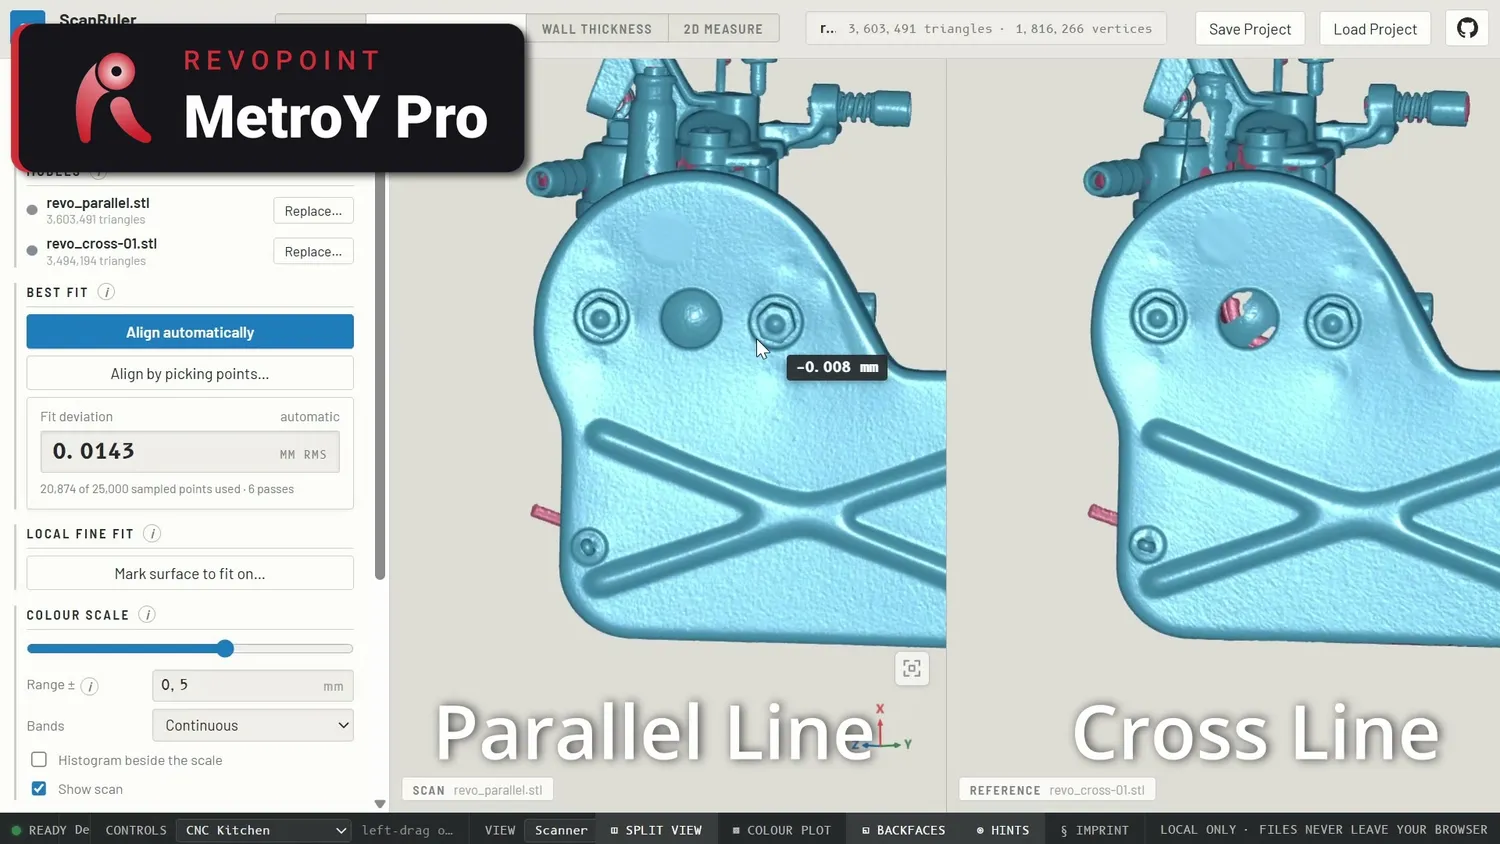 Parallel-line vs. cross-line on the carburetor
Parallel-line and cross-line scans looked remarkably similar, with only slightly less detail in cross-line mode. Full-field mode on the Metro Y was another story. Without any surface preparation, the result simply wasn’t very good.
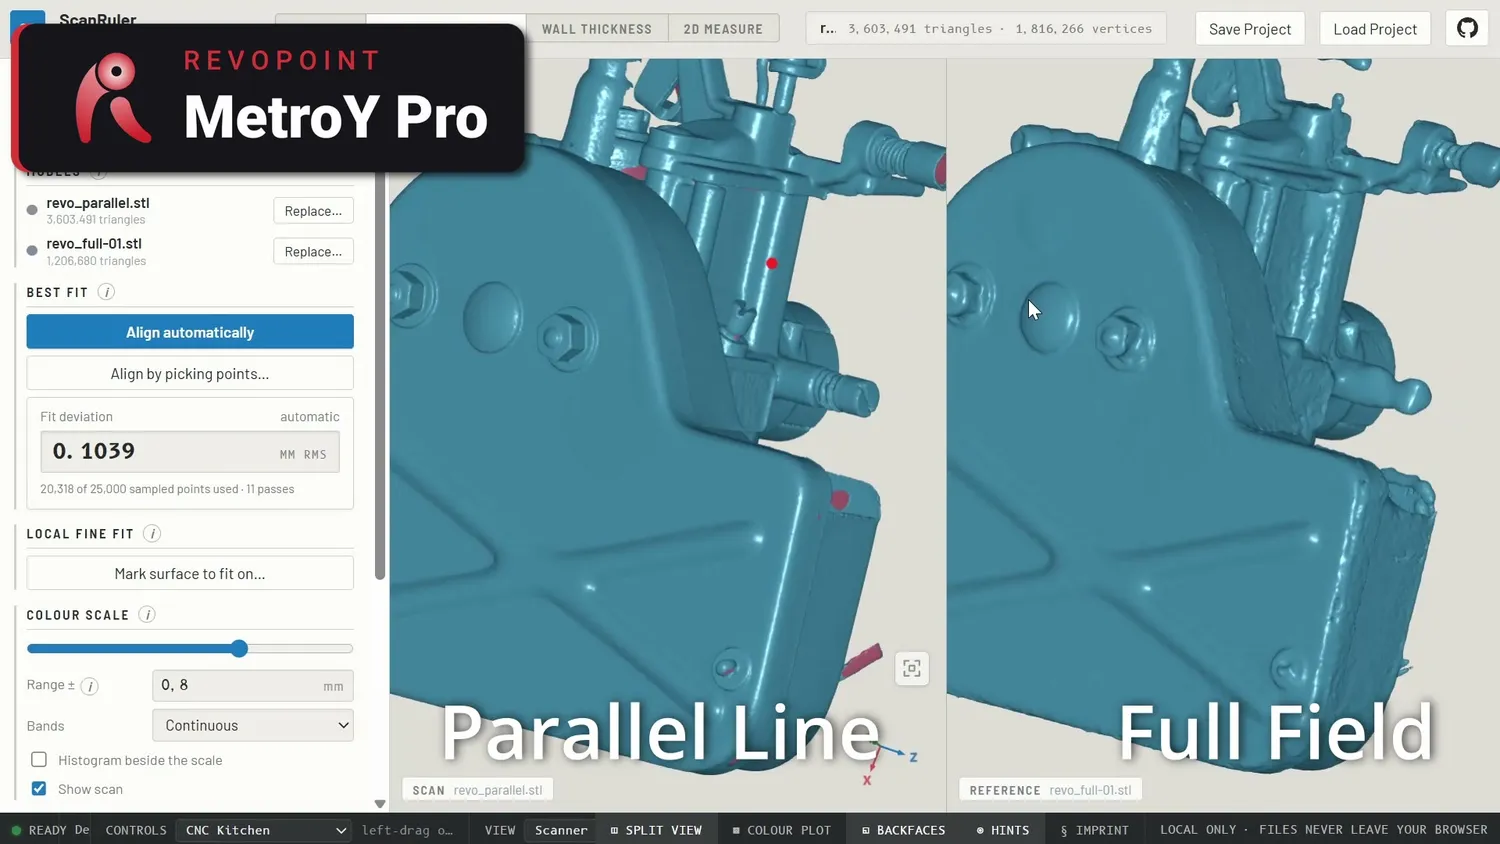 Full-field mode without surface preparation
Comparing the Metro Y against the Raptor tells a similar story to the controller. Creality’s scanner simply captured more detail.
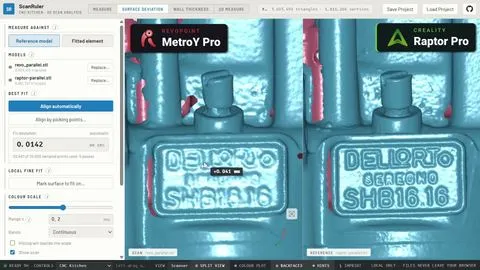 (left) Metro Y Pro, (right) Raptor Pro
You can see that clearly in the text and the springs. It also handled the mix of different surface types better, so even the black rubber scanned nicely without me needing to adjust settings.
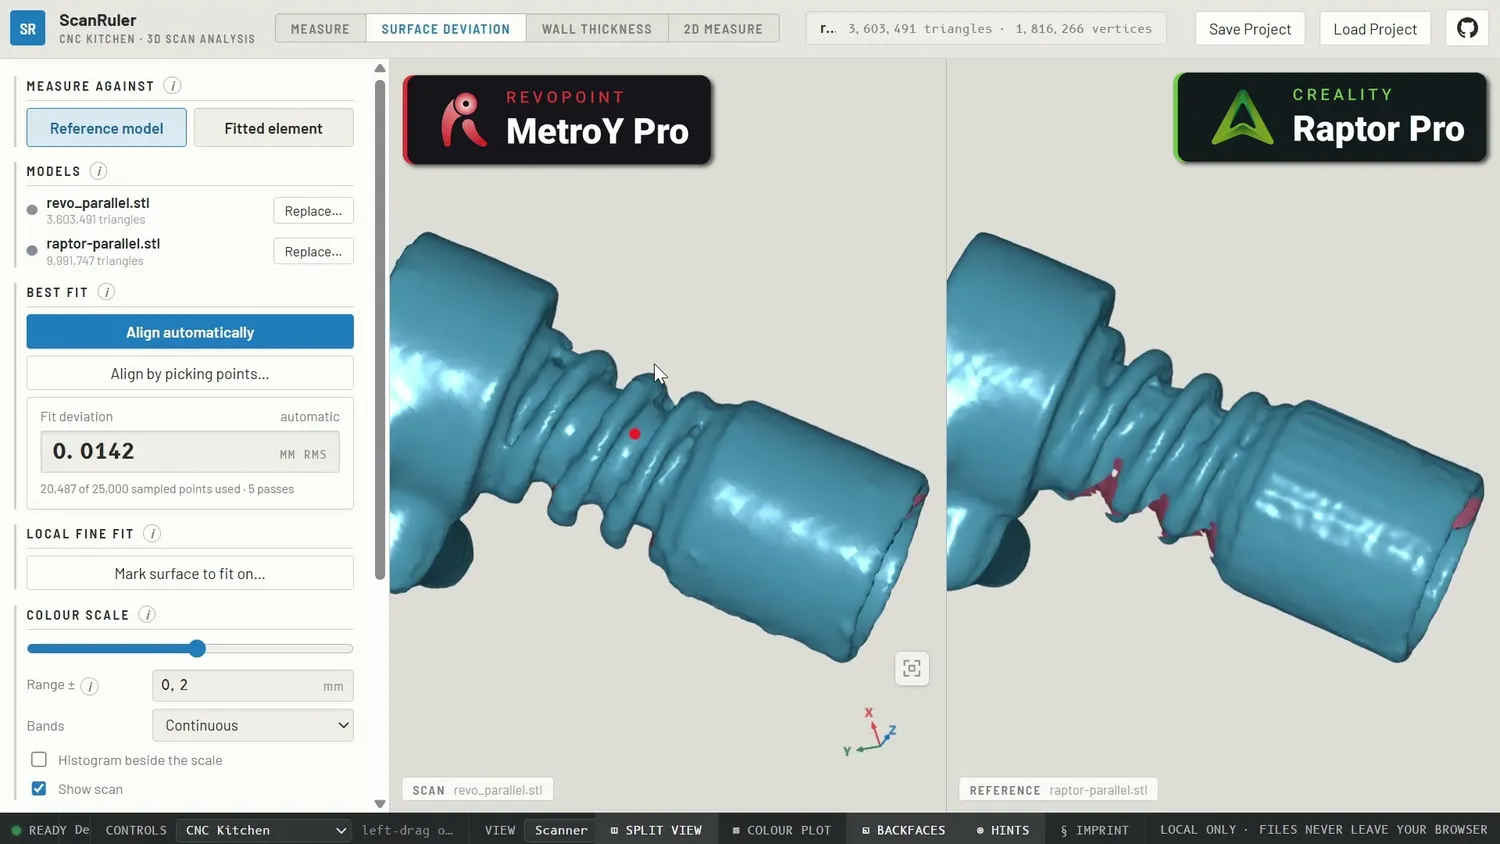 Springs and rubber parts compared
Scanning the Vespa and a human head
Let’s move on to the big specimens. First, the front of my Vespa, and after that, a human sample. Let’s start with the scooter.
With these large, smooth sheet-metal surfaces, markerless scanning is no fun. There just aren’t enough unique geometric features for reliable tracking.
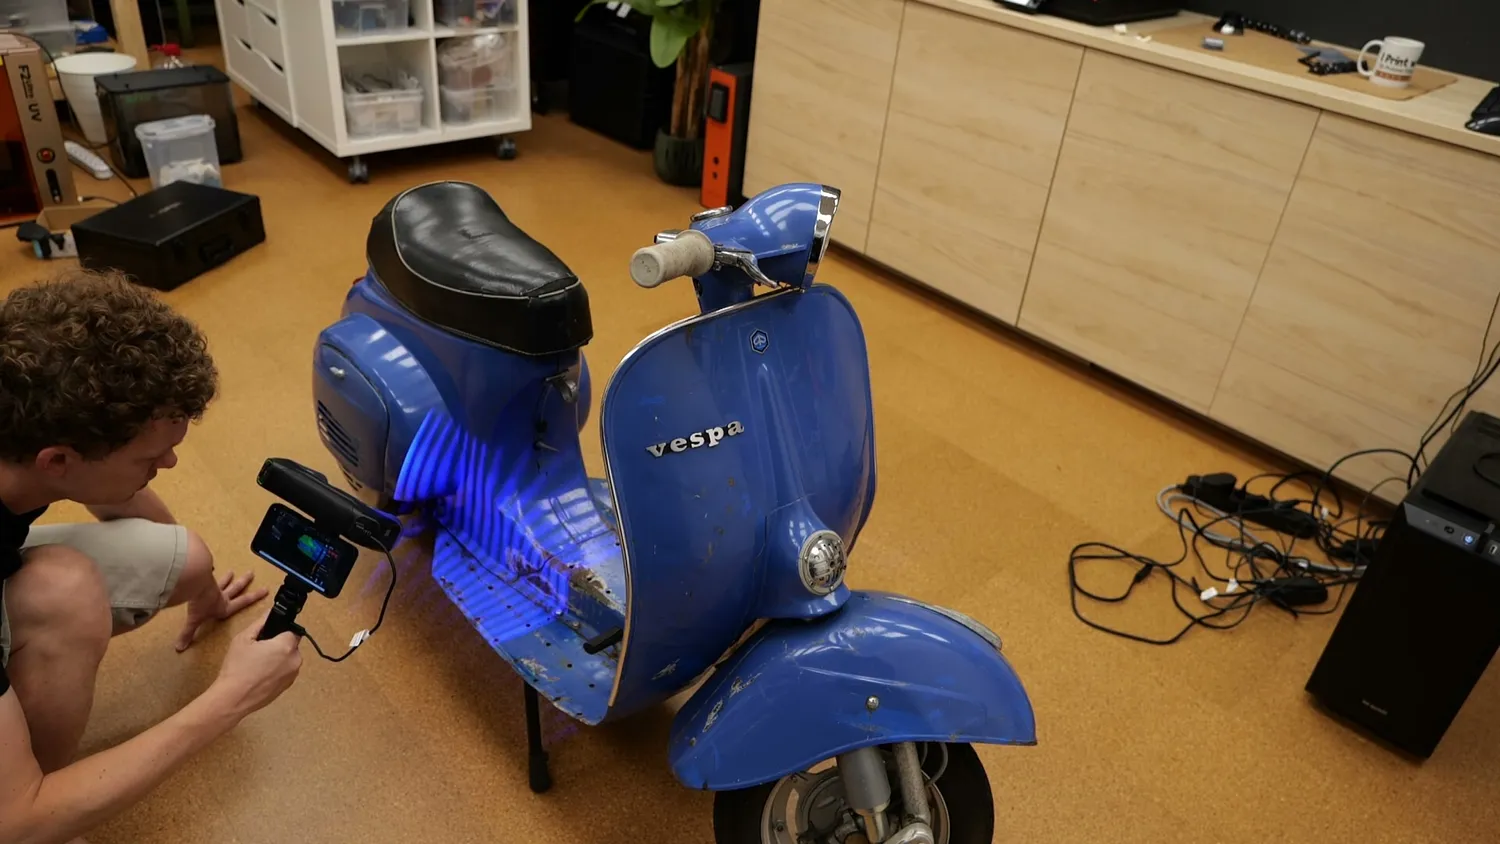 Smooth sheet metal offers nothing to track
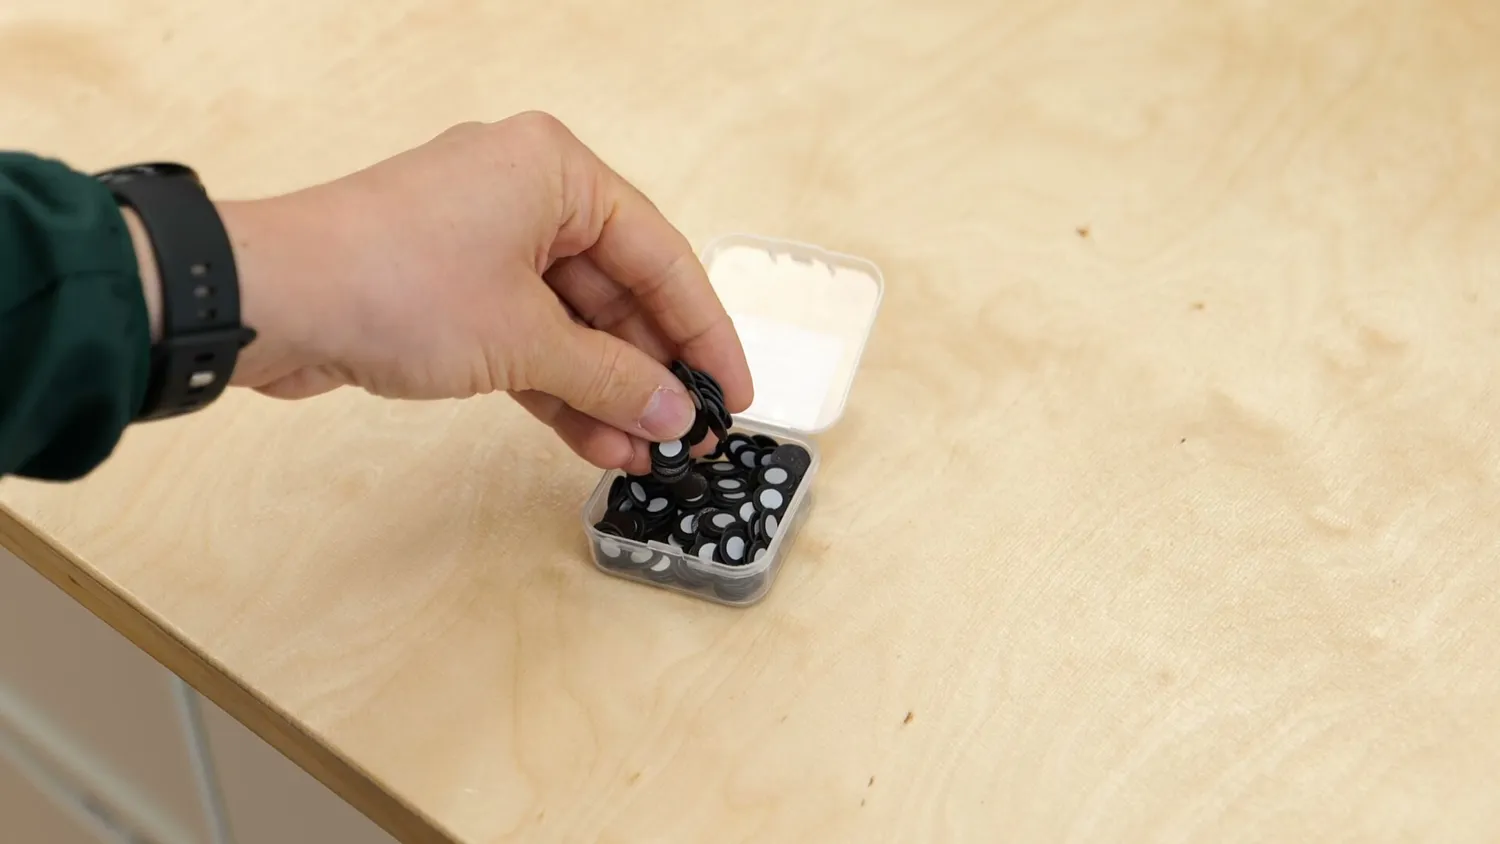
So for something like this, you’re going to need markers. A lot of markers. Sticking hundreds of adhesive dots onto the scooter and scraping them off again afterward is both tedious and expensive, so I bought these magnetic markers* instead. They stick directly to the steel bodywork.
 Magnetic scanning markers
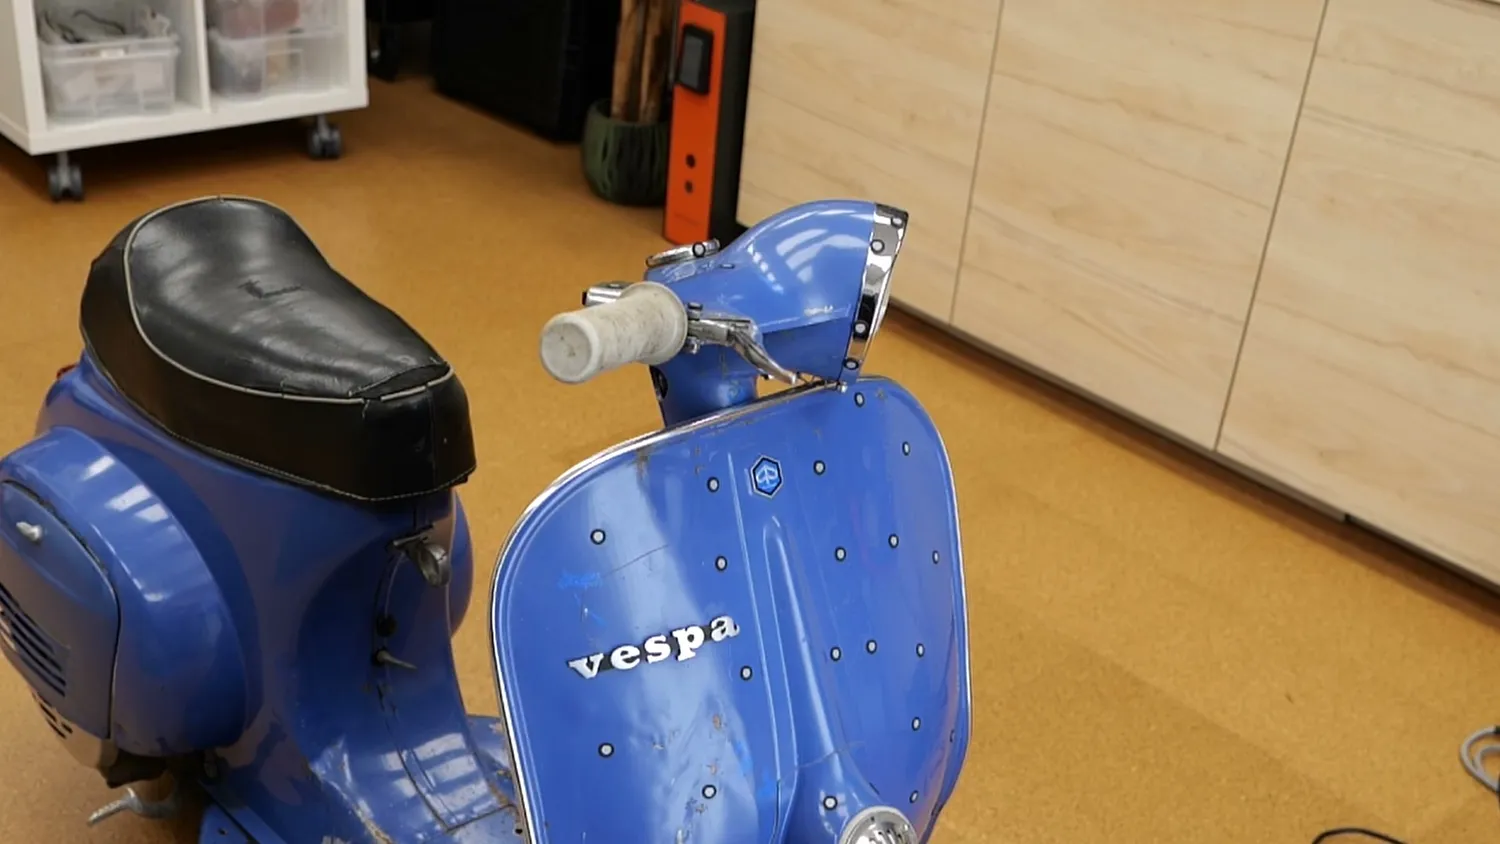
I spread them across the entire front and also placed a few around the iconic handlebar. The handlebar itself is aluminum, so the magnets obviously don’t stick there. I either balanced them in place or attached them to nearby steel or chrome parts.
 Markers balanced on the aluminum handlebar
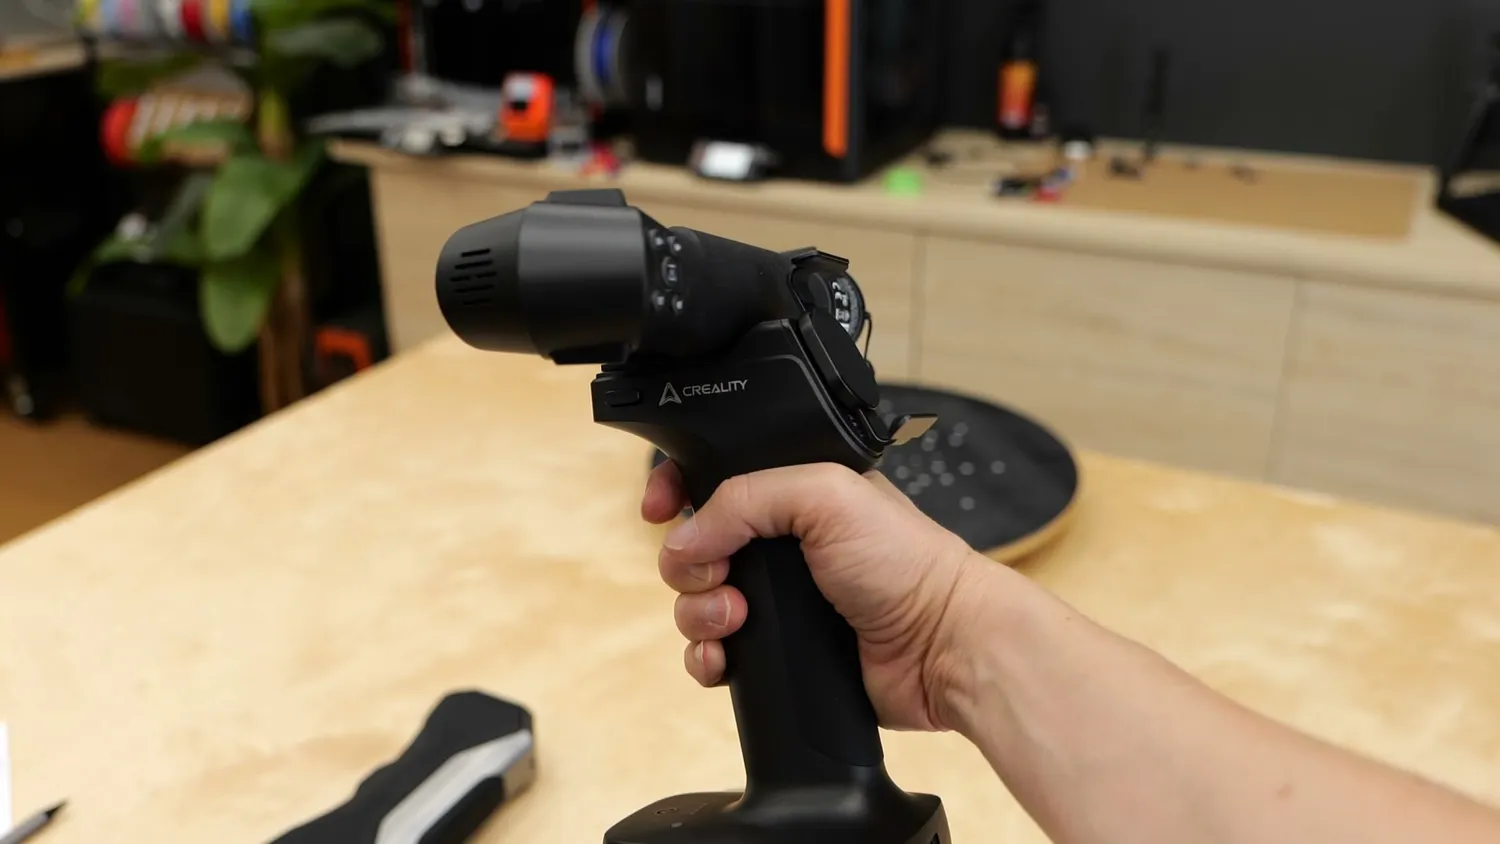
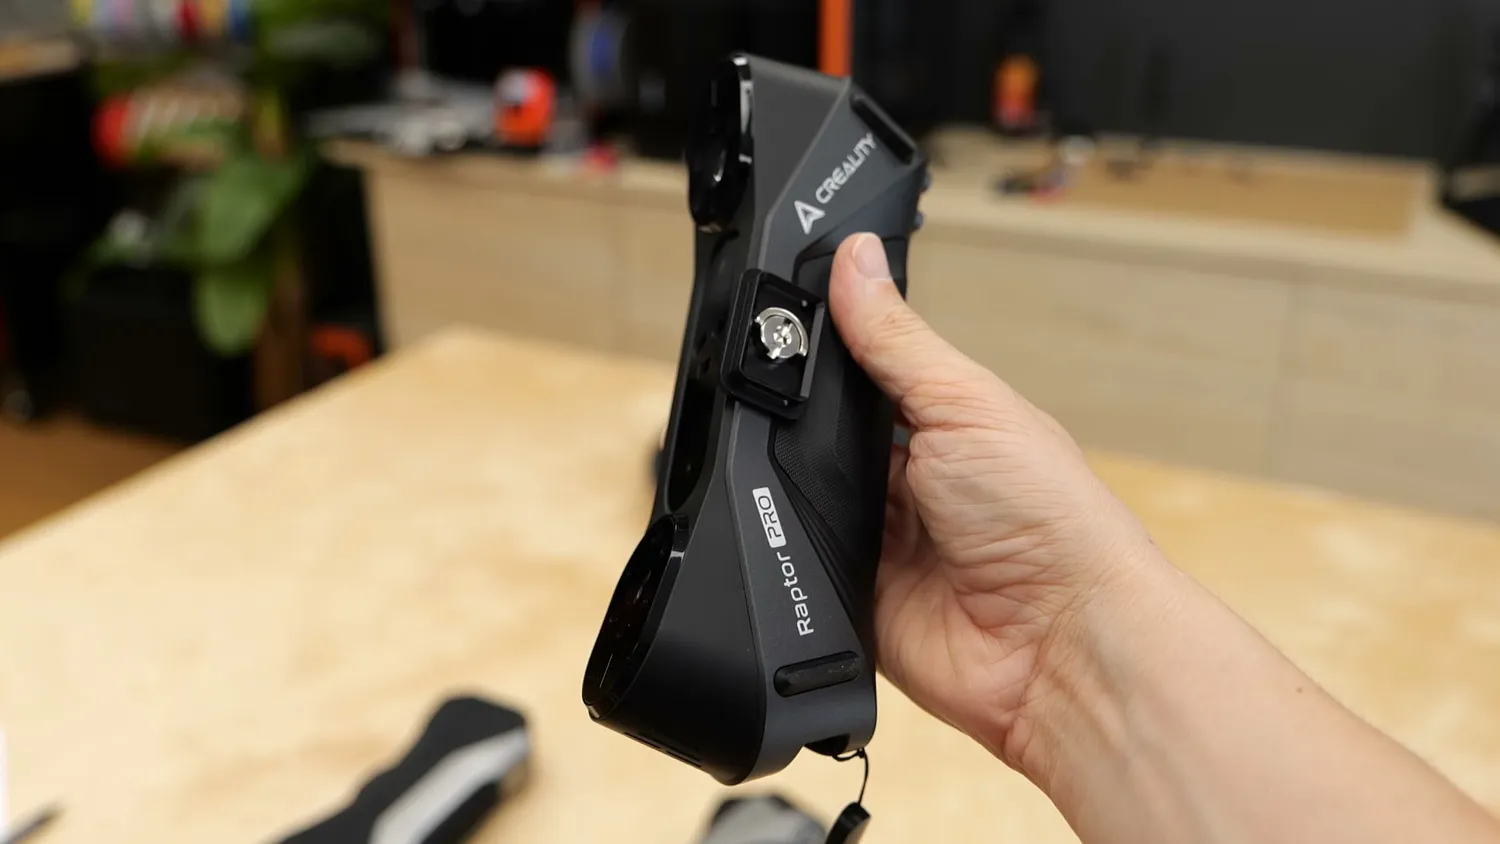
For this test, I also tried the handheld setup on both scanners. As I mentioned earlier, the Creality Raptor can technically run using only a phone.
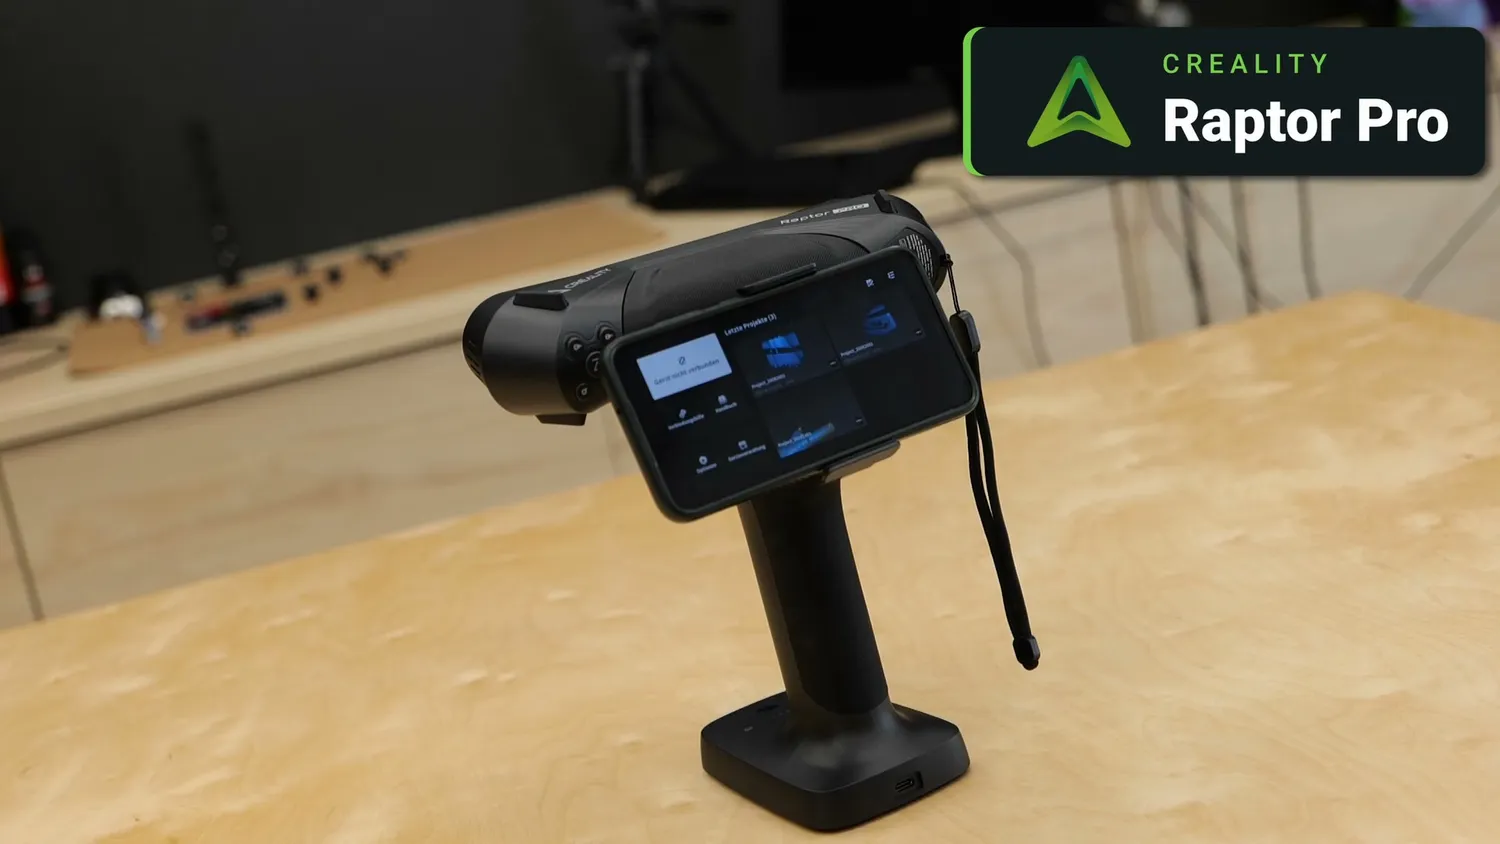 The Raptor on its Scan Bridge
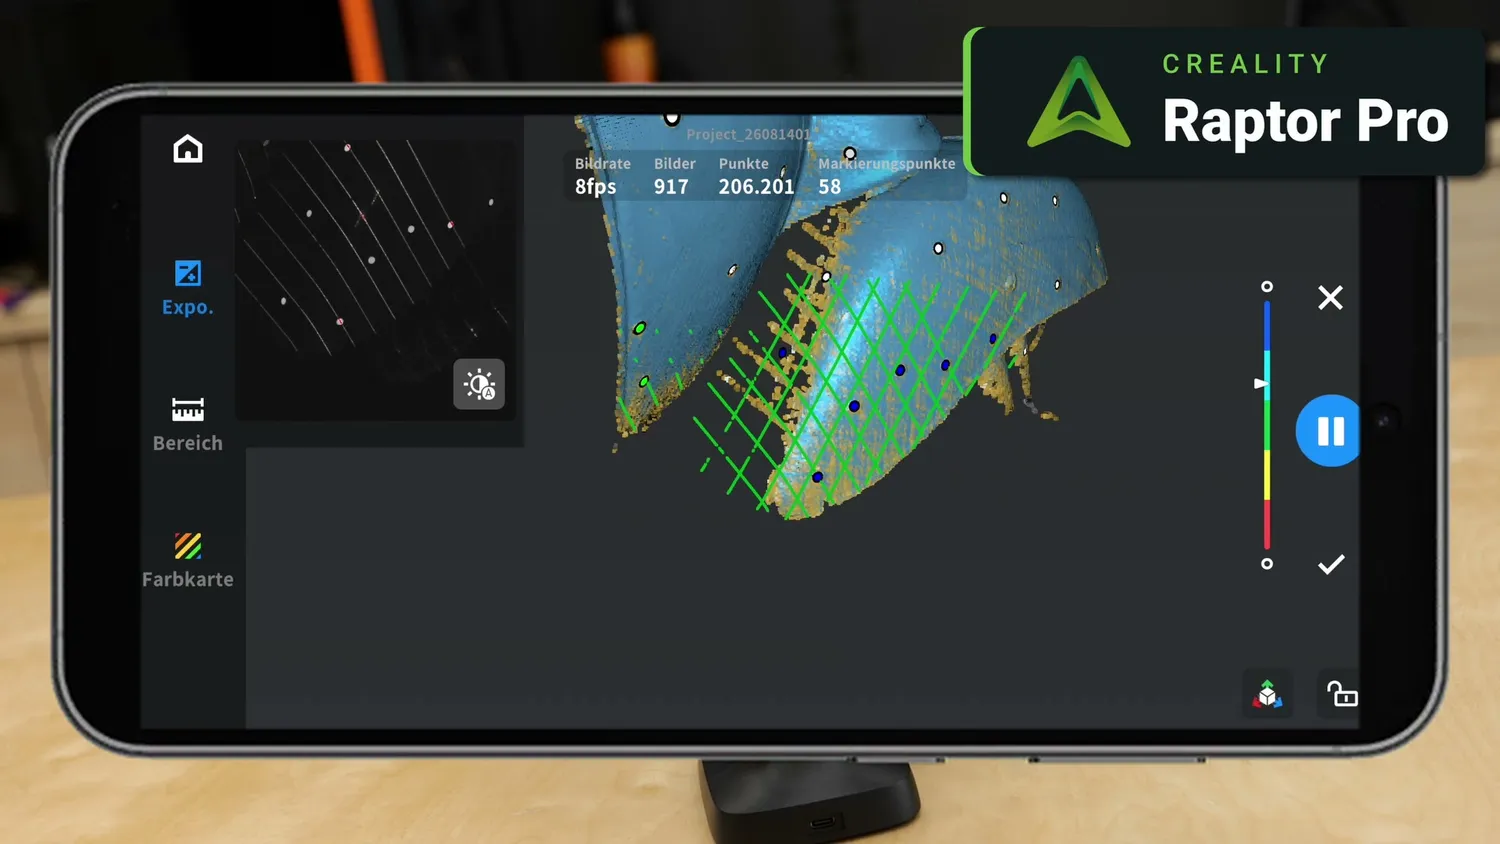
But with the limited processing power on my phone, I only got around 10-20 frames per second instead of the normal 60. That makes scanning pretty painful. It works, but for serious scanning I would still use a proper host computer. In that setup, the phone is basically just a wireless display showing what’s happening on your computer.
 Low frame rates on the phone
Neither app is fantastic, but if you follow the setup instructions carefully, you can get both systems working. The Metro Y Pro already includes everything you need for this. With the Creality scanner, you need the $299 Scan Bridge. Once it’s set up, scanning isn’t really different from using the scanner at your desk, and in a way it’s even more ergonomic than pinching the scanner housing with your hand.
I could easily scan the front of my Vespa using cross-line mode. The result looks great. With more markers and a little more time, I could probably have scanned the entire scooter in one go.
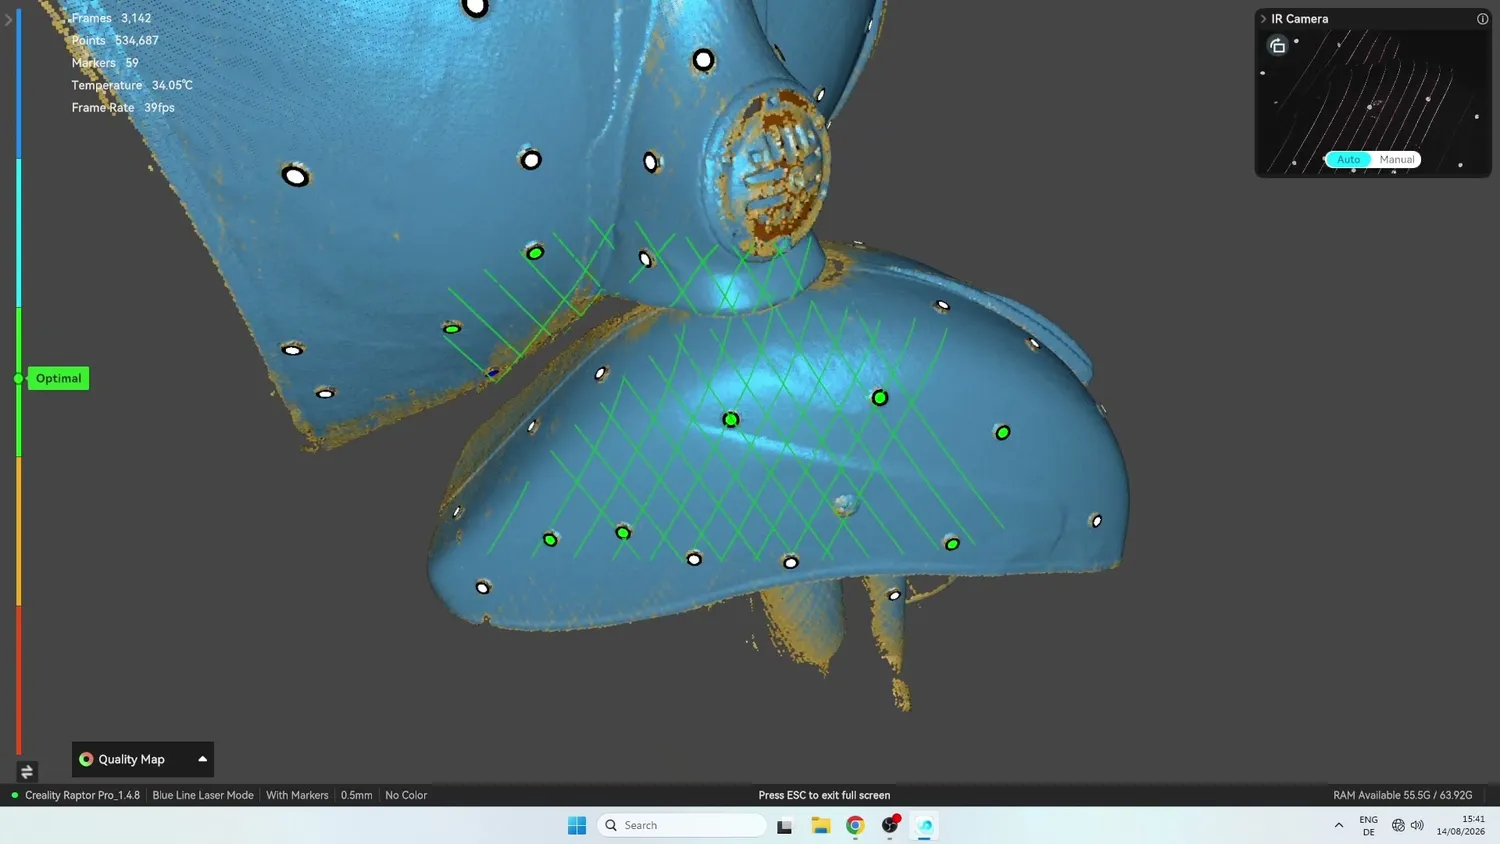 The scanned Vespa front
Comparing the two scans was also interesting. You might expect much larger deviations simply because the part itself is much larger. But the Revopoint and Creality scans matched very well, with deviations of only around 0.1 mm even toward the extremities.
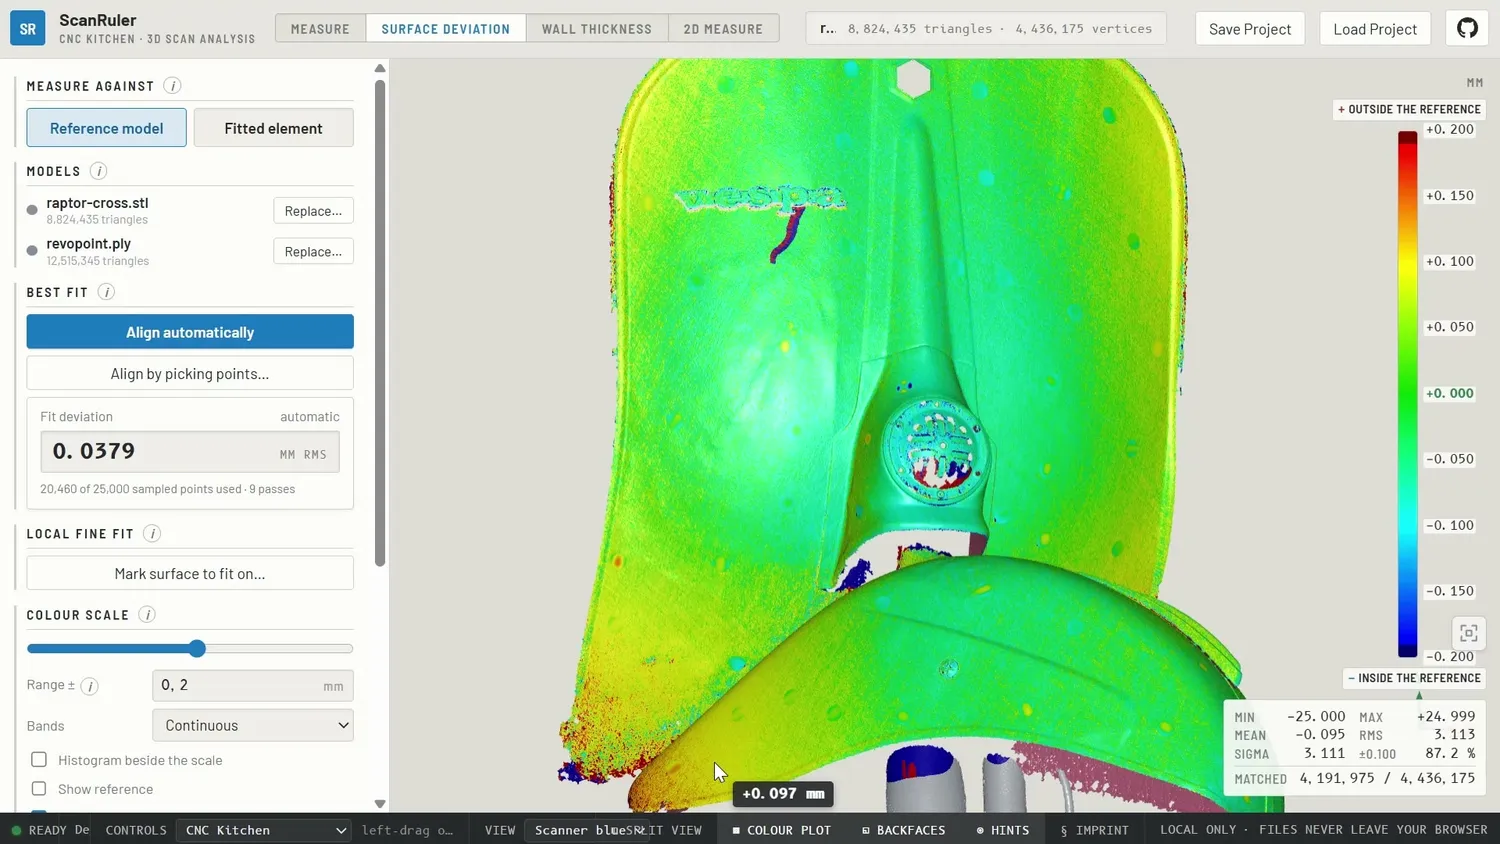 Comparing both Vespa scans
This time, though, I have to give the clear win to the Metro Y. Its surfaces are smoother, it captured more detail overall, and even the reflective Vespa logo came out better.
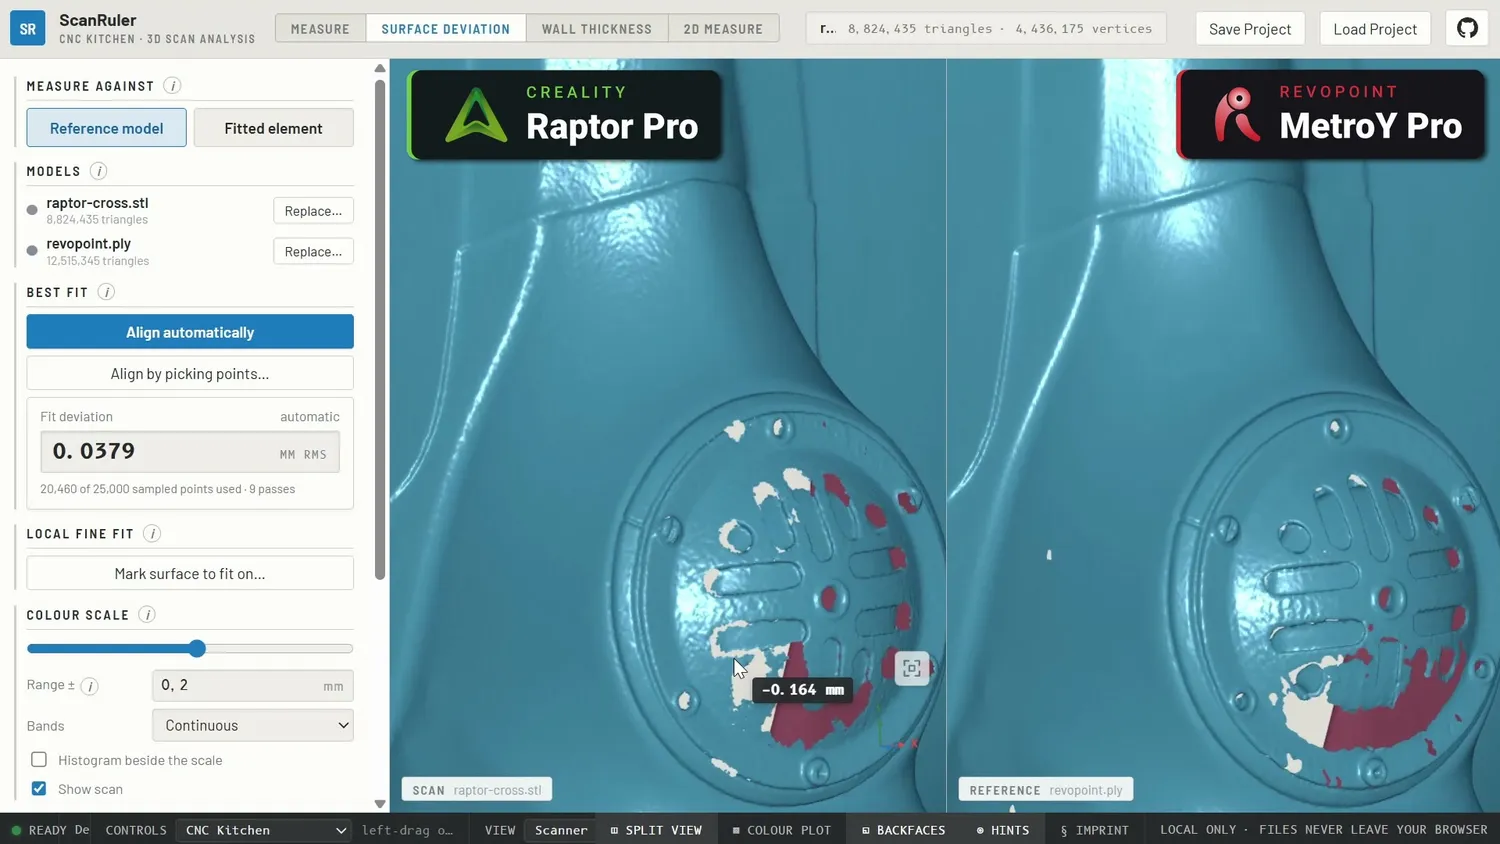
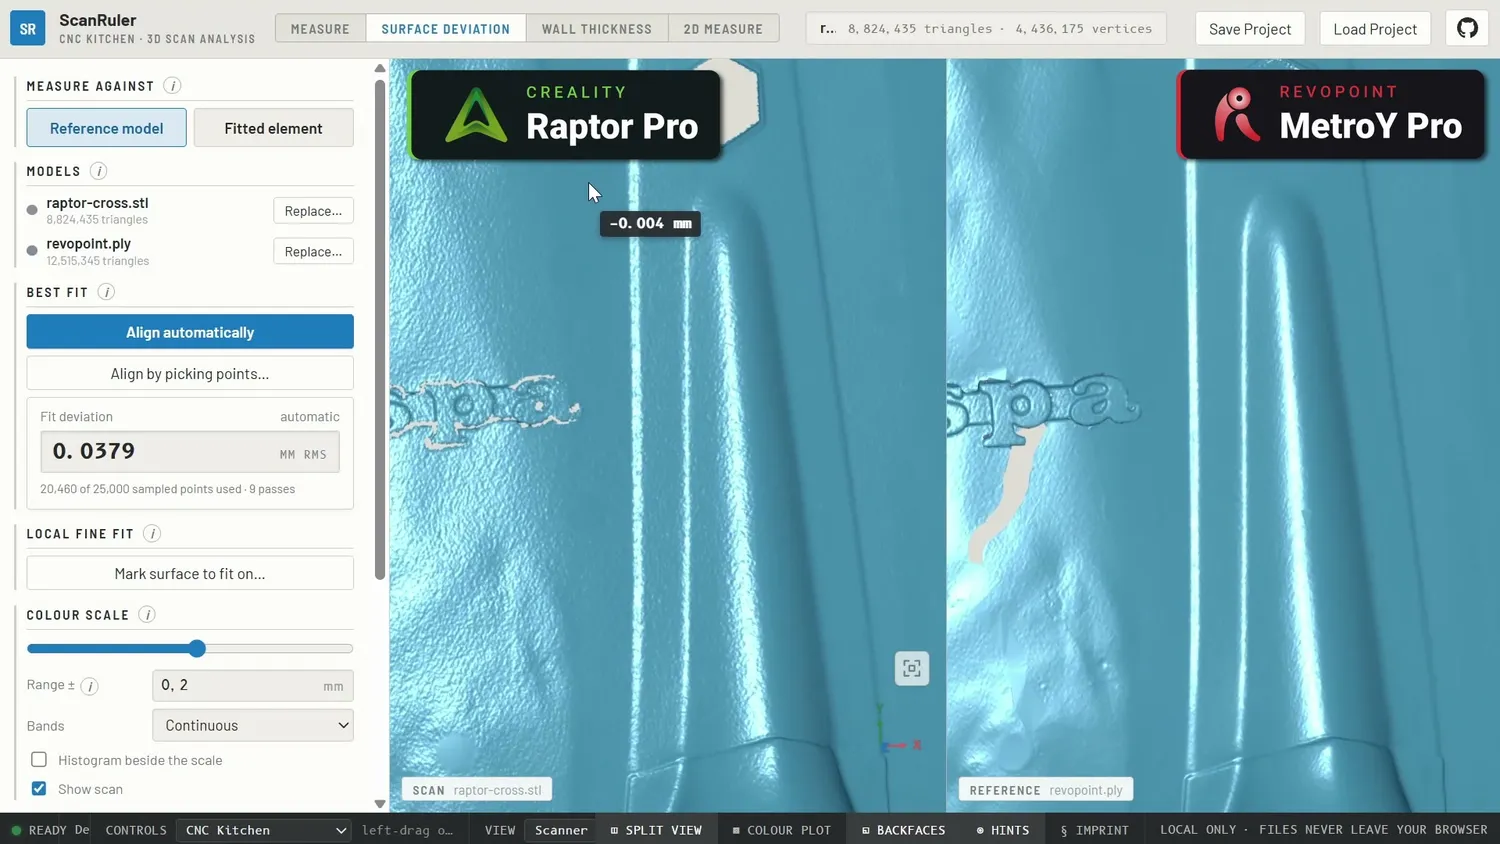
The one thing Revopoint does worse is removing scanning markers from the final data. And this isn’t something I only saw here. I’ve noticed it on several other parts as well.
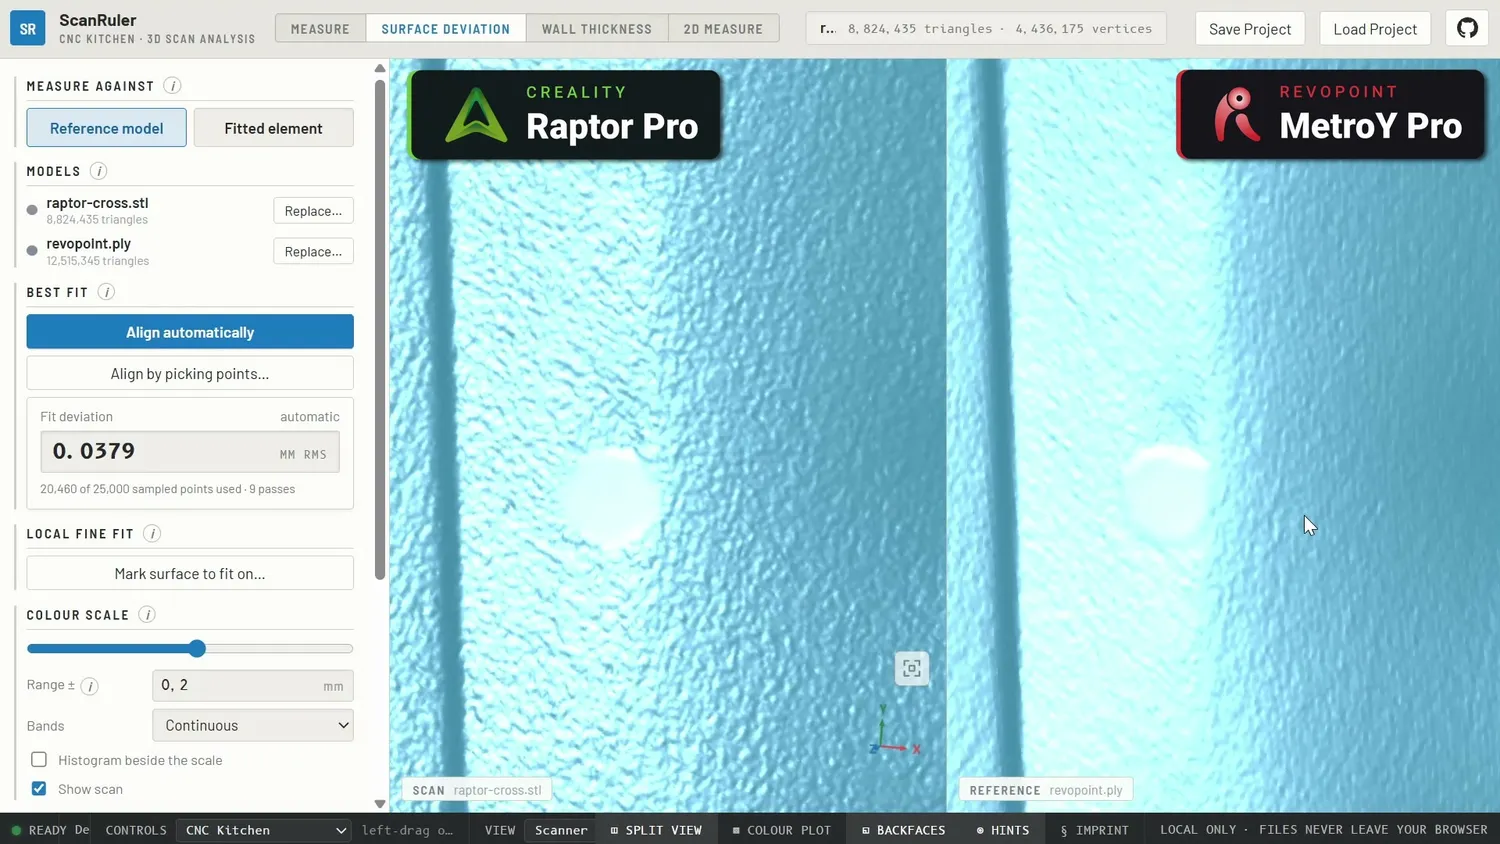 Leftover markers in the Metro Y data
A day later, I did my final test. Two years ago, I regularly scanned my wife during her pregnancy using the Creality Raptor to document how her belly grew. That actually worked remarkably well. But since she probably wouldn’t be super happy if I showed those scans here, I convinced Marius to let me scan his head instead.
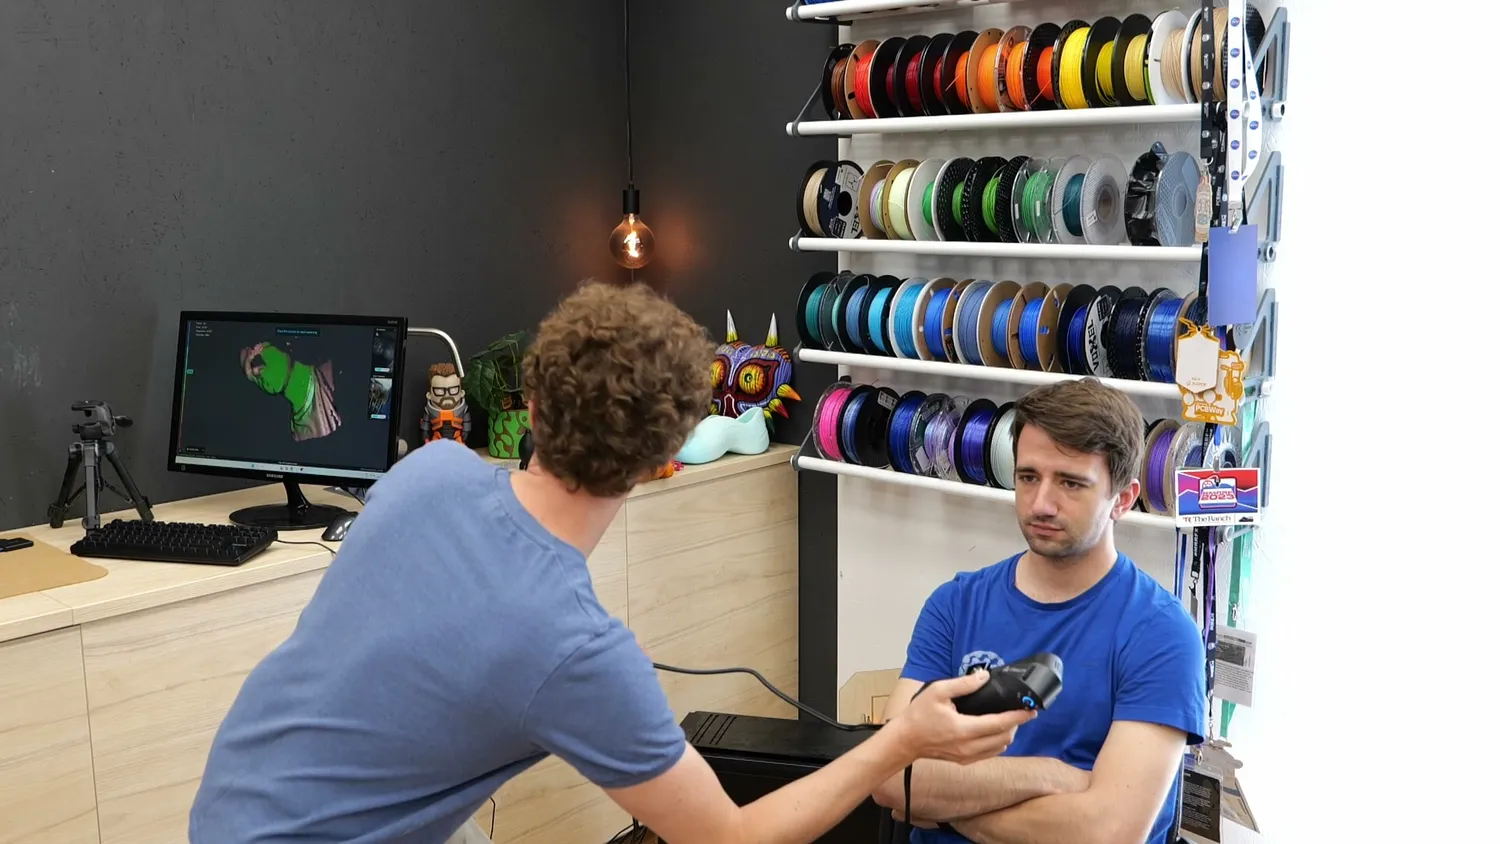 Marius, the human sample
Obviously, I didn’t want to stick tracking markers all over his face, so I had to use feature tracking with both scanners. Creality uses an infrared system similar to Face ID, which meant Marius could keep his eyes open while I scanned him. Overall, that worked quite well. It only struggled with his hair, which is a common problem with 3D scanning.
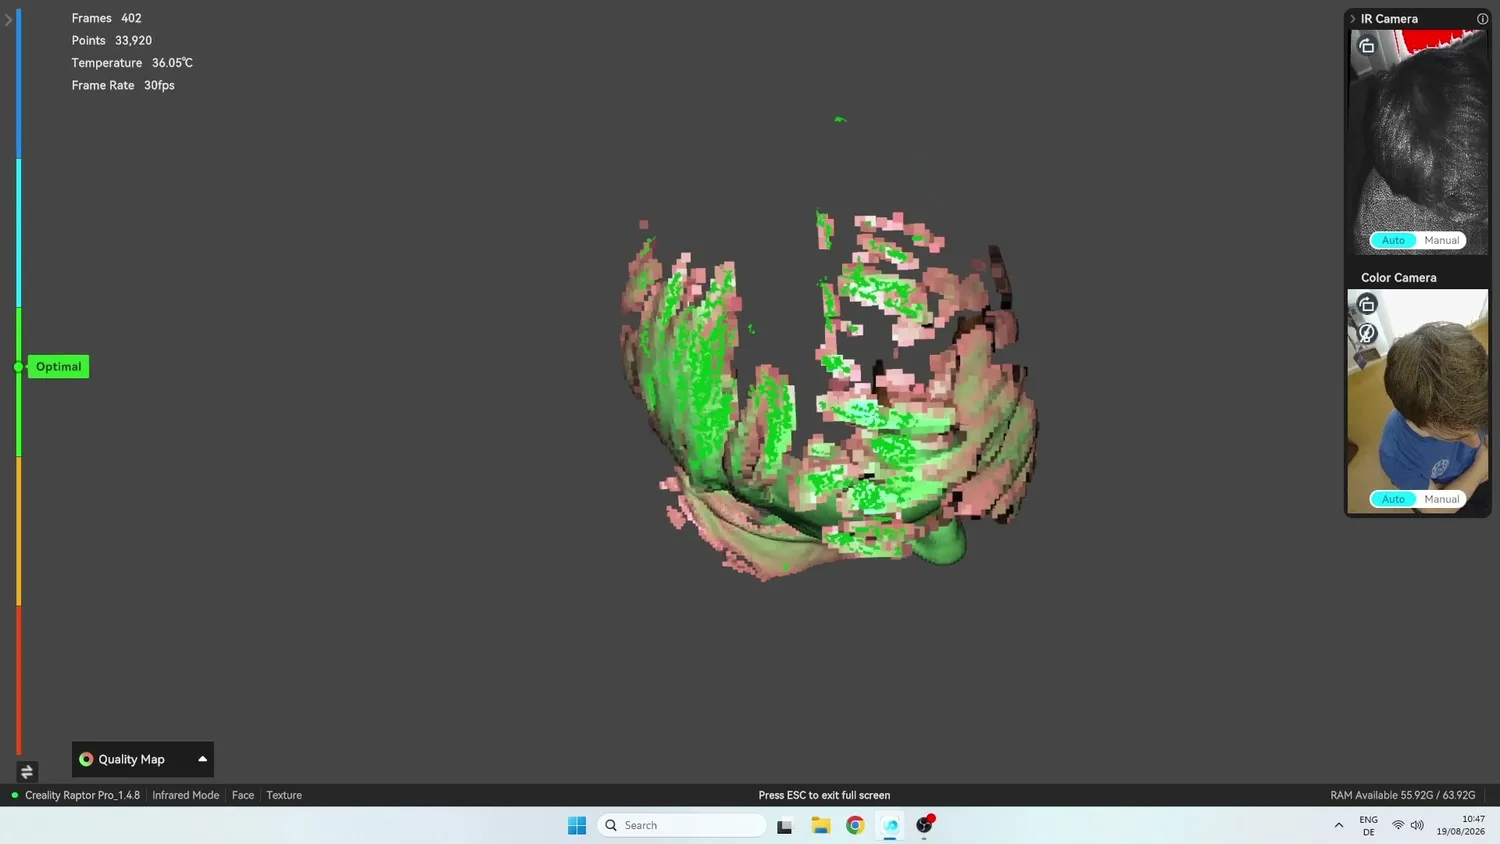 Hair is hard to capture
With the Revopoint, I had to use full-field mode with its bright LED projector, so Marius had to close his eyes. I should mention that Creality actually markets its scanner for scanning people, while Revopoint doesn’t. So take this comparison with a grain of salt.
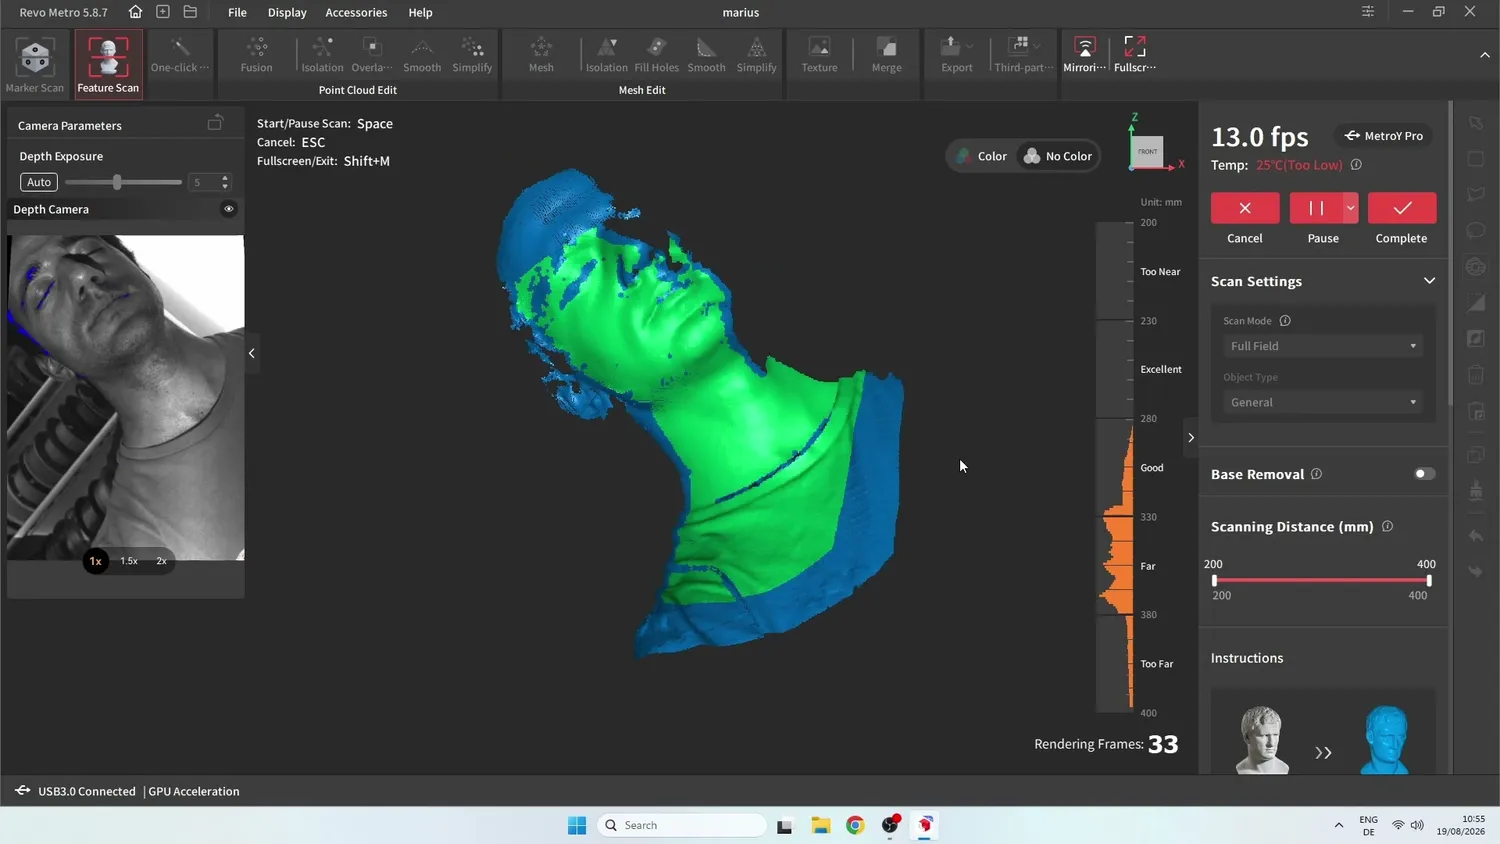 Full-field face scanning with the Metro Y
Scanning Marius with the Metro Y was definitely more difficult. I couldn’t get his hair to scan at all, which really shows that the Metro Y is more focused on technical applications.
The processed scans confirm that. With the Creality Raptor, Marius’s head and face look smooth and natural.
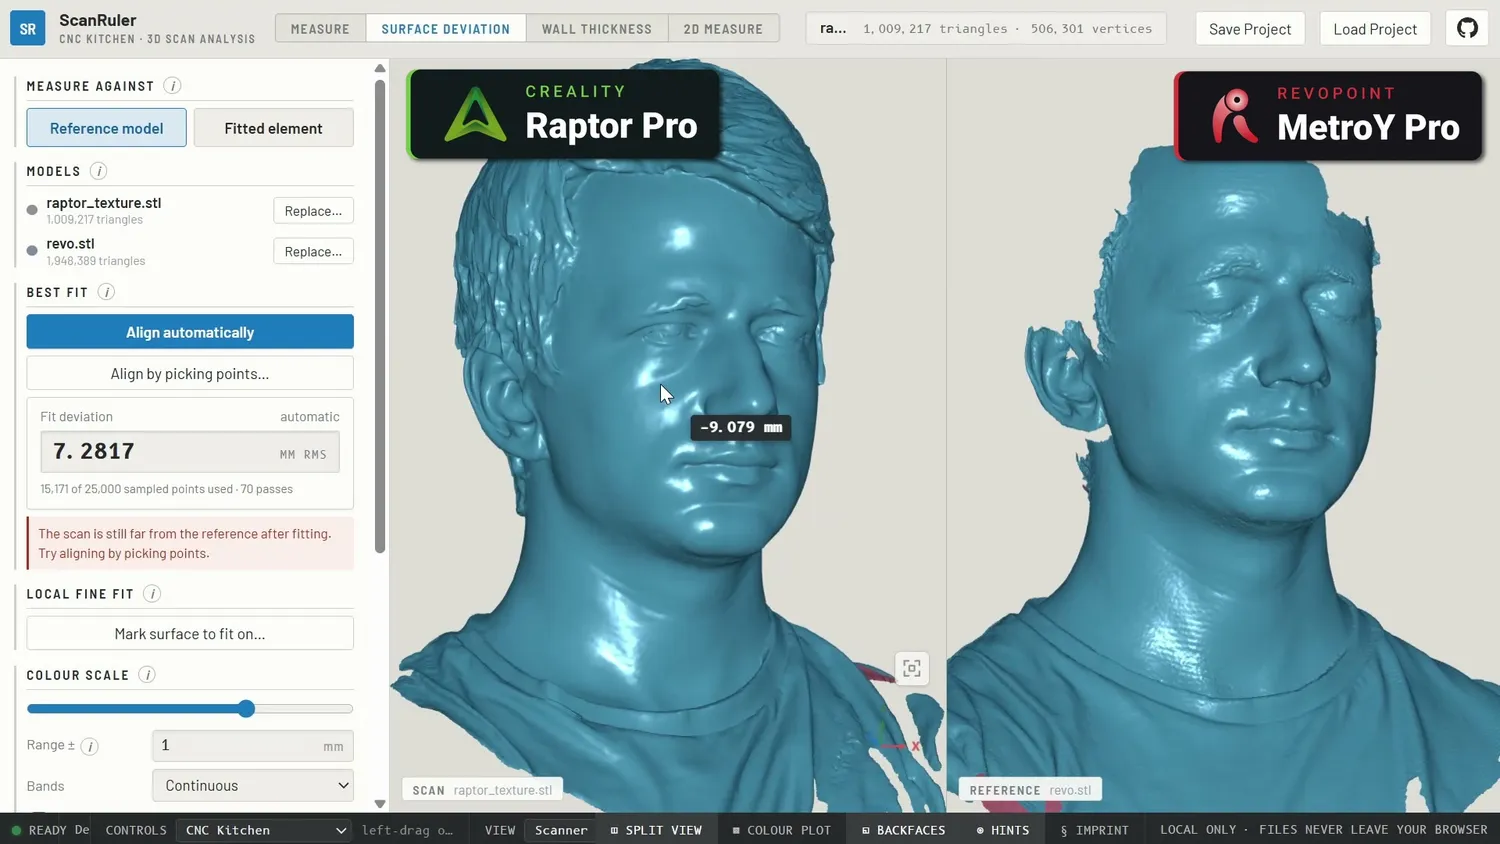
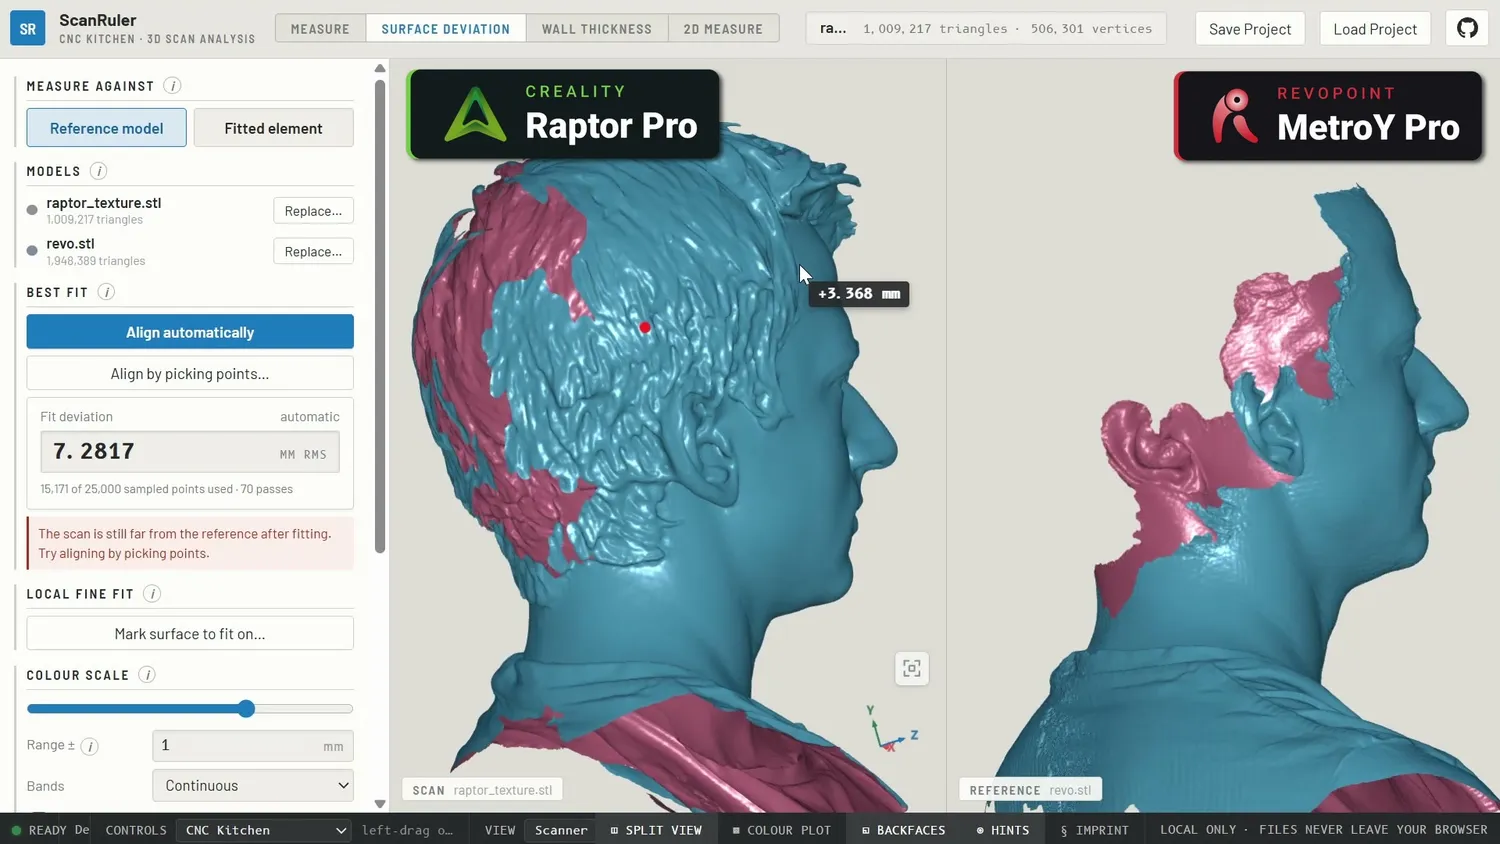
The Metro Y scan has more visible surface detail, but it’s also much grainier and the hair is completely missing. The shirt actually came out pretty well, though. So if you occasionally want to scan people as well, the Raptor is clearly the better choice.
My verdict: usability decides it
So after all of these tests, we’ve looked at a pretty wide range of scans. In my opinion, both scanners are good engineering tools and can be useful for many different applications. Most of the differences come down to details. But there is one difference that currently decides which scanner I would recommend.
Both units cost roughly the same. When it comes to accessories, and especially if you want to use the scanner in handheld mode, the Revopoint Metro Y Pro gives you more for your money. You get the scanning table and the battery handle directly in the box.
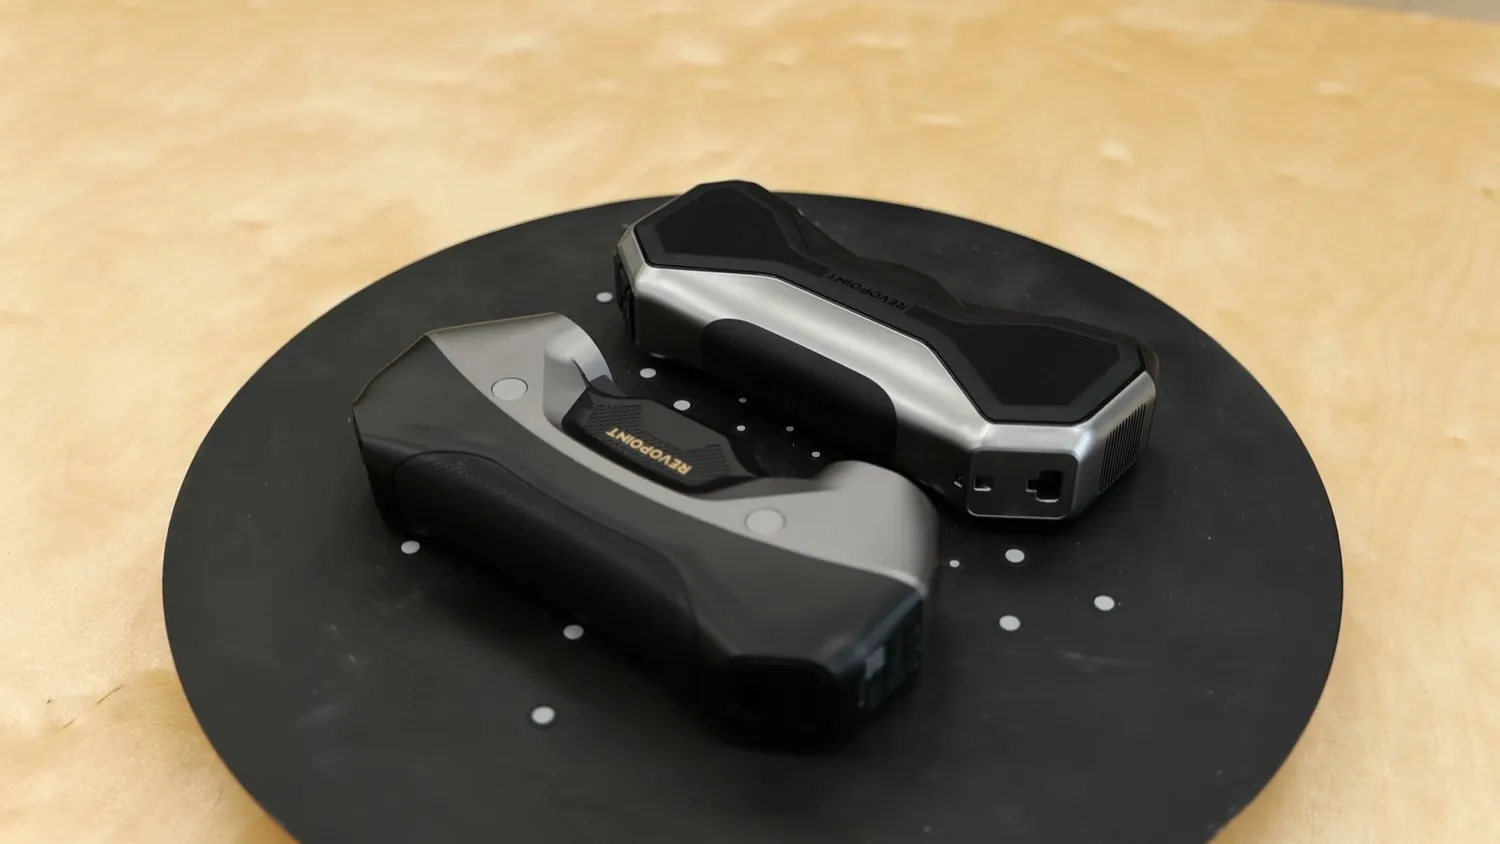 Both cost roughly the same
In terms of scan quality, the two are reasonably close if you’re willing to play around with the settings. But especially on smaller parts, the Creality Raptor Pro is clearly better. I consistently got sharper, crisper results from its parallel-line mode, and usually without doing much tweaking in the software.
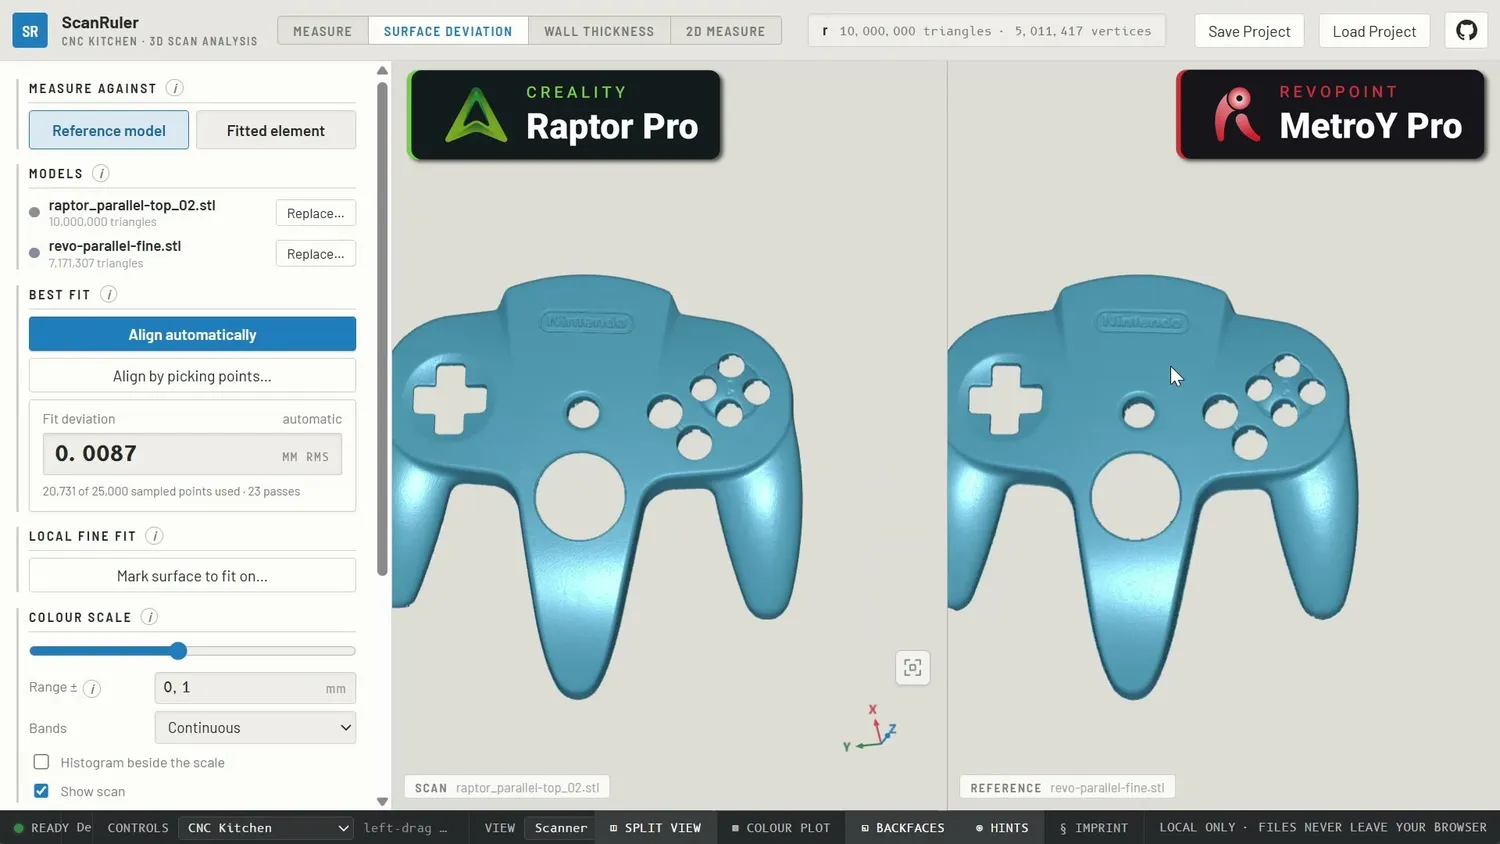 Scan quality is reasonably close overall
Accuracy was very similar between the two. You could already see that from scans made with completely different devices lining up almost perfectly. For most metrology applications I would personally use these scanners for, that accuracy is plenty. And for reverse engineering, it’s more than enough.
Finally, we need to talk about usability. And this is actually the reason why I didn’t make this video for well over a year.
I first had the Metro X, then the Metro Y Pro. I’ve tried them on all of my workstations and laptops, on both Mac and Windows. And I always had the same annoying problem. Lag.
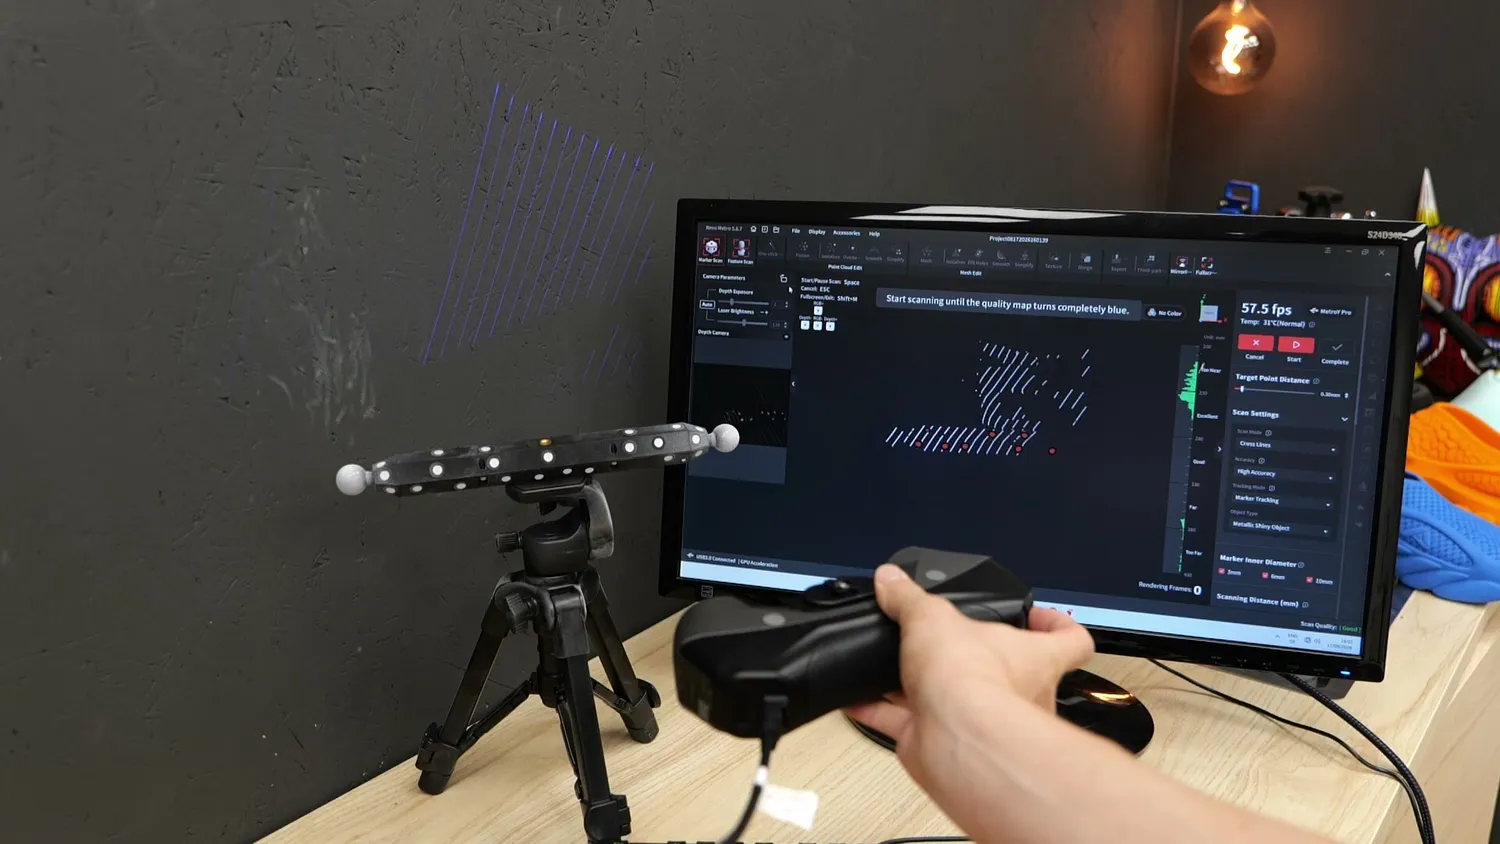 The same problem on every computer
There is a noticeable delay between moving the scanner in my hand and seeing that movement on screen. If you only ever use the Revopoint scanner, you might not even notice it that much. You would probably simply accept it. But use these two scanners side by side and the difference is huge.
Scanning with the Creality Raptor is incredibly smooth, as long as your computer is reasonably capable. When I move the scanner left or right, I immediately see that movement on screen. It makes the whole process feel natural.
Revopoint’s software really struggles with performance, regardless of whether I’m using its CPU or GPU-accelerated mode. There is always this delay. And when you’re trying to navigate around complex geometry, that makes scanning much harder than it needs to be. It just feels bad.
The best comparison I can think of is playing a game through a bad emulator where the action happens half a second after you press a button. That’s what annoys me most about the Revopoint scanners. I’ve installed update after update and tried several completely different computers because I really wanted to give them a chance to improve it. But it never went away.
And it’s not just the live scanning. Processing the captured data in Revopoint’s software is also significantly slower than in Creality Scan and the software even regularly crashed.
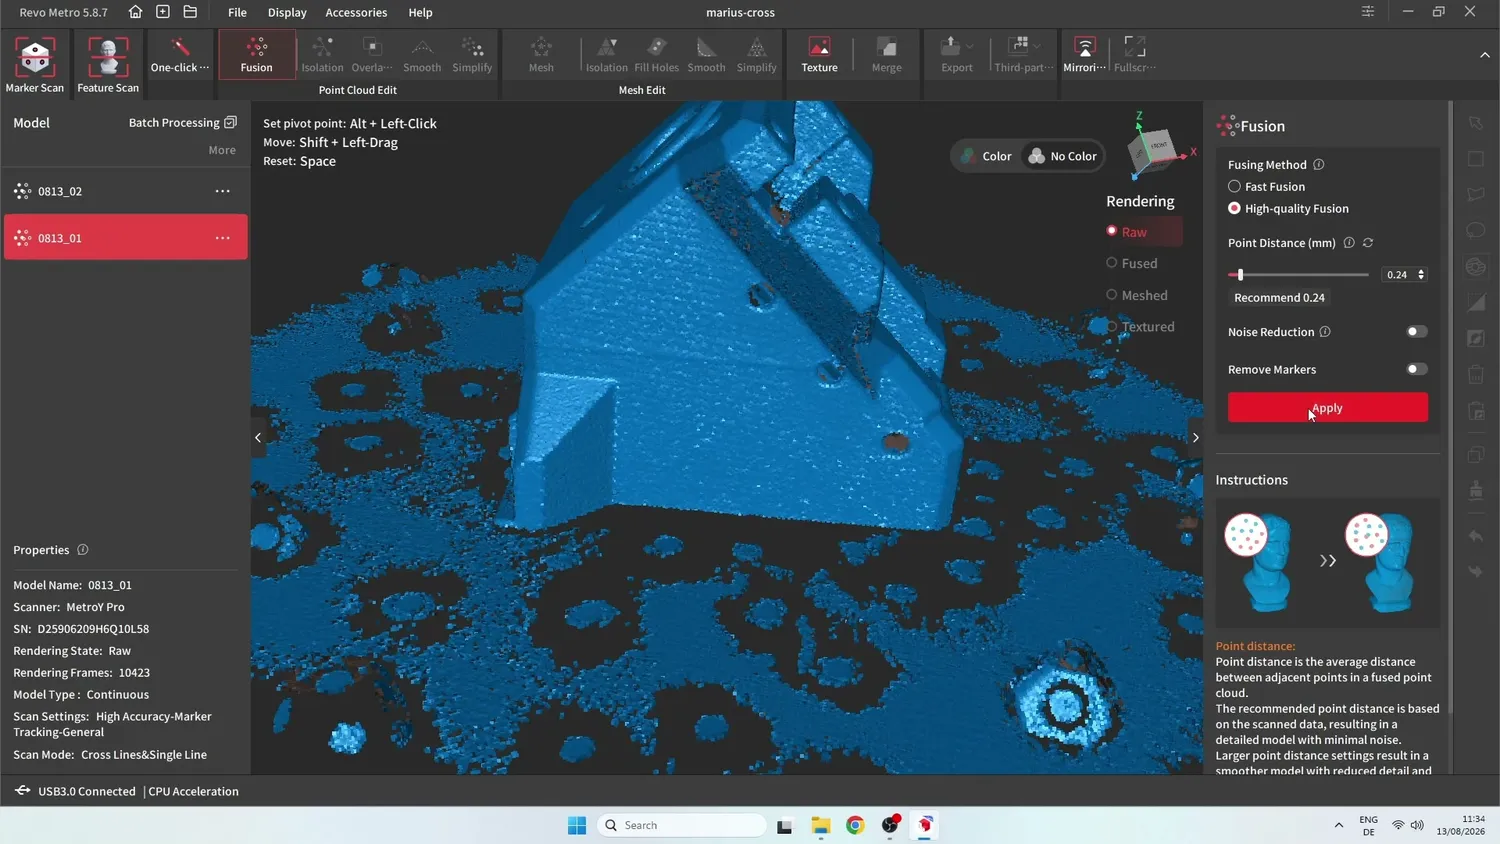 Processing takes longer in Revopoint’s software
That honestly surprised me. Creality has never exactly been famous for great software, while Revopoint basically does nothing but 3D scanners.
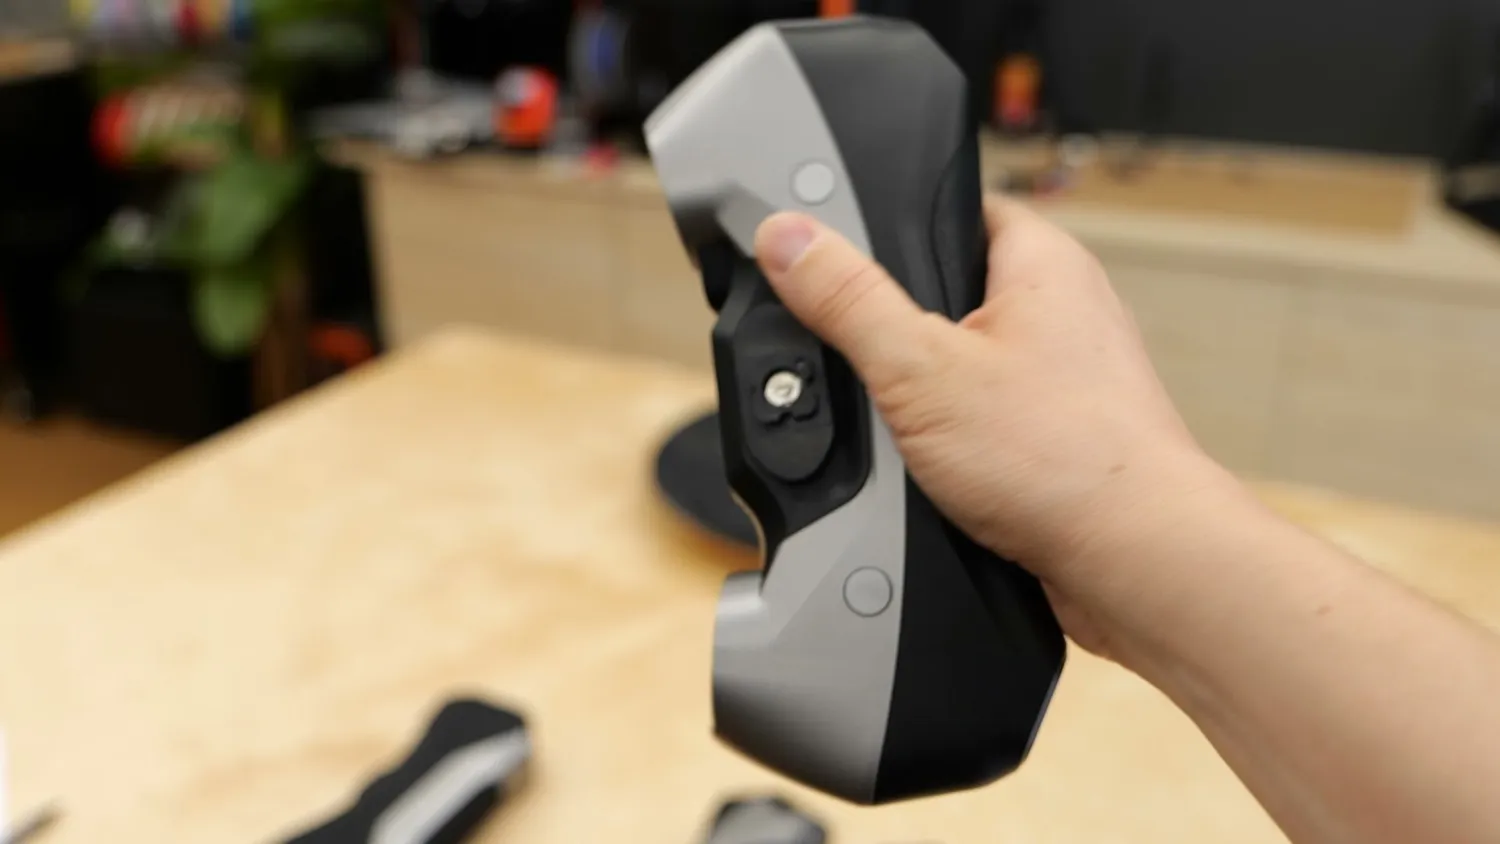
The Metro Y Pro is not a bad scanner. Far from it. But its software simply isn’t where I would expect it to be from a company specializing in 3D scanning.
 Not a bad scanner at all
And that’s why, right now, I would pick the Creality Raptor Pro over the Metro X or Metro Y Pro. With the parallel line and cross line mode using different working distances, it’s more versatile and without tweaking any settings the scan results are simply better. And this is something I think is important for a device you sell to hobbyists and semi-professionals. The Raptor scanners I have always spark joy in me when I use them and every time I tried to give the Metro Series another chance I got frustrated because of the lag and all the settings I had to tweak for good results.
But definitely not everyone has a use for a 3D scanner, especially if you expect to get a perfectly useable CAD model, so please make sure you understand what a 3D scanner can and cannot do before buying one. But if you have the right applications for it, a laser-line 3D scanner can be an incredibly useful tool. And out of all the new engineering gadgets I’ve added to my shop over the last couple of years, this is probably the one I’ve had the most fun using.
At this point, I’d really like to hear about your experiences as well. I know quite a few of you already own one of these scanners, and you might have had the same experience as me, or a completely different one. What stands out to you? What feature are you still missing from these semi-professional 3D scanners? And are there any other scanners you’d like to see me test?
🔍 Get the Creality Raptor Pro ($1,999): https://geni.us/CR-RaptorPro*
🔍 Get the Revopoint Metro Y Pro ($1,759): https://geni.us/RP-MetroYPro*
* Links marked with an asterisk are affiliate links — if you buy through them, I earn a small commission at no extra cost to you. As an Amazon Associate I earn from qualifying purchases. Thanks for supporting my work!