
Is This Laser the 3D Printing Solution We Needed?
Can a laser cleanly mark 3D printed parts? I tested UV, MOPA fiber and blue diode lasers on PLA, PETG, ASA, TPU and PC. Pigments matter more than the polymer.
TL;DRthe short version
- I laser marked dozens of printed test plates in more than a dozen colors and five materials (PLA, PETG, TPU, ASA and polycarbonate) with a 5 W UV, a 60 W MOPA fiber and a 40 W blue diode laser.
- The UV laser was the star of the test: it worked on the widest range of materials, needed the least tuning and produced the cleanest marks with the least thermal damage.
- The marking result depends far more on pigments and additives than on the base polymer. White VoxelPLA marked beautifully dark while Bambu Lab white PLA behaved much worse.
- The MOPA fiber laser is very capable and gives you pulse duration and frequency to tune, but 60 W is far more than plastics need, so I reduced most samples to around 30% power.
- The 40 W blue diode laser was the least useful for clean marking. Its process window was much narrower and it usually produced heat damage before contrast.
- Under the microscope the marks are made of individual pulse dots that bunch up at the ends of each hatch line, because the galvo mirrors slow down there. Skywriting would fix that.
- The markings are durable: isopropyl alcohol only removed soot and even scratching did not take much of the contrast away.
- Robin's light grey Bambu Lab PLA gave one of the worst contrasts of the whole test, so sometimes it is smarter to change the filament color than to keep fighting the laser settings.
⚡ Get the xTool F2 Ultra UV: https://geni.us/F2UltraUV*
⚡ Get the xTool F2 Ultra (60 W MOPA + 40 W diode): https://geni.us/F2Ultra*
Can lasers solve one of the biggest problems in 3D printing? If you want to mark a printed part, you have a few options. You can use a pen, but that is usually the worst idea, because the extrusion lines act like tiny capillary channels and quickly pull the ink away from where you actually wanted it. So instead of a clean line, you often get a blurry mess. You can, of course, multi-color print, and with the right printer, the right slicer settings, and a bit of patience, you can get incredible results. But the resolution is usually still limited by your nozzle size, and depending on the part, it can take a lot of time, material swaps, tuning and also not look great. Stickers are also an option, but they often don’t look very professional, and on 3D printed surfaces, they don’t always stick well either. In professional applications, there is UV printing, which can produce absolutely beautiful results directly on printed parts. But it is still a comparatively slow process, and the machines are only now starting to come down into a price range where smaller workshops might consider them. But there is another option that has become much more approachable in recent years: laser engraving and laser marking. So for this article I haven’t only printed and laser marked dozens of samples but we’ll also go over the different laser types, technologies and the mechanisms, so you finally understand the differences and can find the right one for your job! Let’s find out more.
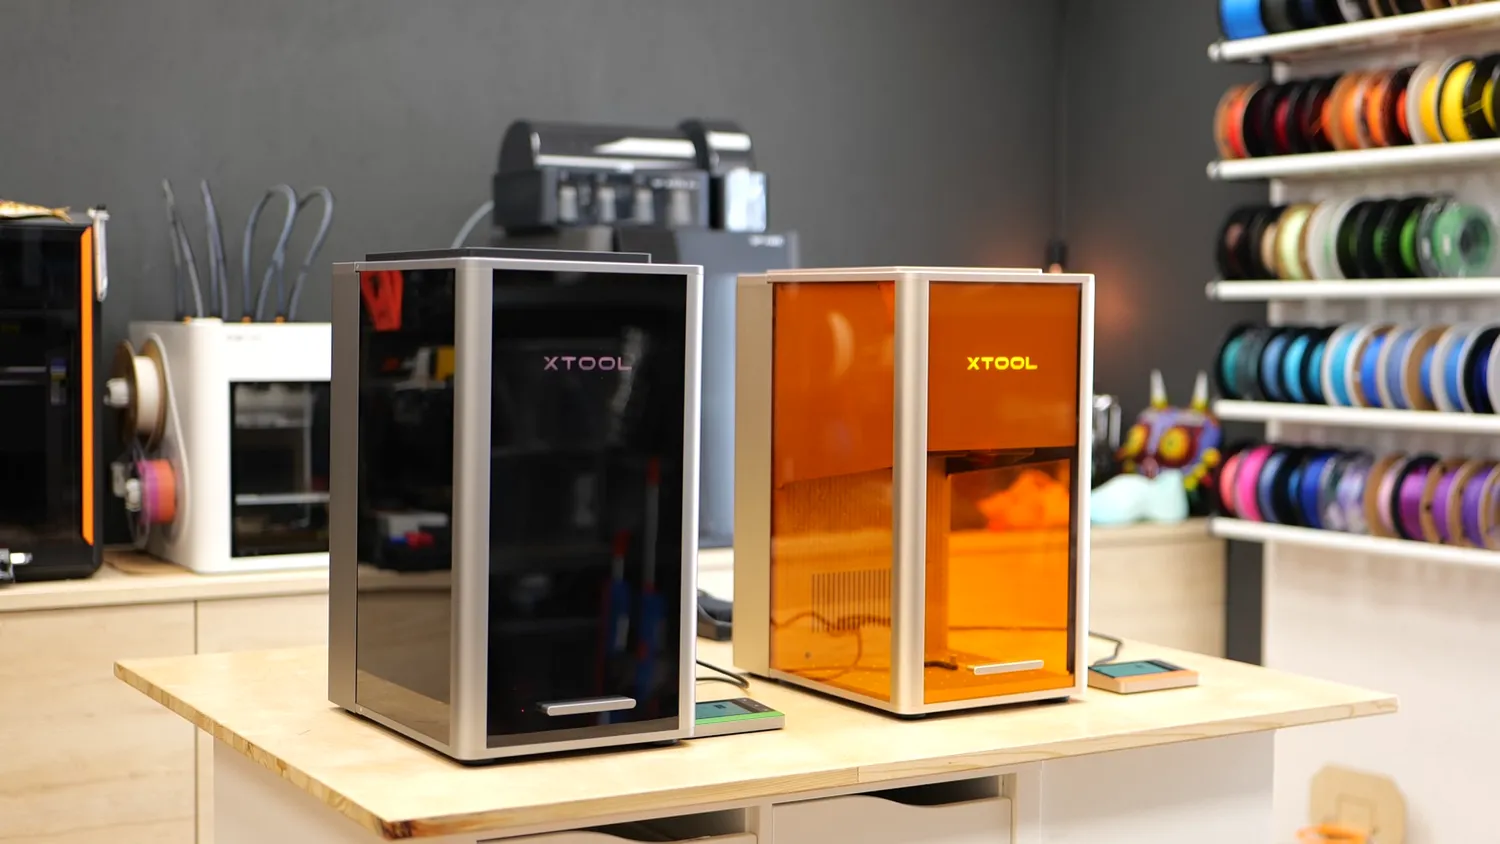 The two machines I used: F2 Ultra (left) and F2 Ultra UV (right)
Why so many products are laser marked
If you look closely at many of the products you buy these days, especially tools, electronics, mechanical parts, or injection molded components, you’ll notice that the markings are often not printed in the traditional sense. They are laser marked. And that makes a lot of sense. Lasers are tool-less, fast, and they allow every single part to be customized individually. Serial numbers, QR codes, part names, logos, Etsy-shop personalization, or even just a clean label on a prototype can all be added without making a stencil, a stamp, or a screen.
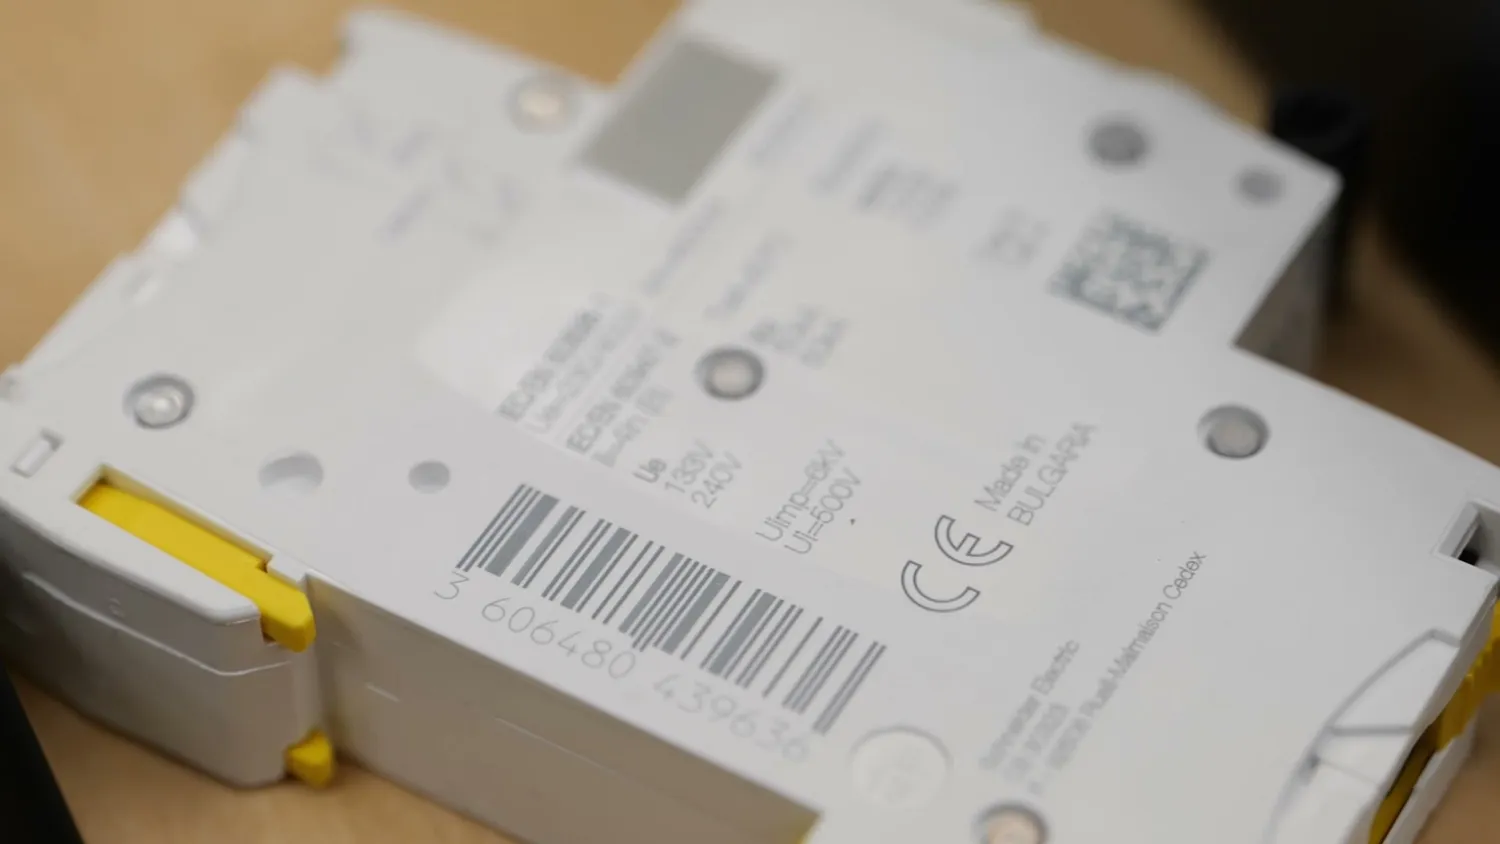 Once you start looking, laser marks are everywhere
But the laser world can also be pretty confusing, because there are so many terms: diode, CO₂, fiber, MOPA, Q-switched, Nd:YAG, YB:YAG, blue, green, red, UV, infrared, pulsed, continuous, and many more. I’ve had quite a few lasers myself over the years, from old Cartesian diode machines to CO₂ lasers. But every time I saw one of those extremely satisfying coin-cleaning videos with a fiber laser, I got that little tickling feeling that I seriously wanted to play around with one myself. So I was very excited when xTool reached out and asked whether they could sponsor a video and provide one of their machines.
The machines and the problem I wanted to solve
My original plan was to use the xTool F2 Ultra, which combines a 60 W MOPA fiber laser with a 40 W blue diode laser. And honestly, this whole “laser marking 3D prints” video was at least partly an excuse to finally make my own coin-cleaning footage. And I have to say: yes, that really works. But when I pitched the 3D-printing angle to xTool, they said that I should also try their new F2 Ultra UV laser, because that machine is supposed to be especially good at marking delicate materials, including plastics. And I was very happy that I was able to get my hands on that machine as well because it really makes a difference!
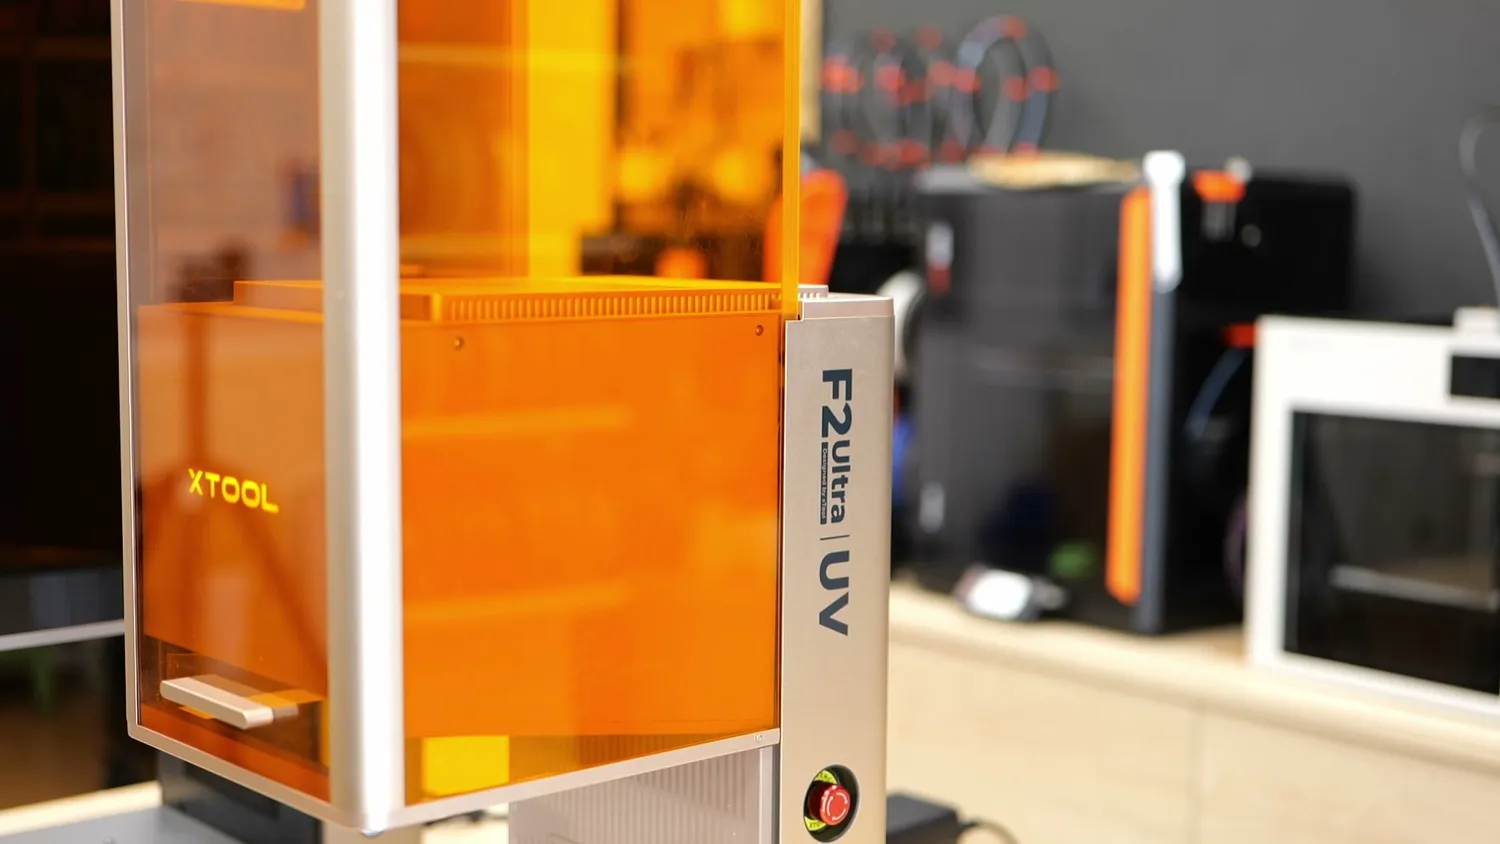 The F2 Ultra UV, the machine that ended up doing most of the work
Cleanly marking 3D prints can be surprisingly challenging, but if you want to make professional-looking and individualized parts, multi-color printing often simply doesn’t cut it. We recently had exactly this problem in the studio. My colleague Robin wanted to label his SMD component magazines*. They are 3D printed, and normal ink printing just didn’t work properly. The ink got pulled along the layer lines by capillary forces and smeared across the surface. Currently he is using UV printing, and the results looked really nice, but the process is pretty slow. That motivated me to find out whether lasers could be a faster and more economical solution. Spoiler: yes, they can. But as always, it depends.
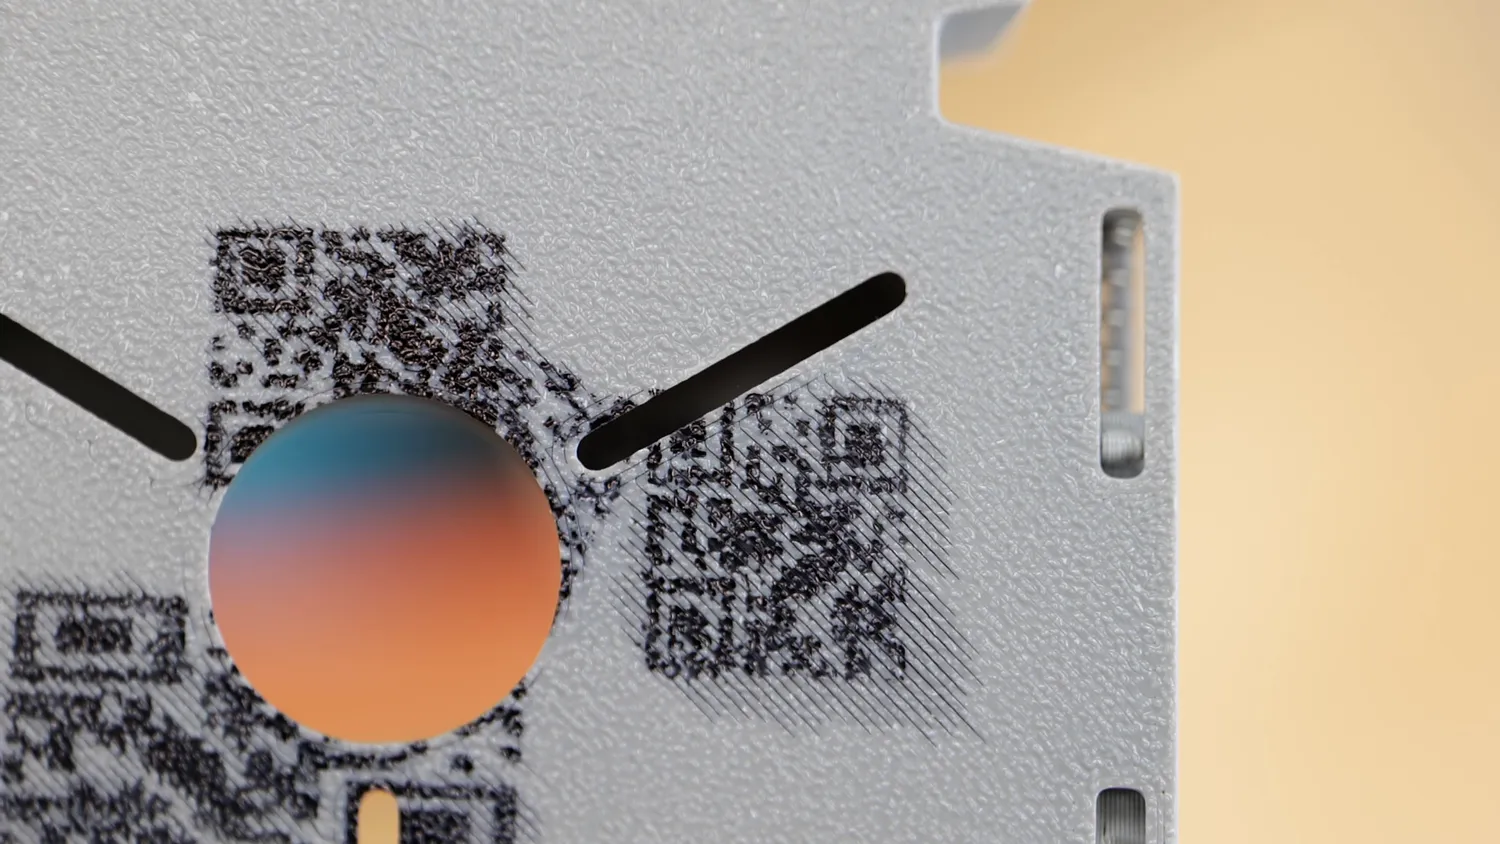 UV printing on the magazines looks great, but it is slow
Why a focused laser hits so hard
Lasers are light typically focused down to a tiny spot and to give you an idea of why they are so powerful and can even instantly evaporate metals, I did a bit of napkin math. Probably everyone has already used a magnifying glass to burn something, and you know how intense and bright that spot can already be. So my 90 mm magnifying glass focuses the 1000 W/m² you can have on a sunny summer day down to a 2 mm focus spot, this increases the power density, so how much energy hits a specific area 2000 times and you get roughly 200 W per square centimeter. With the two lasers I’ve tested the numbers become really insane. Even though they are only 5 and 60 W in power, the focus spot is much smaller, 30 and 10 µm to be precise. At this scale, if you would run them continuously the power density in the laser spot is 42,000 or 31,000 times higher than with your magnifying lens but since both MOPA and UV are pulsed lasers which amplifies the peak power to which we’ll get later, the MOPA’s peak power in the spot during a typical full power pulse is more than 3 million times higher than the bright spot your magnifying lens can produce and this explains why you can easily and instantly vaporize metals or even stones with it and also cause some other interesting effects we’ll see in a bit. So let that quickly sink in.
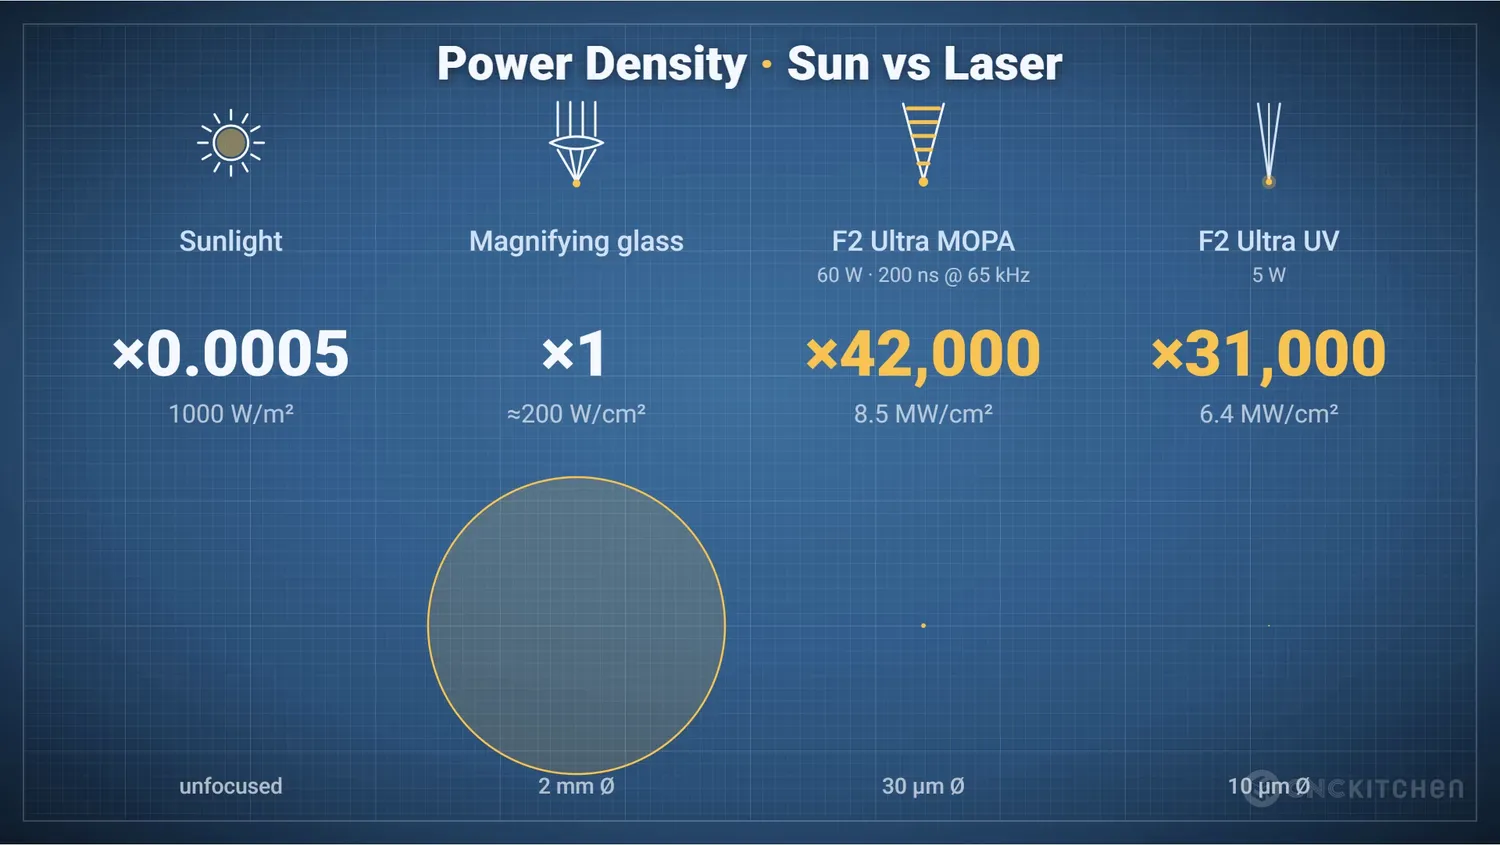 Sunlight, a magnifying glass and the two lasers, in W/cm²
When those high-intensity lasers reach the plastics we want to investigate, different things can happen and this is not only a result of the polymer but also of the additives and colorants that were used, and sometimes the latter is even more important.
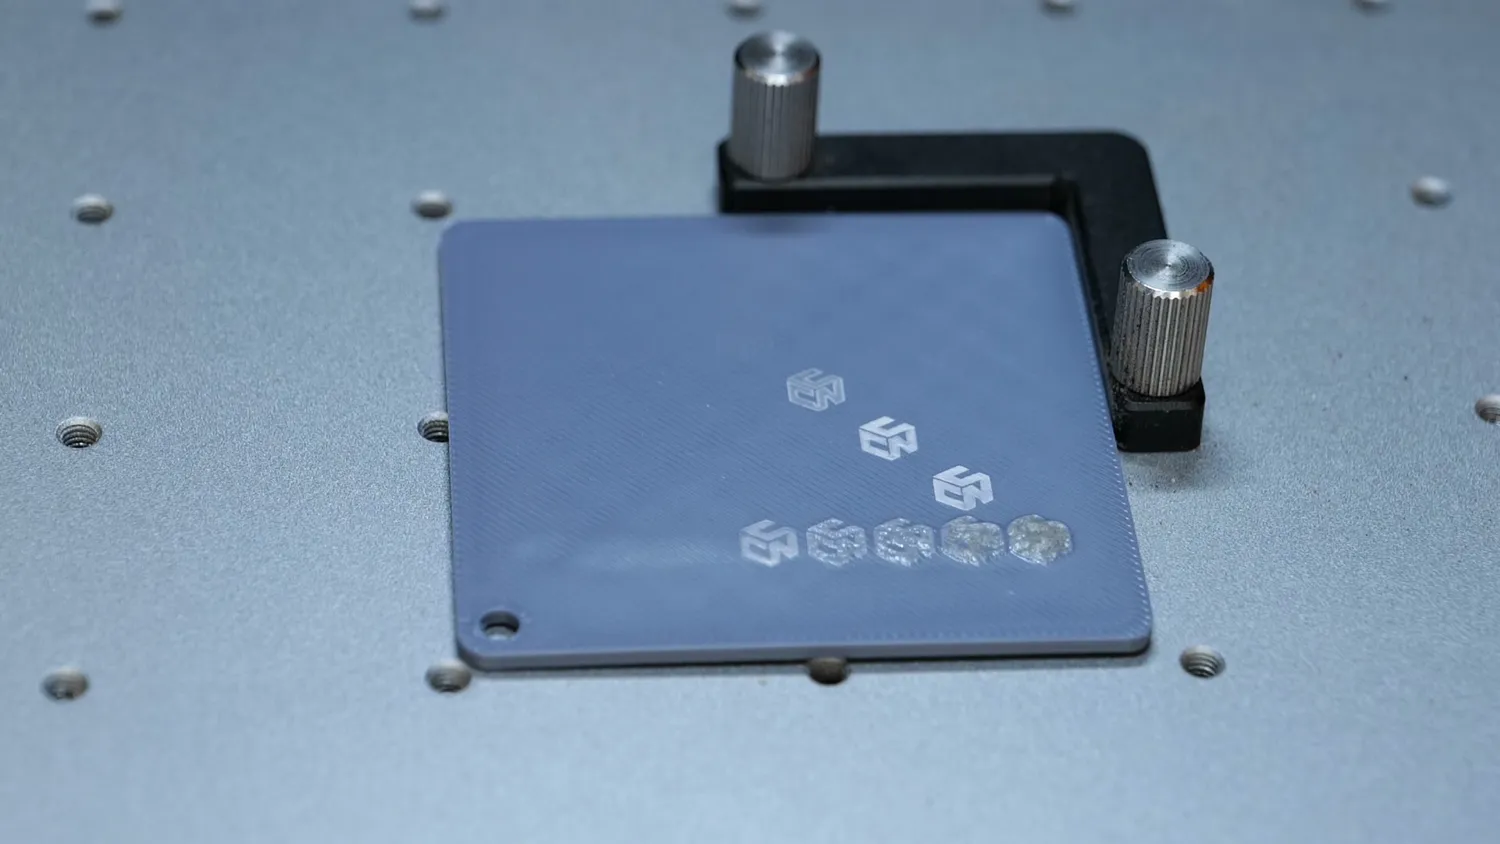 Same laser, same plate, completely different results per setting
So before I started testing, I printed a large variety of test plates from different materials and in many different colors, so that I could later engrave them and compare the results.
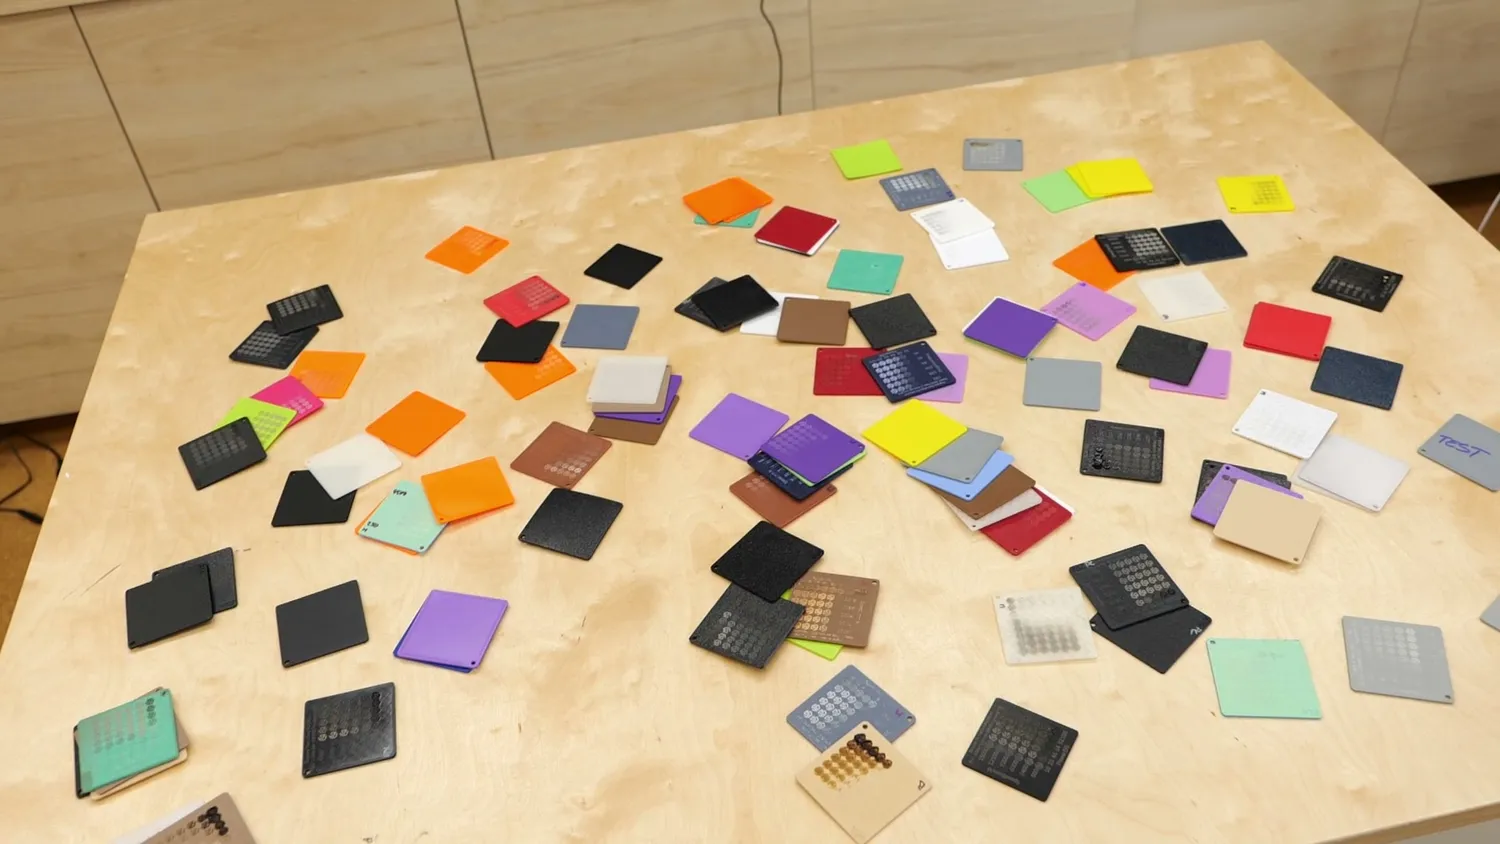 The sample set before any of it was marked
Gantry systems vs. galvo scanners
But before we jump into the test pieces, we need to quickly talk about the different laser types, because not every laser is good at the same job. And the reason is not just power. It is the combination of motion system, wavelength, beam quality, and whether the laser is continuous or pulsed. If you understand that, it becomes much easier to understand why one laser burns a plastic part into a molten mess while another laser creates a clean, high-contrast marking on the same material.
The four laser types we are going to look at
Let’s start with the motion system, or in other words: how the laser spot moves over the workpiece. Most inexpensive diode lasers and many CO₂ laser cutters use a gantry system, which is basically similar to a 3D printer. The laser head, or at least the focusing optics, physically moves over the workpiece. This has some big advantages. You can build large working areas relatively simply, and is therefore great for cutting sheet materials. Another important advantage is that gantry systems can easily carry additional hardware directly at the toolhead, like air assist. Air assist blows air into the cut, removes smoke and debris, reduces flare-ups, and usually gives you much cleaner cuts. The downside though is speed. Even if the system is well built, you are still moving a lot of hardware around, and that limits accelerations and engraving speed.
Air assist blows smoke and debris out of the cut
Then there are galvo scanners. A galvo system uses two tiny rotating mirrors to steer the laser beam over your workpiece. These mirrors sit above your working area before the focusing optics, are lightweight and therefore can move the laser spot very quickly. We are easily talking about speeds that are an order of magnitude higher than on a typical gantry machine, and the precision is also excellent and easily below 0.01 mm! That makes galvo systems ideal for fast engraving and marking, especially for things like serial numbers, QR codes, logos, and small detailed graphics. The trade-off is that the working area is usually smaller, unless you combine the system with a conveyor belt or another positioning stage.
A galvo scanner also has to solve a very interesting optical problem. If you just used a normal lens, the beam would be in focus only at one distance. But as the mirrors scan the beam away from the center, the distance to the workpiece changes, and the focus would no longer lie on a flat plane. Instead, it would form something like a curved bowl. That is why galvo systems usually use an F-theta lens. This lens helps keep the focused spot more or less constant over a flat working area, even though the beam hits the lens at different angles. I think that is pretty cool.
A normal lens curves the focal plane, an F-theta lens flattens it
Diode, CO₂, fiber and UV lasers
Now, let’s talk about the actual laser sources.
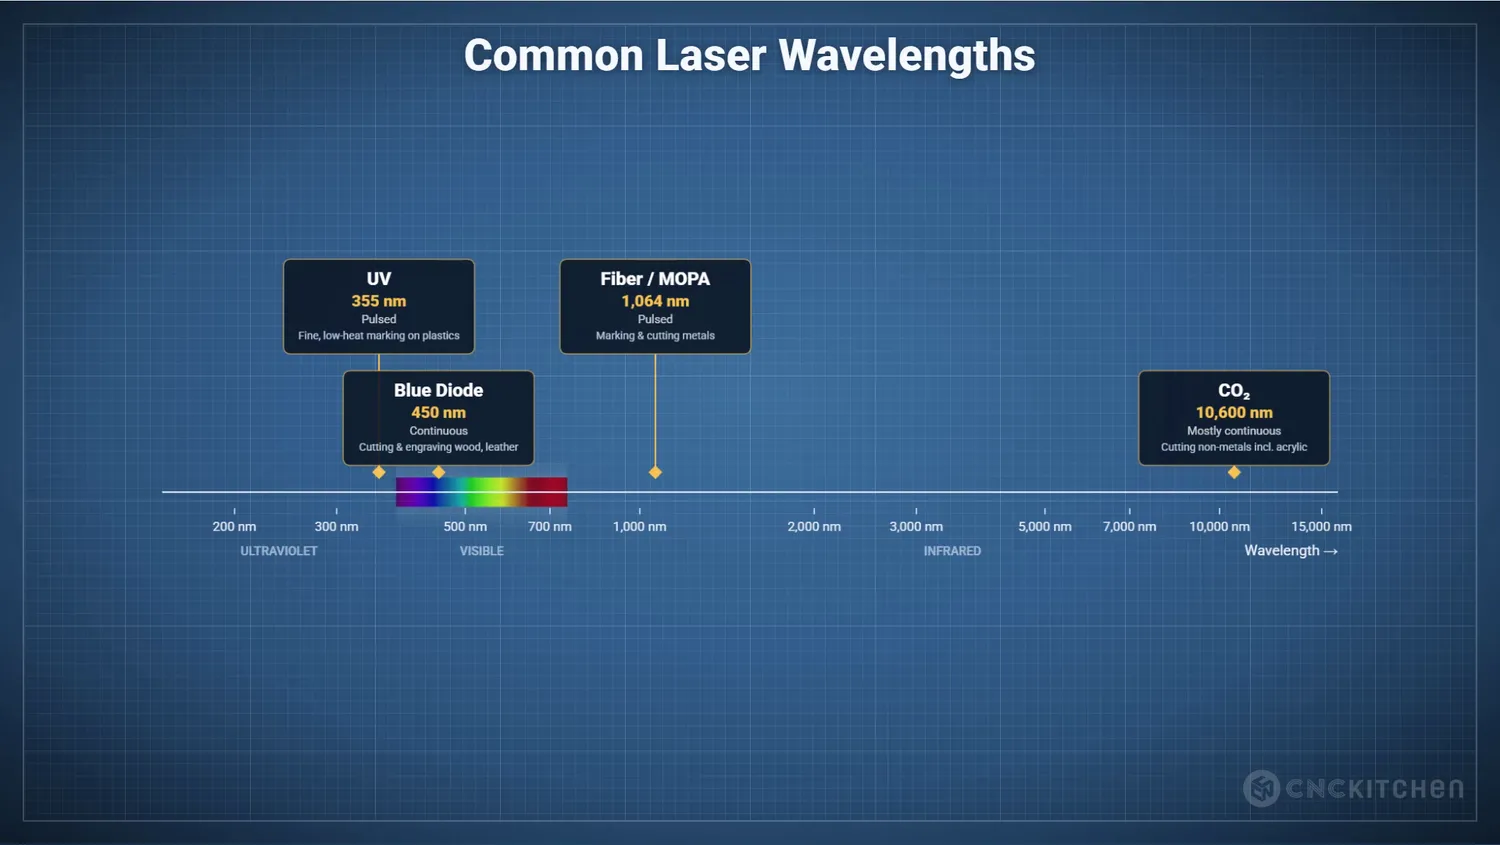 Where the four common laser types sit on the spectrum
The most common entry-level lasers are diode lasers. These days they are often blue, around 450 nanometers. At low power, a module may use just a single laser diode, while higher-power modules combine the output of several diodes using beam-combining optics to reach for example the 40 watts of the xTool F2 Ultra. Generally they are compact, relatively affordable, and can work well on many organic materials like wood, cardboard, leather, some plastics, dark acrylic and at higher powers, even metal! But they also have limitations. Since the wavelength is visible blue light, clear materials often just let it pass through. That’s why a blue diode laser is usually not the right tool for cutting or engraving clear acrylic. Beam quality can also be an issue, because the raw beam from a laser diode is not naturally a nice round spot. Depending on the optics and how multiple diodes are combined, the focus spot can end up elongated or rectangular rather than a clean round dot, which affects how finely you can engrave or how cleanly you can cut.
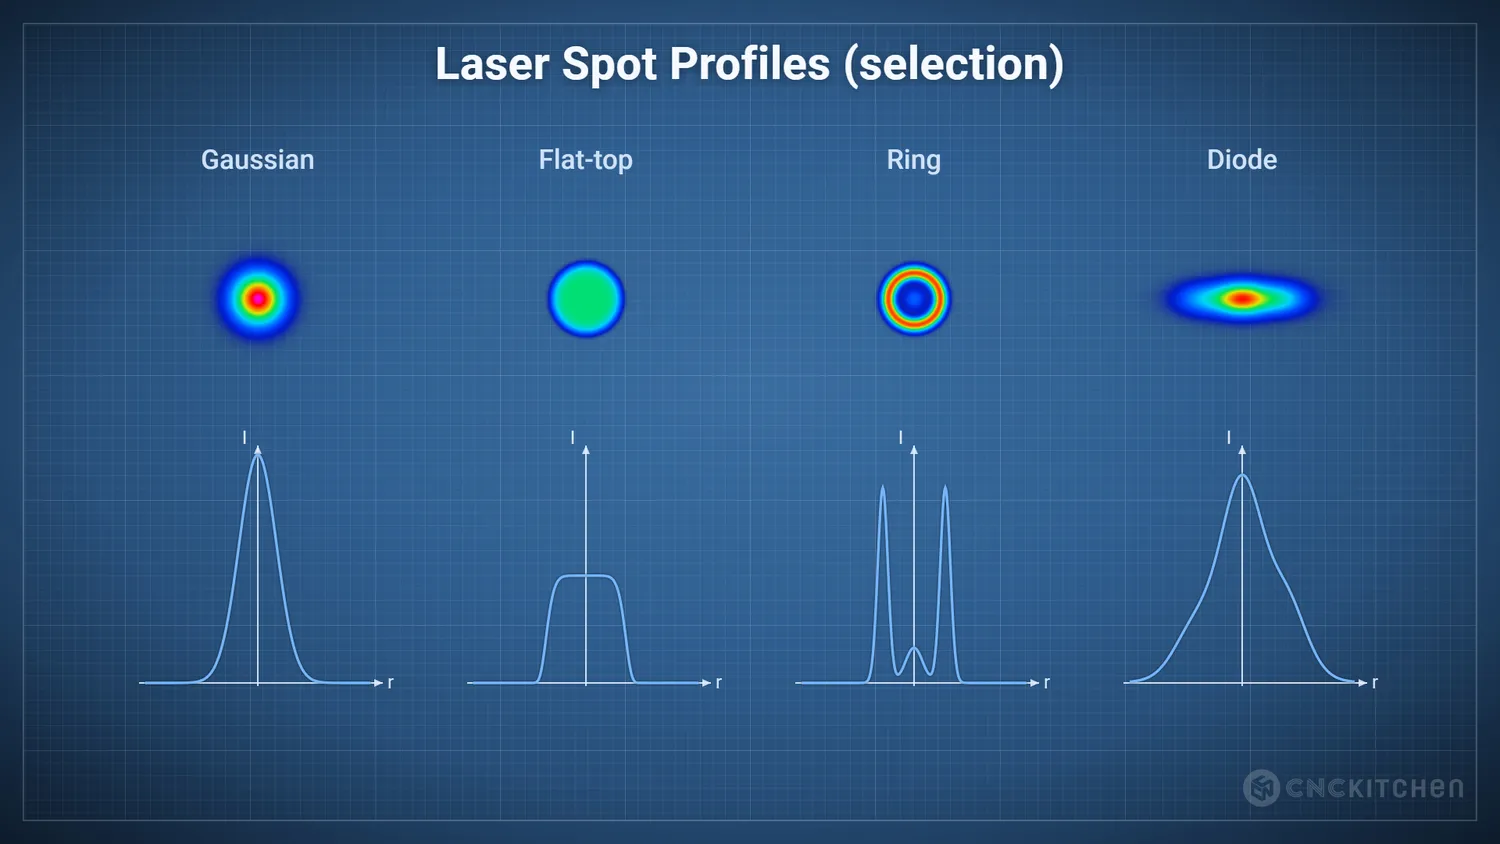 A diode beam is not a clean round dot
CO₂ lasers work very differently. They typically emit light at around 10,600 nanometers, deep in the infrared. This wavelength is absorbed very well by many non-metals, especially wood, leather, paper, rubber, and acrylic, including clear acrylic. So if your main job is cutting or engraving larger non-metallic sheet materials, a CO₂ laser is usually the way to go. It is fast, powerful, scalable, and very well established.
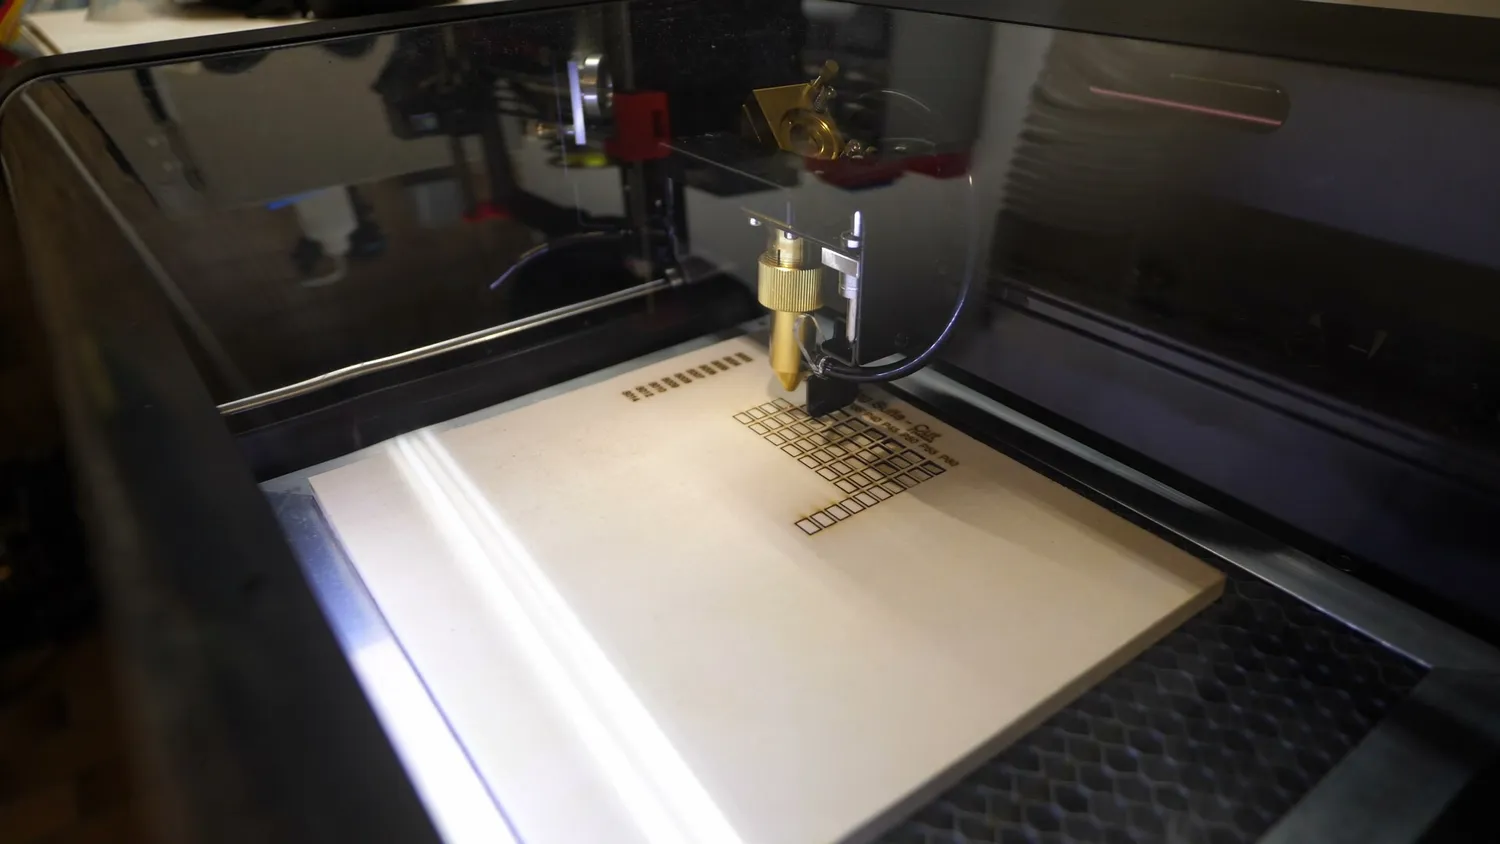 My CO₂ machine running a material test on plywood
Then we get to fiber lasers, which usually work around 1064 nanometers. This wavelength is much better suited for metals and used a lot in industrial marking, cutting and welding applications. And this is also where many of those satisfying coin-cleaning and rust removal videos come from.
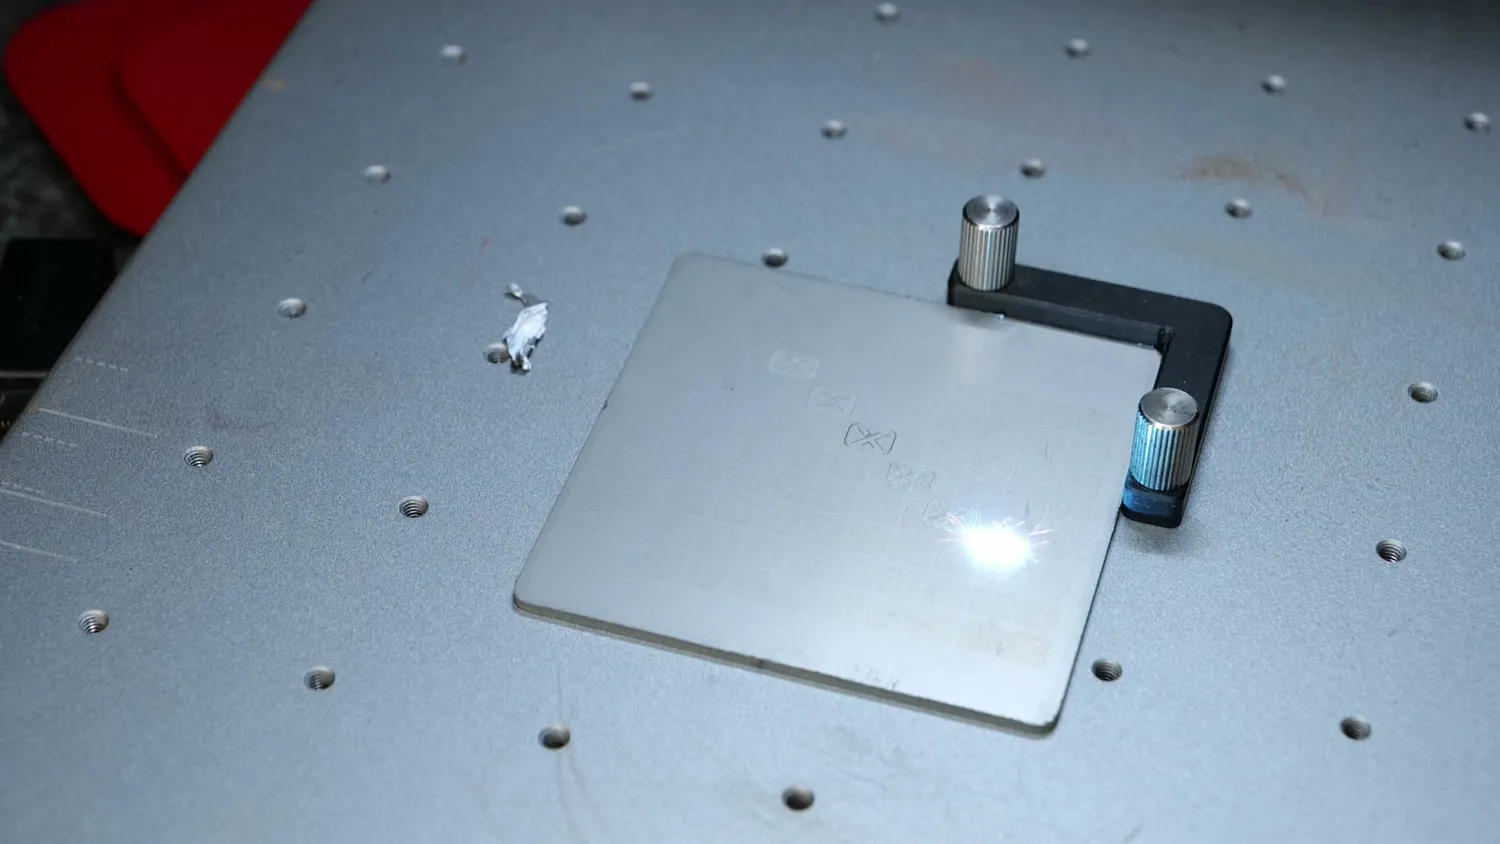 1064 nm is where metals really start to absorb
The new interesting option for me here was the UV laser. A typical UV marking laser works around 355 nanometers, so on the other side of the visible spectrum compared to infrared fiber lasers. This shorter wavelength has two big advantages. First, it can be focused to a very small spot, which is great for fine details. Second, UV photons carry much more energy per photon than infrared ones, and many materials, including plastics, metals, and even glass, absorb UV light much more strongly than longer wavelengths. UV marking is sometimes called “cold marking.” That does not mean there is no heat at all, but the interaction works differently from longer-wavelength lasers. Because the absorption is so strong, the energy is deposited in a very thin surface layer, and because the pulses are extremely short, the surrounding material has very little time to heat up.
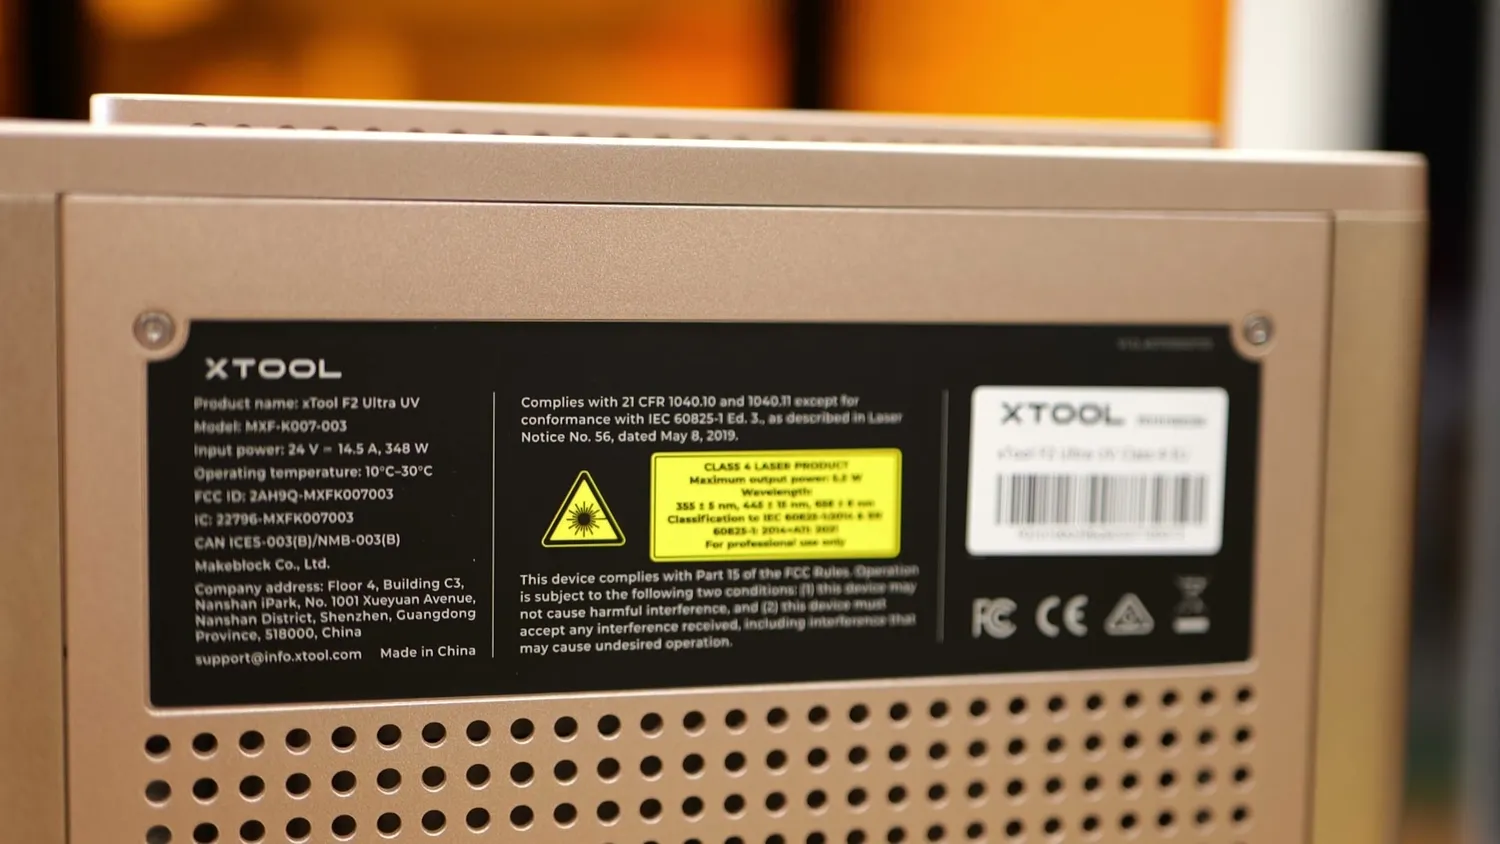 355 nm, 5.2 W, Class 4
To test this, I even managed to engrave my logo into the head of a match without lighting it during the engraving process. That took a bit of trial and error, but I was surprised how well it worked in the end.
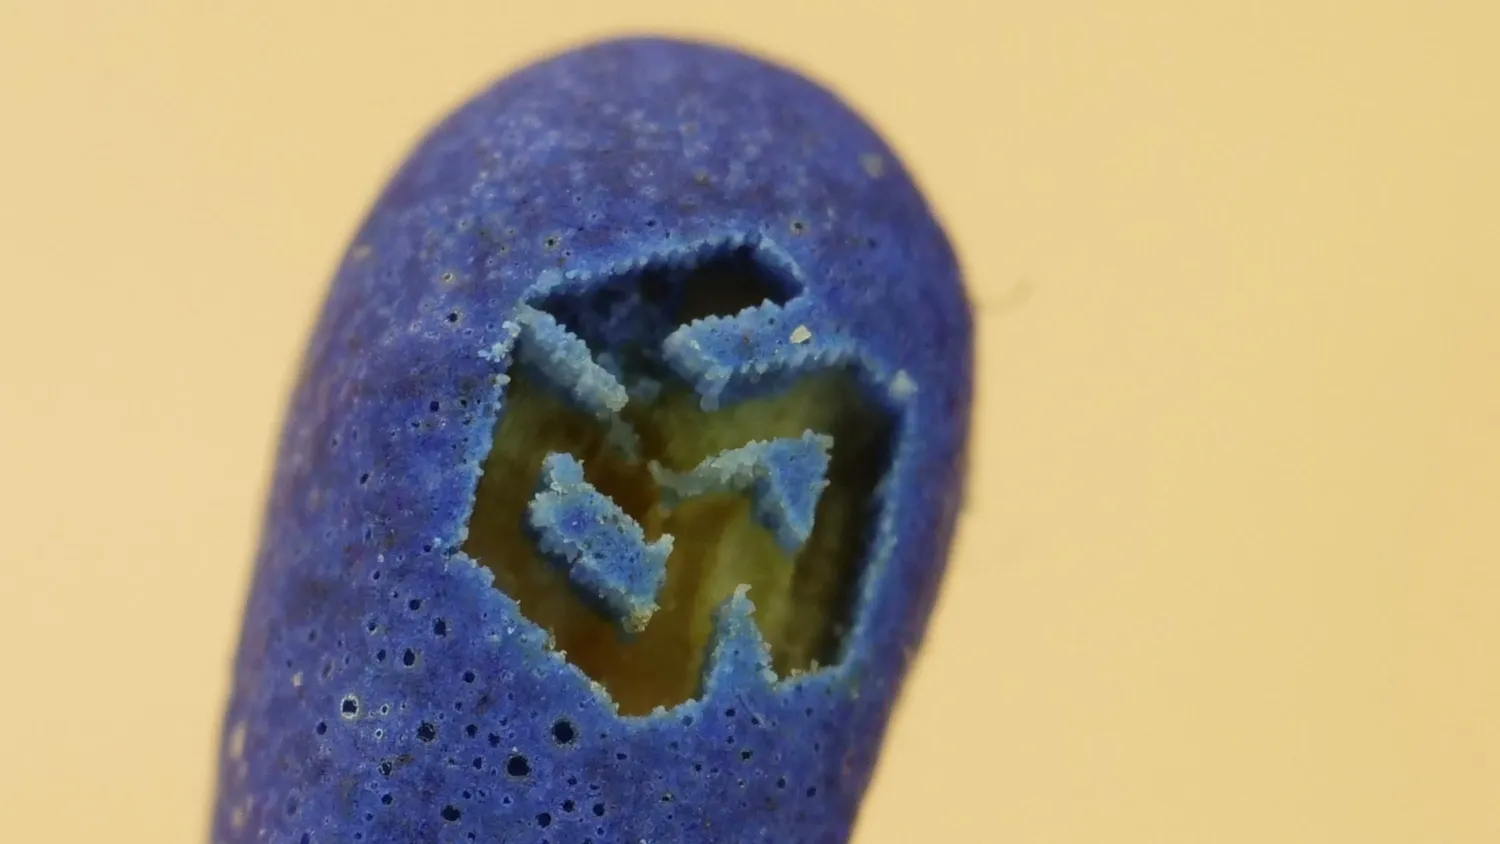 Engraved into a match head, without igniting it
So in a way, a UV laser is more like a tiny surgical knife. It is usually not the right tool for fast cutting or deep engraving, but for high-resolution, low-heat, high-contrast markings on delicate materials, it can be extremely useful. And don’t get me wrong, even though it only has 5 W of power, the power density due to the small spot is ridiculous and it even works flawlessly on metals. We did our own tests on copper, and there are other guys using the F2 Ultra UV for prototyping PCBs!
Continuous vs. pulsed lasers, and what MOPA adds
And now there is one more very important difference that took me a while to really understand and appreciate: continuous versus pulsed lasers.
A continuous beam against short, high-energy pulses
Most diode lasers and many semi-professional CO₂ cutting lasers emit something that is more or less a continuous beam. While cutting, the beam is basically on all the time. So a 40 W laser delivers around 40 W continuously into the cut. That is useful when you want to keep heating, melting, or vaporizing material along a toolpath.
Fiber marking lasers and UV marking lasers usually work differently. They are typically pulsed lasers. Instead of being on continuously, they fire extremely short bursts of energy.
So even if a pulsed laser has an average power of, let’s say, 60 W the F2 Ultra or only 5 W for the F2 Ultra UV, the power during each individual pulse can be thousands or even tens of thousands of watts. You can think of it like a reservoir that is charged up and then dumped in an instant. And you need to distinguish this from the PWM mode that you have on diode lasers, for example, which is used to control the output power. Quickly turning on and off a continuous laser lowers the average power and does not have the same effect as on a real pulsed laser because the maximum power stays the same; you only turn it on and off very quickly.
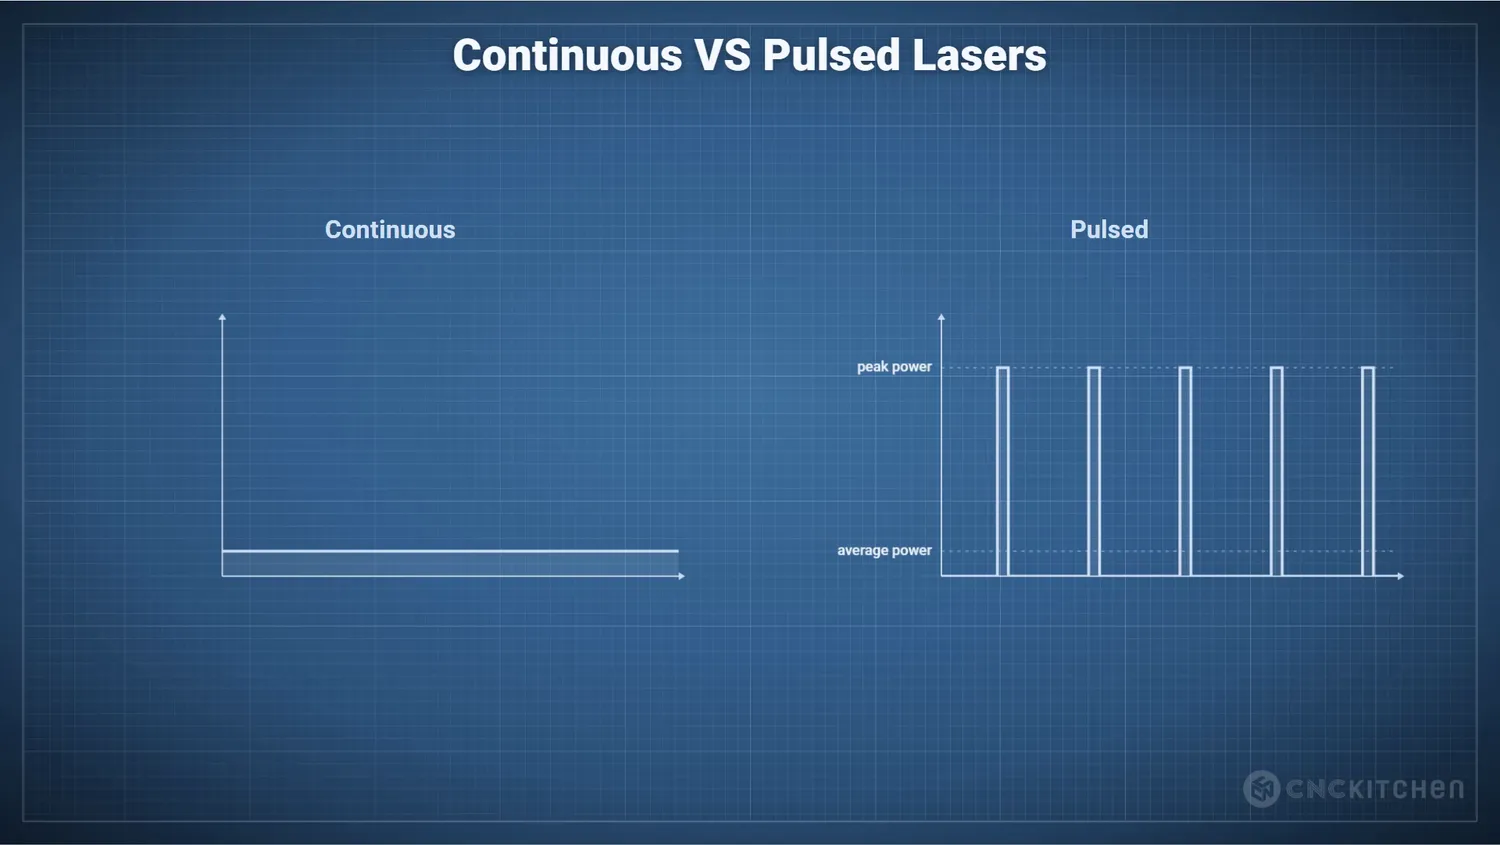 Peak power is what does the work, not average power
One of the settings you often adjust is the frequency, so how many pulses the laser fires per second. A lower frequency means fewer pulses per second, but each pulse can carry more energy. A higher frequency means more pulses, but each one usually contains less energy.
This is one of the reasons why pulsed lasers are so effective for marking. They can create extremely intense micro-events on the surface of the material. Depending on the material, that can cause ablation, oxidation, discoloration, foaming, carbonization, or texture changes without necessarily melting the whole part as much as a continuous beam would.
Pigment bleaching, microfoaming, charring, melting and ablation
And this brings us to the MOPA laser.
A MOPA laser is usually still a 1064 nm fiber laser, but compared to a simpler Q-switched fiber laser, it gives you much more precise control over the pulse parameters, especially pulse duration and frequency.
That means you can tune even better how much energy is dumped onto your part’s surface in a given time and therefore tune how much it is heated. This extra control is what makes MOPA lasers especially useful for things like color marking on stainless steel, where you can tune the oxide layer on the surface and therefore the color you see.
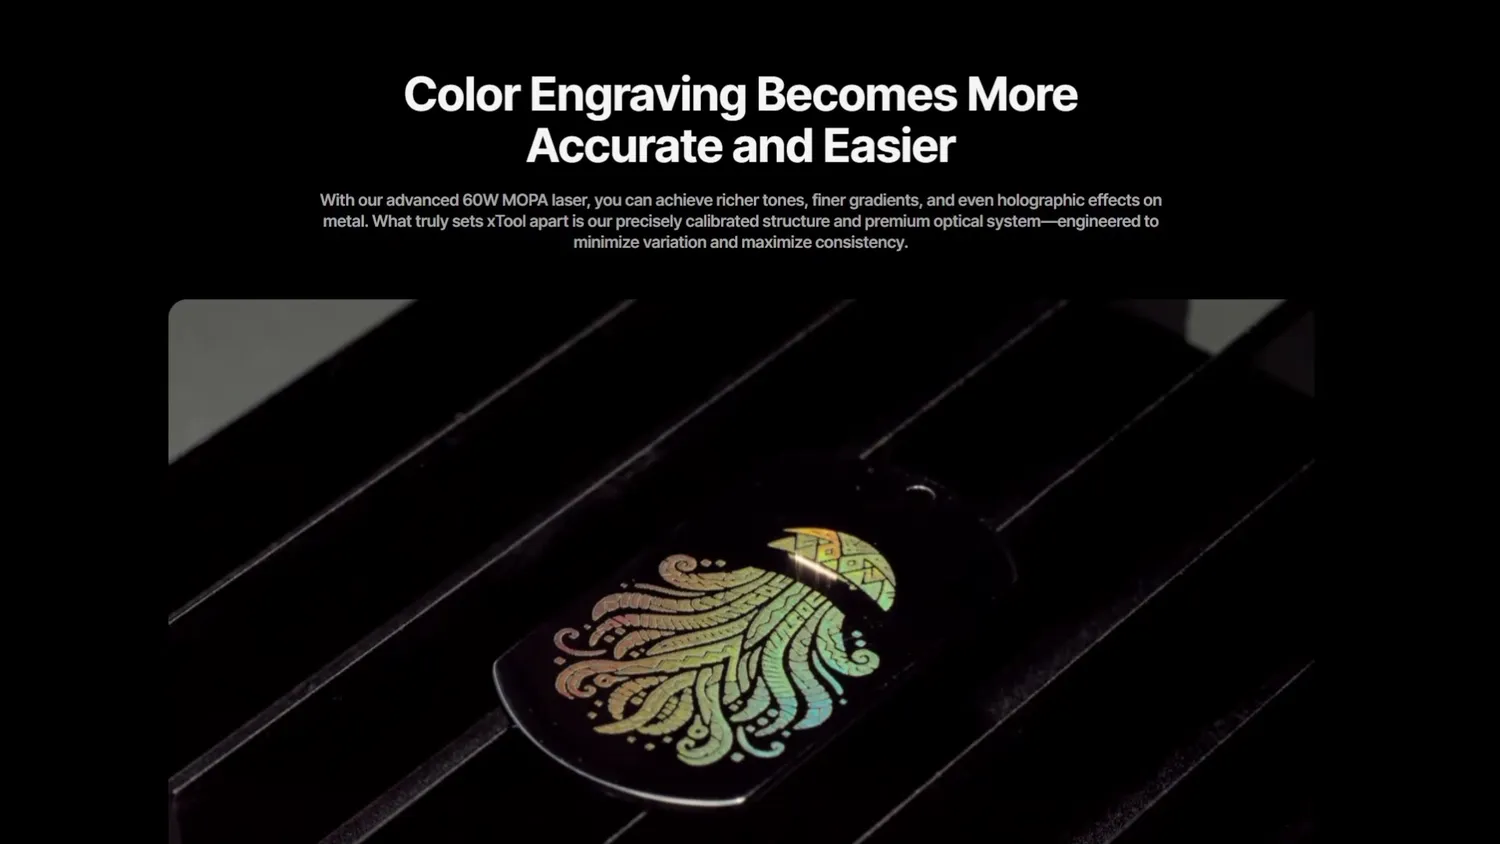 Color marking on steel is a MOPA specialty
Printing and marking a dozen colors
With that background, it becomes much easier to understand why some laser technologies work well on plastics and others don’t.
You can absolutely mark plastics and other materials with diode or CO₂ lasers, but it is often a delicate balance between doing nothing, melting the surface, or burning the part. And if you constantly work with different materials and colors, that can become frustrating very quickly.
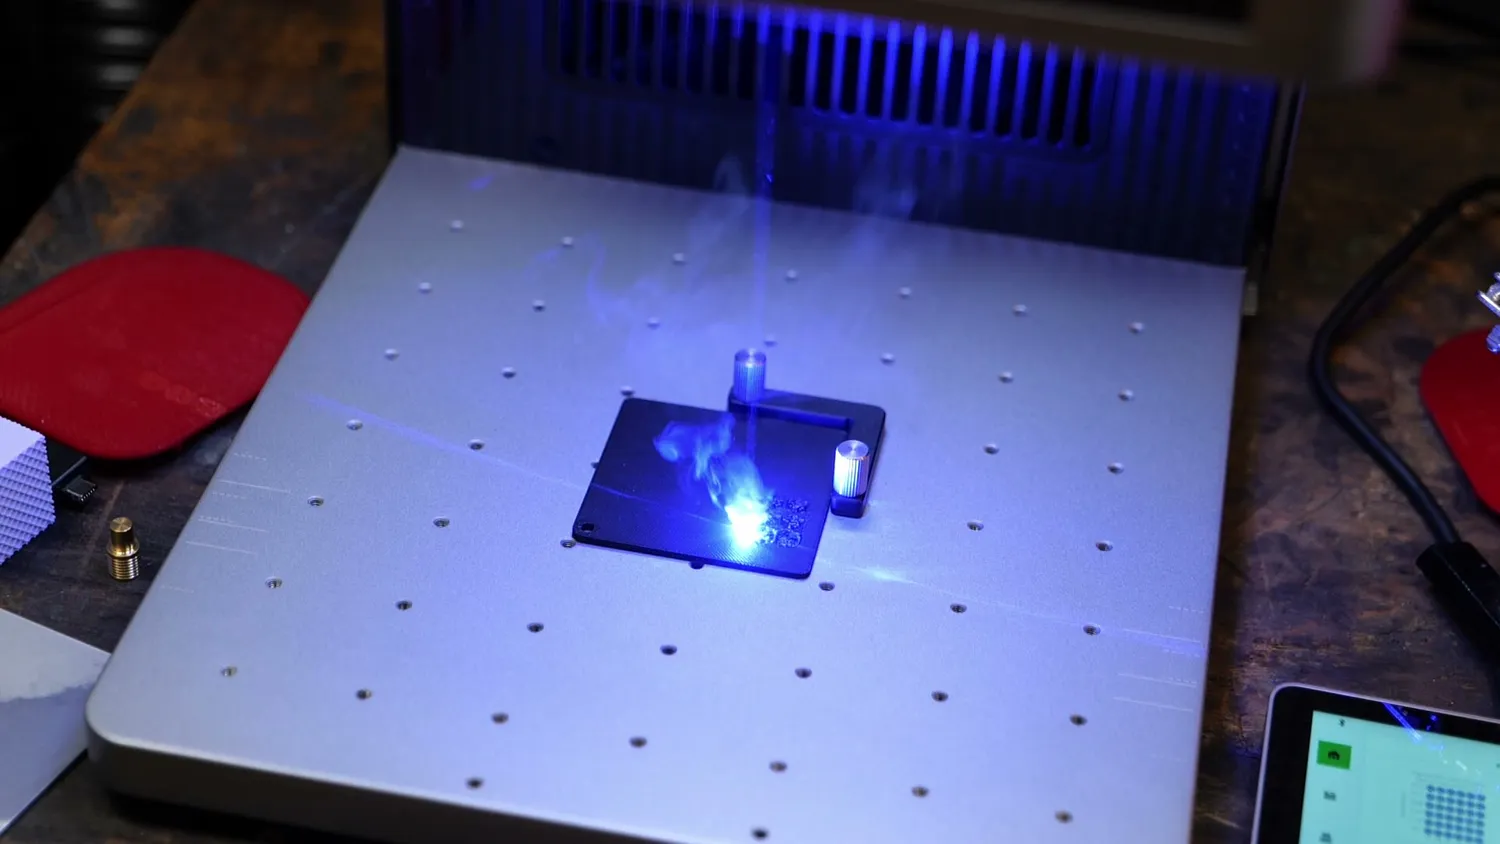 Too much energy, and the plate just melts
So, as I said earlier, I printed test samples in more than a dozen colors and from several different materials, including PLA, PETG, TPU, ASA, and polycarbonate, to find out how well they mark and how easy the process is to set up.
The xTool machines use xTool Studio, which is their own software for creating projects and tuning settings for different materials. And since every material and every color can react differently, the software has a built-in test-pattern generator. You can choose two parameters, set a lower and upper limit, and the software generates a grid of parameter combinations. That is exactly what you want for this kind of testing, because with laser marking, the correct setting can vary quite a bit depending on material and color.
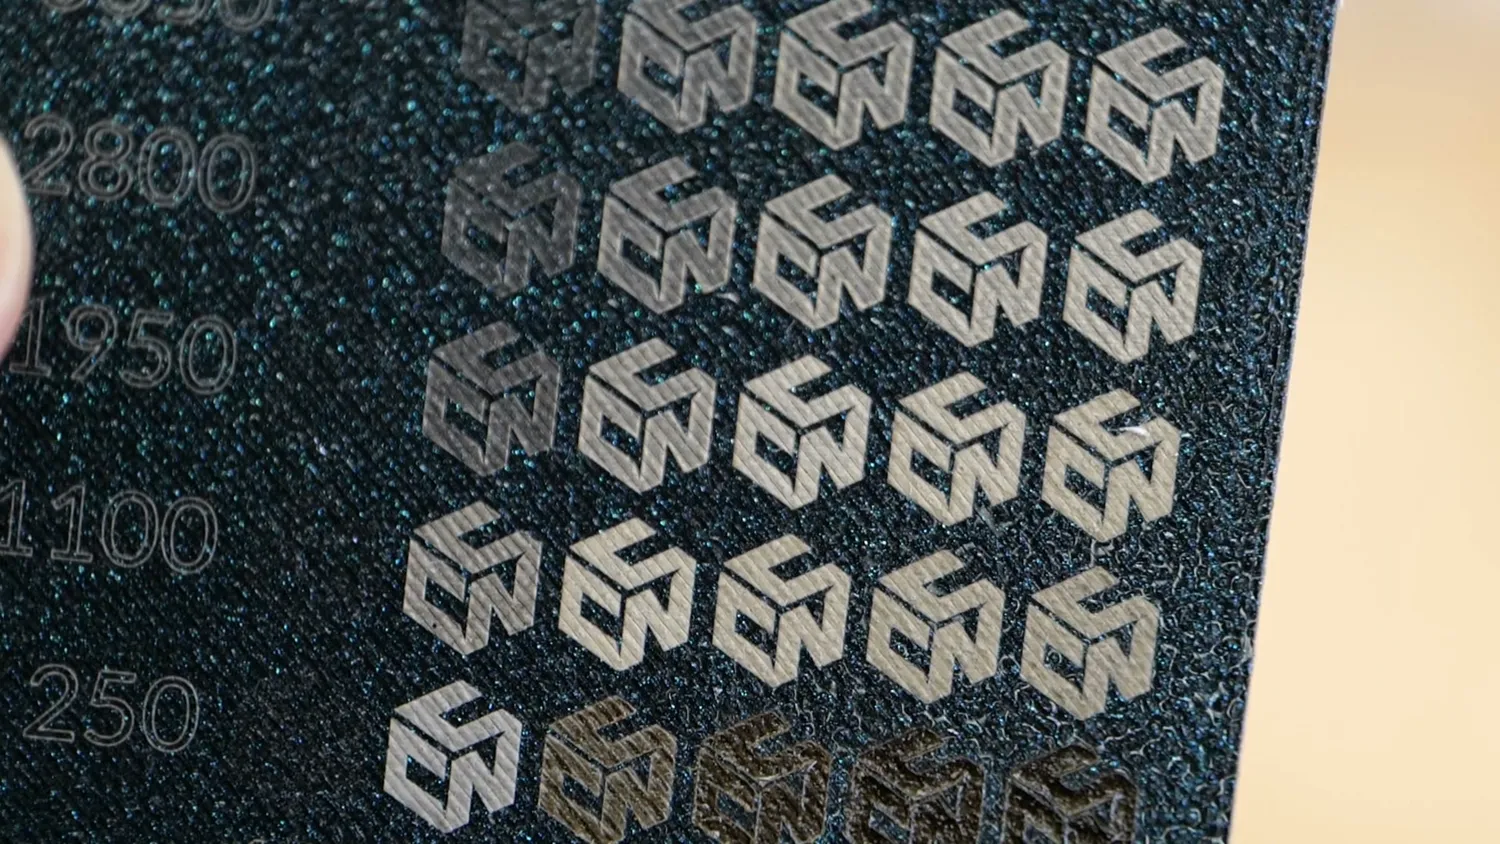
I first played around with the settings to get a feeling for the range. The F2 Ultra goes up to 15,000 mm/s in speed, but with the UV laser, I noticed that the most interesting changes happened in the lower third of that range. So for most of the test plates, I used a range from 10% to 100% of the 5 W laser power and 250 to 4500 mm/s travel speed. On many materials, this gave me a very useful gradient. In one corner, the energy input was so high that the material melted, charred, and sometimes even burnt. Then there was a band where I got a clean, high-contrast mark. And in the opposite corner, the energy input sometimes was so low, or the speed so high, that barely anything happened anymore.
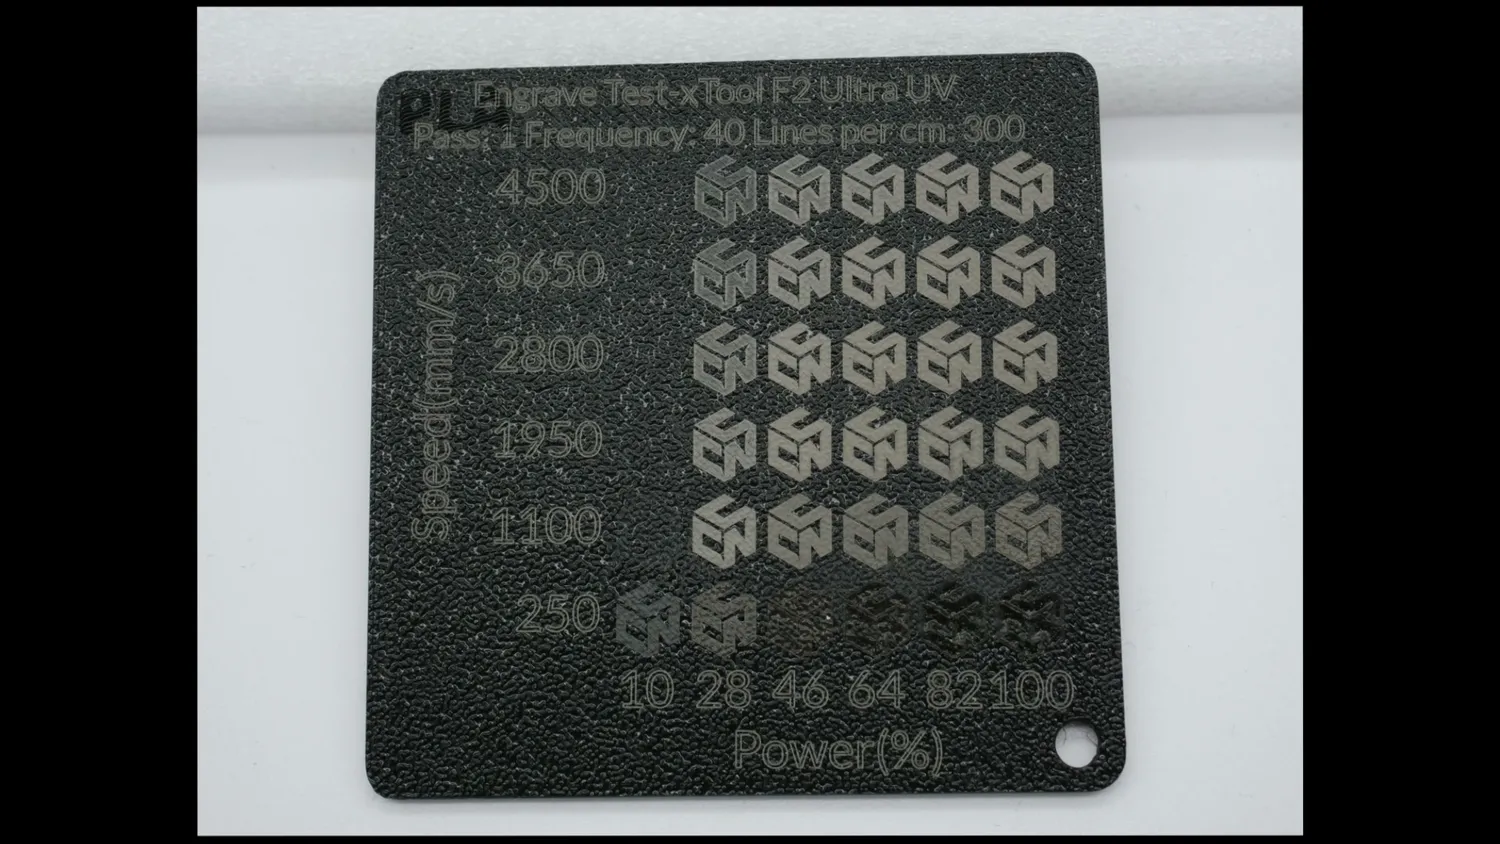 Speed on one axis, power on the other
How lasers actually mark plastics
Before we get to the results, two quick things.
First, how lasers actually mark plastics. There are usually a few different effects involved: discoloration, pigment changes, foaming, carbonization, and material removal. A dark material can turn lighter if the laser creates tiny bubbles under the surface, because those bubbles scatter light. A light material can turn darker if it carbonizes or if the pigment changes. And depending on the laser and settings, you can also break down the pigments, roughen the surface, melt the polymer, ablate material away or a combination of effects! Keep this in the back of your mind as we go through the results, because the same laser can create a mark by completely different mechanisms depending on the material and color.
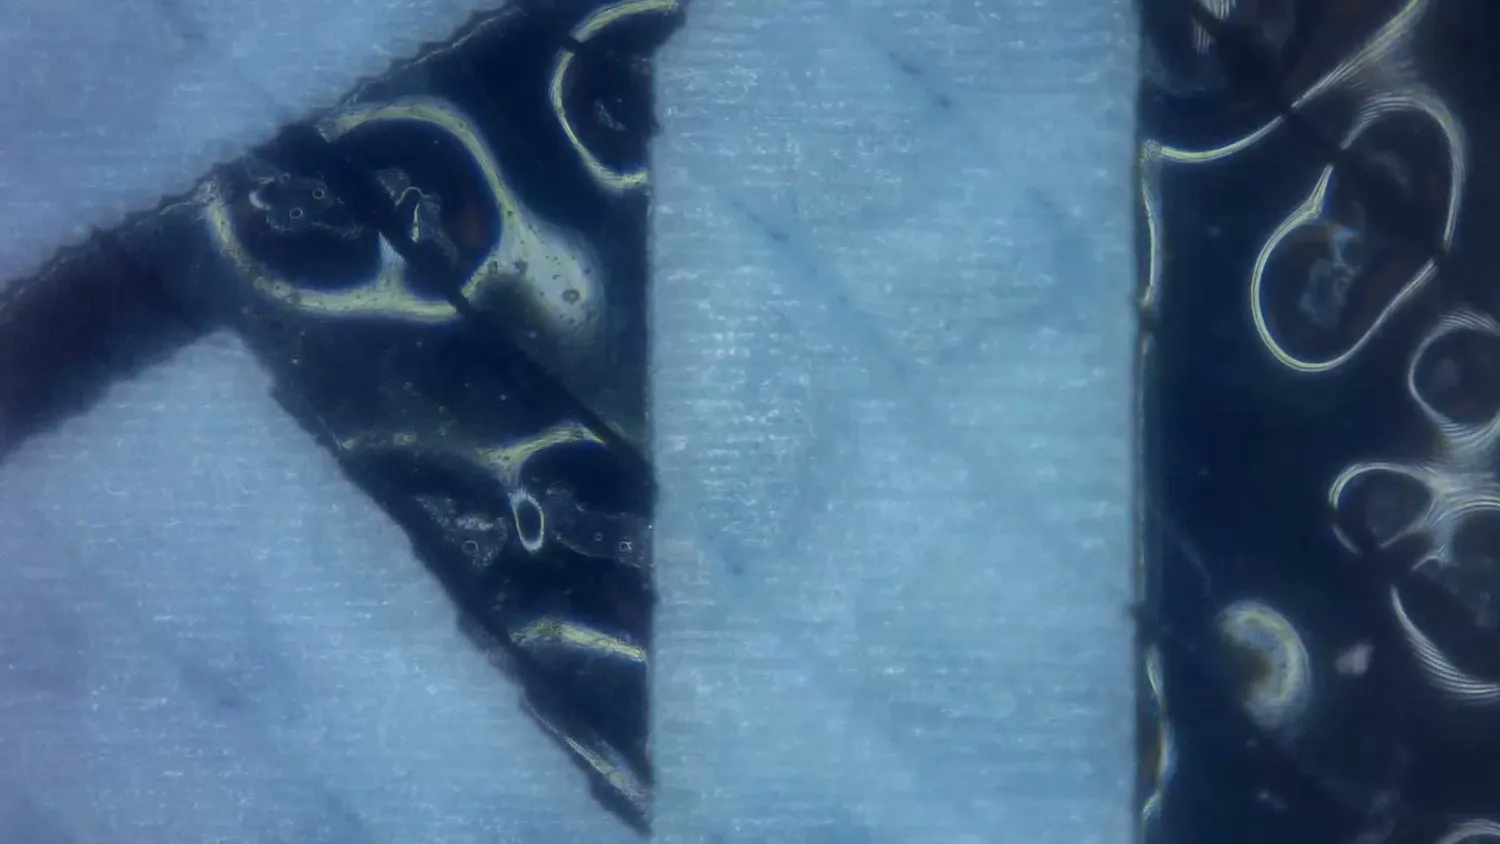 Microfoaming under the surface is what scatters the light
Laser safety and fumes
Second, safety. You have already seen a lot of shots of the lasers in action with the enclosure not fully closed. I only did this so I could properly film the process, and you have to jump through some hoops before the xTool machine even allows you to run like that. But please do not take this lightly. With a blue laser, you can see the beam and you immediately understand that it is bright and dangerous. With the UV and MOPA lasers, the actual laser light is outside the visible spectrum. If you see something, this is only the plasma or glow from the interaction with the material, but the invisible laser radiation itself can still be horribly dangerous. And you only have one pair of eyes. So if you work with machines like this, make sure you have the proper safety equipment, the correct laser safety glasses for the wavelength you’re working with, and use the enclosure whenever possible.
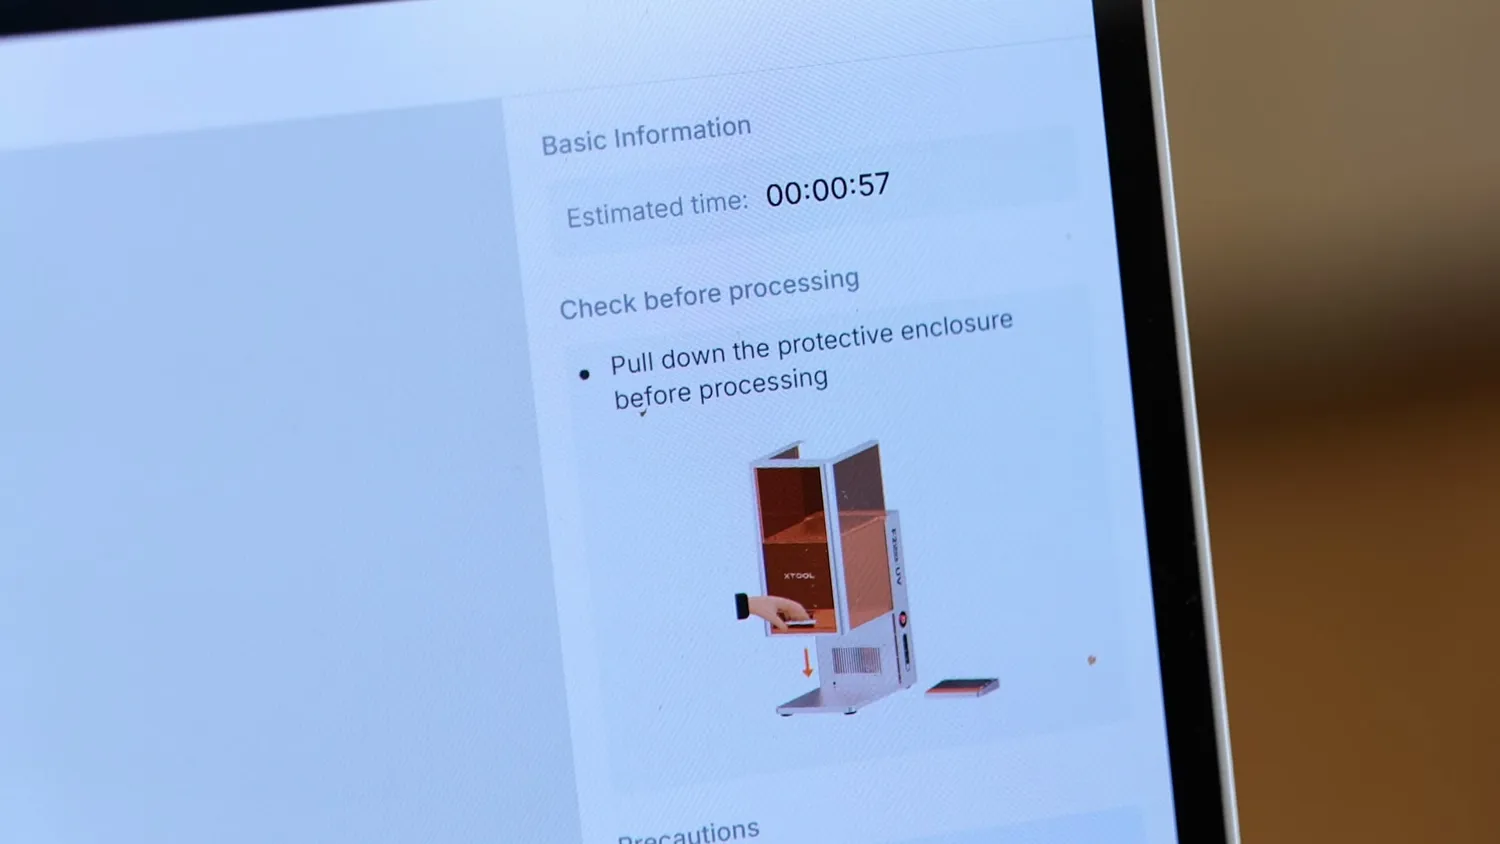 The machine really does not want you to run it open
The same goes for fumes. When a laser interacts with plastic, it can create smoke, particles, and potentially nasty decomposition products. xTool sent me their SafetyPro air purifier*, which worked really well for this setup, and you should never run these machines without a proper filter or directly venting outside. If you think smoking is bad, laser fumes from random plastics or metal condensates are not exactly something you want in your lungs either.
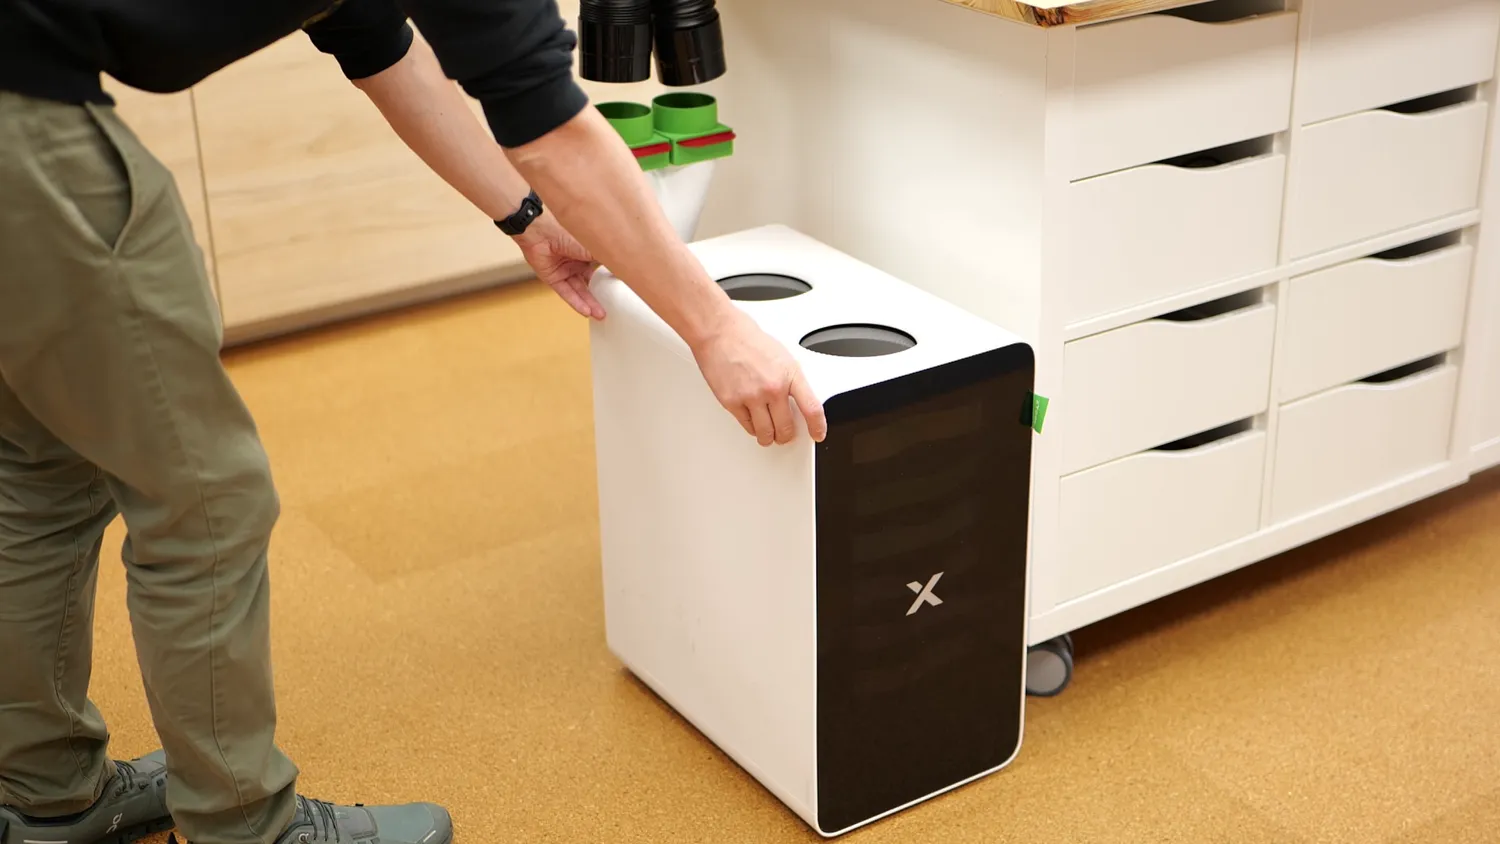 Filtering the fumes is not optional
UV laser results on 3D prints
Alright, let’s go through the lasers one by one.
The UV laser ended up being the star of this test. It worked on the widest range of materials, required the least tuning, and on most samples I could simply run a broad parameter grid and find a useful marking somewhere inside it.
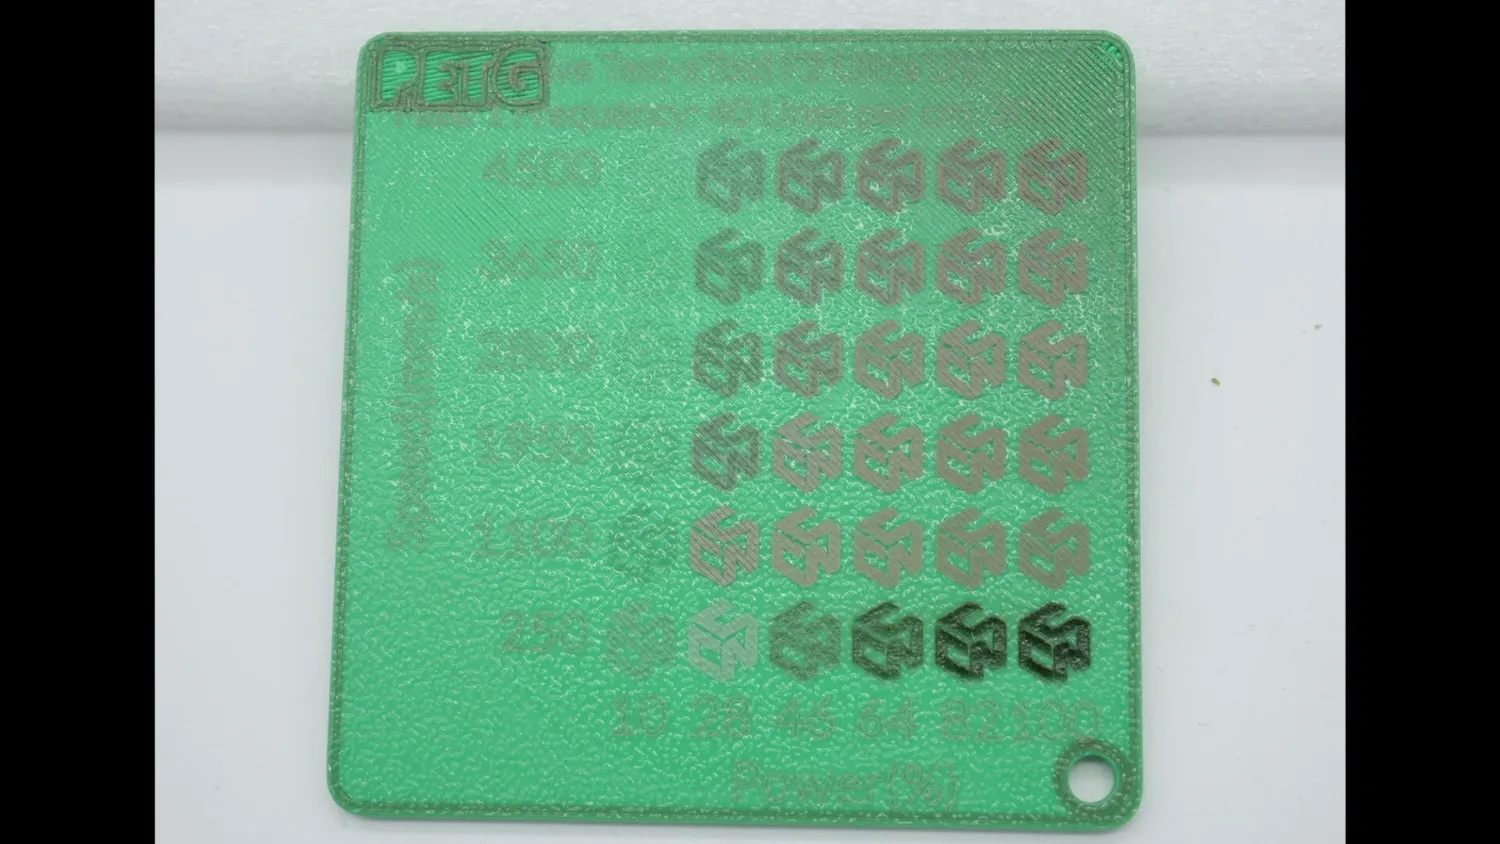 A broad grid on green PETG, with a wide usable band
Under the microscope, the UV-marked samples were fascinating. If I didn’t go overboard with the energy input, the material usually didn’t look burned or charred like wood engraving. The surface often stayed surprisingly intact, and the contrast seemed to come from a combination of microfoaming and changes or removal of pigments. Some colors, like blue, turned almost white in the marked areas. The only materials I really had problems with were the red samples and some of the dark carbon fiber materials.
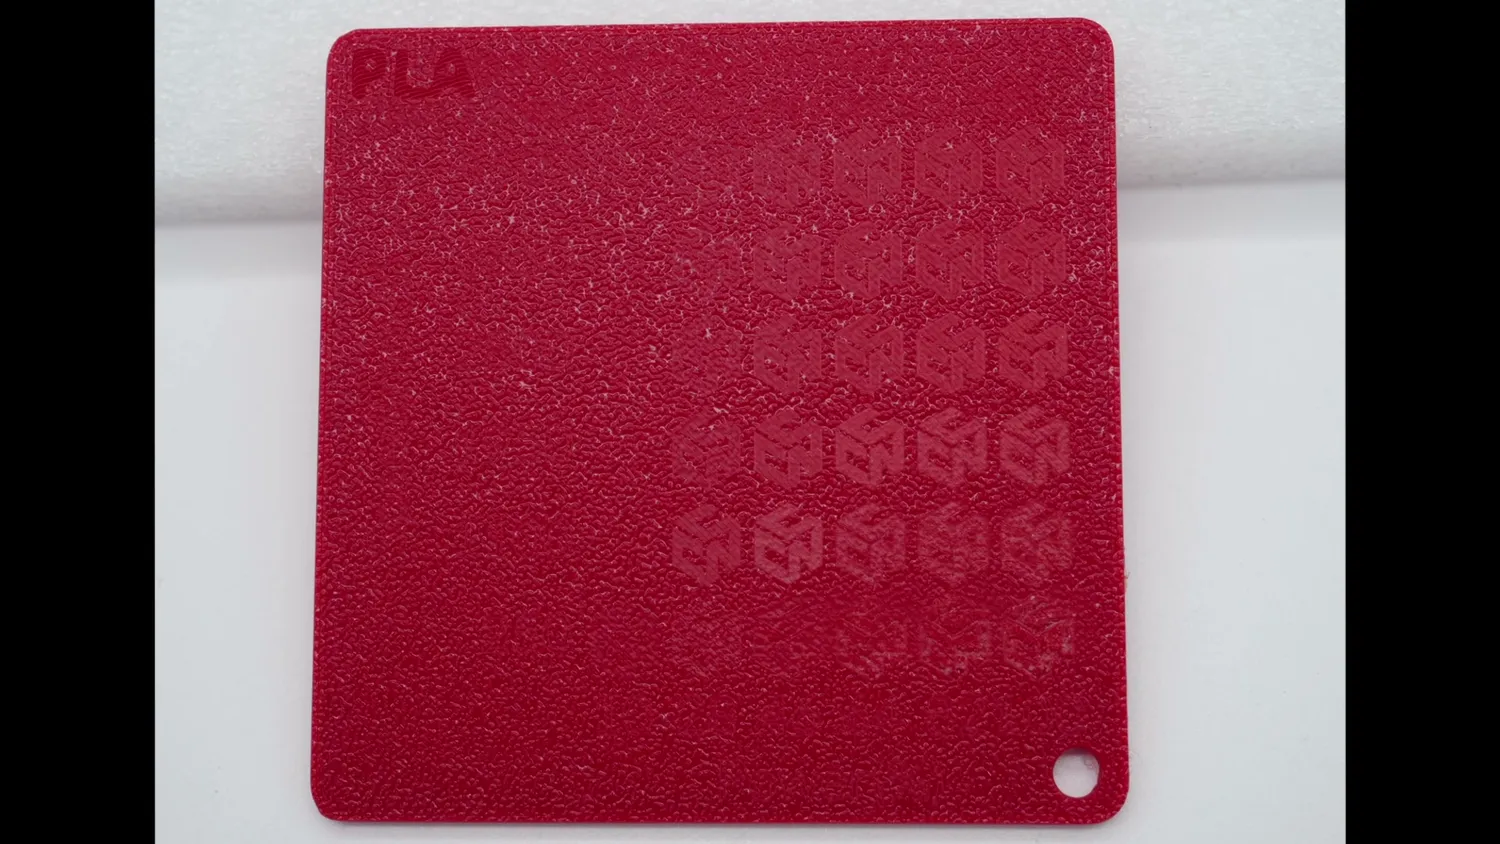 Red was one of the few colors that simply refused
That brings me to one of the most important lessons of this whole project: the marking quality often depends more on the pigments and additives than on the base polymer. Most of my samples were PLA, but I got very similar results on PETG, ASA, TPU, and polycarbonate. The marking result was driven much more by the color and pigment system than by which polymer it was at least on the UV laser. There were still some material differences. Some plastics foamed more easily, others changed color without much surface texture and sometimes the filament manufacturer made all the difference.
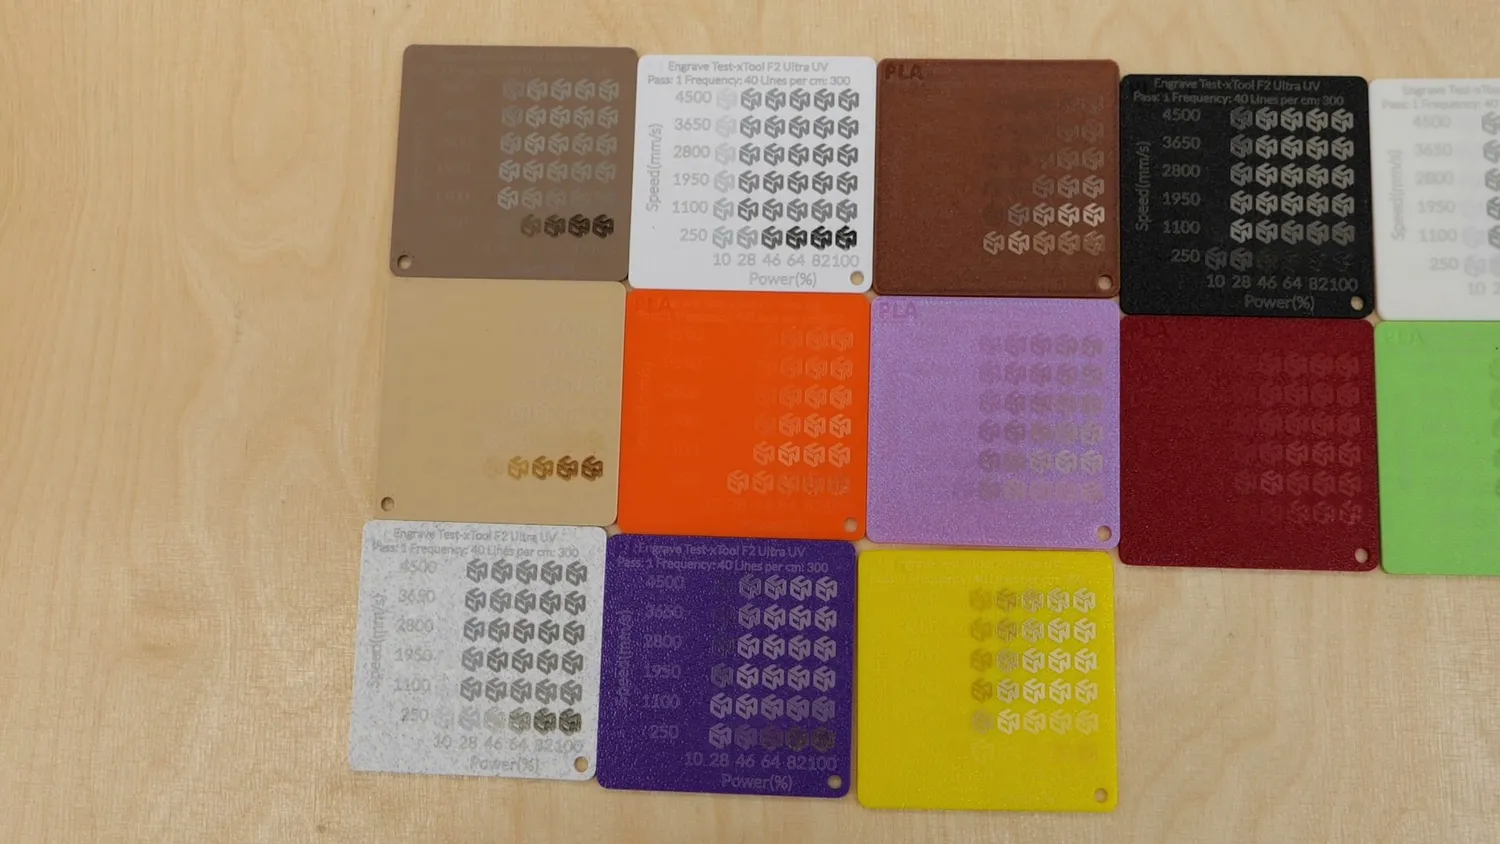 Every color and material, marked with the same grid
The clearest example of this was white PLA. The white VoxelPLA gave me probably the most impressive result of the whole test. The contrast was unlike any of the other samples, and it marked beautifully dark. But the Bambu Lab* white PLA behaved much worse. Similar color, also PLA but completely different result. That is exactly why you cannot just say “white PLA works” or “white PLA doesn’t work.” The pigments and additives can make a ton of difference.
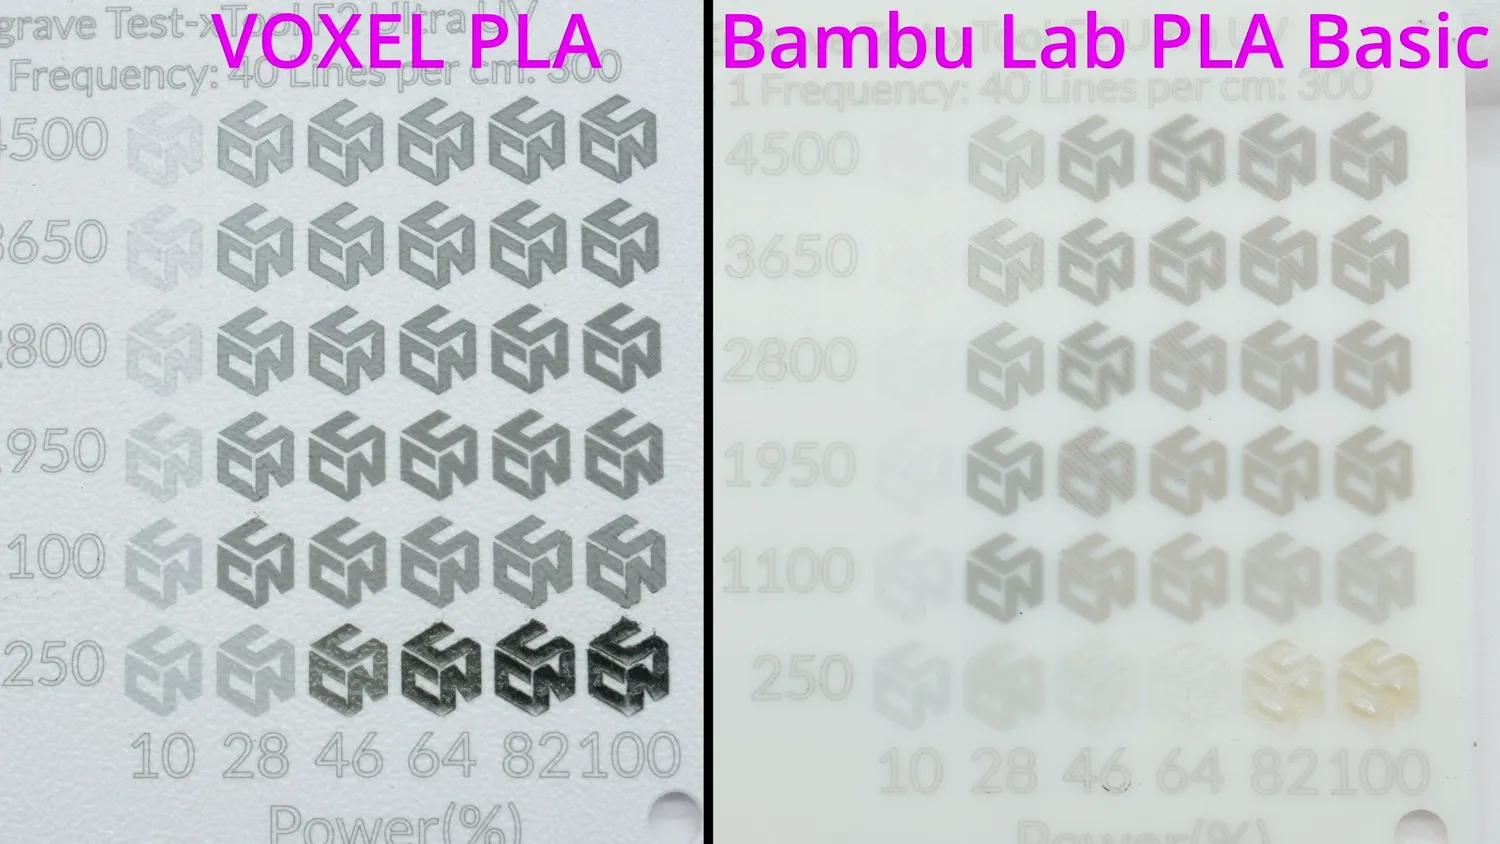 Same color, same polymer, completely different result
The UV laser is also outside the visible spectrum, so materials that look transparent to our eyes are not necessarily transparent at 355 nm. That’s why I even got visible results on transparent samples. The contrast wasn’t as strong as on opaque materials, but the laser definitely interacted with the surface.
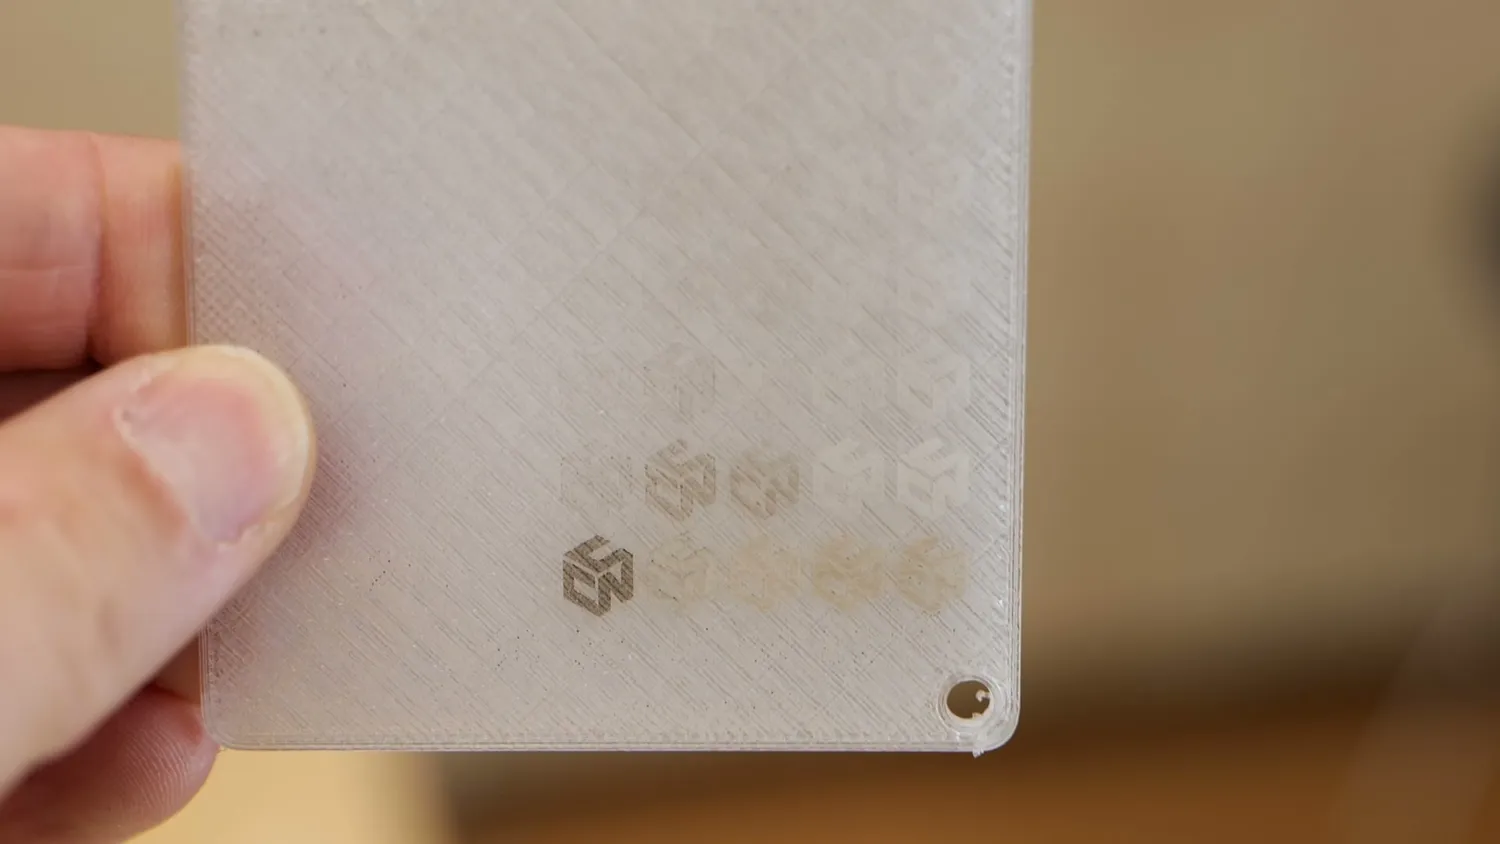 Even transparent samples took a mark
Pulse dots, skywriting and contrast
One more thing I noticed under the microscope, and this is a bit of a tangent but I think it’s interesting: the engraving often wasn’t a continuous filled area. It consisted of many tiny dots, which really shows the pulsed nature of the laser. But the dots were closer together near the edges of the engraved areas and more spread out in the middle. This happens because even though the galvo mirrors are very lightweight, they still have to accelerate and decelerate. Near the ends of each hatch line, the scanning speed is lower, so the pulses land closer together. In the middle, the mirrors are moving faster, so the same pulse frequency creates larger spacing.
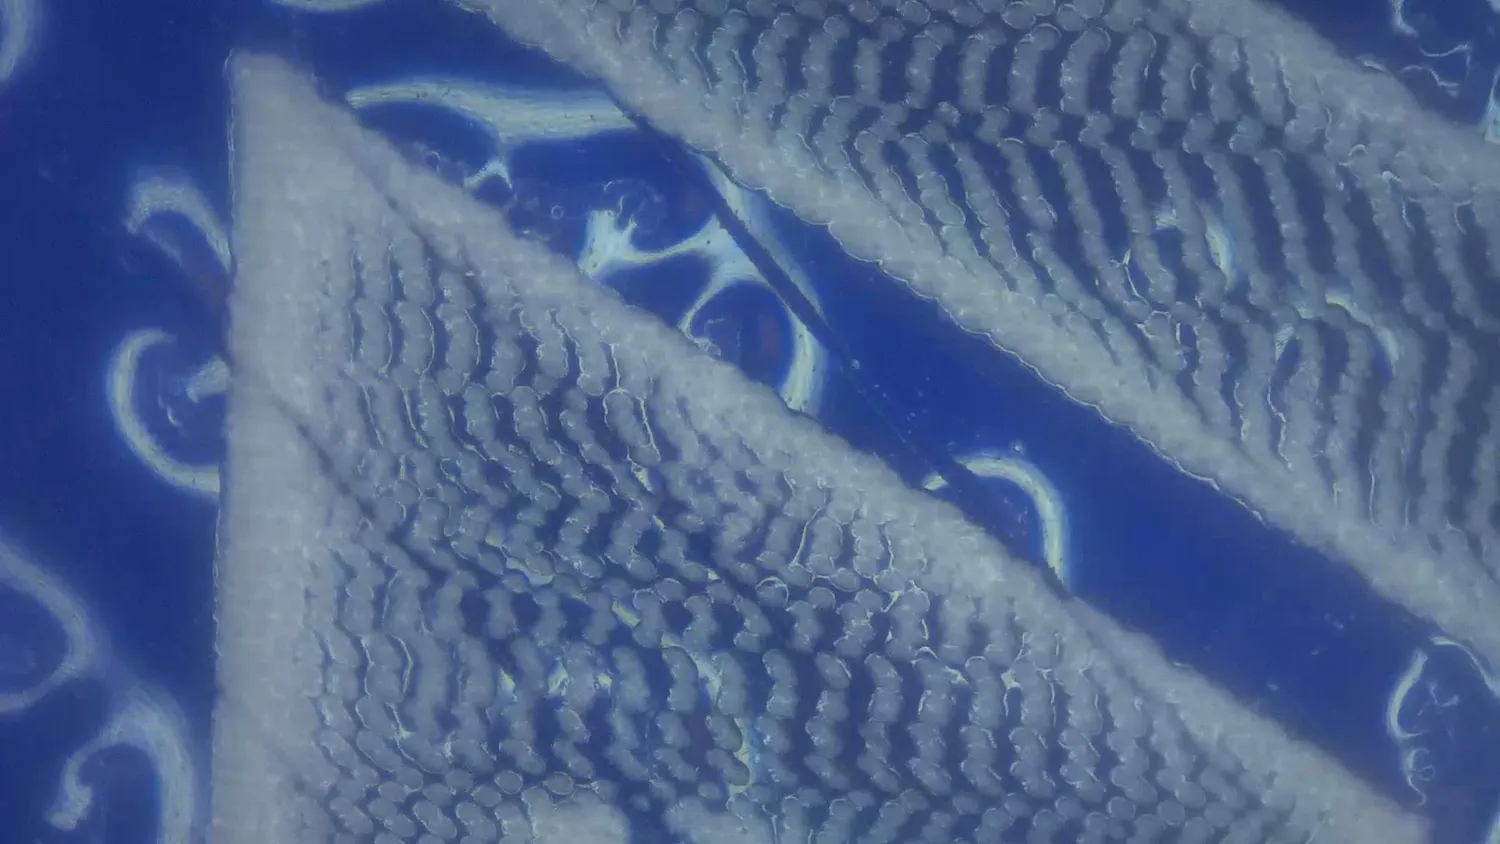 Individual pulses, closer together where the mirrors slow down
From my time working in metal additive manufacturing, where a laser is also steered by a galvo scanner to melt metal powder, I know a technique called skywriting. The idea is to extend the motion path beyond the actual marking area, so the laser only turns on once the scanner is already at constant speed inside the part, and turns off again before decelerating. That gives you much more uniform energy input. I’m curious why something like this isn’t implemented here. For most practical markings it’s probably not a huge issue, but under the microscope, you can definitely see it.
Skywriting extends the path so the laser only fires at constant speed
The perceived contrast also depends on the dot density. Some areas looked lower-contrast simply because not all of the base material had been touched. If you run the laser slower, add a second pass, or increase the line density, more of the surface is affected. That can be a problem if you want a solid marking, but it can also be a feature: by changing the settings, you can effectively engrave different shades rather than only light and dark marks.
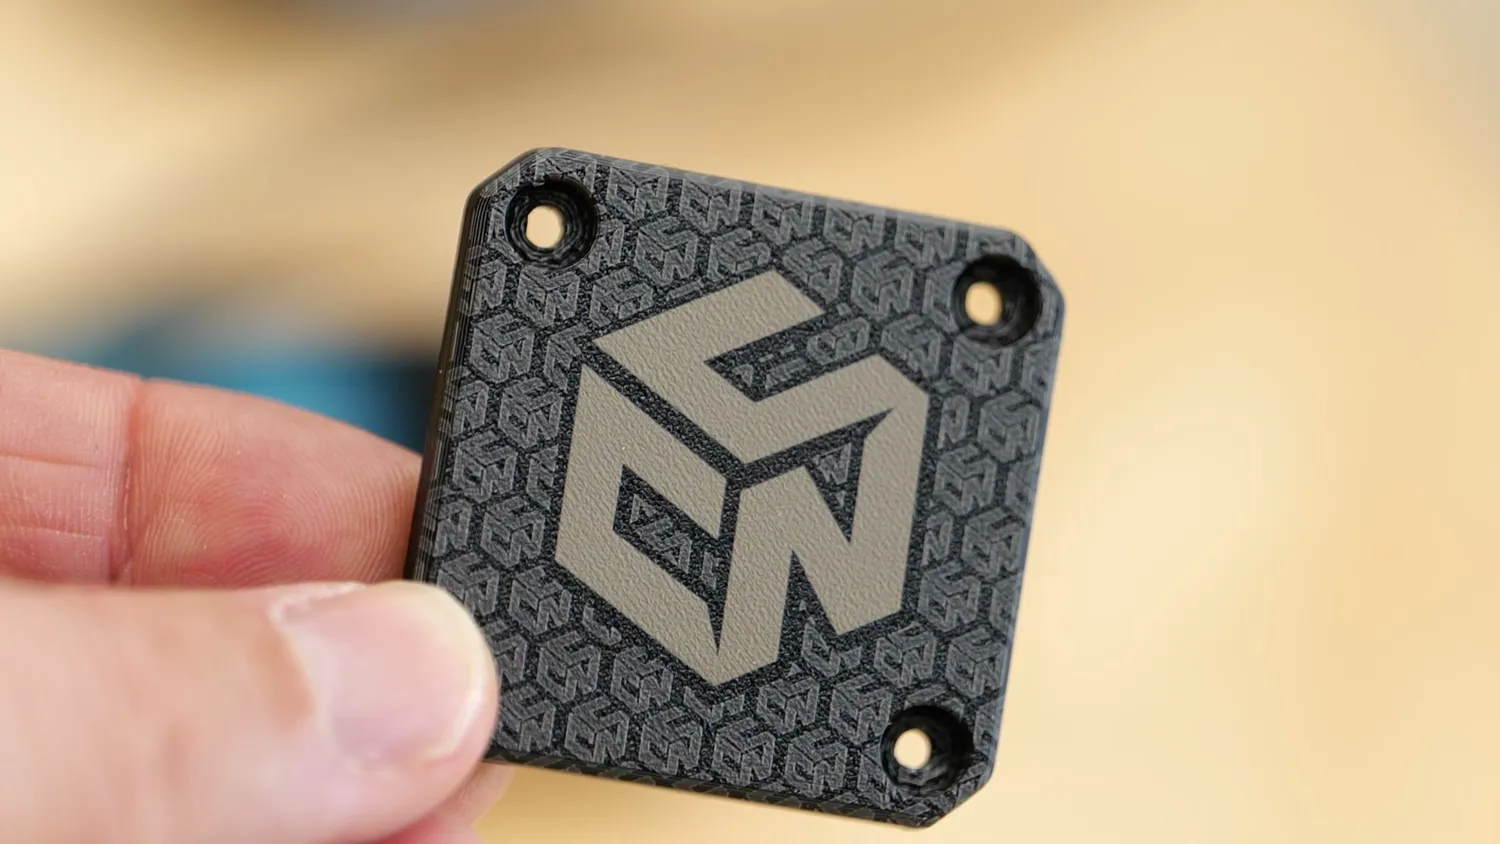 Dot density gives you shades, not just on and off
MOPA fiber laser results
After the UV tests, I repeated many of the same tests with the 60 W MOPA laser. The results were more mixed.
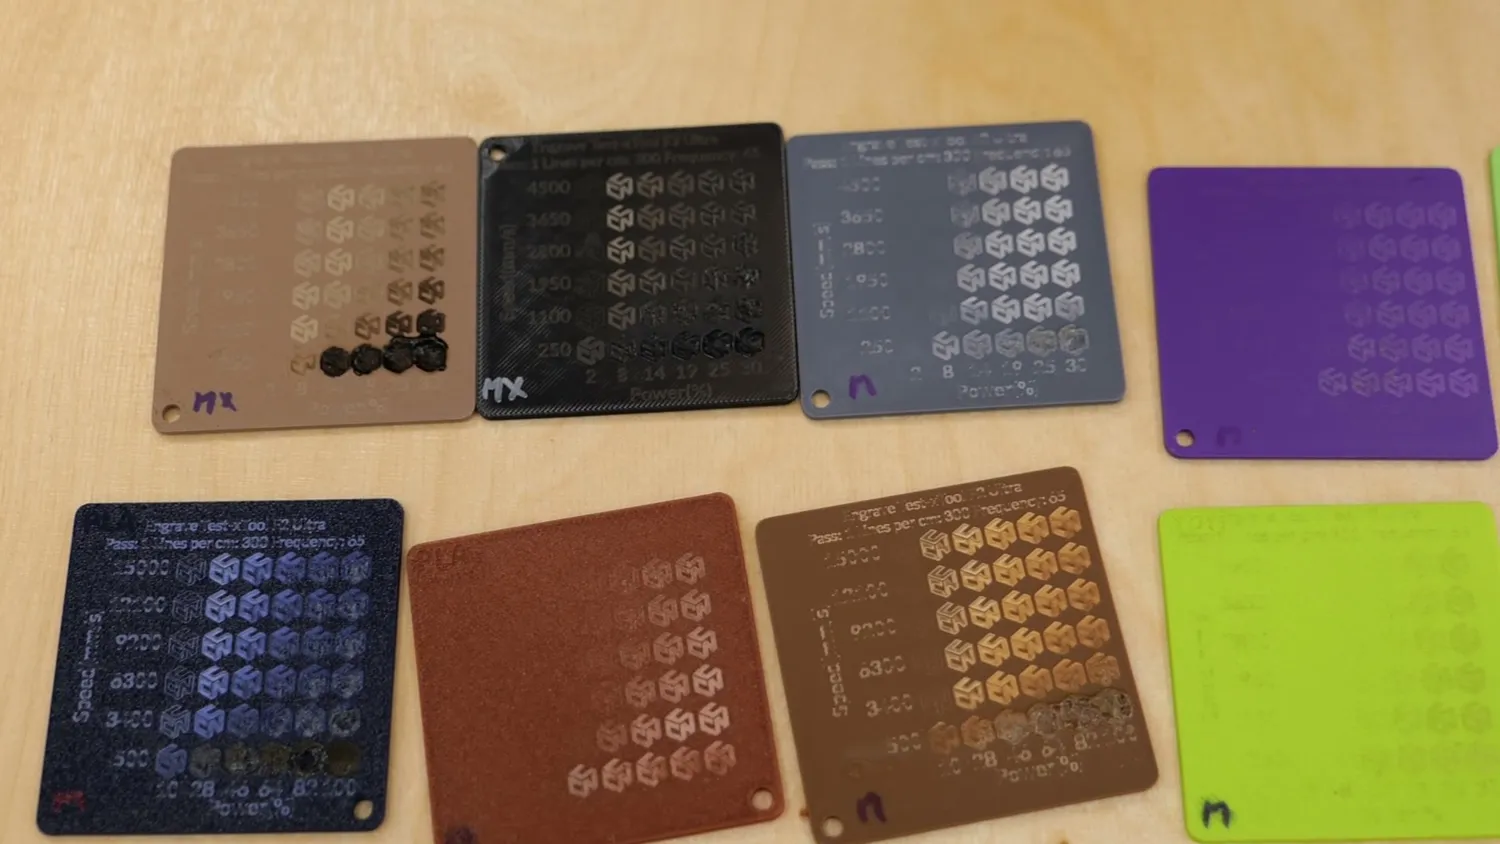 The same samples, this time with the MOPA
The first thing I noticed is that 60 W of average output power is often simply too much for plastics. Instead of testing all the way up to 100% power, I reduced the maximum to around 30% for many of the samples. The F2 Ultra MOPA is much more at home on metals, where you actually need that power cushion.
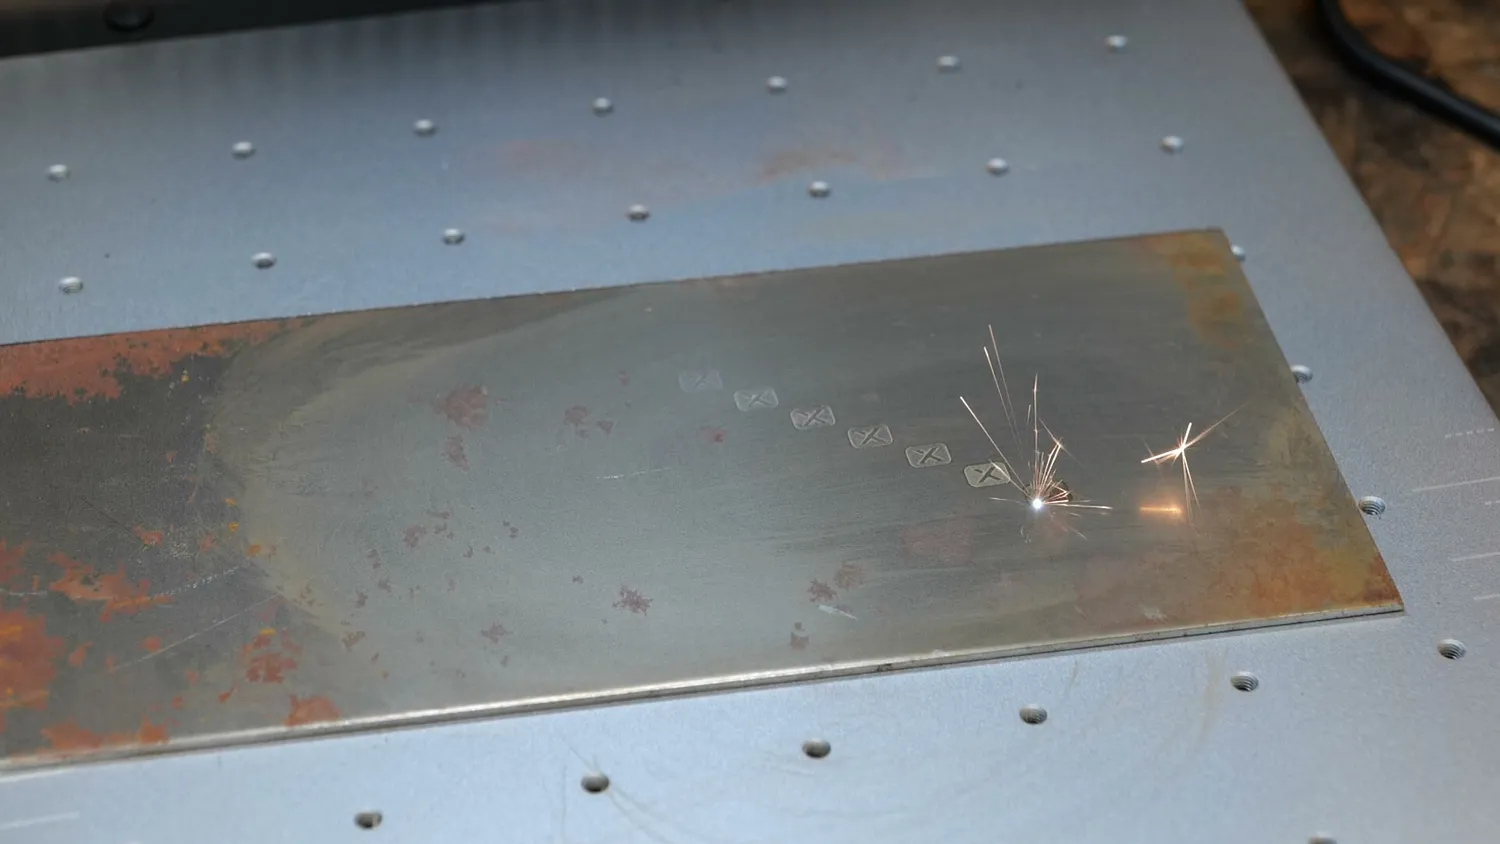 On steel, all that power finally makes sense
On some materials and colors, the MOPA worked very well, and you could clearly see that the pigment was being destroyed or changed, creating a lighter mark. On other samples, it was harder to find a clean process window. The MOPA does give you more parameters to play with, especially pulse frequency and pulse duration, and those settings can absolutely help tune the result. I didn’t optimize every single sample in detail, because that would have turned this into a 12-hour video, but I did adjust the settings on selected samples to understand what was going on.
One interesting thing I saw under the microscope: on some MOPA-marked samples, darker-hue samples had larger dark char particles beneath the surface, in contrast to the UV-marked samples, which were uniformly darker. So even when both lasers create a visible mark, they don’t necessarily create it by exactly the same mechanism.
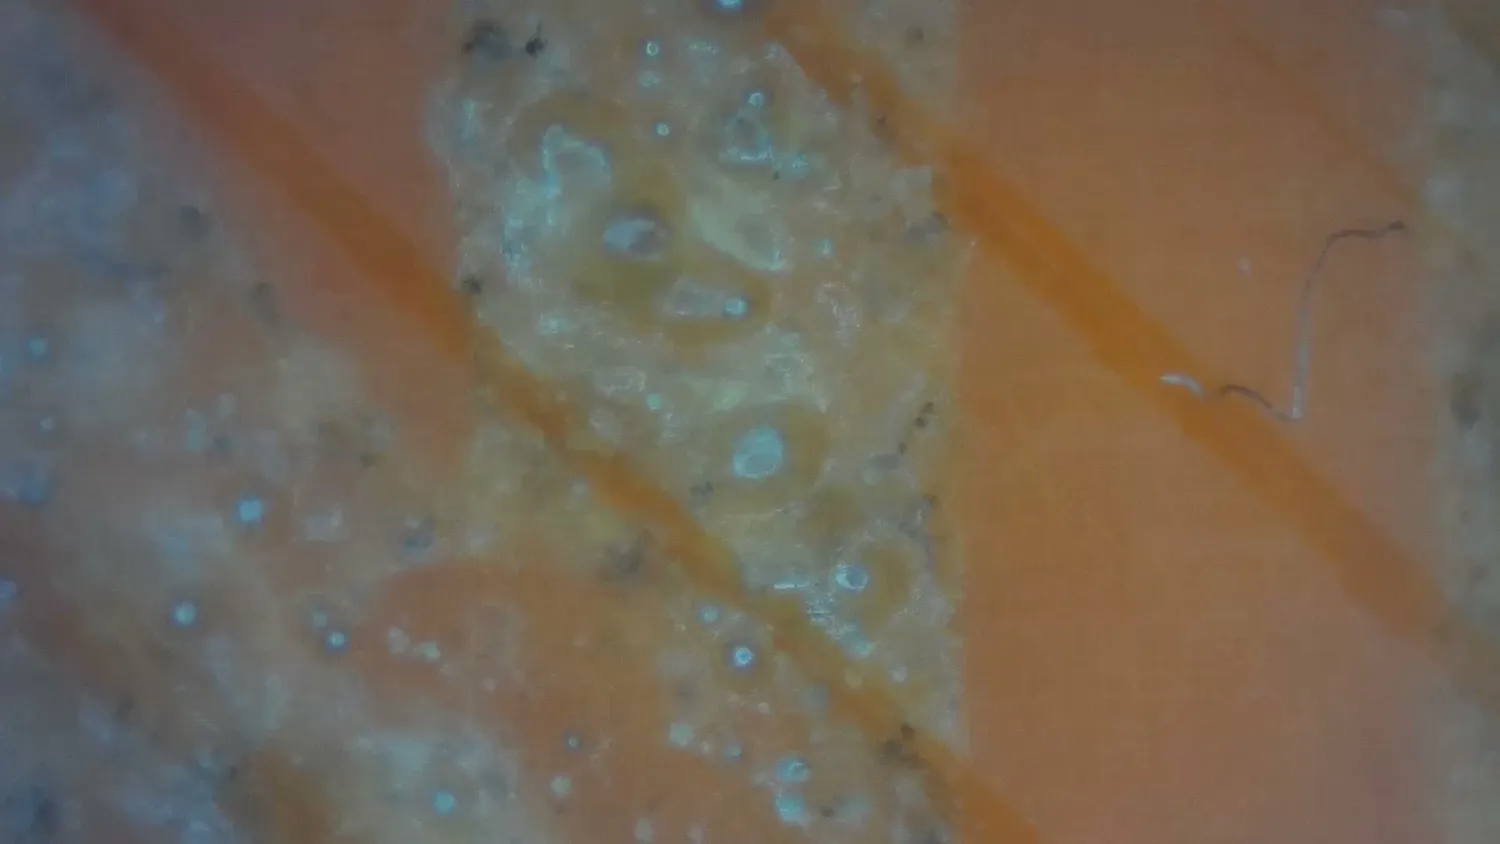 Larger char particles sitting under the surface
The blue diode laser on plastics
Finally, I tested the 40 W blue diode laser that is also built into the xTool F2 Ultra. For clean plastic marking, the results were a bit disappointing. Probably because of its more continuous nature, and also because of the wavelength, it often puts too much heat into the material. Many samples either showed almost no useful contrast or quickly turned into a melted plastic pool.
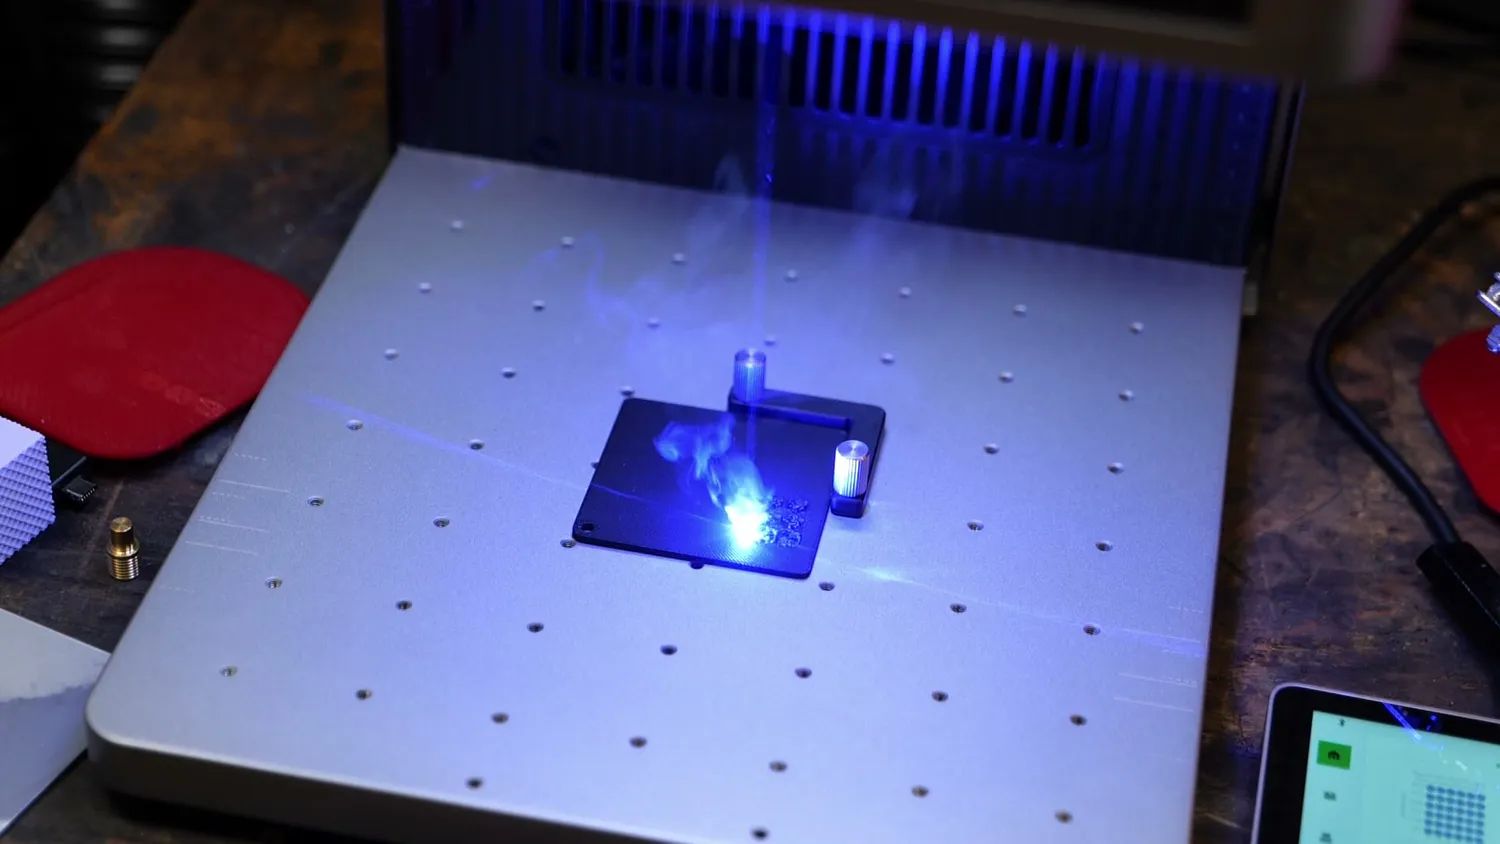 The blue diode mostly just melted the samples
That doesn’t mean the blue laser is useless. It’s excellent for many other jobs, especially cutting and engraving materials that absorb blue light well and where you want charring. But for clean, high-contrast markings on 3D printed plastics, it’s simply not well-suited.
That said, the fact that the lasers can melt plastic sometimes quite evenly gave me a different idea. A year or so ago, I saw a short video by MinWin3D where they attempted to laser smooth a 3D print, and the results looked really impressive. This might not only have visual applications. If you locally remelt the layer lines, you might also improve the strength in those areas. Each of the three lasers was able to melt plastic to some extent, and the interesting question would be which one allows it in the most controlled way. So if that’s a future video you’d like to see, let me know.
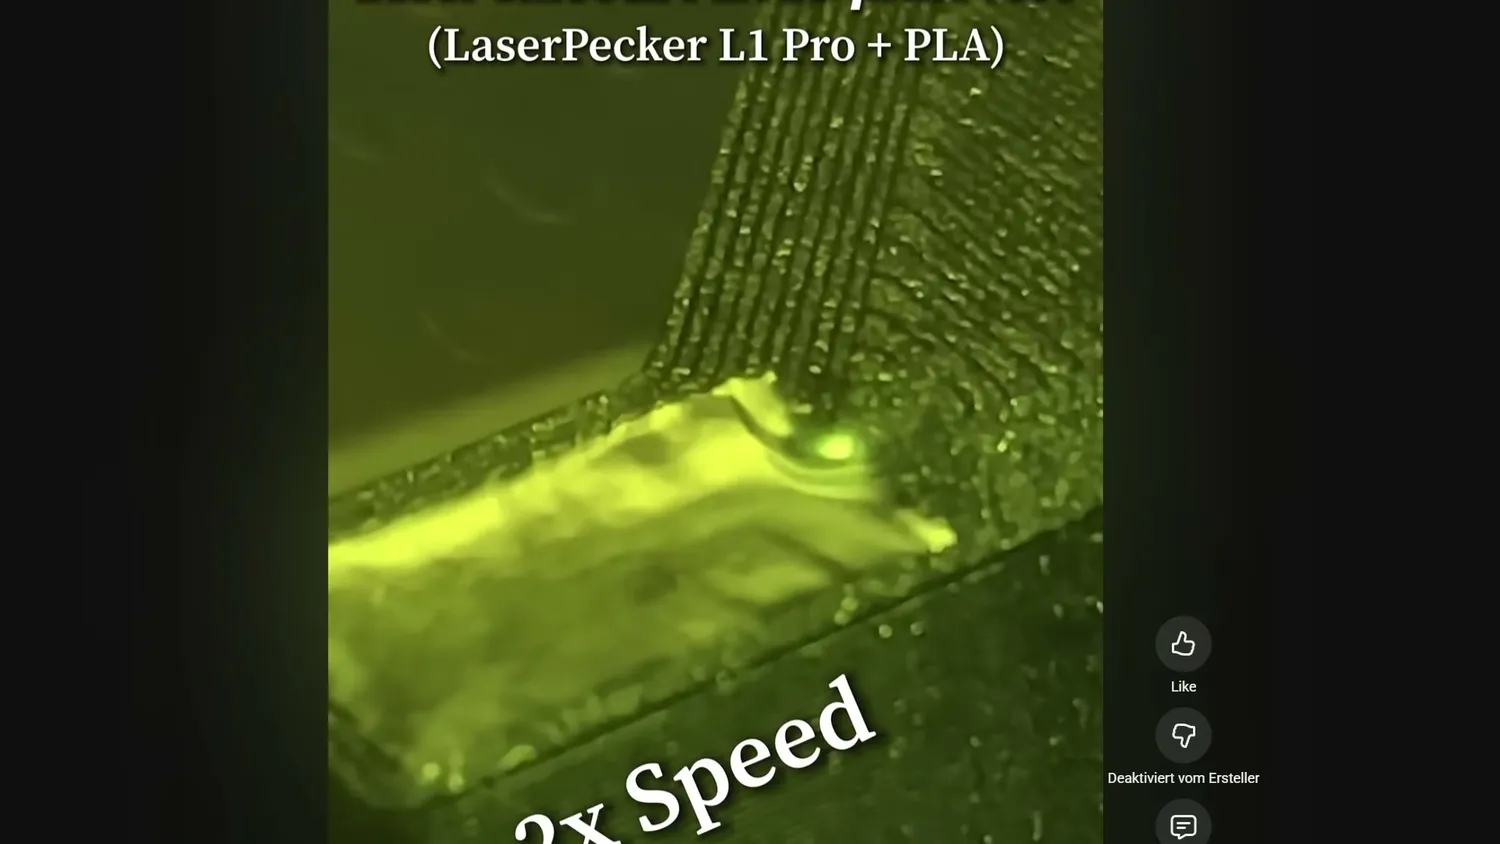 Laser smoothing a printed surface (YouTube/@MinWin3D)
Back to Robin’s SMD magazines
After all of this testing, let’s circle back to the original challenge: Robin’s SMD magazines. The goal was to find out whether we could mark them faster and more economically with a laser instead of UV printing them. So I printed a sample plate from the same light grey Bambu Lab PLA that Robin is currently using for the magazines. And, of course, because this is how testing always works, that exact color gave one of the worst contrasts of all my samples, especially with the UV laser. The MOPA laser performed a bit better here, which was uncommon compared to most of the other materials. Looking closely at the other samples, many UV laser markings had a slightly grey hue, which is more or less the base color of this filament. So there simply wasn’t much contrast to create.
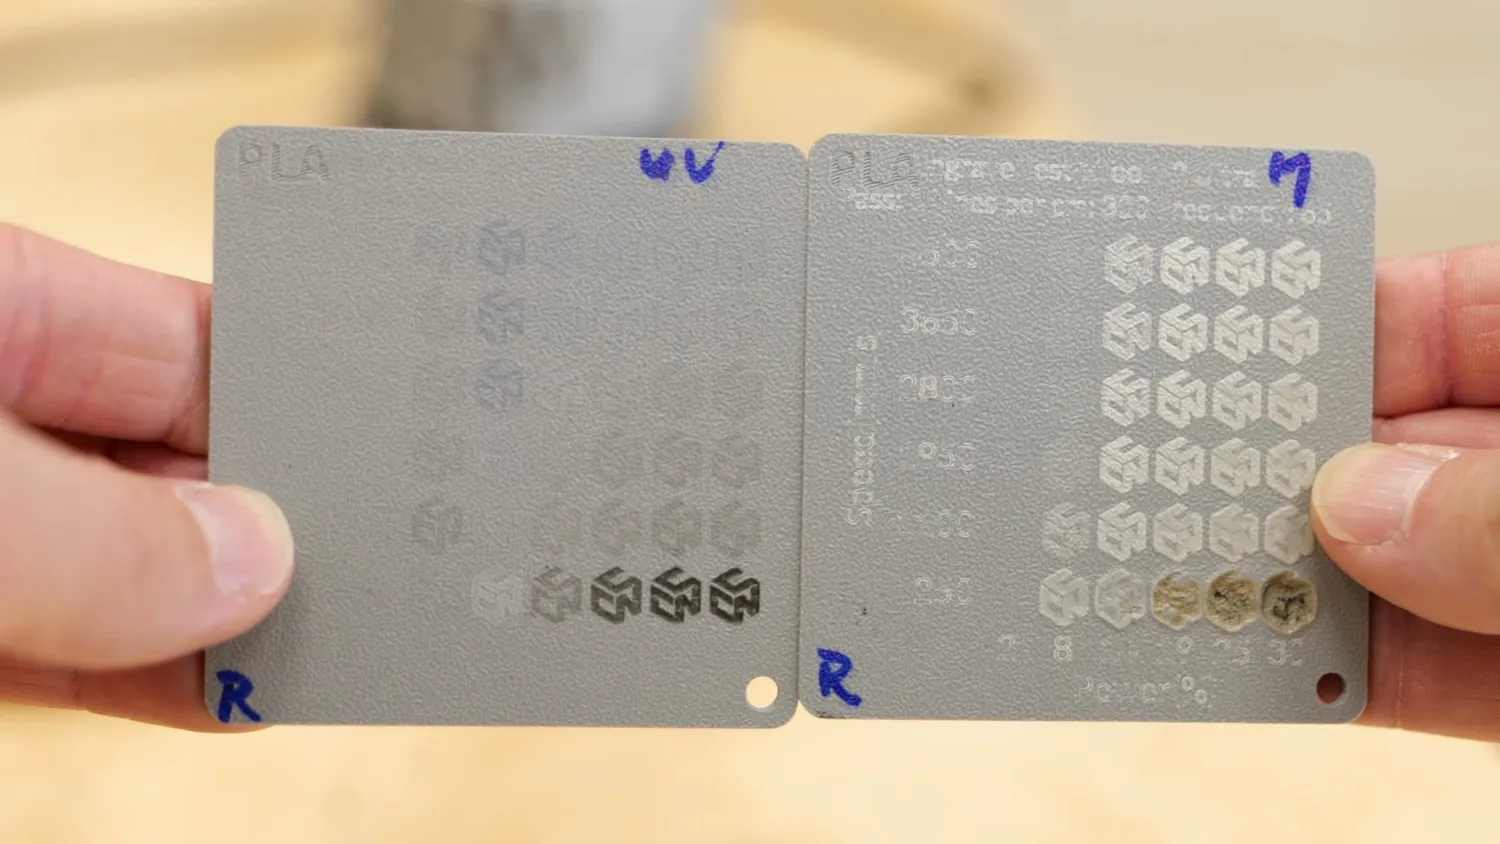 (left) UV laser, (right) MOPA, on the light grey Bambu Lab PLA
But I didn’t want to give up. I refined the settings around the parameters that gave me the best contrast in the initial broad test. That further improved the results. With the UV laser, I still couldn’t find a setting that produced good contrast without damaging the base polymer. So in the end, I settled on a setting where the surface melted slightly and charred a bit.
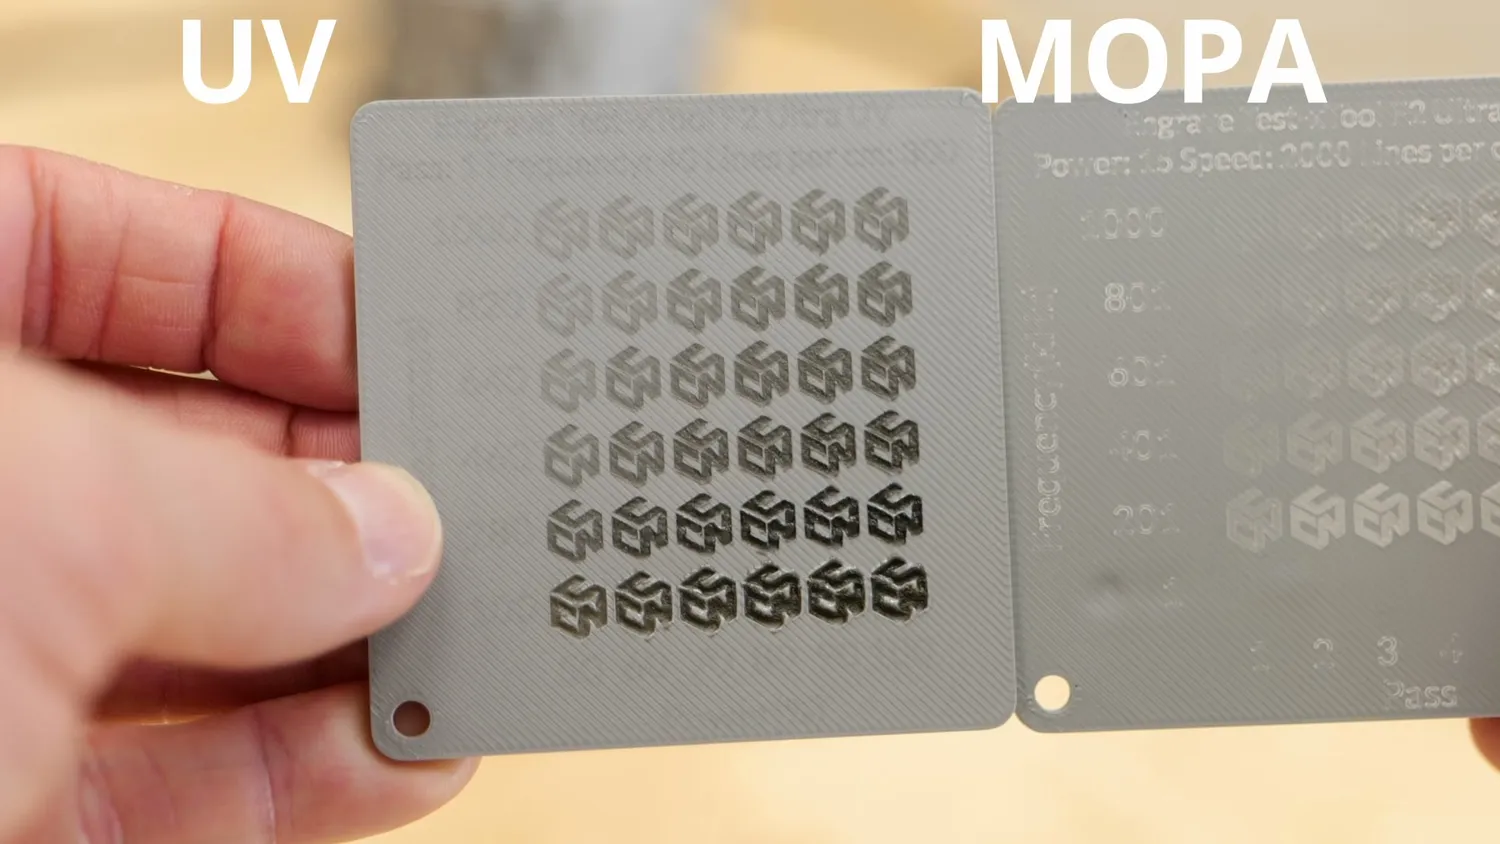 Refining the settings around the best band
With the chosen settings, I engraved two actual SMD magazines. The UV-marked one had the darker engraving. It didn’t look too bad, because the shiny molten surface added some additional contrast. The MOPA-marked one was lighter and looked a bit more defined. Both were acceptable, but neither looked as good as the UV-printed reference.
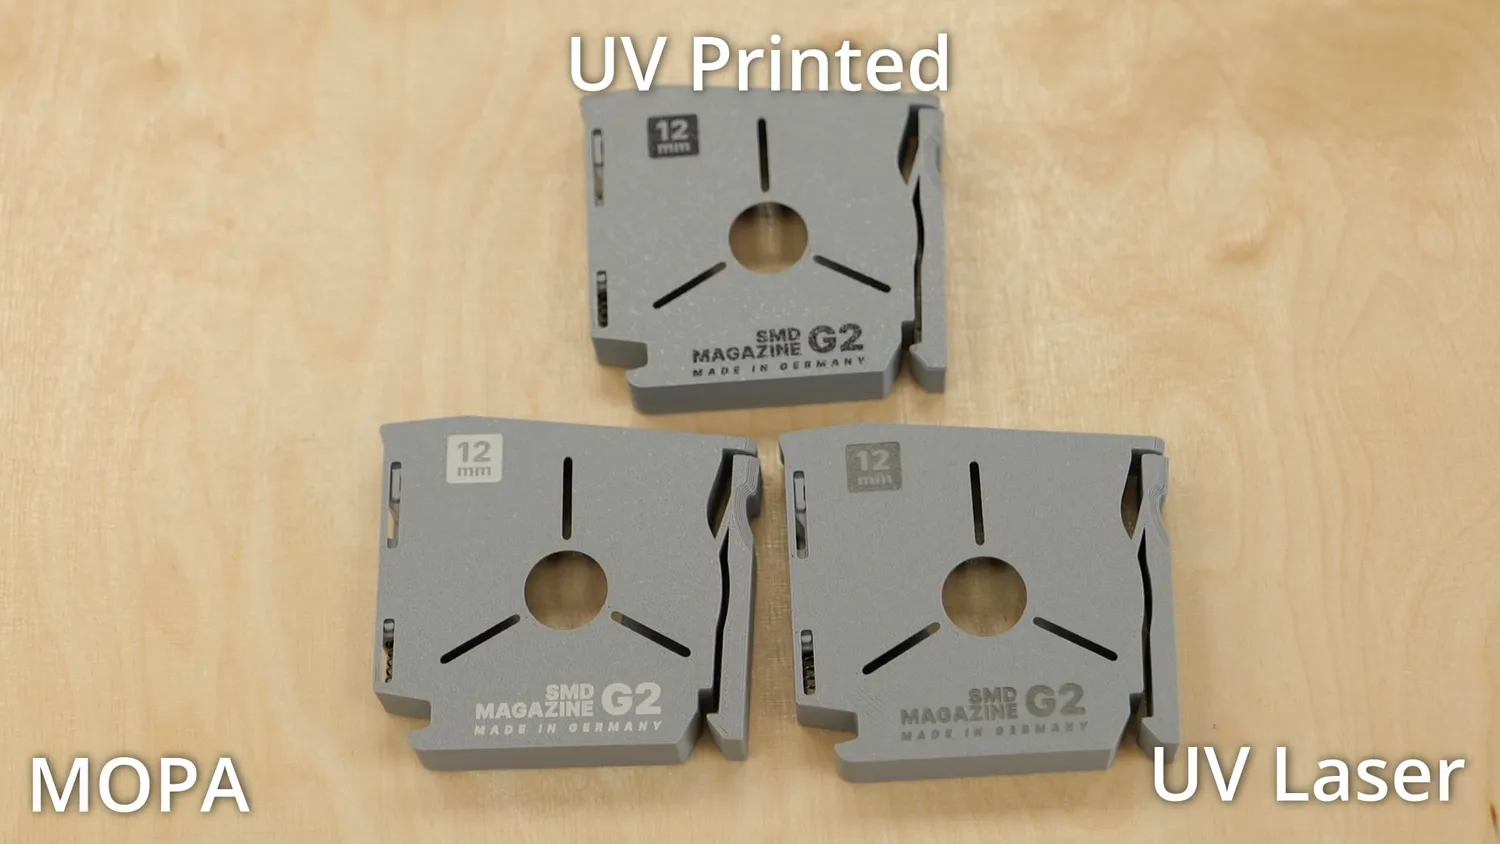 UV printed reference against the two laser markings
Out of curiosity, I also printed two magazines in black PLA and engraved those. And there, especially with the UV laser, the result looked amazing. The marked area turned almost white and had very high contrast. That really summarizes the whole topic: most materials seem to be markable if you tune the parameters, but the effect can be brutally different. Sometimes the best solution is not to keep fighting the laser settings. Sometimes it is smarter to change the filament color or even just use a different supplier. MOPA and UV can work though the UV laser was easier to get right in my tests.
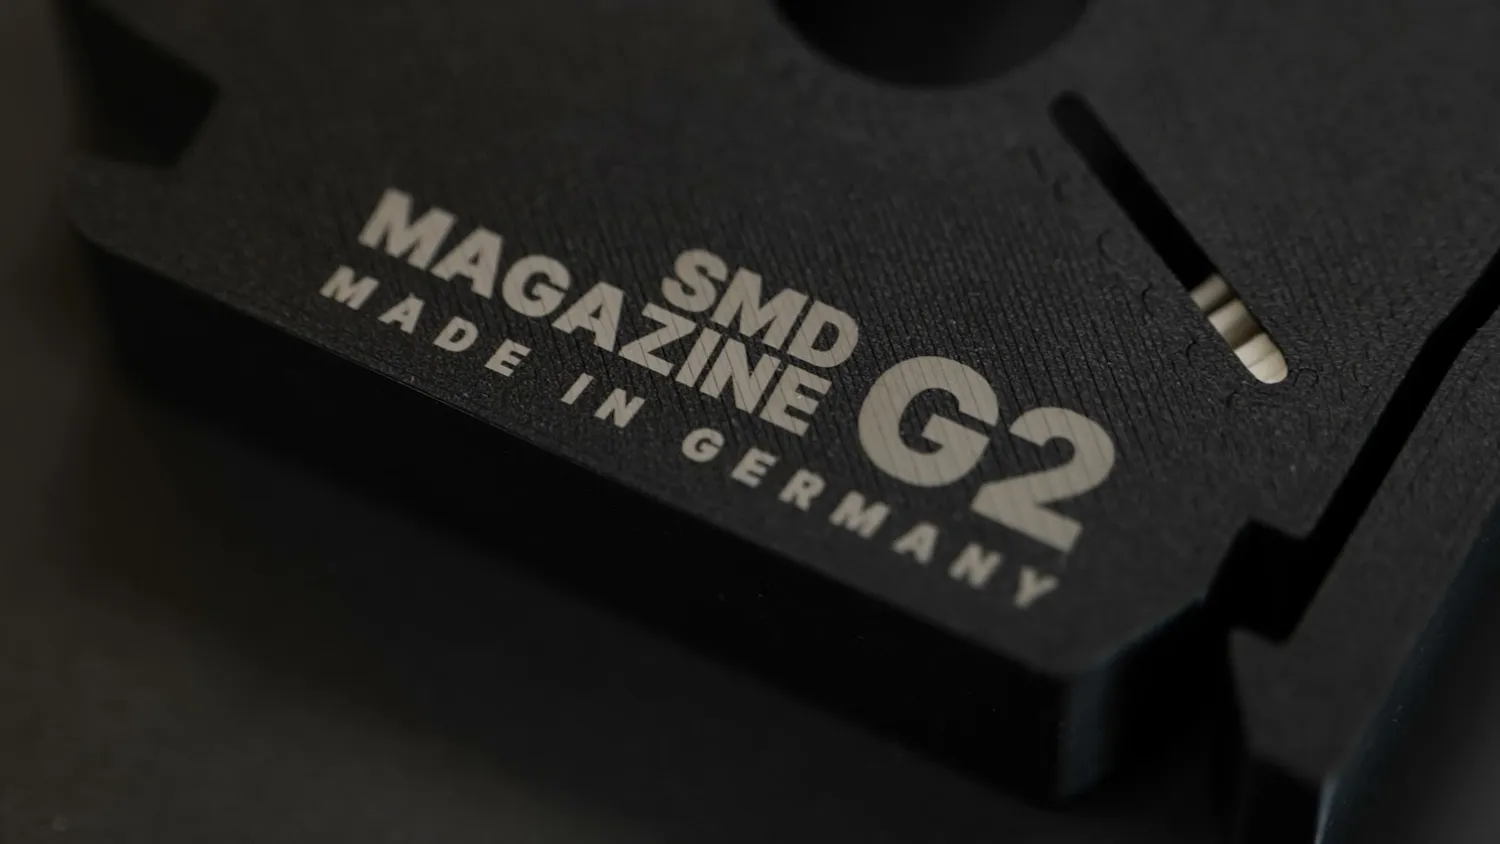 Same laser, same settings, just a different filament color
Laser marking additives and how well the marks last
Laser marking is used a ton on injection molded parts and there are even special laser-marking additives. You add them in small quantities to the plastic, similar to a color masterbatch, and they make the material much easier to laser mark. Depending on the additive and the polymer, they can help create light marks on dark materials through foaming or create dark marks on light materials through carbonization. A friend gave me an injection-molded lid that contains such an additive, and the engraving quality and contrast were superb. That made me wonder whether there might be an interesting application for special laser-markable 3D printing filaments. Or maybe it is simply easier to test existing filaments and find the ones that already work well.
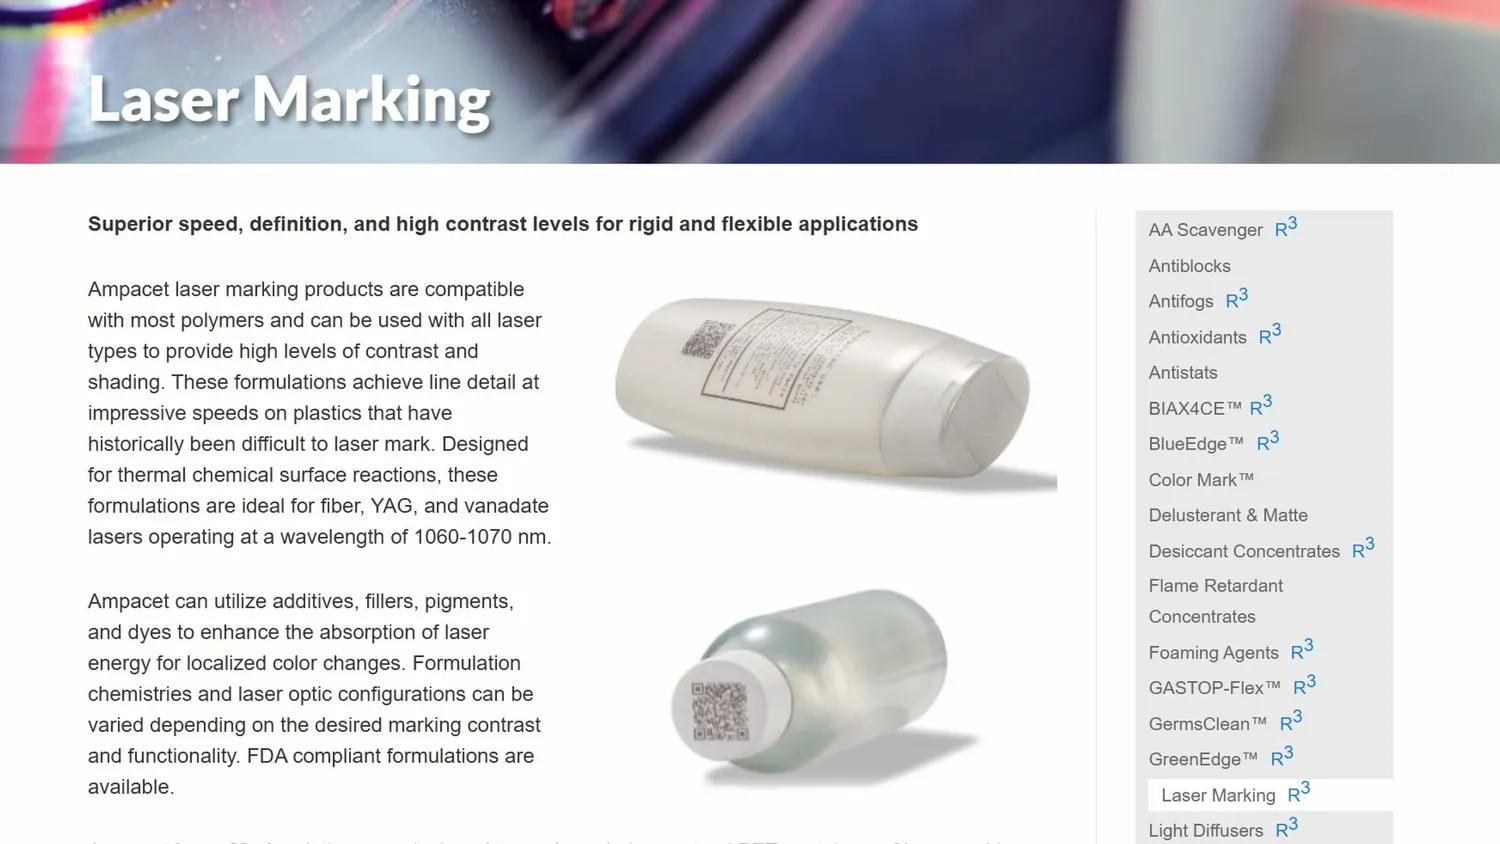 Laser marking additives are a standard product in injection molding
But a marking is only useful if it lasts. So I also wanted to get a feeling for whether the color change was permanent or just some temporary smoke residue sitting on the surface. I cleaned some of the samples with isopropyl alcohol. The only thing I was able to remove was a bit of smoke and soot that had stuck to the surface. The actual markings stayed very durable. Even scratching them did not remove much of the contrast. That was a very encouraging result, because it suggests that the marking is not just printed onto the surface. It is a change in or near the material surface itself.
 Only soot came off, the mark itself stayed
Bracelet beads and my sample ring
So what else did I do with the machines? I marked and engraved a few things around the studio and at home, especially parts where I previously would have used a label maker or simply not added any marking at all. But one application I am especially proud of, and which really shows the amount of detail you can get with the UV laser, are these tiny bracelet beads I made for my daughter. I printed the beads themselves from plain PLA, only a few millimeters wide. Then I made a simple fixture that holds the beads in a repeatable position and locates against the stops inside the machine. After that, I simply used the settings that had given me the best contrast on the matching test sample and engraved different tiny images onto the beads. The results were really impressive. At that scale, the small spot size and precision of the UV laser really shine.
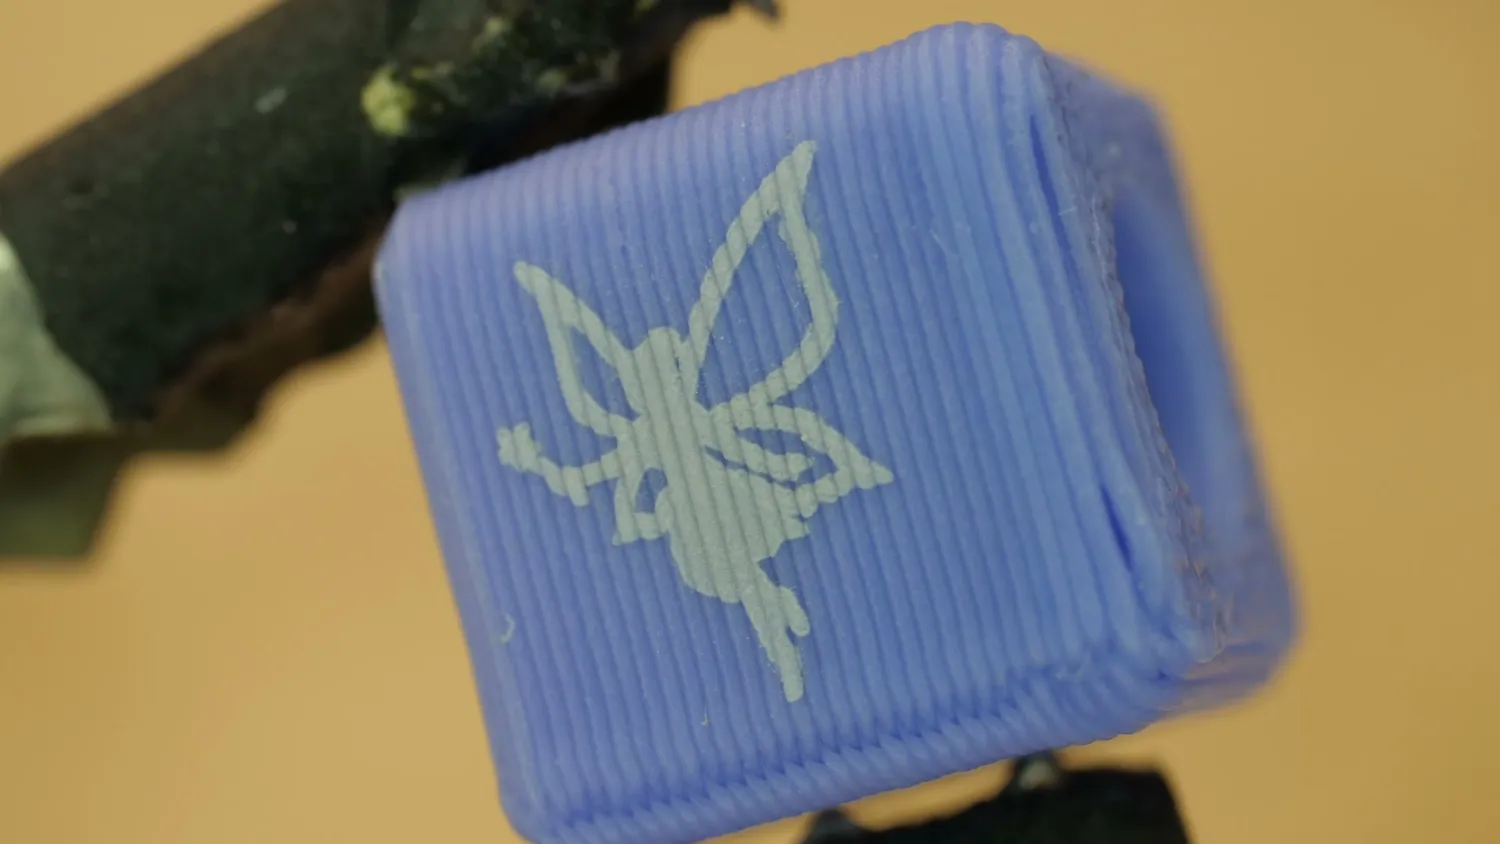
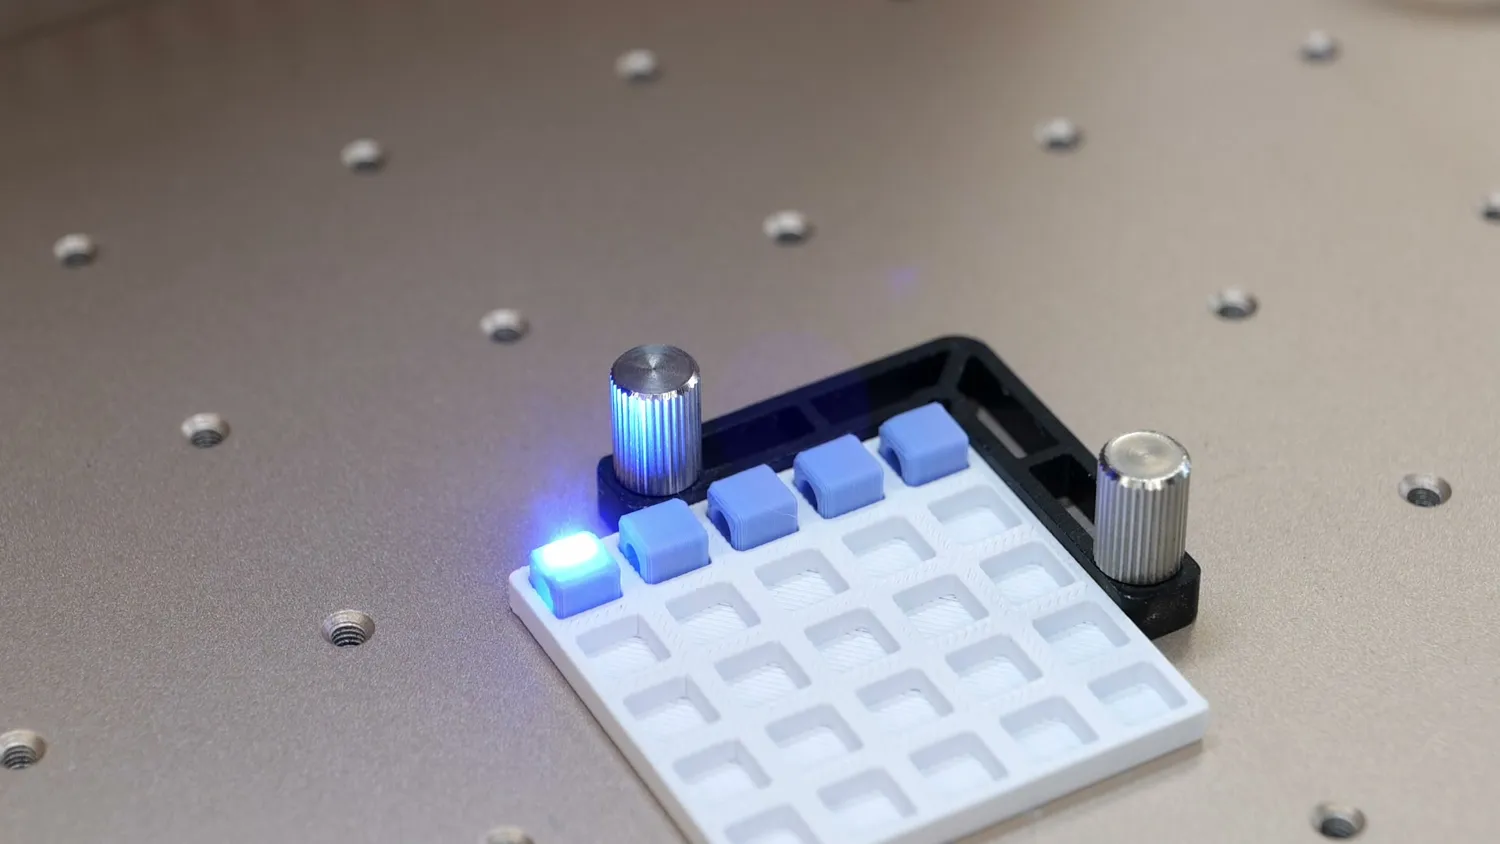
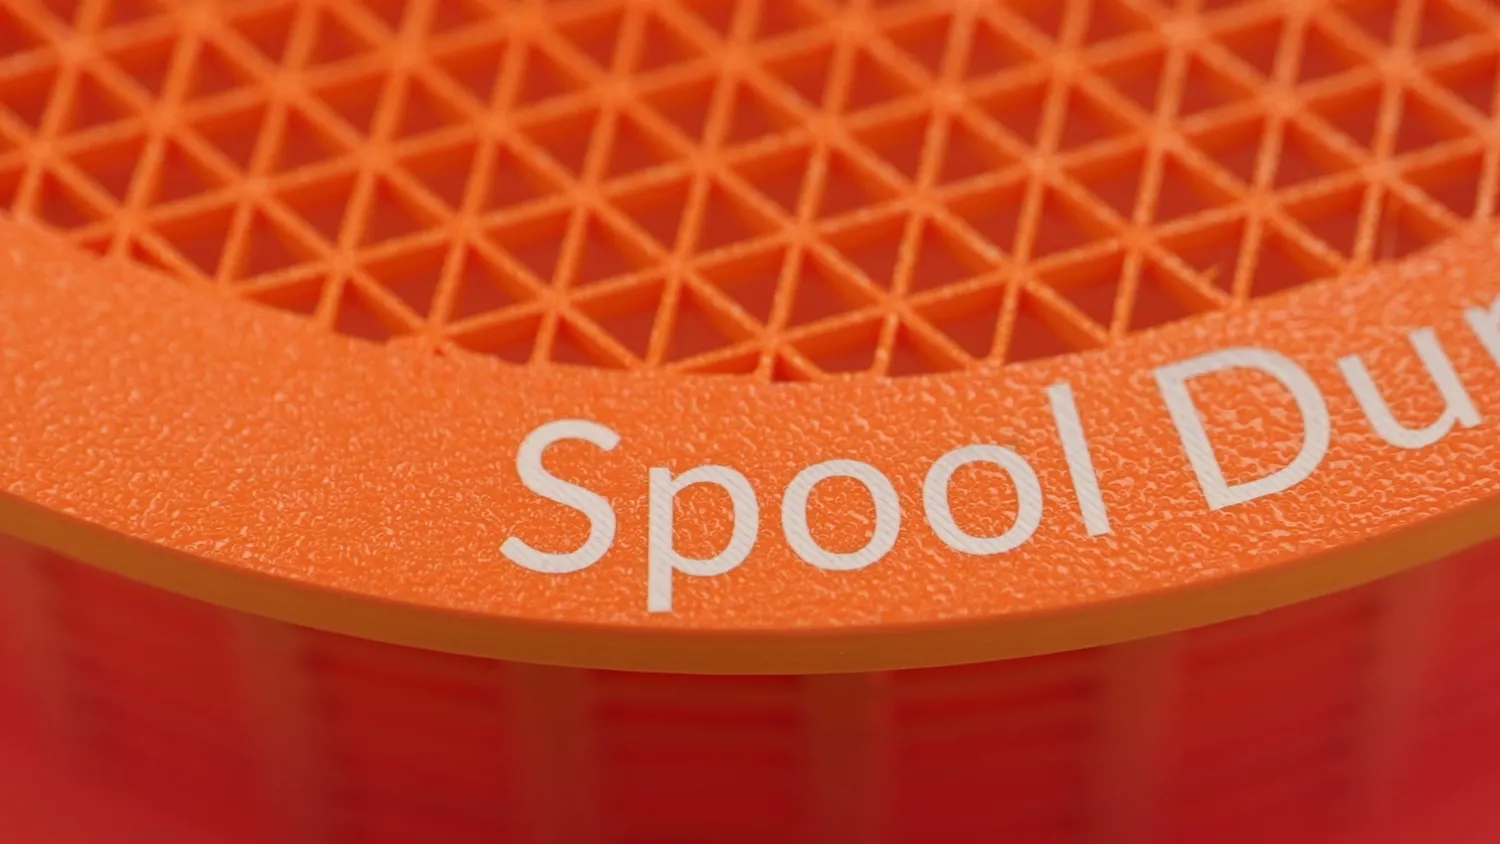
For me, this whole project was a very interesting learning experience. I not only have a much better understanding now of how different laser types work and which ones are suitable for which job, but I also now have tools in the studio that I will definitely use for future projects and prototypes. I put all of my test samples on a ring, so that whenever I want to mark something in the future, I can quickly check which material and color might work before spending hours printing samples and guessing settings.
Diode, CO₂, fiber and UV, side by side
What actually works for marking 3D prints
So, what is my practical takeaway? For marking 3D printed plastics, the UV laser was the easiest and most reliable tool. It worked on the widest range of materials, required the least tuning, and usually produced the cleanest results with the least amount of thermal damage. The MOPA fiber laser was also very capable, and on some materials it worked even better than the UV laser. But it is clearly more of a metal-marking machine, and for plastics, the 60 W version often has more power than you really need. The big advantage is the extra control over pulse duration and frequency, which gives you more ways to tune the interaction. The blue diode laser was the least useful for clean plastic marking in my tests. It can mark or melt some plastics, but the process window was much narrower, and it often produced heat damage before it produced a nice high-contrast mark. And the most important lesson: filament color and pigment chemistry matter a lot. Two materials that are both “white PLA” can behave completely differently. So if you want to laser mark printed parts reliably, testing your exact filament is absolutely necessary.
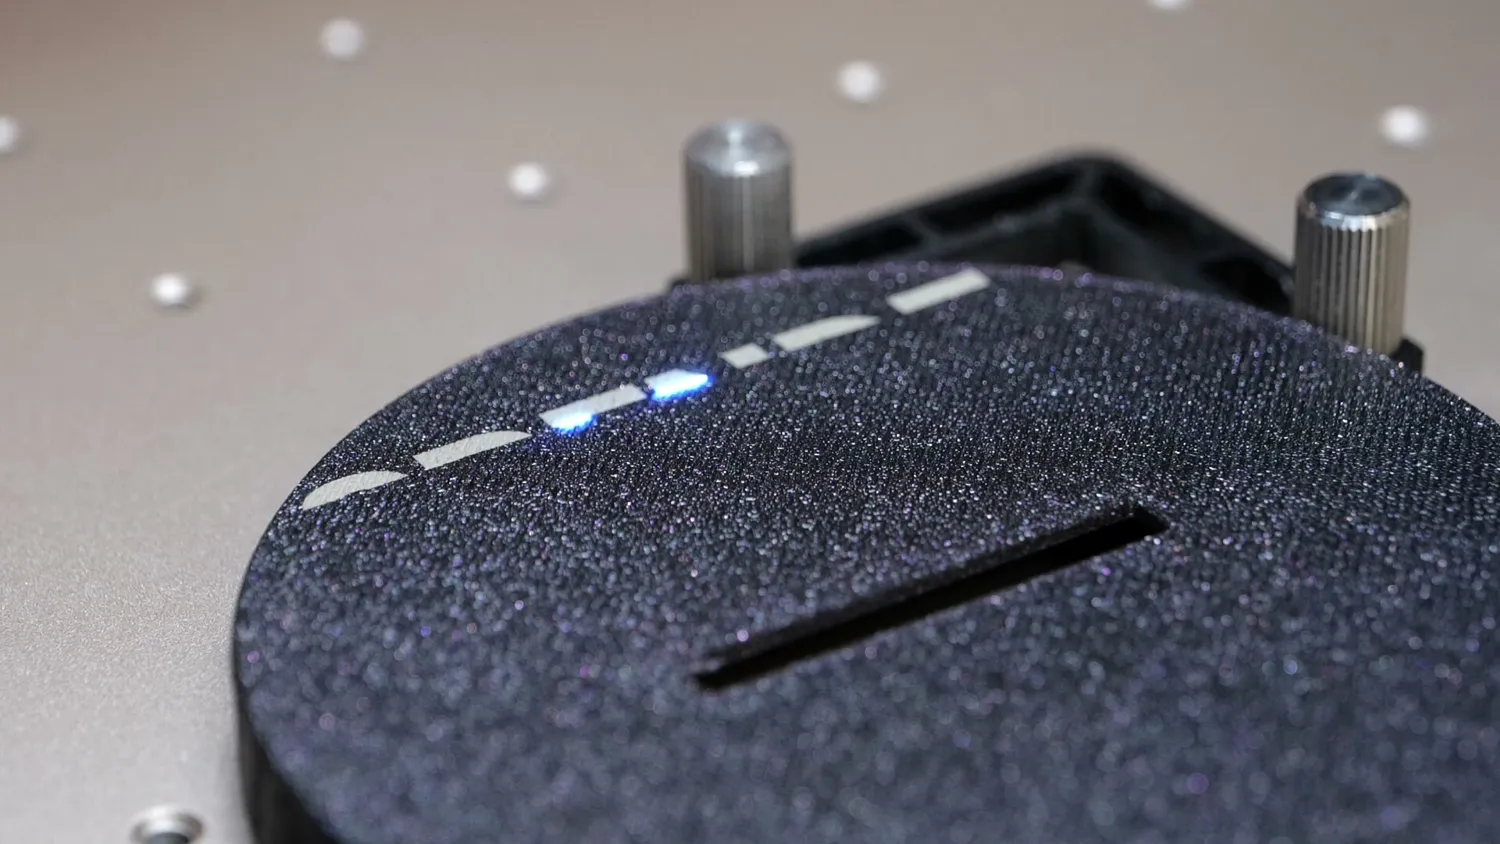 Marking parts around the studio has become a normal step now
Working with the xTool machines has been a real pleasure. The hardware feels solid, the machines are polished, and the software is intuitive enough that you can get useful results quickly. Especially with the built-in generators and the community projects, I can absolutely see these machines being useful for small shops, Etsy sellers, makers, and prototyping labs that want to make customized products without becoming laser experts first. The one thing I am still missing is proper LightBurn support, because that would give me even more control over the process and the toolpaths. Especially after seeing the dot-spacing behavior under the microscope, I would love to have deeper access to the scanning strategy.
⚡ Get the xTool F2 Ultra UV: https://geni.us/F2UltraUV*
⚡ Get the xTool F2 Ultra (60 W MOPA + 40 W diode): https://geni.us/F2Ultra*
* Links marked with an asterisk are affiliate links — if you buy through them, I earn a small commission at no extra cost to you. As an Amazon Associate I earn from qualifying purchases. Thanks for supporting my work!