
Bang-Bang or PID Bed Temperature Control?
Swapping my Prusa's board made the heated bed sing. That sent me down a rabbit hole into PID versus bang-bang bed control, and why PID is almost always better.
TL;DRthe short version
- After putting a DUET 3 Mini 5+ into my old MK2.5 I got clear z-banding on a simple cylinder. On any other printer I would have blamed a wobbly z-axis, but I know this machine after roughly 10000 hours of printing.
- The Prusa bed chirps like a cricket at certain PWM frequencies, so I switched the DUET to simple bang-bang control to silence it. The temperature only swung about ±1 °C, so I wasn't worried.
- That was the cause. Switching back to PID made the artifacts disappear. The swing expands the spacers and warps the bed against its cold carrier, so the whole platform moves relative to the nozzle and you get thicker and thinner layers.
- To tell the two apart, print two towers and change the feedrate on one at the printer. If the artifact spacing stays the same it's the z-axis, if it changes it's the bed.
- Before you touch anything, sanity check the bed temperature. A couple of tenths of a degree is fine and not worth changing firmware over.
- To find out which scheme you're on: in Marlin it's in configuration.h, in RepRap firmware it's M307 parameter B for the bed heater, where unset or 1 is bang-bang and 0 is PID. Or watch the bed LED: rapid flashing is PID, long on and off is bang-bang.
- A badly tuned PID loop gives you exactly the same marks, so run an autotune: M303 in Marlin, then M304 and M500 to save.
- So is PID always better? Mostly yes. The one caveat is switching losses in your SSR, mainboard MOSFET or external MOSFET, which can overheat if the PWM frequency is too high. I settled on PID at 25 Hz, which I can still hear, but not once the part cooling fan runs.
Over the last week, I’ve been putting the new DUET 3 Mini 5+ control board into my old Prusa* Mk2.5, where the plugs of the control board burnt out. There will be a separate video on that experience coming very soon, so make sure to be subscribed for that and have selected the notification bell. My goal after this build was to get at least the same parts quality as with my newer Prusa MK3. The first parts were promising but on closer inspection, I was able to see layer inconsistencies and first thought about backlash in the old z-axis leadscrew.
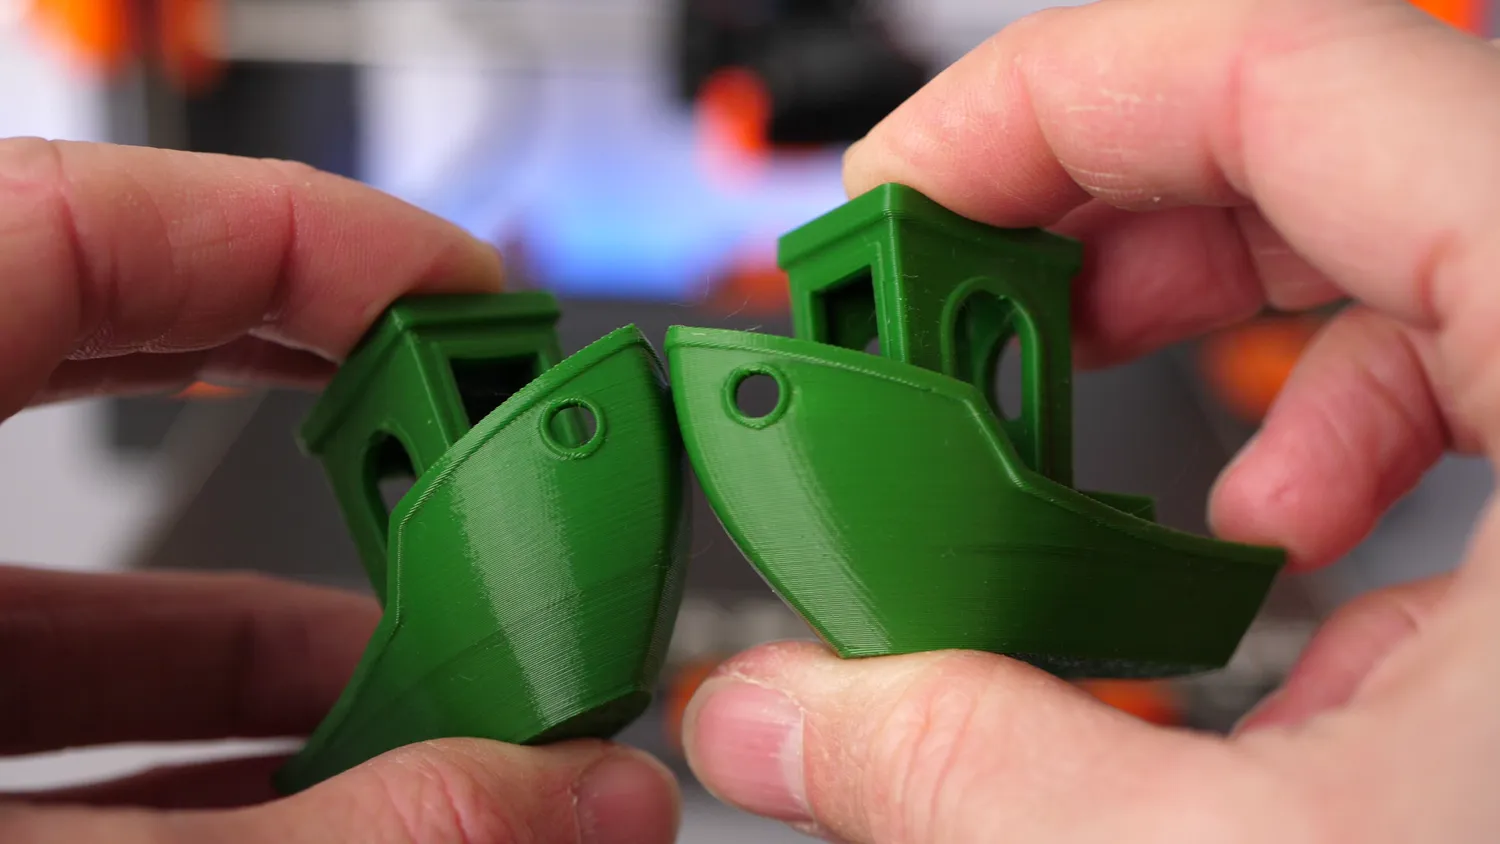
MK2.5 DUET (left) VS MK3S (right)
After printing a simple cylinder it was even more obvious because there, a regular z-banding was clearly visible! On any other printer I would have said that this is the result of a wobbly z-axis but since I know the printing performance of this MK2, after probably 10000 hours of printing, very well, it was clear to me that this could not be the case right here.
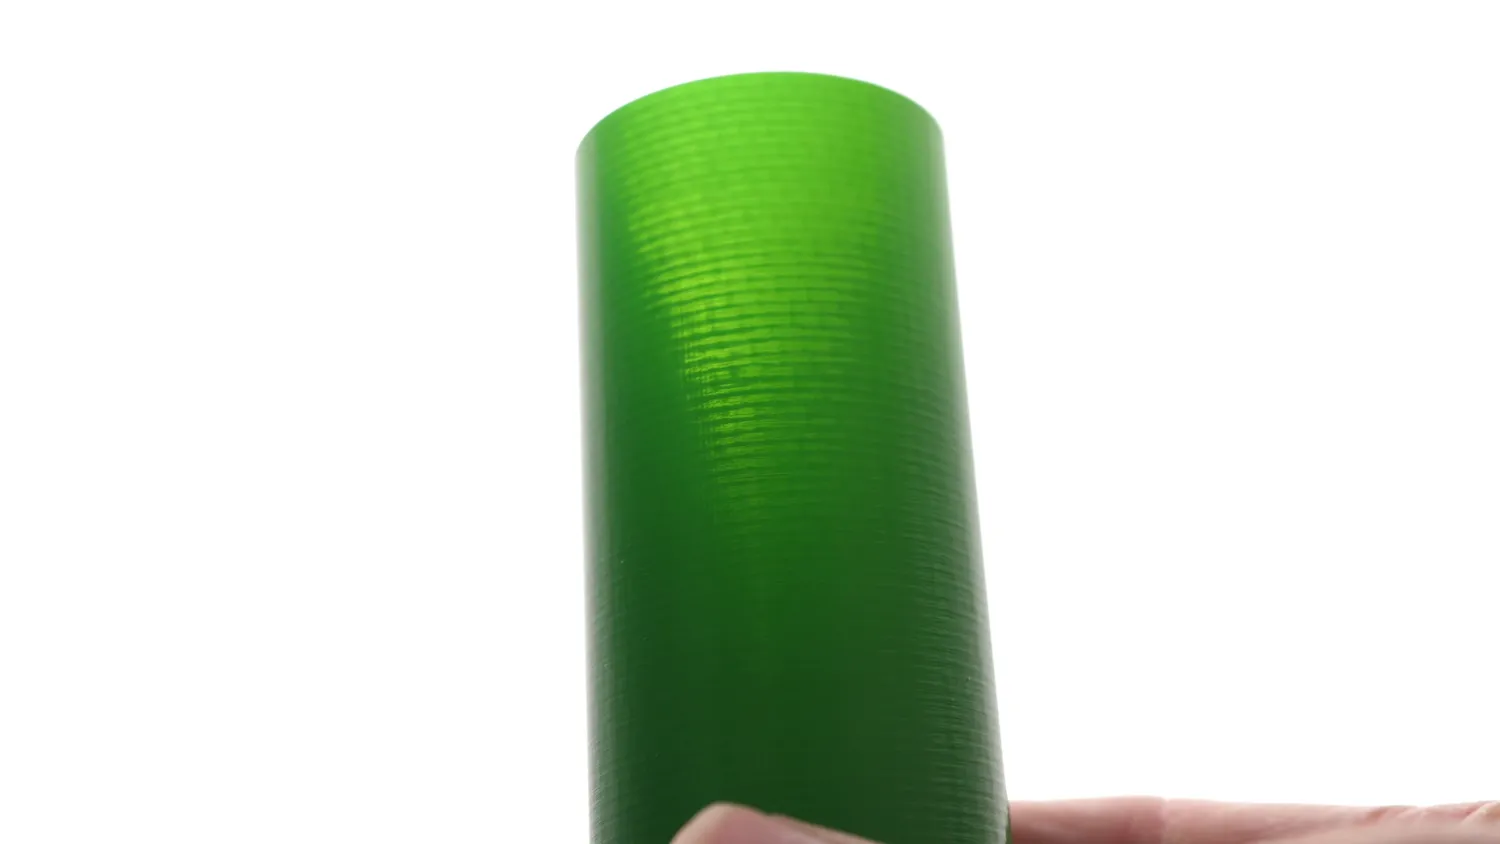
Z-Banding on a Cylinder
How the bed heater is actually controlled
After more thinking it finally dawned on me. So, the Prusa obviously has a heated bed. Nowadays, the current to those print platforms is controlled by MOSFETs that quickly turn on and off to hold the set temperature very precisely. The amount of power that gets sent to the bed is controlled by a PID loop wherewith, the temperature signal and the PID control parameters the duty cycle of the MOSFET is set. The PID control parameters are very important, because if they are not set correctly, the temperature will oscillate around the set value, but more on that in a bit. So the Prusa heated bed has a design flaw in a way, that, depending on the PWM frequency you use to power it, it acts like a speaker and chirps annoyingly like a cricket. Prusa worked around that, with a neat trick they documented on their blog. But the problem is, that with the DUET board I put into the machine, I can’t use the Prusa firmware any more and with standard PID control settings in RepRap Firmware, I exactly got that chirping noise. Let’s get back to the video’s title. So in the old days, the heated beds were often not controlled via a PID scheme but using a so-called simple bang-bang hysteresis controller. This means that you just switch off the power to your bed, when the temperature is slightly above the setpoint and turn is back on when it goes below it. Due to the thermal mass of the system this will lead to a slow oscillation of the temperature around the setpoint. So when I set up the DUET Prusa and noticed the chirping noise I switched to simple bang-bang control. The annoying noise was gone and looking at the temperatures I was not that concerned because they fluctuated only around +-1°C.
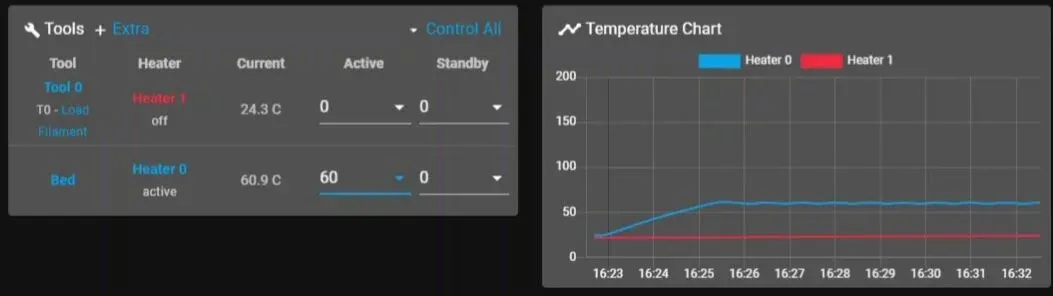
Initial Temperature Graph with Bang-Bang Control
Why a swinging bed shows up in the print
Unfortunately, this temperature fluctuation was enough to cause the z-banding because as soon as I switched back to the PID control, though still noisy, everything looked perfect again. So during these temperature variation several things are happening that cause the problem. First, thermal expansion. Spacers and the bed will expand or shrink due to the temperature change, moving the bed up or down, relative to the printhead. Second, also due to thermal expansion, the bed will get bigger or smaller in comparison to the cold carrier and therefore warp the whole assembly. All of that together will cause the whole print platform to constantly deform during temperature changes and therefore causing thinner and thicker layers in your print, visible in those surface artefacts. And this is the reason why you should make sure that your bed temperature is as constant as possible, though I have to say, that depending on the way you bead is built, this effect can be smaller or bigger.
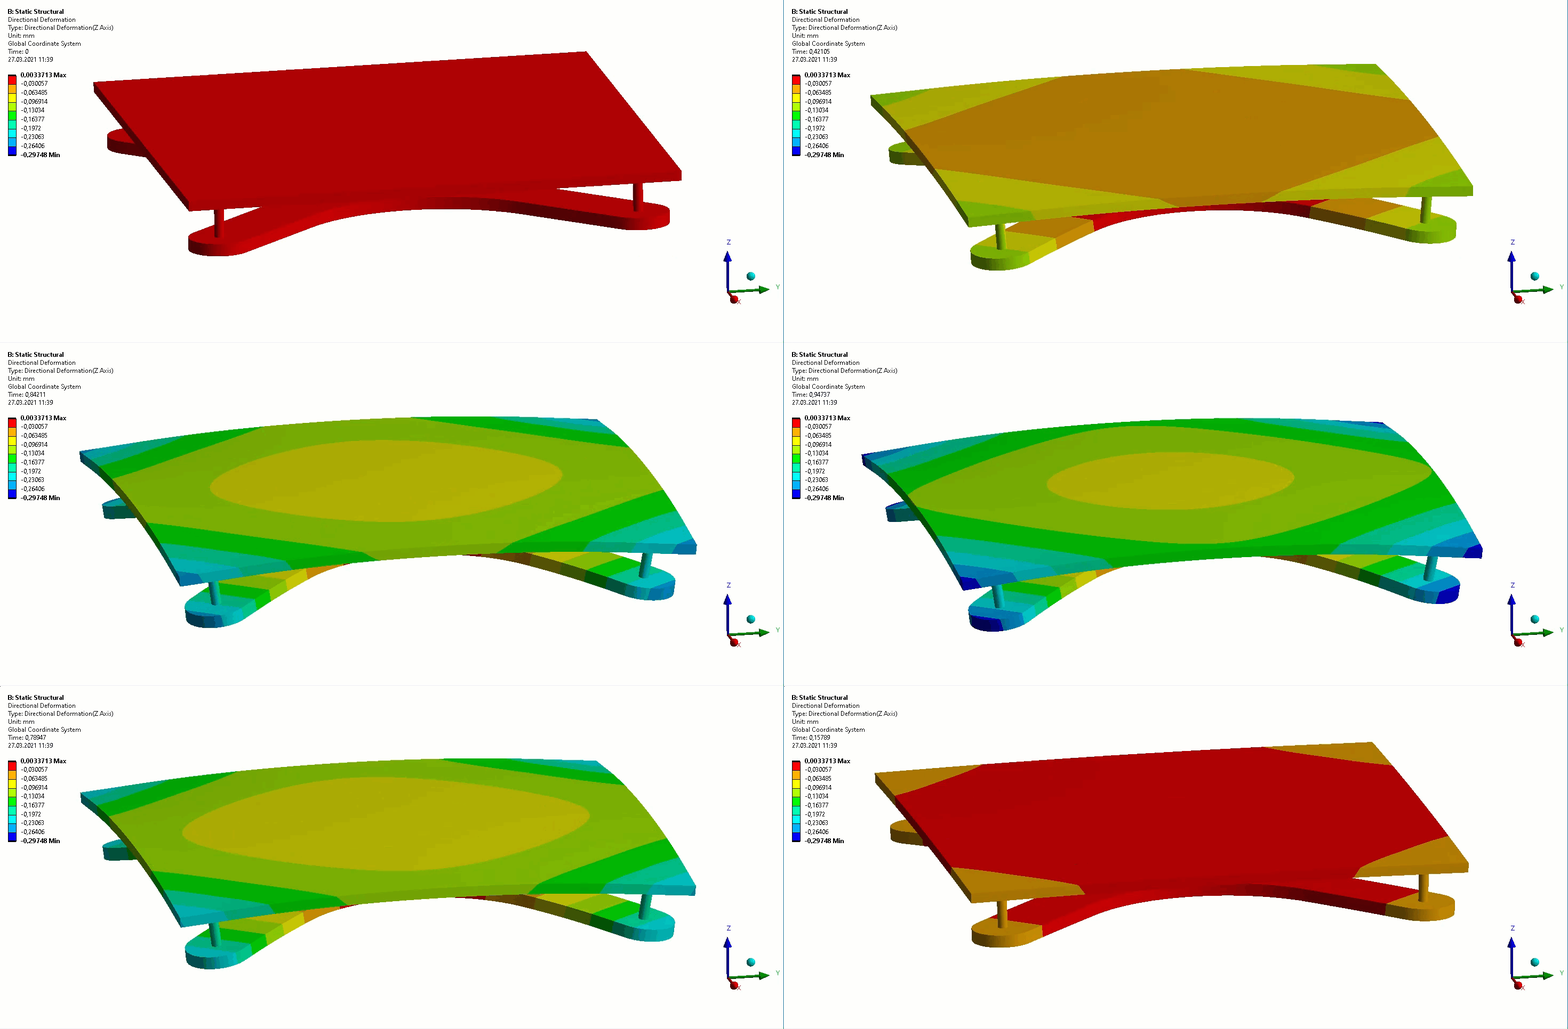
Bed deformation due to temperature variation
Z-wobble or bed heater?
But how do you distinguish if you have z-wobble or a problem with your bed heater? Well, if you have z-wobble, the spacing between the artifacts is usually the pitch of your z-leadscrew. In some cases, and that also happened to me in the past, z-banding from temperature changes might, by coincidence, have roughly the same spacing. So, print two towers, and on one, change the feederate, directly at your printer to a significantly different value, to print slower or faster. If the distance of the artifacts stays the same, you have a wobbly z-axis, if it changes, it’s probably the bed. But before you freak out now and change settings or even your firmware, perform a sanity check. Take a look at the bed temperature on your printer’s screen or using Octoprint, Proterface, or similar. If it varies only a couple of tenths of a degree, don’t worry, that’s fine. Though if the fluctuations are bigger and not only the noise from a bad supply rail, then you might have found a problem.
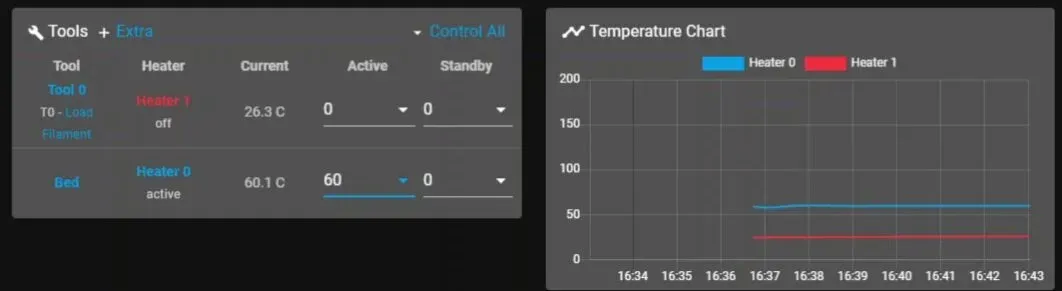
Optimal Bed temperature only varying +-0.1°C
Finding out which scheme you use
If that’s the case, you should at first check if your printer uses PID control or bang-bang. If you have access to the firmware source code, you can check the used algorithm there. In Marlin it’s in configuration.h. If these lines are commented out, you’re using bang-bang. In RepRap firmware, check the M307 command for the bed heater. If the parameter B is not set or set to 1, you’re using bang-bang. If it’s set to 0 you’re using PID. If you don’t have access to the sourcecode, some boards have an indicator LED at the bed connector. If that’s rapidly flashing, it’s PID, if it’s on for a while and then off for a while, it’s bang-bang. So if you find out that you’ve been using bang-bang so far you can consider changing the algorithm to PID. If there is no way to change that setting, unfortunately, I think there is not much you can do.
A mistuned PID does the same thing
So I just said that I had the layer inconsitency problem, because I configured the printer for bang-bang control. Changing it back to PID and tuning it solved my problem. But if your printer already uses PID you might still be able see the same marks on your parts! Why? Well, if your control loop is badly tuned, you’ll encounter the same temperature oscillations as with bang-bang. I demonstrated that here on my Prusa with mistuned values. You don’t only see the temperature on the screen varying but there are also significant marks on the final part itself. In such a case try tuning your PID settings for the bed. In marlin it’s as simple as sending “M303 E-1 C8 S” and then the desired tuning temperature to your board using Pronterface, Octoprint or similar. After a couple of minutes you’ll get your new settings in the terminal that you send back to the board via M304 and save them to the EEPROM using M500. On a DUET board it’s very similar and you use “M303 H0 S” Temperature for tuning and directly save the settings to the config file with M500.
Is PID always the better choice?
Before I end this, it’s also important to talk about the initial question: bang or not bang? Is PID always better than hysteresis control? Mostly yes, and if you have a recent mainboard or printer you should be fine. PID control with the higher frequency Pulse Width Modulation to control power can become an issue if the switching element is not designed for it. Old printers sometimes even used relays to switch power and such a mechanical switch is not meant to open and close several times a second. Though I’m quite sure that your printer doesn’t use a relay for the bed. Well, that’s technically not 100% true. If you use a bed that’s AC powered, you typically use an SSR or Solid State Relay but that’s using a semiconductor to switch instead of a mechanical part. Still these semiconductor switches, even the MOSFETs on your controlboard have switching losses, which means that a certain amount of power is used to change their state and that dissipates in the form of heat. So switching them too fast can cause them to overheat. The default PWM frequencies of the firmwares are usually quite low and shouldn’t be a problem but you still need to check the capability of your SSR, mainboard or external MOSFET. I even found warnings on MOSFET sellers websites about that problem, so be warned!
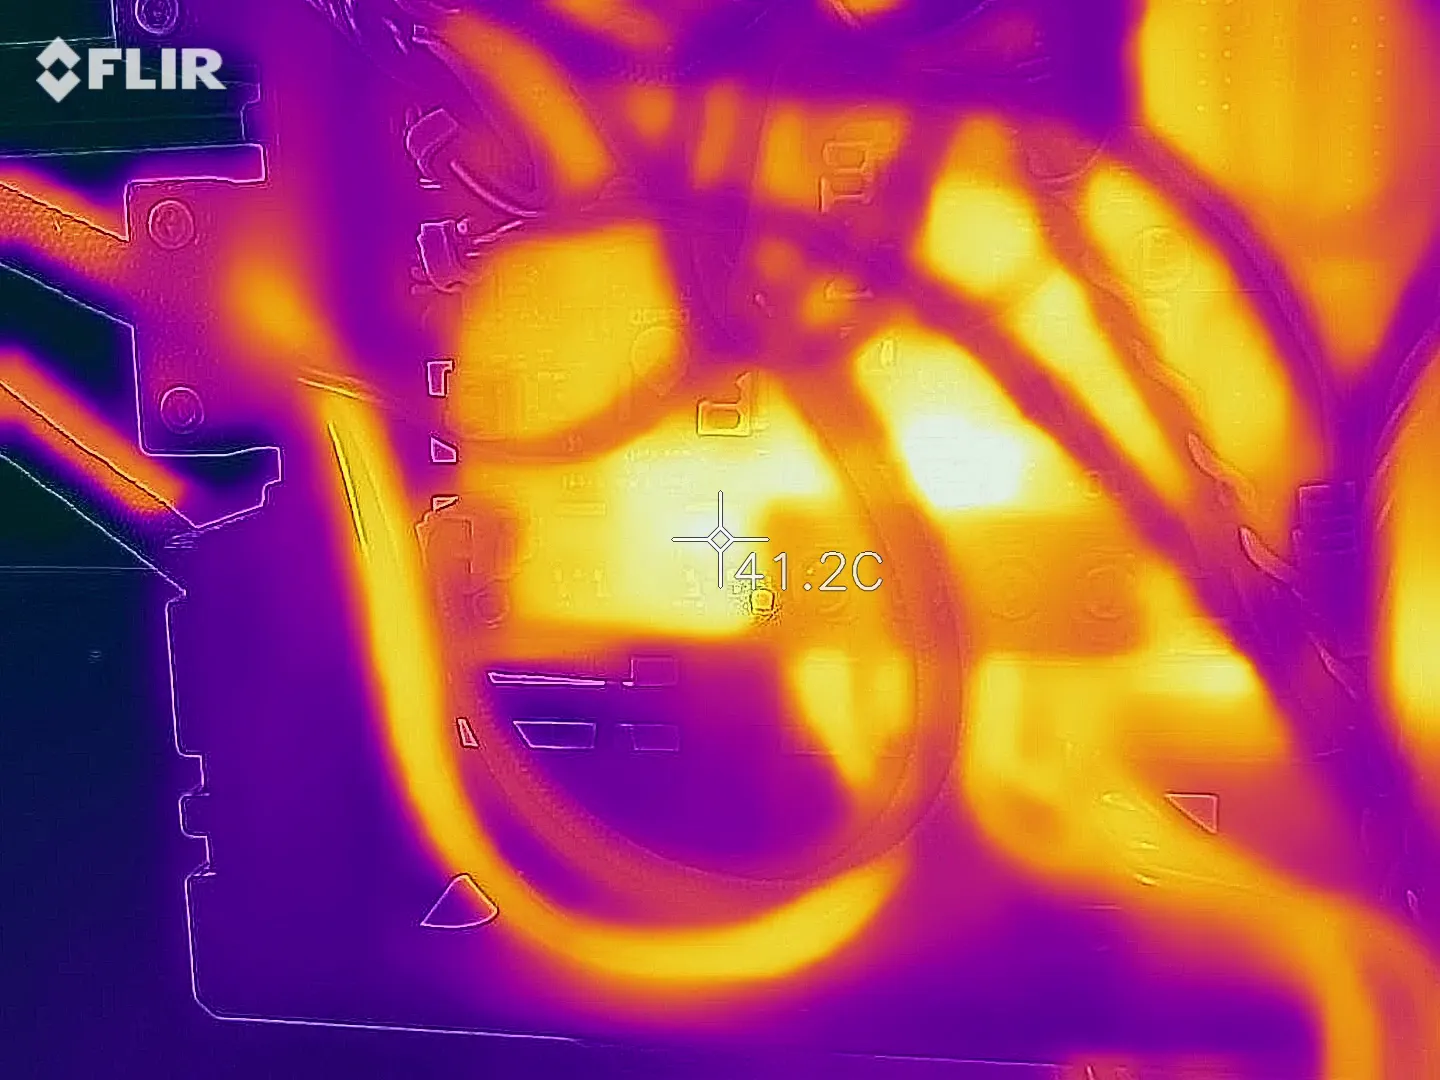
MOSFET temperature on the DUET 3 Mini 5+ board
How I fixed my noisy Prusa bed
Well, and how did I solve my z-banding problem in the end with my noisy Prusa bed? So, I did change the control scheme to PID but to lower the noise of the bed, I set the PWM frequency to 25Hz. I can still hear it in that configuration, but as soon as the part cooling fan of the printer kicks in, it’s not bothering me anymore.
📖 Further Links:
Prusaprinters Blog Entry: https://blog.prusaprinters.org/dev-diary-2-how-we-made-the-heatbed-silent_30946/
Marlin PID Autotune: https://marlinfw.org/docs/gcode/M303.html
DUET PID tuning: https://duet3d.dozuki.com/Wiki/Tuning_the_heater_temperature_control
Choosing and connecting a bed heater: https://duet3d.dozuki.com/Wiki/Choosing_a_bed_heater
* Links marked with an asterisk are affiliate links — if you buy through them, I earn a small commission at no extra cost to you. As an Amazon Associate I earn from qualifying purchases. Thanks for supporting my work!